Download to read offline
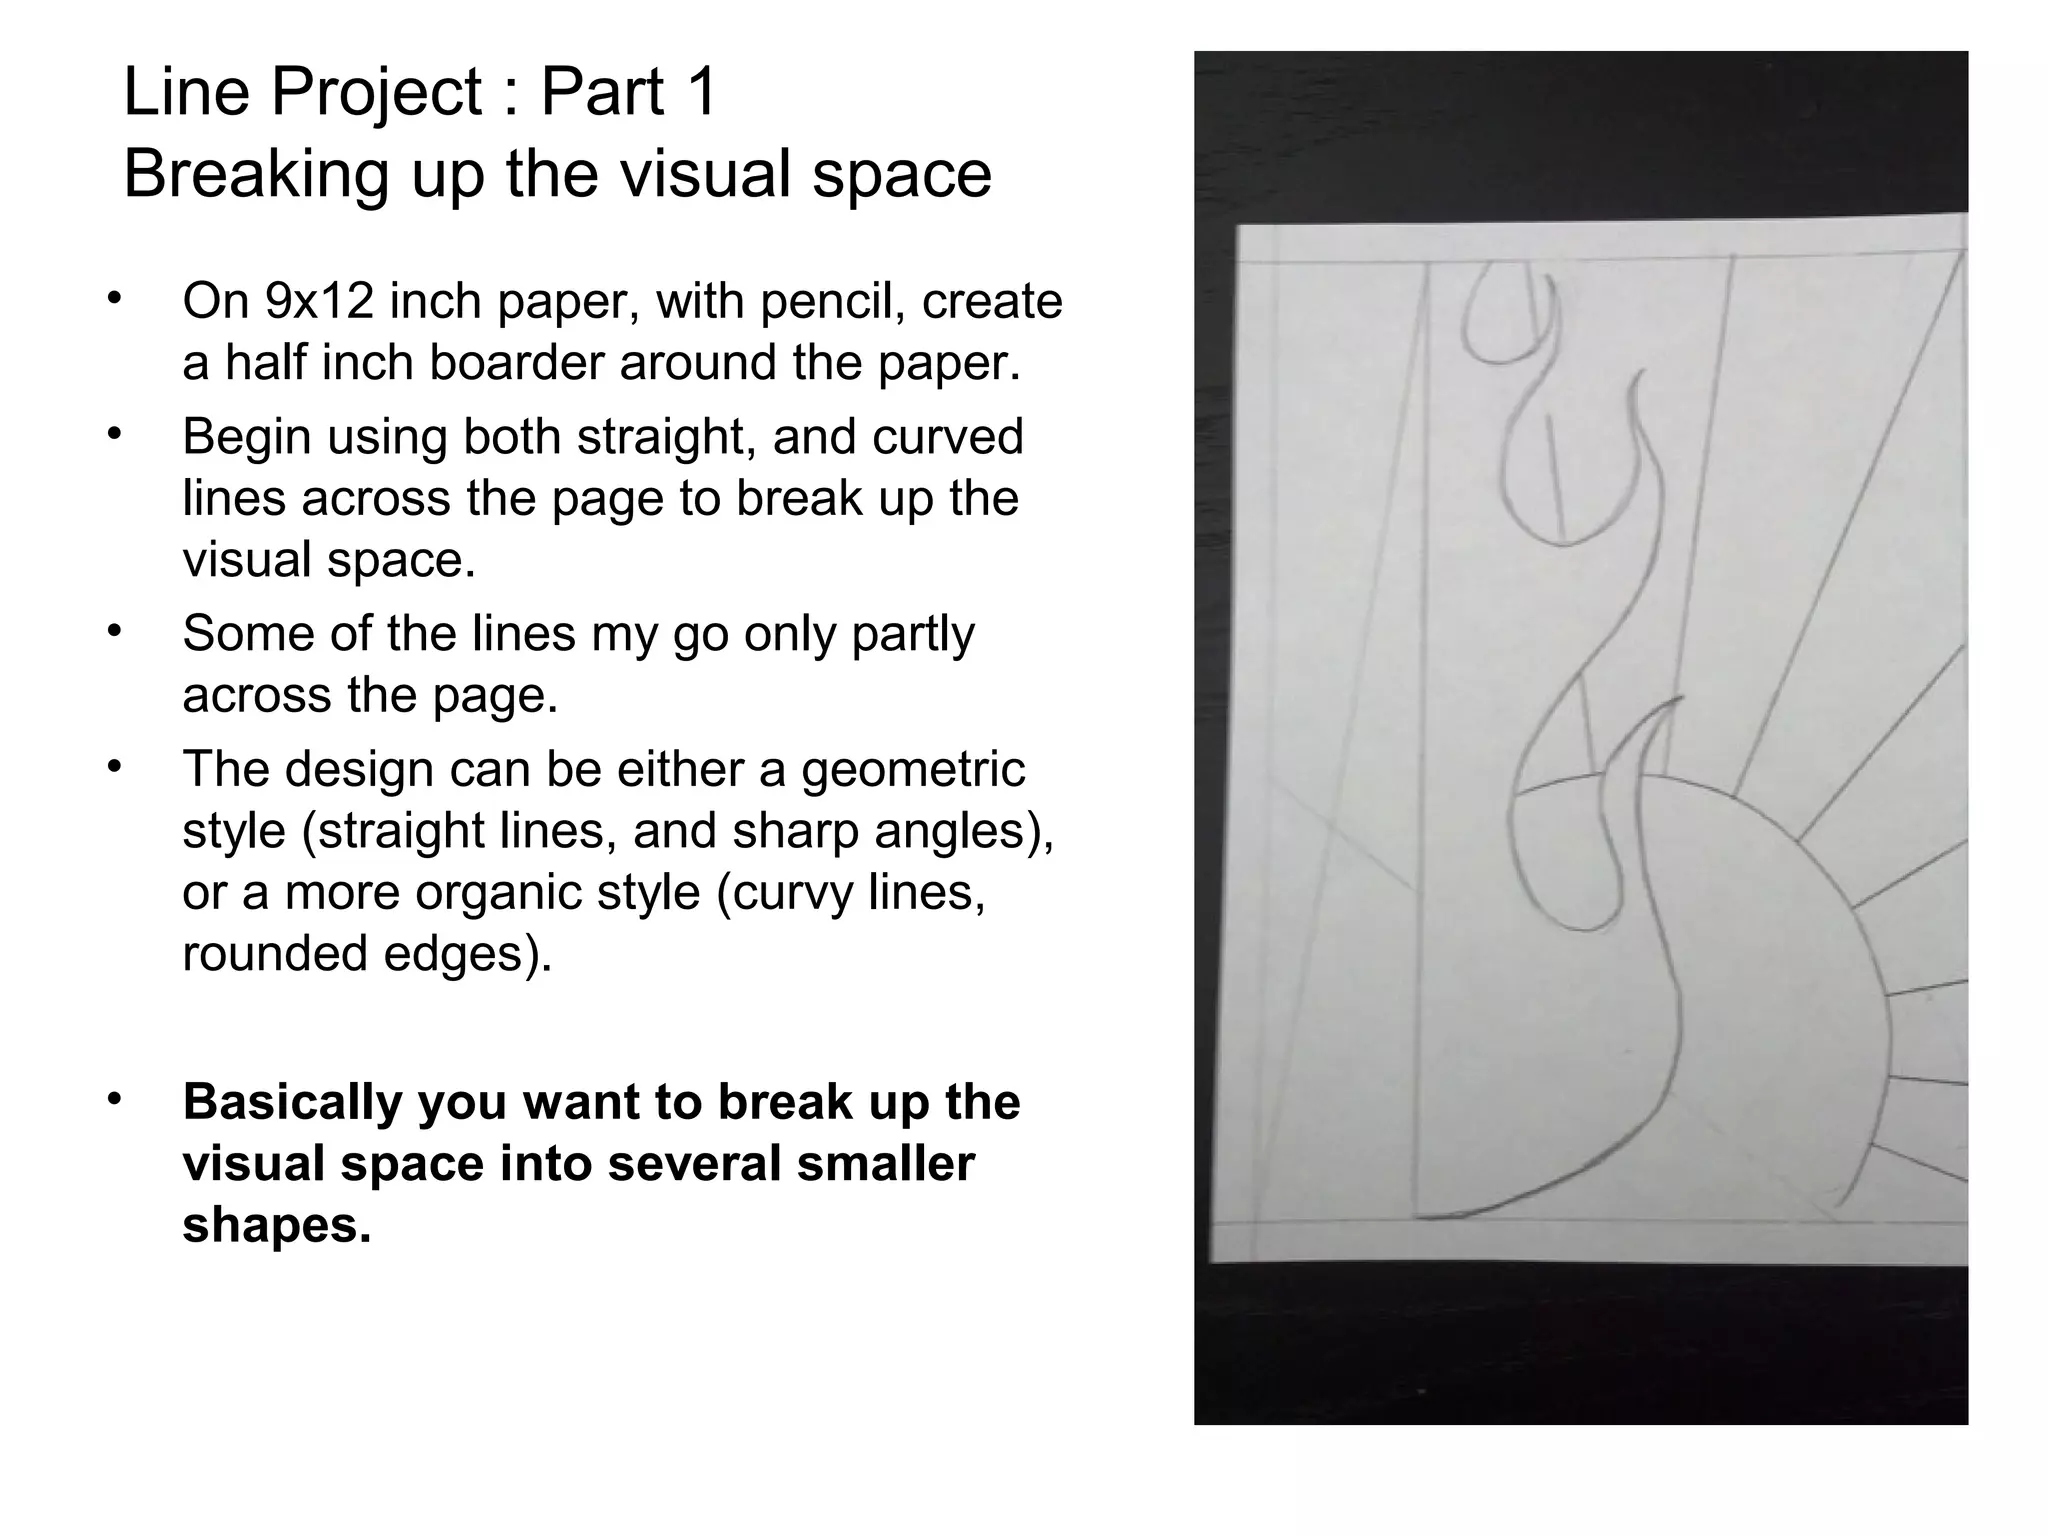
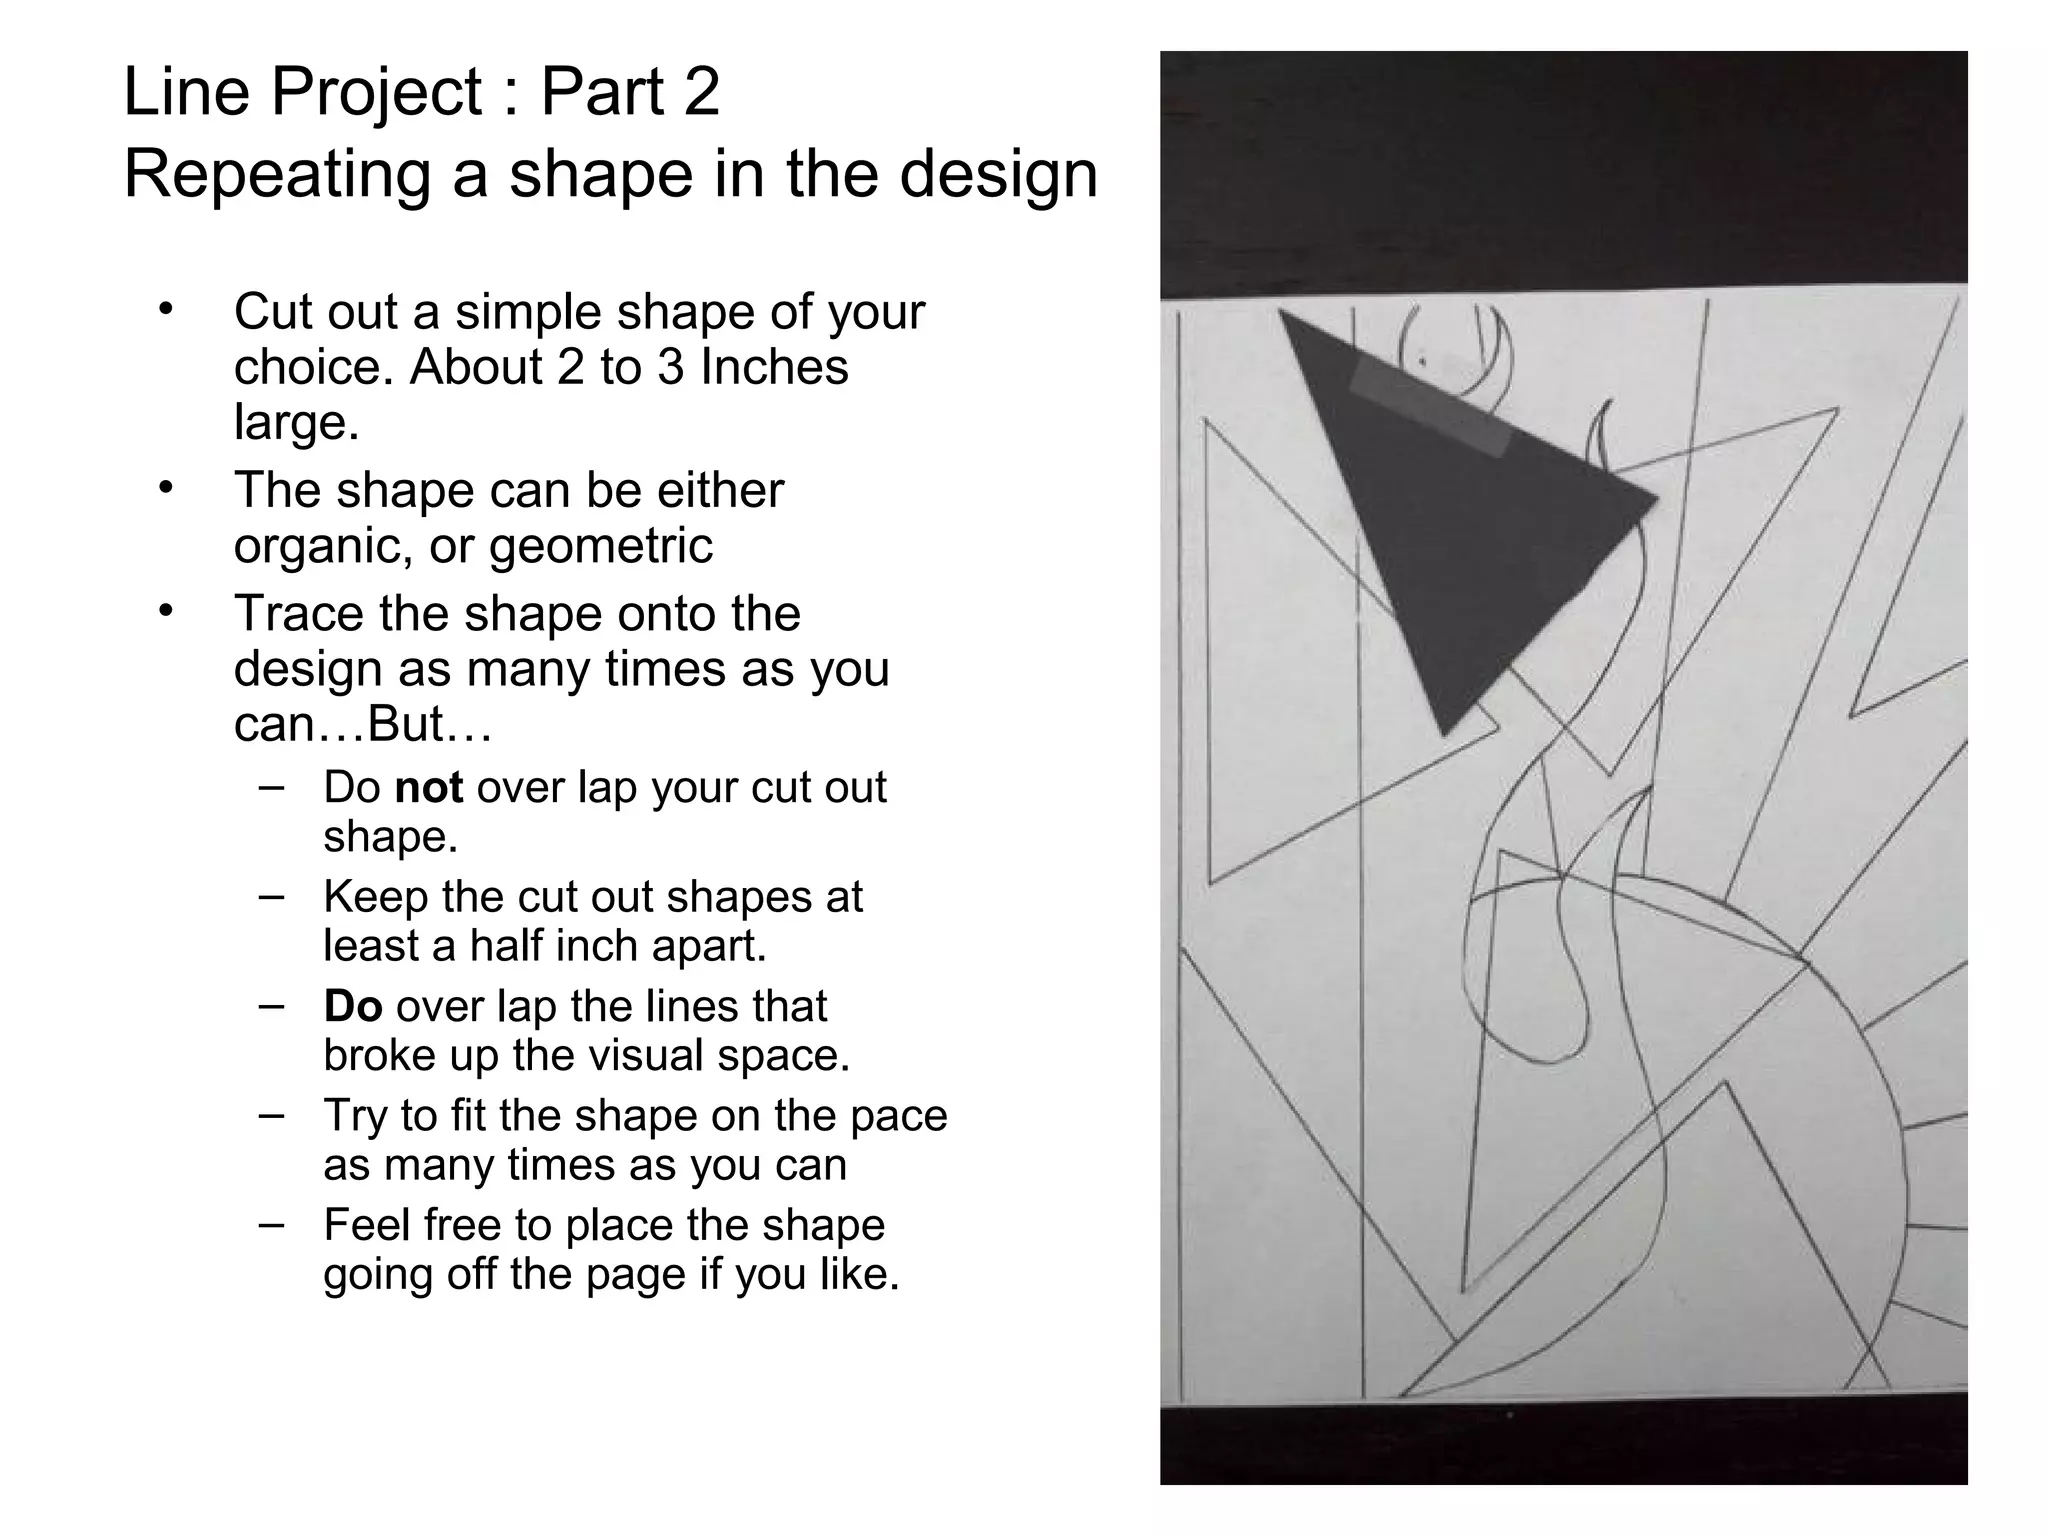
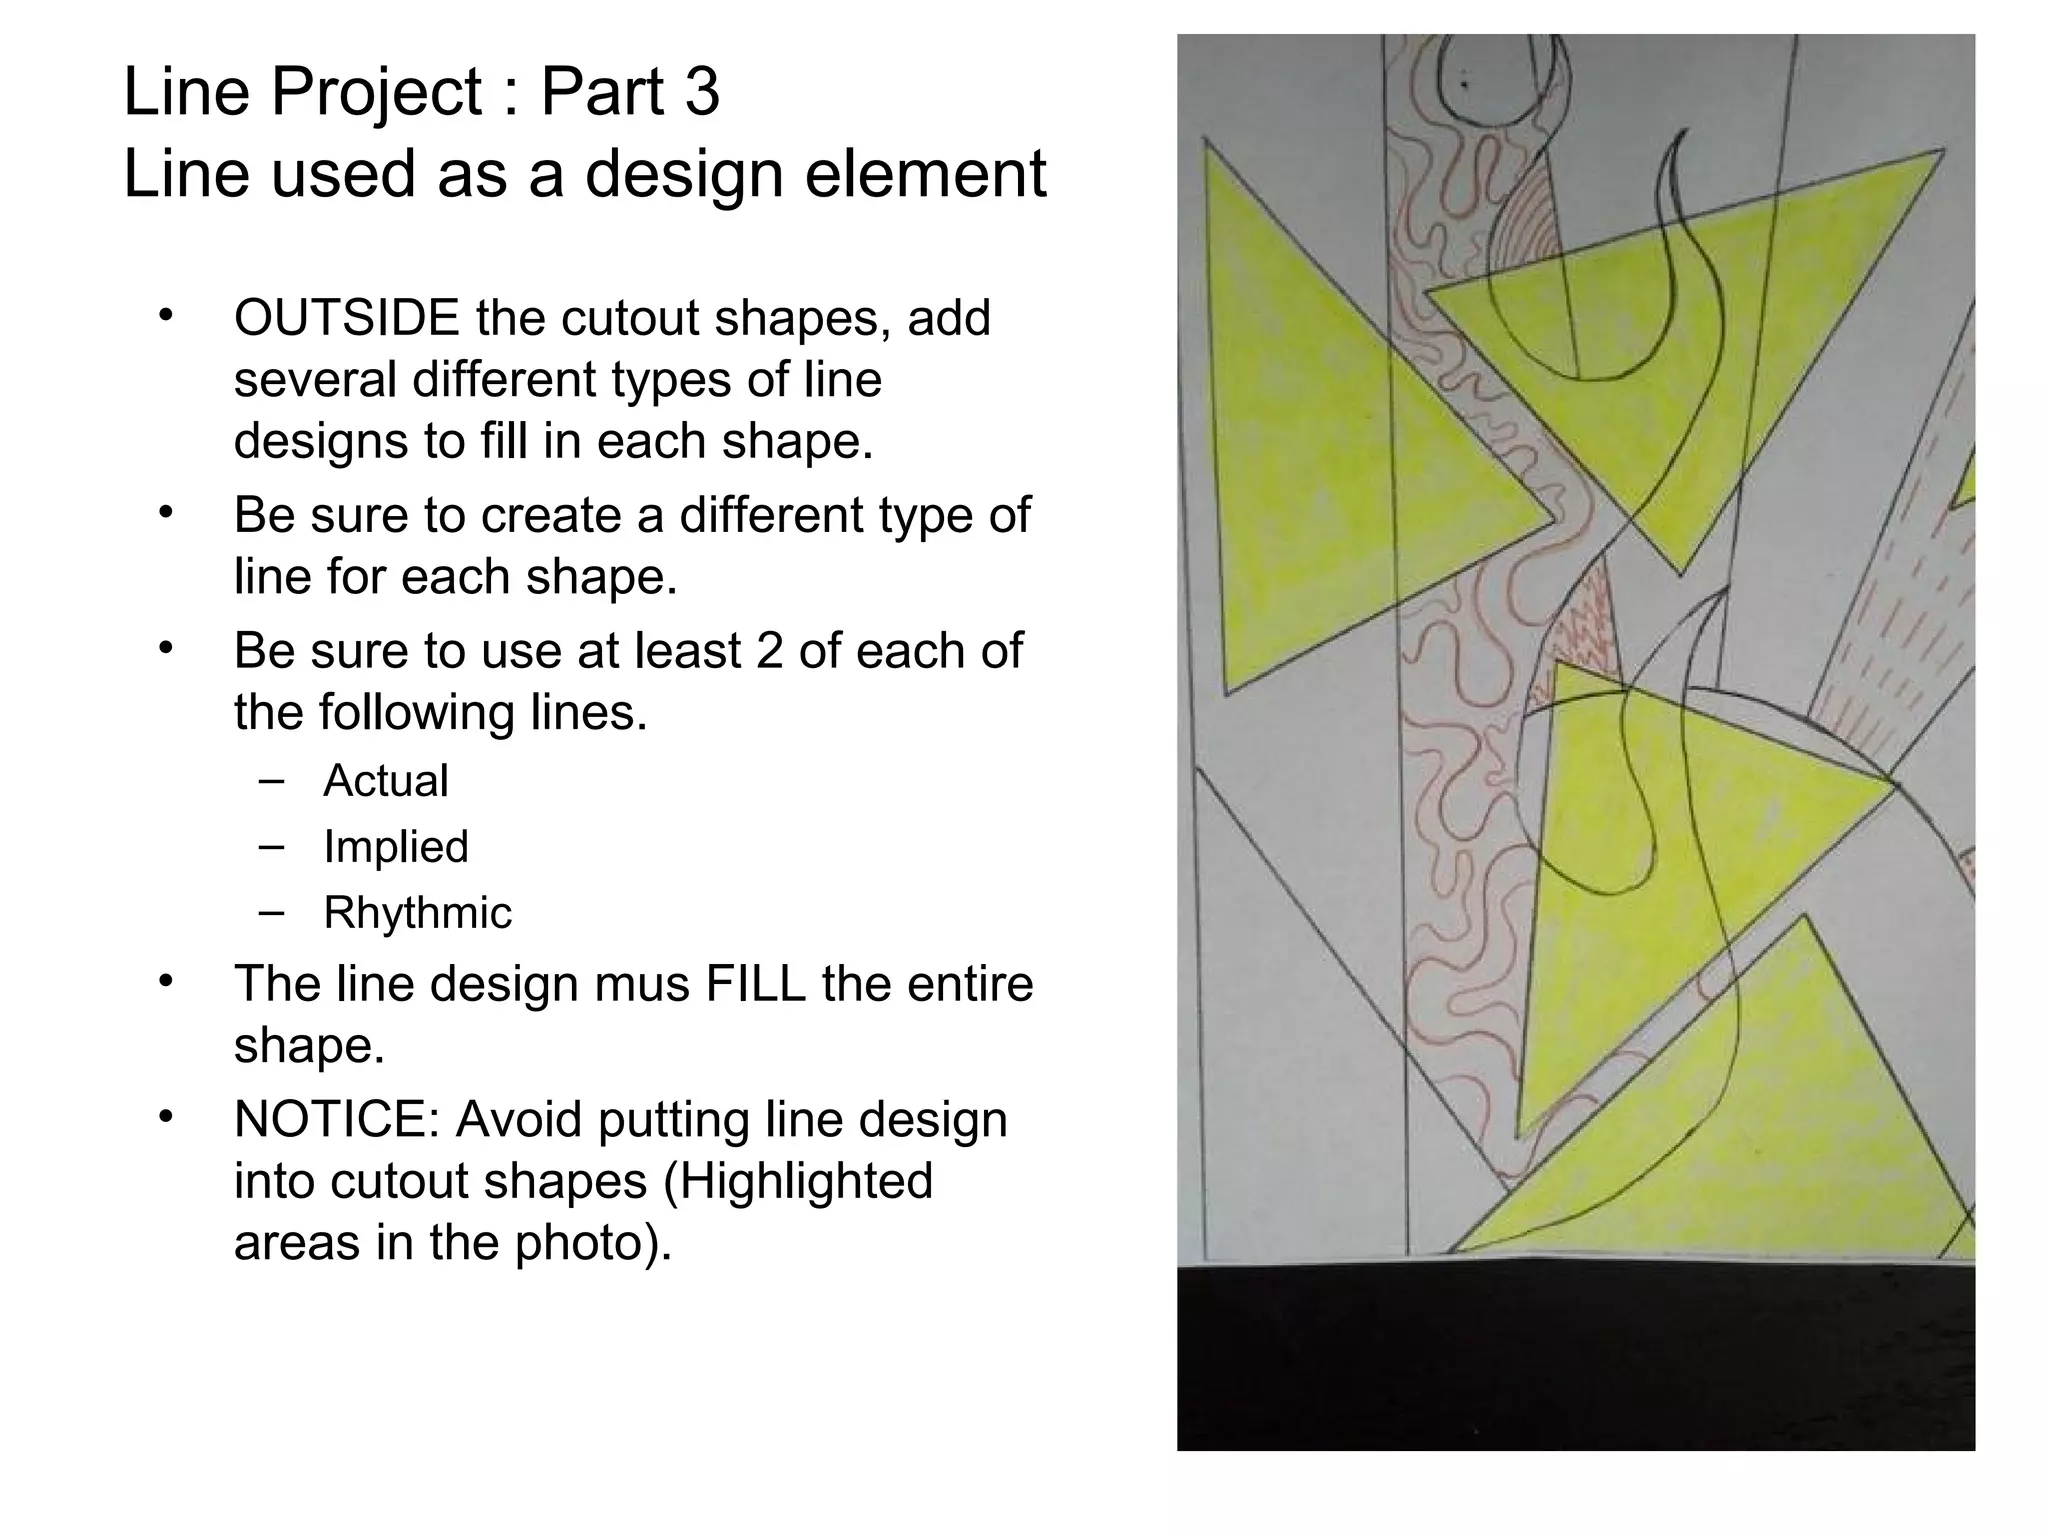


The document provides instructions for a four part line project art assignment. The steps are to: 1. Break up the page with straight and curved lines to create shapes. 2. Cut out a simple shape and repeat it across the page without overlapping, fitting as many as possible. 3. Outside the cutout shapes, add different line designs like actual, implied, and rhythmic lines to fill each shape. 4. Color the cutout shapes changing color where lines pass through, and shade the lined areas using light, medium, and dark tones.


