
Recommended
Recommended
More Related Content
Recently uploaded
Recently uploaded (20)
Featured
Featured (20)
Landscaping Planning
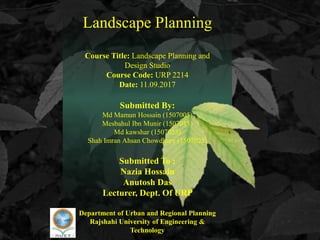
- 1. Landscape Planning Course Title: Landscape Planning and Design Studio Course Code: URP 2214 Date: 11.09.2017 Submitted By: Md Mamun Hossain (1507005) Mesbahul Ibn Munir (1507015) Md kawshar (1507023) Shah Imran Ahsan Chowdhury (1507025) Submitted To : Nazia Hossain Anutosh Das Lecturer, Dept. Of URP Department of Urban and Regional Planning Rajshahi University of Engineering & Technology
- 2. Central Park in New York City
- 3. Figure: Bow bridge (Source: Google,2017) Elements: Both man made and natural elements are used in the central park of New York.
- 4. (Source: Google,2017) Figure: Central park hidden park
- 5. Figure: Natural elements of the Central Park in New York (Source: Google,2017) Different kinds of trees are planted in the central park of New York.
- 6. (Source: Google,2017) Figure: Waterbody in the Central Park of New York Natural waterbodies are preserved in the central park.
- 7. (Source: Google,2017)Figure: Boulevard in Central park of New York Form: Symmetrical and homogeneous form are followed in central park
- 8. (Source: Google,2017) Figure: Pathway in the Central Park of New York In central park both Rigid and Free form are followed in landscaping and various kinds of stone are also used in the pathway of central park.
- 9. (Source: Google,2017) Figure: Seasonal variation in nature of the Central Park of New York Seasonal variation is found in the central park of New York in different season like winter and summer season.
- 10. Figure: Natural elements of central park of New York ( Source: Google,2017 )
- 11. (Source: Google,2017)Figure: Natural view of the Central Park of New York Natural Topography and unplanned form is found in the central park of New York.
- 12. (Source: Google,2017) Figure: Sculptures in the Central Park of New York
- 13. (Source: Google,2017) Figure: Preservation of nature of the Central Park of New York
- 15. location map of frogner park ( Source: Google map,2017 ) Figure: location map of Frogner Park, Norway
- 16. Nature of Frogner Park: Both Natural and man made elements are used in the Frogner park. Figure: Nature of forgner park ( Source: Google,2017 )
- 17. Natural water body are preserved in the Frogner park in Norway. Figure: Waterbody in the Frogner park ( Source: Google,2017 )
- 18. Frogner park is symmetrically balanced and rigid form is followed to beautify the park. Figure: Natural view of the Frogner park ( Source: Google,2017 )
- 19. Symmetrical, planned and homogeneous form is maintained in the frogner park in Norway. Figure: Topographical view of the Frogner park ( Source: Google,2017 )
- 20. Figure: Symmetrical view of the Frogner park ( Source: Google,2017 )
- 21. In frogner park man made elements are mainly focused like Fountain, sculpture etc. Figure: Man made elements of the Frogner park ( Source: Google,2017 )
- 22. Art and architecture Figure: Art and architecture of frogner park ( Source: Google,2017 )
- 23. ( Source: Google,2017 ) Figure: Seasonal variation in Frogner park
- 24. Parks in Bangladesh Figure: Zia Park, Rajshahi Figure: Nondon Park,Dhaka ( Source: Google,2017 )
- 25. Comparison of landscaping between Bangladesh & other countries In abroad there has some plans for preserving nature as well as different environmental creatures and man made amusement park but in our country the responsible authority don’t care about this. The rehabilitation does after many times so that the proper caring cant be possible. In outside of our country the authority gives priority of preserving natural environment after that they do a plan for man made creature. In Bangladesh sometimes authority takes some steps to preserve and to manage for orienting natural items but it is a matter of sorrow that this process is very long term. In Abroad there has parks for the different ages people but in Bangladesh no facility for different ages people.
Editor's Notes
- Picture with background removed (Intermediate) To reproduce the picture effects on this slide, do the following: On the Home tab, in the Slides group, click Layout, and then click Blank. On the Insert tab, in the Images group, click Picture. In the Insert Picture dialog box, select a picture and then click Insert. Select the picture. Under Picture Tools, on the Format tab, in the Size group, click the Size and Position dialog box launcher. In the Format Picture dialog box, resize or crop the image so that the height is set to 7.5” and the width is set to 10”. To crop the picture, click Crop in the left pane, and in the right pane, under Crop position, enter values into the Height, Width, Left, and Top boxes. To resize the picture, click Size in the left pane, and in the right pane, under Size and rotate, enter values into the Height and Width boxes. Also under Picture Tools, on the Format tab, in the Adjust group, click Color, and then under Recolor click Grayscale. Also in the Adjust group, click Corrections, and then under Brightness and Contrast, click Brightness: -40% Contrast: +20%. On the Home tab, in the Clipboard group, click the arrow to the right of Copy, and then click Duplicate. Select the second picture. On the Home tab, in the Drawing group, click Arrange, point to Align, and then do the following: Click Align to Slide. Click Align Middle. Click Align Center. Under Picture Tools, on the Format tab, in the Adjust group, click Reset Picture. Also under Picture Tools, on the Format tab, in the Size group, click the Size and Position dialog box launcher.. In the Format Picture dialog box, resize or crop the image to focus on the main subject in the picture. (Example picture is set to 3.54” height and 3.24” width). To crop the picture, click Crop in the left pane, and in the right pane, under Crop position, enter values into the Height, Width, Left, and Top boxes. To resize the picture, click Size in the left pane, and in the right pane, under Size and rotate, enter values into the Height and Width boxes. Also under Picture Tools, on the Format tab, in the Adjust group, click Remove Background, and then do the following: To remove additional background areas from the picture, on the Background Removal tab, in the Refine group, click Mark Areas to Remove. Select all of the additional areas to be removed. To keep additional areas of the picture that have been removed, on the Background Removal tab, in the Refine group, click Mark Areas to Keep. Select all of the additional areas to be kept. Click Keep Changes in the Close group when finished. To reproduce the shape effects on this slide, do the following: On the Home tab, in the Drawing group, select Rectangle. On the slide, drag to draw a rectangle. Select the rectangle. Also on the Home tab, in the Drawing group, click the Format Shape dialog box launcher. In the Format Shape dialog box, in the Size tab, enter 7.5” into the Height box and enter 4” into the Width box. Also in the Format Shape dialog box, in the Fill tab, select Gradient fill, and then do the following: In the Type list, select Linear. In the Angle box, enter 90°. Under Gradient stops, click Add gradient stops or Remove gradient stops until three stops appear in the slider. Also under Gradient stops, customize the gradient stops as follows: Select the first stop from the left in the slider, and then do the following: In the Position box, enter 0%. Click the button next to Color, and then under Theme Colors click Black, Text 1 (first row, second option from the left). In the Transparency box, enter 100%. Select the second stop from the left in the slider, and then do the following: In the Position box, enter 40%. Click the button next to Color, click More Colors, and then in the Colors dialog box, on the Custom tab, enter values for Red: 47, Green: 91, and Blue: 77. In the Transparency box, enter 0%. Select the third stop from the left in the slider, and then do the following: In the Position box, enter 100%. Click the button next to Color, and then under Theme Colors click Black, Text 1 (first row, second option from the left). In the Transparency box, enter 90%. Also in the Format Shape dialog box, in the Line Color tab, select No Line. Select the second picture. On the Home tab, in the Drawing group, click Arrange, and then click Bring to Front. To reproduce the text effects on this slide, do the following: On the Insert tab, in the Text group, click Text Box, and then on the slide drag to draw your text box. Enter text in the text box, and then select the text. On the Home tab, in the Font group, do the following: In the Font list, click Calisto MT. In the Font Size list, click 36 pt. Click Font Color, and then under Theme Colors click White, Background 1 (first row, first option from the left). Position text over the least transparent part of the gradient.