SlideShare a Scribd company logo
INSTRUCTION MANUAL
HF ALL BAND TRANSCEIVER
i718
i
IMPORTANT
READ ALL INSTRUCTIONS carefully and com-
pletely before using the transceiver.
SAVE THIS INSTRUCTION MANUAL— This
instruction manual contains basic operating instruc-
tions for the IC-718.
EXPLICIT DEFINITIONS
WORD DEFINITION
R DANGER!
Personal death, serious injury or an ex-
plosion mayoccur.
R WARNING!
Personal injury, fire hazard or electric
shock mayoccur.
CAUTION Equipmentdamage mayoccur.
NOTE
Recommended for optimum use.No risk
of personal injury,fire or electric shock.
PRECAUTIONS
R DANGER HIGH VOLTAGE! NEVER touch
an antenna connector during
transmission.
This may result in an electrical shock or burn.
R WARNING RF EXPOSURE! This radio
emits Radio Frequency (RF) energy. Extreme caution
should be observed when operating this radio. If you
have any questions regarding RF exposure and safety
standards please refer to the Federal Communications
Commission Office of Engineering and Technology’s
report on Evaluating Compliance with FCC Guidelines
for Human Radio Frequency Electromagnetic Fields
(OET Bulletin 65).
R WARNING! NEVER operate the radio while
driving a vehicle. Safe driving requires your full atten-
tion—anything less may result in an accident.
R WARNING! NEVER operate the radio with an
earphone or other audio accessories at high volume
levels.
Continuous high volume operation may cause a ring-
ing in your ears. If you experience ringing, reduce the
volume level or discontinue use.
R WARNING! NEVER connect the radio to an
AC outlet. This may pose a fire hazard or result in an
electric shock.
R WARNING! NEVER connect the radio to a
power source of more than 16 V DC such as a 24 V
DC. This could cause a fire or damage the radio.
R WARNING! NEVER reverse the DC power
cable polarity when connecting to a power source.
This could damage the radio.
R WARNING! NEVER cut the DC power cable
between the DC plug and fuse holder. If an incorrect
connection is made after cutting, the radio may be
damaged.
R WARNING! NEVER let metal, wire or other ob-
jects touch any internal part or connectors on the rear
panel of the radio.
This may result in an electric shock or this could cause
a fire or damage the radio.
R WARNING! NEVER operate or touch the radio
with wet hands. This may result in an electric shock or
may damage the radio.
R WARNING! Immediately turn the radio power
OFF and remove the power cable if it emits an abnor-
mal odor, sound or smoke. Contact your Icom dealer
or distributor for advice.
CAUTION: NEVER expose the radio to rain, snow
or any liquids.
CAUTION: NEVER change the internal settings of
the radio. This may reduce radio performance and/or
damage to the radio.
CAUTION: NEVER place the radio where normal
operation of the vehicle may be hindered or where it
could cause bodily injury.
DO NOT operate the radio near unshielded electrical
blasting caps or in an explosive atmosphere.
DO NOT push the PTT when not actually desiring to
transmit.
DO NOT use harsh solvents such as benzine or al-
cohol to clean the radio, as they will damage the ra-
dio’s surfaces. If the radio becomes dusty or dirty,
wipe it clean with a soft, dry cloth.
DO NOT operate or place the radio in areas with
temperatures below –10°C (+14°F) or above +60°C
(+140°F).
Be aware that temperatures on a vehicle’s dashboard
can exceed +80°C (+176°F) in direct sunlight, result-
ing in permanent damage to the radio if left there for
extended periods.
PRECAUTIONS (Continued)
DO NOT place the radio in excessively dusty envi-
ronments or in direct sunlight.
DO NOT place the radio against walls or put any-
thing on top of the radio. This will obstruct heat dissi-
pation.
Place the radio in a secure place to avoid inadvertent
use by children.
During mobile operation, NEVER place the radio
where air bag deployment may be obstructed.
During mobile operation, DO NOT place the radio
where hot or cold air blows directly onto it.
During mobile operation, DO NOT operate the radio
without running the vehicle’s engine. When radio
power is ON and your vehicle’s engine is OFF, the ve-
hicle’s battery will soon become exhausted.
Make sure the radio power is OFF before starting the
vehicle engine. This will avoid possible damage to the
radio by ignition voltage spikes.
During maritime mobile operation, keep the radio and
microphone as far away as possible from the magnetic
navigation compass to prevent erroneous indications.
BE CAREFUL! The heatsink will become hot when
operating the radio continuously for long periods of
time.
BE CAREFUL! If a linear amplifier is connected,
set the radio’s RF output power to less than the linear
amplifier’s maximum input level, otherwise, the linear
amplifier will be damaged.
Use only supplied or optional Icom microphones.
Other manufacturer’s microphones have different
pin assignments, and connecting to the IC-718 may
damage the radio.
FCC INFORMATION
• FOR CLASS B UNINTENTIONAL RADIATORS
This equipment has been tested and found to comply
with the limits for a Class B digital device, pursuant to
part 15 of the FCC Rules. These limits are designed to
provide reasonable protection against harmful interfer-
ence in a residential installation. This equipment gen-
erates, uses and can radiate radio frequency energy
and, if not installed and used in accordance with the
instructions, may cause harmful interference to radio
communications. However, there is no guarantee that
interference will not occur in a particular installation.
If this equipment does cause harmful interference to
radio or television reception, which can be determined
by turning the equipment off and on, the user is en-
couraged to try to correct the interference by one or
more of the following measures:
• Reorient or relocate the receiving
antenna.
• Increase the separation between the equipment and
receiver.
• Connect the equipment into an outlet on a circuit dif-
ferent from that to which the receiver is connected.
• Consult the dealer or an experienced radio/TV tech-
nician for help.
This device complies with Part 15 of the FCC Rules.
Operation is subject to the following two conditions: (1)
this device may not cause harmful interference, and
(2) this device must accept any interference received,
including interference that may cause undesired op-
eration.
WARNING: MODIFICATION OF THIS DEVICE TO
RECEIVE CELLULAR RADIOTELEPHONE SERVICE
SIGNALS IS PROHIBITED UNDER FCC RULES AND
FEDERAL LAW.
CAUTION: Changes or modifications to this device,
not expressly approved by Icom Inc., could void your
authority to operate this device under FCC regula-
tions.
ABOUT CE AND DOC
Hereby, Icom Inc. declares that the ver-
sions of IC-718 which have the “CE”
symbol on the product, comply with the
essential requirements of the Radio
Equipment Directive, 2014/53/EU, and the restric-
tion of the use of certain hazardous substances in
electrical and electronic equipment Directive,
2011/65/EU. The full text of the EU declaration of
conformity is available at the following internet ad-
dress:
http://www.icom.co.jp/world/support
DISPOSAL
The crossed-out wheeled-bin symbol
on your product, literature, or packaging
reminds you that in the European Union,
all electrical and electronic products, bat-
teries, and accumulators (rechargeable
batteries) must be taken to designated
collection locations at the end of their
working life. Do not dispose of these prod-
ucts as unsorted municipal waste.
Dispose of them according to the laws in
your area.
ii
iii
SUPPLIED ACCESSORIES
q
w
e r
The transceiver comes with the following accessories.
Qty.
q DC power cable ............................................... 1
w Hand microphone (HM-36)................................ 1
e Fuse (FGB 4 A; internal fuse) .......................... 1
r Fuse (ATQ 25 A; for DC cable)........................ 2
1
TABLE OF CONTENTS 1
IMPORTANT ......................................................... i
EXPLICIT DEFINITIONS ........................................i
PRECAUTIONS ................................................. i–ii
FCC INFORMATION................................................ii
SUPPLIED ACCESSORIES .................................. iii
1 TABLE OF CONTENTS ..................................... 1
2 PANEL DESCRIPTION....................................2–8
n Front panel ....................................................2
n Function display ............................................. 5
n Rear panel ..................................................... 6
nMicrophone (HM-36) .......................................8
3 INSTALLATION AND CONNECTIONS...........9–14
n Unpacking ..................................................... 9
n Selecting a location ........................................9
n Grounding ..................................................... 9
n Connecting an antenna ................................... 9
n Requiredconnections ....................................10
nAdvanced connections ..................................11
n Connecting the Power supply ........................12
n Connecting a liner amplifier ........................... 13
nExternal antennatuners ................................14
4 FREQUENCY SETTINGS............................ 15–19
n Resetting the CPU ........................................15
n Initial settings ................................................15
n VFO description ............................................16
n Frequency setting ......................................... 17
n Dial lock function .......................................... 19
5 RECEIVE AND TRANSMIT ......................... 20–34
n Mode selection ............................................. 20
n RF gain and Squelch .................................... 20
n Function for receive ...................................... 21
n DSP function
(Requires an optional UT-106 DSP UNIT) ......... 23
n Filter selection ..............................................24
n Filter setting ..................................................25
nSplit frequency operation .............................. 26
n SWR ............................................................26
n Function for transmit ..................................... 27
n Function for CW ............................................31
n Function for RTTY ........................................ 33
6 MEMORY OPERATION............................... 35–38
n Memory channels ......................................... 35
nMemory channel selection ............................ 35
n Memory channel entry .................................. 36
n Transferring data to the VFO ......................... 37
n Memory clearing .......................................... 38
7 SCANS....................................................... 39–40
n Scan types ................................................... 39
nPreparation .................................................. 39
nProgrammed scanoperation ..........................40
n Memory scan operation ................................ 40
8 SET MODE ..............................................41
n General ..................................................
n Quick Set mode items ..............................42-43
n Initial Set mode items ...............................44-47
9 INSTALLATION AND CONNECTIONS....... 48–51
n Opening the transceiver’s case......................48
n Installing the MB-118
MOBILE MOUNTING BRACKET......................... 48
n CR-338 HIGH STABILITY CRYSTAL UNIT ........ 49
n UT-106 DSP RECEIVE UNIT........................... 50
n Optional IF filters ..........................................
n AT-180 internal switch .................................. 51
10 MAINTENANCE...................................... 52–53
n Troubleshooting ..........................................
n Fuse replacement......................................... 5
n Resetting the CPU ........................................5
11 SPECIFICATIONS ........................................5
12 OPTIONS............................................... 55–56
13 CONTROL COMMAND........................... 57–58
n Remote jack (CI-V) information......................57
14 INSTALLATION NOTES .............................. 59
INDEX ........................................................... 60–62
2
NB COMP SET
P.AMP ATT TUNER
2 PANEL DESCRIPTION
n Front panel
Speaker Function Display @1 @0 !9 !8 !7
IC -718
V/M 1 A=B 2 A/B 3
MODE FIL TS
MW 4
SPL7
NR .
M - C 5
SC N 8
ANF 0
M V 6
VO X 9
F-INP
EN
T
q
MIC
w
PHON E S
PWR AF RF/SQL RIT SHIFT
LOCK
!6
!5
!4
!3
CH Z DN UP Y !2
e r t y u i o !0 !1
q POWER SWITCH [PWR]
➥ Push momentarily to turn ON the power.
• First, confirm the optional DC power supply is ON.
➥ Hold down for 1 second to turn OFF the power.
➥ While holding down [SET], push [PWR] to enter
the Initial Set mode. (p. 41)
wMICROPHONE CONNECTOR [MIC]
Connect supplied or optional microphone.
• See p. 55 for appropriate microphones.
• See p. 8 for microphone connector information.
e HEADPHONE JACK [PHONES] (p. 11)
Connect headphones (8 Ω).
• When headphones are connected, the internal speaker
or external speaker does notfunction.
rAF CONTROL [AF] (inner control)
Rotate to adjust the audio output level.
t RF GAIN/SQUELCH CONTROL [RF/SQL]
(outer control: pp. 20, 44)
Rotate to adjust the squelch threshold level. The
squelch removes noise output from the speaker
(closed condition) when no signal is received.
• The squelch is usable for all modes.
• The control can be setas the squelch plus RFgain con-
trols or squelch control only (RF gain is fixed at maxi-
mum) in initial setmode.
y RIT CONTROLS [RIT] (Inner control: p. 21)
➥ Rotate to shift the receive frequency without
changing the transmit frequency.
• Rotate clockwise to increase the frequency, or rotate
counterclockwise to decrease the frequency. “ RIT ”
appears on the display.
• The shift frequency range is ±1.2 kHz.
u IF SHIFT CONTROLS [SHIFT]
(Outer control: p. 21)
Rotate to shift the center frequency of the receiver’s
IF passband.
• Rotate clockwise to shiftthe center frequency higher, or
counterclockwise to shiftthe center frequency lower.
iLOCK SWITCH [LOCK]
➥ Push momentarily to turn the Dial Lock function
ON or OFF. (p. 19)
• The Dial Lock function electronically locks the main
dial.
o MAIN DIAL
Rotate to change the displayed frequency, selects
Quick/Initial set mode items, and so on.
!0 PREAMP SWITCH [P.AMP] (p. 21)
Push momentarily to turn the preamp ON or OFF.
!1CH SWITCH [CH] (p. 35)
Push momentarily to turn the Memory Channel Se-
lect function ON or OFF.
• [MEMO] blinks while the Memory Channel Selectfunc-
tion is turned ON.
•Push one or more times (or hold down)[√ DN]/[UP ∫]
until a desired Memory channel appears.
• After pushing [F-INP/ENT], push a desired Memory
channel number from the keypad, then push [F-INP/
ENT] again to directly selectthe Memory Channel.
• Push [CH] to exit the Memory Channel Select function.
3
2PANEL DESCRIPTION
!2 MEMORY CHANNEL (BAND)
UP/DOWN SWITCHES [√ DN]/[UP ∫]
(p. 35)
➥ Push one or more times to select a Memory
channel, while “MEMO” is blinking.
➥ Push to select a band.
➥ Push to select an item in the Quick/Initial Set
mode.
!3 ATTENUATOR SWITCH [ATT] (p. 22)
Push to turn the 20 dB Attenuator function ON or
OFF.
!4 TUNER SWITCH [TUNER] (pp. 29, 30)
➥ Push to turn the Automatic Antenna Tuner func-
tion ON or OFF.
• An optional antenna tuner must be connected.
➥ Hold down for 1 second to manually start the
tuner.
• An optional antenna tuner must be connected.
• When the tuner cannottune the antenna within 20 sec-
onds,the tuning circuitis automaticallybypassed.
!5 SET SWITCH [SET]
➥ Hold down for 1 second to enter the Quick Set
mode. (p. 41)
➥ While holding down [SET], push [POWER] to
enter the Initial Set mode. (p. 41)
➥ Push to select the Meter function. (p. 28)
• PO: Displays the relative RF output power.
• ALC: Displays ALC level.
• SWR: Displays the SWR over the transmission line.
!6 MIC COMPRESSOR SWITCH [COMP] (p. 28)
Toggles the Microphone Compressor function ON or
OFF.
!7 KEYPAD (pp. 4, 35)
The keypad can be used for direct frequency input,
Memory channel selection, or secondary functions.
!8 NOISE BLANKER SWITCH [NB] (p. 22)
➥ Push to turn the Noise Blanker ON or OFF. The
Noise Blanker reduces pulse-type noise such as
that generated by automobile ignition systems.
This function is not effective against non pulse-
type noise.
➥ Hold down [NB] for 1 second to enter the Noise
Blanker Level Setting mode.
!9 QUICK TUNING STEP SWITCH [TS] (pp. 18, 19)
➥ Selects a Quick Tuning step or turns OFF the
Quick Tuning step.
• While the Quick Tuning icon (“”) is displayed, the
frequency is changed in kHz step.
➥ While the Quick Tuning step is OFF, hold down
for 1 second to turn the 1 Hz step ON or OFF.
• A 1 Hz indication appears and the frequency is
changed in 1 Hz steps.
➥ While the kHz Quick Tuning step is selected, hold
down for 1 second to enter the Tuning Step Set
mode.
@0 FILTER SWITCH [FIL] (p. 24)
Push to select the preset normal, wide, or narrow IF
filters for the selected operating mode.
@1 MODE SWITCHES [LSB/USB]/[CW/CW-
R]/ [RTTY/RTTY-R]/[AM] (p. 20)
Push to select an operating mode.
• In the SSB mode, holding down [MODE] for 1 second
toggles between LSB and USB.
• In the CW mode, holding down [MODE] for 2 seconds
toggles between CWand CW Reverse.
• In the RTTY mode,holdingdown [MODE]for 2 seconds
toggles between RTTY and RTTY Reverse.
• “ ” appears when the Reverse mode is selected.
4
2 PANEL DESCRIPTION
NB COMP SET
n Front panel (continued)
V/M 1 A=B 2 A/B 3
#3 #2
MOD E FILTER TS
MW 4
SPL7
NR .
M=CL 5
SCN8
ANF
M V 6
VO X 9
F-INP
@2 V/M 1
@3 MW 4
@4 SPL7
A=B 2
M=CL 5
SC N 8
A/B 3
#1
M V 6 #0
VO X 9 @9
0 ENT
@5 NR . ANF 0
@8F-INP
ENT
@7
P.AMP ATT
@6
TUN E R
CH Z DN UP Y
@2 VFO/MEMORY SWITCH/1 [V/M•1] (pp. 16, 35)
Push to toggle the operating mode between VFO
and Memory.
@3 MEMORY WRITE SWITCH/4 [MW•4] (p. 36)
Hold down for 1 second to enter the displayed fre-
quency and operating mode into the selected Mem-
ory channel.
@4 SPLIT SWITCH/7 [SPL•7] (p. 26)
Push to turn the Split Frequency function ON or
OFF.
@5 NR SWITCH/. [NR• . ] (p. 23)
➥ Push to turn the Noise Reduction function ON or
OFF. This function can be used in all modes.
• An optional UT-106 DSP UNIT is required.
• “NR” appears on the display.
➥ Hold down for 1 second to enter the Noise Re-
duction Level Set mode.
@6 ANF SWITCH/0 [ANF•0] (p. 23)
Push to turn the Automatic Notch Filter function ON
or OFF.
This function can be used in SSB and AM modes.
• An optional UT-106 DSP UNIT is required.
• “ANF” appears on the display.
@7 FREQUENCY INPUT/ENTER
SWITCH [F-INP/ENT]
➥ Push [F-INP/ENT] to enter the Direct Frequency
Input mode.
➥ After pushing [CH], push [F-INP/ENT] to enter
the Direct Memory Number Selection mode.
@8 SCAN SWITCH/8 [SCAN•8] (p. 39)
➥ Push to start or stop the Programmed Scan in
the VFO mode.
➥ Push to start or stop the Memory Scan in the
Memory mode.
@9 VOX SWITCH/9 [VOX•9] (p. 28)
In the SSB modes, push to turn the VOX function
ON or OFF.
#0 M≈V SWITCH/6 [MV•6] (p. 37)
Hold down for 1 second to copy the memory con-
tents to the VFO.
#1MEMORYCLEARSWITCH/5[M=CL•5](p.38)
In the Memory mode, hold down for 1 second to
clear the selected Memory channel contents.
• “BLANK” appears above the Memory channel number.
#2VFO SELECT SWITCH/3 [A/B•3] (p. 16)
➥ In the VFO mode, push to toggle between VFO
A and VFO B.
➥ When the Split Frequency function is ON, push
to toggle between the transmit and the receive
frequency.
#3 VFO EQUALIZATION SWITCH/2 [A=B•2]
Push to equalize the VFO B frequency and oper-
ating mode to the VFO A frequency and operating
mode.
5
2PANEL DESCRIPTION
n Function display
!9 !8 !7 !6
q
w
e !5
r
t !4
y !2
!3
u
i
o !0 !1
q LOCK ICON (p. 19)
Displayed when the Dial Lock function is in use.
w RECEIVE ICON
Displayed while receiving a signal or when the
squelch is open.
eTUNE ICON
Displayed while the Automatic Tuning function is in
use.
rTRANSMIT ICON
Displayed while transmitting.
tFUNCTION ICONS
➥ “P.AMP” is displayed when antenna preamp is in
use.
➥ “ATT” is displayed when the Attenuator function
is in use.
➥ “NB” is displayed when the Noise Blanker func-
tion is ON.
➥ “BK” is displayed when the Semi Break-in func-
tion is selected in Quick Set mode.
➥ “F-BK” is displayed when the Full Break-in func-
tion is selected in the CW mode. (p. 31)
➥ “VOX” is displayed when the VOX function is se-
lected in the Quick Set mode.
➥ “COM” is displayed when the speech compres-
sor is ON in the SSB mode.
➥ “SCAN” is displayed when the Scan function is in
use.
• Blinks when a scan is paused.
y DSP UNIT ICON
Displayed when an optional UT-106 DSP UNIT is in-
stalled.
u AUTOMATIC NOTCH FILTER ICON (p. 23)
Displayed when the optional Automatic Notch Filter
function is in use.
iNOISE REDUCTION ICON (p. 23)
Displayed when the optional Noise Reduction func-
tion is in use.
o SIGNAL/SQL/RF-GAIN METER
➥ Displays the signal strength while receiving.
➥ Displays the relative output power, ALC, or SWR
levels while transmitting. (p. 27)
!0 VFO/MEMORY ICON (p. 16)
“VFO A” or “VFO B” is displayed when the VFO
mode is selected.
“MEMO” is displayed when the Memory mode is se-
lected.
!1 MEMORY CHANNEL NUMBER READOUT (p. 35)
Displays the selected Memory channel number.
!2BLANK ICON (p. 38)
Indicates that the selected Memory channel has no
content.
• This icon appears both in VFO and Memory mode.
!3 SPLIT ICON (p. 26)
Displayed when the Split function is ON.
!4 RIT ICON (p. 21)
Displayed when the RIT function is in use.
!5 FREQUENCY READOUT
Displays the operating frequency.
!6 REVERSE ICON (p. 20)
Displayed when the CW reverse or RTTY reverse
mode is selected.
!7 WIDE/NARROW FILTER ICONS (pp. 24, 25)
➥ “ ” is displayed when the wide IF filter is se-
lected.
➥ “ ” is displayed when the narrow IF filter is se-
lected.
!8 PROGRAMM ABLE TUNING STEP ICON
Displayed when you select the programmable tun-
ing step.
!9MODE ICONS (p. 20)
Displays the selected operating mode.
6
2 PANEL DESCRIPTION
n Rearpanel
q w e
!0 o i u y t r
q ANTENNA CONNECTOR [ANT] (p. 10)
Connects to a 50 Ω antenna with a PL-259 plug
connector and a 50 Ω coaxial cable.
w DC POWER SOCKET [DC 13.8V] (p. 12)
Connects to a 13.8 V DC source through the sup-
plied DC power cable.
Rear panel view
u ELECTRONIC KEYER JACK [KEY]
Accepts a key or paddle connector for the internal
electronic keyer.
• You can selectthe keyer type between the internal elec-
tronic keyer and straight key operation in the Initial Set
mode.
When connecting
(⊕ )
a straightkey
e TUNER CONTROL SOCKET [TUNER] (p. 14)
Connects to the control cable from an optional AH-4
When connecting
a paddle
iALC INPUT JACK [ALC]
(dot)
(com)
(dash)
AUTOMATIC ANTENNA TUNER.
r CI-V REMOTE CONTROL JACK [REMOTE] (p. 57)
Connects to a PC for remote control of the of trans-
ceiver functions.
tEXTERNAL SPEAKER JACK [EXT SP] (p. 11)
Connects to an 8 Ω external speaker.
• When an external speaker is connected, the internal
speaker is disabled.
y ACCESSORY SOCKET [ACC] (p. 7)
Connects to external equipment such as a linear
amplifier, an automatic antenna tuner, a TNC for
data communications, and so on.
Connects to the ALC output jack of a non-Icom lin-
ear amplifier.
o SEND CONTROL JACK [SEND] (p. 14)
Goes to ground while transmitting to control exter-
nal equipment such as a liner amplifier.
• Maximum control level: 16 V DC/2 A
!0 GROUND TERMINAL [GND] (p. 9)
Connects to ground to prevent electrical shock, TVI,
BCI and other problems.
7
2PANEL DESCRIPTION
D ACC SOCKET INFORMATION
• ACC socket
ACC PIN # NAME DESCRIPTION SPECIFICATIONS
13
9 10 11 12
5 6 7 8
1 2 3 4
Rear panel
view
1 8 V Regulated 8 V output. Output voltage: 8 V ±0.3 V
Output current: Less than 10 mA
2 GND Connects to ground. —
3 SEND
Input/output pin.
Goes to ground when transmitting.
When grounded, transmits.
Ground level: –0.5 V to 0.8 V
Input current: Less than 20 mA
4 BDT Data line for the optional AT-180. —
5 BAND Band voltage output.
(Varies with amateur band) Output voltage: 0 to 8.0 V
6 ALC ALC voltage input. Control voltage: –4 to 0 V
Input impedance: More than 10 kΩ
7 NC — —
8 13.8 V 13.8 V output when power is ON. Output current: Maximum 1 A
9 TKEY Key line for the AT-180. —
10 FSKK RTTY keying input. Ground level: –0.5 to 0.8 V
Input current: Less than 10 mA
11 MOD Modulator input. Input impedance: 10 kΩ
Input level: Approx. 100 mV rms
12 AF AF detector output.
Fixed, regardless of [AF] position.
Output impedance: 4.7 kΩ
Output level: 100 to 300 mV
rms
13 SQL S Squelch output.
Goes to ground when squelch opens.
SQL open: Less than 0.3 V/5 mA
SQL closed: More than 6.0 V/100 μA
• When connecting the ACC conversion cable (OPC-599)
2 q FSKK t AF
4 5
w GND y SQLS
1 3
8 e SEND u 13.8 V
13
9 10 11 12
6 7
r MOD i ALC
5 6 7 8
1 2 3 4
ACC 1
2 q 8 V t ALC
4 5
1 3 w GND y NC
e SEND u 13.8 V
6 7
r BAND
ACC 2
When the SEND terminal controls an inductive load (such as a relay), a counter-electromotive force can cause the transceiver
to malfunction or other damage.To preventthis,we recommend adding a switching diode,such as an “1SS133,” on the load side
of the circuit to the counter-electromotive force absorption. When the diode is added, a switching delay of the relay may occur.
Be sure to check its switching action before operation.
[Example]
ACC
socket
eSEND
i13.8V
Sw itching diode
To a non-Icom
linear amplifier
Relay
8
2 PANEL DESCRIPTION
[MIC]
PIN NO.
FUNCTION DESCRIPTION
w +8 V DC output Maximum 10 mA
e
Frequency up Ground
Frequency down Ground through 470 Ω
r
Squelch open “LOW” level
Squelch close “HIGH” level
n Microphone (HM-36)
q
w
q UP/DOWN SWITCHES [UP]/[DN]
Change the selected readout frequency or Memory
channel.
• Holding down continuously changes the frequency or
Memory channel number.
• The [UP]/[DN] switch can simulate a keypaddle.Preset
in CW PADDL in the Initial Set mode.(p. 31)
w PTT SWITCH
Push to transmit, release to receive.
• MICROPHONE CONNECTOR
(Front view)
q Microphone input
w +8 V DC output
e Frequency up/dow n
i Main readout AFoutput
(varies w ith [AF]/[BAL])
u GND
(Microphone ground)
yGND (PTT ground)
t PTT
rMain readout squelch sw itch CAUTION: DO NOT short pin 2 to ground as this
can damage the internal 8 V regulator. DC voltage is
also applied to pin 1 for microphone operation. Use
caution when using a non-Icom microphone.
• HM-36 SCHEMATICDIAGRAM
Microphone
22 kø
+
0.33 µF
4700 pF
Microphone Plug
MIC
ELEMENT
+ 1 kø
10 µF Microphone Cable
q u
w i y
DOWN UP e
r
t
PTT RECEIVE
TRANSMIT
470 ø
9
INSTALLATION AND CONNECTIONS 3
n Unpacking
After unpacking, immediately report any damage to the
delivering carrier or dealer. Keep the shipping cartons.
For a description and a diagram of accessory equip-
ment included with the IC-718, see ‘Supplied accesso-
ries’ on page 1 of this manual.
n Selecting a location
Select a location for the transceiver that allows ade-
quate air circulation, free from extreme heat, cold, or
vibrations, and away from TV sets, TV antenna ele-
ments, radios and other electromagnetic sources.
The base of the transceiver has an adjustable stand
for desktop use. Set the stand to one of two angles to
suit your operating conditions.
n Connecting an antenna
For radio communications, the antenna is of critical im-
portance, along with output power and receiver sensi-
tivity. Select antenna(s), such as a well-matched 50 Ω
antenna, and feedline. A Voltage Standing Wave Ratio
(VSWR) of 1.5:1 or less is recommended for your desired
band.
NOTE: A lightening arrestor may offer some pro-
tection from static electricity.
Antenna SWR
Eachantenna is tuned for a specifiedfrequency range
and SWR may increase out of that range. When the
SWR is higher than approximately 2.0:1, the trans-
ceiver’s power drops to protect the final transistor.
In this case, an antenna tuner is useful to match the
transceiver and antenna. The IC-718 has an SWR
meter to continuously monitor the antenna SWR.
n Grounding
To prevent electrical shock, television interference
(TVI), broadcast interference (BCI) and other prob-
lems, ground the transceiver through the GROUND
terminal on the rear panel.
For best results, connect a heavy gauge wire or strap
to a long earth-sunk copper rod. Make the distance
between the [GND] terminal and ground as short as
possible.
R WARNING! NEVER connect the [GND]
terminal to a gas or electric pipe, since the connec-
tion could cause an explosion or electric shock.
10
3 INSTALLATION AND CONNECTIONS
V/M 1 A=B 2 A/B 3
M W 4 M -CL 5 M V 6
SPL7 SCN8 VOX 9
NR . ANF 0 ENTF-INP
NB COMP SET
P.AMP ATT TUNER
n Required connections
• Front panel (Microphone)
MICROPHONES (p.55)
i718
MODE FIL TS
PWR
MIC
PHONES
AF RF/SQL RIT SHIFT
LO C K
HM-36 SM-30 SM-50
CH Z DN UP Y
• Rear panel (Basic connection)
ANTENNA (p. 56)
[Example]: 1.8 to 30 MHz bands
AH-710
DC POWER SUPPLY
PS-126
GROUND (p. 9)
CW KEY
Use the heaviest gauge wire
or strap available and make
the connection as short as
possible.
Grounding prevents electrical
shocks, TVI and other prob-
lems.
A straight or bug key can be used
when the internal electronic keyer is
turned OFF in “CW PADDL” in the Ini-
tial Set mode.(p.31)
3INSTALLATION AND CONNECTIONS
V/M 1 A=B 2 A/B 3
M W 4 M -CL 5 M V 6
SPL7 SCN8 VOX 9
NR . ANF 0 ENTF-INP
NB COMP SET
P.AMP ATT TUNER
n Advanced connections
• Front panel (Microphone and headphones)
IC-718
MODE FIL TS
MIC
The AFSK modulation signal can be
inputfrom [MIC]. (p.33)
MIC
PWR
PHONES
AF RF/SQL RIT SHIFT
LO C K
CH ZDN UPY
HEADPHONES
• Rear panel (Optional products and external equipment)
AH-4 or AH-740 (p.55)
with
[REMOTE] (p.57)
Used for remote control and transceive operation.
The optional CT-17 is required when connecting a
PC to [REMOTE].
AH-2b
or a long wire
ANTENNA (p. 13)
Connects a liner amplifier,
and so on.
ACC SOCKET (p.7)
[SEND], [ALC]
(p.14)
Used to connect to a
non-Icom linear ampli-
fier.
EXTERNAL SPEAKER (p. 55)
SP-23
(Option)
11
3 INSTALLATION AND CONNECTIONS
12
n Connecting the Power supply
Use an optional PS-126 DC POWER SUPPLY when op-
erating the IC-718 with AC power. Refer to the dia-
grams below.
CAUTION: Before connecting the DC power cable,
check the following important items. Make sure:
• The [POWER] switch is OFF.
• Output voltage of the power source is 12 to 15 V
when you use a non-Icom power supply.
• DC power cable polarity is correct.
Red: Positive +terminal
Black: Negative _ terminal
CONNECTING THE PS-126 DC POWER SUPPLY
PS-126
Connect to an AC outlet
using the supplied AC cable.
13
9 10 11 12
5 6 7 8
1 2 3 4
DC pow er
socket
DC pow er cable
CONNECTING A NON-ICOM DC POWER SUPPLY
DC power supply AC outlet
13
9 10 11 12
5 6 7 8
1 2 3 4
DC power
socket
Supplied
13.8 V 25 A
_ +
_ black
+ red
AC cable
DC power cable 25 A fuses
CONNECTING A VEHICLE BATTERY
• RWARNING! NEVER connect to a battery with-
out using a DC fuse, otherwise a fire hazard
could occur or damage to the transceiver.
• NEVER connect the transceiver to a 24 V battery.
The transceiver may not receive well on some fre-
quencies when installed in a hybrid vehicle, or any
type of electric vehicle (fuel cell vehicle). This is be-
cause vehicle’s electric components, such as the
inverter system, generate a lot of electric noise.
• DO NOT use a cigarette lighter socket as a pow-
er source when operating in a vehicle. The plug
may cause voltage drops and ignition noise may
be superimposed onto transmit or receive audio.
• Use a rubber grommet when passing the DC
power cable through a metal plate to prevent a
short circuit.
Grommet
_ black
+ red
NOTE: Use terminals for
the cable connections.
Crimp
12 V
battery
Supplied
DC power cable
Solder
3INSTALLATION AND CONNECTIONS
13
n Connecting a linear amplifier
CONNECTING THE IC-PW1/EURO
To an
antenna ACC-1
Remote control cable (supplied w ith the IC-PW1/EURO)
ACC cable (supplied w ith the IC-PW1/EURO)
ANT REMOTE
INPUT1
OPC-599 conversion cable
(option)
Coaxial cable
(supplied w ith the IC-PW1/EURO)
ACC REMOTE
EXCITER
1 1&2
GND
IC-PW1/EURO
To an AC outlet
Ground
GND
13
9 10 1112
5 6 7 8
1 2 3 4
IC-718
Non-European versions: 100 V to 120 V/220 V to 240 V
European version: 230 V
CONNECTING A NON-ICOM LINER AMPLIFIER
R WARNING!
Set the transceiver output
To an
antenna
50 Ω coaxial cable
power and linear amplifier
ALC output level referring to
the linear amplifier instruc-
tion manual.
The ALC input level must
be in the range 0 V to –4
V. The transceiver does not
ac- cept a positive voltage.
Non- matched ALC and RF
power settings could cause
a fire or
RF OUTPUT RF INPUT
SEND
ALC
Non-Icom linear amplifier
ANT
SEND
IC-718
ALC
139 10 11 12
5 6 7 8
1 2 3 4
ruin the linear amplifier. The specifications for the SEND relay are 16 V
DC 2 A. If this level is exceeded, a large external
relay must be used.
3 INSTALLATION AND CONNECTIONS
14
n External antenna tuners
CONNECTING THE AH-4 (p. 30)
Long wire or optional AH-2b
Coaxial cable (from the AH-4)
Control cable
Ground
IC-718 AH-4
Ground
CONNECTING THE AH-740 (p. 30)
Coaxial cable and control cable connections
Coaxial cable (from the AH-740)
Ground
IC-718
OPC-2321
AH-740
Ground
OPC-232 1
Coaxial
cable
Rubber
vulcanizin g
tape, then
electrical
tape.
About the ground strapconnection
Ground
strap
• The coaxial cable is supplied with the AH-740.
The OPC-2321 Control cable is optional.
• See the AH-740 instruction manual for the installation and con-
nection details. Vehicle chassis or body
CONNECTING THE AT-180 (p. 29)
DO NOT connect an AT-180 and AH-4 or AH-740
at the same time. Both tuners will not function cor-
rectly.
When connecting the AT-180, turn OFF the IC-
718’s power, otherwise, the CPU may malfunction
and the AT-180 may not function properly.
Coaxial cable supplied
w ith the AT-180
ACC cable supplied w ith the AT-180 HF
antenna
[ANT] [ACC] AT-180 [ACC]
one of tw o
connectors
IC-718
13
9 10 11 12
5 6 7 8
1 2 3 4
Ground
15
FREQUENCY SETTINGS 4
n Resetting the CPU
Before first applying power, make sure all connections
required for your system are complete by referring to
Chapter 3. Then, reset the transceiver using the fol-
lowing procedure.
A resetting CLEARS all Memory channel program-
ming and returns all Quick Set mode and Initial Set
mode settings to their factory defaults.
q Make sure the transceiver power is OFF.
w While holding down [UP ∫] and [√ DN], hold down
[PWR] for 1 second to turn ON the power.
• The internal CPU is reset.
• The transceiver displays its initial VFO frequencies
when resetting is complete.
e All Quick Set mode and Initial Set mode settings
are returned to their default values. (p. 41)
[PWR] [Z DN] [UP Y]
In cooler temperatures, the LCD may appear dark
and unstable after turning ON the power. This is
normal and does not indicate any equipment mal-
function.
n Initial settings
After resetting the transceiver, set the controls and
switches as shown in the figure below.
[METER]: Po
[NB], [COMP]: OFF
[POWER]: OFF [P.AMP], [ATT]: OFF
[AF]: Max. counter clockwise [LOCK]: OFF
[RF/SQL]: 12 o’clock [RIT]: Center
[IF SHIFT]: Center
Turn ON the power, then check the display. If any of
the following icons appear, turn them OFF as follows.
• Quick tuning step icon (“√”): Push [TS].
• 1 Hz frequency readout: Hold down [TS] for 1
second.
(When Quick Tuning step
is OFF.)
• RIT icon (“ RIT ”): Set the [RIT] control to
the center position.
• Split icon (“ ”): Push [SPL].
16
4 FREQUENCY SETTINGS
n VFO description
VFO is an abbreviation of Variable Frequency Oscilla-
tor, and traditionally refers to an oscillator.
The IC-718 VFOs can store frequencies and operat-
ing modes
You can set a desired frequency in the VFO with the
[MAIN DIAL], the keypad or the Memory Copy function.
(p. 37) You can also select the operating mode with the
[MODE] switch or call up previously accessed frequen-
cies and modes with the Band Stacking Register. (p.
18)
The IC-718 has two VFOs, VFO A and VFO B, es-
pecially suited for split frequency operation. You can
easily use an operating frequency.
• Differences between the VFO mode and the Memory mode
VFO MODE
Each VFO displays a frequency and operating mode.
If the frequency or mode is changed, the VFO auto-
matically memorizes the new frequency or mode.
When you select a VFO, the last used frequency and
mode appear, even if another frequency or mode is
selected in another VFO or Memory channel.
[EXAMPLE]
VFO is selected.
The frequency
is changed.
Memory mode
is selected.
VFO is selected
again.
Last used frequency (14.123 MHz) appears.
MEMORY MODE (pp. 35–
38)
Each Memory channel shows a frequency and oper-
ating mode like a VFO. Even if the frequency or mode
is changed, the Memory channel does not memorize
the new frequency or mode.
When you select the Memory channel, the memorized
frequency and mode appear, even if the frequency or
mode is changed in the memory, then another mem-
ory or VFO is selected.
[EXAMPLE]
Memory channel 1
is selected.
The frequency
is changed.
Another Memory
channel is selected.
Memory channel 1
is selected again.
Memorized frequency (14.100 MHz) appears instead of
the changed frequency (14.123 MHz).
17
4FREQUENCY SETTINGS
n Frequency setting
D Using [MAIN DIAL]
q Push [UP ∫] or [√ DN] one or more times to se-
lect a desired ham band.
w Push [MODE] one or more times to select a de-
sired operating mode. (p. 20)
e Rotate [MAIN DIAL] to set an operating fre-
quency.
• For general coverage receiver use
The IC-718 has a general coverage receiver band.
q Push [UP ∫] or [√ DN] one or more times to se-
lect the general coverage receiver band.
NOTE: Even if you select a ham band, you can se-
lect a general coverage frequency. When the dis-
played frequency exits the transmit frequency
range (ham band), a band edge beep may sound,
depending on the presetting.
D Entering a frequency from the keypad
The transceiver has a keypad for direct frequency
entry.
q Push [F-INP/ENT].
w Enter an operating frequency with the numeric
keys on the keypad.
[EXAMPLE]
•Start
F-INP
ENT
•To enter 21.025 MHz
A=B2 V/M 1 NR ANF 0
•To enter 706 KHz (0.706 MHz)
ANF0 NR SPL7 A
•To enter 7 MHz
F-INP
•To change 14.195 to 14.850 MHz
F
NR SCN8 M=CL 5
• Push [•] to enter “•” (decimal point) between the MHz
and kHz digits.
• To cancel the input, push [SET] (or any key except a
keypad key.
• When you enter the same MHz digits as the displayed
frequency, the step w can be skipped.
e Push [F-INP/ENT] to set the entered frequency.
• When you push [F-INP/EN T] after entering the MHz dig-
its, zeros are automatically entered for the kHz digits.
A=B 2 M=C L 5 EN T
NF0 M V6 ENT
-INP
18
4 FREQUENCY SETTINGS
BAND BAND BAND
18 MHz 18.10000 MHz USB
21 MHz 21.20000 MHz USB
24 MHz 24.95000 MHz USB
28 MHz 28.50000 MHz USB
29 MHz 29.50000 MHz USB
D Band Stacking Register
The Band Stacking Register automatically stores the
last used frequency and operating mode for each
band.
See the table below for a list of the bands available
and the default settings for each register.
BAND BAND BAND
1.9 MHz 1.91000 MHz CW
3.5 MHz 3.55000 MHz LSB
7 MHz 7.05000 MHz LSB
10 MHz 10.12000 MHz CW
14 MHz 14.10000 MHz USB
General 15.10000 MHz USB
D Band selection
All HF ham bands and a general coverage receiver
band are included in the IC-718.
➥ Push [UP ∫] or [√ DN] to select a desired band.
• Holding down [UP ∫] or [√ DN] continuously scrolls
through the selectable bands.
NOTE: For example, if 6.10000 MHz is registered
as the General coverage frequency, the General
coverage band automatically positions itself be-
tween 3.5 MHz and 7 MHz band.
General (new)
Z DN
UP Y
General (old)
D Programmable tuning steps
Select the tuning step to suit your operating require-
ments.
• 0.1, 1, 5, 9, 10, 100 kHz are selectable
q Push [TS] to turn ON the Quick tuning function.
• “” appears.
w Hold down [TS] for 2 seconds to enter the Tuning
Step Set mode.
e Rotate [MAIN DIAL] to select a desired tuning
step.
• 0.1, 1, 5, 9, 10, or 100 kHz are selectable.
rPush [TS] to exit the mode.
t Rotate [MAIN DIAL] to change the frequency ac-
cording to the set tuning step.
y Push [TS] toturn OFF the Quick tuning function.
• “” disappears.
Programmable tuning
step indicator
10 kHz tuning steps is
selected.
19
4FREQUENCY SETTINGS
D 1 Hz and 10 Hz tuning steps
When the programmable tuning step, “,” disap-
pears, rotating [MAIN DIAL] changes the frequency in
increments of 1 or 10 Hz.
q Push [TS] one or more times until “” disappears.
w Hold down [TS] for 1 second to toggle between the
1 Hz and 10 Hz step settings.
• When the 1 Hz step is selected,the 1 Hz digitappears
in the frequency readout.
• When the 10 Hz step is selected, the 1 Hz digit disap-
pears from the frequency readout.
TS
Hold down
for 1 second.
Rotating [MAIN DIAL]
changes the frequency
in 10 Hz steps.
Rotating [MAIN DIAL]
changes the frequency
in 1 Hz steps.
[TS] SWITCH FLOW CHART
10 Hz tuning
Programmable step tuning
(100 Hz –100 kHz)
Hold down
for 1 second
Push Hold down
for 1 second
Hold down
for 1 second
Push
1 Hz tuning
Selectable for each mode.
n Dial Lock function
The Dial Lock function electronically locks [MAIN
DIAL].
➥ Push [LOCK] to turn the function ON or OFF.
• “LOCK” appears when the function is ON.
Appears
20
Set mode
setting
USB, LSB,
CW, RTTY
AM
rS (RF/SQL)
(default)
RF/SQL RF/SQL
At (AUTO) RF GAIN SQL*
Sq (SQL) SQL* SQL*
5 RECEIVE AND TRANSMIT
n Mode selection
You can use the following modes in the IC-718:
SSB (LSB/USB), CW, CW REV (CW reverse), RTTY,
RTTY REV (RTTY reverse) and AM.
OPERATING MODE SELECTION
➥ Push [MODE] one or more times to select the de-
sired operating mode.
➥ Hold down [MODE] for 1 second to toggle between
USB and LSB. (SSB mode only)
➥ Hold down [MODE] for 1 second to toggle between
USB LSB
CW CW
Push
Hold down
MODE
MODE
CW and CW reverse or RTTY and RTTY reverse.
(CW and RTTY mode only)
• The selected mode is displayed in the Function Display.
Note: If desired mode cannot be selected, it may be
inhibited by the Initial Set mode. (p. 44)
RTTY RTTY
AM
for 1 second
n RF gain and Squelch
The IC-718 uses the same control, [RF/SQL], to ad-
just either the RF gain or the squelch, depending on • When set as the [RF/SQL] control
the operating mode selected and the setting of the
RF/SQL item in Initial Set mode (p. 44).
• [RF/SQL] control priority
Maximum RF gain
Squelch is open.
RF gain adjustable
range
S-meter squelch
threshold
S-meter squelch
• When set as the [SQL] control
* The RF gain is set to maximum level when [RF/SQL] is
setas [SQL] control.
• Shallow rotation moves the S-meter to the right indicating
the signal strength which can be received.
We recommend setting the RF Gain control to the
12 o’clock position since this sets RF gain to the
maximum.
The SQUELCH removes noise output from the speaker
(closed condition) when no signal is received. The
squelch is selectable in all modes.
• Segments appear in the S-meter to indicate the S-meter
squelch level.
S-meter squelch
threshold
Squelch is open. S-meter squelch
Shallow Deep
• When set as the [RF] control
Maximum RF gain
Adjustable range
Minimum RF gain
21
5RECEIVE AND TRANSMIT
n Function for receive
ïIFshift function
The IF shift function electronically narrows the pass-
band frequency of the intermediate frequency (IF) and
cuts out higher or lower frequency components of the
IF to reject interference. The function shifts the IF fre-
quency up to ±1.2 kHz in the SSB/CW/RTTY modes
and up ±250 Hz in the CW-narrow/ RTTY narrow
modes. The IF shift is not selectable in the AM mode.
IF SHIFT OPERATION EXAMPLE
• Adjust the [SHIFT] control for minimum interfer-
ence.
• When IF shift is used, the audio tone may
change.
• Set the IF shift control to the center position when
there is no interference.
Both controls at
center position
Cutting a lower
passband
Cutting a higher
passband
SHIFT SHIFT SHIFT
Interference
Passband Passband
Interference
IF center frequency Desired signal Desired signal
ïRIT function
The Receive Incremental Tuning (RIT) function com-
pensates for off-frequency signals. The function shifts
the receive frequency up to 1.2 kHz without shifting
the transmit frequency.
q Rotate the RIT control to shift the off-frequencies.
• “ RIT ” appears on the display.
• The transmitfrequencyis not shifted.
w To cancel the RIT func-
tion, rotate the RIT
control to the center po-
sition.
• “ RIT ” disappears.
RIT off position
ïPreamp
The preamp amplifies received signals in the front
end circuit to improve the signal to noise (S/N) ratio
and sensitivity. Turn this function ON when receiving
weak signals.
➥ Push [P.AMP] to turn the preamp ON or OFF.
• The preamp functions below 1.59999 MHz, but sensi-
tivity may be reduced.
Appears when the
preamp ON.
22
5 RECEIVE AND TRANSMIT
ïAttenuator
The attenuator prevents desired signals from distort-
ing when the receive signal is very strong or when very
strong electric fields, such as from broadcasting sta-
tions, are near your location.
➥ Each push of [ATT] toggles the 20 dB attenuator
function ON or OFF.
• “ATT” appears when the attenuator is ON.
Appears when the
attenuator is ON.
ïNoise Blanker
The Noise Blanker (NB) reduces pulse-type noise
such as that generated by automobile ignition sys-
tems.
q Push the [NB] switch to turn the noise blanker ON
or OFF.
w Hold down [NB] for 1 second to enter the noise
blanker level Set mode.
eRotate [DIAL] toadjust the noise blanker level.
r Push [NB] toexit the Set mode.
t Push [NB] again to turn the noise blanker func-
tion OFF.
• “NB” disappears.
Y
[NB] switch
• When using the noise blanker, received signals
may be distorted if they are excessively strong.
• The noise blanker function in the AM mode can
be turned ON or OFF in the initial set mode set-
ting. (p. 45)
ïMeter peak hold
The meter peak hold function keeps the highest dis-
played bar segment in any meter function for about
0.5 seconds so that you can read the meter indication
easier. This function can be turned ON or OFF in the
initial Set mode (p. 45).
Initial reception of a signal
results in an S-meter reading
of 40 dB over 9.
The highest indicated bar
remains displayed for 0.5
seconds even when the signal
strength decreases.
23
5RECEIVE AND TRANSMIT
n DSP function (Requires an optional UT-106 DSP UNIT)
ï NR (Noise Reduction) function
When an optional UT-106 is installed, the Noise Re-
duction function can be used. Also, DSP appears in
the Function display.
• Noise Reduction example
Noise Reduction OFF Noise Reduction activated
The Noise Reduction function reduces noise compo-
nents and picks out desired signals that are buried in
noise. The received AF signals are converted to digi-
tal signals and then the desired signals are separated
from the noise.
Noise components Desired
signal (CW)
q Push [NR] to turn the noise reduction ON.
• “NR” appears.
w Hold down [NR] for 1 second to enter the Noise
Reduction level Set mode.
e Rotate [DIAL] to adjust the Noise Reduction level.
rPush [NR] to exit the Set mode.
tPush [NR] again toturn the function OFF.
• “NR” disappears.
Higher setting of the [NR] level results in audio sig-
nal masking or distortion. Set the [NR] level for
maximum clarity. The Noise Reduction function is
usable in all modes.
ï ANF (Automatic Notch Filter) function
When an optional UT-106 is installed, the auto notch
function can be used. Also, DSP appears in the Func-
tion display.
Auto notch OFF Auto notch ON
The function automatically attenuates more than 3
beat tones, tuning signals and so on, even if they are
moving. Desired
signal (AF)
Desired
signal (AF)
The auto notch functions in only the SSB mode.
q Select the SSB mode.
w Push [ANF] to turn ON the Auto Notch function.
• “ANF” appears.
ePush [ANF] again toturn OFF the function.
• “ANF” disappears.
Unw anted tone
frequency
Particular frequency
is attenuated
24
5 RECEIVE AND TRANSMIT
No Optional
Filter
FL-52A† FL-53A† FL-96† FL-222 FL-257
SSB
WIDE 6 k* 6 k* 6 k*
6 k*
6 k*
6 k*
2.8 k 3.3 k
NORMAL 2.4 k 2.4 k 2.4 k 2.4 k 2.4 k 2.4 k
NARROW 500* 250* 1.8 k
CW
WIDE 6 k* 6 k* 6 k*
6 k*
6 k*
6 k*
2.8 k 3.3 k
NORMAL 2.4 k 2.4 k 2.4 k 2.4 k 2.4 k 2.4 k
NARROW 500 250 1.8 k
RTTY
WIDE 6 k* 6 k* 6 k*
6 k*
6 k*
6 k*
2.8 k 3.3 k
NORMAL 2.4 k 2.4 k 2.4 k 2.4 k 2.4 k 2.4 k
NARROW 500 250 1.8 k
AM
WIDE
NORMAL 6 k 6 k 6 k 6 k 6 k 6 k
NARROW 2.4 k
2.4 k 2.4 k 2.4 k 2.4 k 2.4 k
500* 250* 2.8 k* 1.8 k* 3.3 k*
n Filter selection
The filter selection adjusts the IF bandpass width, as
shown in the table to the right.
The filter selection is automatically memorized in
each mode.
qSelect the desired mode with the mode keys.
w Push [FIL] one or more times to select the desired
filter combination.
• ã orç does notappearwhileinthenormalIFfiltermode.
• çappears when the wide IF filter is selected.
• ã appears when the narrow IF filter is selected.
When an optional filter is installed, set the optional
filter in the initial Set mode. An optional filter is not
selected by default.
• Optional filter variations
Name Band width Mode
FL-52A† 500 Hz/–6 dB CW/RTTY-N
FL-53A† 250 Hz/–6 dB CW/RTTY-N
FL-96† 2.8 kHz/–6 dB SSB-W
FL-222 1.8 kHz/–6 dB SSB-N
FL-257 3.3 kHz/–6 dB SSB-W
The narrower band width is for higher receive selec-
tivity.
• Filter image Through
2nd IF signal Standard Filter (6 kHz)*** FL-65 (2.4 kHz)* 2nd IF signal/DET
FL-257 (3.3 kHz)**
FL-96† (2.8 kHz)**
FL-222 (1.8 kHz)**
FL-52A† (500 Hz)**
FL-53A† (250 Hz)**
* AM; Narrow,
SSB/CW/RTTY; Normal
** OPTION
*** AM; Normal,
SSB/CW/RTTY; Wide
• Filter selection table
( Hz )
Note: *This selection can be used when the expanded filter selection function is turned ON in
the initial Set mode.(see right) †
No longer produced
25
5RECEIVE AND TRANSMIT
52A (500) 53A (250) 96 (2.8 k) 222 (1.8 k) 257 (3.3 k)
No Optional
Filter
FL-52A†
FL-53A†
FL-96†
FL-222 FL-257
SSB
no no no 96 (2.8 k) no 257(3.3 k)
THU (6 k) THU (6 k) THU (6 k) THU (6 k) THU (6 k) THU (6 k)
CW
no no no 96 (2.8 k) no 257(3.3 k)
THU (6 k) THU (6 k) THU (6 k) THU (6 k) THU (6 k) THU (6 k)
RTTY
no no no 96 (2.8 k) no 257(3.3 k)
THU (6 k) THU (6 k) THU (6 k) THU (6 k) THU (6 k) THU (6 k)
AM
– – – – – – – – – – – – – – – – – –
No Optional
Filter
FL-52A†
FL-53A†
FL-96†
FL-222 FL-257
SSB
– – – no no – – – 222 (1.8 k) – – –
52A (500) 53A (250)
CW
– – – 52A (500) 53A (250) – – – 222 (1.8 k) – – –
RTTY
– – – 52A (500) 53A (250) – – – 222 (1.8 k) – – –
AM
NOR (2.4 k) NOR (2.4 k) NOR (2.4 k) NOR (2.4 k) NOR (2.4 k) NOR (2.4 k)
n Filter setting
When an optional filter is installed, set the optional fil-
ters in the initial Set mode. Optional filters are not se-
lected by default. (p. 47)
D Optional filter setting
q While holding down [SET], push [POWER] toenter
the initial Set mode.
w Push [UP Y] or [Z DN] one or more times until
“FIL” appears on the display.
eRotate [DIAL] toselect adesired filter.
• “no,” “52A,” “53A,” “96,” “222” and “257” indicate no
optional filter.
• FL-52A, FL-53A, FL-96, FL-222 and FL-257 indicate
the respective for 455 kHz IF filter selection.
r Push [PWR] to exit the initial Set mode, and turn
OFF the transceiver.
D Expanded filter selection
The selectable filter combinations can be expanded
by setting the expanded filter selection to ON. Then
an extra wide or narrow filter can be selected in de-
sired modes.
q While holding down [SET], push [PWR] to enter
the initial Set mode.
w Push [UP Y] or [Z DN] one or more times until
“EXP FIL” appears.
• Optional filter selection
• Expanded filter selection “on”
• Wide filter setting
• Narrow filter setting
e Rotate [DIAL] to turn ON the ex-
panded filter selection.
• When ON set, the expanded filter
selection can be used.
• Wide filter setting table
• Wide/narrow filter selecting
r Push [UP Y] one or more times
until “WIDE ” or “NAR ” is
displayed.
t Push [MODE] one or more times
to select the desired mode.
y Rotate [DIAL] to select afilter.
u Repeat steps t and y to select
IF filters for other modes, if de-
sired.
• The filter combinations are stored
according to each operating mode.
i Push [POWER] to exit initial set
mode and turn OFF the trans-
ceiver.
• Narrow filter setting table
: def ault
: def ault
†No longer produced
• See the filter construction diagram on page 24 for “THU (through).”
• “no,” “52A,” “53A,” “96,” “222” and “257” indicate no optional filter.
26
5 RECEIVE AND TRANSMIT
n Split frequency operation
Split frequency operation allows you to transmit and
receive on two different frequencies. Split frequency
operation uses two frequencies, one in VFO A and
the other in VFO B.
The following is an example of setting 7.057 MHz,
CW mode in VFO A (for receive) and 7.025 MHz, CW
mode in VFO B (for transmit).
q Select VFO B and set the frequency to 7.025 MHz/
CW.
w Push [A/B] to select VFO A and set the frequency
to 7.057 MHz/CW.
e Push [SPL] to turn ON the split frequency opera-
tion.
• Split operation is now set for receive 7.057 MHz/CW
and transmit 7.025 MHz/CW.
• To change the receive frequency, rotate the main dial,
to change the transmitfrequency, rotate the main dial
in the transmitmode.
To exchange the transmit and receive frequencies,
push [A/B].
n SWR
The IC-718 has a built-in circuit to measure antenna
SWR— no external equipment or special adjustments
are necessary.
ïMeasuring SWR
q Confirm that the output power is over 30 W.
w Push [SET] one or more times to select the SWR
meter.
e Push [MODE] one or more times to select the CW
or RTTY operation.
• Key down or push [PTT] to transmit,then read the ac-
tual SWR from the meter:
≤ 1.5 well matched antenna
≥ 1.5 check antenna or cable connection and so on. The bestmatch is in this range.
27
5RECEIVE AND TRANSMIT
DISPLAY
INDICATION
MEASUREMENT
Po Indicates the relative RF output power.
ALC
Indicates the ALC level. When the
meter movement shows the input signal
level exceeds the allowable level, the
ALC limits the RF power. In such cases,
reduce the microphone gain (see
above).
SWR
Indicates the SWR over the transmis-
sion line.
n Function for transmit
ï Output power and microphone gain
• Setting the output power
q Hold down [SET] for 1 second to select the Quick
Set mode.
w Push [UP ∫]/[√ DN] one or more times to select
“RF Power.”
e Rotate the main dial to select the desired output.
• Output power is continuously selectable in 101 steps
(L, 1–99 and H).
• Available power
SSB/CW/RTTY: 2 (or less) – 100 W
AM: 2 (or less) – 35 W*
*Carrier power
Maximum output
power is selected.
• Setting the microphone gain
Microphone gain must be adjusted properly so that
your transmit signal is not distorted.
q Select SSB or another phone mode.
w Hold down [SET] for 1 second to enter the Quick
Set mode.
e Push [UP ∫]/[√ DN] one or more times to select
“MIC GAIN.”
rSpeak into the microphon e at your normal voice
level and adjust the mic gain so that the ALC
meter does not peak past the ALC zone.
tPush [SET] toexit Quick Set mode.
ALC zone
Microphone gain is
set to 50.
ïMeter function
The bar meter in the function display acts as an
S-meter (for relative signal strength) during receive,
and can be set to one of three functions during trans-
mit.
• Push [SET] one or more times to select the PO,
ALC and SWR meter mode.
5 RECEIVE AND TRANSMIT
ï Microphone compressor
The IC-718 has a built-in, low distortion mic compres-
sor circuit. This circuit increases your average talk
power in the SSB mode, and is especially useful for
DX’ing when the receiving station is having difficulty
receiving your signal.
q Select USB or LSB mode.
w Select the mic gain display in the Quick Set mode.
• Hold down [SET] for 1 second to select the Quick Set
mode.
• Push [UP ∫]/[√ DN] one or more times to select“MIC
GAIN.”
e Adjust the mic gain by rotating [DIAL].
• While speaking at your normal voice level, the ALC
meter should read about the middle of the ALC zone.
• Be sure the mic gain is in the range of 20 to 50.
rPush [SET] toexit the Quick Set mode.
t Push [COMP] toturn the mic compressor ON. ALC zone
Y
[COMP] switch
y Push [SET] one or more times to select the ALC
meter.
u While speaking into the microphone at your nor-
mal voice level, confirm the ALC level so that the
ALC meter peak does not past the ALC zone.
• If the ALC meter peak pastthe ALC zone, readjust the
mic gain.
Note: If the ALC meter peaks above the ALC zone,
your transmitted voice may be distorted.
Adjust [MIC GAIN] so that the ALC
meter reads within the ALC zone.
ïVOX operation
The VOX (Voice-operated Transmission) function tog-
gles between transmit and receive with your voice. This
function also allows you an opportunity to input log en-
tries into your computer and so on, while operating.
q Push [VOX] toturn the function ON.
w Select “VOX Gain” in the Quick Set mode.
• Hold down [SET] for 1 second to selectthe Quick Set
mode.
• Push [UP ∫]/[√ DN] one or more times to select“VOX
GAIN.”
e While speaking at your normal voice level, adjust
[VOX GAIN] until the transceiver is transmitting.
rSelect “VOX Delay” in the Quick Set mode.
• Push [UP ∫]/[√ DN] one or more times to select“VOX
Delay.”
t While speaking at your normal voice level, adjust
[VOX DELAY] as desired.
y Select “ANTI-VOX” in the Quick Set mode.
• Push [UP ∫]/[√ DN] one or more times to select “AN
VOX.”
u If the received audio from the speaker toggles the
transceiver to transmit, adjust the “ANTI-VOX” to
the point where it has no effect.
i Push [SET] to exit the the Quick Set mode.
28
[VOX] switch
Y
5RECEIVE AND TRANSMIT
29
ï Optional AT-180 AUTOMATIC ANTENNA TUNER operation
The AT-180 automatic antenna tuner autom atically
matches the IC-718 to the antenna. Once the tuner
matches the antenna, the tuning settings are memo-
rized as a preset point for each frequency range (100
kHz steps). Therefore, when you change the frequency
range, the tuning circuits are automatically set to the
memorized point.
CAUTION: NEVER transmit with the tuner ON
when no antenna is connected. This will damage
both the transceiver and the antenna tuner.
• MANUAL TUNING
During SSB operation at low voice levels, the AT-180
may not tune correctly. In such cases, manual tun-
ing is helpful.
Hold down [TUNER] for 1 second to start manual tun-
ing.
• CW mode is selected, a side tone is emitted, and
“ ” blinks;then, the previous mode is selected.
DO NOT! connect the AT-180 and AH-4 or AH-740
at the
same time. Both tuners will not be function cor-
rectly.
Y
TUNER OPERATION
• Tuner type setting (p. 46)
q Hold down [PWR] for 1 second toturn power OFF.
w While pushing and holding [SET], push [PWR] to
turn power ON.
e Push [UP Y] or [Z DN] one or more times to se-
lect [TUNER].
rRotate the main dial toselect “18.”
• AT-180 AUTOMATIC ANTENNA TUNER is selected.
NOTE: NEVER select “4” (AH-4 AUTOM ATIC AN-
TENNA TUNER), otherwise the transceiver automat-
ically transmits when you turn ON the power. Push
[TUNER] to cancel the unexpected transmission.
Then, reselect the correct tuner type.
y Hold down [PWR] for 1 second to turn power OFF.
u Push [PWR] to turn power ON again.
• AUTO TUNE:
Push [TUNER] to turn the tuner ON. The antenna is
tuned automatically during transmission when the an-
tenna SWR is higher than 1.5:1.
• When the tuner is OFF, “ ” goes out.
Y
[TUNER]
[TUNER]
Hold down 1 second to start manual tuning.
If the tuner cannot reduce the SWR to less than 1.5:1
after 20 seconds of tuning, “ ” goes out. In this
case, check:
• the antenna connection and feedline
• the antenna SWR (p. 27: Meter function)
• Through inhibit
The AT-180 has a through inhibit mode. When select-
ing this mode, you can use the tuner at poor SWR’s.
In this case, automatic tuning in the HF bands acti-
vates only when exceeding an SWR of 3:1. There-
fore, manual tuning is necessary each time you
change the frequency. Although termed “through in-
hibit,” the signal will pass “through” the tuner if the
SWR is higher than 3:1 after tuning.
CONVENIENT
• Tuner sensitive condition
If you require critical tuning at any time during trans-
mission, select the tuner sensitive condition. See
page 51 for selection.
• Automatic tuner start
If you want to turn OFF the tuner when the VSWR is
1.5 :1 or less, use “automatic tuner on” and turn
the
tuner OFF. See page 46 for turning the function ON
or OFF.
Tuning indicator;
5 RECEIVE AND TRANSMIT
30
Y
ï Optional external tuner operation
R DANGER! HIGH VOLTAGE!
NEVER touch the antenna element while tuning
or transmitting. Always place it in a secure place.
NEVER operate the AH-4 or AH-740 without an an-
tenna connected. The tuner and transceiver will be
damaged.
NEVER operate the AH-4 or AH-740 if it is not
grounded.
Transmitting before tuning may damage the transceiver.
Note that the AH-4 cannot tune when using a 1⁄2 λ long
wire or multiple of the operating frequency.
AH-4
The AH-4 matches the IC-718 to a long wire antenna
more than 7 m/23 ft long (3.5 MHz and above).
• See page 14 for connection details.
• See the AH-4 instruction manual for AH-4 installa-
tion and connection details.
AH-740
The optional AH-740 covers 2.5 to 30 MHz range with
TUNER OPERATION
Tuning is required for each frequency. BE SURE
to retune the antenna before transmitting when you
change the frequency, even slightly.
• Tuner type setting (p. 46)
q Hold down [PWR] for 1 second toturn power OFF.
w While pushing and holding [SET], push [PWR] to
turn ON the power.
e Push [UP Y] or [Z DN] one or more times to se-
lect [TUNER].
rRotate the main dial to select “4.”
• AH-4 AUTOMATIC ANTENNA TUNER is selected.
• Also select“4” when using the optional AH-740.
t Hold down [PWR] for 1second toturn power OFF.
y Push [PWR] to turn ON the power.
• MANUAL TUNING
q Set the desired frequency in an HF band.
• The IC-718 will nottransmit outsideofthe ham bands.
w Hold down [TUNER] for 1 second.
• “ ” blinks and “CW” appears while tuning.
a supplied whip antenna element. Or when using with
the optional NVIS kit, it covers 2.2 to 30 MHz range.
• See page 14 for connection details.
• See the AH-740 instruction manual for the installa-
tion and connection details.
[TUNER]
e “ ” lights constantly when tuning is complete.
• When the connected wire cannot be tuned, “” goes
out, the AH-4 or AH-740 is bypassed and the antenna
wire is directly connected to the antenna connector on
the transceiver.
r To manually bypass the AH-4 or AH-740, push
[TUNER] to turn it OFF.
Tuning indicator;
Blinks:Tuning now
Appears:Tune is completed
Disappears: Tune cannotbe completed
CONVENIENT
• PTT tune function
The AH-4 or AH-740 is always tuned when the PTT
is pushed after the frequency is changed more than
1%. This function removes the “hold down [TUNER]”
operation and activates first transmission on the new
frequency. This function is turned ON in initial set
mode (p. 46).
5RECEIVE AND TRANSMIT
31
n Function for CW
ïConnection for CW
Initial set mode setting (p.45)
13
9 10 11 12
5 6 7 8
1 2 3 4
[ELEC KEY]
: normal
[ACC]
13
9 10 11 12
You can switch TX/RX with an
external switch through pins 2
and 3 on the ACC connector,
as shown below.
Paddle
: reverse
5 6 7 8
1 2 3 4
Straight key
: off
See page 32 for connection details:
Paddle operation from the front panel
MIC connector.
[MICROPHONE]
Microphone
: UP/DN key
ïCW operation
q Connect a paddle orstraight key as shown above.
w Select CW (or CW-REV) mode by pushing [MODE].
e Set the CW break-in operation to semi break-in,
full break-in or OFF. (p. 42)
• Hold down [SET] for 1 second to enter the Quick Set
mode.
• Push [UP ∫]/[√ DN] one or more times until “BK–IN”
appears,then rotate the main dial to selectthe desired
operation:
FL: full break-in
SE: semi break-in
oF: no break-in
r Set the CW delay time when semi break-in opera-
tion is selected. (p. 43)
• Hold down [SET] for 1 second to enter the Quick Set
mode. Push [UP ∫]/[√ DN] one or more times until
“BK–DELAY” appears, then rotate the main dial to set
the desired delaytime.
CW mode and semi
break-in operation
are selected.
Delay time of 6 dots
is selected in the
Quick set mode for
semi break-in
operation.
5 RECEIVE AND TRANSMIT
32
ïCW pitch control
The received CW tone pitch and monitored CW tone
pitch can be adjusted to suit your preferences (300 to
900 Hz) without changing your transmitting frequency.
q Hold down [SET] for 1 second to enter the Quick
Set mode.
w Push [UP ∫]/[√ DN] one or more times until “CW
PITCH” appears, then rotate the main dial to set
the desired pitch.
This shows the
default setting for
the CW pitch control
(600 Hz).
ïCW reverse mode
The CW-R (CW Reverse) mode receives CW signals
with the reverse side CW carrier point like that of the
LSB and USB modes. Use this mode when interfer-
ing signals are near the desired signal and you want
to change the interference tone.
BFO
1/3 octave
Hold down
for 1 second
MOD E
1/2 octave
BFO
q Push [MODE] one or more times to select the CW
mode.
w Hold down [MODE] for 1 second to toggle between
the CW and CW-R modes. Desired signal
(600 Hz)
Interference
(800 Hz)
Desired signal
(600 Hz)
Interference
(400 Hz)
CW mode (USBside) CW REV mode (LSBside)
ïElectronic CW keyer
The IC-718 has an electronic keyer installed. Both
keying speed and weight (the ratio of dot : space :
dash) can be set in the Quick Set mode. KEYING WEIGHT EXAMPLE: morse code “K”
DOT
• Setting the electronic keyer
q Push [MODE] one or more times to select the CW
mode.
w While pushing and holding [SET], push [POWER]
to enter initial set mode.
e Push [UP ∫]/[√ DN] one or more times until “CW
Weightsetting:
1:1:3 (default)
Weightsetting:
Adjusted
DASH
(Fixed*) DASH
PADDL” appears, then rotate the main dial to se-
lect the paddle type.
• When “ud” is selected, the up/down switches on the
microphone can be use as a paddle.
• When using the up/down switches as a paddle,
squeeze keying cannotbe done.
r Push [UP ∫]/[√ DN] one or more times until “KEY
Adjustable range SPACE (Fixed*)
*SPACE and DOT lengths can be adjusted with “KEY SPD
in the the Quick Set mode only.
RAT” appears, then rotate the main dial to select
the desired weight to between 2.8 and 4.5.
t Push [UP ∫]/[√ DN] one or more times until “KEY
Paddle operation
Front panel
MIC connector
SPD” appears, then rotate the main dial to select DOT E
the desired weight to between 6 and 60. CW
paddle
3.9 k ±5%
MIC U/D
y
Paddle operation from front panel MIC connector
Connect a CW paddle to operate the built-in elec-
tronic keyer from the front panel MIC connector.
DASH
2.2 k ±5% e
• This function is usable from only the front panel mic
connector.
• Select item “n,” “r,” or “oF” in CW PADDL in initial set
mode.
• Connectstraightkey to “DOT” side.
5RECEIVE AND TRANSMIT
33
[ACC]
[EXTSP]
n Function for RTTY
ïConnection for RTTY (FSK)
Rear panel
TU or TNC
PC
2 conductor 3.5 mm (1/8”) plug
Rear panel
view
13
9 10 11 12
5 6 7 8
1 2 3 4
AF
SQL*1
AF out
SEND
GND
FSK
GND Use either the ACC or one of the two 1/8 plugs.
*1
Connect the SQL line w hen required.
ïConnection for AFSK
[MIC] connector
(Front panel view)
q Mic input
i AF output
To a TU or TNC
and personal computer.
[ACC] connector
Rear panel
view
1 7
2 8 6
3 5
4
uMic GND
yPTT GND
tPTT
rSQL
Use either the ACC or microphone connector.
13
9 10 11 12
5 6 7 8
1 2 3 4
SQL*1
AF out
AF in
SEND
GND
*1
Connect the SQL line w hen required.
5 RECEIVE AND TRANSMIT
34
ïRTTY (FSK) operation
q Connect a terminal unit as described on page 34.
w Select the RTTY (or RTTY-R) mode by pushing
[MODE].
e Select the desired mark and shift frequencies as
described below.
r Set the desired operating frequency with the main
dial.
t Start using the PC or TNC (TU).
PRESETTING FOR RTTY
• Tone frequency
q Hold down [SET] for 1 second to enter the Quick
Set mode.
w Push [UP ∫]/[√ DN] one or more times until “TON
2125” appears, then rotate the main dial to select
the desired tone frequency.
• Shift frequency
q Hold down [SET] for 1 second to enter the Quick
Set mode.
w Push [UP ∫]/[√ DN] one or more times until “SIFT
170” appears, then rotate the main dial to select
the desired shift frequency.
RTTY mode
is selected.
RTTY mark frequency
is set to 2125 Hz.
2125, 1615 and 1275
Hz can be used.
RTTY shift frequency
is set to 850 Hz.
850, 425, 200 and
170 Hz can be used.
• RTTY reverse mode
Received characters are occasionally garbled when
the receive signal is reversed between MARK and Normal Reverse
SPACE. This reversal can be caused by incorrect
space mark space mark
TNC connections, settings, commands and so on.
To receive a reversed RTTY signal correctly, select
the RTTY-R (RTTY reverse) mode.
170
Hz
2125
Hz
BFO BFO
2125
Hz
170
Hz
• Hold down [MODE] for 1 second to select the RTTY-R
(RTTY reverse) mode.
Displayed frequency Displayed frequency
ïRTTY (AFSK) operation
q Connect a terminal unit as described on page 33.
w Select the SSB (LSB) mode by pushing [MODE].
• Generally, LSB is used on the HF bands.
e Select the desired FSK tone/shift frequencies and
keying polarity the same way as for the FSK oper-
ation.
r Set the desired frequency with the main dial.
t Start using the PC or TNC (TU).
35
MEMORY OPERATION 6
n Memory channels
The transceiver has 101 Memory channels. The Mem-
ory mode is very useful for quickly changing to often-
used frequencies.
All 101 Memory channels are tunable, which means
the entered frequency can be tuned temporarily with
[DIAL] in the Memory mode.
MEMORY
CHANNEL
MEMORY
CHANNEL
NUMBER
CAPABILITY
TRANSFER
TO VFO
OVER-
WRITING
CLEAR
Regular memory
channels
1–99
One frequency and one mode
in each memory channel.
Yes Yes Yes
Scan edge
memory
channels
P1, P2
One frequency and one mode in
each memory channel as scan
edges for a programmed scan.
Yes Yes No
n Memory channel selection
D Using the [UP Y] or [Z DN] keys
q Push [V/M] toselect the Memory mode.
• “MEMO” appears.
w Push [CH] to enter the memory CH select mode.
• “MEMO” blinks.
e Push [UP Y] or [Z DN] several times to select the
desired Memory channel.
• Hold down [UP Y] or [Z DN] to scroll to the desired
memory.
rPush [CH] to exit the memory CH select mode.
tTo return to the VFO mode, push [V/M] again.
D Using the keypad
q Push [V/M] toselect the Memory mode.
• “MEMO” appears.
w Push [CH] to enter the memory CH select mode.
• “MEMO” blinks.
e Push [F-INP/ENT], then push the desired Memory
channel number using the keypad.
r Push [F-INP/ENT] to select the desired Memory
channel.
tPush [CH] to exit the memory CH select mode.
V/M 1 V/M 1
CH CH
ZDN or UP Y
F-INP
ENT
V/M 1 A=B2
F-INP
ENT
CH CH
36
6 MEMORY OPERATION
n Memory channel entry
Memory channel entry can be performed either in the
VFO mode or in the Memory mode.
D Entering data in the VFO mode
q Set a desired frequency and operating mode in the
VFO mode.
w Push [CH], then push [UP Y] or [Z DN] several
times to select the desired Memory channel.
• “MEMO” blinks.
• “BLANK” appears ifthe selected Memory channel is a
blank channel.
e Hold down [MW] for 1 second to program the dis-
played frequency and operating mode into the
Memory channel.
r Push [CH] toexit Memory channel select mode.
[EXAMPLE]: Entering 7.086 MHz/LSB into Memory
channel 10.
or keypad
MODE
CH
Z DN or UP Y
MW 4 Hold down f or 1 second.
Beep
Beep
Beep
CH
D Entering data in the Memory mode
q Select the desired Memory channel by pushing
[UP Y] or [Z DN] in the Memory mode.
• “BLANK” appears ifthe selected Memory channel is a
blank channel (has no contents).
w Enter the desired frequency and operating mode
in the Memory mode.
• In a blank channel, first directly enter the frequency
using the keypad.
e Hold down [MW] for 1 second to enter the dis-
[EXAMPLE]: Entering 21.280 MHz/CW into Memory
channel 18.
V/M 1
played frequency and operating mode into the
Memory channel.
• Preamp setting, attenuator ON and OFF, and AGC
settings can also be entered into a Memory channel.
CH Z DN or UP Y
CH then
F-INP
[2], [1], [.], [2], [8] F-INP
ENT ENT
MW 4 Hold down f or 1 second.
Beep
Beep
Beep
37
Y
MEMORY OPERATION 6
n Transferring data to the VFO
The frequency and operating mode in a Memory chan-
nel can be transferred to the VFO.
Transferring data can be performed in either the VFO
or Memory mode.
D Transferring in VFO mode
This is useful for transferring entered contents to the
VFO.
qSelect the VFO mode by pushing [V/M].
w Push [CH], then select the Memory channel to be
transferred by pushing [UP Y] or [Z DN].
• “BLANK” appears ifthe selected Memory channel is a
blank channel.
e Hold down [M≈V] for 1 second to transfer the fre-
quency and operating mode.
• The transferred frequencyand operating modeare dis-
played on the function display.
r Push [CH] to exit the Memory channel select
mode.
TRANSFERRING EXAMPLE IN THE VFO MODE
Operating frequency: 21.320 MHz/USB (VFO)
Contents of M-ch 12: 14.180 MHz/CW
CH
Z DN or UP Y
M V6 Hold down f or 1 second
Beep
Beep
Beep
CH
6 MEMORY OPERATION
38
Z
D Transferring in the Memory mode
This is useful for transferring frequency and operating
mode while operating in the Memory mode.
TRANSFERRING EXAMPLE IN MEMORY MODE
Operating frequency: 14.020 MHz/CW (M-ch 16)
Contents of M-ch 16: 14.018 MHz/CW
When you have changed the frequency or operat-
ing mode in the selected Memory channel:
• The displayed frequency and mode are trans-
ferred to the VFO.
• The entered frequency and mode in the Memory
channel are not transferred to the VFO, and they
remain in the Memory channel.
q Push[CH], thenselect theMemory channel tobe
transferred by pushing [UP Y] or [Z DN] in the
Memory mode.
• Enter the frequency or operating mode ifrequired.
w Hold down [M≈V] for 1 second to transfer the fre-
quency and operating mode.
• The displayed frequency and operating mode are
transferred to the VFO.
e To return to the VFO mode, push [V/M] momen-
tarily.
Rotate dial.
M V 6 Hold down f or 1 second.
Beep
Beep
Beep
V/M 1
VFO A is display ed.
V/M 1
M-ch 16 is display ed.
n Memory clearing
Any unnecessary Memory channels can be cleared.
The cleared Memory channels become blank chan-
nels.
q Select the Memory mode by pushing [V/M].
w Push [CH], then select the Memory channel to be
cleared by pushing [UP Y] or [Z DN].
M -C 5 Hold down f or 1 second.
Beep
e Hold down [M-CL] for 1 second to clear the con-
tents.
• The entered frequency and the operating mode disap-
pear.
• “BLANK” appears.
rTo clear other Memory channels, repeat steps w
ande.
Beep
Beep
39
Scan
start
with
Programmed scan Memory scan
Squelch
open
The scan continues
until it is stopped man-
ually, and does not
pause even if it de-
tects signals.
Scan pauses on
each channel when
the scan resume is
ON, not applicable
when OFF.
Squelch
open
closed
Scan stops when detecting a signal.
If you set scan resume ON in the Initial Set
mode, the scan paused for 10 seconds when
detecting a signal, then resumes. When a sig-
nal disappears while scan is paused,scan re-
sumes 2 seconds later.
SCANS 7
n Scantypes
PROGRAMMED SCAN
Repeatedly scans between two scan edge frequencies
(scan edge memorychannels P1 and P2).
MEMORY SCAN
Repeatedlyscans all programmed memorychannels.
BLANK
Scan edge
P1 or P2
Scan edge
P2 or P1 Mch 2 Mch 3 Mch 4
Scan
Jump
This scan operates in VFO mode.
Mch 1
Mch 99
BLANK
Mch 7 Mch 6
Mch 5
This scan operates in the memorymode.
n Preparation
• Channels
For programmed scan/auto memory write scan:
Enter scan edge frequencies into scan edge Memory
channels P1 and P2.
For a memory scan:-
Enter 2 or more Memory channels except scan edge
Memory channels.
• Scan resume ON/OFF
You can select the scan to resume or cancel when de-
tecting a signal, in the Set mode. Scan resume ON/
OFF must be set before operating a scan. See page
45 for ON/OFF setting and scan resume condition de-
tails.
• Scan speed
Scan speed can be selected from 2 levels, high or low,
in the Initial Set mode. See page 45 for details.
• Squelch condition
7 SCANS
40
n Programmed scan operation
qSelect the VFO mode by pushing [V/M].
w Select the desired operating mode.
• The operating mode can also be changed while scan-
ning.
e Set [RF/SQL] open or closed.
• See the previous page for scan details.
• If the [RF/SQL] control function is set as RF control,
the squelch always opens. See pages 15, 20 for de-
tails.
r Push [SCAN] tostart the programmed scan.
• “SCAN” appears while scanning.
t When the scan detects a signal, the scan stops,
pauses or ignores it, depending on the resume
setting and the squelch status.
y To cancel the scan, push [SCAN].
If the same frequencies are programmed into the
P1 and P2 scan edges Memory channels, the scan
does not start.
n Memory scan operation
q Select Memory mode by pushing [V/M].
w Select the desired operating mode.
• The operating mode can also be changed while scan-
ning.
e Set [RF/SQL] open or closed.
• See previous page for scan details.
• If the [RF/SQL] control function is set as an RF con-
trol, the squelch is always opened. See pages 14, 30
for details.
r Push [SCAN] to start the memory scan.
• “SCAN” appears while scanning.
t When the scan detects a signal, the scan stops,
pauses or ignores it, depending on the resume
setting and the squelch status.
y To cancel the scan, push [SCAN].
2 or more Memory channels must have entered
content for memory scan to start.
41
SET MODE 8
n General
The Set mode is used for programming infrequently
changed values or conditions of functions. The IC-718
has 2 separate set modes: Quick Set mode and Initial
Set mode.
[DIAL]
[SET]
D Quick Set mode operation
q While power is ON, hold down [SET] for 1 second.
• The Quick Set mode is selectedand one ofits items ap-
pears.
w Push [UP Y] or [Z DN] to select the desired item.
e Rotate the main dial to set the values or options for
the selected item.
r Repeat w and e to set other items.
t To exit the Quick Set mode, momentarily push
[SET].
D Initial Set mode operation
q Hold down [POWER] for 1 second to turn power
OFF.
w While holding down [SET], push [POWER] to turn
the power ON.
• The Initial Set mode is selected and one ofits items ap-
pears.
e Push [UP Y] or [Z DN] to select the desired item.
rRotate the main dial to set the values or options for
the selected item.
t Repeat e and r to set other items.
y To exit the Initial Set mode, hold down [PWR] for 1
second to turn the power OFF.
u Push [PWR] to turn power ON again.
• The settings you made in the Initial Set mode are now
effective.
[Z DN] [UP Y]
[DISPLAY EXAMPLE: QUICK SET MODE]
Item
Value
[DIAL]
[SET]
[PWR]
[Z DN] [UP Y]
[DISPLAY EXAMPLE: INITIAL SET MODE]
Item
Value
8 SET MODE
42
n Quick Set mode items
• RF power
This item adjusts the RF output power. The RF output
power can be adjusted from L, 1 to 99 and H.
•The default is H (maximum power).
Note that while adjusting the output power, the power meter
is automatically displayed.
• Mic gain
This item adjusts microphone gain from 0 to 99 and H.
The default is 50.
• VOX gain
This item adjusts the VOX gain for the VOX (voice acti-
vated transmit) function.
The default is 50.
• VOX delay
This item adjusts the VOX (voice activated transmit) delay
time from 0 to 2 seconds in 0.1 second units.
The default is 10 (1.0 second).
• Anti VOX level
This item adjusts the ANTI-VOX gain for the VOX (voice
activated transmit) operation.
The default is 50.
• CW pitch
This item adjusts CW tone pitch from 300 Hz to 900 Hz in
10 Hz steps.
The default is 60 for 600 Hz.
• BK-IN
This item selects break-in type for CW operation from the
following values:
oF: No break-in is enabled (default).
SE: Semi break-in is enabled.
FL: Full break-in is enabled.
8SET MODE
43
• BK-IN delay
This item adjusts break-in delay time for CW semi break-
in operation from 2.0 to 13 (dots).
The default is 7.
• Key speed
This item adjusts the CW keying speed from 6 to 60*
wpm.
The default is 20 wpm.
* Some speeds between 6 and 60 cannotbe selected.
• Key ratio
This item selects the CW key ratio (or weight) from 2.8 to
4.5.
The default is 30 (3.0).
• RTTY mark tone
This item selects the Mark. You can select 1275, 1615 and
2125 Hz.
The default is 2125 Hz.
• RTTY shift
This item selects RTTY shift from 170, 200, 425 and 850.
The default is 170 Hz.
• Dimmer
This item selects the LCD back light brightness from Off,
Low and High.
The default is “HI” (High).
8 SET MODE
44
n Initial Set mode items
• Mode select
This item allows you to simplify operation by inhibiting any
unneeded operating modes. For example if you only use
the LSB and USB modes, use “MODE SELECTION” to
inhibit access to all other modes (CW, RTTY and AM),
therefore selecting LSB and USB is quick and easy.
The default is ON for all operating modes. To toggle an op-
erating mode ON or OFF, push [MODE] one or more times
until the desired mode is displayed. Then rotate the main
dial to set to ON or OFF.
• RF/SQL VR
The [RF/SQL] control can be set as:
• RF/squelch control
• Automatic
(acts as squelch in AM modes, as RF in SSB/CW/RTTY modes)
• Squelch control (p. 20)
The default is “rS” (RF/squelch).
• Beep
A beep sounds each time a key is pushed to confirm it.
This function can be turned OFF for silent operation.
The default is “on” (ON).
• Beep level
This item adjusts the confirmation beep level.
The default is 50.
• Band edge beep
A beep sounds when an operating frequency enters or
exits a transmit frequency range. This functions indepen-
dent of the confirmation beep setting.
The default is “on” (ON).
• Side-tone level
This item adjusts the CW side-tone level.
The default is 30.
8SET MODE
45
• Meter peak hold
This item selects meter peak hold function ON or OFF.
The default is “on” (ON).
• Scan speed
This item sets the speed at which channels or frequencies
are scanned during scan operations. High or Low can be
selected.
The default is “HI” (High).
• Scan resume
This item sets the scan resume function ON or OFF.
ON: Scan resumes 10 seconds after stopping on a signal
or 2 seconds after a signal disappears.
OFF: Scan does not resume after stopping on a signal. For
the priority watch, setting to OFF pauses the watch
until the signal disappears and the scan resumes.
The default is “on” (ON).
• AM Noise blanker
This item is used in the AM mode to blank unwanted noise,
such as ignition noise.
The default is “on” (ON).
NOTE: The noise blanker function may degrade the audio
if use when listening to regular AM radio broadcasts.
• Auto TS
This item sets auto tuning speed. The tuning dial normally
changes the frequency 1.5 kHz/revolution in 10 Hz tuning
step. When auto tuning step is turned ON this increases to
30 kHz/revolution in 50 Hz tuning step during quick rota-
tion of the dial.
The default is “on” (ON).
• Key type
This item adjusts the CW paddle type. Select from the fol-
lowing options.
• n: normal (for electronic keyer use)
• r: reverse (for electronic keyer use)
• oF: Turns OFF the electronic keyer (for straight key use)
• ud: For using the microphone’s [UP]/[DN] keys instead of
the paddle.
The default is “n” (normal).
8 SET MODE
46
• Tuner type
This item selects optional antenna tuner type. Select from
the following options.
• no: No optional tuner connected.
• 4: The optional AH-4 antenna tuner.
(Select this type also when using the optional AH-740.)
• 18: The optional AT-180 antenna tuner.
The default is “no.”
• Auto tune
The optional AT-180 ANTENNA TUNER has an automatic start
capability which starts tuning if the SWR is higher than 1.5–
3.
When “OFF” is selected, the tuner remains off, even when
the SWR is poor (1.5–3). When “ON” is selected, the auto-
matic tune starts even when the tuner is turned OFF.
The default is “oF” (OFF).
• PTT tune
The optional AH-4, AH-740 or AT-180 AUTOMATIC ANTENNA
TUNER can automatically start tuning the moment the PTT
is pushed.
The default is “oF” (OFF).
• Speech language*
The optional UT-102 VOICE SYNTHESIZER UNIT allows you to
select between English and Japanese as the speech lan-
guage.
The default is “En” (English).
• Speech speed*
The optional UT-102 VOICE SYNTHESIZER UNIT allows you to
select faster or slower synthesizer output.
The default is “HI” (High).
• Speech S-meter level*
The optional UT-102 allows you to set the synthesizer
to read the frequency/mode only (OFF), or both the fre-
quency/mode and S-meter level (ON).
The default is “on” (ON).
• CI-V baud rate
This item sets the data transfer rate. When “Auto” is se-
lected, the baud rate is automatically set according to the
connected controller or remote controller.
The default is “At” (Auto).
* The UT-102 voice synthesizer is no longer produced and these setting items do not function.
47
8SET MODE
• CI-V address
To distinguish it from other equipment, each CI-V capable
transceiver has its own Icom standard address in hexadec-
imal code. The IC-718’s address is 5E.
When 2 or more IC-718s are connected to an optional CT-17
CI-V LEVEL CONVERTER, rotate the main dial to select a differ-
ent address between 01H to 7FH, for each IC-718.
The default is 5E.
• CI-V Transceive
Transceive operation is possible with the IC-718 connected
to other Icom HF transceivers or receivers. When “on” is
selected, changing the frequency, operating mode and
so on, on the IC-718 automatically changes those of con-
nected transceivers (or receivers) and vice versa.
The default is “on” (ON).
• CI-V 731 mode
When connecting the IC-718 to the IC-735 for transceive
operation, you must change the operating frequency data
to 4 bytes.
• This item MUST be set to “on” when operating the IC-718 with
the IC-735.
The default is “oF” (OFF).
• Optional filter
When an optional IF filer is installed, you must first set the
item to “on” to be able to select the filter. Selectable filters
are FL-96†, FL-222, FL-52A†, FL-53A†, FL-257 and none
(default). See page 24 for usable filters for each mode and
see page 50 for filter installation.
• Expanded filter selection
When an optional IF filter is installed, this selection ex-
pands filter and filter selection (W/N) key combination on
operating mode independent.
• Filter selection (Wide/Narrow)
When an optional IF filter is installed, you can arrange the
filter and filter selection key combination. (p. 25)
†
This filter is no longer produced.
48
9 INSTALLATION AND CONNECTIONS
n Opening the transceiver’s
case
Follow the case and cover opening procedures shown
here when you want to install an optional unit or adjust
an internal unit, and so on.
CAUTION: DISCONNECT the DC power cable
from the IC-718 before performing any work on the
transceiver. Otherwise, there is danger of electric
shock and/or equipment damage.
q Remove the 5 screws from the top of the trans-
ceiver and 4 screws from the sides, then lift up the
top cover.
w Remove the 5 screws from the bottom of the trans-
ceiver, then remove the bottom cover.
D Carrying handle
Installation
An optional handle allows you to easily carry and
transport the transceiver.
Attach the MB-23 carrying handle with the sup-
plied rubber feet as shown to the right.
NOTE: Use only the supplied screws to attach
the handle. Otherwise, the handle may not be
attached correctly and may drop the trans-
ceiver.
n Installing the MB-118 mobile mounting bracket
D Mounting bracket MB-118
The universal mounting bracket allows overhead
mounting.
Installation
Securely mount the transceiver with the 4 supplied
screws (5 x 20) to a thick surface which can support
more than 3.80 kg (8.38 lb).
CAUTION: Non-supplied bolts (longer than 8 mm;
5
/16 in) may damage the internal units.
NEVER install the MB-118 with non-supplied
screws and bolts.
Flat washer (Optional)
Bolt
(M4 × 8)
Screw
(5 × 20)
Spring washer
9INSTALLATION AND CONNECTIONS
49
n CR-338 high stability crystal unit
The CR-338 improves the total frequency stability of
the receiver.
Installation
q Remove the bottom cover as shown in the dia-
gram before.
w Disconnect W2 from J4401 (MAIN unit) and W3
from J4201 (MAIN unit).
e Remove the 9 screws from the PLL unit, discon-
nect P4 from J201 (MAIN unit) and P2 from J401
(MAIN unit), then remove the PLL unit.
r Remove the supplied internal crystal and replace it
with the CR-338.
t Return the PLL unit, plugs and flat cables to their
original positions.
y Adjust the reference frequency at C16 using a fre-
quency counter, if desired.
• Connect the frequency counter to P 2 (PLL unit).
u Return the bottom cover to its original position.
CR-338 Internal crystal
W 2
W 3
J 4201
J 4401
P 4
PLL unit
PLL unit
C 16
J 401
J 201
MAIN unit
Solder 4 leads
P 2; Frequency check point
(Connect a frequency counter
and adjust the frequency to
64.00000 MHz w ith C 16.)
50
9 INSTALLATION AND CONNECTIONS
n UT-106 DsP receiVe unit
The UT-106 provides AF DSP functions such as
noise reduction and auto notch.
flat cable
Turn the unit over
Installation
q Remove the bottom cover.
w Slide the insulating case onto the UT-106 as
shown to the right. (Fig. 1)
e Remove the connection cable (P2601) from J2602
on the MAIN unit. Connect the cable into J1 on the
UT-106.
r Plug the connection cable (P1) from the UT-106 to
J2602 on the MAIN unit.
t Plug the flat cable into J3 on the UT-106 and to
J2603 on the MAIN unit.
• Take care to observe the conductor direction.
P 2601
insulating case J 2603
UT-106
J 2602
MAIN unit
P 1 (from UT-106)
Fig. 1
y Turn the UT-106 unit over. (Fig. 2)
• You do not need to fix with an adhesive strip.
u Put the UT-106 on the MAIN unit.
• You do not need to fix with an adhesive strip.
• Ensure that the extra cable from UT-106 is stored
• Turn the unit over
insulating case
Rear panel
UT-106
under the unit.
iReturn the bottom cover to its original position.
UT-106
J 2602
Flat cable*
J 2602 J 2603
Fig. 2
Main unit
* Supplied with UT-106
n Optional IF filters
Several IF filters are available to select a desired se-
lectivity. You can install 1 filter for the 455 kHz IF.
Choose the appropriate filter for your operating needs.
(pgs, 24−25)
Installation
q Remove the bottom cover as shown on page 48.
w Remove 7 screws, connection cable P1 from J1, P5
from J701, W4 from J4101 and W5 from J4001 and
2 Tr-clampers as shown in the diagram below.
e Install the desired 455 kHz filter as shown in the
diagram below.
rMount the filter with the supplied washers and nuts.
t Solder the 4 leads.
y Return the MAIN unit and bottom cover to their
original positions.
After installing the filter, select it in the Initial Set
mode. (p. 47) Otherwise, the installed filter will not
function properly.
Optional IF filter
P 5
P 1 W 4
J 1
J 701
W 5
J 4101
MAIN unit
Tr-clamper
Solder 4 leads
Tr-clamper
9INSTALLATION AND CONNECTIONS
51
SW Position Operation
S1
A
(default)
The tuner operating settings are set by S2
described below.
B
THROUGH INHIBITMODE
The tuner tunes the antenna even when
the antenna has poor SWR (up to VSWR
3:1 after tuning). In that case, manual tun-
ing is necessary each time you change the
frequency,although the tuner automatically
starts tuning when the VSWR is higher
than 3:1. This setting is called “through
inhibit.” However, the tuner is set to
“through” if the VSWR is higher than 3:1
after tuning.
S2
C
TUNER SENSITIVE MODE
The tuner tunes each time you transmit
(except in the SSB mode). Therefore,the
lowestSWR is obtained at any given time.
In the SSB mode,the setting is the same
as the “D” position below.
D
(default)
NORMAL MODE
The tuner tunes when the SWR is higher
than 1.5:1. Therefore, the tuner activates
only when tuning is necessary.
PIN NO./
NAME
DESCRIPTION
q 8 V Regulated 8 V output.
(10 mA maximum)
w GND Connects to ground.
e SEND
Input/output pin.
Goes to ground when transmitting (20 mA
maximum.) Transmits when grounded.
rBAND Band voltage output.
(Varies with the selected band;0 to 8.0 V.)
tALC ALC output voltage (–4 to 0 V.)
y NC No connection.
u 13.8V 13.8 V output when power is ON (1 A maximum.)
n AT-180 internal switch
The optional AT-180 has 3 operating settings.
Select the suitable setting for your antenna
system.
q Remove the top cover of the AT-180.
w Set the tuner switches to the desired positions
according to the table below.
•AT-180 inside top cover
S2 S1
D C B A
• Specifications for the AT-180
• Frequency coverage: 1.9– 54 MHz
• Input impedance: 50 O
• Connector information for ACC 2 socket
2
4 5
1 3 ACC 2
• Maximum input: 120 W 6 7
power
• Minimum tuning: 8 W
power
• Matching impedance: 16.7–150 O (HF band)
range 20–125 O (50 MHz band)
• Tuning accuracy: Less than SWR 1.5:1
• Insertion loss: Less than 1.0 dB
(after tuning)
• Power supply: 13.8 V DC/1 A (supplied from
requirements the transceiver’s ACC socket)
• Dimensions (mm/in): 167 (W) × 58.6 (H) ×225 (D) mm
69
⁄16 (W) × 2 5
⁄17 (H) × 8 7
⁄8 (D) in
• Weight (approx.): 2.3 kg, 5 lb 11⁄8 oz
• Supplied accessories: coaxial cable (1 m),
ACC cable (DIN 13 pins)
52
10 MAINTENANCE
n Troubleshooting
The following chart is designed to help you correct
problems which are not equipment malfunctions.
If you are not able to locate the cause of a problem
or solve it through the use of this chart, contact your
nearest Icom Dealer or Service Center.
PROBLEM POSSIBLE CAUSE SOLUTION REF.
POWER
Pow er does not come on
when the [POWER] sw itch
is pushed.
• DC pow er cable is improperly connected.
• Fuse is blow n.
• Pow er supply is not turned ON.
• Reconnect the DC pow er cable correctly.
• Check for the cause, fix it and then replace the
fuse w ith a spare one. (Fuses are in the DC
pow er cable and the internal PA unit.)
• Turn ON the pow ersupply.
p. 12
p. 53
RECEIVE
No sounds come from the
speaker.
• Volume level is too low.
• The squelch is closed.
• The transceiveris in the transmitting mode.
• Rotate [AF] clockw ise to obtain a suitable lis-
tening level.
• Rotate [RF/SQL] to around the 10 o’clock po-
sition to open, and then properly the squelch.
• Turn off the transmit mode.
p. 2
p. 2
p. 6
Sensitivity is low. • The antenna is not connected properly.
• The antenna for another band is connected.
• The antenna is not properly tuned.
• The attenuator is activated.
• Reconnect to the antenna connector.
• Connect an antenna suitable for the operating
frequency.
• Hold dow n [TUNER] for 2 seconds to manually
tune the antenna.
• Push [ATT] to set “ATT” or to OFF.
—
—
p. 3
p. 3
Receive audio is distorted. • The operating mode is not selected correctly.
• The IF SHIFT function is activated.
• The Noise blanker function is activated.
• The preamp is activated.
• If installed, the Noise Reduction function is
activated and the [NR] controlis set too high.
• Select the correct operating mode.
• Rotate SHIFT to the center position.
• Push [NB] to turn OFF the function.
• Push [P.AMP] to turn OFF the function.
• Set the [NR] control for maximum readability.
p. 20
p. 21
p. 21
p. 22
p. 23
TRANSMIT
Transmitting is impossible. • The operating frequency is outside the select-
ed ham band.
• Set the frequency within the selected ham band. p. 17
Output pow er is too low. • [RF POWER] is set too low.
• [MIC GAIN] is set too low.
• The selected antenna is for a different band.
• The antenna is not properly tuned.
• Set [RF POWER] to a suitable level.
• Set [MIC GAIN] to a suitable level.
• Select an antenna suitable for the operating
frequency.
• Hold dow n [TUNE] for 2 seconds to manually
tune the antenna.
p. 42
p. 42
p. 10
p. 3
No contact possible with
another station.
• The RIT function is activated.
• The Split frequency function is activated.
• Push [RIT] to turn OFF the function.
• Push [SPLIT] to turn OFF the function.
p. 21
pp. 7,
31, 32
Transmitted signals are
distorted.
• [MIC GAIN] too high.
• [COMP] function is activated.
• Set [MIC GAIN] to a suitable level.
• Turn OFF [COMP].
p. 2
p. 28
SCAN
Programmed scan does
not stop.
• Squelch is open.
• [RF/SQL] is assigned to RF gain control and
squelch is open.
• Set [RF/SQL] to the threshold point.
• Reset [RF/SQL] control assigned and set it to
the threshold point.
p. 3
p. 26
Programmed scan does
not start.
• The same frequencies have been entered in
scan edge memory channels P1 and P2.
• Enter different frequencies in Scan Edge memory
channels P1 and P2.
p. 40
Memory scan does not
start.
• 2 or more memory channels have not been
entered.
• Enter 2 or more memory channels. p. 40
DISPLAY
The displayed frequency
does not change w hen
rotating the main dial.
• The dial lock function is activated.
• A Quick Set mode screen is selected.
• The internal CPU has malfunctioned.
• Push [LOCK] to deactivate the function.
• Push [SET] to exit the Quick Set mode.
• Reset the CPU.
p. 6
p. 41
p. 53
10MAINTENANCE
53
n Fuse replacement
If a fuse blows, or the transceiver stops functioning,
find the source of the problem, and repair it.
Then replace the damaged fuse with a new, adequate-
ly rated fuse.
DC POWER CABLE FUSE REPLACEMENT
CAUTION: Turn the power OFF and disconnect
the DC power cable from the transceiver before re-
moving the transceiver’s cover.
The IC-718 has 2 types of fuses installed for trans-
ceiver protection.
• DC power cable fuses �������� ATQ 25 A
• Circuitry fuse ������������ FGB 4 A
25 A fuse
CIRCUITRY FUSE REPLACEMENT
The 13.8 V DC from the DC power source is applied
to all units in the IC-718 through the circuitry fuse.
This fuse is in the MAIN unit.
q Remove the top cover as shown on page 48.
w Replace the circuitry fuse as shown in the diagram
to the right.
e Replace the top cover.
PA unit
FGB 4 A
n Resetting the CPU
[PWR] [Z DN] [UP Y]
Resetting CLEARS all entered content in Memory
channels and returns entered values in the set
mode to their defaults.
When the unit is new and you are applying power, or
if the function seems to be displaying erroneous infor-
mation, reset the CPU as follows:
q Make sure transceiver power is OFF.
w While pushing [UP Y] and [Z DN], push [PWR] to
turn ON the power.
• The internal CPU is reset.
• The transceiver displays its initial VFO frequencies
when resetting is complete.
Ic718
Ic718
Ic718
Ic718
Ic718
Ic718
Ic718
Ic718
Ic718
Ic718
Ic718
Ic718
Ic718
Ic718
Ic718

More Related Content

What's hot

Ampeg GVT5W 5W Class A Elektro Gitar Amfi Kafası manual kullanim klavuzu
Ampeg GVT5W 5W Class A Elektro Gitar Amfi Kafası manual kullanim klavuzuAmpeg GVT5W 5W Class A Elektro Gitar Amfi Kafası manual kullanim klavuzu
Ampeg GVT5W 5W Class A Elektro Gitar Amfi Kafası manual kullanim klavuzu
GitarPazar
 
JVC RM-LP25U Remote Control Panel
JVC RM-LP25U Remote Control PanelJVC RM-LP25U Remote Control Panel
JVC RM-LP25U Remote Control Panel
AV ProfShop
 
Ampeg GVT15H Class A Elektro Gitar Amfi Kafası manual kullanim klavuzu
Ampeg GVT15H Class A Elektro Gitar Amfi Kafası manual kullanim klavuzuAmpeg GVT15H Class A Elektro Gitar Amfi Kafası manual kullanim klavuzu
Ampeg GVT15H Class A Elektro Gitar Amfi Kafası manual kullanim klavuzu
GitarPazar
 
Motorola t480 mn001399 a01 ag-enus_talkabout_emergency_preparedness_two_way_r...
Motorola t480 mn001399 a01 ag-enus_talkabout_emergency_preparedness_two_way_r...Motorola t480 mn001399 a01 ag-enus_talkabout_emergency_preparedness_two_way_r...
Motorola t480 mn001399 a01 ag-enus_talkabout_emergency_preparedness_two_way_r...
los_pinos
 
1202 vlz3
1202 vlz31202 vlz3
1202 vlz3
tdrltda
 
Aeon Labs Multi sensor 6 in 1 manual english
Aeon Labs Multi sensor 6 in 1 manual englishAeon Labs Multi sensor 6 in 1 manual english
Aeon Labs Multi sensor 6 in 1 manual english
Domotica daVinci
 
Ampeg BA108 1x8 Bas Gitar Amfisi gitarpazar.com kullanim klavuzu manual
Ampeg BA108 1x8 Bas Gitar Amfisi gitarpazar.com kullanim klavuzu manualAmpeg BA108 1x8 Bas Gitar Amfisi gitarpazar.com kullanim klavuzu manual
Ampeg BA108 1x8 Bas Gitar Amfisi gitarpazar.com kullanim klavuzu manual
GitarPazar
 
Ampeg Micro-Classic 100W 2x10 Bas Gitar Kafa Kabin gitarpazar kullanim klavuz...
Ampeg Micro-Classic 100W 2x10 Bas Gitar Kafa Kabin gitarpazar kullanim klavuz...Ampeg Micro-Classic 100W 2x10 Bas Gitar Kafa Kabin gitarpazar kullanim klavuz...
Ampeg Micro-Classic 100W 2x10 Bas Gitar Kafa Kabin gitarpazar kullanim klavuz...
GitarPazar
 
Ax3000 g e2_manual korg
Ax3000 g e2_manual korgAx3000 g e2_manual korg
Ax3000 g e2_manual korg
julios laurel arias
 
Sears bh9430pw-users-manual-399058 (1)
Sears bh9430pw-users-manual-399058 (1)Sears bh9430pw-users-manual-399058 (1)
Sears bh9430pw-users-manual-399058 (1)
Kojo King
 
Manual MH9 CO2 MCOHOME
Manual MH9 CO2 MCOHOMEManual MH9 CO2 MCOHOME
Manual MH9 CO2 MCOHOME
Domotica daVinci
 
Manual Aeon Labs Nano Dimmer
Manual   Aeon Labs Nano DimmerManual   Aeon Labs Nano Dimmer
Manual Aeon Labs Nano Dimmer
Domotica daVinci
 
Manual Smart water leakage sensor Z-Wave Plus - Zipato
Manual Smart water leakage sensor Z-Wave Plus - ZipatoManual Smart water leakage sensor Z-Wave Plus - Zipato
Manual Smart water leakage sensor Z-Wave Plus - Zipato
Domotica daVinci
 
Jual Miring!! Total Station Focus 8?? Call 087778355373-0856180442
Jual Miring!! Total Station Focus 8?? Call 087778355373-0856180442Jual Miring!! Total Station Focus 8?? Call 087778355373-0856180442
Jual Miring!! Total Station Focus 8?? Call 087778355373-0856180442
ALAMSURVEY
 
Sv i s5 user manual-100520
Sv i s5 user manual-100520Sv i s5 user manual-100520
Sv i s5 user manual-100520
Toàn Huỳnh
 
Popp z-rain-user-manual
Popp z-rain-user-manualPopp z-rain-user-manual
Popp z-rain-user-manual
Domotica daVinci
 

What's hot (20)

Ampeg GVT5W 5W Class A Elektro Gitar Amfi Kafası manual kullanim klavuzu
Ampeg GVT5W 5W Class A Elektro Gitar Amfi Kafası manual kullanim klavuzuAmpeg GVT5W 5W Class A Elektro Gitar Amfi Kafası manual kullanim klavuzu
Ampeg GVT5W 5W Class A Elektro Gitar Amfi Kafası manual kullanim klavuzu
 
JVC RM-LP25U Remote Control Panel
JVC RM-LP25U Remote Control PanelJVC RM-LP25U Remote Control Panel
JVC RM-LP25U Remote Control Panel
 
Ampeg GVT15H Class A Elektro Gitar Amfi Kafası manual kullanim klavuzu
Ampeg GVT15H Class A Elektro Gitar Amfi Kafası manual kullanim klavuzuAmpeg GVT15H Class A Elektro Gitar Amfi Kafası manual kullanim klavuzu
Ampeg GVT15H Class A Elektro Gitar Amfi Kafası manual kullanim klavuzu
 
Electricity on site
Electricity on siteElectricity on site
Electricity on site
 
Motorola t480 mn001399 a01 ag-enus_talkabout_emergency_preparedness_two_way_r...
Motorola t480 mn001399 a01 ag-enus_talkabout_emergency_preparedness_two_way_r...Motorola t480 mn001399 a01 ag-enus_talkabout_emergency_preparedness_two_way_r...
Motorola t480 mn001399 a01 ag-enus_talkabout_emergency_preparedness_two_way_r...
 
1202 vlz3
1202 vlz31202 vlz3
1202 vlz3
 
Manual de table tb100 unitech
Manual  de table tb100 unitechManual  de table tb100 unitech
Manual de table tb100 unitech
 
Ic-R5
Ic-R5Ic-R5
Ic-R5
 
Canon XF100
Canon XF100Canon XF100
Canon XF100
 
Aeon Labs Multi sensor 6 in 1 manual english
Aeon Labs Multi sensor 6 in 1 manual englishAeon Labs Multi sensor 6 in 1 manual english
Aeon Labs Multi sensor 6 in 1 manual english
 
Ampeg BA108 1x8 Bas Gitar Amfisi gitarpazar.com kullanim klavuzu manual
Ampeg BA108 1x8 Bas Gitar Amfisi gitarpazar.com kullanim klavuzu manualAmpeg BA108 1x8 Bas Gitar Amfisi gitarpazar.com kullanim klavuzu manual
Ampeg BA108 1x8 Bas Gitar Amfisi gitarpazar.com kullanim klavuzu manual
 
Ampeg Micro-Classic 100W 2x10 Bas Gitar Kafa Kabin gitarpazar kullanim klavuz...
Ampeg Micro-Classic 100W 2x10 Bas Gitar Kafa Kabin gitarpazar kullanim klavuz...Ampeg Micro-Classic 100W 2x10 Bas Gitar Kafa Kabin gitarpazar kullanim klavuz...
Ampeg Micro-Classic 100W 2x10 Bas Gitar Kafa Kabin gitarpazar kullanim klavuz...
 
Ax3000 g e2_manual korg
Ax3000 g e2_manual korgAx3000 g e2_manual korg
Ax3000 g e2_manual korg
 
Sears bh9430pw-users-manual-399058 (1)
Sears bh9430pw-users-manual-399058 (1)Sears bh9430pw-users-manual-399058 (1)
Sears bh9430pw-users-manual-399058 (1)
 
Manual MH9 CO2 MCOHOME
Manual MH9 CO2 MCOHOMEManual MH9 CO2 MCOHOME
Manual MH9 CO2 MCOHOME
 
Manual Aeon Labs Nano Dimmer
Manual   Aeon Labs Nano DimmerManual   Aeon Labs Nano Dimmer
Manual Aeon Labs Nano Dimmer
 
Manual Smart water leakage sensor Z-Wave Plus - Zipato
Manual Smart water leakage sensor Z-Wave Plus - ZipatoManual Smart water leakage sensor Z-Wave Plus - Zipato
Manual Smart water leakage sensor Z-Wave Plus - Zipato
 
Jual Miring!! Total Station Focus 8?? Call 087778355373-0856180442
Jual Miring!! Total Station Focus 8?? Call 087778355373-0856180442Jual Miring!! Total Station Focus 8?? Call 087778355373-0856180442
Jual Miring!! Total Station Focus 8?? Call 087778355373-0856180442
 
Sv i s5 user manual-100520
Sv i s5 user manual-100520Sv i s5 user manual-100520
Sv i s5 user manual-100520
 
Popp z-rain-user-manual
Popp z-rain-user-manualPopp z-rain-user-manual
Popp z-rain-user-manual
 

Similar to Ic718

ProFX8_12_OM.pdf
ProFX8_12_OM.pdfProFX8_12_OM.pdf
ProFX8_12_OM.pdf
Jonias Nobre
 
MA-2402-Manual-127240.pdf
MA-2402-Manual-127240.pdfMA-2402-Manual-127240.pdf
MA-2402-Manual-127240.pdf
CREST2020
 
Thump th 15 a
Thump th 15 aThump th 15 a
MSI CX61 2QC (GT 920M) manual PDF download (English) / User Guide
MSI CX61 2QC (GT 920M) manual PDF download (English) / User GuideMSI CX61 2QC (GT 920M) manual PDF download (English) / User Guide
MSI CX61 2QC (GT 920M) manual PDF download (English) / User Guide
manualsheet
 
SURFboard Central for Wi-Fi Cable Modems UG.pdf
SURFboard Central for Wi-Fi Cable Modems UG.pdfSURFboard Central for Wi-Fi Cable Modems UG.pdf
SURFboard Central for Wi-Fi Cable Modems UG.pdf
DelbertSletten
 
MSI GP60 Leopard (GTX 950M) manual PDF download / User Guide
MSI GP60 Leopard (GTX 950M) manual PDF download / User GuideMSI GP60 Leopard (GTX 950M) manual PDF download / User Guide
MSI GP60 Leopard (GTX 950M) manual PDF download / User Guide
manualsheet
 
MSI GP60 Leopard (GT940M) User Manual PDF Download / User Guide
MSI GP60 Leopard (GT940M) User Manual PDF Download  / User GuideMSI GP60 Leopard (GT940M) User Manual PDF Download  / User Guide
MSI GP60 Leopard (GT940M) User Manual PDF Download / User Guide
manualsheet
 
MSI GE60 Apache Pro (GTX 960M) Manual PDF Download / User Guide
MSI GE60 Apache Pro (GTX 960M) Manual PDF Download / User GuideMSI GE60 Apache Pro (GTX 960M) Manual PDF Download / User Guide
MSI GE60 Apache Pro (GTX 960M) Manual PDF Download / User Guide
manualsheet
 
MSI GP70 Leopard (GT 940M) manual PDF download / User Guide
MSI GP70 Leopard (GT 940M) manual PDF download / User GuideMSI GP70 Leopard (GT 940M) manual PDF download / User Guide
MSI GP70 Leopard (GT 940M) manual PDF download / User Guide
manualsheet
 
MSI GP70 Leopard Pro (GTX 950M) manual PDF download / User Guide
  MSI GP70 Leopard Pro (GTX 950M) manual PDF download / User Guide  MSI GP70 Leopard Pro (GTX 950M) manual PDF download / User Guide
MSI GP70 Leopard Pro (GTX 950M) manual PDF download / User Guide
manualsheet
 
mackie-profx12v2-12-channel-sound-reinforcement-mixer-profx12v2-328790-user-m...
mackie-profx12v2-12-channel-sound-reinforcement-mixer-profx12v2-328790-user-m...mackie-profx12v2-12-channel-sound-reinforcement-mixer-profx12v2-328790-user-m...
mackie-profx12v2-12-channel-sound-reinforcement-mixer-profx12v2-328790-user-m...
FbioTonhoqueLaino
 
CE-2000TX-Operation-Manual-126991.powerpdf
CE-2000TX-Operation-Manual-126991.powerpdfCE-2000TX-Operation-Manual-126991.powerpdf
CE-2000TX-Operation-Manual-126991.powerpdf
ArnelIbanez1
 
operating instructions for sony a6300.pdf
operating instructions for sony a6300.pdfoperating instructions for sony a6300.pdf
operating instructions for sony a6300.pdf
Pulkit878643
 
Nikon xs manual
Nikon xs manualNikon xs manual
Nikon xs manual
Adriana Ibarra
 
Ic R20 Manual (1)
Ic R20 Manual (1)Ic R20 Manual (1)
Ic R20 Manual (1)guest772056
 
manual de tv zenith H1934y (1)
manual de tv zenith H1934y (1)manual de tv zenith H1934y (1)
manual de tv zenith H1934y (1)
marcelo1568
 
Manual Technical VHF Transceiver Icom IC2200
Manual Technical VHF Transceiver Icom  IC2200Manual Technical VHF Transceiver Icom  IC2200
Manual Technical VHF Transceiver Icom IC2200
CakNur10
 
MSI S100 manual guide PDF download (English) / User Guide
MSI S100 manual guide PDF download (English) / User GuideMSI S100 manual guide PDF download (English) / User Guide
MSI S100 manual guide PDF download (English) / User Guide
manualsheet
 
Sdr h85 manual with my post-its
Sdr h85 manual with my post-itsSdr h85 manual with my post-its
Sdr h85 manual with my post-its
James bonfoey
 

Similar to Ic718 (20)

ProFX8_12_OM.pdf
ProFX8_12_OM.pdfProFX8_12_OM.pdf
ProFX8_12_OM.pdf
 
Ic2200h Manual
Ic2200h ManualIc2200h Manual
Ic2200h Manual
 
MA-2402-Manual-127240.pdf
MA-2402-Manual-127240.pdfMA-2402-Manual-127240.pdf
MA-2402-Manual-127240.pdf
 
Thump th 15 a
Thump th 15 aThump th 15 a
Thump th 15 a
 
MSI CX61 2QC (GT 920M) manual PDF download (English) / User Guide
MSI CX61 2QC (GT 920M) manual PDF download (English) / User GuideMSI CX61 2QC (GT 920M) manual PDF download (English) / User Guide
MSI CX61 2QC (GT 920M) manual PDF download (English) / User Guide
 
SURFboard Central for Wi-Fi Cable Modems UG.pdf
SURFboard Central for Wi-Fi Cable Modems UG.pdfSURFboard Central for Wi-Fi Cable Modems UG.pdf
SURFboard Central for Wi-Fi Cable Modems UG.pdf
 
MSI GP60 Leopard (GTX 950M) manual PDF download / User Guide
MSI GP60 Leopard (GTX 950M) manual PDF download / User GuideMSI GP60 Leopard (GTX 950M) manual PDF download / User Guide
MSI GP60 Leopard (GTX 950M) manual PDF download / User Guide
 
MSI GP60 Leopard (GT940M) User Manual PDF Download / User Guide
MSI GP60 Leopard (GT940M) User Manual PDF Download  / User GuideMSI GP60 Leopard (GT940M) User Manual PDF Download  / User Guide
MSI GP60 Leopard (GT940M) User Manual PDF Download / User Guide
 
MSI GE60 Apache Pro (GTX 960M) Manual PDF Download / User Guide
MSI GE60 Apache Pro (GTX 960M) Manual PDF Download / User GuideMSI GE60 Apache Pro (GTX 960M) Manual PDF Download / User Guide
MSI GE60 Apache Pro (GTX 960M) Manual PDF Download / User Guide
 
MSI GP70 Leopard (GT 940M) manual PDF download / User Guide
MSI GP70 Leopard (GT 940M) manual PDF download / User GuideMSI GP70 Leopard (GT 940M) manual PDF download / User Guide
MSI GP70 Leopard (GT 940M) manual PDF download / User Guide
 
MSI GP70 Leopard Pro (GTX 950M) manual PDF download / User Guide
  MSI GP70 Leopard Pro (GTX 950M) manual PDF download / User Guide  MSI GP70 Leopard Pro (GTX 950M) manual PDF download / User Guide
MSI GP70 Leopard Pro (GTX 950M) manual PDF download / User Guide
 
mackie-profx12v2-12-channel-sound-reinforcement-mixer-profx12v2-328790-user-m...
mackie-profx12v2-12-channel-sound-reinforcement-mixer-profx12v2-328790-user-m...mackie-profx12v2-12-channel-sound-reinforcement-mixer-profx12v2-328790-user-m...
mackie-profx12v2-12-channel-sound-reinforcement-mixer-profx12v2-328790-user-m...
 
CE-2000TX-Operation-Manual-126991.powerpdf
CE-2000TX-Operation-Manual-126991.powerpdfCE-2000TX-Operation-Manual-126991.powerpdf
CE-2000TX-Operation-Manual-126991.powerpdf
 
operating instructions for sony a6300.pdf
operating instructions for sony a6300.pdfoperating instructions for sony a6300.pdf
operating instructions for sony a6300.pdf
 
Nikon xs manual
Nikon xs manualNikon xs manual
Nikon xs manual
 
Ic R20 Manual (1)
Ic R20 Manual (1)Ic R20 Manual (1)
Ic R20 Manual (1)
 
manual de tv zenith H1934y (1)
manual de tv zenith H1934y (1)manual de tv zenith H1934y (1)
manual de tv zenith H1934y (1)
 
Manual Technical VHF Transceiver Icom IC2200
Manual Technical VHF Transceiver Icom  IC2200Manual Technical VHF Transceiver Icom  IC2200
Manual Technical VHF Transceiver Icom IC2200
 
MSI S100 manual guide PDF download (English) / User Guide
MSI S100 manual guide PDF download (English) / User GuideMSI S100 manual guide PDF download (English) / User Guide
MSI S100 manual guide PDF download (English) / User Guide
 
Sdr h85 manual with my post-its
Sdr h85 manual with my post-itsSdr h85 manual with my post-its
Sdr h85 manual with my post-its
 

Recently uploaded

AI for Every Business: Unlocking Your Product's Universal Potential by VP of ...
AI for Every Business: Unlocking Your Product's Universal Potential by VP of ...AI for Every Business: Unlocking Your Product's Universal Potential by VP of ...
AI for Every Business: Unlocking Your Product's Universal Potential by VP of ...
Product School
 
FIDO Alliance Osaka Seminar: The WebAuthn API and Discoverable Credentials.pdf
FIDO Alliance Osaka Seminar: The WebAuthn API and Discoverable Credentials.pdfFIDO Alliance Osaka Seminar: The WebAuthn API and Discoverable Credentials.pdf
FIDO Alliance Osaka Seminar: The WebAuthn API and Discoverable Credentials.pdf
FIDO Alliance
 
Builder.ai Founder Sachin Dev Duggal's Strategic Approach to Create an Innova...
Builder.ai Founder Sachin Dev Duggal's Strategic Approach to Create an Innova...Builder.ai Founder Sachin Dev Duggal's Strategic Approach to Create an Innova...
Builder.ai Founder Sachin Dev Duggal's Strategic Approach to Create an Innova...
Ramesh Iyer
 
"Impact of front-end architecture on development cost", Viktor Turskyi
"Impact of front-end architecture on development cost", Viktor Turskyi"Impact of front-end architecture on development cost", Viktor Turskyi
"Impact of front-end architecture on development cost", Viktor Turskyi
Fwdays
 
To Graph or Not to Graph Knowledge Graph Architectures and LLMs
To Graph or Not to Graph Knowledge Graph Architectures and LLMsTo Graph or Not to Graph Knowledge Graph Architectures and LLMs
To Graph or Not to Graph Knowledge Graph Architectures and LLMs
Paul Groth
 
Bits & Pixels using AI for Good.........
Bits & Pixels using AI for Good.........Bits & Pixels using AI for Good.........
Bits & Pixels using AI for Good.........
Alison B. Lowndes
 
ODC, Data Fabric and Architecture User Group
ODC, Data Fabric and Architecture User GroupODC, Data Fabric and Architecture User Group
ODC, Data Fabric and Architecture User Group
CatarinaPereira64715
 
Slack (or Teams) Automation for Bonterra Impact Management (fka Social Soluti...
Slack (or Teams) Automation for Bonterra Impact Management (fka Social Soluti...Slack (or Teams) Automation for Bonterra Impact Management (fka Social Soluti...
Slack (or Teams) Automation for Bonterra Impact Management (fka Social Soluti...
Jeffrey Haguewood
 
UiPath Test Automation using UiPath Test Suite series, part 3
UiPath Test Automation using UiPath Test Suite series, part 3UiPath Test Automation using UiPath Test Suite series, part 3
UiPath Test Automation using UiPath Test Suite series, part 3
DianaGray10
 
FIDO Alliance Osaka Seminar: Passkeys at Amazon.pdf
FIDO Alliance Osaka Seminar: Passkeys at Amazon.pdfFIDO Alliance Osaka Seminar: Passkeys at Amazon.pdf
FIDO Alliance Osaka Seminar: Passkeys at Amazon.pdf
FIDO Alliance
 
State of ICS and IoT Cyber Threat Landscape Report 2024 preview
State of ICS and IoT Cyber Threat Landscape Report 2024 previewState of ICS and IoT Cyber Threat Landscape Report 2024 preview
State of ICS and IoT Cyber Threat Landscape Report 2024 preview
Prayukth K V
 
Search and Society: Reimagining Information Access for Radical Futures
Search and Society: Reimagining Information Access for Radical FuturesSearch and Society: Reimagining Information Access for Radical Futures
Search and Society: Reimagining Information Access for Radical Futures
Bhaskar Mitra
 
IOS-PENTESTING-BEGINNERS-PRACTICAL-GUIDE-.pptx
IOS-PENTESTING-BEGINNERS-PRACTICAL-GUIDE-.pptxIOS-PENTESTING-BEGINNERS-PRACTICAL-GUIDE-.pptx
IOS-PENTESTING-BEGINNERS-PRACTICAL-GUIDE-.pptx
Abida Shariff
 
FIDO Alliance Osaka Seminar: FIDO Security Aspects.pdf
FIDO Alliance Osaka Seminar: FIDO Security Aspects.pdfFIDO Alliance Osaka Seminar: FIDO Security Aspects.pdf
FIDO Alliance Osaka Seminar: FIDO Security Aspects.pdf
FIDO Alliance
 
Software Delivery At the Speed of AI: Inflectra Invests In AI-Powered Quality
Software Delivery At the Speed of AI: Inflectra Invests In AI-Powered QualitySoftware Delivery At the Speed of AI: Inflectra Invests In AI-Powered Quality
Software Delivery At the Speed of AI: Inflectra Invests In AI-Powered Quality
Inflectra
 
GDG Cloud Southlake #33: Boule & Rebala: Effective AppSec in SDLC using Deplo...
GDG Cloud Southlake #33: Boule & Rebala: Effective AppSec in SDLC using Deplo...GDG Cloud Southlake #33: Boule & Rebala: Effective AppSec in SDLC using Deplo...
GDG Cloud Southlake #33: Boule & Rebala: Effective AppSec in SDLC using Deplo...
James Anderson
 
GraphRAG is All You need? LLM & Knowledge Graph
GraphRAG is All You need? LLM & Knowledge GraphGraphRAG is All You need? LLM & Knowledge Graph
GraphRAG is All You need? LLM & Knowledge Graph
Guy Korland
 
Mission to Decommission: Importance of Decommissioning Products to Increase E...
Mission to Decommission: Importance of Decommissioning Products to Increase E...Mission to Decommission: Importance of Decommissioning Products to Increase E...
Mission to Decommission: Importance of Decommissioning Products to Increase E...
Product School
 
Empowering NextGen Mobility via Large Action Model Infrastructure (LAMI): pav...
Empowering NextGen Mobility via Large Action Model Infrastructure (LAMI): pav...Empowering NextGen Mobility via Large Action Model Infrastructure (LAMI): pav...
Empowering NextGen Mobility via Large Action Model Infrastructure (LAMI): pav...
Thierry Lestable
 
Designing Great Products: The Power of Design and Leadership by Chief Designe...
Designing Great Products: The Power of Design and Leadership by Chief Designe...Designing Great Products: The Power of Design and Leadership by Chief Designe...
Designing Great Products: The Power of Design and Leadership by Chief Designe...
Product School
 

Recently uploaded (20)

AI for Every Business: Unlocking Your Product's Universal Potential by VP of ...
AI for Every Business: Unlocking Your Product's Universal Potential by VP of ...AI for Every Business: Unlocking Your Product's Universal Potential by VP of ...
AI for Every Business: Unlocking Your Product's Universal Potential by VP of ...
 
FIDO Alliance Osaka Seminar: The WebAuthn API and Discoverable Credentials.pdf
FIDO Alliance Osaka Seminar: The WebAuthn API and Discoverable Credentials.pdfFIDO Alliance Osaka Seminar: The WebAuthn API and Discoverable Credentials.pdf
FIDO Alliance Osaka Seminar: The WebAuthn API and Discoverable Credentials.pdf
 
Builder.ai Founder Sachin Dev Duggal's Strategic Approach to Create an Innova...
Builder.ai Founder Sachin Dev Duggal's Strategic Approach to Create an Innova...Builder.ai Founder Sachin Dev Duggal's Strategic Approach to Create an Innova...
Builder.ai Founder Sachin Dev Duggal's Strategic Approach to Create an Innova...
 
"Impact of front-end architecture on development cost", Viktor Turskyi
"Impact of front-end architecture on development cost", Viktor Turskyi"Impact of front-end architecture on development cost", Viktor Turskyi
"Impact of front-end architecture on development cost", Viktor Turskyi
 
To Graph or Not to Graph Knowledge Graph Architectures and LLMs
To Graph or Not to Graph Knowledge Graph Architectures and LLMsTo Graph or Not to Graph Knowledge Graph Architectures and LLMs
To Graph or Not to Graph Knowledge Graph Architectures and LLMs
 
Bits & Pixels using AI for Good.........
Bits & Pixels using AI for Good.........Bits & Pixels using AI for Good.........
Bits & Pixels using AI for Good.........
 
ODC, Data Fabric and Architecture User Group
ODC, Data Fabric and Architecture User GroupODC, Data Fabric and Architecture User Group
ODC, Data Fabric and Architecture User Group
 
Slack (or Teams) Automation for Bonterra Impact Management (fka Social Soluti...
Slack (or Teams) Automation for Bonterra Impact Management (fka Social Soluti...Slack (or Teams) Automation for Bonterra Impact Management (fka Social Soluti...
Slack (or Teams) Automation for Bonterra Impact Management (fka Social Soluti...
 
UiPath Test Automation using UiPath Test Suite series, part 3
UiPath Test Automation using UiPath Test Suite series, part 3UiPath Test Automation using UiPath Test Suite series, part 3
UiPath Test Automation using UiPath Test Suite series, part 3
 
FIDO Alliance Osaka Seminar: Passkeys at Amazon.pdf
FIDO Alliance Osaka Seminar: Passkeys at Amazon.pdfFIDO Alliance Osaka Seminar: Passkeys at Amazon.pdf
FIDO Alliance Osaka Seminar: Passkeys at Amazon.pdf
 
State of ICS and IoT Cyber Threat Landscape Report 2024 preview
State of ICS and IoT Cyber Threat Landscape Report 2024 previewState of ICS and IoT Cyber Threat Landscape Report 2024 preview
State of ICS and IoT Cyber Threat Landscape Report 2024 preview
 
Search and Society: Reimagining Information Access for Radical Futures
Search and Society: Reimagining Information Access for Radical FuturesSearch and Society: Reimagining Information Access for Radical Futures
Search and Society: Reimagining Information Access for Radical Futures
 
IOS-PENTESTING-BEGINNERS-PRACTICAL-GUIDE-.pptx
IOS-PENTESTING-BEGINNERS-PRACTICAL-GUIDE-.pptxIOS-PENTESTING-BEGINNERS-PRACTICAL-GUIDE-.pptx
IOS-PENTESTING-BEGINNERS-PRACTICAL-GUIDE-.pptx
 
FIDO Alliance Osaka Seminar: FIDO Security Aspects.pdf
FIDO Alliance Osaka Seminar: FIDO Security Aspects.pdfFIDO Alliance Osaka Seminar: FIDO Security Aspects.pdf
FIDO Alliance Osaka Seminar: FIDO Security Aspects.pdf
 
Software Delivery At the Speed of AI: Inflectra Invests In AI-Powered Quality
Software Delivery At the Speed of AI: Inflectra Invests In AI-Powered QualitySoftware Delivery At the Speed of AI: Inflectra Invests In AI-Powered Quality
Software Delivery At the Speed of AI: Inflectra Invests In AI-Powered Quality
 
GDG Cloud Southlake #33: Boule & Rebala: Effective AppSec in SDLC using Deplo...
GDG Cloud Southlake #33: Boule & Rebala: Effective AppSec in SDLC using Deplo...GDG Cloud Southlake #33: Boule & Rebala: Effective AppSec in SDLC using Deplo...
GDG Cloud Southlake #33: Boule & Rebala: Effective AppSec in SDLC using Deplo...
 
GraphRAG is All You need? LLM & Knowledge Graph
GraphRAG is All You need? LLM & Knowledge GraphGraphRAG is All You need? LLM & Knowledge Graph
GraphRAG is All You need? LLM & Knowledge Graph
 
Mission to Decommission: Importance of Decommissioning Products to Increase E...
Mission to Decommission: Importance of Decommissioning Products to Increase E...Mission to Decommission: Importance of Decommissioning Products to Increase E...
Mission to Decommission: Importance of Decommissioning Products to Increase E...
 
Empowering NextGen Mobility via Large Action Model Infrastructure (LAMI): pav...
Empowering NextGen Mobility via Large Action Model Infrastructure (LAMI): pav...Empowering NextGen Mobility via Large Action Model Infrastructure (LAMI): pav...
Empowering NextGen Mobility via Large Action Model Infrastructure (LAMI): pav...
 
Designing Great Products: The Power of Design and Leadership by Chief Designe...
Designing Great Products: The Power of Design and Leadership by Chief Designe...Designing Great Products: The Power of Design and Leadership by Chief Designe...
Designing Great Products: The Power of Design and Leadership by Chief Designe...
 

Ic718

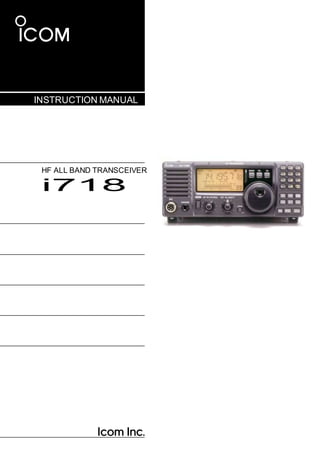
  • 1. INSTRUCTION MANUAL HF ALL BAND TRANSCEIVER i718
  • 2. i IMPORTANT READ ALL INSTRUCTIONS carefully and com- pletely before using the transceiver. SAVE THIS INSTRUCTION MANUAL— This instruction manual contains basic operating instruc- tions for the IC-718. EXPLICIT DEFINITIONS WORD DEFINITION R DANGER! Personal death, serious injury or an ex- plosion mayoccur. R WARNING! Personal injury, fire hazard or electric shock mayoccur. CAUTION Equipmentdamage mayoccur. NOTE Recommended for optimum use.No risk of personal injury,fire or electric shock. PRECAUTIONS R DANGER HIGH VOLTAGE! NEVER touch an antenna connector during transmission. This may result in an electrical shock or burn. R WARNING RF EXPOSURE! This radio emits Radio Frequency (RF) energy. Extreme caution should be observed when operating this radio. If you have any questions regarding RF exposure and safety standards please refer to the Federal Communications Commission Office of Engineering and Technology’s report on Evaluating Compliance with FCC Guidelines for Human Radio Frequency Electromagnetic Fields (OET Bulletin 65). R WARNING! NEVER operate the radio while driving a vehicle. Safe driving requires your full atten- tion—anything less may result in an accident. R WARNING! NEVER operate the radio with an earphone or other audio accessories at high volume levels. Continuous high volume operation may cause a ring- ing in your ears. If you experience ringing, reduce the volume level or discontinue use. R WARNING! NEVER connect the radio to an AC outlet. This may pose a fire hazard or result in an electric shock. R WARNING! NEVER connect the radio to a power source of more than 16 V DC such as a 24 V DC. This could cause a fire or damage the radio. R WARNING! NEVER reverse the DC power cable polarity when connecting to a power source. This could damage the radio. R WARNING! NEVER cut the DC power cable between the DC plug and fuse holder. If an incorrect connection is made after cutting, the radio may be damaged. R WARNING! NEVER let metal, wire or other ob- jects touch any internal part or connectors on the rear panel of the radio. This may result in an electric shock or this could cause a fire or damage the radio. R WARNING! NEVER operate or touch the radio with wet hands. This may result in an electric shock or may damage the radio. R WARNING! Immediately turn the radio power OFF and remove the power cable if it emits an abnor- mal odor, sound or smoke. Contact your Icom dealer or distributor for advice. CAUTION: NEVER expose the radio to rain, snow or any liquids. CAUTION: NEVER change the internal settings of the radio. This may reduce radio performance and/or damage to the radio. CAUTION: NEVER place the radio where normal operation of the vehicle may be hindered or where it could cause bodily injury. DO NOT operate the radio near unshielded electrical blasting caps or in an explosive atmosphere. DO NOT push the PTT when not actually desiring to transmit. DO NOT use harsh solvents such as benzine or al- cohol to clean the radio, as they will damage the ra- dio’s surfaces. If the radio becomes dusty or dirty, wipe it clean with a soft, dry cloth. DO NOT operate or place the radio in areas with temperatures below –10°C (+14°F) or above +60°C (+140°F). Be aware that temperatures on a vehicle’s dashboard can exceed +80°C (+176°F) in direct sunlight, result- ing in permanent damage to the radio if left there for extended periods.
  • 3. PRECAUTIONS (Continued) DO NOT place the radio in excessively dusty envi- ronments or in direct sunlight. DO NOT place the radio against walls or put any- thing on top of the radio. This will obstruct heat dissi- pation. Place the radio in a secure place to avoid inadvertent use by children. During mobile operation, NEVER place the radio where air bag deployment may be obstructed. During mobile operation, DO NOT place the radio where hot or cold air blows directly onto it. During mobile operation, DO NOT operate the radio without running the vehicle’s engine. When radio power is ON and your vehicle’s engine is OFF, the ve- hicle’s battery will soon become exhausted. Make sure the radio power is OFF before starting the vehicle engine. This will avoid possible damage to the radio by ignition voltage spikes. During maritime mobile operation, keep the radio and microphone as far away as possible from the magnetic navigation compass to prevent erroneous indications. BE CAREFUL! The heatsink will become hot when operating the radio continuously for long periods of time. BE CAREFUL! If a linear amplifier is connected, set the radio’s RF output power to less than the linear amplifier’s maximum input level, otherwise, the linear amplifier will be damaged. Use only supplied or optional Icom microphones. Other manufacturer’s microphones have different pin assignments, and connecting to the IC-718 may damage the radio. FCC INFORMATION • FOR CLASS B UNINTENTIONAL RADIATORS This equipment has been tested and found to comply with the limits for a Class B digital device, pursuant to part 15 of the FCC Rules. These limits are designed to provide reasonable protection against harmful interfer- ence in a residential installation. This equipment gen- erates, uses and can radiate radio frequency energy and, if not installed and used in accordance with the instructions, may cause harmful interference to radio communications. However, there is no guarantee that interference will not occur in a particular installation. If this equipment does cause harmful interference to radio or television reception, which can be determined by turning the equipment off and on, the user is en- couraged to try to correct the interference by one or more of the following measures: • Reorient or relocate the receiving antenna. • Increase the separation between the equipment and receiver. • Connect the equipment into an outlet on a circuit dif- ferent from that to which the receiver is connected. • Consult the dealer or an experienced radio/TV tech- nician for help. This device complies with Part 15 of the FCC Rules. Operation is subject to the following two conditions: (1) this device may not cause harmful interference, and (2) this device must accept any interference received, including interference that may cause undesired op- eration. WARNING: MODIFICATION OF THIS DEVICE TO RECEIVE CELLULAR RADIOTELEPHONE SERVICE SIGNALS IS PROHIBITED UNDER FCC RULES AND FEDERAL LAW. CAUTION: Changes or modifications to this device, not expressly approved by Icom Inc., could void your authority to operate this device under FCC regula- tions. ABOUT CE AND DOC Hereby, Icom Inc. declares that the ver- sions of IC-718 which have the “CE” symbol on the product, comply with the essential requirements of the Radio Equipment Directive, 2014/53/EU, and the restric- tion of the use of certain hazardous substances in electrical and electronic equipment Directive, 2011/65/EU. The full text of the EU declaration of conformity is available at the following internet ad- dress: http://www.icom.co.jp/world/support DISPOSAL The crossed-out wheeled-bin symbol on your product, literature, or packaging reminds you that in the European Union, all electrical and electronic products, bat- teries, and accumulators (rechargeable batteries) must be taken to designated collection locations at the end of their working life. Do not dispose of these prod- ucts as unsorted municipal waste. Dispose of them according to the laws in your area. ii
  • 4. iii SUPPLIED ACCESSORIES q w e r The transceiver comes with the following accessories. Qty. q DC power cable ............................................... 1 w Hand microphone (HM-36)................................ 1 e Fuse (FGB 4 A; internal fuse) .......................... 1 r Fuse (ATQ 25 A; for DC cable)........................ 2
  • 5. 1 TABLE OF CONTENTS 1 IMPORTANT ......................................................... i EXPLICIT DEFINITIONS ........................................i PRECAUTIONS ................................................. i–ii FCC INFORMATION................................................ii SUPPLIED ACCESSORIES .................................. iii 1 TABLE OF CONTENTS ..................................... 1 2 PANEL DESCRIPTION....................................2–8 n Front panel ....................................................2 n Function display ............................................. 5 n Rear panel ..................................................... 6 nMicrophone (HM-36) .......................................8 3 INSTALLATION AND CONNECTIONS...........9–14 n Unpacking ..................................................... 9 n Selecting a location ........................................9 n Grounding ..................................................... 9 n Connecting an antenna ................................... 9 n Requiredconnections ....................................10 nAdvanced connections ..................................11 n Connecting the Power supply ........................12 n Connecting a liner amplifier ........................... 13 nExternal antennatuners ................................14 4 FREQUENCY SETTINGS............................ 15–19 n Resetting the CPU ........................................15 n Initial settings ................................................15 n VFO description ............................................16 n Frequency setting ......................................... 17 n Dial lock function .......................................... 19 5 RECEIVE AND TRANSMIT ......................... 20–34 n Mode selection ............................................. 20 n RF gain and Squelch .................................... 20 n Function for receive ...................................... 21 n DSP function (Requires an optional UT-106 DSP UNIT) ......... 23 n Filter selection ..............................................24 n Filter setting ..................................................25 nSplit frequency operation .............................. 26 n SWR ............................................................26 n Function for transmit ..................................... 27 n Function for CW ............................................31 n Function for RTTY ........................................ 33 6 MEMORY OPERATION............................... 35–38 n Memory channels ......................................... 35 nMemory channel selection ............................ 35 n Memory channel entry .................................. 36 n Transferring data to the VFO ......................... 37 n Memory clearing .......................................... 38 7 SCANS....................................................... 39–40 n Scan types ................................................... 39 nPreparation .................................................. 39 nProgrammed scanoperation ..........................40 n Memory scan operation ................................ 40 8 SET MODE ..............................................41 n General .................................................. n Quick Set mode items ..............................42-43 n Initial Set mode items ...............................44-47 9 INSTALLATION AND CONNECTIONS....... 48–51 n Opening the transceiver’s case......................48 n Installing the MB-118 MOBILE MOUNTING BRACKET......................... 48 n CR-338 HIGH STABILITY CRYSTAL UNIT ........ 49 n UT-106 DSP RECEIVE UNIT........................... 50 n Optional IF filters .......................................... n AT-180 internal switch .................................. 51 10 MAINTENANCE...................................... 52–53 n Troubleshooting .......................................... n Fuse replacement......................................... 5 n Resetting the CPU ........................................5 11 SPECIFICATIONS ........................................5 12 OPTIONS............................................... 55–56 13 CONTROL COMMAND........................... 57–58 n Remote jack (CI-V) information......................57 14 INSTALLATION NOTES .............................. 59 INDEX ........................................................... 60–62
  • 6. 2 NB COMP SET P.AMP ATT TUNER 2 PANEL DESCRIPTION n Front panel Speaker Function Display @1 @0 !9 !8 !7 IC -718 V/M 1 A=B 2 A/B 3 MODE FIL TS MW 4 SPL7 NR . M - C 5 SC N 8 ANF 0 M V 6 VO X 9 F-INP EN T q MIC w PHON E S PWR AF RF/SQL RIT SHIFT LOCK !6 !5 !4 !3 CH Z DN UP Y !2 e r t y u i o !0 !1 q POWER SWITCH [PWR] ➥ Push momentarily to turn ON the power. • First, confirm the optional DC power supply is ON. ➥ Hold down for 1 second to turn OFF the power. ➥ While holding down [SET], push [PWR] to enter the Initial Set mode. (p. 41) wMICROPHONE CONNECTOR [MIC] Connect supplied or optional microphone. • See p. 55 for appropriate microphones. • See p. 8 for microphone connector information. e HEADPHONE JACK [PHONES] (p. 11) Connect headphones (8 Ω). • When headphones are connected, the internal speaker or external speaker does notfunction. rAF CONTROL [AF] (inner control) Rotate to adjust the audio output level. t RF GAIN/SQUELCH CONTROL [RF/SQL] (outer control: pp. 20, 44) Rotate to adjust the squelch threshold level. The squelch removes noise output from the speaker (closed condition) when no signal is received. • The squelch is usable for all modes. • The control can be setas the squelch plus RFgain con- trols or squelch control only (RF gain is fixed at maxi- mum) in initial setmode. y RIT CONTROLS [RIT] (Inner control: p. 21) ➥ Rotate to shift the receive frequency without changing the transmit frequency. • Rotate clockwise to increase the frequency, or rotate counterclockwise to decrease the frequency. “ RIT ” appears on the display. • The shift frequency range is ±1.2 kHz. u IF SHIFT CONTROLS [SHIFT] (Outer control: p. 21) Rotate to shift the center frequency of the receiver’s IF passband. • Rotate clockwise to shiftthe center frequency higher, or counterclockwise to shiftthe center frequency lower. iLOCK SWITCH [LOCK] ➥ Push momentarily to turn the Dial Lock function ON or OFF. (p. 19) • The Dial Lock function electronically locks the main dial. o MAIN DIAL Rotate to change the displayed frequency, selects Quick/Initial set mode items, and so on. !0 PREAMP SWITCH [P.AMP] (p. 21) Push momentarily to turn the preamp ON or OFF. !1CH SWITCH [CH] (p. 35) Push momentarily to turn the Memory Channel Se- lect function ON or OFF. • [MEMO] blinks while the Memory Channel Selectfunc- tion is turned ON. •Push one or more times (or hold down)[√ DN]/[UP ∫] until a desired Memory channel appears. • After pushing [F-INP/ENT], push a desired Memory channel number from the keypad, then push [F-INP/ ENT] again to directly selectthe Memory Channel. • Push [CH] to exit the Memory Channel Select function.
  • 7. 3 2PANEL DESCRIPTION !2 MEMORY CHANNEL (BAND) UP/DOWN SWITCHES [√ DN]/[UP ∫] (p. 35) ➥ Push one or more times to select a Memory channel, while “MEMO” is blinking. ➥ Push to select a band. ➥ Push to select an item in the Quick/Initial Set mode. !3 ATTENUATOR SWITCH [ATT] (p. 22) Push to turn the 20 dB Attenuator function ON or OFF. !4 TUNER SWITCH [TUNER] (pp. 29, 30) ➥ Push to turn the Automatic Antenna Tuner func- tion ON or OFF. • An optional antenna tuner must be connected. ➥ Hold down for 1 second to manually start the tuner. • An optional antenna tuner must be connected. • When the tuner cannottune the antenna within 20 sec- onds,the tuning circuitis automaticallybypassed. !5 SET SWITCH [SET] ➥ Hold down for 1 second to enter the Quick Set mode. (p. 41) ➥ While holding down [SET], push [POWER] to enter the Initial Set mode. (p. 41) ➥ Push to select the Meter function. (p. 28) • PO: Displays the relative RF output power. • ALC: Displays ALC level. • SWR: Displays the SWR over the transmission line. !6 MIC COMPRESSOR SWITCH [COMP] (p. 28) Toggles the Microphone Compressor function ON or OFF. !7 KEYPAD (pp. 4, 35) The keypad can be used for direct frequency input, Memory channel selection, or secondary functions. !8 NOISE BLANKER SWITCH [NB] (p. 22) ➥ Push to turn the Noise Blanker ON or OFF. The Noise Blanker reduces pulse-type noise such as that generated by automobile ignition systems. This function is not effective against non pulse- type noise. ➥ Hold down [NB] for 1 second to enter the Noise Blanker Level Setting mode. !9 QUICK TUNING STEP SWITCH [TS] (pp. 18, 19) ➥ Selects a Quick Tuning step or turns OFF the Quick Tuning step. • While the Quick Tuning icon (“”) is displayed, the frequency is changed in kHz step. ➥ While the Quick Tuning step is OFF, hold down for 1 second to turn the 1 Hz step ON or OFF. • A 1 Hz indication appears and the frequency is changed in 1 Hz steps. ➥ While the kHz Quick Tuning step is selected, hold down for 1 second to enter the Tuning Step Set mode. @0 FILTER SWITCH [FIL] (p. 24) Push to select the preset normal, wide, or narrow IF filters for the selected operating mode. @1 MODE SWITCHES [LSB/USB]/[CW/CW- R]/ [RTTY/RTTY-R]/[AM] (p. 20) Push to select an operating mode. • In the SSB mode, holding down [MODE] for 1 second toggles between LSB and USB. • In the CW mode, holding down [MODE] for 2 seconds toggles between CWand CW Reverse. • In the RTTY mode,holdingdown [MODE]for 2 seconds toggles between RTTY and RTTY Reverse. • “ ” appears when the Reverse mode is selected.
  • 8. 4 2 PANEL DESCRIPTION NB COMP SET n Front panel (continued) V/M 1 A=B 2 A/B 3 #3 #2 MOD E FILTER TS MW 4 SPL7 NR . M=CL 5 SCN8 ANF M V 6 VO X 9 F-INP @2 V/M 1 @3 MW 4 @4 SPL7 A=B 2 M=CL 5 SC N 8 A/B 3 #1 M V 6 #0 VO X 9 @9 0 ENT @5 NR . ANF 0 @8F-INP ENT @7 P.AMP ATT @6 TUN E R CH Z DN UP Y @2 VFO/MEMORY SWITCH/1 [V/M•1] (pp. 16, 35) Push to toggle the operating mode between VFO and Memory. @3 MEMORY WRITE SWITCH/4 [MW•4] (p. 36) Hold down for 1 second to enter the displayed fre- quency and operating mode into the selected Mem- ory channel. @4 SPLIT SWITCH/7 [SPL•7] (p. 26) Push to turn the Split Frequency function ON or OFF. @5 NR SWITCH/. [NR• . ] (p. 23) ➥ Push to turn the Noise Reduction function ON or OFF. This function can be used in all modes. • An optional UT-106 DSP UNIT is required. • “NR” appears on the display. ➥ Hold down for 1 second to enter the Noise Re- duction Level Set mode. @6 ANF SWITCH/0 [ANF•0] (p. 23) Push to turn the Automatic Notch Filter function ON or OFF. This function can be used in SSB and AM modes. • An optional UT-106 DSP UNIT is required. • “ANF” appears on the display. @7 FREQUENCY INPUT/ENTER SWITCH [F-INP/ENT] ➥ Push [F-INP/ENT] to enter the Direct Frequency Input mode. ➥ After pushing [CH], push [F-INP/ENT] to enter the Direct Memory Number Selection mode. @8 SCAN SWITCH/8 [SCAN•8] (p. 39) ➥ Push to start or stop the Programmed Scan in the VFO mode. ➥ Push to start or stop the Memory Scan in the Memory mode. @9 VOX SWITCH/9 [VOX•9] (p. 28) In the SSB modes, push to turn the VOX function ON or OFF. #0 M≈V SWITCH/6 [MV•6] (p. 37) Hold down for 1 second to copy the memory con- tents to the VFO. #1MEMORYCLEARSWITCH/5[M=CL•5](p.38) In the Memory mode, hold down for 1 second to clear the selected Memory channel contents. • “BLANK” appears above the Memory channel number. #2VFO SELECT SWITCH/3 [A/B•3] (p. 16) ➥ In the VFO mode, push to toggle between VFO A and VFO B. ➥ When the Split Frequency function is ON, push to toggle between the transmit and the receive frequency. #3 VFO EQUALIZATION SWITCH/2 [A=B•2] Push to equalize the VFO B frequency and oper- ating mode to the VFO A frequency and operating mode.
  • 9. 5 2PANEL DESCRIPTION n Function display !9 !8 !7 !6 q w e !5 r t !4 y !2 !3 u i o !0 !1 q LOCK ICON (p. 19) Displayed when the Dial Lock function is in use. w RECEIVE ICON Displayed while receiving a signal or when the squelch is open. eTUNE ICON Displayed while the Automatic Tuning function is in use. rTRANSMIT ICON Displayed while transmitting. tFUNCTION ICONS ➥ “P.AMP” is displayed when antenna preamp is in use. ➥ “ATT” is displayed when the Attenuator function is in use. ➥ “NB” is displayed when the Noise Blanker func- tion is ON. ➥ “BK” is displayed when the Semi Break-in func- tion is selected in Quick Set mode. ➥ “F-BK” is displayed when the Full Break-in func- tion is selected in the CW mode. (p. 31) ➥ “VOX” is displayed when the VOX function is se- lected in the Quick Set mode. ➥ “COM” is displayed when the speech compres- sor is ON in the SSB mode. ➥ “SCAN” is displayed when the Scan function is in use. • Blinks when a scan is paused. y DSP UNIT ICON Displayed when an optional UT-106 DSP UNIT is in- stalled. u AUTOMATIC NOTCH FILTER ICON (p. 23) Displayed when the optional Automatic Notch Filter function is in use. iNOISE REDUCTION ICON (p. 23) Displayed when the optional Noise Reduction func- tion is in use. o SIGNAL/SQL/RF-GAIN METER ➥ Displays the signal strength while receiving. ➥ Displays the relative output power, ALC, or SWR levels while transmitting. (p. 27) !0 VFO/MEMORY ICON (p. 16) “VFO A” or “VFO B” is displayed when the VFO mode is selected. “MEMO” is displayed when the Memory mode is se- lected. !1 MEMORY CHANNEL NUMBER READOUT (p. 35) Displays the selected Memory channel number. !2BLANK ICON (p. 38) Indicates that the selected Memory channel has no content. • This icon appears both in VFO and Memory mode. !3 SPLIT ICON (p. 26) Displayed when the Split function is ON. !4 RIT ICON (p. 21) Displayed when the RIT function is in use. !5 FREQUENCY READOUT Displays the operating frequency. !6 REVERSE ICON (p. 20) Displayed when the CW reverse or RTTY reverse mode is selected. !7 WIDE/NARROW FILTER ICONS (pp. 24, 25) ➥ “ ” is displayed when the wide IF filter is se- lected. ➥ “ ” is displayed when the narrow IF filter is se- lected. !8 PROGRAMM ABLE TUNING STEP ICON Displayed when you select the programmable tun- ing step. !9MODE ICONS (p. 20) Displays the selected operating mode.
  • 10. 6 2 PANEL DESCRIPTION n Rearpanel q w e !0 o i u y t r q ANTENNA CONNECTOR [ANT] (p. 10) Connects to a 50 Ω antenna with a PL-259 plug connector and a 50 Ω coaxial cable. w DC POWER SOCKET [DC 13.8V] (p. 12) Connects to a 13.8 V DC source through the sup- plied DC power cable. Rear panel view u ELECTRONIC KEYER JACK [KEY] Accepts a key or paddle connector for the internal electronic keyer. • You can selectthe keyer type between the internal elec- tronic keyer and straight key operation in the Initial Set mode. When connecting (⊕ ) a straightkey e TUNER CONTROL SOCKET [TUNER] (p. 14) Connects to the control cable from an optional AH-4 When connecting a paddle iALC INPUT JACK [ALC] (dot) (com) (dash) AUTOMATIC ANTENNA TUNER. r CI-V REMOTE CONTROL JACK [REMOTE] (p. 57) Connects to a PC for remote control of the of trans- ceiver functions. tEXTERNAL SPEAKER JACK [EXT SP] (p. 11) Connects to an 8 Ω external speaker. • When an external speaker is connected, the internal speaker is disabled. y ACCESSORY SOCKET [ACC] (p. 7) Connects to external equipment such as a linear amplifier, an automatic antenna tuner, a TNC for data communications, and so on. Connects to the ALC output jack of a non-Icom lin- ear amplifier. o SEND CONTROL JACK [SEND] (p. 14) Goes to ground while transmitting to control exter- nal equipment such as a liner amplifier. • Maximum control level: 16 V DC/2 A !0 GROUND TERMINAL [GND] (p. 9) Connects to ground to prevent electrical shock, TVI, BCI and other problems.
  • 11. 7 2PANEL DESCRIPTION D ACC SOCKET INFORMATION • ACC socket ACC PIN # NAME DESCRIPTION SPECIFICATIONS 13 9 10 11 12 5 6 7 8 1 2 3 4 Rear panel view 1 8 V Regulated 8 V output. Output voltage: 8 V ±0.3 V Output current: Less than 10 mA 2 GND Connects to ground. — 3 SEND Input/output pin. Goes to ground when transmitting. When grounded, transmits. Ground level: –0.5 V to 0.8 V Input current: Less than 20 mA 4 BDT Data line for the optional AT-180. — 5 BAND Band voltage output. (Varies with amateur band) Output voltage: 0 to 8.0 V 6 ALC ALC voltage input. Control voltage: –4 to 0 V Input impedance: More than 10 kΩ 7 NC — — 8 13.8 V 13.8 V output when power is ON. Output current: Maximum 1 A 9 TKEY Key line for the AT-180. — 10 FSKK RTTY keying input. Ground level: –0.5 to 0.8 V Input current: Less than 10 mA 11 MOD Modulator input. Input impedance: 10 kΩ Input level: Approx. 100 mV rms 12 AF AF detector output. Fixed, regardless of [AF] position. Output impedance: 4.7 kΩ Output level: 100 to 300 mV rms 13 SQL S Squelch output. Goes to ground when squelch opens. SQL open: Less than 0.3 V/5 mA SQL closed: More than 6.0 V/100 μA • When connecting the ACC conversion cable (OPC-599) 2 q FSKK t AF 4 5 w GND y SQLS 1 3 8 e SEND u 13.8 V 13 9 10 11 12 6 7 r MOD i ALC 5 6 7 8 1 2 3 4 ACC 1 2 q 8 V t ALC 4 5 1 3 w GND y NC e SEND u 13.8 V 6 7 r BAND ACC 2 When the SEND terminal controls an inductive load (such as a relay), a counter-electromotive force can cause the transceiver to malfunction or other damage.To preventthis,we recommend adding a switching diode,such as an “1SS133,” on the load side of the circuit to the counter-electromotive force absorption. When the diode is added, a switching delay of the relay may occur. Be sure to check its switching action before operation. [Example] ACC socket eSEND i13.8V Sw itching diode To a non-Icom linear amplifier Relay
  • 12. 8 2 PANEL DESCRIPTION [MIC] PIN NO. FUNCTION DESCRIPTION w +8 V DC output Maximum 10 mA e Frequency up Ground Frequency down Ground through 470 Ω r Squelch open “LOW” level Squelch close “HIGH” level n Microphone (HM-36) q w q UP/DOWN SWITCHES [UP]/[DN] Change the selected readout frequency or Memory channel. • Holding down continuously changes the frequency or Memory channel number. • The [UP]/[DN] switch can simulate a keypaddle.Preset in CW PADDL in the Initial Set mode.(p. 31) w PTT SWITCH Push to transmit, release to receive. • MICROPHONE CONNECTOR (Front view) q Microphone input w +8 V DC output e Frequency up/dow n i Main readout AFoutput (varies w ith [AF]/[BAL]) u GND (Microphone ground) yGND (PTT ground) t PTT rMain readout squelch sw itch CAUTION: DO NOT short pin 2 to ground as this can damage the internal 8 V regulator. DC voltage is also applied to pin 1 for microphone operation. Use caution when using a non-Icom microphone. • HM-36 SCHEMATICDIAGRAM Microphone 22 kø + 0.33 µF 4700 pF Microphone Plug MIC ELEMENT + 1 kø 10 µF Microphone Cable q u w i y DOWN UP e r t PTT RECEIVE TRANSMIT 470 ø
  • 13. 9 INSTALLATION AND CONNECTIONS 3 n Unpacking After unpacking, immediately report any damage to the delivering carrier or dealer. Keep the shipping cartons. For a description and a diagram of accessory equip- ment included with the IC-718, see ‘Supplied accesso- ries’ on page 1 of this manual. n Selecting a location Select a location for the transceiver that allows ade- quate air circulation, free from extreme heat, cold, or vibrations, and away from TV sets, TV antenna ele- ments, radios and other electromagnetic sources. The base of the transceiver has an adjustable stand for desktop use. Set the stand to one of two angles to suit your operating conditions. n Connecting an antenna For radio communications, the antenna is of critical im- portance, along with output power and receiver sensi- tivity. Select antenna(s), such as a well-matched 50 Ω antenna, and feedline. A Voltage Standing Wave Ratio (VSWR) of 1.5:1 or less is recommended for your desired band. NOTE: A lightening arrestor may offer some pro- tection from static electricity. Antenna SWR Eachantenna is tuned for a specifiedfrequency range and SWR may increase out of that range. When the SWR is higher than approximately 2.0:1, the trans- ceiver’s power drops to protect the final transistor. In this case, an antenna tuner is useful to match the transceiver and antenna. The IC-718 has an SWR meter to continuously monitor the antenna SWR. n Grounding To prevent electrical shock, television interference (TVI), broadcast interference (BCI) and other prob- lems, ground the transceiver through the GROUND terminal on the rear panel. For best results, connect a heavy gauge wire or strap to a long earth-sunk copper rod. Make the distance between the [GND] terminal and ground as short as possible. R WARNING! NEVER connect the [GND] terminal to a gas or electric pipe, since the connec- tion could cause an explosion or electric shock.
  • 14. 10 3 INSTALLATION AND CONNECTIONS V/M 1 A=B 2 A/B 3 M W 4 M -CL 5 M V 6 SPL7 SCN8 VOX 9 NR . ANF 0 ENTF-INP NB COMP SET P.AMP ATT TUNER n Required connections • Front panel (Microphone) MICROPHONES (p.55) i718 MODE FIL TS PWR MIC PHONES AF RF/SQL RIT SHIFT LO C K HM-36 SM-30 SM-50 CH Z DN UP Y • Rear panel (Basic connection) ANTENNA (p. 56) [Example]: 1.8 to 30 MHz bands AH-710 DC POWER SUPPLY PS-126 GROUND (p. 9) CW KEY Use the heaviest gauge wire or strap available and make the connection as short as possible. Grounding prevents electrical shocks, TVI and other prob- lems. A straight or bug key can be used when the internal electronic keyer is turned OFF in “CW PADDL” in the Ini- tial Set mode.(p.31)
  • 15. 3INSTALLATION AND CONNECTIONS V/M 1 A=B 2 A/B 3 M W 4 M -CL 5 M V 6 SPL7 SCN8 VOX 9 NR . ANF 0 ENTF-INP NB COMP SET P.AMP ATT TUNER n Advanced connections • Front panel (Microphone and headphones) IC-718 MODE FIL TS MIC The AFSK modulation signal can be inputfrom [MIC]. (p.33) MIC PWR PHONES AF RF/SQL RIT SHIFT LO C K CH ZDN UPY HEADPHONES • Rear panel (Optional products and external equipment) AH-4 or AH-740 (p.55) with [REMOTE] (p.57) Used for remote control and transceive operation. The optional CT-17 is required when connecting a PC to [REMOTE]. AH-2b or a long wire ANTENNA (p. 13) Connects a liner amplifier, and so on. ACC SOCKET (p.7) [SEND], [ALC] (p.14) Used to connect to a non-Icom linear ampli- fier. EXTERNAL SPEAKER (p. 55) SP-23 (Option) 11
  • 16. 3 INSTALLATION AND CONNECTIONS 12 n Connecting the Power supply Use an optional PS-126 DC POWER SUPPLY when op- erating the IC-718 with AC power. Refer to the dia- grams below. CAUTION: Before connecting the DC power cable, check the following important items. Make sure: • The [POWER] switch is OFF. • Output voltage of the power source is 12 to 15 V when you use a non-Icom power supply. • DC power cable polarity is correct. Red: Positive +terminal Black: Negative _ terminal CONNECTING THE PS-126 DC POWER SUPPLY PS-126 Connect to an AC outlet using the supplied AC cable. 13 9 10 11 12 5 6 7 8 1 2 3 4 DC pow er socket DC pow er cable CONNECTING A NON-ICOM DC POWER SUPPLY DC power supply AC outlet 13 9 10 11 12 5 6 7 8 1 2 3 4 DC power socket Supplied 13.8 V 25 A _ + _ black + red AC cable DC power cable 25 A fuses CONNECTING A VEHICLE BATTERY • RWARNING! NEVER connect to a battery with- out using a DC fuse, otherwise a fire hazard could occur or damage to the transceiver. • NEVER connect the transceiver to a 24 V battery. The transceiver may not receive well on some fre- quencies when installed in a hybrid vehicle, or any type of electric vehicle (fuel cell vehicle). This is be- cause vehicle’s electric components, such as the inverter system, generate a lot of electric noise. • DO NOT use a cigarette lighter socket as a pow- er source when operating in a vehicle. The plug may cause voltage drops and ignition noise may be superimposed onto transmit or receive audio. • Use a rubber grommet when passing the DC power cable through a metal plate to prevent a short circuit. Grommet _ black + red NOTE: Use terminals for the cable connections. Crimp 12 V battery Supplied DC power cable Solder
  • 17. 3INSTALLATION AND CONNECTIONS 13 n Connecting a linear amplifier CONNECTING THE IC-PW1/EURO To an antenna ACC-1 Remote control cable (supplied w ith the IC-PW1/EURO) ACC cable (supplied w ith the IC-PW1/EURO) ANT REMOTE INPUT1 OPC-599 conversion cable (option) Coaxial cable (supplied w ith the IC-PW1/EURO) ACC REMOTE EXCITER 1 1&2 GND IC-PW1/EURO To an AC outlet Ground GND 13 9 10 1112 5 6 7 8 1 2 3 4 IC-718 Non-European versions: 100 V to 120 V/220 V to 240 V European version: 230 V CONNECTING A NON-ICOM LINER AMPLIFIER R WARNING! Set the transceiver output To an antenna 50 Ω coaxial cable power and linear amplifier ALC output level referring to the linear amplifier instruc- tion manual. The ALC input level must be in the range 0 V to –4 V. The transceiver does not ac- cept a positive voltage. Non- matched ALC and RF power settings could cause a fire or RF OUTPUT RF INPUT SEND ALC Non-Icom linear amplifier ANT SEND IC-718 ALC 139 10 11 12 5 6 7 8 1 2 3 4 ruin the linear amplifier. The specifications for the SEND relay are 16 V DC 2 A. If this level is exceeded, a large external relay must be used.
  • 18. 3 INSTALLATION AND CONNECTIONS 14 n External antenna tuners CONNECTING THE AH-4 (p. 30) Long wire or optional AH-2b Coaxial cable (from the AH-4) Control cable Ground IC-718 AH-4 Ground CONNECTING THE AH-740 (p. 30) Coaxial cable and control cable connections Coaxial cable (from the AH-740) Ground IC-718 OPC-2321 AH-740 Ground OPC-232 1 Coaxial cable Rubber vulcanizin g tape, then electrical tape. About the ground strapconnection Ground strap • The coaxial cable is supplied with the AH-740. The OPC-2321 Control cable is optional. • See the AH-740 instruction manual for the installation and con- nection details. Vehicle chassis or body CONNECTING THE AT-180 (p. 29) DO NOT connect an AT-180 and AH-4 or AH-740 at the same time. Both tuners will not function cor- rectly. When connecting the AT-180, turn OFF the IC- 718’s power, otherwise, the CPU may malfunction and the AT-180 may not function properly. Coaxial cable supplied w ith the AT-180 ACC cable supplied w ith the AT-180 HF antenna [ANT] [ACC] AT-180 [ACC] one of tw o connectors IC-718 13 9 10 11 12 5 6 7 8 1 2 3 4 Ground
  • 19. 15 FREQUENCY SETTINGS 4 n Resetting the CPU Before first applying power, make sure all connections required for your system are complete by referring to Chapter 3. Then, reset the transceiver using the fol- lowing procedure. A resetting CLEARS all Memory channel program- ming and returns all Quick Set mode and Initial Set mode settings to their factory defaults. q Make sure the transceiver power is OFF. w While holding down [UP ∫] and [√ DN], hold down [PWR] for 1 second to turn ON the power. • The internal CPU is reset. • The transceiver displays its initial VFO frequencies when resetting is complete. e All Quick Set mode and Initial Set mode settings are returned to their default values. (p. 41) [PWR] [Z DN] [UP Y] In cooler temperatures, the LCD may appear dark and unstable after turning ON the power. This is normal and does not indicate any equipment mal- function. n Initial settings After resetting the transceiver, set the controls and switches as shown in the figure below. [METER]: Po [NB], [COMP]: OFF [POWER]: OFF [P.AMP], [ATT]: OFF [AF]: Max. counter clockwise [LOCK]: OFF [RF/SQL]: 12 o’clock [RIT]: Center [IF SHIFT]: Center Turn ON the power, then check the display. If any of the following icons appear, turn them OFF as follows. • Quick tuning step icon (“√”): Push [TS]. • 1 Hz frequency readout: Hold down [TS] for 1 second. (When Quick Tuning step is OFF.) • RIT icon (“ RIT ”): Set the [RIT] control to the center position. • Split icon (“ ”): Push [SPL].
  • 20. 16 4 FREQUENCY SETTINGS n VFO description VFO is an abbreviation of Variable Frequency Oscilla- tor, and traditionally refers to an oscillator. The IC-718 VFOs can store frequencies and operat- ing modes You can set a desired frequency in the VFO with the [MAIN DIAL], the keypad or the Memory Copy function. (p. 37) You can also select the operating mode with the [MODE] switch or call up previously accessed frequen- cies and modes with the Band Stacking Register. (p. 18) The IC-718 has two VFOs, VFO A and VFO B, es- pecially suited for split frequency operation. You can easily use an operating frequency. • Differences between the VFO mode and the Memory mode VFO MODE Each VFO displays a frequency and operating mode. If the frequency or mode is changed, the VFO auto- matically memorizes the new frequency or mode. When you select a VFO, the last used frequency and mode appear, even if another frequency or mode is selected in another VFO or Memory channel. [EXAMPLE] VFO is selected. The frequency is changed. Memory mode is selected. VFO is selected again. Last used frequency (14.123 MHz) appears. MEMORY MODE (pp. 35– 38) Each Memory channel shows a frequency and oper- ating mode like a VFO. Even if the frequency or mode is changed, the Memory channel does not memorize the new frequency or mode. When you select the Memory channel, the memorized frequency and mode appear, even if the frequency or mode is changed in the memory, then another mem- ory or VFO is selected. [EXAMPLE] Memory channel 1 is selected. The frequency is changed. Another Memory channel is selected. Memory channel 1 is selected again. Memorized frequency (14.100 MHz) appears instead of the changed frequency (14.123 MHz).
  • 21. 17 4FREQUENCY SETTINGS n Frequency setting D Using [MAIN DIAL] q Push [UP ∫] or [√ DN] one or more times to se- lect a desired ham band. w Push [MODE] one or more times to select a de- sired operating mode. (p. 20) e Rotate [MAIN DIAL] to set an operating fre- quency. • For general coverage receiver use The IC-718 has a general coverage receiver band. q Push [UP ∫] or [√ DN] one or more times to se- lect the general coverage receiver band. NOTE: Even if you select a ham band, you can se- lect a general coverage frequency. When the dis- played frequency exits the transmit frequency range (ham band), a band edge beep may sound, depending on the presetting. D Entering a frequency from the keypad The transceiver has a keypad for direct frequency entry. q Push [F-INP/ENT]. w Enter an operating frequency with the numeric keys on the keypad. [EXAMPLE] •Start F-INP ENT •To enter 21.025 MHz A=B2 V/M 1 NR ANF 0 •To enter 706 KHz (0.706 MHz) ANF0 NR SPL7 A •To enter 7 MHz F-INP •To change 14.195 to 14.850 MHz F NR SCN8 M=CL 5 • Push [•] to enter “•” (decimal point) between the MHz and kHz digits. • To cancel the input, push [SET] (or any key except a keypad key. • When you enter the same MHz digits as the displayed frequency, the step w can be skipped. e Push [F-INP/ENT] to set the entered frequency. • When you push [F-INP/EN T] after entering the MHz dig- its, zeros are automatically entered for the kHz digits. A=B 2 M=C L 5 EN T NF0 M V6 ENT -INP
  • 22. 18 4 FREQUENCY SETTINGS BAND BAND BAND 18 MHz 18.10000 MHz USB 21 MHz 21.20000 MHz USB 24 MHz 24.95000 MHz USB 28 MHz 28.50000 MHz USB 29 MHz 29.50000 MHz USB D Band Stacking Register The Band Stacking Register automatically stores the last used frequency and operating mode for each band. See the table below for a list of the bands available and the default settings for each register. BAND BAND BAND 1.9 MHz 1.91000 MHz CW 3.5 MHz 3.55000 MHz LSB 7 MHz 7.05000 MHz LSB 10 MHz 10.12000 MHz CW 14 MHz 14.10000 MHz USB General 15.10000 MHz USB D Band selection All HF ham bands and a general coverage receiver band are included in the IC-718. ➥ Push [UP ∫] or [√ DN] to select a desired band. • Holding down [UP ∫] or [√ DN] continuously scrolls through the selectable bands. NOTE: For example, if 6.10000 MHz is registered as the General coverage frequency, the General coverage band automatically positions itself be- tween 3.5 MHz and 7 MHz band. General (new) Z DN UP Y General (old) D Programmable tuning steps Select the tuning step to suit your operating require- ments. • 0.1, 1, 5, 9, 10, 100 kHz are selectable q Push [TS] to turn ON the Quick tuning function. • “” appears. w Hold down [TS] for 2 seconds to enter the Tuning Step Set mode. e Rotate [MAIN DIAL] to select a desired tuning step. • 0.1, 1, 5, 9, 10, or 100 kHz are selectable. rPush [TS] to exit the mode. t Rotate [MAIN DIAL] to change the frequency ac- cording to the set tuning step. y Push [TS] toturn OFF the Quick tuning function. • “” disappears. Programmable tuning step indicator 10 kHz tuning steps is selected.
  • 23. 19 4FREQUENCY SETTINGS D 1 Hz and 10 Hz tuning steps When the programmable tuning step, “,” disap- pears, rotating [MAIN DIAL] changes the frequency in increments of 1 or 10 Hz. q Push [TS] one or more times until “” disappears. w Hold down [TS] for 1 second to toggle between the 1 Hz and 10 Hz step settings. • When the 1 Hz step is selected,the 1 Hz digitappears in the frequency readout. • When the 10 Hz step is selected, the 1 Hz digit disap- pears from the frequency readout. TS Hold down for 1 second. Rotating [MAIN DIAL] changes the frequency in 10 Hz steps. Rotating [MAIN DIAL] changes the frequency in 1 Hz steps. [TS] SWITCH FLOW CHART 10 Hz tuning Programmable step tuning (100 Hz –100 kHz) Hold down for 1 second Push Hold down for 1 second Hold down for 1 second Push 1 Hz tuning Selectable for each mode. n Dial Lock function The Dial Lock function electronically locks [MAIN DIAL]. ➥ Push [LOCK] to turn the function ON or OFF. • “LOCK” appears when the function is ON. Appears
  • 24. 20 Set mode setting USB, LSB, CW, RTTY AM rS (RF/SQL) (default) RF/SQL RF/SQL At (AUTO) RF GAIN SQL* Sq (SQL) SQL* SQL* 5 RECEIVE AND TRANSMIT n Mode selection You can use the following modes in the IC-718: SSB (LSB/USB), CW, CW REV (CW reverse), RTTY, RTTY REV (RTTY reverse) and AM. OPERATING MODE SELECTION ➥ Push [MODE] one or more times to select the de- sired operating mode. ➥ Hold down [MODE] for 1 second to toggle between USB and LSB. (SSB mode only) ➥ Hold down [MODE] for 1 second to toggle between USB LSB CW CW Push Hold down MODE MODE CW and CW reverse or RTTY and RTTY reverse. (CW and RTTY mode only) • The selected mode is displayed in the Function Display. Note: If desired mode cannot be selected, it may be inhibited by the Initial Set mode. (p. 44) RTTY RTTY AM for 1 second n RF gain and Squelch The IC-718 uses the same control, [RF/SQL], to ad- just either the RF gain or the squelch, depending on • When set as the [RF/SQL] control the operating mode selected and the setting of the RF/SQL item in Initial Set mode (p. 44). • [RF/SQL] control priority Maximum RF gain Squelch is open. RF gain adjustable range S-meter squelch threshold S-meter squelch • When set as the [SQL] control * The RF gain is set to maximum level when [RF/SQL] is setas [SQL] control. • Shallow rotation moves the S-meter to the right indicating the signal strength which can be received. We recommend setting the RF Gain control to the 12 o’clock position since this sets RF gain to the maximum. The SQUELCH removes noise output from the speaker (closed condition) when no signal is received. The squelch is selectable in all modes. • Segments appear in the S-meter to indicate the S-meter squelch level. S-meter squelch threshold Squelch is open. S-meter squelch Shallow Deep • When set as the [RF] control Maximum RF gain Adjustable range Minimum RF gain
  • 25. 21 5RECEIVE AND TRANSMIT n Function for receive ïIFshift function The IF shift function electronically narrows the pass- band frequency of the intermediate frequency (IF) and cuts out higher or lower frequency components of the IF to reject interference. The function shifts the IF fre- quency up to ±1.2 kHz in the SSB/CW/RTTY modes and up ±250 Hz in the CW-narrow/ RTTY narrow modes. The IF shift is not selectable in the AM mode. IF SHIFT OPERATION EXAMPLE • Adjust the [SHIFT] control for minimum interfer- ence. • When IF shift is used, the audio tone may change. • Set the IF shift control to the center position when there is no interference. Both controls at center position Cutting a lower passband Cutting a higher passband SHIFT SHIFT SHIFT Interference Passband Passband Interference IF center frequency Desired signal Desired signal ïRIT function The Receive Incremental Tuning (RIT) function com- pensates for off-frequency signals. The function shifts the receive frequency up to 1.2 kHz without shifting the transmit frequency. q Rotate the RIT control to shift the off-frequencies. • “ RIT ” appears on the display. • The transmitfrequencyis not shifted. w To cancel the RIT func- tion, rotate the RIT control to the center po- sition. • “ RIT ” disappears. RIT off position ïPreamp The preamp amplifies received signals in the front end circuit to improve the signal to noise (S/N) ratio and sensitivity. Turn this function ON when receiving weak signals. ➥ Push [P.AMP] to turn the preamp ON or OFF. • The preamp functions below 1.59999 MHz, but sensi- tivity may be reduced. Appears when the preamp ON.
  • 26. 22 5 RECEIVE AND TRANSMIT ïAttenuator The attenuator prevents desired signals from distort- ing when the receive signal is very strong or when very strong electric fields, such as from broadcasting sta- tions, are near your location. ➥ Each push of [ATT] toggles the 20 dB attenuator function ON or OFF. • “ATT” appears when the attenuator is ON. Appears when the attenuator is ON. ïNoise Blanker The Noise Blanker (NB) reduces pulse-type noise such as that generated by automobile ignition sys- tems. q Push the [NB] switch to turn the noise blanker ON or OFF. w Hold down [NB] for 1 second to enter the noise blanker level Set mode. eRotate [DIAL] toadjust the noise blanker level. r Push [NB] toexit the Set mode. t Push [NB] again to turn the noise blanker func- tion OFF. • “NB” disappears. Y [NB] switch • When using the noise blanker, received signals may be distorted if they are excessively strong. • The noise blanker function in the AM mode can be turned ON or OFF in the initial set mode set- ting. (p. 45) ïMeter peak hold The meter peak hold function keeps the highest dis- played bar segment in any meter function for about 0.5 seconds so that you can read the meter indication easier. This function can be turned ON or OFF in the initial Set mode (p. 45). Initial reception of a signal results in an S-meter reading of 40 dB over 9. The highest indicated bar remains displayed for 0.5 seconds even when the signal strength decreases.
  • 27. 23 5RECEIVE AND TRANSMIT n DSP function (Requires an optional UT-106 DSP UNIT) ï NR (Noise Reduction) function When an optional UT-106 is installed, the Noise Re- duction function can be used. Also, DSP appears in the Function display. • Noise Reduction example Noise Reduction OFF Noise Reduction activated The Noise Reduction function reduces noise compo- nents and picks out desired signals that are buried in noise. The received AF signals are converted to digi- tal signals and then the desired signals are separated from the noise. Noise components Desired signal (CW) q Push [NR] to turn the noise reduction ON. • “NR” appears. w Hold down [NR] for 1 second to enter the Noise Reduction level Set mode. e Rotate [DIAL] to adjust the Noise Reduction level. rPush [NR] to exit the Set mode. tPush [NR] again toturn the function OFF. • “NR” disappears. Higher setting of the [NR] level results in audio sig- nal masking or distortion. Set the [NR] level for maximum clarity. The Noise Reduction function is usable in all modes. ï ANF (Automatic Notch Filter) function When an optional UT-106 is installed, the auto notch function can be used. Also, DSP appears in the Func- tion display. Auto notch OFF Auto notch ON The function automatically attenuates more than 3 beat tones, tuning signals and so on, even if they are moving. Desired signal (AF) Desired signal (AF) The auto notch functions in only the SSB mode. q Select the SSB mode. w Push [ANF] to turn ON the Auto Notch function. • “ANF” appears. ePush [ANF] again toturn OFF the function. • “ANF” disappears. Unw anted tone frequency Particular frequency is attenuated
  • 28. 24 5 RECEIVE AND TRANSMIT No Optional Filter FL-52A† FL-53A† FL-96† FL-222 FL-257 SSB WIDE 6 k* 6 k* 6 k* 6 k* 6 k* 6 k* 2.8 k 3.3 k NORMAL 2.4 k 2.4 k 2.4 k 2.4 k 2.4 k 2.4 k NARROW 500* 250* 1.8 k CW WIDE 6 k* 6 k* 6 k* 6 k* 6 k* 6 k* 2.8 k 3.3 k NORMAL 2.4 k 2.4 k 2.4 k 2.4 k 2.4 k 2.4 k NARROW 500 250 1.8 k RTTY WIDE 6 k* 6 k* 6 k* 6 k* 6 k* 6 k* 2.8 k 3.3 k NORMAL 2.4 k 2.4 k 2.4 k 2.4 k 2.4 k 2.4 k NARROW 500 250 1.8 k AM WIDE NORMAL 6 k 6 k 6 k 6 k 6 k 6 k NARROW 2.4 k 2.4 k 2.4 k 2.4 k 2.4 k 2.4 k 500* 250* 2.8 k* 1.8 k* 3.3 k* n Filter selection The filter selection adjusts the IF bandpass width, as shown in the table to the right. The filter selection is automatically memorized in each mode. qSelect the desired mode with the mode keys. w Push [FIL] one or more times to select the desired filter combination. • ã orç does notappearwhileinthenormalIFfiltermode. • çappears when the wide IF filter is selected. • ã appears when the narrow IF filter is selected. When an optional filter is installed, set the optional filter in the initial Set mode. An optional filter is not selected by default. • Optional filter variations Name Band width Mode FL-52A† 500 Hz/–6 dB CW/RTTY-N FL-53A† 250 Hz/–6 dB CW/RTTY-N FL-96† 2.8 kHz/–6 dB SSB-W FL-222 1.8 kHz/–6 dB SSB-N FL-257 3.3 kHz/–6 dB SSB-W The narrower band width is for higher receive selec- tivity. • Filter image Through 2nd IF signal Standard Filter (6 kHz)*** FL-65 (2.4 kHz)* 2nd IF signal/DET FL-257 (3.3 kHz)** FL-96† (2.8 kHz)** FL-222 (1.8 kHz)** FL-52A† (500 Hz)** FL-53A† (250 Hz)** * AM; Narrow, SSB/CW/RTTY; Normal ** OPTION *** AM; Normal, SSB/CW/RTTY; Wide • Filter selection table ( Hz ) Note: *This selection can be used when the expanded filter selection function is turned ON in the initial Set mode.(see right) † No longer produced
  • 29. 25 5RECEIVE AND TRANSMIT 52A (500) 53A (250) 96 (2.8 k) 222 (1.8 k) 257 (3.3 k) No Optional Filter FL-52A† FL-53A† FL-96† FL-222 FL-257 SSB no no no 96 (2.8 k) no 257(3.3 k) THU (6 k) THU (6 k) THU (6 k) THU (6 k) THU (6 k) THU (6 k) CW no no no 96 (2.8 k) no 257(3.3 k) THU (6 k) THU (6 k) THU (6 k) THU (6 k) THU (6 k) THU (6 k) RTTY no no no 96 (2.8 k) no 257(3.3 k) THU (6 k) THU (6 k) THU (6 k) THU (6 k) THU (6 k) THU (6 k) AM – – – – – – – – – – – – – – – – – – No Optional Filter FL-52A† FL-53A† FL-96† FL-222 FL-257 SSB – – – no no – – – 222 (1.8 k) – – – 52A (500) 53A (250) CW – – – 52A (500) 53A (250) – – – 222 (1.8 k) – – – RTTY – – – 52A (500) 53A (250) – – – 222 (1.8 k) – – – AM NOR (2.4 k) NOR (2.4 k) NOR (2.4 k) NOR (2.4 k) NOR (2.4 k) NOR (2.4 k) n Filter setting When an optional filter is installed, set the optional fil- ters in the initial Set mode. Optional filters are not se- lected by default. (p. 47) D Optional filter setting q While holding down [SET], push [POWER] toenter the initial Set mode. w Push [UP Y] or [Z DN] one or more times until “FIL” appears on the display. eRotate [DIAL] toselect adesired filter. • “no,” “52A,” “53A,” “96,” “222” and “257” indicate no optional filter. • FL-52A, FL-53A, FL-96, FL-222 and FL-257 indicate the respective for 455 kHz IF filter selection. r Push [PWR] to exit the initial Set mode, and turn OFF the transceiver. D Expanded filter selection The selectable filter combinations can be expanded by setting the expanded filter selection to ON. Then an extra wide or narrow filter can be selected in de- sired modes. q While holding down [SET], push [PWR] to enter the initial Set mode. w Push [UP Y] or [Z DN] one or more times until “EXP FIL” appears. • Optional filter selection • Expanded filter selection “on” • Wide filter setting • Narrow filter setting e Rotate [DIAL] to turn ON the ex- panded filter selection. • When ON set, the expanded filter selection can be used. • Wide filter setting table • Wide/narrow filter selecting r Push [UP Y] one or more times until “WIDE ” or “NAR ” is displayed. t Push [MODE] one or more times to select the desired mode. y Rotate [DIAL] to select afilter. u Repeat steps t and y to select IF filters for other modes, if de- sired. • The filter combinations are stored according to each operating mode. i Push [POWER] to exit initial set mode and turn OFF the trans- ceiver. • Narrow filter setting table : def ault : def ault †No longer produced • See the filter construction diagram on page 24 for “THU (through).” • “no,” “52A,” “53A,” “96,” “222” and “257” indicate no optional filter.
  • 30. 26 5 RECEIVE AND TRANSMIT n Split frequency operation Split frequency operation allows you to transmit and receive on two different frequencies. Split frequency operation uses two frequencies, one in VFO A and the other in VFO B. The following is an example of setting 7.057 MHz, CW mode in VFO A (for receive) and 7.025 MHz, CW mode in VFO B (for transmit). q Select VFO B and set the frequency to 7.025 MHz/ CW. w Push [A/B] to select VFO A and set the frequency to 7.057 MHz/CW. e Push [SPL] to turn ON the split frequency opera- tion. • Split operation is now set for receive 7.057 MHz/CW and transmit 7.025 MHz/CW. • To change the receive frequency, rotate the main dial, to change the transmitfrequency, rotate the main dial in the transmitmode. To exchange the transmit and receive frequencies, push [A/B]. n SWR The IC-718 has a built-in circuit to measure antenna SWR— no external equipment or special adjustments are necessary. ïMeasuring SWR q Confirm that the output power is over 30 W. w Push [SET] one or more times to select the SWR meter. e Push [MODE] one or more times to select the CW or RTTY operation. • Key down or push [PTT] to transmit,then read the ac- tual SWR from the meter: ≤ 1.5 well matched antenna ≥ 1.5 check antenna or cable connection and so on. The bestmatch is in this range.
  • 31. 27 5RECEIVE AND TRANSMIT DISPLAY INDICATION MEASUREMENT Po Indicates the relative RF output power. ALC Indicates the ALC level. When the meter movement shows the input signal level exceeds the allowable level, the ALC limits the RF power. In such cases, reduce the microphone gain (see above). SWR Indicates the SWR over the transmis- sion line. n Function for transmit ï Output power and microphone gain • Setting the output power q Hold down [SET] for 1 second to select the Quick Set mode. w Push [UP ∫]/[√ DN] one or more times to select “RF Power.” e Rotate the main dial to select the desired output. • Output power is continuously selectable in 101 steps (L, 1–99 and H). • Available power SSB/CW/RTTY: 2 (or less) – 100 W AM: 2 (or less) – 35 W* *Carrier power Maximum output power is selected. • Setting the microphone gain Microphone gain must be adjusted properly so that your transmit signal is not distorted. q Select SSB or another phone mode. w Hold down [SET] for 1 second to enter the Quick Set mode. e Push [UP ∫]/[√ DN] one or more times to select “MIC GAIN.” rSpeak into the microphon e at your normal voice level and adjust the mic gain so that the ALC meter does not peak past the ALC zone. tPush [SET] toexit Quick Set mode. ALC zone Microphone gain is set to 50. ïMeter function The bar meter in the function display acts as an S-meter (for relative signal strength) during receive, and can be set to one of three functions during trans- mit. • Push [SET] one or more times to select the PO, ALC and SWR meter mode.
  • 32. 5 RECEIVE AND TRANSMIT ï Microphone compressor The IC-718 has a built-in, low distortion mic compres- sor circuit. This circuit increases your average talk power in the SSB mode, and is especially useful for DX’ing when the receiving station is having difficulty receiving your signal. q Select USB or LSB mode. w Select the mic gain display in the Quick Set mode. • Hold down [SET] for 1 second to select the Quick Set mode. • Push [UP ∫]/[√ DN] one or more times to select“MIC GAIN.” e Adjust the mic gain by rotating [DIAL]. • While speaking at your normal voice level, the ALC meter should read about the middle of the ALC zone. • Be sure the mic gain is in the range of 20 to 50. rPush [SET] toexit the Quick Set mode. t Push [COMP] toturn the mic compressor ON. ALC zone Y [COMP] switch y Push [SET] one or more times to select the ALC meter. u While speaking into the microphone at your nor- mal voice level, confirm the ALC level so that the ALC meter peak does not past the ALC zone. • If the ALC meter peak pastthe ALC zone, readjust the mic gain. Note: If the ALC meter peaks above the ALC zone, your transmitted voice may be distorted. Adjust [MIC GAIN] so that the ALC meter reads within the ALC zone. ïVOX operation The VOX (Voice-operated Transmission) function tog- gles between transmit and receive with your voice. This function also allows you an opportunity to input log en- tries into your computer and so on, while operating. q Push [VOX] toturn the function ON. w Select “VOX Gain” in the Quick Set mode. • Hold down [SET] for 1 second to selectthe Quick Set mode. • Push [UP ∫]/[√ DN] one or more times to select“VOX GAIN.” e While speaking at your normal voice level, adjust [VOX GAIN] until the transceiver is transmitting. rSelect “VOX Delay” in the Quick Set mode. • Push [UP ∫]/[√ DN] one or more times to select“VOX Delay.” t While speaking at your normal voice level, adjust [VOX DELAY] as desired. y Select “ANTI-VOX” in the Quick Set mode. • Push [UP ∫]/[√ DN] one or more times to select “AN VOX.” u If the received audio from the speaker toggles the transceiver to transmit, adjust the “ANTI-VOX” to the point where it has no effect. i Push [SET] to exit the the Quick Set mode. 28 [VOX] switch Y
  • 33. 5RECEIVE AND TRANSMIT 29 ï Optional AT-180 AUTOMATIC ANTENNA TUNER operation The AT-180 automatic antenna tuner autom atically matches the IC-718 to the antenna. Once the tuner matches the antenna, the tuning settings are memo- rized as a preset point for each frequency range (100 kHz steps). Therefore, when you change the frequency range, the tuning circuits are automatically set to the memorized point. CAUTION: NEVER transmit with the tuner ON when no antenna is connected. This will damage both the transceiver and the antenna tuner. • MANUAL TUNING During SSB operation at low voice levels, the AT-180 may not tune correctly. In such cases, manual tun- ing is helpful. Hold down [TUNER] for 1 second to start manual tun- ing. • CW mode is selected, a side tone is emitted, and “ ” blinks;then, the previous mode is selected. DO NOT! connect the AT-180 and AH-4 or AH-740 at the same time. Both tuners will not be function cor- rectly. Y TUNER OPERATION • Tuner type setting (p. 46) q Hold down [PWR] for 1 second toturn power OFF. w While pushing and holding [SET], push [PWR] to turn power ON. e Push [UP Y] or [Z DN] one or more times to se- lect [TUNER]. rRotate the main dial toselect “18.” • AT-180 AUTOMATIC ANTENNA TUNER is selected. NOTE: NEVER select “4” (AH-4 AUTOM ATIC AN- TENNA TUNER), otherwise the transceiver automat- ically transmits when you turn ON the power. Push [TUNER] to cancel the unexpected transmission. Then, reselect the correct tuner type. y Hold down [PWR] for 1 second to turn power OFF. u Push [PWR] to turn power ON again. • AUTO TUNE: Push [TUNER] to turn the tuner ON. The antenna is tuned automatically during transmission when the an- tenna SWR is higher than 1.5:1. • When the tuner is OFF, “ ” goes out. Y [TUNER] [TUNER] Hold down 1 second to start manual tuning. If the tuner cannot reduce the SWR to less than 1.5:1 after 20 seconds of tuning, “ ” goes out. In this case, check: • the antenna connection and feedline • the antenna SWR (p. 27: Meter function) • Through inhibit The AT-180 has a through inhibit mode. When select- ing this mode, you can use the tuner at poor SWR’s. In this case, automatic tuning in the HF bands acti- vates only when exceeding an SWR of 3:1. There- fore, manual tuning is necessary each time you change the frequency. Although termed “through in- hibit,” the signal will pass “through” the tuner if the SWR is higher than 3:1 after tuning. CONVENIENT • Tuner sensitive condition If you require critical tuning at any time during trans- mission, select the tuner sensitive condition. See page 51 for selection. • Automatic tuner start If you want to turn OFF the tuner when the VSWR is 1.5 :1 or less, use “automatic tuner on” and turn the tuner OFF. See page 46 for turning the function ON or OFF. Tuning indicator;
  • 34. 5 RECEIVE AND TRANSMIT 30 Y ï Optional external tuner operation R DANGER! HIGH VOLTAGE! NEVER touch the antenna element while tuning or transmitting. Always place it in a secure place. NEVER operate the AH-4 or AH-740 without an an- tenna connected. The tuner and transceiver will be damaged. NEVER operate the AH-4 or AH-740 if it is not grounded. Transmitting before tuning may damage the transceiver. Note that the AH-4 cannot tune when using a 1⁄2 λ long wire or multiple of the operating frequency. AH-4 The AH-4 matches the IC-718 to a long wire antenna more than 7 m/23 ft long (3.5 MHz and above). • See page 14 for connection details. • See the AH-4 instruction manual for AH-4 installa- tion and connection details. AH-740 The optional AH-740 covers 2.5 to 30 MHz range with TUNER OPERATION Tuning is required for each frequency. BE SURE to retune the antenna before transmitting when you change the frequency, even slightly. • Tuner type setting (p. 46) q Hold down [PWR] for 1 second toturn power OFF. w While pushing and holding [SET], push [PWR] to turn ON the power. e Push [UP Y] or [Z DN] one or more times to se- lect [TUNER]. rRotate the main dial to select “4.” • AH-4 AUTOMATIC ANTENNA TUNER is selected. • Also select“4” when using the optional AH-740. t Hold down [PWR] for 1second toturn power OFF. y Push [PWR] to turn ON the power. • MANUAL TUNING q Set the desired frequency in an HF band. • The IC-718 will nottransmit outsideofthe ham bands. w Hold down [TUNER] for 1 second. • “ ” blinks and “CW” appears while tuning. a supplied whip antenna element. Or when using with the optional NVIS kit, it covers 2.2 to 30 MHz range. • See page 14 for connection details. • See the AH-740 instruction manual for the installa- tion and connection details. [TUNER] e “ ” lights constantly when tuning is complete. • When the connected wire cannot be tuned, “” goes out, the AH-4 or AH-740 is bypassed and the antenna wire is directly connected to the antenna connector on the transceiver. r To manually bypass the AH-4 or AH-740, push [TUNER] to turn it OFF. Tuning indicator; Blinks:Tuning now Appears:Tune is completed Disappears: Tune cannotbe completed CONVENIENT • PTT tune function The AH-4 or AH-740 is always tuned when the PTT is pushed after the frequency is changed more than 1%. This function removes the “hold down [TUNER]” operation and activates first transmission on the new frequency. This function is turned ON in initial set mode (p. 46).
  • 35. 5RECEIVE AND TRANSMIT 31 n Function for CW ïConnection for CW Initial set mode setting (p.45) 13 9 10 11 12 5 6 7 8 1 2 3 4 [ELEC KEY] : normal [ACC] 13 9 10 11 12 You can switch TX/RX with an external switch through pins 2 and 3 on the ACC connector, as shown below. Paddle : reverse 5 6 7 8 1 2 3 4 Straight key : off See page 32 for connection details: Paddle operation from the front panel MIC connector. [MICROPHONE] Microphone : UP/DN key ïCW operation q Connect a paddle orstraight key as shown above. w Select CW (or CW-REV) mode by pushing [MODE]. e Set the CW break-in operation to semi break-in, full break-in or OFF. (p. 42) • Hold down [SET] for 1 second to enter the Quick Set mode. • Push [UP ∫]/[√ DN] one or more times until “BK–IN” appears,then rotate the main dial to selectthe desired operation: FL: full break-in SE: semi break-in oF: no break-in r Set the CW delay time when semi break-in opera- tion is selected. (p. 43) • Hold down [SET] for 1 second to enter the Quick Set mode. Push [UP ∫]/[√ DN] one or more times until “BK–DELAY” appears, then rotate the main dial to set the desired delaytime. CW mode and semi break-in operation are selected. Delay time of 6 dots is selected in the Quick set mode for semi break-in operation.
  • 36. 5 RECEIVE AND TRANSMIT 32 ïCW pitch control The received CW tone pitch and monitored CW tone pitch can be adjusted to suit your preferences (300 to 900 Hz) without changing your transmitting frequency. q Hold down [SET] for 1 second to enter the Quick Set mode. w Push [UP ∫]/[√ DN] one or more times until “CW PITCH” appears, then rotate the main dial to set the desired pitch. This shows the default setting for the CW pitch control (600 Hz). ïCW reverse mode The CW-R (CW Reverse) mode receives CW signals with the reverse side CW carrier point like that of the LSB and USB modes. Use this mode when interfer- ing signals are near the desired signal and you want to change the interference tone. BFO 1/3 octave Hold down for 1 second MOD E 1/2 octave BFO q Push [MODE] one or more times to select the CW mode. w Hold down [MODE] for 1 second to toggle between the CW and CW-R modes. Desired signal (600 Hz) Interference (800 Hz) Desired signal (600 Hz) Interference (400 Hz) CW mode (USBside) CW REV mode (LSBside) ïElectronic CW keyer The IC-718 has an electronic keyer installed. Both keying speed and weight (the ratio of dot : space : dash) can be set in the Quick Set mode. KEYING WEIGHT EXAMPLE: morse code “K” DOT • Setting the electronic keyer q Push [MODE] one or more times to select the CW mode. w While pushing and holding [SET], push [POWER] to enter initial set mode. e Push [UP ∫]/[√ DN] one or more times until “CW Weightsetting: 1:1:3 (default) Weightsetting: Adjusted DASH (Fixed*) DASH PADDL” appears, then rotate the main dial to se- lect the paddle type. • When “ud” is selected, the up/down switches on the microphone can be use as a paddle. • When using the up/down switches as a paddle, squeeze keying cannotbe done. r Push [UP ∫]/[√ DN] one or more times until “KEY Adjustable range SPACE (Fixed*) *SPACE and DOT lengths can be adjusted with “KEY SPD in the the Quick Set mode only. RAT” appears, then rotate the main dial to select the desired weight to between 2.8 and 4.5. t Push [UP ∫]/[√ DN] one or more times until “KEY Paddle operation Front panel MIC connector SPD” appears, then rotate the main dial to select DOT E the desired weight to between 6 and 60. CW paddle 3.9 k ±5% MIC U/D y Paddle operation from front panel MIC connector Connect a CW paddle to operate the built-in elec- tronic keyer from the front panel MIC connector. DASH 2.2 k ±5% e • This function is usable from only the front panel mic connector. • Select item “n,” “r,” or “oF” in CW PADDL in initial set mode. • Connectstraightkey to “DOT” side.
  • 37. 5RECEIVE AND TRANSMIT 33 [ACC] [EXTSP] n Function for RTTY ïConnection for RTTY (FSK) Rear panel TU or TNC PC 2 conductor 3.5 mm (1/8”) plug Rear panel view 13 9 10 11 12 5 6 7 8 1 2 3 4 AF SQL*1 AF out SEND GND FSK GND Use either the ACC or one of the two 1/8 plugs. *1 Connect the SQL line w hen required. ïConnection for AFSK [MIC] connector (Front panel view) q Mic input i AF output To a TU or TNC and personal computer. [ACC] connector Rear panel view 1 7 2 8 6 3 5 4 uMic GND yPTT GND tPTT rSQL Use either the ACC or microphone connector. 13 9 10 11 12 5 6 7 8 1 2 3 4 SQL*1 AF out AF in SEND GND *1 Connect the SQL line w hen required.
  • 38. 5 RECEIVE AND TRANSMIT 34 ïRTTY (FSK) operation q Connect a terminal unit as described on page 34. w Select the RTTY (or RTTY-R) mode by pushing [MODE]. e Select the desired mark and shift frequencies as described below. r Set the desired operating frequency with the main dial. t Start using the PC or TNC (TU). PRESETTING FOR RTTY • Tone frequency q Hold down [SET] for 1 second to enter the Quick Set mode. w Push [UP ∫]/[√ DN] one or more times until “TON 2125” appears, then rotate the main dial to select the desired tone frequency. • Shift frequency q Hold down [SET] for 1 second to enter the Quick Set mode. w Push [UP ∫]/[√ DN] one or more times until “SIFT 170” appears, then rotate the main dial to select the desired shift frequency. RTTY mode is selected. RTTY mark frequency is set to 2125 Hz. 2125, 1615 and 1275 Hz can be used. RTTY shift frequency is set to 850 Hz. 850, 425, 200 and 170 Hz can be used. • RTTY reverse mode Received characters are occasionally garbled when the receive signal is reversed between MARK and Normal Reverse SPACE. This reversal can be caused by incorrect space mark space mark TNC connections, settings, commands and so on. To receive a reversed RTTY signal correctly, select the RTTY-R (RTTY reverse) mode. 170 Hz 2125 Hz BFO BFO 2125 Hz 170 Hz • Hold down [MODE] for 1 second to select the RTTY-R (RTTY reverse) mode. Displayed frequency Displayed frequency ïRTTY (AFSK) operation q Connect a terminal unit as described on page 33. w Select the SSB (LSB) mode by pushing [MODE]. • Generally, LSB is used on the HF bands. e Select the desired FSK tone/shift frequencies and keying polarity the same way as for the FSK oper- ation. r Set the desired frequency with the main dial. t Start using the PC or TNC (TU).
  • 39. 35 MEMORY OPERATION 6 n Memory channels The transceiver has 101 Memory channels. The Mem- ory mode is very useful for quickly changing to often- used frequencies. All 101 Memory channels are tunable, which means the entered frequency can be tuned temporarily with [DIAL] in the Memory mode. MEMORY CHANNEL MEMORY CHANNEL NUMBER CAPABILITY TRANSFER TO VFO OVER- WRITING CLEAR Regular memory channels 1–99 One frequency and one mode in each memory channel. Yes Yes Yes Scan edge memory channels P1, P2 One frequency and one mode in each memory channel as scan edges for a programmed scan. Yes Yes No n Memory channel selection D Using the [UP Y] or [Z DN] keys q Push [V/M] toselect the Memory mode. • “MEMO” appears. w Push [CH] to enter the memory CH select mode. • “MEMO” blinks. e Push [UP Y] or [Z DN] several times to select the desired Memory channel. • Hold down [UP Y] or [Z DN] to scroll to the desired memory. rPush [CH] to exit the memory CH select mode. tTo return to the VFO mode, push [V/M] again. D Using the keypad q Push [V/M] toselect the Memory mode. • “MEMO” appears. w Push [CH] to enter the memory CH select mode. • “MEMO” blinks. e Push [F-INP/ENT], then push the desired Memory channel number using the keypad. r Push [F-INP/ENT] to select the desired Memory channel. tPush [CH] to exit the memory CH select mode. V/M 1 V/M 1 CH CH ZDN or UP Y F-INP ENT V/M 1 A=B2 F-INP ENT CH CH
  • 40. 36 6 MEMORY OPERATION n Memory channel entry Memory channel entry can be performed either in the VFO mode or in the Memory mode. D Entering data in the VFO mode q Set a desired frequency and operating mode in the VFO mode. w Push [CH], then push [UP Y] or [Z DN] several times to select the desired Memory channel. • “MEMO” blinks. • “BLANK” appears ifthe selected Memory channel is a blank channel. e Hold down [MW] for 1 second to program the dis- played frequency and operating mode into the Memory channel. r Push [CH] toexit Memory channel select mode. [EXAMPLE]: Entering 7.086 MHz/LSB into Memory channel 10. or keypad MODE CH Z DN or UP Y MW 4 Hold down f or 1 second. Beep Beep Beep CH D Entering data in the Memory mode q Select the desired Memory channel by pushing [UP Y] or [Z DN] in the Memory mode. • “BLANK” appears ifthe selected Memory channel is a blank channel (has no contents). w Enter the desired frequency and operating mode in the Memory mode. • In a blank channel, first directly enter the frequency using the keypad. e Hold down [MW] for 1 second to enter the dis- [EXAMPLE]: Entering 21.280 MHz/CW into Memory channel 18. V/M 1 played frequency and operating mode into the Memory channel. • Preamp setting, attenuator ON and OFF, and AGC settings can also be entered into a Memory channel. CH Z DN or UP Y CH then F-INP [2], [1], [.], [2], [8] F-INP ENT ENT MW 4 Hold down f or 1 second. Beep Beep Beep
  • 41. 37 Y MEMORY OPERATION 6 n Transferring data to the VFO The frequency and operating mode in a Memory chan- nel can be transferred to the VFO. Transferring data can be performed in either the VFO or Memory mode. D Transferring in VFO mode This is useful for transferring entered contents to the VFO. qSelect the VFO mode by pushing [V/M]. w Push [CH], then select the Memory channel to be transferred by pushing [UP Y] or [Z DN]. • “BLANK” appears ifthe selected Memory channel is a blank channel. e Hold down [M≈V] for 1 second to transfer the fre- quency and operating mode. • The transferred frequencyand operating modeare dis- played on the function display. r Push [CH] to exit the Memory channel select mode. TRANSFERRING EXAMPLE IN THE VFO MODE Operating frequency: 21.320 MHz/USB (VFO) Contents of M-ch 12: 14.180 MHz/CW CH Z DN or UP Y M V6 Hold down f or 1 second Beep Beep Beep CH
  • 42. 6 MEMORY OPERATION 38 Z D Transferring in the Memory mode This is useful for transferring frequency and operating mode while operating in the Memory mode. TRANSFERRING EXAMPLE IN MEMORY MODE Operating frequency: 14.020 MHz/CW (M-ch 16) Contents of M-ch 16: 14.018 MHz/CW When you have changed the frequency or operat- ing mode in the selected Memory channel: • The displayed frequency and mode are trans- ferred to the VFO. • The entered frequency and mode in the Memory channel are not transferred to the VFO, and they remain in the Memory channel. q Push[CH], thenselect theMemory channel tobe transferred by pushing [UP Y] or [Z DN] in the Memory mode. • Enter the frequency or operating mode ifrequired. w Hold down [M≈V] for 1 second to transfer the fre- quency and operating mode. • The displayed frequency and operating mode are transferred to the VFO. e To return to the VFO mode, push [V/M] momen- tarily. Rotate dial. M V 6 Hold down f or 1 second. Beep Beep Beep V/M 1 VFO A is display ed. V/M 1 M-ch 16 is display ed. n Memory clearing Any unnecessary Memory channels can be cleared. The cleared Memory channels become blank chan- nels. q Select the Memory mode by pushing [V/M]. w Push [CH], then select the Memory channel to be cleared by pushing [UP Y] or [Z DN]. M -C 5 Hold down f or 1 second. Beep e Hold down [M-CL] for 1 second to clear the con- tents. • The entered frequency and the operating mode disap- pear. • “BLANK” appears. rTo clear other Memory channels, repeat steps w ande. Beep Beep
  • 43. 39 Scan start with Programmed scan Memory scan Squelch open The scan continues until it is stopped man- ually, and does not pause even if it de- tects signals. Scan pauses on each channel when the scan resume is ON, not applicable when OFF. Squelch open closed Scan stops when detecting a signal. If you set scan resume ON in the Initial Set mode, the scan paused for 10 seconds when detecting a signal, then resumes. When a sig- nal disappears while scan is paused,scan re- sumes 2 seconds later. SCANS 7 n Scantypes PROGRAMMED SCAN Repeatedly scans between two scan edge frequencies (scan edge memorychannels P1 and P2). MEMORY SCAN Repeatedlyscans all programmed memorychannels. BLANK Scan edge P1 or P2 Scan edge P2 or P1 Mch 2 Mch 3 Mch 4 Scan Jump This scan operates in VFO mode. Mch 1 Mch 99 BLANK Mch 7 Mch 6 Mch 5 This scan operates in the memorymode. n Preparation • Channels For programmed scan/auto memory write scan: Enter scan edge frequencies into scan edge Memory channels P1 and P2. For a memory scan:- Enter 2 or more Memory channels except scan edge Memory channels. • Scan resume ON/OFF You can select the scan to resume or cancel when de- tecting a signal, in the Set mode. Scan resume ON/ OFF must be set before operating a scan. See page 45 for ON/OFF setting and scan resume condition de- tails. • Scan speed Scan speed can be selected from 2 levels, high or low, in the Initial Set mode. See page 45 for details. • Squelch condition
  • 44. 7 SCANS 40 n Programmed scan operation qSelect the VFO mode by pushing [V/M]. w Select the desired operating mode. • The operating mode can also be changed while scan- ning. e Set [RF/SQL] open or closed. • See the previous page for scan details. • If the [RF/SQL] control function is set as RF control, the squelch always opens. See pages 15, 20 for de- tails. r Push [SCAN] tostart the programmed scan. • “SCAN” appears while scanning. t When the scan detects a signal, the scan stops, pauses or ignores it, depending on the resume setting and the squelch status. y To cancel the scan, push [SCAN]. If the same frequencies are programmed into the P1 and P2 scan edges Memory channels, the scan does not start. n Memory scan operation q Select Memory mode by pushing [V/M]. w Select the desired operating mode. • The operating mode can also be changed while scan- ning. e Set [RF/SQL] open or closed. • See previous page for scan details. • If the [RF/SQL] control function is set as an RF con- trol, the squelch is always opened. See pages 14, 30 for details. r Push [SCAN] to start the memory scan. • “SCAN” appears while scanning. t When the scan detects a signal, the scan stops, pauses or ignores it, depending on the resume setting and the squelch status. y To cancel the scan, push [SCAN]. 2 or more Memory channels must have entered content for memory scan to start.
  • 45. 41 SET MODE 8 n General The Set mode is used for programming infrequently changed values or conditions of functions. The IC-718 has 2 separate set modes: Quick Set mode and Initial Set mode. [DIAL] [SET] D Quick Set mode operation q While power is ON, hold down [SET] for 1 second. • The Quick Set mode is selectedand one ofits items ap- pears. w Push [UP Y] or [Z DN] to select the desired item. e Rotate the main dial to set the values or options for the selected item. r Repeat w and e to set other items. t To exit the Quick Set mode, momentarily push [SET]. D Initial Set mode operation q Hold down [POWER] for 1 second to turn power OFF. w While holding down [SET], push [POWER] to turn the power ON. • The Initial Set mode is selected and one ofits items ap- pears. e Push [UP Y] or [Z DN] to select the desired item. rRotate the main dial to set the values or options for the selected item. t Repeat e and r to set other items. y To exit the Initial Set mode, hold down [PWR] for 1 second to turn the power OFF. u Push [PWR] to turn power ON again. • The settings you made in the Initial Set mode are now effective. [Z DN] [UP Y] [DISPLAY EXAMPLE: QUICK SET MODE] Item Value [DIAL] [SET] [PWR] [Z DN] [UP Y] [DISPLAY EXAMPLE: INITIAL SET MODE] Item Value
  • 46. 8 SET MODE 42 n Quick Set mode items • RF power This item adjusts the RF output power. The RF output power can be adjusted from L, 1 to 99 and H. •The default is H (maximum power). Note that while adjusting the output power, the power meter is automatically displayed. • Mic gain This item adjusts microphone gain from 0 to 99 and H. The default is 50. • VOX gain This item adjusts the VOX gain for the VOX (voice acti- vated transmit) function. The default is 50. • VOX delay This item adjusts the VOX (voice activated transmit) delay time from 0 to 2 seconds in 0.1 second units. The default is 10 (1.0 second). • Anti VOX level This item adjusts the ANTI-VOX gain for the VOX (voice activated transmit) operation. The default is 50. • CW pitch This item adjusts CW tone pitch from 300 Hz to 900 Hz in 10 Hz steps. The default is 60 for 600 Hz. • BK-IN This item selects break-in type for CW operation from the following values: oF: No break-in is enabled (default). SE: Semi break-in is enabled. FL: Full break-in is enabled.
  • 47. 8SET MODE 43 • BK-IN delay This item adjusts break-in delay time for CW semi break- in operation from 2.0 to 13 (dots). The default is 7. • Key speed This item adjusts the CW keying speed from 6 to 60* wpm. The default is 20 wpm. * Some speeds between 6 and 60 cannotbe selected. • Key ratio This item selects the CW key ratio (or weight) from 2.8 to 4.5. The default is 30 (3.0). • RTTY mark tone This item selects the Mark. You can select 1275, 1615 and 2125 Hz. The default is 2125 Hz. • RTTY shift This item selects RTTY shift from 170, 200, 425 and 850. The default is 170 Hz. • Dimmer This item selects the LCD back light brightness from Off, Low and High. The default is “HI” (High).
  • 48. 8 SET MODE 44 n Initial Set mode items • Mode select This item allows you to simplify operation by inhibiting any unneeded operating modes. For example if you only use the LSB and USB modes, use “MODE SELECTION” to inhibit access to all other modes (CW, RTTY and AM), therefore selecting LSB and USB is quick and easy. The default is ON for all operating modes. To toggle an op- erating mode ON or OFF, push [MODE] one or more times until the desired mode is displayed. Then rotate the main dial to set to ON or OFF. • RF/SQL VR The [RF/SQL] control can be set as: • RF/squelch control • Automatic (acts as squelch in AM modes, as RF in SSB/CW/RTTY modes) • Squelch control (p. 20) The default is “rS” (RF/squelch). • Beep A beep sounds each time a key is pushed to confirm it. This function can be turned OFF for silent operation. The default is “on” (ON). • Beep level This item adjusts the confirmation beep level. The default is 50. • Band edge beep A beep sounds when an operating frequency enters or exits a transmit frequency range. This functions indepen- dent of the confirmation beep setting. The default is “on” (ON). • Side-tone level This item adjusts the CW side-tone level. The default is 30.
  • 49. 8SET MODE 45 • Meter peak hold This item selects meter peak hold function ON or OFF. The default is “on” (ON). • Scan speed This item sets the speed at which channels or frequencies are scanned during scan operations. High or Low can be selected. The default is “HI” (High). • Scan resume This item sets the scan resume function ON or OFF. ON: Scan resumes 10 seconds after stopping on a signal or 2 seconds after a signal disappears. OFF: Scan does not resume after stopping on a signal. For the priority watch, setting to OFF pauses the watch until the signal disappears and the scan resumes. The default is “on” (ON). • AM Noise blanker This item is used in the AM mode to blank unwanted noise, such as ignition noise. The default is “on” (ON). NOTE: The noise blanker function may degrade the audio if use when listening to regular AM radio broadcasts. • Auto TS This item sets auto tuning speed. The tuning dial normally changes the frequency 1.5 kHz/revolution in 10 Hz tuning step. When auto tuning step is turned ON this increases to 30 kHz/revolution in 50 Hz tuning step during quick rota- tion of the dial. The default is “on” (ON). • Key type This item adjusts the CW paddle type. Select from the fol- lowing options. • n: normal (for electronic keyer use) • r: reverse (for electronic keyer use) • oF: Turns OFF the electronic keyer (for straight key use) • ud: For using the microphone’s [UP]/[DN] keys instead of the paddle. The default is “n” (normal).
  • 50. 8 SET MODE 46 • Tuner type This item selects optional antenna tuner type. Select from the following options. • no: No optional tuner connected. • 4: The optional AH-4 antenna tuner. (Select this type also when using the optional AH-740.) • 18: The optional AT-180 antenna tuner. The default is “no.” • Auto tune The optional AT-180 ANTENNA TUNER has an automatic start capability which starts tuning if the SWR is higher than 1.5– 3. When “OFF” is selected, the tuner remains off, even when the SWR is poor (1.5–3). When “ON” is selected, the auto- matic tune starts even when the tuner is turned OFF. The default is “oF” (OFF). • PTT tune The optional AH-4, AH-740 or AT-180 AUTOMATIC ANTENNA TUNER can automatically start tuning the moment the PTT is pushed. The default is “oF” (OFF). • Speech language* The optional UT-102 VOICE SYNTHESIZER UNIT allows you to select between English and Japanese as the speech lan- guage. The default is “En” (English). • Speech speed* The optional UT-102 VOICE SYNTHESIZER UNIT allows you to select faster or slower synthesizer output. The default is “HI” (High). • Speech S-meter level* The optional UT-102 allows you to set the synthesizer to read the frequency/mode only (OFF), or both the fre- quency/mode and S-meter level (ON). The default is “on” (ON). • CI-V baud rate This item sets the data transfer rate. When “Auto” is se- lected, the baud rate is automatically set according to the connected controller or remote controller. The default is “At” (Auto). * The UT-102 voice synthesizer is no longer produced and these setting items do not function.
  • 51. 47 8SET MODE • CI-V address To distinguish it from other equipment, each CI-V capable transceiver has its own Icom standard address in hexadec- imal code. The IC-718’s address is 5E. When 2 or more IC-718s are connected to an optional CT-17 CI-V LEVEL CONVERTER, rotate the main dial to select a differ- ent address between 01H to 7FH, for each IC-718. The default is 5E. • CI-V Transceive Transceive operation is possible with the IC-718 connected to other Icom HF transceivers or receivers. When “on” is selected, changing the frequency, operating mode and so on, on the IC-718 automatically changes those of con- nected transceivers (or receivers) and vice versa. The default is “on” (ON). • CI-V 731 mode When connecting the IC-718 to the IC-735 for transceive operation, you must change the operating frequency data to 4 bytes. • This item MUST be set to “on” when operating the IC-718 with the IC-735. The default is “oF” (OFF). • Optional filter When an optional IF filer is installed, you must first set the item to “on” to be able to select the filter. Selectable filters are FL-96†, FL-222, FL-52A†, FL-53A†, FL-257 and none (default). See page 24 for usable filters for each mode and see page 50 for filter installation. • Expanded filter selection When an optional IF filter is installed, this selection ex- pands filter and filter selection (W/N) key combination on operating mode independent. • Filter selection (Wide/Narrow) When an optional IF filter is installed, you can arrange the filter and filter selection key combination. (p. 25) † This filter is no longer produced.
  • 52. 48 9 INSTALLATION AND CONNECTIONS n Opening the transceiver’s case Follow the case and cover opening procedures shown here when you want to install an optional unit or adjust an internal unit, and so on. CAUTION: DISCONNECT the DC power cable from the IC-718 before performing any work on the transceiver. Otherwise, there is danger of electric shock and/or equipment damage. q Remove the 5 screws from the top of the trans- ceiver and 4 screws from the sides, then lift up the top cover. w Remove the 5 screws from the bottom of the trans- ceiver, then remove the bottom cover. D Carrying handle Installation An optional handle allows you to easily carry and transport the transceiver. Attach the MB-23 carrying handle with the sup- plied rubber feet as shown to the right. NOTE: Use only the supplied screws to attach the handle. Otherwise, the handle may not be attached correctly and may drop the trans- ceiver. n Installing the MB-118 mobile mounting bracket D Mounting bracket MB-118 The universal mounting bracket allows overhead mounting. Installation Securely mount the transceiver with the 4 supplied screws (5 x 20) to a thick surface which can support more than 3.80 kg (8.38 lb). CAUTION: Non-supplied bolts (longer than 8 mm; 5 /16 in) may damage the internal units. NEVER install the MB-118 with non-supplied screws and bolts. Flat washer (Optional) Bolt (M4 × 8) Screw (5 × 20) Spring washer
  • 53. 9INSTALLATION AND CONNECTIONS 49 n CR-338 high stability crystal unit The CR-338 improves the total frequency stability of the receiver. Installation q Remove the bottom cover as shown in the dia- gram before. w Disconnect W2 from J4401 (MAIN unit) and W3 from J4201 (MAIN unit). e Remove the 9 screws from the PLL unit, discon- nect P4 from J201 (MAIN unit) and P2 from J401 (MAIN unit), then remove the PLL unit. r Remove the supplied internal crystal and replace it with the CR-338. t Return the PLL unit, plugs and flat cables to their original positions. y Adjust the reference frequency at C16 using a fre- quency counter, if desired. • Connect the frequency counter to P 2 (PLL unit). u Return the bottom cover to its original position. CR-338 Internal crystal W 2 W 3 J 4201 J 4401 P 4 PLL unit PLL unit C 16 J 401 J 201 MAIN unit Solder 4 leads P 2; Frequency check point (Connect a frequency counter and adjust the frequency to 64.00000 MHz w ith C 16.)
  • 54. 50 9 INSTALLATION AND CONNECTIONS n UT-106 DsP receiVe unit The UT-106 provides AF DSP functions such as noise reduction and auto notch. flat cable Turn the unit over Installation q Remove the bottom cover. w Slide the insulating case onto the UT-106 as shown to the right. (Fig. 1) e Remove the connection cable (P2601) from J2602 on the MAIN unit. Connect the cable into J1 on the UT-106. r Plug the connection cable (P1) from the UT-106 to J2602 on the MAIN unit. t Plug the flat cable into J3 on the UT-106 and to J2603 on the MAIN unit. • Take care to observe the conductor direction. P 2601 insulating case J 2603 UT-106 J 2602 MAIN unit P 1 (from UT-106) Fig. 1 y Turn the UT-106 unit over. (Fig. 2) • You do not need to fix with an adhesive strip. u Put the UT-106 on the MAIN unit. • You do not need to fix with an adhesive strip. • Ensure that the extra cable from UT-106 is stored • Turn the unit over insulating case Rear panel UT-106 under the unit. iReturn the bottom cover to its original position. UT-106 J 2602 Flat cable* J 2602 J 2603 Fig. 2 Main unit * Supplied with UT-106 n Optional IF filters Several IF filters are available to select a desired se- lectivity. You can install 1 filter for the 455 kHz IF. Choose the appropriate filter for your operating needs. (pgs, 24−25) Installation q Remove the bottom cover as shown on page 48. w Remove 7 screws, connection cable P1 from J1, P5 from J701, W4 from J4101 and W5 from J4001 and 2 Tr-clampers as shown in the diagram below. e Install the desired 455 kHz filter as shown in the diagram below. rMount the filter with the supplied washers and nuts. t Solder the 4 leads. y Return the MAIN unit and bottom cover to their original positions. After installing the filter, select it in the Initial Set mode. (p. 47) Otherwise, the installed filter will not function properly. Optional IF filter P 5 P 1 W 4 J 1 J 701 W 5 J 4101 MAIN unit Tr-clamper Solder 4 leads Tr-clamper
  • 55. 9INSTALLATION AND CONNECTIONS 51 SW Position Operation S1 A (default) The tuner operating settings are set by S2 described below. B THROUGH INHIBITMODE The tuner tunes the antenna even when the antenna has poor SWR (up to VSWR 3:1 after tuning). In that case, manual tun- ing is necessary each time you change the frequency,although the tuner automatically starts tuning when the VSWR is higher than 3:1. This setting is called “through inhibit.” However, the tuner is set to “through” if the VSWR is higher than 3:1 after tuning. S2 C TUNER SENSITIVE MODE The tuner tunes each time you transmit (except in the SSB mode). Therefore,the lowestSWR is obtained at any given time. In the SSB mode,the setting is the same as the “D” position below. D (default) NORMAL MODE The tuner tunes when the SWR is higher than 1.5:1. Therefore, the tuner activates only when tuning is necessary. PIN NO./ NAME DESCRIPTION q 8 V Regulated 8 V output. (10 mA maximum) w GND Connects to ground. e SEND Input/output pin. Goes to ground when transmitting (20 mA maximum.) Transmits when grounded. rBAND Band voltage output. (Varies with the selected band;0 to 8.0 V.) tALC ALC output voltage (–4 to 0 V.) y NC No connection. u 13.8V 13.8 V output when power is ON (1 A maximum.) n AT-180 internal switch The optional AT-180 has 3 operating settings. Select the suitable setting for your antenna system. q Remove the top cover of the AT-180. w Set the tuner switches to the desired positions according to the table below. •AT-180 inside top cover S2 S1 D C B A • Specifications for the AT-180 • Frequency coverage: 1.9– 54 MHz • Input impedance: 50 O • Connector information for ACC 2 socket 2 4 5 1 3 ACC 2 • Maximum input: 120 W 6 7 power • Minimum tuning: 8 W power • Matching impedance: 16.7–150 O (HF band) range 20–125 O (50 MHz band) • Tuning accuracy: Less than SWR 1.5:1 • Insertion loss: Less than 1.0 dB (after tuning) • Power supply: 13.8 V DC/1 A (supplied from requirements the transceiver’s ACC socket) • Dimensions (mm/in): 167 (W) × 58.6 (H) ×225 (D) mm 69 ⁄16 (W) × 2 5 ⁄17 (H) × 8 7 ⁄8 (D) in • Weight (approx.): 2.3 kg, 5 lb 11⁄8 oz • Supplied accessories: coaxial cable (1 m), ACC cable (DIN 13 pins)
  • 56. 52 10 MAINTENANCE n Troubleshooting The following chart is designed to help you correct problems which are not equipment malfunctions. If you are not able to locate the cause of a problem or solve it through the use of this chart, contact your nearest Icom Dealer or Service Center. PROBLEM POSSIBLE CAUSE SOLUTION REF. POWER Pow er does not come on when the [POWER] sw itch is pushed. • DC pow er cable is improperly connected. • Fuse is blow n. • Pow er supply is not turned ON. • Reconnect the DC pow er cable correctly. • Check for the cause, fix it and then replace the fuse w ith a spare one. (Fuses are in the DC pow er cable and the internal PA unit.) • Turn ON the pow ersupply. p. 12 p. 53 RECEIVE No sounds come from the speaker. • Volume level is too low. • The squelch is closed. • The transceiveris in the transmitting mode. • Rotate [AF] clockw ise to obtain a suitable lis- tening level. • Rotate [RF/SQL] to around the 10 o’clock po- sition to open, and then properly the squelch. • Turn off the transmit mode. p. 2 p. 2 p. 6 Sensitivity is low. • The antenna is not connected properly. • The antenna for another band is connected. • The antenna is not properly tuned. • The attenuator is activated. • Reconnect to the antenna connector. • Connect an antenna suitable for the operating frequency. • Hold dow n [TUNER] for 2 seconds to manually tune the antenna. • Push [ATT] to set “ATT” or to OFF. — — p. 3 p. 3 Receive audio is distorted. • The operating mode is not selected correctly. • The IF SHIFT function is activated. • The Noise blanker function is activated. • The preamp is activated. • If installed, the Noise Reduction function is activated and the [NR] controlis set too high. • Select the correct operating mode. • Rotate SHIFT to the center position. • Push [NB] to turn OFF the function. • Push [P.AMP] to turn OFF the function. • Set the [NR] control for maximum readability. p. 20 p. 21 p. 21 p. 22 p. 23 TRANSMIT Transmitting is impossible. • The operating frequency is outside the select- ed ham band. • Set the frequency within the selected ham band. p. 17 Output pow er is too low. • [RF POWER] is set too low. • [MIC GAIN] is set too low. • The selected antenna is for a different band. • The antenna is not properly tuned. • Set [RF POWER] to a suitable level. • Set [MIC GAIN] to a suitable level. • Select an antenna suitable for the operating frequency. • Hold dow n [TUNE] for 2 seconds to manually tune the antenna. p. 42 p. 42 p. 10 p. 3 No contact possible with another station. • The RIT function is activated. • The Split frequency function is activated. • Push [RIT] to turn OFF the function. • Push [SPLIT] to turn OFF the function. p. 21 pp. 7, 31, 32 Transmitted signals are distorted. • [MIC GAIN] too high. • [COMP] function is activated. • Set [MIC GAIN] to a suitable level. • Turn OFF [COMP]. p. 2 p. 28 SCAN Programmed scan does not stop. • Squelch is open. • [RF/SQL] is assigned to RF gain control and squelch is open. • Set [RF/SQL] to the threshold point. • Reset [RF/SQL] control assigned and set it to the threshold point. p. 3 p. 26 Programmed scan does not start. • The same frequencies have been entered in scan edge memory channels P1 and P2. • Enter different frequencies in Scan Edge memory channels P1 and P2. p. 40 Memory scan does not start. • 2 or more memory channels have not been entered. • Enter 2 or more memory channels. p. 40 DISPLAY The displayed frequency does not change w hen rotating the main dial. • The dial lock function is activated. • A Quick Set mode screen is selected. • The internal CPU has malfunctioned. • Push [LOCK] to deactivate the function. • Push [SET] to exit the Quick Set mode. • Reset the CPU. p. 6 p. 41 p. 53
  • 57. 10MAINTENANCE 53 n Fuse replacement If a fuse blows, or the transceiver stops functioning, find the source of the problem, and repair it. Then replace the damaged fuse with a new, adequate- ly rated fuse. DC POWER CABLE FUSE REPLACEMENT CAUTION: Turn the power OFF and disconnect the DC power cable from the transceiver before re- moving the transceiver’s cover. The IC-718 has 2 types of fuses installed for trans- ceiver protection. • DC power cable fuses �������� ATQ 25 A • Circuitry fuse ������������ FGB 4 A 25 A fuse CIRCUITRY FUSE REPLACEMENT The 13.8 V DC from the DC power source is applied to all units in the IC-718 through the circuitry fuse. This fuse is in the MAIN unit. q Remove the top cover as shown on page 48. w Replace the circuitry fuse as shown in the diagram to the right. e Replace the top cover. PA unit FGB 4 A n Resetting the CPU [PWR] [Z DN] [UP Y] Resetting CLEARS all entered content in Memory channels and returns entered values in the set mode to their defaults. When the unit is new and you are applying power, or if the function seems to be displaying erroneous infor- mation, reset the CPU as follows: q Make sure transceiver power is OFF. w While pushing [UP Y] and [Z DN], push [PWR] to turn ON the power. • The internal CPU is reset. • The transceiver displays its initial VFO frequencies when resetting is complete.