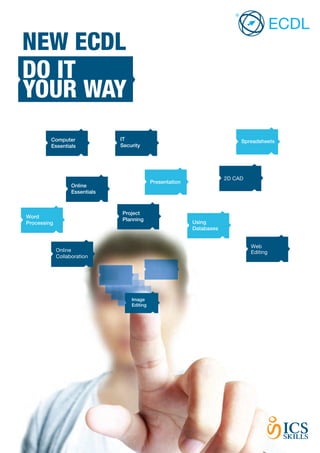
SlideShare a Scribd company logo
1 of 120
Download to read offline
NEW ECDL
DO IT
YOUR WAY
Presentation
Project
Planning
Spreadsheets
Word
Processing Using
Databases
Online
Essentials
Computer
Essentials
IT
Security
Online
Collaboration
2D CAD
Web
Editing
Image
Editing
5 REASONS
TO DO
NEW ECDL
Employers
love
ECDL
You will learn
practical
skills
Spoilt
for
choice
Anywhere
Anytime
Learn local
take it
global
Welcome to New ECDL (Version 6). More than just a syllabus update, New ECDL is based on
the changing needs of our candidates. Whether they are a student or an employer, or just
want boost their skills, New ECDL has something to offer.
New ECDL gives candidates more choice, more flexibility and a new model
for lifelong learning.
Other benefits associated with ECDL continue such as:
Quality Syllabi and tests created by the ECDL Foundation
Recognition ECDL retains worldwide recognition
Administration Minimal changes to our systems mean a smooth transition for centres
Support Our unrivalled level of customer service and support is in place to assist you
Price Bundle prices remain unchanged
Introducing New ECDL
Updated modules and new modules mean the ability to choose ECDL modules that are
relevant to your learners.
Create a class as normal then simply pick a package containing your module selection.
Pre-loaded templates consisting of the most popular module combinations will make this easy
for you.
If you don’t see what you want create your
own template once and reuse over and over.
For a solid foundation in digital
skills we strongly recommend
the following modules:
For proven proficiency in the use of
computers we strongly recommend
the combination below:
When choosing any ECDL
package we suggest starting
with this combination:
Our Advice
OR OR
Do it your way – pick your package
Computer Essentials
Online Essentials
Word Processing
Spreadsheets
Computer Essentials
Online Essentials
Word Processing
Spreadsheets
Computer Essentials
Online Essentials
Word Processing
Spreadsheets
Using Databases
Presentation
+ 1 other
Computer Essentials
Online Essentials
Word Processing
Spreadsheets
+ 3 others
Spreadsheets
Word Processing
Online Essentials
Computer Essentials
Online Collaboration
Presentation
Using Databases
Spreadsheets
Word Processing
Online Essentials
Computer Essentials
Web Editing
Online Collaboration
Presentation
Presentation
Word Processing
Online Essentials
Computer Essentials
Project Planning
IT Security
NEW ECDL Syllabi
September 2013
Module title Page
ECDL Computer Essentials 5
ECDL Online Essentials 17
ECDL Word Processing 29
39ECDL Spreadsheets
49ECDL Using Databases
59
69
80
90
100
112
ECDL Presentation
ECDL Online Collaboration
ECDL Image Editing
ECDL Web Editing
ECDL IT Security
ECDL Project Planning
Quick Reference Guides produced by the ECDL Foundation are included here to give an indication of the scope of each module only.
They may or may not correspond to available automated tests, elearning or software versions in use at your test centre.
Quick Reference guides may be used by instructors in the delivery of ECDL but ICS Skills and the ECDL Foundation do not warrant
that use of any guide will ensure passing of the test.
Computer Essentials Module Summary
WHAT ARE THE BENEFITS OF THIS MODULE?
HOW DO I GET STARTED?
SYLLABUS OUTLINE
To find out more about this module and to locate your nearest
accredited test centre, please visit www.ecdl.org/programmes.
CATEGORY SKILL SET
Computers and Devices
Desktop, Icons, Settings
Outputs
File Management
Networks
ICT
Hardware
Software and Licensing
Start Up, Shut Down
Desktop and Icons
Using Windows
Tools and Settings
Working with Text
Printing
Introducing Files and Folders
Organising Files and Folders
Storage and Compression
Network Concepts
Network Access
Security and Well-Being
Protecting Data and Devices
Malware
Health and Green IT
Covers the key skills and main concepts relating to ICT,
computers, devices, and software.
Certifies best practice in effective computer use.
Developed with input from computer users, subject matter
experts, and practising computer professionals from all over the
world. This process ensures the relevance and range of module
content.
This module sets out essential concepts and skills
relating to the use of devices, file creation and man-
agement, networks, and data security.
On completion of this module the candidate will be able to:
Understand key concepts relating to ICT, computers, devices and
software.
Start up and shut down a computer.
Work effectively on the computer desktop using icons, windows.
Adjust the main operating system settings and use built-in help
features.
Create a simple document and print an output.
Know about the main concepts of file management and be able
to efficiently organise files and folders.
Understand key storage concepts and use utility software to
compress and extract large files.
Understand network concepts and connection options and be
able to connect to a network.
Understand the importance of protecting data and devices from
malware, and the importance of backing up data.
Recognise considerations relating to green IT, accessibility, and
user health.
© 2012 ECDL Foundation Ref: ECDL / ICDL Computer Essentials - Syllabus - V1.0
ECDL / ICDL Computer Essentials
This module sets out essential concepts and skills relating to the use of devices, file creation
and management, networks and data security.
Module Goals
Successful candidates will be able to:
 Understand key concepts relating to ICT, computers, devices and software.
 Start up and shut down a computer.
 Work effectively on the computer desktop using icons, windows.
 Adjust the main operating system settings and use built-in help features.
 Create a simple document and print an output.
 Know about the main concepts of file management and be able to efficiently organise
files and folders.
 Understand key storage concepts and use utility software to compress and extract
large files.
 Understand network concepts and connection options and be able to connect to a
network.
 Understand the importance of protecting data and devices from malware and of
backing up data.
 Recognise considerations relating to green IT, accessibility and user health.
CATEGORY SKILL SET REF. TASK ITEM
1 Computers and
Devices
1.1.1 ICT 1.1.1 Define the term Information and
Communication Technology
(ICT).
1.1.2 Identify different types of ICT
services/uses like: Internet
services, mobile technology,
office productivity applications.
1.2 Hardware 1.2.1 Define the term hardware.
Identify the main types of
computers like: desktops,
laptops, tablets. Identify the
main types of devices like:
smartphones, media players,
digital cameras.
1.2.2 Define the terms processor,
Random Access Memory
(RAM), storage. Understand
their impact on performance
when using computers and
devices.
© 2012 ECDL Foundation Ref: ECDL / ICDL Computer Essentials - Syllabus - V1.0
CATEGORY SKILL SET REF. TASK ITEM
1.2.3 Identify the main types of
integrated and external
equipment like: printers,
screens, scanners, keyboards,
mouse/trackpad, webcam,
speakers, microphone, docking
station.
1.2.4 Identify common input/output
ports like: USB, HDMI.
1.3 Software and Licensing 1.3.1 Define the term software and
distinguish between the main
types of software like: operating
systems, applications. Know
that software can be installed
locally or available online.
1.3.2 Define the term operating
system and identify some
common operating systems for
computers and devices.
1.3.3 Identify common examples of
applications like: office
productivity, communications,
social networking, media,
design, mobile applications.
1.3.4 Define the term End-User
License Agreement (EULA).
Recognise that software must
be licensed before use.
1.3.5 Outline the types of software
licenses: proprietary, open
source, trial version, shareware,
freeware.
1.4 Start Up, Shut Down 1.4.1 Start a computer and log on
securely using a user name and
password.
1.4.2 Log off, shut down, restart a
computer using an appropriate
routine.
2 Desktop, Icons,
Settings
2.1 Desktop and Icons 2.1.1 Outline the purpose of the
desktop and the task bar.
2.1.2 Identify common icons like
those representing: files,
folders, applications, printers,
drives, shortcuts/aliases,
recycle bin/wastebasket/trash.
© 2012 ECDL Foundation Ref: ECDL / ICDL Computer Essentials - Syllabus - V1.0
CATEGORY SKILL SET REF. TASK ITEM
2.1.3 Select and move icons.
2.1.4 Create, rename, move, delete a
shortcut/alias.
2.2 Using Windows 2.2.1 Identify the different parts of a
window: title bar, menu bar,
toolbar, ribbon, status bar,
scroll bar.
2.2.2 Open, collapse, expand,
restore down, maximise, resize,
move, close a window.
2.2.3 Switch between open windows.
2.3 Tools and Settings 2.3.1 Use available help functions.
2.3.2 View the computer's basic
system information: operating
system name and version
number, installed RAM.
2.3.3 Change desktop configuration
settings: date and time, volume
settings, background,
resolution.
2.3.4 Change, add, remove keyboard
language. Change default
language.
2.3.5 Shut down a non-responding
application.
2.3.6 Install, uninstall an application.
2.3.7 Connect a device (USB flash
drive, digital camera, media
player) to a computer.
Disconnect a device using an
appropriate routine.
2.3.8 Capture a full screen, active
window.
3 Outputs 3.1 Working with Text 3.1.1 Open, close a word processing
application. Open, close files.
3.1.2 Enter text into a document.
3.1.3 Copy, move text within a
document, between open
documents. Paste a screen
capture into a document.
© 2012 ECDL Foundation Ref: ECDL / ICDL Computer Essentials - Syllabus - V1.0
CATEGORY SKILL SET REF. TASK ITEM
3.1.4 Save and name a document.
3.2 Printing 3.2.1 Install, uninstall a printer. Print
a test page.
3.2.2 Set the default printer from an
installed printer list.
3.2.3 Print a document from a word
processing application.
3.2.4 View, pause, restart, cancel a
print job.
4 File Management 4.1 Introducing Files and
Folders
4.1.1 Understand how an operating
system organises drives,
folders, files in a hierarchical
structure. Navigate between
drives, folders, sub-folders,
files.
4.1.2 Display file, folder properties
like: name, size, location.
4.1.3 Change view to display files
and folders like: tiles, icons, list,
details.
4.1.4 Identify common file types like:
word processing, spreadsheet,
presentation, portable
document format (pdf), image,
audio, video, compressed,
executable files.
4.1.5 Open a file, folder, drive.
4.1.6 Recognise good practice in
folder, file naming: use
meaningful names for folders
and files to help with searching
and organisation.
4.1.7 Create a folder.
4.1.8 Rename a file, folder.
4.1.9 Search for files by properties:
all or part of file name using
wildcards if necessary, content,
date modified.
4.1.10 View list of recently used files.
© 2012 ECDL Foundation Ref: ECDL / ICDL Computer Essentials - Syllabus - V1.0
CATEGORY SKILL SET REF. TASK ITEM
4.2 Organising Files and
Folders
4.2.1 Select individual, adjacent, non-
adjacent files, folders.
4.2.2 Sort files in ascending,
descending order by name,
size, type, date modified.
4.2.3 Copy, move files, folders
between folders, drives.
4.2.4 Delete files, folders to the
recycle bin/wastebasket/trash
and restore to original location.
4.2.5 Empty the recycle
bin/wastebasket/trash.
4.3 Storage and Compression 4.3.1 Identify the main types of
storage media like: internal
hard disk, external hard disk,
network drive, CD, DVD, Blu-
ray Disc, USB flash drive,
memory card, online file
storage.
4.3.2 Identify file size, folder size,
storage capacity measurements
like: KB, MB, GB, TB.
4.3.3 View available space on a
storage device.
4.3.4 Understand the purpose of file,
folder compression.
4.3.5 Compress files, folders.
4.3.6 Extract compressed files,
folders to a location on a drive.
5 Networks 5.1 Network Concepts 5.1.1 Define the term network.
Outline the purpose of a
network: to share, access data
and devices securely.
5.1.2 Define the term Internet.
Identify some of its main uses
like: World Wide Web (WWW),
VoIP, e-mail, IM.
5.1.3 Define the terms intranet, virtual
private network (VPN) and
identify their main uses.
© 2012 ECDL Foundation Ref: ECDL / ICDL Computer Essentials - Syllabus - V1.0
CATEGORY SKILL SET REF. TASK ITEM
5.1.4 Understand what transfer rate
means. Understand how it is
measured: bits per second
(bps), kilobits per second
(kbps), megabits per second
(mbps), gigabits per second
(gbps).
5.1.5 Understand the concepts of
downloading from, uploading to
a network.
5.2 Network Access 5.2.1 Identify the different options for
connecting to the Internet like:
phone line, mobile phone,
cable, wi-fi, wi-max, satellite.
5.2.2 Define the term Internet Service
Provider (ISP). Identify
important considerations when
selecting an internet
subscription option like: upload
speed, download speed and
quota, cost.
5.2.3 Recognise the status of a
wireless network:
protected/secure, open.
5.2.4 Connect to a wireless network.
6 Security and
Well-Being
6.1 Protecting Data and
Devices
6.1.1 Recognise good password
policies like: create with
adequate length, adequate
character mix, do not share,
change regularly.
6.1.2 Define the term firewall and
outline its purpose.
6.1.3 Understand the purpose of
regularly backing up data to a
remote location.
6.1.4 Recognise the importance of
regularly updating software like:
anti-virus, application, operating
system software.
6.2 Malware 6.2.1 Understand the term malware.
Identify different types of
malware like: virus, worm,
Trojan, spyware.
6.2.2 Be aware how malware can
infect a computer or device.
© 2012 ECDL Foundation Ref: ECDL / ICDL Computer Essentials - Syllabus - V1.0 of 9
CATEGORY SKILL SET REF. TASK ITEM
6.2.3 Use anti-virus software to scan
a computer.
6.3 Health and Green IT 6.3.1 Recognise ways to help ensure
a user’s well-being while using
a computer or device like: take
regular breaks, ensure
appropriate lighting and
posture.
6.3.2 Recognise computer and
device energy saving practices:
turning off, adjusting automatic
shutdown, backlight, sleep
mode settings.
6.3.3 Recognise that computers,
devices, batteries, printer
cartridges and paper should be
recycled.
6.3.4 Identify some options available
for enhancing accessibility like:
voice recognition software,
screen reader, screen
magnifier, on-screen keyboard,
high contrast.
Computer Essentials									Quick Reference
This quick reference is for understanding the main concepts of ICT and using the computer and managing files on Windows 7
This module sets out essential concepts and skills relating to the use of devices, file
creation and management, networks and data security.
Successful candidates will be able to:
•	 Understand key concepts relating to ICT, computers, devices and software.
•	 Start up and shut down a computer.
•	 Work effectively on the computer desktop using icons, windows.
•	 Adjust the main operating system settings and use built-in help features.
•	 Create a simple document and print an output.
•	 Know about the main concepts of file management and be able to efficiently
organise files and folders.
•	 Understand key storage concepts and use utility software to compress and
extract large files.
•	 Understand network concepts and connection options and be able to connect
to a network.
•	 Understand the importance of protecting data and devices from malware and of
backing up data.
•	 Recognise considerations relating to green IT, accessibility and user health.
1 Computers and Devices
1.1 	 ICT
1.1.1 	 Define the term Information and
	 Communication Technology (ICT).
•	 ICT - Using digital technology to access, store
and process information into an organized and
understandable form
1.1.2	 Identify different types of ICT services and
	 uses like:
•	 Internet services - Examples include online
banking, online shopping, e-mail and data
transfer
•	 Mobile technology - Examples include using
the internet on smartphones, laptops
•	 Office productivity applications - Examples
include word processing, spread sheets,
presentation software
1.2	Hardware
1.2.1	 Define the term hardware.
Hardware - Physical, tangible items that form part
of a computer system
1.2.1	 Identify the main types of computers like:
Types of Computer
Desktop
A traditional stand-alone or
networked computer
Laptop
A small, portable computer
designed for mobile, flexible
use
Tablet
A small, mobile, hand-held
computer that combines
computing and Internet access
1.2.1	 Identify the main types of devices like:
Types of Devices
Smart
Phone
Used for phone calls,
e-mail, Internet browsing,
and working with mobile
applications
Media
Player
Used to download and
play music and videos
Digital Camera
Used to take photographs in
digital format
1.2.2 	 Define the terms processor, Random Access
Memory (RAM), storage. Understand their
impact on performance when using computers
and devices.
•	 Processor - An important component for
processing information
•	 RAM - Working temporary memory that loses
its data when the computer is shut down
•	 Storage - Internal or external devices that
retain saved data.
•	 The type and speed of the processor, the
amount of RAM used, and the amount of
available storage space, can have an impact
on the computer’s overall performance.
1.2.3	 Identify the main types of integrated and
external equipment like:
Printers
Devices that print
information on
paper or other
materials
Screens
Devices that
display text and
graphics
Scanners
Devices that read
images or text and
convert the data into
digital information
Keyboards
Typing devices used to
issue commands and
enter characters
Mouse/
Trackpad
A pointing device used
to select items and
issue commands
Web
camera
(webcam)
A video camera used
to capture a digital
video
Speakers
Devices that produce
sound waves audible
to the human ear
Microphone
A device used to
digitally capture sound
Docking
Station
A device that connects
a laptop computer to
other devices
1.2.4 	 Identify common input/output ports like:
•	 Universal Serial Bus (USB) - Typically used to
connect storage and other devices
•	 High-Definition Multimedia Interface (HDMI) -
Typically used to connect media devices
1.3	 Software and Licensing
1.3.1	 Define the term software and distinguish
between the main types of software like:
operating systems, applications. Know that
software can be installed locally or available
online.
•	 Software - Applications or programs that
perform specific tasks, such as word
processing or graphics editing
•	 Operating system - Controls the computer,
schedules tasks, manages storage, and
handles communication with other devices.
•	 Applications software - Designed for specific
tasks such as presentations or spreadsheets.
•	 Software can be installed on a specific
computer or device, on a network or accessed
via the cloud.
1.3.2 	 Define the term operating system and
identify some common operating systems for
computers and devices.
•	 Operating system - Software that schedules
tasks, manages storage and handles
communication with other devices
•	 Examples include Windows, Linux, Mac OS X
1.3.3	 Identify common examples of applications like:
•	 Office productivity - Examples include word
processing and spreadsheets
•	 Communications - Examples include e-mail
and instant messaging
•	 Social networking - Examples include websites
that allows users to connect and exchange
status updates and comments
•	 Media - Examples include news applications
and social media applications
•	 Design - Examples include photo-editing and
desktop publishing
•	 Mobile applications - Examples include online
storage applications and e-mail applications
1.3.4	 Define the term End-User License Agreement
(EULA). Recognise that software must be
licensed before use.
•	 EULA - A legal agreement between the user of
software and the software manufacturer
•	 Users should ensure all software used is fully
licensed before use.
1.3.5	 Outline the types of software licenses:
•	 Proprietary - Software that must be bought
before use
•	 Open source - Free software that makes its
source code available
•	 Trial version - Software that can be used for
a restricted time only and users will have to
purchase to use further
•	 Shareware - Software that is distributed
on a try-before-you-buy basis with limited
functionality
•	 Freeware - Free copyrighted software
1.4	 Start Up, Shut Down
Keyboard Shortcuts & Commands
Open menu
Help
Cut
Copy
Paste
Undo
Up one screen
Down one screen
Beginning of a line
End of line
Purpose PurposeKeyboard
Shortcut
Keyboard
Shortcut
ALT+LETTER
F1
CTRL+X
CTRL+C
CTRL+V
CTRL+Z
PAGE UP
PAGE DOWN
HOME
END
© 2012, ECDL Foundation. This Quick Reference may be used by candidates to assist in preparation for this ECDL module test. ECDL Foundation does not warrant that use of this guide will ensure passing of the test.
Screen shots used with permission from Microsoft.
Quick Reference
Quick Reference1.4.1	 Start a computer and log on securely using a
user name and password.
•	 Make sure that both the computer and monitor
are plugged into a power source.
•	 Turn on the computer and the monitor.
•	 Enter a user name and password when
requested.
•	 Press the Return key.
1.4.2	 Log off a computer using an appropriate
routine.
•	 Close any open files and applications.
•	 Click the Start button.
•	 Select the Shut Down arrow.
•	 Click Log off.
1.4.2	 Shut down a computer using an appropriate
routine.
•	 Close any open files and applications.
•	 Click the Start button.
•	 Click Shut Down.
1.4.2	 Restart a computer using an appropriate
routine.
•	 Close any open files and applications.
•	 Click the Start button.
•	 Select the Shut Down arrow.
•	 Click Restart.
2.1	 Desktop and Icons
2.1.1	 Outline the purpose of the desktop and the
task bar.
•	 Desktop - Displays icons for files, folders and
applications
•	 Task bar- Shows active applications, files and
folders and other icons
2.1.2	 Identify common icons like those representing:
FILES
FOLDERS
APPLICATIONS
PRINTERS
DRIVES
SHORTCUTS/ALIASES
RECYCLE BIN/WASTEBASKET/
TRASH
2.1.3	 Select and move icons.
•	 On the desktop, click on an icon and drag and
drop to a new location.
2.1.4	 Create a shortcut/alias.
•	 Select location to move shortcut to.
•	 Right-click and click Create shortcut.
2.1.4	 Rename a shortcut/alias.
•	 Right-click on the shortcut icon.
•	 Click Rename.
•	 Enter new name.
2.1.4	 Move a shortcut/alias.
•	 Right-click on the shortcut icon.
•	 Click Cut.
•	 Select location to move shortcut to.
•	 Right-click and select Paste.
2.1.4	 Delete a shortcut/alias.
•	 Right-click on the shortcut icon.
•	 Click Delete.
•	 Click Yes to confirm deletion.
2.2	 Using Windows
2.2.1	 Identify the different parts of a window:
1.	 Title bar
2.	Menu
3.	Toolbar/Ribbon
4.	 Status bar
5.	 Scroll bar.
	
2.2.2	 Open, collapse, expand, restore down,
maximise, resize, move, close a window.
•	 To open a window, select the file or folder,
right-click and select Open.
•	 To collapse a window, click the Minimise
button in the upper right corner of the window.
•	 To expand a window, move the mouse to the
edge of the Title bar and drag the window to
increase the size.
•	 To restore down a window, click the Restore
Down button in the upper right corner of the
window.
•	 To maximise a window, click the Maximise
button in the upper right corner of the window.
•	 To resize a window, move the mouse over
the Title bar and drag the window to size
preferred.
•	 To move a window, move the mouse over
the Title bar and drag the window to a new
location.
•	 To close a window, click the Close button in
the upper right corner of the window.
2.2.3	 Switch between open windows.
•	 Move the mouse over the application icons
on the Task Bar so any open windows are
displayed.
•	 Click the required window icons found on the
Task Bar.
2.3	 Tools and Settings
2.3.1	 Use available help functions.
•	 Click the Start button.
•	Click Help and Support.
•	 Enter the query into the Search Help search
box.
•	 Press the Return key.
2.3.2	 View the computer’s basic system information:
operating system name and version number,
installed RAM.
•	 Click the Start button.
•	Click Control Panel.
•	Click System.
2.3.3	 Change desktop configuration settings: date
and time.
•	 Click the time shown on the right side of the
Task Bar.
•	Click Change Date and time settings.
•	Click Change Date and time.
•	 Enter a date and time.
•	Click Apply.
2.3.3	 Change desktop configuration settings: volume
settings.
•	 Double-click the speaker button on the right
side of the Task Bar.
•	 Adjust the volume as required.
2.3.3	 Change desktop configuration settings:
background.
•	 Right-click on the desktop and click
Personalize.
•	 Click a theme to change the desktop
background.
•	Click Apply.
2.3.3	 Change desktop configuration settings:
resolution.
•	 Right-click on the desktop and click Screen
resolution.
•	 Click the Resolution box.
•	 Click on the Resolution field arrow and drag
the slider to specify a screen resolution.
•	Click Apply.
2.3.4	 Change keyboard language.
•	 Click the Start button.
•	Click Control Panel.
•	Click Region and Language.
•	 Click on the Keyboards and Languages tab.
•	Click Change Keyboards.
•	 Click on the preferred keyboard language.
•	Click OK.
2.3.4	 Add keyboard language.
•	 Click the Start button.
•	Click Control Panel.
•	Click Region and Language.
•	 Click on the Keyboards and Languages tab.
•	Click Change Keyboards.
•	Click Add.
•	 Click on the expandable button next to the
language required.
•	 Click on the expandable button next to the
keyboard.
•	 Check the language checkbox option
preferred.
•	Click OK.
2.3.4	 Remove keyboard language.
•	 Click the Start button.
•	Click Control Panel.
•	Click Region and Language.
•	 Click on the Keyboards and Languages tab.
•	Click Change Keyboards.
•	 Select the keyboard language to remove.
•	Click Remove
•	Click OK.
2.3.4	 Change default language.
•	 Click the Start button.
•	Click Control Panel.
•	Click Region and Language.
•	 Click on the Keyboards and Languages tab.
•	Click Change Keyboards.
•	 Select the language button in Default language
input field.
•	 Select from the list of installed default
languages.
•	Click OK.
2.3.5	 Shut down a non-responding application.
•	 Press the Ctrl+Alt+Delete keys.
•	 Click the Start Task Manager button.
•	 In the Applications tab select the application.
•	Click End Task.
2.3.6	 Install an application.
•	 Click the Start button.
•	Click Control Panel.
•	Double-click Add or Remove Programs.
•	Click Add New Programs.
•	Click Install a program from the network.
•	 Select program to install to begin the wizard.
•	 Follow the wizard instructions.
2.3.6	 Uninstall an application.
•	 Click the Start button.
•	Click Control Panel.
•	Click Programs and Features.
2 Desktop, Icons, Settings
1
3
5
4
2
Quick Reference•	 Select the application to uninstall.
•	Click Uninstall/Change.
•	Click Yes.
2.3.7	 Connect a device (USB flash drive, digital
camera, media player) to a computer.
•	 Insert the flash drive (or cable for other device)
into the USB port on the computer.
•	 The computer will signal that a new device has
been detected.
•	 Save or view files and folders as needed.
2.3.7	 Disconnect a device using an appropriate
routine.
•	 Click on the USB device icon on the Task Bar.
•	Select Eject USB Disk and remove the USB
flash drive.
2.3.8	 Capture a full screen.
•	 Press the Print Screen key.
2.3.8	 Capture an active window.
•	 Open a window on the desktop.
•	 Press the Alt key + Print Screen key.
3.1	 Working with Text
3.1.1	 Open a word processing application.
•	 Click the Start button.
•	Select All Programs.
•	Click Microsoft Word 2010.
3.1.1	 Close a word processing application.
•	 Click the File button.
•	Click Exit.
3.1.1	 Open files.
•	 Click the File button.
•	Click Open.
•	 Select the document to open and click Open.
3.1.1	 Close files.
•	 Click the File button.
•	Click Close.
3.1.2	 Enter text into a document.
•	 Click into the open word processing
document.
•	 Enter the text.
3.1.3	 Copy text within a document, between open
documents.
•	 Select the text to copy.
•	 On the Home tab, in the Clipboard group, click
the Copy button.
•	 Click in a new location within the document or
within another open document.
•	 On the Home tab in the Clipboard group, click
the Paste button.
3.1.3	 Move text within a document, between open
documents.
•	 Select the text to move.
•	 On the Home tab, in the Clipboard group, click
the Cut button.
•	 Click in a new location within the document or
within another open document.
•	 On the Home tab in the Clipboard group, click
the Paste button.
3.1.3	 Paste a screen capture into a document.
•	 After taking the screen capture, click in a new
location within the document.
•	 On the Home tab in the Clipboard group, click
the Paste button.
3.1.4	 Save and name a document.
•	 Click the File button.
•	Click Save.
•	 Create a file name and select the location.
•	Click Save.
3.2	 Printing
3.2.1	 Install a printer.
•	 Click the Start button.
•	Click Devices and Printers.
•	Click Add a printer.
•	 Follow the wizard instructions.
3.2.1	 Uninstall a printer.
•	 Click the Start button.
•	Click Devices and Printers.
•	 Select the printer.
•	 Right-click and select Remove device.
•	Click Yes to confirm removal.
3.2.1	 Print a test page.
•	 Right-click a printer.
•	Click Printer properties.
•	 On the General tab, click Print Test Page.
•	Click OK.
3.2.2	 Set the default printer from an installed printer
list.
•	 Click the Start button.
•	Click Devices and Printers.
•	 Select a printer to set as default printer.
•	 Right-click and click Set as Default Printer.
3.2.3	 Print a document from a word processing
application.
•	 In an open document, click the File button.
•	Select Print.
•	Click Print.
3.2.4	 View, pause, restart, cancel a print job.
•	 To view a print job, double-click on the Printer
icon on the Task Bar.
•	 To pause a print job, right-click the print job
and select Pause.
•	 To restart a print job, right-click the print job
and select Restart.
•	 To delete a print job, right-click the print job
and select Cancel.
4.1	 Introducing Files and Folders
4.1.1	 Understand how an operating system or-
ganises drives, folders, files in a hierarchical
structure.
•	 Windows Explorer displays the hierarchical
structure of files, folders, and drives on your
computer.
4.1.1	 Navigate between drives, folders, sub-folders,
files.
•	 Click the Start button.
•	Click Computer.
•	 Double-click on the drive where the folder or
file is located.
•	 Locate the folder and file name on the
drive.	
4.1.2	 Display file, folder properties like: name, size,
location.
•	 Right-click on the file or folder.
•	Select Properties.
•	Click OK.
4.1.3	 Change view to display files and folders like:
tiles, icons, list, details.
•	 In an open window, click on the Change your
view button.
•	 Click on a preferred option to view files or
folders.
4.1.4	 Identify common file types like:
Common File Type File Extension File
Icon
Word Processing .docx
Spreadsheet .xlsx
Presentation .pptx
Portable Document
Format
.pdf
Image .gif, .jpg, .bmp
Audio .mp3
Video .avi
Compressed .zip
Executable .exe
4.1.5	 Open a file, folder, drive.
•	 Select the file, folder or drive to open.
•	 Right-click and click Open.
4.1.6	 Recognise good practice in folder, file naming:
•	 Use meaningful names for folders and files to
help with searching and organisation.
4.1.7	 Create a folder.
•	 Navigate to where the folder will be created.
•	 Right-click and click New.
•	Click Folder.
•	 Enter a folder name and press the Return key.
4.1.8	 Rename a file, folder.
•	 Right-click on the file or folder to re-name.
•	Click Rename.
•	 Enter a new name.
•	 Press the Return key.
4.1.9	 Search for files by properties: all or part of file
name.
•	 Double-click the Windows Explorer icon on the
Task Bar.
•	 In the search field enter a full file name or part
of a file name.
•	 Click Search.
4.1.9	 Search for files by properties: using wildcards
if necessary
•	 Double-click the Windows Explorer icon on the
Task Bar.
•	 In the search field use wildcards in the criteria
boxes to perform search.
•	 Enter *.txt to find all files with the extension
.txt.
•	 Enter b*.* to find all files that begin with the
letter b.
•	 Click Search.
4.1.9	 Search for files by properties: by content.
•	 Click the Start button.
•	 Click Search.
•	 Enter text.
4.1.9	 Search for files by properties: by date modified.
•	 Double-click the Windows Explorer icon on the
Task Bar.
•	 Click in the Search Libraries field.
•	 Click Date modified.
•	 Select date required from displayed calendar.
4.1.10	 View list of recently used files.
•	 Click the Start button.
•	 Select Recent Items.
•	 If the Recent Items button is not already
installed, right-click the Task Bar and click
Properties.
•	 In the Start Menu tab, click Customize.
•	 In the dialog displayed, check the Recent
Items checkbox.
•	 Click OK.
4.2	 Organising Files and Folders
4.2.1	 Select individual files, folders.
•	 Click on a file or folder.
4.2.1	 Select adjacent files, folders.
•	 Click the first file or folder, hold down the Shift
key, and then click the last file or folder.
•	 Release the Shift key.
4.2.1	 Select non-adjacent files, folders.
•	 Hold down the Ctrl key, and then click each file
or folder to select.
4.2.2	 Sort files in ascending, descending order by
name.
•	 Click the View menu.
•	 Select Sort by.
•	 Click Name to sort files by name in ascending
order.
•	 Click the View menu.
•	 Select Sort by.
•	 Click Descending to sort in descending order.
4.2.2	 Sort files in ascending, descending order by
size.
•	 Click the View menu.
•	 Select Sort by.
•	 Click Size to sort files by size in ascending
order.
•	 Click the View menu.
•	 Select Sort by.
•	 Click Descending to sort in descending order.
4.2.2	 Sort files in ascending, descending order by
type.
•	 Click the View menu.
•	 Select Sort by.
•	 Click Type to sort files by name in ascending
order.
•	 Click the View menu.
•	 Select Sort by.
•	 Click Descending to sort in descending order.
3 Outputs
4 File Management
Quick Reference4.2.2	 Sort files in ascending, descending order by
date modified.
•	 Double-click on the folder containing the files
to sort.
•	 Click the View menu.
•	 Select Sort by.
•	 Click Date Modified to sort files by date
modified in ascending order.
•	 Click the View menu.
•	 Select Sort by.
•	 Click Descending to sort in descending order.
4.2.3	 Copy files, folders between folders, drives.
•	 Right-click on the file or folder to copy.
•	 Click Copy.
•	 Click on the new location.
•	 Right-click and click Paste.
4.2.3	 Move files, folders between folders, drives.
•	 Right-click on the file or folder to move.
•	 Click Cut.
•	 Click on the new location.
•	 Right-click and click Paste.
4.2.4	 Delete files, folders to the recycle bin/
wastebasket/trash.
•	 Right-click on the file or folder to delete.
•	 Click Delete.
•	 Click Yes to confirm deletion.
4.2.4	 Restore files, folders to original location.
•	 Double-click the Recycle Bin icon.
•	 Select the items to restore.
•	 On the Recycle Bin Tasks pane, click Restore
the selected items.
4.2.5	 Empty the recycle bin/wastebasket/trash.
•	 Open the Recycle Bin.
•	 On the Recycle Bin Tasks pane, click Empty
Recycle Bin.
4.3	 Storage and Compression
4.3.1	 Identify the main types of storage media like:
Storage
Media
Description
Internal hard
disk
A non-volatile, random access
storage device for digital data
External
hard disk
A hard disk located outside the
computer
Network
drive
A drive shared by multiple users
or devices
CD An optical disc used to store music
DVD An optical disc used to store video
Blu-ray Disc A high definition optical disc used
to store media with up to five times
greater storage than DVDs
USB flash
drive
A portable digital storage device
Memory
card
A digital storage device used in
cameras and other devices
Online file
storage
A file storage service available over
the Internet
4.3.2	 Identify file size, folder size, storage capacity
measurements like:
Unit Bit Size Comparable To
Kilobyte
(KB)
1,024
Bytes
½ page of plain
text
Megabyte
(MB)
1,024 KB 700 pages of
plain text or one
picture/graphic
Gigabyte
(GB)
1, 024 MB A set of
encyclopaedias
Terabyte
(TB)
1,024 GB A bookstore full
of books
4.3.3	 View available space on a storage device.
•	 Select the drive or device.
•	 Right-click and select Properties.
•	 Click OK.
4.3.4	 Understand the purpose of file, folder com-
pression.
•	 Compressing files decreases a file’s size and
reduces the amount of space used for storage.
4.3.5	 Compress files, folders.
•	 Select files.
•	 Right-click on files.
•	 Select Send To.
•	 Select Compressed (zipped) Folder.
4.3.6	 Extract compressed files, folders to a location
on a drive.
•	 Right-click on the compressed file icon.
•	 Select Extract All.
5.1 	 Network Concepts
5.1.1	 Define the term network.
•	 Network- More than one computer or device
connected together to share data, applications
or peripherals
5.1.1	 Outline the purpose of a network:
•	 Share, access data and devices securely
5.1.2	 Define the term Internet. Identify some of its
main uses like: World Wide Web (WWW), VoIP,
e-mail, IM.
•	 Internet - A global network connecting millions
of computers worldwide
•	 Main uses - To provide access to information
via the World Wide Web, to allow conversa-
tions over the internet (VoIP), to allow digital
message exchange via email and to allow
real-time text messaging via instant messaging
5.1.3	 Define the terms intranet, virtual private net-
work (VPN) and identify their main uses.
•	 Intranet - A private Internet used internally
within an organisation to store internal docu-
ments, training material or business specific
applications
•	 VPN - A network used to connect remote
users securely to a business network to share
data and communicate.
5.1.4	 Understand what transfer rate means. Un-
derstand how it is measured: bits per second
(bps), kilobits per second (kbps), megabits per
second (mbps), gigabits per second (gbps).
•	 Transfer rate - The rate at which information is
transferred to or from a disk drive
•	 Measured in bits per second (bps), kilobits per
second (kbps), megabits per second (mbps),
gigabits per second (gbps).
5.1.5	 Understand the concepts of downloading from,
uploading to a network.
•	 Downloading - To copy a file or image from a
web page
•	 Uploading - To copy a file or image from a
computer to a web page
5.2	 Network Access
5.2.1	 Identify the different options for connecting to
the Internet like:
•	 Phone line
•	 Mobile technology
•	 Cable
•	 Wi-fi
•	 Wi-max
•	 Satellite
5.2.2	 Define the term Internet Service Provider (ISP).
•	 Internet Service Provider (ISP) - An organisa-
tion that provides access to the Internet
5.2.2	 Identify important considerations when
selecting an Internet subscription option like:
•	 Upload speed
•	 Download speed
•	 Download quota
•	 Cost
5.2.3	 Recognise the status of a wireless network:
•	 Protected/secure - The network is protected to
prevent unauthorised access.
•	 Open - The network is accessible to all
5.2.4	 Connect to a wireless network.
•	 Double-click on the wireless connection icon
on the Task Bar.
•	 Select desired network and connect, using a
password if required.
6.1	 Protecting Data on Computers and Devices
6.1.1	 Recognise good password policies like:
•	 Create with adequate length
•	 Create with adequate character mix
•	 Do not share
•	 Change regularly
6.1.2	 Define the term firewall and outline its purpose.
•	 Firewall - A security system designed to pro-
tect a network against external threats
6.1.3	 Understand the purpose of regularly backing
up data to a remote location.
•	 Important to have an off-site backup copy of
files in case of unforeseen network, hardware
or software problems, so that a copy of the
data is available if the original data were to
become unusable
6.1.4	 Recognise the importance of regularly 	
	 updating software like: anti-virus,
	 application, operating system software.
•	 Update anti-virus regularly to detect new
viruses
•	 Update application and operating system
software regularly to fix known problems and
security risks
6.2	Malware
6.2.1	 Define the term malware. Identify different
types of malware like: virus, worm, Trojan,
spyware.
•	 Malware - Malicious software designed to
install itself on a computer without the owner’s
consent	
•	 Virus - Intrusive programs that infect computer
files and may cause damage
•	 Worm - Self-replicating malware that uses a
computer network to send copies of itself to
other computers
•	 Trojan - Destructive program that masquer-
ades as an application.
•	 Spyware - Malware that collects information
on user browser habits without their consent
6.2.2	 Be aware how malware can infect a computer
or device.
•	 Viruses can be transmitted via the installation
of a program from an insecure source on the
Internet, a CD- ROM, an online bulletin board,
or e-mail attachments.
6.2.3	 Use anti-virus software to scan a computer.
•	 Open the virus scanning application.
•	 Enter the specific drive(s), folder(s) and name
of file to scan.
•	 Perform the scan.
6.3	 Health and Green IT
6.3.1	 Recognise ways to help ensure a user’s well-
being while using a computer or device like:
•	 Take regular breaks
•	 Ensure appropriate lighting and posture
•	 Lighting should be bright enough and correctly
positioned.
•	 Correct positioning of the computer, desk and
seat will minimise bad posture.
6.3.2	 Recognise computer and device energy saving
practices:
•	 Turning off - When not in use
•	 Adjusting automatic shut down - After a speci-
fied number of minutes not used
•	 Adjusting backlight - This can be decreased
•	 Adjusting sleep mode settings - This can be
activated after pre-set timings
6.3.3	 Recognise that computers, devices, batteries,
printer cartridges and paper should be
recycled.
6.3.4	 Identify some options available for enhancing
accessibility like:
Type Description
Voice
recognition
software
Translates voice commands and
is used in place of a mouse and
keyboard
Screen
reader
Reads aloud information from a
computer display, for users with
impaired vision
Screen
magnifier
Displays enlarged screen content
On-screen
keyboard
Provides an alternative to a
physical keyboard or inputting data
High
contrast
Makes the screen easier to view
for users
5 Networks
6 Security and Well-Being
© 2012, ECDL Foundation. This Quick Reference may be used by candidates to assist in preparation for this ECDL module test. ECDL Foundation does not warrant that use of this guide will ensure passing of the test.
Screen shots used with permission from Microsoft.
Online Essentials Module Summary
WHAT ARE THE BENEFITS OF THIS MODULE?
HOW DO I GET STARTED?
SYLLABUS OUTLINE
To find out more about this module and to locate your nearest
accredited test centre, please visit www.ecdl.org/programmes.
CATEGORY SKILL SET
Web Browsing Concepts
Web Browsing
Web-Based Information
Communication
Concepts
Using E-mail
Key Concepts
Security and Safety
Using the Web Browser
Tools and Settings
Bookmarks
Web Outputs
Search
Critical Evaluation
Copyright, Data Protection
Online Communities
Communication Tools
E-mail Concepts
Sending E-mail
Receiving E-mail
Tools and Settings
Organising E-mails
Using Calendars
Covers the key skills needed to understand the main concepts
relating to web browsing and online security.
Certifies best practice in effective online computer use.
Developed with input from computer users, subject matter
experts, and practising computer professionals from all over the
world. This process ensures the relevance and range of module
content.
This module sets out essential concepts and skills
relating to web browsing, effective information search,
online communication and e-mail.
On completion of this module the candidate will be able to:
Understand web browsing and online security concepts.
Use the web browser and manage browser settings, bookmarks,
and web outputs.
Search effectively for online information and critically evaluate
web content.
Understand key copyright and data protection issues.
Understand concepts of online communities, communications
and email.
Send, receive e-mails and manage email settings.
Organise and search emails and use calendars.
© 2012 ECDL Foundation Ref: ECDL / ICDL Online Essentials - Syllabus - V1.0
This module sets out essential concepts and skills relating to web browsing, effective
information search, online communication and e-mail.
Module Goals
Successful candidates will be able to:
 Understand web browsing and online security concepts.
 Use the web browser and manage browser settings, bookmarks, web outputs.
 Search effectively for online information and critically evaluate web content.
 Understand key copyright and data protection issues.
 Understand concepts of online communities, communications and e-mail.
 Send, receive e-mails and manage e-mail settings.
 Organise and search e-mails and use calendars.
CATEGORY SKILL SET REF. TASK ITEM
1 Web Browsing
Concepts
1.1 Key Concepts 1.1.1 Understand the terms: Internet,
World Wide Web (WWW),
Uniform Resource Locator (URL),
hyperlink.
1.1.2 Understand the structure of a web
address. Identify common types
of domains like: geographical,
organisation (.org, .edu, .com,
.gov).
1.1.3 Define the term web browser.
Identify common web browsers.
1.1.4 Outline different Internet activities
like: information searching,
shopping, learning, publishing,
banking, government services,
entertainment, communication.
1.2 Security and Safety 1.2.1 Recognise ways to protect
yourself when online: purchase
from secure reputable websites,
avoid unnecessary disclosure of
personal and financial
information, log off from websites.
1.2.2 Define the term encryption.
1.2.3 Identify a secure website: https,
lock symbol.
ECDL / ICDL Online Essentials
© 2012 ECDL Foundation Ref: ECDL / ICDL Online Essentials - Syllabus - V1.0
CATEGORY SKILL SET REF. TASK ITEM
1.2.4 Define the term digital certificate.
1.2.5 Recognise options for controlling
Internet use like: supervision, web
browsing restrictions, download
restrictions.
2 Web Browsing 2.1 Using the Web Browser 2.1.1 Open, close a web browsing
application.
2.1.2 Enter a URL in the address bar
and go to the URL.
2.1.3 Refresh a web page, stop a web
page downloading.
2.1.4 Activate a hyperlink.
2.1.5 Open a web page in a new tab,
new window.
2.1.6 Open, close tabs, windows.
Switch between tabs, windows.
2.1.7 Navigate between pages:
backwards, forwards, home page.
2.1.8 Show previously visited URLs
using history.
2.1.9 Complete, submit, reset a web-
based form.
2.1.10 Use a web tool to translate a web
page, text.
2.2 Tools and Settings 2.2.1 Set the web browser home page.
2.2.2 Understand the term pop-up.
Allow, block pop-ups.
2.2.3 Understand the term cookie.
Allow, block cookies.
2.2.4 Use available help functions.
2.2.5 Display, hide built-in toolbars.
Restore, minimise the ribbon.
2.2.6 Delete history, temporary internet
files, saved form data.
© 2012 ECDL Foundation Ref: ECDL / ICDL Online Essentials - Syllabus - V1.0
CATEGORY SKILL SET REF. TASK ITEM
2.3 Bookmarks 2.3.1 Add, delete a bookmark /
favourite.
2.3.2 Show bookmarks / favourites.
2.3.3 Create, delete a bookmarks /
favourites folder. Add web pages
to a bookmarks / favourites folder.
2.4 Web Outputs 2.4.1 Download, save files to a location.
2.4.2 Copy text, image, URL to another
location like: document, e-mail.
2.4.3 Preview, print a web page,
selection from a web page using
available printing options.
3 Web-Based
Information
3.1 Search 3.1.1 Define the term search engine
and name some common search
engines.
3.1.2 Carry out a search using a
keyword, phrase.
3.1.3 Refine a search using advanced
search features like: exact
phrase, date, language, media
type.
3.1.4 Search a web-based
encyclopaedia, dictionary.
3.2 Critical Evaluation 3.2.1 Understand the importance of
critically evaluating online
information. Understand the
purpose of different sites like:
information, entertainment,
opinion, sales.
3.2.2 Outline factors that determine the
credibility of a website like:
author, referencing, up-to-date
content.
3.2.3 Recognise the appropriateness of
online information for a particular
audience.
© 2012 ECDL Foundation Ref: ECDL / ICDL Online Essentials - Syllabus - V1.0
CATEGORY SKILL SET REF. TASK ITEM
3.3 Copyright, Data
Protection
3.3.1 Define the terms copyright,
intellectual property. Recognise
the need to acknowledge sources
and/or seek permission as
appropriate.
3.3.2 Recognise the main data
protection rights and obligations in
your country.
4 Communication
Concepts
4.1 Online Communities 4.1.1 Understand the concept of an
online (virtual) community. Identify
examples like: social networking
websites, Internet forums, web
conferencing, chat, online
computer games.
4.1.2 Outline ways that users can
publish and share content online:
blogs, microblogs, podcasts,
images, audio and video clips.
4.1.3 Recognise ways to protect
yourself when using online
communities: apply appropriate
privacy settings, restrict available
personal information, use private
messaging when appropriate,
disable location information,
block/report unknown users.
4.2 Communication Tools 4.2.1 Define the term Instant
Messaging (IM).
4.2.2 Define the terms short message
service (SMS), multimedia
message service (MMS).
4.2.3 Define the term Voice over
Internet Protocol (VoIP).
4.2.4 Recognise good practice when
using electronic communication:
be accurate and brief, use clear
subject headings, do not
inappropriately disclose personal
details, do not circulate
inappropriate content, spell check
content.
4.3 E-mail Concepts 4.3.1 Define the term e-mail and outline
its main uses.
© 2012 ECDL Foundation Ref: ECDL / ICDL Online Essentials - Syllabus - V1.0
CATEGORY SKILL SET REF. TASK ITEM
4.3.2 Identify the structure of an e-mail
address.
4.3.3 Be aware of possible problems
when sending file attachments
like: file size limits, file type
restrictions.
4.3.4 Outline the difference between
the To, Copy (Cc), Blind copy
(Bcc) fields and recognise their
appropriate use.
4.3.5 Be aware of the possibility of
receiving fraudulent and
unsolicited e-mail. Be aware of
the possibility of an e-mail
infecting the computer.
4.3.6 Define the term phishing.
5 Using E-mail 5.1 Sending E-mail 5.1.1 Access an e-mail account.
5.1.2 Outline the main purpose of
standard e-mail folders: Inbox,
Outbox, Sent, Deleted / Trash
Items, Draft, Spam/Junk.
5.1.3 Create an e-mail.
5.1.4 Enter one or more e-mail
addresses, distribution list in the
To, Copy (Cc), Blind copy (Bcc)
fields.
5.1.5 Enter an appropriate title in the
subject field and enter, paste text
into the body of an e-mail.
5.1.6 Add, remove a file attachment.
5.1.7 Send an e-mail with, without
priority.
5.2 Receiving E-mail 5.2.1 Open, close an e-mail.
5.2.2 Use the reply, reply to all function,
and identify when these should be
used.
5.2.3 Forward an e-mail.
© 2012 ECDL Foundation Ref: ECDL / ICDL Online Essentials - Syllabus - V1.0
CATEGORY SKILL SET REF. TASK ITEM
5.2.4 Open, save a file attachment to a
location.
5.2.5 Preview, print a message using
available printing options.
5.3 Tools and Settings 5.3.1 Use available help functions.
5.3.2 Display, hide built-in toolbars.
Restore, minimise the ribbon.
5.3.3 Create and insert a text e-mail
signature.
5.3.4 Turn on, turn off an automatic out
of office reply.
5.3.5 Recognise e-mail status as read,
unread. Mark an e-mail as read,
unread. Flag, unflag an e-mail.
5.3.6 Create, delete, update a contact,
distribution list / mailing list.
5.4 Organising E-mails 5.4.1 Add, remove message inbox
headings like: sender, subject,
date received.
5.4.2 Search for an e-mail by sender,
subject, e-mail content.
5.4.3 Sort e-mails by name, by date, by
size.
5.4.4 Create, delete an e-mail
folder/label. Move e-mails to an e-
mail folder/label.
5.4.5 Delete an e-mail. Restore a
deleted e-mail.
5.4.6 Empty the e-mail bin/deleted
items /trash folder.
5.4.7 Move a message to, remove a
message from a junk folder.
5.5 Using Calendars 5.5.1 Create, cancel, update a meeting
in a calendar.
© 2012 ECDL Foundation Ref: ECDL / ICDL Online Essentials - Syllabus - V1.0
CATEGORY SKILL SET REF. TASK ITEM
5.5.2 Add invitees, resources to a
meeting in a calendar. Remove
invitees, resources from a
meeting in a calendar.
5.5.3 Accept, decline an invitation.
Online Essentials										Quick Reference
This quick reference is for Microsoft Internet Explorer 9.0 and Outlook 2010
This module sets out essential concepts and skills relating to web
browsing, effective information search, online communication
and e-mail.
Successful candidates will be able to:
•	 Understand web browsing and online security concepts.
•	 Use the web browser and manage browser settings, book-
marks, web outputs.
•	 Search effectively for online information and critically evalu-
ate web content.
•	 Understand key copyright and data protection issues.
•	 Understand concepts of online communities, communica-
tions and e-mail.
•	 Send, receive e-mails and manage e-mail settings.
•	 Organise and search e-mails and use calendars.
1 Web Browsing Concepts
1.1	 Key Concepts
1.1.1	 Understand the terms: Internet, World Wide
Web (WWW), Uniform Resource Locator (URL),
	hyperlink.
•	 Internet - A global network connecting millions
of computers worldwide
•	 World Wide Web (WWW) - A collection of
linked documents residing on Internet servers
around the world
•	 Uniform Resource Locator (URL) - An address
for web pages found on the Internet
•	 Hyperlink - A link that transfers the user from
one web page to another web page by clicking
on a highlighted word or icon
1.1.2	 Understand the structure of a web address.
•	 Protocol - Usually http:// (Hypertext Transfer
Protocol) this defines how the information is
transmitted
•	 WWW - Indicates the website is on the World
Wide Web
•	 Domain - The section of the Internet owned by
the website
•	 Extension - Identifies either the type of
organisation or the country of origin of the
website.
	 http://www.ecdl.org
	 Protocol 	 www Domain Extension
1.1.2	 Identify common types of domains like:
geographical, organisation (.org, .edu, .com,
.gov).
•	 Geographical domain - Two letter identifier that
lists where the website is registered
•	 Organisation domain - Three letter identifier
that identifies if the organisation is commercial,
governmental, educational, non- profit making
etc.
1.1.3	 Define the term web browser. Identify common
web browsers.
•	 Web browser - A software program used to
view information on the World Wide Web
•	 Examples - Firefox, Google Chrome, Internet
Explorer, Safari
1.1.4	 Outline different Internet activities like:
•	 Information searching
•	 Shopping
•	 Learning
•	 Publishing
•	 Banking
•	 Government services
•	 Entertainment
•	 Communication
1.2	 Security and Safety
1.2.1	 Recognise ways to protect yourself when
online:
•	 Purchase from secure reputable websites -
More likely to have secure payment and data
protection
•	 Avoid unnecessary disclosure of personal and
financial information - Helps avoid identity
theft
•	 Log off from websites - Prevents others using
your personal details
1.2.2	 Define the term encryption.
•	 Encryption - The encoding of data to prevent
unauthorised access
1.2.3	 Identify a secure website: https, lock symbol.
•	 https - (Hypertext Transfer Protocol Secure) is
displayed in the Address Bar
•	 Lock symbol - Displayed in the Address Bar
1.2.4	 Define the term digital certificate.
•	 Digital certificate - Certifies the validity and
credentials of a website
1.2.5	 Recognise options for controlling Internet use
like:
•	 Supervision - Physical or software monitoring
of Internet activity
•	 Web browsing restrictions - Using browser
settings to control web browsing
•	 Download restrictions - Limiting the type or
amount of data downloaded
2.1	 Using the Web Browser
2.1.1	 Open a web browsing application.
•	 Click the Start Button.
•	 Select All Programs.
•	 Click Internet Explorer.
2.1.1	 Close a web browsing application.
•	 Click the Close button in the top right of the
window.
•	 If message displayed, click Close all tabs.
2.1.2	 Enter a URL in the address bar and go to the
URL.
•	 Click into the address bar.
•	 Enter the URL.
2.1.3	 Refresh a web page.
•	 Click the Refresh button beside the Address
Bar.
2.1.3	 Stop a web page downloading.
•	 Click the Stop button beside the Address Bar.
2.1.4	 Activate a hyperlink.
•	 Place the mouse pointer over the hyperlink.
•	 Click on the hyperlink.
2.1.5	 Open a web page in a new tab
•	 Open a Web page.
•	 Right-click on a link.
•	 Click Open in new tab.
2.1.5	 Open a web page in a new window.
•	 Right-click on a link.
•	 Click Open in new window.
2.1.6	 Open, close tabs, windows.
•	 To open a tab, click on the New Tab icon at the
top of the browser window.
•	 To close a tab, click the Close Tab icon in the
corner of the open tab.
•	 To open a window, click the Page menu on the
Command Bar and click New Window.
•	 To close a window, click on the Internet
Explorer icon on the taskbar and click the
Close button.
2.1.6	 Switch between tabs, windows.
•	 To switch between tabs, click on the tab
required at the top of the browser window.
•	 To switch between windows, click on the
Internet Explorer icon on the Task Bar and
select the window required.
2.1.7	 Navigate between pages: backwards, forwards,
home page.
•	 To show the previous web page visited, click
the Back button beside the Address Bar.
•	 To show the next web page visited, click the
Forward button beside the Address Bar.
•	 Click the Home button on the Command Bar.
2.1.8	 Show previously visited URLs using history.
•	 Click the View favorites, feeds, and history
button.
•	 On the History tab, click on a date.
2.1.9	 Complete, submit, reset a web-based form.
•	 To complete a form, click into each form field
and enter text or select from given options as
required.
•	 To send the entered data from the form to the
server, click Submit.
•	 To remove any entered data in the form and
start again, click Reset.
2.1.10	 Use a web tool to translate a web page, text.
•	 To translate a web page, right-click and click
Translate with Bing.
•	 To translate text, select the text, right-click and
click Translate with Bing.
2 Web Browsing
Keyboard Shortcuts & Commands
Open menu
Help
Cut
Copy
Paste
Undo
Up one screen
Down one screen
Beginning of a line
End of line
Purpose PurposeKeyboard Shortcut Keyboard Shortcut
ALT+LETTER
F1
CTRL+X
CTRL+C
CTRL+V
CTRL+Z
PAGE UP
PAGE DOWN
HOME
END
© 2012, ECDL Foundation. This Quick Reference may be used by candidates to assist in preparation for this ECDL module test. ECDL Foundation does not warrant that use of this guide will ensure passing of the test.
Screen shots used with permission from Microsoft.
Quick Reference2.2	 Tools and Settings
2.2.1	 Set the web browser home page.
•	 Navigate to the web page to set as the home
page.
•	 Click the Tools button on the Command Bar.
•	 Click Internet Options.
•	 Click Use current.
•	 Click OK.
2.2.2	 Understand the term pop-up.
•	 Pop-up- A new browser window that opens
unrequested over current web page and
usually contain advertisements
2.2.2	 Allow, block pop-ups.
•	 Click the Tools button.
•	 Click Internet Options.
•	 Select the Privacy tab.
•	 To allow pop-ups, uncheck the Turn on Pop-up
Blocker checkbox.
•	 To block pop-ups, check the Turn on Pop-up
Blocker checkbox.
•	 Click OK.
2.2.3	 Understand the term cookie.
•	 Cookie - A text file stored on a user’s
computer that monitors their web habits
2.2.3	 Allow, block cookies.
•	 Click the Tools button.
•	 Click Internet Options.
•	 Click the Privacy tab.
•	 Under Settings, move the slider to the top to
block all cookies or to the bottom to allow all
cookies.
•	 Click OK.
2.2.4	 Use available help functions.
•	 Click the Help button on the Command Bar.
•	 Click Internet Explorer Help.
2.2.5	 Display, hide built-in toolbars.
•	 Right-click near the top of the window.
•	 To display a toolbar, click on the toolbar name
so that a check mark is showing.
•	 To hide a toolbar, click on the toolbar name to
remove the checkmark.
2.2.5	 Restore, minimise the ribbon.
•	 To minimise the ribbon, click F11.
•	 To restore the ribbon, click F11.
2.2.6	 Delete history, temporary internet files, saved
form data.
•	 Click the Tools button.
•	 Click Internet Options.
•	 In the General tab, in the Browsing History
field, click Delete.
•	 To delete history, check the History checkbox.
•	 To delete temporary internet files, check the
Temporary Internet Files check box.
•	 To delete saved form data, check the Form
Data check box.
•	 Click Delete.
2.3	Bookmarks
2.3.1	 Add a bookmark / favourite.
•	 Go to a web page.
•	 Click the Favorites button.
•	 Click the Add to Favorites button.
•	 Click Add.
2.3.1	 Delete a bookmark / favourite.
•	 Click the Favorites button.
•	 Click the Add to Favorites arrow.
•	 Click Organize Favorites.
•	 Select a web page and click Delete.
•	 Click Close.
2.3.2	 Show bookmarks / favourites.
•	 Click the Favorites button.
•	 On the Favorites tab, click a web page.
2.3.3	 Create a bookmarks / favourites folder.
•	 Click the Favorites button.
•	 Click the Add to Favorites arrow.
•	 Click Organize Favorites.
•	 Click New Folders and name the folder.
2.3.3	 Delete a bookmarks / favourites folder.
•	 Click the Favorites button.
•	 Click the Add to Favorites arrow.
•	 Click Organize Favorites.
•	 Select a folder and click the Delete button.
2.3.3	 Add web pages to a bookmarks / favourites
folder.
•	 Click the Favorites button.
•	 Click the Add to Favorites button.
•	 Click the Create in arrow and select a folder to
store the bookmark in.
•	 Click Add.
2.4 	 Web Outputs
2.4.1	 Download files to a location.
•	 Right-click on the item.
•	 Select Save Target As.
•	 Create a filename and select the location.
•	 Click Save.
2.4.1 	 Save files to a location.
•	 Click the Page button on the Command Bar.
•	 Click Save As.
•	 Select a location.
•	 Enter the file name.
•	 Click Save.
2.4.2	 Copy text, image to another location like:
document, e-mail.
•	 Right-click on the text or image.
•	 Select Copy.
•	 Open a document or e-mail.
•	 Right-click and click Paste.
2.4.2	 Copy URL from a web page to another location
like: document, e-mail.
•	 Click in the address bar.
•	 Select the URL.
•	 Right-click and click Copy.
•	 Open a document or e-mail.
•	 Right-click and click Paste.
2.4.3	 Preview, selection from a web page using
available printing options.
•	 On the Command Bar, click the Print arrow.
•	 Click Print Preview.
2.4.3 	 Print a web page, selection from a web page
using available printing options.
•	 On the Command Bar, click the Print arrow.
•	 Click Print.
•	 To print a web page, click All and click Print.
•	 To print a selection from a web page, select
the text, click Selection and click Print.
3.1	Search
3.1.1	 Define the term search engine and name some
common search engines.
•	 Search engine - A website used to search for
information on the World Wide Web, based on
the criteria entered
•	 Examples-www.google.com, www.yahoo.com,
www.bing.com
3.1.2	 Carry out a search using a keyword, phrase.
•	 Open a search engine.
•	 Click into the search box in the search engine
window.
•	 Enter the keyword or phrase and press the
Return key.
3.1.3	 Refine a search using advanced search
features like: exact phrase, date, language,
media type.
•	 After initial search, click the More search tools
link from the search engine window.
•	 Enter a combination of criteria and selections
from the advanced choices.
3.1.4	 Search a web-based encyclopaedia.
•	 Click into the Address Bar.
•	 Enter the URL http://en.wikipedia.org/wiki/
Main_Page.
•	 Click into the search box at the top right of
Wikipedia.
•	 Enter a keyword or phrase.
•	 Press the Return key.
3.1.4	 Search a web-based dictionary.
•	 Click into the Address Bar.
•	 Enter the URL http://www.collinslanguage.
com.
•	 Click into the search box at the top of Collins
dictionary.
•	 Enter a word.
•	 Click the Search button.
3.2 	 Critical Evaluation
3.2.1	 Understand the importance of critically
evaluating online information.
•	 Online data should be checked or questioned
rather than accepted as fact.
3.2.1	 Understand the purpose of different sites like:
•	 Information - Giving readers facts on current
affairs, special interests
•	 Entertainment - Providing humorous or
engaging content
•	 Opinion - Sites, such as blogs, that provide the
author’s view on topics
•	 Sales - Online shopping and promoting
products or services
3.2.2	 Outline factors that determine the credibility of
a website like:
•	 Author- The author or authors should be
clearly identified
•	 Referencing - Referencing of all sources
quoted or mentioned should be clear
•	 Up-to-date content - Material should be
current and maintained
3.2.3	 Recognise the appropriateness of online
information for a particular audience.
•	 Web content should be adapted to the needs
of the audience
•	 For example, those sites geared towards
children should have age-appropriate material,
higher graphic content, lower text volume.
3.3	 Copyright, Data Protection
3.3.1	 Define the terms copyright, intellectual
property.
•	 Copyright - Exclusive rights to a work for a
specified period of time
•	 Intellectual property - Creative ideas or
inventions that can be protected by the owner
3.3.1 	 Recognise the need to acknowledge sources
and/or seek permission as appropriate.
•	 To avoid plagiarism any content referenced or
quoted should be properly acknowledged
•	 Permission should be sought to quote
someone particularly for interviews or e-mail
exchanges
3.3.2	 Recognise the main data protection rights and
obligations in your country.
•	 Note that rights can vary between countries
and states
•	 Destroy personal information no longer needed
by the business
•	 Notify data subjects if data about them
acquired in an unauthorised way
•	 Implement reasonable security
4.1	 Online Communities
4.1.1	 Understand the concept of an online (virtual)
community.
•	 Like-minded individuals who interact online
4.1.1	 Identify examples like:
•	 Social networking websites
•	 Internet forums
•	 Web conferencing
•	 Chat
•	 Online computer games
4.1.2	 Outline ways that users can publish and share
content online:
•	 Blog - A shared on-line journal
•	 Microblog - A shared on-line journal with
smaller updates
•	 Podcasts - Digital media files released
regularly and can be downloaded through an
RSS feed
•	 Images - Digital photos and graphics
•	 Audio and video clips - typically shared on
sites like YouTube and Flickr
4.1.3	 Recognise ways to protect yourself when using
online communities:
•	 Apply appropriate privacy settings- Make your
profile private
•	 Restrict available personal information- Help
avoid identity theft and fraud
•	 Use private messaging when appropriate- Do
not make personal communications public
•	 Disable location information- If not, your
current location is displayed
•	 Block/report unknown users- Unless you can
verify their identity
4.2 	 Communication Tools
4.2.1	 Define the term Instant Messaging (IM).
•	 IM - Real-time text-based communication via
the Internet
4.2.2	 Define the terms short message service (SMS),
multimedia message service (MMS).
•	 SMS - The sending and receiving of short text
messages between mobile devices.
•	 MMS - The sending and receiving of audio and
video clips between mobile devices.
4.2.3	 Define the term Voice over Internet Protocol
(VoIP).
•	 Allows users to talk to each other in real time
over the Internet
4.2.4	 Recognise good practice when using
electronic communication:
•	 Be accurate and brief
•	 Use clear subject headings
•	 Do not inappropriately disclose personal
details
•	 Do not circulate inappropriate content
3 Web-Based Information
4 Communication Concepts
Quick Reference•	 Spell check content
4.3	 E-mail Concepts
4.3.1	 Define the term e-mail and outline its main
uses.
•	 An electronic message sent or received over
the Internet
•	 Used for sending and receiving messages and
attachments
4.3.2	 Identify the structure of an e-mail address.
j d o e @ e c d l . o r g
	 UserName @ Sign Domain Name Extension
•	 UserName - A unique name identifying the
user’s e-mail name
•	 @ - Used to separate the user name from the
domain
•	 Domain Name - The location/company of the
e-mail address
•	 Extension - Typically identifies the type of
organisation or the country the e-mail address
is associated with
4.3.3	 Be aware of possible problems when sending
file attachments like:
•	 File size limits - E-mail attachments may
exceed the e-mail provider’s maximum file size
limit
•	 File type restrictions - Executable files are
often rejected by e-mail servers
4.3.4	 Outline the difference between the To, Copy
(Cc), Blind copy (Bcc) fields and recognise their
appropriate use.
•	 To - Main recipient of the e-mail and has to act
on the e-mail
•	 Cc - Included for informational purposes only
•	 Bcc - Blind carbon copy address not visible to
other recipients
4.3.5	 Be aware of the possibility of receiving
fraudulent and unsolicited e-mail. Be aware
of the possibility of an e-mail infecting the
computer.
•	 E-mail users may receive e-mail or junk mail
from unscrupulous sources.
•	 Viruses may be activated when an e-mail
messages or attachments from unknown
sources are opened.
4.3.6	 Define the term phishing.
•	 A fraudulent e-mail message that often has a
link to a fake website
•	 Encourages recipients to divulge personal and
financial details
5.1	 Sending E-mail
5.1.1	 Access an e-mail account.
•	 Click the Start button.
•	 Select All Programs.
•	 Click Microsoft Office.
•	 Click Microsoft Office Outlook 2010.
5.1.2	 Outline the main purpose of standard e-mail
folders:
•	 Inbox - Folder all e-mails are sent to by default
•	 Outbox - Temporary folder that sores e-mails
until they have been sent
•	 Sent - Folder that stores all sent e-mails
•	 Deleted / Trash Items - Stores mails no longer
needed
•	 Draft - Stores mails before the user chooses to
send them
•	 Spam/Junk - Stores incoming mail from
unknown or suspicious senders
5.1.3	 Create an e-mail.
•	 On the Home tab, in the New group, click the
New E-mail button.
5.1.4	 Enter one or more e-mail addresses,
distribution list in the To field.
•	 Click in the To field.
•	 Enter the e-mail address of the recipient or the
name of a contact group.
5.1.4	 Enter one or more e-mail addresses,
distribution list in the Copy (Cc) field.
•	 Click in the Cc field.
•	 Enter the e-mail address of the Cc recipient or
the name of a contact group.
5.1.4	 Enter one or more e-mail addresses,
distribution list in the Blind copy (Bcc) field.
•	 Click in the Bcc field.
•	 Enter the e-mail address of the Bcc recipient
or the name of a contact group.
5.1.5	 Enter an appropriate title in the subject field
•	 Click in the Subject field.
•	 Enter the subject of the e-mail.
5.1.5	 Enter text into the body of an e-mail.
•	 Click in the body of the e-mail and enter text
required.
5.1.5	 Paste text into the body of an e-mail.
•	 Select the text to copy, right-click and select
Copy.
•	 Open the e-mail message and click the
location where you want to paste the text.
•	 On the Message tab, in the Clipboard group,
click the Paste button.
5.1.5	 Spell check an e-mail.
•	 Click at the beginning of the e-mail message.
•	 On the Review tab, in the Proofing group, click
the Spelling & Grammar button.
•	 Correct errors as suggested.
•	 Once the spell check is complete, click OK.
5.1.6	 Add a file attachment.
•	 On the Message tab, in the Include group,
click the Attach File button.
•	 Locate and select the file to attach.
•	 Click Insert.
5.1.6	 Remove a file attachment.
•	 Select the attachment in the Attached field.
•	 Press the Delete Key.
5.1.7	 Send an e-mail with, without priority.
•	 On the Message tab, in the Tags group, click
the High Importance or the Low Importance
button.
•	 Click Send.
5.2	 Receiving E-mail
5.2.1	 Open an e-mail.
•	 Select the Inbox icon on the Navigation pane.
•	 Double-click the e-mail.
5.2.1	 Close an e-mail.
•	 Click the Close button at the top right of the
window.
5.2.2	 Use the reply, reply to all function.
•	 Open the message.
•	 On the Home tab, in the Respond group, click
the Reply or the Reply all button.
•	 Enter any text required.
•	 Click Send.
5.2.2	 Identify when the reply, reply to all function
should be used.
•	 Use Reply to send message to the Sender.
•	 Use Reply All to send message to the Sender
and to all of those in the Cc field.
5.2.3	 Forward an e-mail.
•	 Open the message.
•	 On the Home tab, in the Respond group, click
the Forward button.
•	 Enter e-mail addresses into the To field and
the Cc field as required.
•	 Enter any text required.
•	 Click Send.
5.2.4	 Open, save a file attachment to a location.
•	 Open the message.
•	 Right-click on the attachment.
•	 Select Save As.
•	 Create a file name and select a location to
save the file.
•	 Click Save.
5.2.5	 Preview a message using available printing
options.
•	 Open the message.
•	 Click the File menu, select Print.
•	 A print preview is displayed on the right of the
window.
5.2.5	 Print a message using available printing
options.
•	 Open the message.
•	 Click the File menu, select Print, then click
Print.
•	 Select desired options.
•	 Click OK.
5.3 Tools and Settings
5.3.1	 Use available help functions.
•	 Click the Help button on the Standard
toolbar.
5.3.2	 Display built-in toolbars.
•	 Right-click on the Toolbar area at the top of
the window.
•	 Click on a Toolbar that is not currently
displayed.
5.3.2	 Hide built-in toolbars.
•	 Right-click on the Toolbar area at the top of
the window.
•	 Click on a Toolbar that is currently displayed.
5.3.2	 Restore, minimise the ribbon.
•	 Right-click any tab.
•	 To minimise the ribbon, click Minimize the
ribbon.
•	 To restore the ribbon, click on the checked
Minimize the ribbon.
5.3.3	 Create a text e-mail signature.
•	 Create a new e-mail.
•	 On the Message tab, in the Include group,
click the Signature arrow.
•	 Click Signatures.
•	 On the E-mail signature tab click New.
•	 In the Enter a name for your new
signature box, enter a name.
•	 Click OK.
•	 In the Edit signature box, enter the text to be
included in the signature.
•	 To format the text, select the text, and then
use the style and formatting buttons to select
the options preferred
•	 Click OK.
5.3.3	 Insert a text e-mail signature.
•	 Create a new e-mail.
•	 If the signature is not shown automatically, on
the Message tab, in the Include group, click
the Signature arrow.
•	 Click the name of the signature previously
created.
5.3.4	 Turn on, turn off an automatic out of office
reply.
•	 Click on the File menu, then click Info.
•	 Click the Automatic Replies button.
•	 To turn on an automatic out of office reply,
check the I am currently Out of the Office
checkbox.
•	 To turn off an automatic out of office reply,
check the I am currently In the Office
checkbox.
•	 Click OK.
5.3.5	 Recognise e-mail status as read, unread. Flag,
unflag an e-mail.
•	 Read e-mail messages appear in regular type
with an open envelope icon.
•	 Unread e-mail messages appear in bold type
with a closed envelope icon.
5.3.5	 Mark an e-mail as read, unread.
•	 Select the message.
•	 On the Home tab, in the Tags group, click the
Unread/Read button.
5.3.5	 Flag an e-mail.
•	 Select the message.
•	 On the Home tab, in the Tags group, click the
Follow Up button.
•	 Click option preferred.
5.3.5	 Unflag an e-mail.
•	 Select the message.
•	 On the Home tab, in the Tags group, click the
Follow Up button.
•	 Click Clear Flag.
5.3.6	 Create, delete, update a contact, distribution
list/mailing list.
	
5 Using E-mail
Quick Reference
•	 Click on the Contacts button on the navigation
pane.
•	 On the Home tab, in the New group, click the
New Contact button.
•	 Enter the contacts details in the required fields.
•	 In the Contact tab, in the Actions group, click
the Save & Close button.
5.3.6	 Create a distribution list / mailing list.
•	 Click on the Contacts button on the navigation
pane.
•	 On the Home tab, in the New group, click the
New Contact Group button.
•	 Enter a name for the group in the Name field.
•	 On the Contact Group tab, in the Members
group, click the Add Members button.
•	 Select from where to enter members details.
•	 In the Contact group tab, in the Actions group,
click the Save & Close button.
5.3.6	 Delete a contact, distribution list / mailing list.
•	 Select the contact or contact group to delete.
•	 On the Home tab, in the Delete group, click the
Delete button.
5.3.6	 Update a contact, distribution list / mailing list.
•	 Double-click on the contact or contact group
to update.
•	 Enter or delete required fields.
•	 In the Contact or Contact Group tab, in the
Actions group, click the Save & Close button.
5.4	 Organising E-mails
5.4.1	 Add, remove message inbox headings like:
sender, subject, date received.
•	 On the View tab, in the Current View group,
click the View settings button.
•	 On the Advanced View Settings:Compact
dialog box, click the Columns button.
•	 To add inbox headings, select a field in the left
column and click Add.
•	 To remove inbox headings, select a field in the
right column and click Remove.
•	 Click OK.
5.4.2	 Search for an e-mail by sender, subject.
•	 Select the Inbox.
•	 Click in the Search field.
•	 On the Search tab, in the Refine group, click
the From button or Subject button.
•	 Enter the search criteria.
5.4.2	 Search for an e-mail by e-mail content.
•	 Select the Inbox.
•	 In the Search box enter text to search by.
•	 All e-mails with this text will be listed in the
Search Results window.
5.4.3	 Sort e-mails by name, by date, by size.
•	 Select the Inbox.
•	 On the View tab, in the Current View group,
click the View settings button.
•	 On the Advanced View Settings:Compact
dialog box, click the Sort button.
•	 To sort by name, click From.
•	 To sort by date, click Received.
•	 To sort by size, click Size.
•	 Click OK.
5.4.4	 Create an e-mail folder/label.
•	 Select the Inbox.
•	 On the Folder tab, in the New group, click the
New Folder button.
•	 Enter a name for the folder in the Name: field.
•	 In Select where to place the folder, Inbox
should be highlighted.
•	 Click OK.
5.4.4	 Delete an e-mail folder/label.
•	 Select the folder for deletion.
•	 On the Folder tab, in the Actions group, click
the Delete Folder button.
•	 Click Yes to the displayed message.
5.4.4	 Move e-mails to an e-mail folder/label.
•	 Select a message to move.
•	 On the Home tab in the Move group, click the
Move arrow.
•	 Click Other Folder.
•	 Select folder preferred.
•	 Click OK.
5.4.5	 Delete an e-mail.
•	 Select the e-mail message for deletion.
•	 On the Home tab in the Delete group, click the
Delete button.
5.4.5	 Restore a deleted e-mail.
•	 Select the Deleted Items folder.
•	 Select a message to restore.
•	 On the Home tab in the Move group, click the
Move button.
•	 Click Other Folder.
•	 Select a destination folder.
•	 Click OK.
5.4.6	 Empty the e-mail bin/deleted items /trash
folder.
•	 Select the Deleted Items folder.
•	 On the Folder tab, in the Clean Up group, click
the Empty Folder button.
•	 Click Yes to the displayed message.
5.4.7	 Move a message to a junk folder.
•	 Select the message.
•	 On the Home tab in the Move group, click the
Move arrow.
•	 Click Other Folder.
•	 Select Junk E-mail.
•	 Click OK.
5.4.7	 Remove a message from a junk folder.
•	 Click the Folders button on the Navigation
pane.
•	 Click Junk E-mail.
•	 On the Home tab in the Move group, click the
Move arrow.
•	 Click Other Folder.
•	 Select Inbox.
5.5	 Using Calendars
5.5.1	 Create a meeting in a calendar.
•	 On the Home tab, in the New group, click the
New Meeting button.
•	 Enter details in the To, Subject and Location
fields.
•	 Enter details in the Start time fields.
•	 Enter details in the End time fields.
•	 Click Send.
5.5.1	 Cancel a meeting in a calendar.
•	 Select the meeting.
•	 On the Meeting tab, in the Actions group, click
Cancel meeting.
•	 When prompted, click Send Cancellation.
5.5.1	 Update a meeting in a calendar.
•	 Select the meeting.
•	 On the Meeting tab, in the Actions group, click
Open.
•	 Enter new details as required.
•	 Click Send Update.
5.5.2	 Add invitees, resources to a meeting in a
calendar.
•	 On the Meeting tab, in the Attendees group,
click the Add or Remove Attendees button.
•	 Select names from address book displayed.
•	 Click OK.
5.5.2	 Remove invitees, resources from a meeting in
a calendar.
•	 On the Meeting tab, in the Attendees group,
click the Add or Remove Attendees button.
•	 Select names from Required field.
•	 Press the Delete key.
•	 Click OK.
5.5.3 	 Accept, decline an invitation.
•	 Open the meeting request.
•	 On the Meeting tab, in the Respond group,
click the Accept button.
•	 Click Send the response now.
5.5.3 	 Accept, decline an invitation.
•	 Open the meeting request.
•	 On the Meeting tab, in the Respond group,
click the Decline button.
Outlook 2010 Tabs
Message
Insert
Options
Format Text
Review
© 2012, ECDL Foundation. This Quick Reference may be used by candidates to assist in preparation for this ECDL module test. ECDL Foundation does not warrant that use of this guide will ensure passing of the test.
Screen shots used with permission from Microsoft.
Word Processing Module Summary
WHAT ARE THE BENEFITS OF THIS MODULE?
HOW DO I GET STARTED?
SYLLABUS OUTLINE
To find out more about this module and to locate your nearest
accredited test centre, please visit www.ecdl.org/programmes.
CATEGORY SKILL SET
Using the
Application
Document
Creation
Formatting
Objects
Mail Merge
Working with Documents
Enhancing Productivity
Enter Text
Select, Edit
Text
Paragraphs
Styles
Table Creation
Table Formatting
Graphical Objects
Preparation
Outputs
Prepare
Outputs
Setup
Check and Print
www.ecdl.org
Covers the key skills needed to use a word processing
application.
Can be applied to a range of word processing software from
vendor packages to ‘freeware’.
Certifies best practice in effective word processing software use.
Developed with input from computer users, subject matter
experts, and practising computer professionals from all over the
world. This process ensures the relevance and range of module
content.
This module allows candidates to demonstrate the
ability to use a word processing application to
accomplish everyday tasks associated with creating,
formatting, and finishing small-sized word processing
documents, such as letters and other everyday
documents.
On completion of this module the candidate will be able to:
Work with documents and save them in different file formats.
Choose built-in options, such as the Help function, to enhance
productivity.
Create and edit small-sized word processing documents that will
be ready to share and distribute.
Apply different formats to documents to enhance them before
distribution; recognise good practice in choosing the appropriate
formatting options.
Insert tables, images, and drawn objects into documents.
Prepare documents for mail merge operations.
Adjust document page settings.
Check and correct spelling before finally printing documents.
Word Processing
The following is the Syllabus for Word Processing, which provides the basis for the
practice-based test in this module.
Module Goals
Module Word Processing requires the candidate to demonstrate the ability to use a word
processing application to create everyday letters and documents.
The candidate shall be able to:
• Work with documents and save them in different file formats.
• Choose built-in options such as the Help function to enhance productivity.
• Create and edit small-sized word processing documents that will be ready to
share and distribute.
• Apply different formats to documents to enhance them before distribution
and recognize good practice in choosing the appropriate formatting options.
• Insert tables, images and drawn objects into documents.
• Prepare documents for mail merge operations.
• Adjust document page settings and check and correct spelling before finally
printing documents.
CATEGORY SKILL SET REF. TASK ITEM
3.1 Using the
Application
3.1.1 Working with
Documents
3.1.1.1 Open, close a word processing
application. Open, close documents.
3.1.1.2 Create a new document based on
default template, other available
template like: memo, fax, agenda.
3.1.1.3 Save a document to a location on a
drive. Save a document under
another name to a location on a
drive.
3.1.1.4 Save a document as another file type
like: text file, Rich Text Format,
template, software specific file
extension, version number.
3.1.1.5 Switch between open documents.
3.1.2 Enhancing Productivity 3.1.2.1 Set basic options/preferences in the
application: user name, default folder
to open, save documents.
3.1.2.2 Use available Help functions.
CATEGORY SKILL SET REF. TASK ITEM
3.1.2.3 Use magnification/zoom tools.
3.1.2.4 Display, hide built-in toolbars.
Restore, minimize the ribbon.
3.2 Document
Creation
3.2.1 Enter Text 3.2.1.1 Switch between page view modes.
3.2.1.2 Enter text into a document.
3.2.1.3 Insert symbols or special characters
like: ©, ®, ™.
3.2.2 Select, Edit 3.2.2.1 Display, hide non-printing formatting
marks like: spaces, paragraph
marks, manual line break marks, tab
characters.
3.2.2.2 Select character, word, line,
sentence, paragraph, entire body
text.
3.2.2.3 Edit content by entering, removing
characters, words within existing
text, by over-typing to replace
existing text.
3.2.2.4 Use a simple search command for a
specific word, phrase.
3.2.2.5 Use a simple replace command for a
specific word, phrase.
3.2.2.6 Copy, move text within a document,
between open documents.
3.2.2.7 Delete text.
3.2.2.8 Use the undo, redo command.
3.3 Formatting 3.3.1 Text 3.3.1.1 Change text formatting: font sizes,
font types.
3.3.1.2 Apply text formatting: bold, italic,
underline.
3.3.1.3 Apply text formatting: subscript,
superscript.
3.3.1.4 Apply different colours to text.
3.3.1.5 Apply case changes to text.
3.3.1.6 Apply automatic hyphenation.
3.3.2 Paragraphs 3.3.2.1 Create, merge paragraph(s).
CATEGORY SKILL SET REF. TASK ITEM
3.3.2.2 Insert, remove soft carriage return
(line break).
3.3.2.3 Recognize good practice in aligning
text: use align, indent, tab tools
rather than inserting spaces.
3.3.2.4 Align text left, centre, right, justified.
3.3.2.5 Indent paragraphs: left, right, first
line.
3.3.2.6 Set, remove and use tabs: left,
centre, right, decimal.
3.3.2.7 Recognize good practice in
paragraph spacing: apply spacing
between paragraphs rather than use
the Return key.
3.3.2.8 Apply spacing above, below
paragraphs. Apply single, 1.5 lines,
double line spacing within
paragraphs.
3.3.2.9 Add, remove bullets, numbers in a
single level list. Switch between
different standard bullet, number
styles in a single level list.
3.3.2.10 Add a box border and
shading/background colour to a
paragraph.
3.3.3 Styles 3.3.3.1 Apply an existing character style to
selected text.
3.3.3.2 Apply an existing paragraph style to
one or more paragraphs.
3.3.3.3 Use copy format tool.
3.4 Objects 3.4.1 Table Creation 3.4.1.1 Create a table ready for data
insertion.
3.4.1.2 Insert, edit data in a table.
3.4.1.3 Select rows, columns, cells, entire
table.
3.4.1.4 Insert, delete, rows and columns.
3.4.2 Table Formatting 3.4.2.1 Modify column width, row height.
3.4.2.2 Modify cell border line style, width,
colour.
CATEGORY SKILL SET REF. TASK ITEM
3.4.2.3 Add shading/background colour to
cells.
3.4.3 Graphical Objects 3.4.3.1 Insert an object (picture, image,
chart, drawn object) to a specified
location in a document.
3.4.3.2 Select an object.
3.4.3.3 Copy, move an object within a
document, between open
documents.
3.4.3.4 Resize, delete an object.
3.5 Mail Merge 3.5.1 Preparation 3.5.1.1 Open, prepare a document, as a
main document for a mail merge.
3.5.1.2 Select a mailing list, other data file,
for use in a mail merge.
3.5.1.3 Insert data fields in a mail merge
main document (letter, address
labels).
3.5.2 Outputs 3.5.2.1 Merge a mailing list with a letter,
label document as a new file or
printed output.
3.5.2.2 Print mail merge outputs: letters,
labels.
3.6 Prepare Outputs 3.6.1 Setup 3.6.1.1 Change document orientation:
portrait, landscape. Change paper
size.
3.6.1.2 Change margins of entire document,
top, bottom, left, right.
3.6.1.3 Recognize good practice in adding
new pages: insert a page break
rather than using the Return key.
3.6.1.4 Insert, delete a page break in a
document.
3.6.1.5 Add, edit text in headers, footers.
3.6.1.6 Add fields in headers, footers: date,
page number information, file name.
3.6.1.7 Apply automatic page numbering to
a document.
3.6.2 Check and Print 3.6.2.1 Spell check a document and make
changes like: correcting spelling
errors, deleting repeated words.
CATEGORY SKILL SET REF. TASK ITEM
3.6.2.2 Add words to a built-in custom
dictionary using a spell checker.
3.6.2.3 Preview a document.
3.6.2.4 Print a document from an installed
printer using output options like:
entire document, specific pages,
number of copies.
Word Processing
Quick Reference
This quick reference is for Microsoft Word 2007 on Windows XP
This module sets out essential concepts and skills relating to the ability to use a
word processing application to create everyday letters and documents.
Successful candidates will be able to:
Work with documents and save them in different file formats.
Choose built-in options such as the Help function to enhance productivity.
Create and edit small-sized word processing documents that will be ready to
share and distribute.
Apply different formats to documents to enhance them before distribution and
recognize good practice in choosing the appropriate formatting options.
Insert tables, images and drawn objects into documents.
Prepare documents for mail merge operations.
Adjust document page settings and check and correct spelling before finally
printing documents.
Word 2007 Tabs
General
Open a document CTRL+O
Save a document CTRL+S
Print a document CTRL+P
Close a document CTRL+W
Undo CTRL+Z
Redo or Repeat CTRL+Y
Help F1
Switch between apps ALT+TAB
Editing
Cut CTRL+X
Copy CTRL+C
Paste CTRL+V
Formatting
Bold CTRL+B
Italics CTRL+I
Underline CTRL+U
Navigation
Up one screen PAGE UP
Down one screen PAGE DOWN
Beginning of line HOME
End of line END
Beginning of a document CTRL+HOME
End of a document CTRL+END
Keyboard Shortcuts
1.1 Working with Documents
1.1.1 Open a word processing application.
Click the Start button.
Select All Programs.
Click Microsoft Word 2007.
1.1.1 Close a word processing application.
Click the Office button.
Click Exit Word.
1.1.1 Open documents.
Click the Office button.
Click Open.
Select document(s) to open and click Open.
1.1.1 Close documents.
Click the Office button.
Click Close.
1.1.2 Create a new document based on default template.
Click the Office button.
Click New.
Click Blank Document.
Click Create.
1.1.2 Create a new document based on other available
template like: memo, fax, agenda.
Click the Office button.
Click New.
Under templates, click Memos.
Click to select a memo template.
Click Download.
1.1.3 Save a document to a location on a drive.
Click the Office button.
Click Save.
Create a file name and select the location.
Click Save.
1.1.3 Save a document under another name to a
location on a drive.
Click the Office button.
Click Save As.
Enter a new file name over the existing file name
and select the location.
Click Save.
1.1.4 Save a document as another file type like: text file,
Rich Text Format, template, software specific file
extension, version number.
Click the Office button.
Select Save As.
Click on the Save as type drop-down menu and
select a file type.
Click on Save.
1.1.5 Switch between open documents.
On the View tab, in the Windows group, click the
Switch Windows button.
Click the name of the document to switch to.
1.2 Enhancing Productivity
1.2.1 Set basic options/preferences in the application:
user name.
Click the Office button.
Click Word Options.
On the Popular tab, enter a user name in the
User name text box.
Click OK.
1.2.1 Set basic options/preferences in the
application: default folder to open,
save documents.
Click the Office button.
Click Word Options.
On the Save tab, enter a default file location
in the Default file location: text box.
Click OK.
1.2.2 Use available Help functions.
Click on the Help button on the top right
of the ribbon.
1.2.3 Use magnification/zoom tools.
On the View tab, in the Zoom group, click
the Zoom button.
Select the magnification required.
Click OK.
1.2.4 Restore, minimize the ribbon.
Double click any tab to minimize the ribbon.
Double click any tab again to restore the
ribbon.
Certification Test Goals
1 Using the Application
Home
Insert
Page Layout
References
Mailings
Review
View
© 2012, ECDL Foundation. This Quick Reference may be used by candidates to assist in preparation for this ECDL module test. ECDL Foundation does not warrant that use of this guide will ensure passing of the test.
Screen shots used with permission from Microsoft.
Quick Reference
2.1 Enter Text
2.1.1 Switch between page view modes.
On the View tab, in the Document Views group,
click on a view mode.
Print Layout view shows how a document will
look when printed.
Full Screen Reading view shows the document
at a size that is suitable for reading.
Web Layout view shows how a document will
look in a web browser.
Outline view shows the structure of the document
as nested levels of headings and body text.
Draft view shows the content of a document
with a simplified layout.
2.1.2 Enter text into a document.
Click in the document window.
Enter the text.
2.1.3 Insert symbols or special characters like: ©, ®, ™.
On the Insert tab, in the Symbols group, click the
Symbol button, and then click More Symbols.
On the Special Characters tab, select a special
character, like ©, ®, or ™, and click on the Insert
button.
2.2 Select, Edit
2.2.1 Display, hide non-printing formatting marks like:
spaces, paragraph marks, manual line break
marks, tab characters.
On the Home tab, in the Paragraph group, click
the Show/Hide button.
2.2.2 Select character, word, line, sentence, paragraph,
entire body text.
2.2.3 Edit content by entering, removing characters,
words within existing text.
Select the text for editing in the document
window.
Begin typing.
2.2.3 Edit content by over-typing to replace existing
text.
To switch to Overtype mode, right-click on the
Status Bar and then click Overtype.
The Insert button will show on the left side of the
status bar.
Click the Insert button and the word Overtype
replaces the word Insert.
Click immediately before the text to replace.
Begin entering new text.
2.2.4 Use a simple search command for a specific
word, phrase.
3.1.4 Apply different colors to text.
Select the text to color.
On the Home tab, in the Font group, click the Font
Color arrow.
Click on a color.
3.1.5 Apply case changes to text.
Select the text to change case.
On the Home tab, in the Font group, click the
Change Case button.
To capitalize the first letter of a sentence, click
Sentence case.
To make all letters lowercase, click lowercase.
To capitalize all of the letters, click UPPERCASE.
To capitalize the first letter of each word, click
Capitalize Each Word.
To shift between two case views, click tOGGLE
cASE.
3.1.6 Apply automatic hyphenation.
Make sure that no text is selected.
On the Page Layout tab, in the Page Setup group,
click Hyphenation, and then click the Automatic
button.
3.2 Paragraphs
3.2.1 Create, merge paragraph(s).
To create a paragraph, press the Return key.
To merge paragraphs, click directly before first
paragraph mark.
Press the Delete key.
3.2.2 Insert, remove soft carriage return (line break).
To insert the line break, press the Shift + Return
keys.
To delete the line break, select line break and
press the Delete key.
3.2.3 Recognize good practice in aligning text.
Use align, indent, tab tools rather than inserting
spaces.
3.2.4 Align text left, right.
Select the text to align.
On the Home tab, in the Paragraph group,
click the Align Left or Align Right buttons.
3.2.4 Align text center.
Select the text to center.
On the Home tab, in the Paragraph group,
click the Center button.
3.2.4 Align text justified.
Select the text to justify.
On the Home tab, in the Paragraph group,
click the Justify button.
3.2.5 Indent paragraphs: left, right
Select the paragraph.
On the Page Layout tab, in the Paragraph group,
click the Paragraph group arrow.
To indent to the left, click in the Left box and enter
the indent required.
To indent to the right, click in the Right box and
enter the indent required.
On the Home tab, in the Editing group, click the
Find button.
Enter the word or phrase to find into the Find what
box.
Click Find Next to select the first occurrence of the
word or phrase.
2.2.5 Use a simple replace command for a specific word,
phrase.
On the Home tab, in the Editing group, click the
Replace button.
Enter the word or phrase to find for replacement
into the Find what box.
Enter the word or phrase to replace into the Replace
with box.
Click Find Next.
2.2.6 Copy text within a document, between open
documents.
Select text to copy.
On the Home tab, in the Clipboard group, click the
Copy button.
Click in a new location within the document or within
another open document.
On the Home tab, in the Clipboard group, click the
Paste button.
2.2.6 Move text within a document, between open
documents.
Select the text to move.
On the Home tab, in the Clipboard group, click the
Cut button.
Click in a new location within the document or within
another open document.
On the Home tab, in the Clipboard group, click the
Paste button.
2.2.7 Delete text.
Select the text to delete.
Press the Delete Key.
2.2.8 Use the undo, redo command.
On the Quick Access Toolbar, click Undo or Repeat.
3.1 Text
3.1.1 Change text formatting: font sizes.
Select the text to format.
On the Home tab, in the Font group, click the Font
Size arrow.
Select a size from the list or enter a size into the
Font Size box.
3.1.1 Change text formatting: font types.
Select the text to format.
On the Home tab, in the Font group, click the Font
arrow.
Select a font from the list or enter a font name into
the Font box.
3.1.2 Apply text formatting: bold, italic, underline.
Select the text to format.
To embolden the text, on the Home tab, in the
Font group, click the Bold button.
To italicize the text, on the Home tab, in the
Font group, click the Italic button.
To underline the text, on the Home tab, in the
Font group, click the Underline button.
3.1.3 Apply text formatting: subscript, superscript.
Select the text to format.
On the Home tab, in the Font group, click the
Superscript or Subscript button.
2 Document Creation
3 Formatting
Select
Word Double-click the word
Ctrl + click in the sentence
Click in the Selection Bar to the
left of the line
Triple-click the paragraph
Triple-click in the Selection Bar
Sentence
Line
Paragraph
Entire Body text
Action
Ic sskills new_ecdl_syllabus_2013

More Related Content

What's hot

Accessible computer interface for a cnc machining center
Accessible computer interface for a cnc machining centerAccessible computer interface for a cnc machining center
Accessible computer interface for a cnc machining centerJupira Silva
 
SRS REPORT ON A ANDROID GAME
SRS REPORT ON A ANDROID GAMESRS REPORT ON A ANDROID GAME
SRS REPORT ON A ANDROID GAMEmilan tripathi
 
Chapter 6 output
Chapter 6   outputChapter 6   output
Chapter 6 outputhaider ali
 
Discovering Computers: Chapter 05
Discovering Computers: Chapter 05Discovering Computers: Chapter 05
Discovering Computers: Chapter 05Anna Stirling
 
Discovering Computers: Chapter 03
Discovering Computers: Chapter 03Discovering Computers: Chapter 03
Discovering Computers: Chapter 03Anna Stirling
 
Creativity, Productivity, Collaboration NSW Roadshow - November 2013
Creativity, Productivity, Collaboration NSW Roadshow - November 2013Creativity, Productivity, Collaboration NSW Roadshow - November 2013
Creativity, Productivity, Collaboration NSW Roadshow - November 2013Microsoft Education AU
 
Report on e-Notice App (An Android Application)
Report on e-Notice App (An Android Application)Report on e-Notice App (An Android Application)
Report on e-Notice App (An Android Application)Priyanka Kapoor
 
Java Technical Design Document
Java Technical Design DocumentJava Technical Design Document
Java Technical Design DocumentDeborah Obasogie
 
Chapter 5 input
Chapter 5   inputChapter 5   input
Chapter 5 inputhaider ali
 
DTCC Chapter 2 The Internet and the WWW
DTCC Chapter 2 The Internet and the WWWDTCC Chapter 2 The Internet and the WWW
DTCC Chapter 2 The Internet and the WWWJan Fisher
 
Chapter 13 programming languages and program development
Chapter 13   programming languages and program developmentChapter 13   programming languages and program development
Chapter 13 programming languages and program developmenthaider ali
 

What's hot (12)

Accessible computer interface for a cnc machining center
Accessible computer interface for a cnc machining centerAccessible computer interface for a cnc machining center
Accessible computer interface for a cnc machining center
 
SRS REPORT ON A ANDROID GAME
SRS REPORT ON A ANDROID GAMESRS REPORT ON A ANDROID GAME
SRS REPORT ON A ANDROID GAME
 
Chapter 6 output
Chapter 6   outputChapter 6   output
Chapter 6 output
 
Discovering Computers: Chapter 05
Discovering Computers: Chapter 05Discovering Computers: Chapter 05
Discovering Computers: Chapter 05
 
Discovering Computers: Chapter 03
Discovering Computers: Chapter 03Discovering Computers: Chapter 03
Discovering Computers: Chapter 03
 
Creativity, Productivity, Collaboration NSW Roadshow - November 2013
Creativity, Productivity, Collaboration NSW Roadshow - November 2013Creativity, Productivity, Collaboration NSW Roadshow - November 2013
Creativity, Productivity, Collaboration NSW Roadshow - November 2013
 
Report on e-Notice App (An Android Application)
Report on e-Notice App (An Android Application)Report on e-Notice App (An Android Application)
Report on e-Notice App (An Android Application)
 
Java Technical Design Document
Java Technical Design DocumentJava Technical Design Document
Java Technical Design Document
 
Chapter 5 input
Chapter 5   inputChapter 5   input
Chapter 5 input
 
DTCC Chapter 2 The Internet and the WWW
DTCC Chapter 2 The Internet and the WWWDTCC Chapter 2 The Internet and the WWW
DTCC Chapter 2 The Internet and the WWW
 
7.agila model
7.agila model7.agila model
7.agila model
 
Chapter 13 programming languages and program development
Chapter 13   programming languages and program developmentChapter 13   programming languages and program development
Chapter 13 programming languages and program development
 

Viewers also liked

6 pettarin ecdl-presentation
6 pettarin ecdl-presentation6 pettarin ecdl-presentation
6 pettarin ecdl-presentationPietro Latino
 
Sample part tests - mswin72010 - v1 - 0
Sample part  tests - mswin72010 - v1 - 0Sample part  tests - mswin72010 - v1 - 0
Sample part tests - mswin72010 - v1 - 0Orji Olisa
 
ICDL Module 2 - Using Computers & Managing Files (Windows XP) - Presentation ...
ICDL Module 2 - Using Computers & Managing Files (Windows XP) - Presentation ...ICDL Module 2 - Using Computers & Managing Files (Windows XP) - Presentation ...
ICDL Module 2 - Using Computers & Managing Files (Windows XP) - Presentation ...Michael Lew
 
Ecdl v5 module 4 print
Ecdl v5 module 4 printEcdl v5 module 4 print
Ecdl v5 module 4 printMichael Lew
 
Ecdl v5 module 3 print
Ecdl v5 module 3 printEcdl v5 module 3 print
Ecdl v5 module 3 printMichael Lew
 
Ecdl v5 module 2 print
Ecdl v5 module 2 printEcdl v5 module 2 print
Ecdl v5 module 2 printMichael Lew
 
ICDL Advanced Excel 2010 - Tutorial
ICDL Advanced Excel 2010 - TutorialICDL Advanced Excel 2010 - Tutorial
ICDL Advanced Excel 2010 - TutorialMichael Lew
 
ICDL Module 1 - Concepts of ICT (Information and Communication Technology) - ...
ICDL Module 1 - Concepts of ICT (Information and Communication Technology) - ...ICDL Module 1 - Concepts of ICT (Information and Communication Technology) - ...
ICDL Module 1 - Concepts of ICT (Information and Communication Technology) - ...Michael Lew
 

Viewers also liked (11)

6 pettarin ecdl-presentation
6 pettarin ecdl-presentation6 pettarin ecdl-presentation
6 pettarin ecdl-presentation
 
Sample part tests - mswin72010 - v1 - 0
Sample part  tests - mswin72010 - v1 - 0Sample part  tests - mswin72010 - v1 - 0
Sample part tests - mswin72010 - v1 - 0
 
Windows xp(1)
Windows xp(1)Windows xp(1)
Windows xp(1)
 
ICDL Module 2 - Using Computers & Managing Files (Windows XP) - Presentation ...
ICDL Module 2 - Using Computers & Managing Files (Windows XP) - Presentation ...ICDL Module 2 - Using Computers & Managing Files (Windows XP) - Presentation ...
ICDL Module 2 - Using Computers & Managing Files (Windows XP) - Presentation ...
 
Ecdl v5 module 4 print
Ecdl v5 module 4 printEcdl v5 module 4 print
Ecdl v5 module 4 print
 
Ecdl v5 module 3 print
Ecdl v5 module 3 printEcdl v5 module 3 print
Ecdl v5 module 3 print
 
Ecdl v5 module 2 print
Ecdl v5 module 2 printEcdl v5 module 2 print
Ecdl v5 module 2 print
 
ICDL Advanced Excel 2010 - Tutorial
ICDL Advanced Excel 2010 - TutorialICDL Advanced Excel 2010 - Tutorial
ICDL Advanced Excel 2010 - Tutorial
 
994187 mod 1
994187 mod 1994187 mod 1
994187 mod 1
 
ICDL Module 1 - Concepts of ICT (Information and Communication Technology) - ...
ICDL Module 1 - Concepts of ICT (Information and Communication Technology) - ...ICDL Module 1 - Concepts of ICT (Information and Communication Technology) - ...
ICDL Module 1 - Concepts of ICT (Information and Communication Technology) - ...
 
Hotel housekeeping
Hotel housekeepingHotel housekeeping
Hotel housekeeping
 

Similar to Ic sskills new_ecdl_syllabus_2013

Computer basics
Computer basicsComputer basics
Computer basicsthinkict
 
Kto12 tle ict computer hardware servicing
Kto12 tle ict computer hardware servicingKto12 tle ict computer hardware servicing
Kto12 tle ict computer hardware servicingAlvin Francisco
 
Android task manager project presentation
Android task manager project presentationAndroid task manager project presentation
Android task manager project presentationAkhilesh Jaiswal
 
EDDL (Electronic Device Description Language)
EDDL (Electronic Device Description Language)EDDL (Electronic Device Description Language)
EDDL (Electronic Device Description Language)Heirarch Meissner
 
End-users digital competences & ECDL
End-users digital competences & ECDLEnd-users digital competences & ECDL
End-users digital competences & ECDLPierfranco Ravotto
 
Web-Based Lighting Automation System
Web-Based Lighting Automation SystemWeb-Based Lighting Automation System
Web-Based Lighting Automation SystemApoorva Chandra
 
project report 8051,eembedded system,pcb designing,electronic voting machine
project report 8051,eembedded system,pcb designing,electronic voting machineproject report 8051,eembedded system,pcb designing,electronic voting machine
project report 8051,eembedded system,pcb designing,electronic voting machineAyush Khurana
 
Creating Great Apps with MOTODEV Studio for Android
Creating Great Apps with MOTODEV Studio for AndroidCreating Great Apps with MOTODEV Studio for Android
Creating Great Apps with MOTODEV Studio for AndroidMotorola Mobility - MOTODEV
 
Campus portal for wireless devices srs
Campus portal for wireless devices srsCampus portal for wireless devices srs
Campus portal for wireless devices srsAnand Goyal
 
Week1 lec1 intro_to_computers
Week1 lec1 intro_to_computersWeek1 lec1 intro_to_computers
Week1 lec1 intro_to_computersResty Aldana
 
Final srs of academic a webpage based android app
Final srs of academic a webpage based android appFinal srs of academic a webpage based android app
Final srs of academic a webpage based android apppreeta sinha
 
Build Smarter User Interfaces for Legacy Applications with IBM Rational Host ...
Build Smarter User Interfaces for Legacy Applications with IBM Rational Host ...Build Smarter User Interfaces for Legacy Applications with IBM Rational Host ...
Build Smarter User Interfaces for Legacy Applications with IBM Rational Host ...Strongback Consulting
 
Graphical Password Authenticationimp.docx2
Graphical Password Authenticationimp.docx2Graphical Password Authenticationimp.docx2
Graphical Password Authenticationimp.docx2Raghu Vamsy Sirasala
 

Similar to Ic sskills new_ecdl_syllabus_2013 (20)

CREATIVE TECHNOLOGY 7 QI-L1
CREATIVE TECHNOLOGY 7 QI-L1CREATIVE TECHNOLOGY 7 QI-L1
CREATIVE TECHNOLOGY 7 QI-L1
 
Lab 2 software
Lab 2   softwareLab 2   software
Lab 2 software
 
Computer basics
Computer basicsComputer basics
Computer basics
 
Kto12 tle ict computer hardware servicing
Kto12 tle ict computer hardware servicingKto12 tle ict computer hardware servicing
Kto12 tle ict computer hardware servicing
 
Android task manager project presentation
Android task manager project presentationAndroid task manager project presentation
Android task manager project presentation
 
EDDL (Electronic Device Description Language)
EDDL (Electronic Device Description Language)EDDL (Electronic Device Description Language)
EDDL (Electronic Device Description Language)
 
End-users digital competences & ECDL
End-users digital competences & ECDLEnd-users digital competences & ECDL
End-users digital competences & ECDL
 
Web-Based Lighting Automation System
Web-Based Lighting Automation SystemWeb-Based Lighting Automation System
Web-Based Lighting Automation System
 
Documentation
DocumentationDocumentation
Documentation
 
6. safe users-guide
6.  safe users-guide6.  safe users-guide
6. safe users-guide
 
VIRTUAL LAB
VIRTUAL LABVIRTUAL LAB
VIRTUAL LAB
 
project report 8051,eembedded system,pcb designing,electronic voting machine
project report 8051,eembedded system,pcb designing,electronic voting machineproject report 8051,eembedded system,pcb designing,electronic voting machine
project report 8051,eembedded system,pcb designing,electronic voting machine
 
Chapter 01
Chapter 01Chapter 01
Chapter 01
 
Creating Great Apps with MOTODEV Studio for Android
Creating Great Apps with MOTODEV Studio for AndroidCreating Great Apps with MOTODEV Studio for Android
Creating Great Apps with MOTODEV Studio for Android
 
Campus portal for wireless devices srs
Campus portal for wireless devices srsCampus portal for wireless devices srs
Campus portal for wireless devices srs
 
Chapter 1
Chapter 1Chapter 1
Chapter 1
 
Week1 lec1 intro_to_computers
Week1 lec1 intro_to_computersWeek1 lec1 intro_to_computers
Week1 lec1 intro_to_computers
 
Final srs of academic a webpage based android app
Final srs of academic a webpage based android appFinal srs of academic a webpage based android app
Final srs of academic a webpage based android app
 
Build Smarter User Interfaces for Legacy Applications with IBM Rational Host ...
Build Smarter User Interfaces for Legacy Applications with IBM Rational Host ...Build Smarter User Interfaces for Legacy Applications with IBM Rational Host ...
Build Smarter User Interfaces for Legacy Applications with IBM Rational Host ...
 
Graphical Password Authenticationimp.docx2
Graphical Password Authenticationimp.docx2Graphical Password Authenticationimp.docx2
Graphical Password Authenticationimp.docx2
 

Recently uploaded

How to Configure Email Server in Odoo 17
How to Configure Email Server in Odoo 17How to Configure Email Server in Odoo 17
How to Configure Email Server in Odoo 17Celine George
 
Concept of Vouching. B.Com(Hons) /B.Compdf
Concept of Vouching. B.Com(Hons) /B.CompdfConcept of Vouching. B.Com(Hons) /B.Compdf
Concept of Vouching. B.Com(Hons) /B.CompdfUmakantAnnand
 
MENTAL STATUS EXAMINATION format.docx
MENTAL     STATUS EXAMINATION format.docxMENTAL     STATUS EXAMINATION format.docx
MENTAL STATUS EXAMINATION format.docxPoojaSen20
 
The Most Excellent Way | 1 Corinthians 13
The Most Excellent Way | 1 Corinthians 13The Most Excellent Way | 1 Corinthians 13
The Most Excellent Way | 1 Corinthians 13Steve Thomason
 
call girls in Kamla Market (DELHI) 🔝 >༒9953330565🔝 genuine Escort Service 🔝✔️✔️
call girls in Kamla Market (DELHI) 🔝 >༒9953330565🔝 genuine Escort Service 🔝✔️✔️call girls in Kamla Market (DELHI) 🔝 >༒9953330565🔝 genuine Escort Service 🔝✔️✔️
call girls in Kamla Market (DELHI) 🔝 >༒9953330565🔝 genuine Escort Service 🔝✔️✔️9953056974 Low Rate Call Girls In Saket, Delhi NCR
 
Presentation by Andreas Schleicher Tackling the School Absenteeism Crisis 30 ...
Presentation by Andreas Schleicher Tackling the School Absenteeism Crisis 30 ...Presentation by Andreas Schleicher Tackling the School Absenteeism Crisis 30 ...
Presentation by Andreas Schleicher Tackling the School Absenteeism Crisis 30 ...EduSkills OECD
 
Paris 2024 Olympic Geographies - an activity
Paris 2024 Olympic Geographies - an activityParis 2024 Olympic Geographies - an activity
Paris 2024 Olympic Geographies - an activityGeoBlogs
 
Interactive Powerpoint_How to Master effective communication
Interactive Powerpoint_How to Master effective communicationInteractive Powerpoint_How to Master effective communication
Interactive Powerpoint_How to Master effective communicationnomboosow
 
Introduction to ArtificiaI Intelligence in Higher Education
Introduction to ArtificiaI Intelligence in Higher EducationIntroduction to ArtificiaI Intelligence in Higher Education
Introduction to ArtificiaI Intelligence in Higher Educationpboyjonauth
 
Hybridoma Technology ( Production , Purification , and Application )
Hybridoma Technology  ( Production , Purification , and Application  ) Hybridoma Technology  ( Production , Purification , and Application  )
Hybridoma Technology ( Production , Purification , and Application ) Sakshi Ghasle
 
“Oh GOSH! Reflecting on Hackteria's Collaborative Practices in a Global Do-It...
“Oh GOSH! Reflecting on Hackteria's Collaborative Practices in a Global Do-It...“Oh GOSH! Reflecting on Hackteria's Collaborative Practices in a Global Do-It...
“Oh GOSH! Reflecting on Hackteria's Collaborative Practices in a Global Do-It...Marc Dusseiller Dusjagr
 
A Critique of the Proposed National Education Policy Reform
A Critique of the Proposed National Education Policy ReformA Critique of the Proposed National Education Policy Reform
A Critique of the Proposed National Education Policy ReformChameera Dedduwage
 
Presiding Officer Training module 2024 lok sabha elections
Presiding Officer Training module 2024 lok sabha electionsPresiding Officer Training module 2024 lok sabha elections
Presiding Officer Training module 2024 lok sabha electionsanshu789521
 
How to Make a Pirate ship Primary Education.pptx
How to Make a Pirate ship Primary Education.pptxHow to Make a Pirate ship Primary Education.pptx
How to Make a Pirate ship Primary Education.pptxmanuelaromero2013
 
URLs and Routing in the Odoo 17 Website App
URLs and Routing in the Odoo 17 Website AppURLs and Routing in the Odoo 17 Website App
URLs and Routing in the Odoo 17 Website AppCeline George
 
Accessible design: Minimum effort, maximum impact
Accessible design: Minimum effort, maximum impactAccessible design: Minimum effort, maximum impact
Accessible design: Minimum effort, maximum impactdawncurless
 
Introduction to AI in Higher Education_draft.pptx
Introduction to AI in Higher Education_draft.pptxIntroduction to AI in Higher Education_draft.pptx
Introduction to AI in Higher Education_draft.pptxpboyjonauth
 

Recently uploaded (20)

How to Configure Email Server in Odoo 17
How to Configure Email Server in Odoo 17How to Configure Email Server in Odoo 17
How to Configure Email Server in Odoo 17
 
Concept of Vouching. B.Com(Hons) /B.Compdf
Concept of Vouching. B.Com(Hons) /B.CompdfConcept of Vouching. B.Com(Hons) /B.Compdf
Concept of Vouching. B.Com(Hons) /B.Compdf
 
MENTAL STATUS EXAMINATION format.docx
MENTAL     STATUS EXAMINATION format.docxMENTAL     STATUS EXAMINATION format.docx
MENTAL STATUS EXAMINATION format.docx
 
The Most Excellent Way | 1 Corinthians 13
The Most Excellent Way | 1 Corinthians 13The Most Excellent Way | 1 Corinthians 13
The Most Excellent Way | 1 Corinthians 13
 
call girls in Kamla Market (DELHI) 🔝 >༒9953330565🔝 genuine Escort Service 🔝✔️✔️
call girls in Kamla Market (DELHI) 🔝 >༒9953330565🔝 genuine Escort Service 🔝✔️✔️call girls in Kamla Market (DELHI) 🔝 >༒9953330565🔝 genuine Escort Service 🔝✔️✔️
call girls in Kamla Market (DELHI) 🔝 >༒9953330565🔝 genuine Escort Service 🔝✔️✔️
 
Presentation by Andreas Schleicher Tackling the School Absenteeism Crisis 30 ...
Presentation by Andreas Schleicher Tackling the School Absenteeism Crisis 30 ...Presentation by Andreas Schleicher Tackling the School Absenteeism Crisis 30 ...
Presentation by Andreas Schleicher Tackling the School Absenteeism Crisis 30 ...
 
Paris 2024 Olympic Geographies - an activity
Paris 2024 Olympic Geographies - an activityParis 2024 Olympic Geographies - an activity
Paris 2024 Olympic Geographies - an activity
 
Interactive Powerpoint_How to Master effective communication
Interactive Powerpoint_How to Master effective communicationInteractive Powerpoint_How to Master effective communication
Interactive Powerpoint_How to Master effective communication
 
9953330565 Low Rate Call Girls In Rohini Delhi NCR
9953330565 Low Rate Call Girls In Rohini  Delhi NCR9953330565 Low Rate Call Girls In Rohini  Delhi NCR
9953330565 Low Rate Call Girls In Rohini Delhi NCR
 
Introduction to ArtificiaI Intelligence in Higher Education
Introduction to ArtificiaI Intelligence in Higher EducationIntroduction to ArtificiaI Intelligence in Higher Education
Introduction to ArtificiaI Intelligence in Higher Education
 
Hybridoma Technology ( Production , Purification , and Application )
Hybridoma Technology  ( Production , Purification , and Application  ) Hybridoma Technology  ( Production , Purification , and Application  )
Hybridoma Technology ( Production , Purification , and Application )
 
“Oh GOSH! Reflecting on Hackteria's Collaborative Practices in a Global Do-It...
“Oh GOSH! Reflecting on Hackteria's Collaborative Practices in a Global Do-It...“Oh GOSH! Reflecting on Hackteria's Collaborative Practices in a Global Do-It...
“Oh GOSH! Reflecting on Hackteria's Collaborative Practices in a Global Do-It...
 
Model Call Girl in Tilak Nagar Delhi reach out to us at 🔝9953056974🔝
Model Call Girl in Tilak Nagar Delhi reach out to us at 🔝9953056974🔝Model Call Girl in Tilak Nagar Delhi reach out to us at 🔝9953056974🔝
Model Call Girl in Tilak Nagar Delhi reach out to us at 🔝9953056974🔝
 
Staff of Color (SOC) Retention Efforts DDSD
Staff of Color (SOC) Retention Efforts DDSDStaff of Color (SOC) Retention Efforts DDSD
Staff of Color (SOC) Retention Efforts DDSD
 
A Critique of the Proposed National Education Policy Reform
A Critique of the Proposed National Education Policy ReformA Critique of the Proposed National Education Policy Reform
A Critique of the Proposed National Education Policy Reform
 
Presiding Officer Training module 2024 lok sabha elections
Presiding Officer Training module 2024 lok sabha electionsPresiding Officer Training module 2024 lok sabha elections
Presiding Officer Training module 2024 lok sabha elections
 
How to Make a Pirate ship Primary Education.pptx
How to Make a Pirate ship Primary Education.pptxHow to Make a Pirate ship Primary Education.pptx
How to Make a Pirate ship Primary Education.pptx
 
URLs and Routing in the Odoo 17 Website App
URLs and Routing in the Odoo 17 Website AppURLs and Routing in the Odoo 17 Website App
URLs and Routing in the Odoo 17 Website App
 
Accessible design: Minimum effort, maximum impact
Accessible design: Minimum effort, maximum impactAccessible design: Minimum effort, maximum impact
Accessible design: Minimum effort, maximum impact
 
Introduction to AI in Higher Education_draft.pptx
Introduction to AI in Higher Education_draft.pptxIntroduction to AI in Higher Education_draft.pptx
Introduction to AI in Higher Education_draft.pptx
 

Ic sskills new_ecdl_syllabus_2013

  • 1. NEW ECDL DO IT YOUR WAY Presentation Project Planning Spreadsheets Word Processing Using Databases Online Essentials Computer Essentials IT Security Online Collaboration 2D CAD Web Editing Image Editing
  • 2. 5 REASONS TO DO NEW ECDL Employers love ECDL You will learn practical skills Spoilt for choice Anywhere Anytime Learn local take it global Welcome to New ECDL (Version 6). More than just a syllabus update, New ECDL is based on the changing needs of our candidates. Whether they are a student or an employer, or just want boost their skills, New ECDL has something to offer. New ECDL gives candidates more choice, more flexibility and a new model for lifelong learning. Other benefits associated with ECDL continue such as: Quality Syllabi and tests created by the ECDL Foundation Recognition ECDL retains worldwide recognition Administration Minimal changes to our systems mean a smooth transition for centres Support Our unrivalled level of customer service and support is in place to assist you Price Bundle prices remain unchanged Introducing New ECDL
  • 3. Updated modules and new modules mean the ability to choose ECDL modules that are relevant to your learners. Create a class as normal then simply pick a package containing your module selection. Pre-loaded templates consisting of the most popular module combinations will make this easy for you. If you don’t see what you want create your own template once and reuse over and over. For a solid foundation in digital skills we strongly recommend the following modules: For proven proficiency in the use of computers we strongly recommend the combination below: When choosing any ECDL package we suggest starting with this combination: Our Advice OR OR Do it your way – pick your package Computer Essentials Online Essentials Word Processing Spreadsheets Computer Essentials Online Essentials Word Processing Spreadsheets Computer Essentials Online Essentials Word Processing Spreadsheets Using Databases Presentation + 1 other Computer Essentials Online Essentials Word Processing Spreadsheets + 3 others Spreadsheets Word Processing Online Essentials Computer Essentials Online Collaboration Presentation Using Databases Spreadsheets Word Processing Online Essentials Computer Essentials Web Editing Online Collaboration Presentation Presentation Word Processing Online Essentials Computer Essentials Project Planning IT Security
  • 4. NEW ECDL Syllabi September 2013 Module title Page ECDL Computer Essentials 5 ECDL Online Essentials 17 ECDL Word Processing 29 39ECDL Spreadsheets 49ECDL Using Databases 59 69 80 90 100 112 ECDL Presentation ECDL Online Collaboration ECDL Image Editing ECDL Web Editing ECDL IT Security ECDL Project Planning Quick Reference Guides produced by the ECDL Foundation are included here to give an indication of the scope of each module only. They may or may not correspond to available automated tests, elearning or software versions in use at your test centre. Quick Reference guides may be used by instructors in the delivery of ECDL but ICS Skills and the ECDL Foundation do not warrant that use of any guide will ensure passing of the test.
  • 5. Computer Essentials Module Summary WHAT ARE THE BENEFITS OF THIS MODULE? HOW DO I GET STARTED? SYLLABUS OUTLINE To find out more about this module and to locate your nearest accredited test centre, please visit www.ecdl.org/programmes. CATEGORY SKILL SET Computers and Devices Desktop, Icons, Settings Outputs File Management Networks ICT Hardware Software and Licensing Start Up, Shut Down Desktop and Icons Using Windows Tools and Settings Working with Text Printing Introducing Files and Folders Organising Files and Folders Storage and Compression Network Concepts Network Access Security and Well-Being Protecting Data and Devices Malware Health and Green IT Covers the key skills and main concepts relating to ICT, computers, devices, and software. Certifies best practice in effective computer use. Developed with input from computer users, subject matter experts, and practising computer professionals from all over the world. This process ensures the relevance and range of module content. This module sets out essential concepts and skills relating to the use of devices, file creation and man- agement, networks, and data security. On completion of this module the candidate will be able to: Understand key concepts relating to ICT, computers, devices and software. Start up and shut down a computer. Work effectively on the computer desktop using icons, windows. Adjust the main operating system settings and use built-in help features. Create a simple document and print an output. Know about the main concepts of file management and be able to efficiently organise files and folders. Understand key storage concepts and use utility software to compress and extract large files. Understand network concepts and connection options and be able to connect to a network. Understand the importance of protecting data and devices from malware, and the importance of backing up data. Recognise considerations relating to green IT, accessibility, and user health.
  • 6. © 2012 ECDL Foundation Ref: ECDL / ICDL Computer Essentials - Syllabus - V1.0 ECDL / ICDL Computer Essentials This module sets out essential concepts and skills relating to the use of devices, file creation and management, networks and data security. Module Goals Successful candidates will be able to:  Understand key concepts relating to ICT, computers, devices and software.  Start up and shut down a computer.  Work effectively on the computer desktop using icons, windows.  Adjust the main operating system settings and use built-in help features.  Create a simple document and print an output.  Know about the main concepts of file management and be able to efficiently organise files and folders.  Understand key storage concepts and use utility software to compress and extract large files.  Understand network concepts and connection options and be able to connect to a network.  Understand the importance of protecting data and devices from malware and of backing up data.  Recognise considerations relating to green IT, accessibility and user health. CATEGORY SKILL SET REF. TASK ITEM 1 Computers and Devices 1.1.1 ICT 1.1.1 Define the term Information and Communication Technology (ICT). 1.1.2 Identify different types of ICT services/uses like: Internet services, mobile technology, office productivity applications. 1.2 Hardware 1.2.1 Define the term hardware. Identify the main types of computers like: desktops, laptops, tablets. Identify the main types of devices like: smartphones, media players, digital cameras. 1.2.2 Define the terms processor, Random Access Memory (RAM), storage. Understand their impact on performance when using computers and devices.
  • 7. © 2012 ECDL Foundation Ref: ECDL / ICDL Computer Essentials - Syllabus - V1.0 CATEGORY SKILL SET REF. TASK ITEM 1.2.3 Identify the main types of integrated and external equipment like: printers, screens, scanners, keyboards, mouse/trackpad, webcam, speakers, microphone, docking station. 1.2.4 Identify common input/output ports like: USB, HDMI. 1.3 Software and Licensing 1.3.1 Define the term software and distinguish between the main types of software like: operating systems, applications. Know that software can be installed locally or available online. 1.3.2 Define the term operating system and identify some common operating systems for computers and devices. 1.3.3 Identify common examples of applications like: office productivity, communications, social networking, media, design, mobile applications. 1.3.4 Define the term End-User License Agreement (EULA). Recognise that software must be licensed before use. 1.3.5 Outline the types of software licenses: proprietary, open source, trial version, shareware, freeware. 1.4 Start Up, Shut Down 1.4.1 Start a computer and log on securely using a user name and password. 1.4.2 Log off, shut down, restart a computer using an appropriate routine. 2 Desktop, Icons, Settings 2.1 Desktop and Icons 2.1.1 Outline the purpose of the desktop and the task bar. 2.1.2 Identify common icons like those representing: files, folders, applications, printers, drives, shortcuts/aliases, recycle bin/wastebasket/trash.
  • 8. © 2012 ECDL Foundation Ref: ECDL / ICDL Computer Essentials - Syllabus - V1.0 CATEGORY SKILL SET REF. TASK ITEM 2.1.3 Select and move icons. 2.1.4 Create, rename, move, delete a shortcut/alias. 2.2 Using Windows 2.2.1 Identify the different parts of a window: title bar, menu bar, toolbar, ribbon, status bar, scroll bar. 2.2.2 Open, collapse, expand, restore down, maximise, resize, move, close a window. 2.2.3 Switch between open windows. 2.3 Tools and Settings 2.3.1 Use available help functions. 2.3.2 View the computer's basic system information: operating system name and version number, installed RAM. 2.3.3 Change desktop configuration settings: date and time, volume settings, background, resolution. 2.3.4 Change, add, remove keyboard language. Change default language. 2.3.5 Shut down a non-responding application. 2.3.6 Install, uninstall an application. 2.3.7 Connect a device (USB flash drive, digital camera, media player) to a computer. Disconnect a device using an appropriate routine. 2.3.8 Capture a full screen, active window. 3 Outputs 3.1 Working with Text 3.1.1 Open, close a word processing application. Open, close files. 3.1.2 Enter text into a document. 3.1.3 Copy, move text within a document, between open documents. Paste a screen capture into a document.
  • 9. © 2012 ECDL Foundation Ref: ECDL / ICDL Computer Essentials - Syllabus - V1.0 CATEGORY SKILL SET REF. TASK ITEM 3.1.4 Save and name a document. 3.2 Printing 3.2.1 Install, uninstall a printer. Print a test page. 3.2.2 Set the default printer from an installed printer list. 3.2.3 Print a document from a word processing application. 3.2.4 View, pause, restart, cancel a print job. 4 File Management 4.1 Introducing Files and Folders 4.1.1 Understand how an operating system organises drives, folders, files in a hierarchical structure. Navigate between drives, folders, sub-folders, files. 4.1.2 Display file, folder properties like: name, size, location. 4.1.3 Change view to display files and folders like: tiles, icons, list, details. 4.1.4 Identify common file types like: word processing, spreadsheet, presentation, portable document format (pdf), image, audio, video, compressed, executable files. 4.1.5 Open a file, folder, drive. 4.1.6 Recognise good practice in folder, file naming: use meaningful names for folders and files to help with searching and organisation. 4.1.7 Create a folder. 4.1.8 Rename a file, folder. 4.1.9 Search for files by properties: all or part of file name using wildcards if necessary, content, date modified. 4.1.10 View list of recently used files.
  • 10. © 2012 ECDL Foundation Ref: ECDL / ICDL Computer Essentials - Syllabus - V1.0 CATEGORY SKILL SET REF. TASK ITEM 4.2 Organising Files and Folders 4.2.1 Select individual, adjacent, non- adjacent files, folders. 4.2.2 Sort files in ascending, descending order by name, size, type, date modified. 4.2.3 Copy, move files, folders between folders, drives. 4.2.4 Delete files, folders to the recycle bin/wastebasket/trash and restore to original location. 4.2.5 Empty the recycle bin/wastebasket/trash. 4.3 Storage and Compression 4.3.1 Identify the main types of storage media like: internal hard disk, external hard disk, network drive, CD, DVD, Blu- ray Disc, USB flash drive, memory card, online file storage. 4.3.2 Identify file size, folder size, storage capacity measurements like: KB, MB, GB, TB. 4.3.3 View available space on a storage device. 4.3.4 Understand the purpose of file, folder compression. 4.3.5 Compress files, folders. 4.3.6 Extract compressed files, folders to a location on a drive. 5 Networks 5.1 Network Concepts 5.1.1 Define the term network. Outline the purpose of a network: to share, access data and devices securely. 5.1.2 Define the term Internet. Identify some of its main uses like: World Wide Web (WWW), VoIP, e-mail, IM. 5.1.3 Define the terms intranet, virtual private network (VPN) and identify their main uses.
  • 11. © 2012 ECDL Foundation Ref: ECDL / ICDL Computer Essentials - Syllabus - V1.0 CATEGORY SKILL SET REF. TASK ITEM 5.1.4 Understand what transfer rate means. Understand how it is measured: bits per second (bps), kilobits per second (kbps), megabits per second (mbps), gigabits per second (gbps). 5.1.5 Understand the concepts of downloading from, uploading to a network. 5.2 Network Access 5.2.1 Identify the different options for connecting to the Internet like: phone line, mobile phone, cable, wi-fi, wi-max, satellite. 5.2.2 Define the term Internet Service Provider (ISP). Identify important considerations when selecting an internet subscription option like: upload speed, download speed and quota, cost. 5.2.3 Recognise the status of a wireless network: protected/secure, open. 5.2.4 Connect to a wireless network. 6 Security and Well-Being 6.1 Protecting Data and Devices 6.1.1 Recognise good password policies like: create with adequate length, adequate character mix, do not share, change regularly. 6.1.2 Define the term firewall and outline its purpose. 6.1.3 Understand the purpose of regularly backing up data to a remote location. 6.1.4 Recognise the importance of regularly updating software like: anti-virus, application, operating system software. 6.2 Malware 6.2.1 Understand the term malware. Identify different types of malware like: virus, worm, Trojan, spyware. 6.2.2 Be aware how malware can infect a computer or device.
  • 12. © 2012 ECDL Foundation Ref: ECDL / ICDL Computer Essentials - Syllabus - V1.0 of 9 CATEGORY SKILL SET REF. TASK ITEM 6.2.3 Use anti-virus software to scan a computer. 6.3 Health and Green IT 6.3.1 Recognise ways to help ensure a user’s well-being while using a computer or device like: take regular breaks, ensure appropriate lighting and posture. 6.3.2 Recognise computer and device energy saving practices: turning off, adjusting automatic shutdown, backlight, sleep mode settings. 6.3.3 Recognise that computers, devices, batteries, printer cartridges and paper should be recycled. 6.3.4 Identify some options available for enhancing accessibility like: voice recognition software, screen reader, screen magnifier, on-screen keyboard, high contrast.
  • 13. Computer Essentials Quick Reference This quick reference is for understanding the main concepts of ICT and using the computer and managing files on Windows 7 This module sets out essential concepts and skills relating to the use of devices, file creation and management, networks and data security. Successful candidates will be able to: • Understand key concepts relating to ICT, computers, devices and software. • Start up and shut down a computer. • Work effectively on the computer desktop using icons, windows. • Adjust the main operating system settings and use built-in help features. • Create a simple document and print an output. • Know about the main concepts of file management and be able to efficiently organise files and folders. • Understand key storage concepts and use utility software to compress and extract large files. • Understand network concepts and connection options and be able to connect to a network. • Understand the importance of protecting data and devices from malware and of backing up data. • Recognise considerations relating to green IT, accessibility and user health. 1 Computers and Devices 1.1 ICT 1.1.1 Define the term Information and Communication Technology (ICT). • ICT - Using digital technology to access, store and process information into an organized and understandable form 1.1.2 Identify different types of ICT services and uses like: • Internet services - Examples include online banking, online shopping, e-mail and data transfer • Mobile technology - Examples include using the internet on smartphones, laptops • Office productivity applications - Examples include word processing, spread sheets, presentation software 1.2 Hardware 1.2.1 Define the term hardware. Hardware - Physical, tangible items that form part of a computer system 1.2.1 Identify the main types of computers like: Types of Computer Desktop A traditional stand-alone or networked computer Laptop A small, portable computer designed for mobile, flexible use Tablet A small, mobile, hand-held computer that combines computing and Internet access 1.2.1 Identify the main types of devices like: Types of Devices Smart Phone Used for phone calls, e-mail, Internet browsing, and working with mobile applications Media Player Used to download and play music and videos Digital Camera Used to take photographs in digital format 1.2.2 Define the terms processor, Random Access Memory (RAM), storage. Understand their impact on performance when using computers and devices. • Processor - An important component for processing information • RAM - Working temporary memory that loses its data when the computer is shut down • Storage - Internal or external devices that retain saved data. • The type and speed of the processor, the amount of RAM used, and the amount of available storage space, can have an impact on the computer’s overall performance. 1.2.3 Identify the main types of integrated and external equipment like: Printers Devices that print information on paper or other materials Screens Devices that display text and graphics Scanners Devices that read images or text and convert the data into digital information Keyboards Typing devices used to issue commands and enter characters Mouse/ Trackpad A pointing device used to select items and issue commands Web camera (webcam) A video camera used to capture a digital video Speakers Devices that produce sound waves audible to the human ear Microphone A device used to digitally capture sound Docking Station A device that connects a laptop computer to other devices 1.2.4 Identify common input/output ports like: • Universal Serial Bus (USB) - Typically used to connect storage and other devices • High-Definition Multimedia Interface (HDMI) - Typically used to connect media devices 1.3 Software and Licensing 1.3.1 Define the term software and distinguish between the main types of software like: operating systems, applications. Know that software can be installed locally or available online. • Software - Applications or programs that perform specific tasks, such as word processing or graphics editing • Operating system - Controls the computer, schedules tasks, manages storage, and handles communication with other devices. • Applications software - Designed for specific tasks such as presentations or spreadsheets. • Software can be installed on a specific computer or device, on a network or accessed via the cloud. 1.3.2 Define the term operating system and identify some common operating systems for computers and devices. • Operating system - Software that schedules tasks, manages storage and handles communication with other devices • Examples include Windows, Linux, Mac OS X 1.3.3 Identify common examples of applications like: • Office productivity - Examples include word processing and spreadsheets • Communications - Examples include e-mail and instant messaging • Social networking - Examples include websites that allows users to connect and exchange status updates and comments • Media - Examples include news applications and social media applications • Design - Examples include photo-editing and desktop publishing • Mobile applications - Examples include online storage applications and e-mail applications 1.3.4 Define the term End-User License Agreement (EULA). Recognise that software must be licensed before use. • EULA - A legal agreement between the user of software and the software manufacturer • Users should ensure all software used is fully licensed before use. 1.3.5 Outline the types of software licenses: • Proprietary - Software that must be bought before use • Open source - Free software that makes its source code available • Trial version - Software that can be used for a restricted time only and users will have to purchase to use further • Shareware - Software that is distributed on a try-before-you-buy basis with limited functionality • Freeware - Free copyrighted software 1.4 Start Up, Shut Down Keyboard Shortcuts & Commands Open menu Help Cut Copy Paste Undo Up one screen Down one screen Beginning of a line End of line Purpose PurposeKeyboard Shortcut Keyboard Shortcut ALT+LETTER F1 CTRL+X CTRL+C CTRL+V CTRL+Z PAGE UP PAGE DOWN HOME END © 2012, ECDL Foundation. This Quick Reference may be used by candidates to assist in preparation for this ECDL module test. ECDL Foundation does not warrant that use of this guide will ensure passing of the test. Screen shots used with permission from Microsoft. Quick Reference
  • 14. Quick Reference1.4.1 Start a computer and log on securely using a user name and password. • Make sure that both the computer and monitor are plugged into a power source. • Turn on the computer and the monitor. • Enter a user name and password when requested. • Press the Return key. 1.4.2 Log off a computer using an appropriate routine. • Close any open files and applications. • Click the Start button. • Select the Shut Down arrow. • Click Log off. 1.4.2 Shut down a computer using an appropriate routine. • Close any open files and applications. • Click the Start button. • Click Shut Down. 1.4.2 Restart a computer using an appropriate routine. • Close any open files and applications. • Click the Start button. • Select the Shut Down arrow. • Click Restart. 2.1 Desktop and Icons 2.1.1 Outline the purpose of the desktop and the task bar. • Desktop - Displays icons for files, folders and applications • Task bar- Shows active applications, files and folders and other icons 2.1.2 Identify common icons like those representing: FILES FOLDERS APPLICATIONS PRINTERS DRIVES SHORTCUTS/ALIASES RECYCLE BIN/WASTEBASKET/ TRASH 2.1.3 Select and move icons. • On the desktop, click on an icon and drag and drop to a new location. 2.1.4 Create a shortcut/alias. • Select location to move shortcut to. • Right-click and click Create shortcut. 2.1.4 Rename a shortcut/alias. • Right-click on the shortcut icon. • Click Rename. • Enter new name. 2.1.4 Move a shortcut/alias. • Right-click on the shortcut icon. • Click Cut. • Select location to move shortcut to. • Right-click and select Paste. 2.1.4 Delete a shortcut/alias. • Right-click on the shortcut icon. • Click Delete. • Click Yes to confirm deletion. 2.2 Using Windows 2.2.1 Identify the different parts of a window: 1. Title bar 2. Menu 3. Toolbar/Ribbon 4. Status bar 5. Scroll bar. 2.2.2 Open, collapse, expand, restore down, maximise, resize, move, close a window. • To open a window, select the file or folder, right-click and select Open. • To collapse a window, click the Minimise button in the upper right corner of the window. • To expand a window, move the mouse to the edge of the Title bar and drag the window to increase the size. • To restore down a window, click the Restore Down button in the upper right corner of the window. • To maximise a window, click the Maximise button in the upper right corner of the window. • To resize a window, move the mouse over the Title bar and drag the window to size preferred. • To move a window, move the mouse over the Title bar and drag the window to a new location. • To close a window, click the Close button in the upper right corner of the window. 2.2.3 Switch between open windows. • Move the mouse over the application icons on the Task Bar so any open windows are displayed. • Click the required window icons found on the Task Bar. 2.3 Tools and Settings 2.3.1 Use available help functions. • Click the Start button. • Click Help and Support. • Enter the query into the Search Help search box. • Press the Return key. 2.3.2 View the computer’s basic system information: operating system name and version number, installed RAM. • Click the Start button. • Click Control Panel. • Click System. 2.3.3 Change desktop configuration settings: date and time. • Click the time shown on the right side of the Task Bar. • Click Change Date and time settings. • Click Change Date and time. • Enter a date and time. • Click Apply. 2.3.3 Change desktop configuration settings: volume settings. • Double-click the speaker button on the right side of the Task Bar. • Adjust the volume as required. 2.3.3 Change desktop configuration settings: background. • Right-click on the desktop and click Personalize. • Click a theme to change the desktop background. • Click Apply. 2.3.3 Change desktop configuration settings: resolution. • Right-click on the desktop and click Screen resolution. • Click the Resolution box. • Click on the Resolution field arrow and drag the slider to specify a screen resolution. • Click Apply. 2.3.4 Change keyboard language. • Click the Start button. • Click Control Panel. • Click Region and Language. • Click on the Keyboards and Languages tab. • Click Change Keyboards. • Click on the preferred keyboard language. • Click OK. 2.3.4 Add keyboard language. • Click the Start button. • Click Control Panel. • Click Region and Language. • Click on the Keyboards and Languages tab. • Click Change Keyboards. • Click Add. • Click on the expandable button next to the language required. • Click on the expandable button next to the keyboard. • Check the language checkbox option preferred. • Click OK. 2.3.4 Remove keyboard language. • Click the Start button. • Click Control Panel. • Click Region and Language. • Click on the Keyboards and Languages tab. • Click Change Keyboards. • Select the keyboard language to remove. • Click Remove • Click OK. 2.3.4 Change default language. • Click the Start button. • Click Control Panel. • Click Region and Language. • Click on the Keyboards and Languages tab. • Click Change Keyboards. • Select the language button in Default language input field. • Select from the list of installed default languages. • Click OK. 2.3.5 Shut down a non-responding application. • Press the Ctrl+Alt+Delete keys. • Click the Start Task Manager button. • In the Applications tab select the application. • Click End Task. 2.3.6 Install an application. • Click the Start button. • Click Control Panel. • Double-click Add or Remove Programs. • Click Add New Programs. • Click Install a program from the network. • Select program to install to begin the wizard. • Follow the wizard instructions. 2.3.6 Uninstall an application. • Click the Start button. • Click Control Panel. • Click Programs and Features. 2 Desktop, Icons, Settings 1 3 5 4 2
  • 15. Quick Reference• Select the application to uninstall. • Click Uninstall/Change. • Click Yes. 2.3.7 Connect a device (USB flash drive, digital camera, media player) to a computer. • Insert the flash drive (or cable for other device) into the USB port on the computer. • The computer will signal that a new device has been detected. • Save or view files and folders as needed. 2.3.7 Disconnect a device using an appropriate routine. • Click on the USB device icon on the Task Bar. • Select Eject USB Disk and remove the USB flash drive. 2.3.8 Capture a full screen. • Press the Print Screen key. 2.3.8 Capture an active window. • Open a window on the desktop. • Press the Alt key + Print Screen key. 3.1 Working with Text 3.1.1 Open a word processing application. • Click the Start button. • Select All Programs. • Click Microsoft Word 2010. 3.1.1 Close a word processing application. • Click the File button. • Click Exit. 3.1.1 Open files. • Click the File button. • Click Open. • Select the document to open and click Open. 3.1.1 Close files. • Click the File button. • Click Close. 3.1.2 Enter text into a document. • Click into the open word processing document. • Enter the text. 3.1.3 Copy text within a document, between open documents. • Select the text to copy. • On the Home tab, in the Clipboard group, click the Copy button. • Click in a new location within the document or within another open document. • On the Home tab in the Clipboard group, click the Paste button. 3.1.3 Move text within a document, between open documents. • Select the text to move. • On the Home tab, in the Clipboard group, click the Cut button. • Click in a new location within the document or within another open document. • On the Home tab in the Clipboard group, click the Paste button. 3.1.3 Paste a screen capture into a document. • After taking the screen capture, click in a new location within the document. • On the Home tab in the Clipboard group, click the Paste button. 3.1.4 Save and name a document. • Click the File button. • Click Save. • Create a file name and select the location. • Click Save. 3.2 Printing 3.2.1 Install a printer. • Click the Start button. • Click Devices and Printers. • Click Add a printer. • Follow the wizard instructions. 3.2.1 Uninstall a printer. • Click the Start button. • Click Devices and Printers. • Select the printer. • Right-click and select Remove device. • Click Yes to confirm removal. 3.2.1 Print a test page. • Right-click a printer. • Click Printer properties. • On the General tab, click Print Test Page. • Click OK. 3.2.2 Set the default printer from an installed printer list. • Click the Start button. • Click Devices and Printers. • Select a printer to set as default printer. • Right-click and click Set as Default Printer. 3.2.3 Print a document from a word processing application. • In an open document, click the File button. • Select Print. • Click Print. 3.2.4 View, pause, restart, cancel a print job. • To view a print job, double-click on the Printer icon on the Task Bar. • To pause a print job, right-click the print job and select Pause. • To restart a print job, right-click the print job and select Restart. • To delete a print job, right-click the print job and select Cancel. 4.1 Introducing Files and Folders 4.1.1 Understand how an operating system or- ganises drives, folders, files in a hierarchical structure. • Windows Explorer displays the hierarchical structure of files, folders, and drives on your computer. 4.1.1 Navigate between drives, folders, sub-folders, files. • Click the Start button. • Click Computer. • Double-click on the drive where the folder or file is located. • Locate the folder and file name on the drive. 4.1.2 Display file, folder properties like: name, size, location. • Right-click on the file or folder. • Select Properties. • Click OK. 4.1.3 Change view to display files and folders like: tiles, icons, list, details. • In an open window, click on the Change your view button. • Click on a preferred option to view files or folders. 4.1.4 Identify common file types like: Common File Type File Extension File Icon Word Processing .docx Spreadsheet .xlsx Presentation .pptx Portable Document Format .pdf Image .gif, .jpg, .bmp Audio .mp3 Video .avi Compressed .zip Executable .exe 4.1.5 Open a file, folder, drive. • Select the file, folder or drive to open. • Right-click and click Open. 4.1.6 Recognise good practice in folder, file naming: • Use meaningful names for folders and files to help with searching and organisation. 4.1.7 Create a folder. • Navigate to where the folder will be created. • Right-click and click New. • Click Folder. • Enter a folder name and press the Return key. 4.1.8 Rename a file, folder. • Right-click on the file or folder to re-name. • Click Rename. • Enter a new name. • Press the Return key. 4.1.9 Search for files by properties: all or part of file name. • Double-click the Windows Explorer icon on the Task Bar. • In the search field enter a full file name or part of a file name. • Click Search. 4.1.9 Search for files by properties: using wildcards if necessary • Double-click the Windows Explorer icon on the Task Bar. • In the search field use wildcards in the criteria boxes to perform search. • Enter *.txt to find all files with the extension .txt. • Enter b*.* to find all files that begin with the letter b. • Click Search. 4.1.9 Search for files by properties: by content. • Click the Start button. • Click Search. • Enter text. 4.1.9 Search for files by properties: by date modified. • Double-click the Windows Explorer icon on the Task Bar. • Click in the Search Libraries field. • Click Date modified. • Select date required from displayed calendar. 4.1.10 View list of recently used files. • Click the Start button. • Select Recent Items. • If the Recent Items button is not already installed, right-click the Task Bar and click Properties. • In the Start Menu tab, click Customize. • In the dialog displayed, check the Recent Items checkbox. • Click OK. 4.2 Organising Files and Folders 4.2.1 Select individual files, folders. • Click on a file or folder. 4.2.1 Select adjacent files, folders. • Click the first file or folder, hold down the Shift key, and then click the last file or folder. • Release the Shift key. 4.2.1 Select non-adjacent files, folders. • Hold down the Ctrl key, and then click each file or folder to select. 4.2.2 Sort files in ascending, descending order by name. • Click the View menu. • Select Sort by. • Click Name to sort files by name in ascending order. • Click the View menu. • Select Sort by. • Click Descending to sort in descending order. 4.2.2 Sort files in ascending, descending order by size. • Click the View menu. • Select Sort by. • Click Size to sort files by size in ascending order. • Click the View menu. • Select Sort by. • Click Descending to sort in descending order. 4.2.2 Sort files in ascending, descending order by type. • Click the View menu. • Select Sort by. • Click Type to sort files by name in ascending order. • Click the View menu. • Select Sort by. • Click Descending to sort in descending order. 3 Outputs 4 File Management
  • 16. Quick Reference4.2.2 Sort files in ascending, descending order by date modified. • Double-click on the folder containing the files to sort. • Click the View menu. • Select Sort by. • Click Date Modified to sort files by date modified in ascending order. • Click the View menu. • Select Sort by. • Click Descending to sort in descending order. 4.2.3 Copy files, folders between folders, drives. • Right-click on the file or folder to copy. • Click Copy. • Click on the new location. • Right-click and click Paste. 4.2.3 Move files, folders between folders, drives. • Right-click on the file or folder to move. • Click Cut. • Click on the new location. • Right-click and click Paste. 4.2.4 Delete files, folders to the recycle bin/ wastebasket/trash. • Right-click on the file or folder to delete. • Click Delete. • Click Yes to confirm deletion. 4.2.4 Restore files, folders to original location. • Double-click the Recycle Bin icon. • Select the items to restore. • On the Recycle Bin Tasks pane, click Restore the selected items. 4.2.5 Empty the recycle bin/wastebasket/trash. • Open the Recycle Bin. • On the Recycle Bin Tasks pane, click Empty Recycle Bin. 4.3 Storage and Compression 4.3.1 Identify the main types of storage media like: Storage Media Description Internal hard disk A non-volatile, random access storage device for digital data External hard disk A hard disk located outside the computer Network drive A drive shared by multiple users or devices CD An optical disc used to store music DVD An optical disc used to store video Blu-ray Disc A high definition optical disc used to store media with up to five times greater storage than DVDs USB flash drive A portable digital storage device Memory card A digital storage device used in cameras and other devices Online file storage A file storage service available over the Internet 4.3.2 Identify file size, folder size, storage capacity measurements like: Unit Bit Size Comparable To Kilobyte (KB) 1,024 Bytes ½ page of plain text Megabyte (MB) 1,024 KB 700 pages of plain text or one picture/graphic Gigabyte (GB) 1, 024 MB A set of encyclopaedias Terabyte (TB) 1,024 GB A bookstore full of books 4.3.3 View available space on a storage device. • Select the drive or device. • Right-click and select Properties. • Click OK. 4.3.4 Understand the purpose of file, folder com- pression. • Compressing files decreases a file’s size and reduces the amount of space used for storage. 4.3.5 Compress files, folders. • Select files. • Right-click on files. • Select Send To. • Select Compressed (zipped) Folder. 4.3.6 Extract compressed files, folders to a location on a drive. • Right-click on the compressed file icon. • Select Extract All. 5.1 Network Concepts 5.1.1 Define the term network. • Network- More than one computer or device connected together to share data, applications or peripherals 5.1.1 Outline the purpose of a network: • Share, access data and devices securely 5.1.2 Define the term Internet. Identify some of its main uses like: World Wide Web (WWW), VoIP, e-mail, IM. • Internet - A global network connecting millions of computers worldwide • Main uses - To provide access to information via the World Wide Web, to allow conversa- tions over the internet (VoIP), to allow digital message exchange via email and to allow real-time text messaging via instant messaging 5.1.3 Define the terms intranet, virtual private net- work (VPN) and identify their main uses. • Intranet - A private Internet used internally within an organisation to store internal docu- ments, training material or business specific applications • VPN - A network used to connect remote users securely to a business network to share data and communicate. 5.1.4 Understand what transfer rate means. Un- derstand how it is measured: bits per second (bps), kilobits per second (kbps), megabits per second (mbps), gigabits per second (gbps). • Transfer rate - The rate at which information is transferred to or from a disk drive • Measured in bits per second (bps), kilobits per second (kbps), megabits per second (mbps), gigabits per second (gbps). 5.1.5 Understand the concepts of downloading from, uploading to a network. • Downloading - To copy a file or image from a web page • Uploading - To copy a file or image from a computer to a web page 5.2 Network Access 5.2.1 Identify the different options for connecting to the Internet like: • Phone line • Mobile technology • Cable • Wi-fi • Wi-max • Satellite 5.2.2 Define the term Internet Service Provider (ISP). • Internet Service Provider (ISP) - An organisa- tion that provides access to the Internet 5.2.2 Identify important considerations when selecting an Internet subscription option like: • Upload speed • Download speed • Download quota • Cost 5.2.3 Recognise the status of a wireless network: • Protected/secure - The network is protected to prevent unauthorised access. • Open - The network is accessible to all 5.2.4 Connect to a wireless network. • Double-click on the wireless connection icon on the Task Bar. • Select desired network and connect, using a password if required. 6.1 Protecting Data on Computers and Devices 6.1.1 Recognise good password policies like: • Create with adequate length • Create with adequate character mix • Do not share • Change regularly 6.1.2 Define the term firewall and outline its purpose. • Firewall - A security system designed to pro- tect a network against external threats 6.1.3 Understand the purpose of regularly backing up data to a remote location. • Important to have an off-site backup copy of files in case of unforeseen network, hardware or software problems, so that a copy of the data is available if the original data were to become unusable 6.1.4 Recognise the importance of regularly updating software like: anti-virus, application, operating system software. • Update anti-virus regularly to detect new viruses • Update application and operating system software regularly to fix known problems and security risks 6.2 Malware 6.2.1 Define the term malware. Identify different types of malware like: virus, worm, Trojan, spyware. • Malware - Malicious software designed to install itself on a computer without the owner’s consent • Virus - Intrusive programs that infect computer files and may cause damage • Worm - Self-replicating malware that uses a computer network to send copies of itself to other computers • Trojan - Destructive program that masquer- ades as an application. • Spyware - Malware that collects information on user browser habits without their consent 6.2.2 Be aware how malware can infect a computer or device. • Viruses can be transmitted via the installation of a program from an insecure source on the Internet, a CD- ROM, an online bulletin board, or e-mail attachments. 6.2.3 Use anti-virus software to scan a computer. • Open the virus scanning application. • Enter the specific drive(s), folder(s) and name of file to scan. • Perform the scan. 6.3 Health and Green IT 6.3.1 Recognise ways to help ensure a user’s well- being while using a computer or device like: • Take regular breaks • Ensure appropriate lighting and posture • Lighting should be bright enough and correctly positioned. • Correct positioning of the computer, desk and seat will minimise bad posture. 6.3.2 Recognise computer and device energy saving practices: • Turning off - When not in use • Adjusting automatic shut down - After a speci- fied number of minutes not used • Adjusting backlight - This can be decreased • Adjusting sleep mode settings - This can be activated after pre-set timings 6.3.3 Recognise that computers, devices, batteries, printer cartridges and paper should be recycled. 6.3.4 Identify some options available for enhancing accessibility like: Type Description Voice recognition software Translates voice commands and is used in place of a mouse and keyboard Screen reader Reads aloud information from a computer display, for users with impaired vision Screen magnifier Displays enlarged screen content On-screen keyboard Provides an alternative to a physical keyboard or inputting data High contrast Makes the screen easier to view for users 5 Networks 6 Security and Well-Being © 2012, ECDL Foundation. This Quick Reference may be used by candidates to assist in preparation for this ECDL module test. ECDL Foundation does not warrant that use of this guide will ensure passing of the test. Screen shots used with permission from Microsoft.
  • 17. Online Essentials Module Summary WHAT ARE THE BENEFITS OF THIS MODULE? HOW DO I GET STARTED? SYLLABUS OUTLINE To find out more about this module and to locate your nearest accredited test centre, please visit www.ecdl.org/programmes. CATEGORY SKILL SET Web Browsing Concepts Web Browsing Web-Based Information Communication Concepts Using E-mail Key Concepts Security and Safety Using the Web Browser Tools and Settings Bookmarks Web Outputs Search Critical Evaluation Copyright, Data Protection Online Communities Communication Tools E-mail Concepts Sending E-mail Receiving E-mail Tools and Settings Organising E-mails Using Calendars Covers the key skills needed to understand the main concepts relating to web browsing and online security. Certifies best practice in effective online computer use. Developed with input from computer users, subject matter experts, and practising computer professionals from all over the world. This process ensures the relevance and range of module content. This module sets out essential concepts and skills relating to web browsing, effective information search, online communication and e-mail. On completion of this module the candidate will be able to: Understand web browsing and online security concepts. Use the web browser and manage browser settings, bookmarks, and web outputs. Search effectively for online information and critically evaluate web content. Understand key copyright and data protection issues. Understand concepts of online communities, communications and email. Send, receive e-mails and manage email settings. Organise and search emails and use calendars.
  • 18. © 2012 ECDL Foundation Ref: ECDL / ICDL Online Essentials - Syllabus - V1.0 This module sets out essential concepts and skills relating to web browsing, effective information search, online communication and e-mail. Module Goals Successful candidates will be able to:  Understand web browsing and online security concepts.  Use the web browser and manage browser settings, bookmarks, web outputs.  Search effectively for online information and critically evaluate web content.  Understand key copyright and data protection issues.  Understand concepts of online communities, communications and e-mail.  Send, receive e-mails and manage e-mail settings.  Organise and search e-mails and use calendars. CATEGORY SKILL SET REF. TASK ITEM 1 Web Browsing Concepts 1.1 Key Concepts 1.1.1 Understand the terms: Internet, World Wide Web (WWW), Uniform Resource Locator (URL), hyperlink. 1.1.2 Understand the structure of a web address. Identify common types of domains like: geographical, organisation (.org, .edu, .com, .gov). 1.1.3 Define the term web browser. Identify common web browsers. 1.1.4 Outline different Internet activities like: information searching, shopping, learning, publishing, banking, government services, entertainment, communication. 1.2 Security and Safety 1.2.1 Recognise ways to protect yourself when online: purchase from secure reputable websites, avoid unnecessary disclosure of personal and financial information, log off from websites. 1.2.2 Define the term encryption. 1.2.3 Identify a secure website: https, lock symbol. ECDL / ICDL Online Essentials
  • 19. © 2012 ECDL Foundation Ref: ECDL / ICDL Online Essentials - Syllabus - V1.0 CATEGORY SKILL SET REF. TASK ITEM 1.2.4 Define the term digital certificate. 1.2.5 Recognise options for controlling Internet use like: supervision, web browsing restrictions, download restrictions. 2 Web Browsing 2.1 Using the Web Browser 2.1.1 Open, close a web browsing application. 2.1.2 Enter a URL in the address bar and go to the URL. 2.1.3 Refresh a web page, stop a web page downloading. 2.1.4 Activate a hyperlink. 2.1.5 Open a web page in a new tab, new window. 2.1.6 Open, close tabs, windows. Switch between tabs, windows. 2.1.7 Navigate between pages: backwards, forwards, home page. 2.1.8 Show previously visited URLs using history. 2.1.9 Complete, submit, reset a web- based form. 2.1.10 Use a web tool to translate a web page, text. 2.2 Tools and Settings 2.2.1 Set the web browser home page. 2.2.2 Understand the term pop-up. Allow, block pop-ups. 2.2.3 Understand the term cookie. Allow, block cookies. 2.2.4 Use available help functions. 2.2.5 Display, hide built-in toolbars. Restore, minimise the ribbon. 2.2.6 Delete history, temporary internet files, saved form data.
  • 20. © 2012 ECDL Foundation Ref: ECDL / ICDL Online Essentials - Syllabus - V1.0 CATEGORY SKILL SET REF. TASK ITEM 2.3 Bookmarks 2.3.1 Add, delete a bookmark / favourite. 2.3.2 Show bookmarks / favourites. 2.3.3 Create, delete a bookmarks / favourites folder. Add web pages to a bookmarks / favourites folder. 2.4 Web Outputs 2.4.1 Download, save files to a location. 2.4.2 Copy text, image, URL to another location like: document, e-mail. 2.4.3 Preview, print a web page, selection from a web page using available printing options. 3 Web-Based Information 3.1 Search 3.1.1 Define the term search engine and name some common search engines. 3.1.2 Carry out a search using a keyword, phrase. 3.1.3 Refine a search using advanced search features like: exact phrase, date, language, media type. 3.1.4 Search a web-based encyclopaedia, dictionary. 3.2 Critical Evaluation 3.2.1 Understand the importance of critically evaluating online information. Understand the purpose of different sites like: information, entertainment, opinion, sales. 3.2.2 Outline factors that determine the credibility of a website like: author, referencing, up-to-date content. 3.2.3 Recognise the appropriateness of online information for a particular audience.
  • 21. © 2012 ECDL Foundation Ref: ECDL / ICDL Online Essentials - Syllabus - V1.0 CATEGORY SKILL SET REF. TASK ITEM 3.3 Copyright, Data Protection 3.3.1 Define the terms copyright, intellectual property. Recognise the need to acknowledge sources and/or seek permission as appropriate. 3.3.2 Recognise the main data protection rights and obligations in your country. 4 Communication Concepts 4.1 Online Communities 4.1.1 Understand the concept of an online (virtual) community. Identify examples like: social networking websites, Internet forums, web conferencing, chat, online computer games. 4.1.2 Outline ways that users can publish and share content online: blogs, microblogs, podcasts, images, audio and video clips. 4.1.3 Recognise ways to protect yourself when using online communities: apply appropriate privacy settings, restrict available personal information, use private messaging when appropriate, disable location information, block/report unknown users. 4.2 Communication Tools 4.2.1 Define the term Instant Messaging (IM). 4.2.2 Define the terms short message service (SMS), multimedia message service (MMS). 4.2.3 Define the term Voice over Internet Protocol (VoIP). 4.2.4 Recognise good practice when using electronic communication: be accurate and brief, use clear subject headings, do not inappropriately disclose personal details, do not circulate inappropriate content, spell check content. 4.3 E-mail Concepts 4.3.1 Define the term e-mail and outline its main uses.
  • 22. © 2012 ECDL Foundation Ref: ECDL / ICDL Online Essentials - Syllabus - V1.0 CATEGORY SKILL SET REF. TASK ITEM 4.3.2 Identify the structure of an e-mail address. 4.3.3 Be aware of possible problems when sending file attachments like: file size limits, file type restrictions. 4.3.4 Outline the difference between the To, Copy (Cc), Blind copy (Bcc) fields and recognise their appropriate use. 4.3.5 Be aware of the possibility of receiving fraudulent and unsolicited e-mail. Be aware of the possibility of an e-mail infecting the computer. 4.3.6 Define the term phishing. 5 Using E-mail 5.1 Sending E-mail 5.1.1 Access an e-mail account. 5.1.2 Outline the main purpose of standard e-mail folders: Inbox, Outbox, Sent, Deleted / Trash Items, Draft, Spam/Junk. 5.1.3 Create an e-mail. 5.1.4 Enter one or more e-mail addresses, distribution list in the To, Copy (Cc), Blind copy (Bcc) fields. 5.1.5 Enter an appropriate title in the subject field and enter, paste text into the body of an e-mail. 5.1.6 Add, remove a file attachment. 5.1.7 Send an e-mail with, without priority. 5.2 Receiving E-mail 5.2.1 Open, close an e-mail. 5.2.2 Use the reply, reply to all function, and identify when these should be used. 5.2.3 Forward an e-mail.
  • 23. © 2012 ECDL Foundation Ref: ECDL / ICDL Online Essentials - Syllabus - V1.0 CATEGORY SKILL SET REF. TASK ITEM 5.2.4 Open, save a file attachment to a location. 5.2.5 Preview, print a message using available printing options. 5.3 Tools and Settings 5.3.1 Use available help functions. 5.3.2 Display, hide built-in toolbars. Restore, minimise the ribbon. 5.3.3 Create and insert a text e-mail signature. 5.3.4 Turn on, turn off an automatic out of office reply. 5.3.5 Recognise e-mail status as read, unread. Mark an e-mail as read, unread. Flag, unflag an e-mail. 5.3.6 Create, delete, update a contact, distribution list / mailing list. 5.4 Organising E-mails 5.4.1 Add, remove message inbox headings like: sender, subject, date received. 5.4.2 Search for an e-mail by sender, subject, e-mail content. 5.4.3 Sort e-mails by name, by date, by size. 5.4.4 Create, delete an e-mail folder/label. Move e-mails to an e- mail folder/label. 5.4.5 Delete an e-mail. Restore a deleted e-mail. 5.4.6 Empty the e-mail bin/deleted items /trash folder. 5.4.7 Move a message to, remove a message from a junk folder. 5.5 Using Calendars 5.5.1 Create, cancel, update a meeting in a calendar.
  • 24. © 2012 ECDL Foundation Ref: ECDL / ICDL Online Essentials - Syllabus - V1.0 CATEGORY SKILL SET REF. TASK ITEM 5.5.2 Add invitees, resources to a meeting in a calendar. Remove invitees, resources from a meeting in a calendar. 5.5.3 Accept, decline an invitation.
  • 25. Online Essentials Quick Reference This quick reference is for Microsoft Internet Explorer 9.0 and Outlook 2010 This module sets out essential concepts and skills relating to web browsing, effective information search, online communication and e-mail. Successful candidates will be able to: • Understand web browsing and online security concepts. • Use the web browser and manage browser settings, book- marks, web outputs. • Search effectively for online information and critically evalu- ate web content. • Understand key copyright and data protection issues. • Understand concepts of online communities, communica- tions and e-mail. • Send, receive e-mails and manage e-mail settings. • Organise and search e-mails and use calendars. 1 Web Browsing Concepts 1.1 Key Concepts 1.1.1 Understand the terms: Internet, World Wide Web (WWW), Uniform Resource Locator (URL), hyperlink. • Internet - A global network connecting millions of computers worldwide • World Wide Web (WWW) - A collection of linked documents residing on Internet servers around the world • Uniform Resource Locator (URL) - An address for web pages found on the Internet • Hyperlink - A link that transfers the user from one web page to another web page by clicking on a highlighted word or icon 1.1.2 Understand the structure of a web address. • Protocol - Usually http:// (Hypertext Transfer Protocol) this defines how the information is transmitted • WWW - Indicates the website is on the World Wide Web • Domain - The section of the Internet owned by the website • Extension - Identifies either the type of organisation or the country of origin of the website. http://www.ecdl.org Protocol www Domain Extension 1.1.2 Identify common types of domains like: geographical, organisation (.org, .edu, .com, .gov). • Geographical domain - Two letter identifier that lists where the website is registered • Organisation domain - Three letter identifier that identifies if the organisation is commercial, governmental, educational, non- profit making etc. 1.1.3 Define the term web browser. Identify common web browsers. • Web browser - A software program used to view information on the World Wide Web • Examples - Firefox, Google Chrome, Internet Explorer, Safari 1.1.4 Outline different Internet activities like: • Information searching • Shopping • Learning • Publishing • Banking • Government services • Entertainment • Communication 1.2 Security and Safety 1.2.1 Recognise ways to protect yourself when online: • Purchase from secure reputable websites - More likely to have secure payment and data protection • Avoid unnecessary disclosure of personal and financial information - Helps avoid identity theft • Log off from websites - Prevents others using your personal details 1.2.2 Define the term encryption. • Encryption - The encoding of data to prevent unauthorised access 1.2.3 Identify a secure website: https, lock symbol. • https - (Hypertext Transfer Protocol Secure) is displayed in the Address Bar • Lock symbol - Displayed in the Address Bar 1.2.4 Define the term digital certificate. • Digital certificate - Certifies the validity and credentials of a website 1.2.5 Recognise options for controlling Internet use like: • Supervision - Physical or software monitoring of Internet activity • Web browsing restrictions - Using browser settings to control web browsing • Download restrictions - Limiting the type or amount of data downloaded 2.1 Using the Web Browser 2.1.1 Open a web browsing application. • Click the Start Button. • Select All Programs. • Click Internet Explorer. 2.1.1 Close a web browsing application. • Click the Close button in the top right of the window. • If message displayed, click Close all tabs. 2.1.2 Enter a URL in the address bar and go to the URL. • Click into the address bar. • Enter the URL. 2.1.3 Refresh a web page. • Click the Refresh button beside the Address Bar. 2.1.3 Stop a web page downloading. • Click the Stop button beside the Address Bar. 2.1.4 Activate a hyperlink. • Place the mouse pointer over the hyperlink. • Click on the hyperlink. 2.1.5 Open a web page in a new tab • Open a Web page. • Right-click on a link. • Click Open in new tab. 2.1.5 Open a web page in a new window. • Right-click on a link. • Click Open in new window. 2.1.6 Open, close tabs, windows. • To open a tab, click on the New Tab icon at the top of the browser window. • To close a tab, click the Close Tab icon in the corner of the open tab. • To open a window, click the Page menu on the Command Bar and click New Window. • To close a window, click on the Internet Explorer icon on the taskbar and click the Close button. 2.1.6 Switch between tabs, windows. • To switch between tabs, click on the tab required at the top of the browser window. • To switch between windows, click on the Internet Explorer icon on the Task Bar and select the window required. 2.1.7 Navigate between pages: backwards, forwards, home page. • To show the previous web page visited, click the Back button beside the Address Bar. • To show the next web page visited, click the Forward button beside the Address Bar. • Click the Home button on the Command Bar. 2.1.8 Show previously visited URLs using history. • Click the View favorites, feeds, and history button. • On the History tab, click on a date. 2.1.9 Complete, submit, reset a web-based form. • To complete a form, click into each form field and enter text or select from given options as required. • To send the entered data from the form to the server, click Submit. • To remove any entered data in the form and start again, click Reset. 2.1.10 Use a web tool to translate a web page, text. • To translate a web page, right-click and click Translate with Bing. • To translate text, select the text, right-click and click Translate with Bing. 2 Web Browsing Keyboard Shortcuts & Commands Open menu Help Cut Copy Paste Undo Up one screen Down one screen Beginning of a line End of line Purpose PurposeKeyboard Shortcut Keyboard Shortcut ALT+LETTER F1 CTRL+X CTRL+C CTRL+V CTRL+Z PAGE UP PAGE DOWN HOME END © 2012, ECDL Foundation. This Quick Reference may be used by candidates to assist in preparation for this ECDL module test. ECDL Foundation does not warrant that use of this guide will ensure passing of the test. Screen shots used with permission from Microsoft.
  • 26. Quick Reference2.2 Tools and Settings 2.2.1 Set the web browser home page. • Navigate to the web page to set as the home page. • Click the Tools button on the Command Bar. • Click Internet Options. • Click Use current. • Click OK. 2.2.2 Understand the term pop-up. • Pop-up- A new browser window that opens unrequested over current web page and usually contain advertisements 2.2.2 Allow, block pop-ups. • Click the Tools button. • Click Internet Options. • Select the Privacy tab. • To allow pop-ups, uncheck the Turn on Pop-up Blocker checkbox. • To block pop-ups, check the Turn on Pop-up Blocker checkbox. • Click OK. 2.2.3 Understand the term cookie. • Cookie - A text file stored on a user’s computer that monitors their web habits 2.2.3 Allow, block cookies. • Click the Tools button. • Click Internet Options. • Click the Privacy tab. • Under Settings, move the slider to the top to block all cookies or to the bottom to allow all cookies. • Click OK. 2.2.4 Use available help functions. • Click the Help button on the Command Bar. • Click Internet Explorer Help. 2.2.5 Display, hide built-in toolbars. • Right-click near the top of the window. • To display a toolbar, click on the toolbar name so that a check mark is showing. • To hide a toolbar, click on the toolbar name to remove the checkmark. 2.2.5 Restore, minimise the ribbon. • To minimise the ribbon, click F11. • To restore the ribbon, click F11. 2.2.6 Delete history, temporary internet files, saved form data. • Click the Tools button. • Click Internet Options. • In the General tab, in the Browsing History field, click Delete. • To delete history, check the History checkbox. • To delete temporary internet files, check the Temporary Internet Files check box. • To delete saved form data, check the Form Data check box. • Click Delete. 2.3 Bookmarks 2.3.1 Add a bookmark / favourite. • Go to a web page. • Click the Favorites button. • Click the Add to Favorites button. • Click Add. 2.3.1 Delete a bookmark / favourite. • Click the Favorites button. • Click the Add to Favorites arrow. • Click Organize Favorites. • Select a web page and click Delete. • Click Close. 2.3.2 Show bookmarks / favourites. • Click the Favorites button. • On the Favorites tab, click a web page. 2.3.3 Create a bookmarks / favourites folder. • Click the Favorites button. • Click the Add to Favorites arrow. • Click Organize Favorites. • Click New Folders and name the folder. 2.3.3 Delete a bookmarks / favourites folder. • Click the Favorites button. • Click the Add to Favorites arrow. • Click Organize Favorites. • Select a folder and click the Delete button. 2.3.3 Add web pages to a bookmarks / favourites folder. • Click the Favorites button. • Click the Add to Favorites button. • Click the Create in arrow and select a folder to store the bookmark in. • Click Add. 2.4 Web Outputs 2.4.1 Download files to a location. • Right-click on the item. • Select Save Target As. • Create a filename and select the location. • Click Save. 2.4.1 Save files to a location. • Click the Page button on the Command Bar. • Click Save As. • Select a location. • Enter the file name. • Click Save. 2.4.2 Copy text, image to another location like: document, e-mail. • Right-click on the text or image. • Select Copy. • Open a document or e-mail. • Right-click and click Paste. 2.4.2 Copy URL from a web page to another location like: document, e-mail. • Click in the address bar. • Select the URL. • Right-click and click Copy. • Open a document or e-mail. • Right-click and click Paste. 2.4.3 Preview, selection from a web page using available printing options. • On the Command Bar, click the Print arrow. • Click Print Preview. 2.4.3 Print a web page, selection from a web page using available printing options. • On the Command Bar, click the Print arrow. • Click Print. • To print a web page, click All and click Print. • To print a selection from a web page, select the text, click Selection and click Print. 3.1 Search 3.1.1 Define the term search engine and name some common search engines. • Search engine - A website used to search for information on the World Wide Web, based on the criteria entered • Examples-www.google.com, www.yahoo.com, www.bing.com 3.1.2 Carry out a search using a keyword, phrase. • Open a search engine. • Click into the search box in the search engine window. • Enter the keyword or phrase and press the Return key. 3.1.3 Refine a search using advanced search features like: exact phrase, date, language, media type. • After initial search, click the More search tools link from the search engine window. • Enter a combination of criteria and selections from the advanced choices. 3.1.4 Search a web-based encyclopaedia. • Click into the Address Bar. • Enter the URL http://en.wikipedia.org/wiki/ Main_Page. • Click into the search box at the top right of Wikipedia. • Enter a keyword or phrase. • Press the Return key. 3.1.4 Search a web-based dictionary. • Click into the Address Bar. • Enter the URL http://www.collinslanguage. com. • Click into the search box at the top of Collins dictionary. • Enter a word. • Click the Search button. 3.2 Critical Evaluation 3.2.1 Understand the importance of critically evaluating online information. • Online data should be checked or questioned rather than accepted as fact. 3.2.1 Understand the purpose of different sites like: • Information - Giving readers facts on current affairs, special interests • Entertainment - Providing humorous or engaging content • Opinion - Sites, such as blogs, that provide the author’s view on topics • Sales - Online shopping and promoting products or services 3.2.2 Outline factors that determine the credibility of a website like: • Author- The author or authors should be clearly identified • Referencing - Referencing of all sources quoted or mentioned should be clear • Up-to-date content - Material should be current and maintained 3.2.3 Recognise the appropriateness of online information for a particular audience. • Web content should be adapted to the needs of the audience • For example, those sites geared towards children should have age-appropriate material, higher graphic content, lower text volume. 3.3 Copyright, Data Protection 3.3.1 Define the terms copyright, intellectual property. • Copyright - Exclusive rights to a work for a specified period of time • Intellectual property - Creative ideas or inventions that can be protected by the owner 3.3.1 Recognise the need to acknowledge sources and/or seek permission as appropriate. • To avoid plagiarism any content referenced or quoted should be properly acknowledged • Permission should be sought to quote someone particularly for interviews or e-mail exchanges 3.3.2 Recognise the main data protection rights and obligations in your country. • Note that rights can vary between countries and states • Destroy personal information no longer needed by the business • Notify data subjects if data about them acquired in an unauthorised way • Implement reasonable security 4.1 Online Communities 4.1.1 Understand the concept of an online (virtual) community. • Like-minded individuals who interact online 4.1.1 Identify examples like: • Social networking websites • Internet forums • Web conferencing • Chat • Online computer games 4.1.2 Outline ways that users can publish and share content online: • Blog - A shared on-line journal • Microblog - A shared on-line journal with smaller updates • Podcasts - Digital media files released regularly and can be downloaded through an RSS feed • Images - Digital photos and graphics • Audio and video clips - typically shared on sites like YouTube and Flickr 4.1.3 Recognise ways to protect yourself when using online communities: • Apply appropriate privacy settings- Make your profile private • Restrict available personal information- Help avoid identity theft and fraud • Use private messaging when appropriate- Do not make personal communications public • Disable location information- If not, your current location is displayed • Block/report unknown users- Unless you can verify their identity 4.2 Communication Tools 4.2.1 Define the term Instant Messaging (IM). • IM - Real-time text-based communication via the Internet 4.2.2 Define the terms short message service (SMS), multimedia message service (MMS). • SMS - The sending and receiving of short text messages between mobile devices. • MMS - The sending and receiving of audio and video clips between mobile devices. 4.2.3 Define the term Voice over Internet Protocol (VoIP). • Allows users to talk to each other in real time over the Internet 4.2.4 Recognise good practice when using electronic communication: • Be accurate and brief • Use clear subject headings • Do not inappropriately disclose personal details • Do not circulate inappropriate content 3 Web-Based Information 4 Communication Concepts
  • 27. Quick Reference• Spell check content 4.3 E-mail Concepts 4.3.1 Define the term e-mail and outline its main uses. • An electronic message sent or received over the Internet • Used for sending and receiving messages and attachments 4.3.2 Identify the structure of an e-mail address. j d o e @ e c d l . o r g UserName @ Sign Domain Name Extension • UserName - A unique name identifying the user’s e-mail name • @ - Used to separate the user name from the domain • Domain Name - The location/company of the e-mail address • Extension - Typically identifies the type of organisation or the country the e-mail address is associated with 4.3.3 Be aware of possible problems when sending file attachments like: • File size limits - E-mail attachments may exceed the e-mail provider’s maximum file size limit • File type restrictions - Executable files are often rejected by e-mail servers 4.3.4 Outline the difference between the To, Copy (Cc), Blind copy (Bcc) fields and recognise their appropriate use. • To - Main recipient of the e-mail and has to act on the e-mail • Cc - Included for informational purposes only • Bcc - Blind carbon copy address not visible to other recipients 4.3.5 Be aware of the possibility of receiving fraudulent and unsolicited e-mail. Be aware of the possibility of an e-mail infecting the computer. • E-mail users may receive e-mail or junk mail from unscrupulous sources. • Viruses may be activated when an e-mail messages or attachments from unknown sources are opened. 4.3.6 Define the term phishing. • A fraudulent e-mail message that often has a link to a fake website • Encourages recipients to divulge personal and financial details 5.1 Sending E-mail 5.1.1 Access an e-mail account. • Click the Start button. • Select All Programs. • Click Microsoft Office. • Click Microsoft Office Outlook 2010. 5.1.2 Outline the main purpose of standard e-mail folders: • Inbox - Folder all e-mails are sent to by default • Outbox - Temporary folder that sores e-mails until they have been sent • Sent - Folder that stores all sent e-mails • Deleted / Trash Items - Stores mails no longer needed • Draft - Stores mails before the user chooses to send them • Spam/Junk - Stores incoming mail from unknown or suspicious senders 5.1.3 Create an e-mail. • On the Home tab, in the New group, click the New E-mail button. 5.1.4 Enter one or more e-mail addresses, distribution list in the To field. • Click in the To field. • Enter the e-mail address of the recipient or the name of a contact group. 5.1.4 Enter one or more e-mail addresses, distribution list in the Copy (Cc) field. • Click in the Cc field. • Enter the e-mail address of the Cc recipient or the name of a contact group. 5.1.4 Enter one or more e-mail addresses, distribution list in the Blind copy (Bcc) field. • Click in the Bcc field. • Enter the e-mail address of the Bcc recipient or the name of a contact group. 5.1.5 Enter an appropriate title in the subject field • Click in the Subject field. • Enter the subject of the e-mail. 5.1.5 Enter text into the body of an e-mail. • Click in the body of the e-mail and enter text required. 5.1.5 Paste text into the body of an e-mail. • Select the text to copy, right-click and select Copy. • Open the e-mail message and click the location where you want to paste the text. • On the Message tab, in the Clipboard group, click the Paste button. 5.1.5 Spell check an e-mail. • Click at the beginning of the e-mail message. • On the Review tab, in the Proofing group, click the Spelling & Grammar button. • Correct errors as suggested. • Once the spell check is complete, click OK. 5.1.6 Add a file attachment. • On the Message tab, in the Include group, click the Attach File button. • Locate and select the file to attach. • Click Insert. 5.1.6 Remove a file attachment. • Select the attachment in the Attached field. • Press the Delete Key. 5.1.7 Send an e-mail with, without priority. • On the Message tab, in the Tags group, click the High Importance or the Low Importance button. • Click Send. 5.2 Receiving E-mail 5.2.1 Open an e-mail. • Select the Inbox icon on the Navigation pane. • Double-click the e-mail. 5.2.1 Close an e-mail. • Click the Close button at the top right of the window. 5.2.2 Use the reply, reply to all function. • Open the message. • On the Home tab, in the Respond group, click the Reply or the Reply all button. • Enter any text required. • Click Send. 5.2.2 Identify when the reply, reply to all function should be used. • Use Reply to send message to the Sender. • Use Reply All to send message to the Sender and to all of those in the Cc field. 5.2.3 Forward an e-mail. • Open the message. • On the Home tab, in the Respond group, click the Forward button. • Enter e-mail addresses into the To field and the Cc field as required. • Enter any text required. • Click Send. 5.2.4 Open, save a file attachment to a location. • Open the message. • Right-click on the attachment. • Select Save As. • Create a file name and select a location to save the file. • Click Save. 5.2.5 Preview a message using available printing options. • Open the message. • Click the File menu, select Print. • A print preview is displayed on the right of the window. 5.2.5 Print a message using available printing options. • Open the message. • Click the File menu, select Print, then click Print. • Select desired options. • Click OK. 5.3 Tools and Settings 5.3.1 Use available help functions. • Click the Help button on the Standard toolbar. 5.3.2 Display built-in toolbars. • Right-click on the Toolbar area at the top of the window. • Click on a Toolbar that is not currently displayed. 5.3.2 Hide built-in toolbars. • Right-click on the Toolbar area at the top of the window. • Click on a Toolbar that is currently displayed. 5.3.2 Restore, minimise the ribbon. • Right-click any tab. • To minimise the ribbon, click Minimize the ribbon. • To restore the ribbon, click on the checked Minimize the ribbon. 5.3.3 Create a text e-mail signature. • Create a new e-mail. • On the Message tab, in the Include group, click the Signature arrow. • Click Signatures. • On the E-mail signature tab click New. • In the Enter a name for your new signature box, enter a name. • Click OK. • In the Edit signature box, enter the text to be included in the signature. • To format the text, select the text, and then use the style and formatting buttons to select the options preferred • Click OK. 5.3.3 Insert a text e-mail signature. • Create a new e-mail. • If the signature is not shown automatically, on the Message tab, in the Include group, click the Signature arrow. • Click the name of the signature previously created. 5.3.4 Turn on, turn off an automatic out of office reply. • Click on the File menu, then click Info. • Click the Automatic Replies button. • To turn on an automatic out of office reply, check the I am currently Out of the Office checkbox. • To turn off an automatic out of office reply, check the I am currently In the Office checkbox. • Click OK. 5.3.5 Recognise e-mail status as read, unread. Flag, unflag an e-mail. • Read e-mail messages appear in regular type with an open envelope icon. • Unread e-mail messages appear in bold type with a closed envelope icon. 5.3.5 Mark an e-mail as read, unread. • Select the message. • On the Home tab, in the Tags group, click the Unread/Read button. 5.3.5 Flag an e-mail. • Select the message. • On the Home tab, in the Tags group, click the Follow Up button. • Click option preferred. 5.3.5 Unflag an e-mail. • Select the message. • On the Home tab, in the Tags group, click the Follow Up button. • Click Clear Flag. 5.3.6 Create, delete, update a contact, distribution list/mailing list. 5 Using E-mail
  • 28. Quick Reference • Click on the Contacts button on the navigation pane. • On the Home tab, in the New group, click the New Contact button. • Enter the contacts details in the required fields. • In the Contact tab, in the Actions group, click the Save & Close button. 5.3.6 Create a distribution list / mailing list. • Click on the Contacts button on the navigation pane. • On the Home tab, in the New group, click the New Contact Group button. • Enter a name for the group in the Name field. • On the Contact Group tab, in the Members group, click the Add Members button. • Select from where to enter members details. • In the Contact group tab, in the Actions group, click the Save & Close button. 5.3.6 Delete a contact, distribution list / mailing list. • Select the contact or contact group to delete. • On the Home tab, in the Delete group, click the Delete button. 5.3.6 Update a contact, distribution list / mailing list. • Double-click on the contact or contact group to update. • Enter or delete required fields. • In the Contact or Contact Group tab, in the Actions group, click the Save & Close button. 5.4 Organising E-mails 5.4.1 Add, remove message inbox headings like: sender, subject, date received. • On the View tab, in the Current View group, click the View settings button. • On the Advanced View Settings:Compact dialog box, click the Columns button. • To add inbox headings, select a field in the left column and click Add. • To remove inbox headings, select a field in the right column and click Remove. • Click OK. 5.4.2 Search for an e-mail by sender, subject. • Select the Inbox. • Click in the Search field. • On the Search tab, in the Refine group, click the From button or Subject button. • Enter the search criteria. 5.4.2 Search for an e-mail by e-mail content. • Select the Inbox. • In the Search box enter text to search by. • All e-mails with this text will be listed in the Search Results window. 5.4.3 Sort e-mails by name, by date, by size. • Select the Inbox. • On the View tab, in the Current View group, click the View settings button. • On the Advanced View Settings:Compact dialog box, click the Sort button. • To sort by name, click From. • To sort by date, click Received. • To sort by size, click Size. • Click OK. 5.4.4 Create an e-mail folder/label. • Select the Inbox. • On the Folder tab, in the New group, click the New Folder button. • Enter a name for the folder in the Name: field. • In Select where to place the folder, Inbox should be highlighted. • Click OK. 5.4.4 Delete an e-mail folder/label. • Select the folder for deletion. • On the Folder tab, in the Actions group, click the Delete Folder button. • Click Yes to the displayed message. 5.4.4 Move e-mails to an e-mail folder/label. • Select a message to move. • On the Home tab in the Move group, click the Move arrow. • Click Other Folder. • Select folder preferred. • Click OK. 5.4.5 Delete an e-mail. • Select the e-mail message for deletion. • On the Home tab in the Delete group, click the Delete button. 5.4.5 Restore a deleted e-mail. • Select the Deleted Items folder. • Select a message to restore. • On the Home tab in the Move group, click the Move button. • Click Other Folder. • Select a destination folder. • Click OK. 5.4.6 Empty the e-mail bin/deleted items /trash folder. • Select the Deleted Items folder. • On the Folder tab, in the Clean Up group, click the Empty Folder button. • Click Yes to the displayed message. 5.4.7 Move a message to a junk folder. • Select the message. • On the Home tab in the Move group, click the Move arrow. • Click Other Folder. • Select Junk E-mail. • Click OK. 5.4.7 Remove a message from a junk folder. • Click the Folders button on the Navigation pane. • Click Junk E-mail. • On the Home tab in the Move group, click the Move arrow. • Click Other Folder. • Select Inbox. 5.5 Using Calendars 5.5.1 Create a meeting in a calendar. • On the Home tab, in the New group, click the New Meeting button. • Enter details in the To, Subject and Location fields. • Enter details in the Start time fields. • Enter details in the End time fields. • Click Send. 5.5.1 Cancel a meeting in a calendar. • Select the meeting. • On the Meeting tab, in the Actions group, click Cancel meeting. • When prompted, click Send Cancellation. 5.5.1 Update a meeting in a calendar. • Select the meeting. • On the Meeting tab, in the Actions group, click Open. • Enter new details as required. • Click Send Update. 5.5.2 Add invitees, resources to a meeting in a calendar. • On the Meeting tab, in the Attendees group, click the Add or Remove Attendees button. • Select names from address book displayed. • Click OK. 5.5.2 Remove invitees, resources from a meeting in a calendar. • On the Meeting tab, in the Attendees group, click the Add or Remove Attendees button. • Select names from Required field. • Press the Delete key. • Click OK. 5.5.3 Accept, decline an invitation. • Open the meeting request. • On the Meeting tab, in the Respond group, click the Accept button. • Click Send the response now. 5.5.3 Accept, decline an invitation. • Open the meeting request. • On the Meeting tab, in the Respond group, click the Decline button. Outlook 2010 Tabs Message Insert Options Format Text Review © 2012, ECDL Foundation. This Quick Reference may be used by candidates to assist in preparation for this ECDL module test. ECDL Foundation does not warrant that use of this guide will ensure passing of the test. Screen shots used with permission from Microsoft.
  • 29. Word Processing Module Summary WHAT ARE THE BENEFITS OF THIS MODULE? HOW DO I GET STARTED? SYLLABUS OUTLINE To find out more about this module and to locate your nearest accredited test centre, please visit www.ecdl.org/programmes. CATEGORY SKILL SET Using the Application Document Creation Formatting Objects Mail Merge Working with Documents Enhancing Productivity Enter Text Select, Edit Text Paragraphs Styles Table Creation Table Formatting Graphical Objects Preparation Outputs Prepare Outputs Setup Check and Print www.ecdl.org Covers the key skills needed to use a word processing application. Can be applied to a range of word processing software from vendor packages to ‘freeware’. Certifies best practice in effective word processing software use. Developed with input from computer users, subject matter experts, and practising computer professionals from all over the world. This process ensures the relevance and range of module content. This module allows candidates to demonstrate the ability to use a word processing application to accomplish everyday tasks associated with creating, formatting, and finishing small-sized word processing documents, such as letters and other everyday documents. On completion of this module the candidate will be able to: Work with documents and save them in different file formats. Choose built-in options, such as the Help function, to enhance productivity. Create and edit small-sized word processing documents that will be ready to share and distribute. Apply different formats to documents to enhance them before distribution; recognise good practice in choosing the appropriate formatting options. Insert tables, images, and drawn objects into documents. Prepare documents for mail merge operations. Adjust document page settings. Check and correct spelling before finally printing documents.
  • 30. Word Processing The following is the Syllabus for Word Processing, which provides the basis for the practice-based test in this module. Module Goals Module Word Processing requires the candidate to demonstrate the ability to use a word processing application to create everyday letters and documents. The candidate shall be able to: • Work with documents and save them in different file formats. • Choose built-in options such as the Help function to enhance productivity. • Create and edit small-sized word processing documents that will be ready to share and distribute. • Apply different formats to documents to enhance them before distribution and recognize good practice in choosing the appropriate formatting options. • Insert tables, images and drawn objects into documents. • Prepare documents for mail merge operations. • Adjust document page settings and check and correct spelling before finally printing documents. CATEGORY SKILL SET REF. TASK ITEM 3.1 Using the Application 3.1.1 Working with Documents 3.1.1.1 Open, close a word processing application. Open, close documents. 3.1.1.2 Create a new document based on default template, other available template like: memo, fax, agenda. 3.1.1.3 Save a document to a location on a drive. Save a document under another name to a location on a drive. 3.1.1.4 Save a document as another file type like: text file, Rich Text Format, template, software specific file extension, version number. 3.1.1.5 Switch between open documents. 3.1.2 Enhancing Productivity 3.1.2.1 Set basic options/preferences in the application: user name, default folder to open, save documents. 3.1.2.2 Use available Help functions.
  • 31. CATEGORY SKILL SET REF. TASK ITEM 3.1.2.3 Use magnification/zoom tools. 3.1.2.4 Display, hide built-in toolbars. Restore, minimize the ribbon. 3.2 Document Creation 3.2.1 Enter Text 3.2.1.1 Switch between page view modes. 3.2.1.2 Enter text into a document. 3.2.1.3 Insert symbols or special characters like: ©, ®, ™. 3.2.2 Select, Edit 3.2.2.1 Display, hide non-printing formatting marks like: spaces, paragraph marks, manual line break marks, tab characters. 3.2.2.2 Select character, word, line, sentence, paragraph, entire body text. 3.2.2.3 Edit content by entering, removing characters, words within existing text, by over-typing to replace existing text. 3.2.2.4 Use a simple search command for a specific word, phrase. 3.2.2.5 Use a simple replace command for a specific word, phrase. 3.2.2.6 Copy, move text within a document, between open documents. 3.2.2.7 Delete text. 3.2.2.8 Use the undo, redo command. 3.3 Formatting 3.3.1 Text 3.3.1.1 Change text formatting: font sizes, font types. 3.3.1.2 Apply text formatting: bold, italic, underline. 3.3.1.3 Apply text formatting: subscript, superscript. 3.3.1.4 Apply different colours to text. 3.3.1.5 Apply case changes to text. 3.3.1.6 Apply automatic hyphenation. 3.3.2 Paragraphs 3.3.2.1 Create, merge paragraph(s).
  • 32. CATEGORY SKILL SET REF. TASK ITEM 3.3.2.2 Insert, remove soft carriage return (line break). 3.3.2.3 Recognize good practice in aligning text: use align, indent, tab tools rather than inserting spaces. 3.3.2.4 Align text left, centre, right, justified. 3.3.2.5 Indent paragraphs: left, right, first line. 3.3.2.6 Set, remove and use tabs: left, centre, right, decimal. 3.3.2.7 Recognize good practice in paragraph spacing: apply spacing between paragraphs rather than use the Return key. 3.3.2.8 Apply spacing above, below paragraphs. Apply single, 1.5 lines, double line spacing within paragraphs. 3.3.2.9 Add, remove bullets, numbers in a single level list. Switch between different standard bullet, number styles in a single level list. 3.3.2.10 Add a box border and shading/background colour to a paragraph. 3.3.3 Styles 3.3.3.1 Apply an existing character style to selected text. 3.3.3.2 Apply an existing paragraph style to one or more paragraphs. 3.3.3.3 Use copy format tool. 3.4 Objects 3.4.1 Table Creation 3.4.1.1 Create a table ready for data insertion. 3.4.1.2 Insert, edit data in a table. 3.4.1.3 Select rows, columns, cells, entire table. 3.4.1.4 Insert, delete, rows and columns. 3.4.2 Table Formatting 3.4.2.1 Modify column width, row height. 3.4.2.2 Modify cell border line style, width, colour.
  • 33. CATEGORY SKILL SET REF. TASK ITEM 3.4.2.3 Add shading/background colour to cells. 3.4.3 Graphical Objects 3.4.3.1 Insert an object (picture, image, chart, drawn object) to a specified location in a document. 3.4.3.2 Select an object. 3.4.3.3 Copy, move an object within a document, between open documents. 3.4.3.4 Resize, delete an object. 3.5 Mail Merge 3.5.1 Preparation 3.5.1.1 Open, prepare a document, as a main document for a mail merge. 3.5.1.2 Select a mailing list, other data file, for use in a mail merge. 3.5.1.3 Insert data fields in a mail merge main document (letter, address labels). 3.5.2 Outputs 3.5.2.1 Merge a mailing list with a letter, label document as a new file or printed output. 3.5.2.2 Print mail merge outputs: letters, labels. 3.6 Prepare Outputs 3.6.1 Setup 3.6.1.1 Change document orientation: portrait, landscape. Change paper size. 3.6.1.2 Change margins of entire document, top, bottom, left, right. 3.6.1.3 Recognize good practice in adding new pages: insert a page break rather than using the Return key. 3.6.1.4 Insert, delete a page break in a document. 3.6.1.5 Add, edit text in headers, footers. 3.6.1.6 Add fields in headers, footers: date, page number information, file name. 3.6.1.7 Apply automatic page numbering to a document. 3.6.2 Check and Print 3.6.2.1 Spell check a document and make changes like: correcting spelling errors, deleting repeated words.
  • 34. CATEGORY SKILL SET REF. TASK ITEM 3.6.2.2 Add words to a built-in custom dictionary using a spell checker. 3.6.2.3 Preview a document. 3.6.2.4 Print a document from an installed printer using output options like: entire document, specific pages, number of copies.
  • 35. Word Processing Quick Reference This quick reference is for Microsoft Word 2007 on Windows XP This module sets out essential concepts and skills relating to the ability to use a word processing application to create everyday letters and documents. Successful candidates will be able to: Work with documents and save them in different file formats. Choose built-in options such as the Help function to enhance productivity. Create and edit small-sized word processing documents that will be ready to share and distribute. Apply different formats to documents to enhance them before distribution and recognize good practice in choosing the appropriate formatting options. Insert tables, images and drawn objects into documents. Prepare documents for mail merge operations. Adjust document page settings and check and correct spelling before finally printing documents. Word 2007 Tabs General Open a document CTRL+O Save a document CTRL+S Print a document CTRL+P Close a document CTRL+W Undo CTRL+Z Redo or Repeat CTRL+Y Help F1 Switch between apps ALT+TAB Editing Cut CTRL+X Copy CTRL+C Paste CTRL+V Formatting Bold CTRL+B Italics CTRL+I Underline CTRL+U Navigation Up one screen PAGE UP Down one screen PAGE DOWN Beginning of line HOME End of line END Beginning of a document CTRL+HOME End of a document CTRL+END Keyboard Shortcuts 1.1 Working with Documents 1.1.1 Open a word processing application. Click the Start button. Select All Programs. Click Microsoft Word 2007. 1.1.1 Close a word processing application. Click the Office button. Click Exit Word. 1.1.1 Open documents. Click the Office button. Click Open. Select document(s) to open and click Open. 1.1.1 Close documents. Click the Office button. Click Close. 1.1.2 Create a new document based on default template. Click the Office button. Click New. Click Blank Document. Click Create. 1.1.2 Create a new document based on other available template like: memo, fax, agenda. Click the Office button. Click New. Under templates, click Memos. Click to select a memo template. Click Download. 1.1.3 Save a document to a location on a drive. Click the Office button. Click Save. Create a file name and select the location. Click Save. 1.1.3 Save a document under another name to a location on a drive. Click the Office button. Click Save As. Enter a new file name over the existing file name and select the location. Click Save. 1.1.4 Save a document as another file type like: text file, Rich Text Format, template, software specific file extension, version number. Click the Office button. Select Save As. Click on the Save as type drop-down menu and select a file type. Click on Save. 1.1.5 Switch between open documents. On the View tab, in the Windows group, click the Switch Windows button. Click the name of the document to switch to. 1.2 Enhancing Productivity 1.2.1 Set basic options/preferences in the application: user name. Click the Office button. Click Word Options. On the Popular tab, enter a user name in the User name text box. Click OK. 1.2.1 Set basic options/preferences in the application: default folder to open, save documents. Click the Office button. Click Word Options. On the Save tab, enter a default file location in the Default file location: text box. Click OK. 1.2.2 Use available Help functions. Click on the Help button on the top right of the ribbon. 1.2.3 Use magnification/zoom tools. On the View tab, in the Zoom group, click the Zoom button. Select the magnification required. Click OK. 1.2.4 Restore, minimize the ribbon. Double click any tab to minimize the ribbon. Double click any tab again to restore the ribbon. Certification Test Goals 1 Using the Application Home Insert Page Layout References Mailings Review View © 2012, ECDL Foundation. This Quick Reference may be used by candidates to assist in preparation for this ECDL module test. ECDL Foundation does not warrant that use of this guide will ensure passing of the test. Screen shots used with permission from Microsoft. Quick Reference
  • 36. 2.1 Enter Text 2.1.1 Switch between page view modes. On the View tab, in the Document Views group, click on a view mode. Print Layout view shows how a document will look when printed. Full Screen Reading view shows the document at a size that is suitable for reading. Web Layout view shows how a document will look in a web browser. Outline view shows the structure of the document as nested levels of headings and body text. Draft view shows the content of a document with a simplified layout. 2.1.2 Enter text into a document. Click in the document window. Enter the text. 2.1.3 Insert symbols or special characters like: ©, ®, ™. On the Insert tab, in the Symbols group, click the Symbol button, and then click More Symbols. On the Special Characters tab, select a special character, like ©, ®, or ™, and click on the Insert button. 2.2 Select, Edit 2.2.1 Display, hide non-printing formatting marks like: spaces, paragraph marks, manual line break marks, tab characters. On the Home tab, in the Paragraph group, click the Show/Hide button. 2.2.2 Select character, word, line, sentence, paragraph, entire body text. 2.2.3 Edit content by entering, removing characters, words within existing text. Select the text for editing in the document window. Begin typing. 2.2.3 Edit content by over-typing to replace existing text. To switch to Overtype mode, right-click on the Status Bar and then click Overtype. The Insert button will show on the left side of the status bar. Click the Insert button and the word Overtype replaces the word Insert. Click immediately before the text to replace. Begin entering new text. 2.2.4 Use a simple search command for a specific word, phrase. 3.1.4 Apply different colors to text. Select the text to color. On the Home tab, in the Font group, click the Font Color arrow. Click on a color. 3.1.5 Apply case changes to text. Select the text to change case. On the Home tab, in the Font group, click the Change Case button. To capitalize the first letter of a sentence, click Sentence case. To make all letters lowercase, click lowercase. To capitalize all of the letters, click UPPERCASE. To capitalize the first letter of each word, click Capitalize Each Word. To shift between two case views, click tOGGLE cASE. 3.1.6 Apply automatic hyphenation. Make sure that no text is selected. On the Page Layout tab, in the Page Setup group, click Hyphenation, and then click the Automatic button. 3.2 Paragraphs 3.2.1 Create, merge paragraph(s). To create a paragraph, press the Return key. To merge paragraphs, click directly before first paragraph mark. Press the Delete key. 3.2.2 Insert, remove soft carriage return (line break). To insert the line break, press the Shift + Return keys. To delete the line break, select line break and press the Delete key. 3.2.3 Recognize good practice in aligning text. Use align, indent, tab tools rather than inserting spaces. 3.2.4 Align text left, right. Select the text to align. On the Home tab, in the Paragraph group, click the Align Left or Align Right buttons. 3.2.4 Align text center. Select the text to center. On the Home tab, in the Paragraph group, click the Center button. 3.2.4 Align text justified. Select the text to justify. On the Home tab, in the Paragraph group, click the Justify button. 3.2.5 Indent paragraphs: left, right Select the paragraph. On the Page Layout tab, in the Paragraph group, click the Paragraph group arrow. To indent to the left, click in the Left box and enter the indent required. To indent to the right, click in the Right box and enter the indent required. On the Home tab, in the Editing group, click the Find button. Enter the word or phrase to find into the Find what box. Click Find Next to select the first occurrence of the word or phrase. 2.2.5 Use a simple replace command for a specific word, phrase. On the Home tab, in the Editing group, click the Replace button. Enter the word or phrase to find for replacement into the Find what box. Enter the word or phrase to replace into the Replace with box. Click Find Next. 2.2.6 Copy text within a document, between open documents. Select text to copy. On the Home tab, in the Clipboard group, click the Copy button. Click in a new location within the document or within another open document. On the Home tab, in the Clipboard group, click the Paste button. 2.2.6 Move text within a document, between open documents. Select the text to move. On the Home tab, in the Clipboard group, click the Cut button. Click in a new location within the document or within another open document. On the Home tab, in the Clipboard group, click the Paste button. 2.2.7 Delete text. Select the text to delete. Press the Delete Key. 2.2.8 Use the undo, redo command. On the Quick Access Toolbar, click Undo or Repeat. 3.1 Text 3.1.1 Change text formatting: font sizes. Select the text to format. On the Home tab, in the Font group, click the Font Size arrow. Select a size from the list or enter a size into the Font Size box. 3.1.1 Change text formatting: font types. Select the text to format. On the Home tab, in the Font group, click the Font arrow. Select a font from the list or enter a font name into the Font box. 3.1.2 Apply text formatting: bold, italic, underline. Select the text to format. To embolden the text, on the Home tab, in the Font group, click the Bold button. To italicize the text, on the Home tab, in the Font group, click the Italic button. To underline the text, on the Home tab, in the Font group, click the Underline button. 3.1.3 Apply text formatting: subscript, superscript. Select the text to format. On the Home tab, in the Font group, click the Superscript or Subscript button. 2 Document Creation 3 Formatting Select Word Double-click the word Ctrl + click in the sentence Click in the Selection Bar to the left of the line Triple-click the paragraph Triple-click in the Selection Bar Sentence Line Paragraph Entire Body text Action