![9 White Paper| Disaster Recovery using Exadata Cloud
Copyright © 2020, Oracle and/or its affiliates | Public Document
O N O N - P R E M I S E H O S T
[root@onpremise1 ~]# telnet <TARGET HOST IP ADDRESS> <PORT>
Trying xxx.xxx.xxx.xxx...
Connected to xxx.xxx.xxx.xxx.
Escape character is '^]'.
^C^]q
telnet> q
Connection closed.
O N C L O U D H O S T S
[root@oci2 ~]# telnet <TARGET HOST IP ADDRESS> <PORT>
Trying xxx.xxx.xxx.xxx...
Connected to xxx.xxx.xxx.xxx.
Escape character is '^]'.
^]q
telnet> q
Connection closed.
netcat (nc -zv <IP> <PORT>) can be used in place of telnet
DEPLOYMENT PROCESS
The deployment process below assumes the prerequisites have been met. Once the network is configured between the environments,
the process of instantiating a Hybrid Data Guard standby database is similar to the process that would be followed in an on-premises
configuration. Once complete the cloud database will be visible in the cloud console and will be registered for use with cloud tooling,
patching and backup functionality. Data Guard operations such as switchover, failover and reinstate will be manually executed through
Data Guard Broker as in an on-premises environment.
Unless otherwise noted, commands are the same whether the cloud system is Exadata Cloud Service or Exadata Cloud at Customer
Gen2.
This process assumes ASM and Oracle Managed Files (OMF) is configured on the primary database. The process for configuring
Hybrid Data Guard in non-OMF and non-ASM configurations is outside the scope of this document.
Prerequisite: Update Cloud Tools
This process requires a minimum dbaastools rpm version of 18.2.3.2.0_190618. Updating to the latest dbaastools rpms are always
recommended.
Apply the latest tools rpm with the following:
(as root) # dbaascli patch tools apply LATEST
Step 1: Create the Cloud Database
The cloud console create database functionality will be used to create what will become the standby database. Creating the database
through the console (then deleting the files and instantiating) will ensure the database is visible in the console and is registered properly
for use with the cloud tooling. Before creating the database, the bundle patch of the primary database must be known as well as all one-
off patches.
Select and download the desired RDBMS version and Bundle Patch](https://image.slidesharecdn.com/hybriddataguardtoexadacloudgen2exaccexacs-220911183219-f96f523d/85/Hybrid-Data-Guard-to-Cloud-GEN2-ExaCS-pdf-10-320.jpg)
![12 White Paper| Disaster Recovery using Exadata Cloud
Copyright © 2020, Oracle and/or its affiliates | Public Document
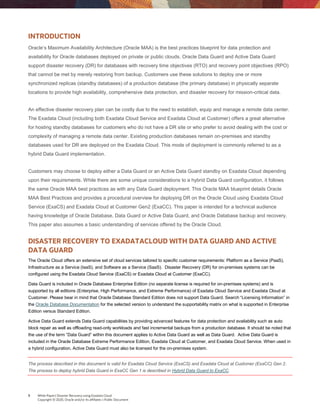
As grid user (sudo from opc user to grid user)
Edit /tmp/delete_ASM_files.sh created previously to remove any unneeded lines from sqlplus, leaving only lines beginning with
‘asmcmd’.
[grid@<host> ~]$ vi /tmp/delete_ASM_files.sh
Then save and execute the script
[grid@<host> ~]$ . /tmp/delete_ASM_files.sh
All files for the starter database have now been removed.
Step 3: Copy the Password File to the Exadata Cloud
The password file for the Cloud database must be replaced by the password file of the on-premises primary database.
Check password file location
If Oracle Clusterware is running on the on-premises host, check the password file location.
$ srvctl config database -db testdbname
Database unique name: testdbname
Database name:
Oracle home: /u02/app/oracle/product/12.2.0.0/dbhome_2
Oracle user: oracle
Spfile: +DATA/testdbname/spfiledbtestdbname.ora
Password file: +DATA/testdbname/PASSWORD/orapwd<sid> <======== password file location
Domain: domainname.xxxx.xxxx
Copy password file on-premises to Cloud Exadata
Copy password file to all Exadata Cloud nodes.
If on-premises password file location is non-ASM, copy the file as below.
$ scp -i <ssh key> $ORACLE_HOME/dbs/orapw<SID> opc@<Public-IP-OCI-HOST>:/tmp
If password file location is ASM, switch user to "grid" or the ASM owner, source the environment variables and then copy the
password file as below.
on-premises
$ sudo su – grid
$ export ORACLE_SID=<ASM ORACLE_SID>
$ export ORACLE_HOME=<GRID_HOME>
$ asmcmd
ASMCMD> cd +<DISKGROUP_NAME>/<DB_UNIQUE_NAME>/PASSWORD
ASMCMD> cp orapw<SID> /tmp
copying +DATA/testdbname/PASSWORD/orapw<sid> -> /tmp/orapw<sid>
scp -i <ssh key> /tmp/orapw<SID> opc@<Public-IP-OCI-HOST>:/tmp
Place the password file in the proper Exadata Cloud location for the standby database.
As opc user on Exadata Cloud host](https://image.slidesharecdn.com/hybriddataguardtoexadacloudgen2exaccexacs-220911183219-f96f523d/85/Hybrid-Data-Guard-to-Cloud-GEN2-ExaCS-pdf-13-320.jpg)

![15 White Paper| Disaster Recovery using Exadata Cloud
Copyright © 2020, Oracle and/or its affiliates | Public Document
SQLNET.CRYPTO_CHECKSUM_TYPES_CLIENT=(SHA1)
Entries for each database are needed in both primary and standby tnsnames.ora files for proper redo transport. Use the following
example, replacing bolded values with values relevant to the configuration.
The TNS descriptors for the databases will be different depending on whether the scan listeners are resolvable from the other system.
The description below assumes the scan name is resolvable and can be used in the TNS descriptor. See Appendix B for an example of
the TNS descriptors using ADDRESS_LIST if the scan name cannot be resolved.
T N S N A M E S . O R A O N O N - P R E M I S E S H O S T
Add the following descriptor to the on premises tnsnames.ora files after making necessary replacements.
<standby db_unique_name> =
(DESCRIPTION =
(SDU=65536) (RECV_BUF_SIZE=134217728)
(SEND_BUF_SIZE=134217728)
(ADDRESS_LIST =
(ADDRESS = (PROTOCOL = TCP)(HOST = <standby scan name>)(PORT = {1521|<port#>}))
)
(CONNECT_DATA =
(SERVER = DEDICATED)
(SERVICE_NAME = <service name of the standby database>)
))
T N S N A M E S . O R A O N C L O U D H O S T S
Add the descriptor for the primary database to cloud tnsnames.ora files after making the necessary changes.
Change the descriptor name for the Cloud standby to use the db_unique_name rather than the db_name
<primary db_unique_name> =
(DESCRIPTION =
(SDU=65536) (RECV_BUF_SIZE=134217728)
(SEND_BUF_SIZE=134217728)
(ADDRESS_LIST =
(ADDRESS = (PROTOCOL = TCP)(HOST = <primary scan name>)(PORT = {1521|<port#>}))
)
(CONNECT_DATA =
(SERVER = DEDICATED)
(SERVICE_NAME = <primary database service name>])
(UR=A)
))
Step 7: Instantiate the Standby Database
The standby database can be created from the active primary database or from a backup of the primary database. This section
describes the method duplicating from the active primary database using Oracle 12.1 or higher feature RMAN ‘RESTORE…FROM
SERVICE’.
RDBMS 11.2 does not support RMAN RESTORE FROM SERVICE. Backups based duplication or RMAN DUPLICATE must be used.
For details refer to the documentation.](https://image.slidesharecdn.com/hybriddataguardtoexadacloudgen2exaccexacs-220911183219-f96f523d/85/Hybrid-Data-Guard-to-Cloud-GEN2-ExaCS-pdf-16-320.jpg)


This document provides guidance on using Oracle's Exadata Cloud Service (ExaCS) or Exadata Cloud at Customer (ExaCC) to set up disaster recovery for an on-premises database using Oracle Data Guard or Active Data Guard. It outlines the key benefits of a hybrid cloud/on-premises configuration and provides a 10-step process for implementing this along with considerations for security, networking, and ongoing management after deployment. The document is intended to help technical audiences set up a cloud-based standby database for disaster recovery that follows Oracle Maximum Availability Architecture best practices.