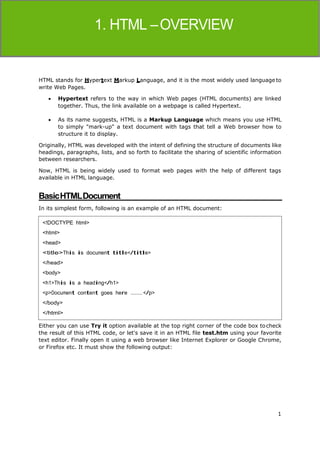
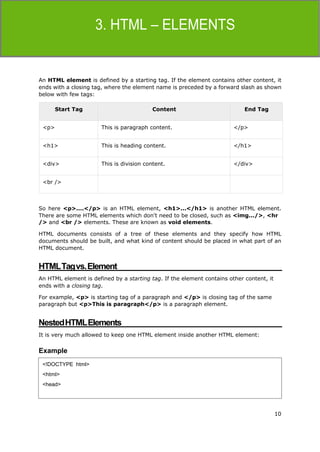
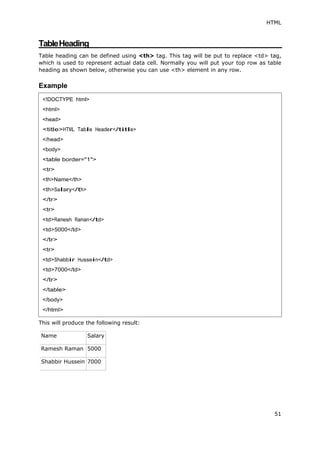
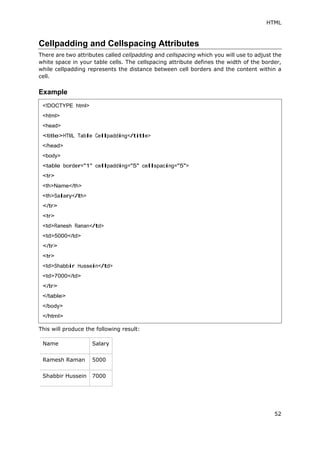
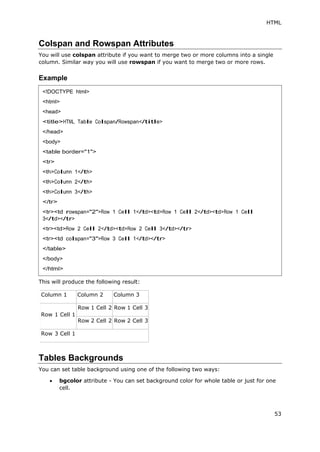
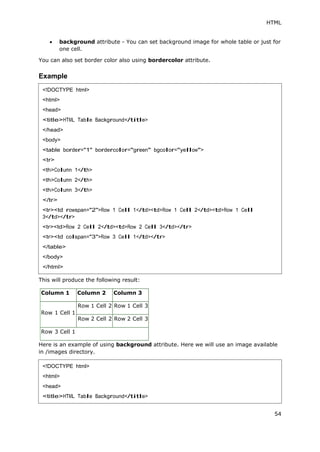
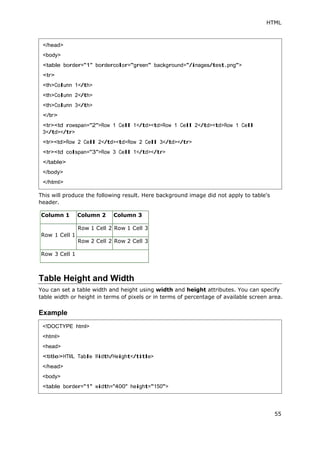
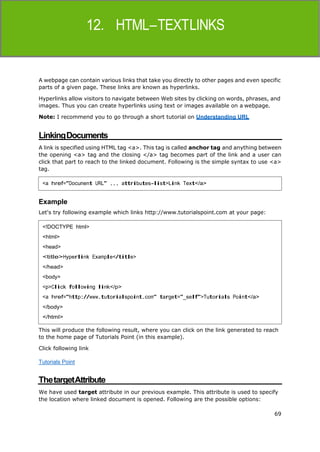
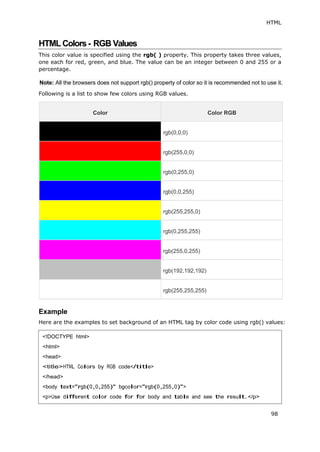
HTML (Hypertext Markup Language) is the standard markup language used to create web pages. It uses tags to define headings, paragraphs, lists and other elements. Originally developed to share scientific information, HTML is now widely used to format web pages using tags like <html>, <head>, <body>, <h1>, <p>, <br>, and <img>. HTML documents have a basic structure including a <DOCTYPE> declaration, <html> and <body> tags which contain other tags to define and structure the content.


![HTML
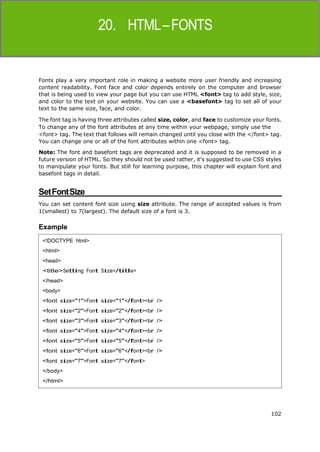
43
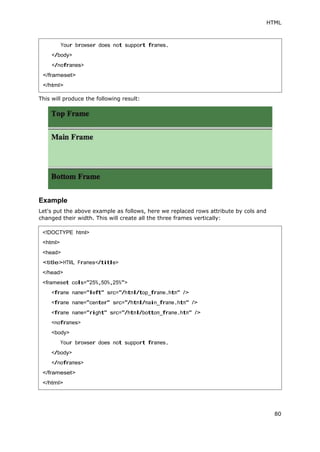
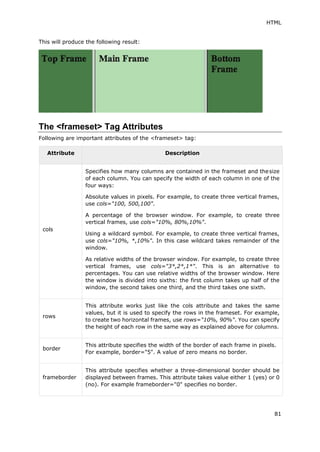
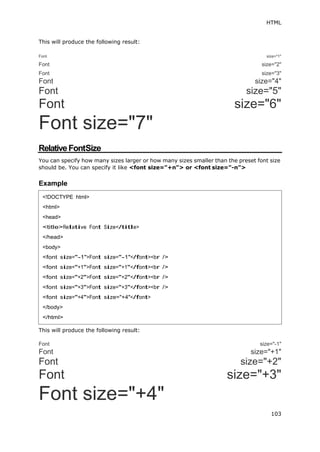
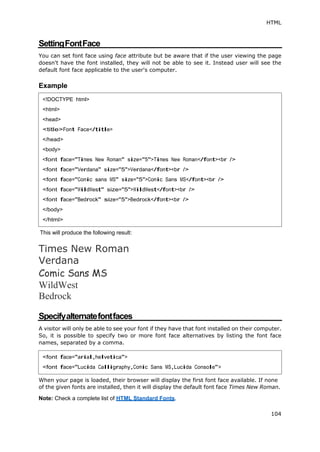
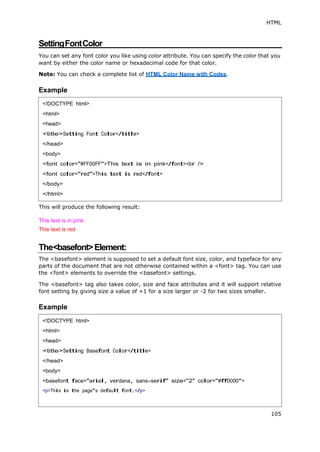
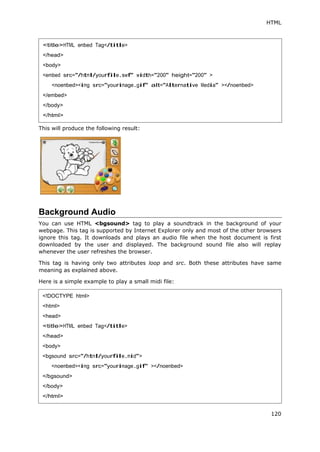
This will produce the following result:
Document content goes here.....
Conditional Comments
Conditional comments only work in Internet Explorer (IE) on Windows but they are ignored
by other browsers. They are supported from Explorer 5 onwards, and you can use them
to give conditional instructions to different versions of IE.
Example
You will come across a situation where you will need to apply a different style sheet based
on different versions of Internet Explorer, in such situation conditional comments will be
helpful.
Using CommentTag
There are few browsers that support <comment> tag to comment a part of HTML code.
Example
-->
<p>Document content goes here ........ </p>
</body>
</html>
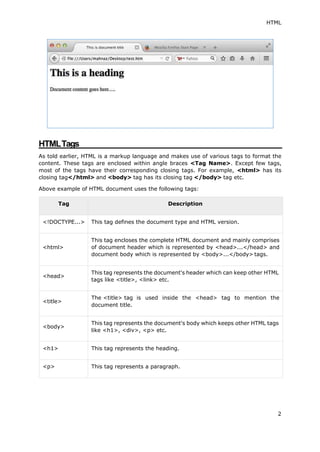
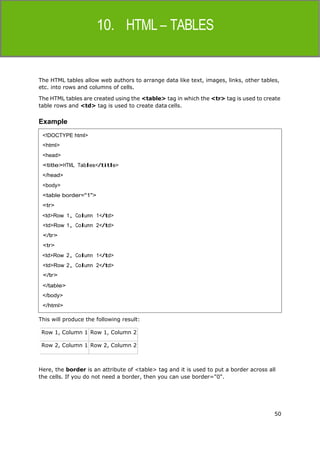
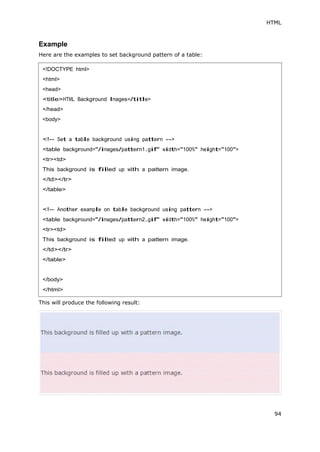
<!DOCTYPE html><html>
<head>
<title>Conditional Comments</title>
<!--[if IE 6]>
Special instructions for IE 6 here
<![endif]-->
</head>
<body>
<p>Document content goes here ........</p>
</body>
</html>
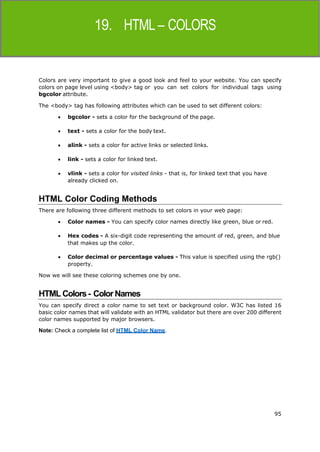
<!DOCTYPE html><html>
<head>
<title>Using Comment Tag</title>](https://image.slidesharecdn.com/html-240120204759-1b68e787/85/html-pdf-40-320.jpg)


![[DSC Europe 25] Milos Belcevic - Product Professional's Journey to Full-Stack...](https://cdn.slidesharecdn.com/ss_thumbnails/1zovd6fgsycdg4wvgvls-milos-belcevic-product-professionals-journey-to-full-stack-product-developer-260123083019-d993120d-thumbnail.jpg?width=640&height=640&fit=bounds)
![[DSC Europe 25] Josip Saban - Career building for data professionals.pptx](https://cdn.slidesharecdn.com/ss_thumbnails/zroflcttkm1vmli0txea-josip-saban-career-building-for-data-professionals-260123083019-587cdb8c-thumbnail.jpg?width=640&height=640&fit=bounds)


