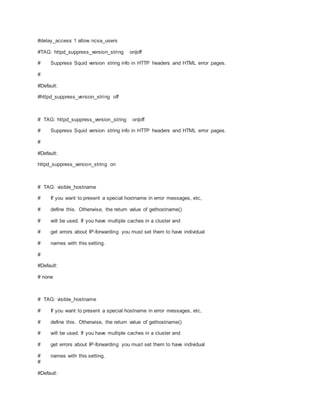
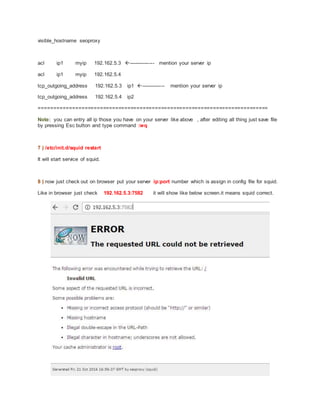
The document provides a step-by-step guide to install and configure Squid proxy on a CentOS server, including commands to install required packages, configure user authentication, and set up access control. It details the necessary configurations to be made in the Squid configuration file, such as setting ports and user access. Finally, it explains how to check the proxy functionality and set it up in browser settings.
![How to install Squid Proxy on Server or How to install Squid
Proxy on Centos O.S
Use belowcommandtoinstall SquidProxyonServer orHow to install SquidProxyonCentosO.S
Step) logininserverwithrootandproperpasswordand run below command.
1 ) # yum install squid
[root@server~]#yuminstall squid
Loadedplugins:fastestmirror
SettingupInstall Process
Determiningfastestmirrors
* base:mirrors.vonline.vn
* extras:mirrors.vinahost.vn
* rpmforge:kartolo.sby.datautama.net.id
* updates:mirrors.vinahost.vn
base | 3.7 kB 00:00
extras | 3.4 kB 00:00
rpmforge | 1.9 kB 00:00
updates | 3.4 kB 00:00
updates/primary_db 45% [======- ] 29 kB/s | 1.2 MB 00:50 ETA
#completed
2 ) # yum install httpd –y
[root@server~]#yuminstall httpd -y
Loadedplugins:fastestmirror
SettingupInstall Process](https://image.slidesharecdn.com/howtoinstallsquidproxyonserverorhowtoinstallsquidproxyoncentoso-161026122005/85/How-to-install-squid-proxy-on-server-or-how-to-install-squid-proxy-on-centos-o-1-320.jpg)
![How to install Squid Proxy on Server or How to install Squid
Proxy on Centos O.S
Use belowcommandtoinstall SquidProxyonServer orHow to install SquidProxyonCentosO.S
Step) logininserverwithrootandproperpasswordand run below command.
1 ) # yum install squid
[root@server~]#yuminstall squid
Loadedplugins:fastestmirror
SettingupInstall Process
Determiningfastestmirrors
* base:mirrors.vonline.vn
* extras:mirrors.vinahost.vn
* rpmforge:kartolo.sby.datautama.net.id
* updates:mirrors.vinahost.vn
base | 3.7 kB 00:00
extras | 3.4 kB 00:00
rpmforge | 1.9 kB 00:00
updates | 3.4 kB 00:00
updates/primary_db 45% [======- ] 29 kB/s | 1.2 MB 00:50 ETA
#completed
2 ) # yum install httpd –y
[root@server~]#yuminstall httpd -y
Loadedplugins:fastestmirror
SettingupInstall Process](https://image.slidesharecdn.com/howtoinstallsquidproxyonserverorhowtoinstallsquidproxyoncentoso-161026122005/75/How-to-install-squid-proxy-on-server-or-how-to-install-squid-proxy-on-centos-o-1-2048.jpg)
![Loadingmirrorspeedsfromcachedhostfile
* base:mirrors.vonline.vn
* extras:mirrors.vinahost.vn
* rpmforge:kartolo.sby.datautama.net.id
* updates:mirrors.vinahost.vn
ResolvingDependencies
--> Runningtransactioncheck
--->Package httpd.x86_64 0:2.2.15-54.el6.centoswill be installed
--> FinishedDependencyResolution
DependenciesResolved
================================================================================
Package Arch Version Repository Size
================================================================================
Installing:
httpd x86_64 2.2.15-54.el6.centos updates 833 k
TransactionSummary
================================================================================
Install 1 Package(s)
Total downloadsize:833k
Installedsize:3.0M
DownloadingPackages:
httpd-2.2.15-54.el6.cento41%[====== ] 19 kB/s| 347 kB 00:26 ETA
#completed
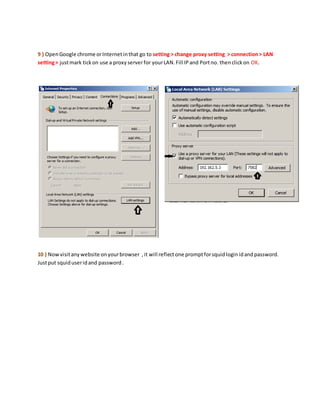
3 ) # touch /etc/squid/passwd
This file for create squid password.](https://image.slidesharecdn.com/howtoinstallsquidproxyonserverorhowtoinstallsquidproxyoncentoso-161026122005/85/How-to-install-squid-proxy-on-server-or-how-to-install-squid-proxy-on-centos-o-2-320.jpg)


![[MathWorks] Versioning Infrastructure](https://cdn.slidesharecdn.com/ss_thumbnails/mathworks-michaelmirmanpv4-130523185914-phpapp01-thumbnail.jpg?width=640&height=640&fit=bounds)


![17937858 squid-server - [the-xp.blogspot.com]](https://cdn.slidesharecdn.com/ss_thumbnails/17937858-squid-server-the-xp-140822050606-phpapp02-thumbnail.jpg?width=640&height=640&fit=bounds)


![18587936 squid-proxy-configuration-guide - [the-xp.blogspot.com]](https://cdn.slidesharecdn.com/ss_thumbnails/18587936-squid-proxy-configuration-guide-the-xp-140822050639-phpapp02-thumbnail.jpg?width=640&height=640&fit=bounds)


