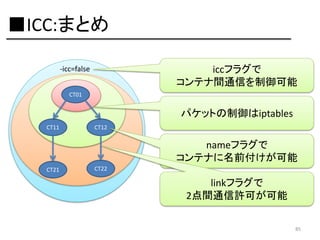
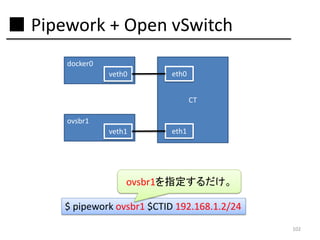
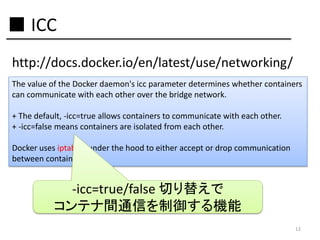
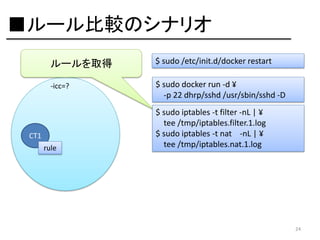
■ ICC
http://docs.docker.io/en/latest/use/networking/
The valueof the Docker daemon's icc parameter determines whether containers
can communicate with each other over the bridge network.
+ The default, -icc=true allows containers to communicate with each other.
+ -icc=false means containers are isolated from each other.
Docker uses iptables under the hood to either accept or drop communication
between containers.
-icc=true/false 切り替えで
コンテナ間通信を制御する機能
12
13.
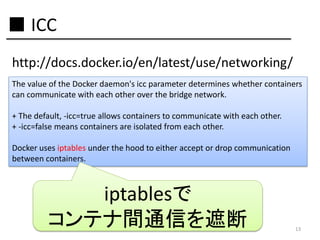
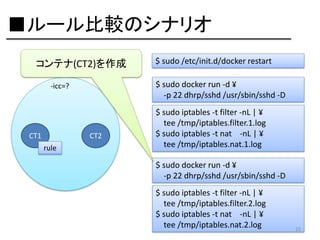
■ ICC
http://docs.docker.io/en/latest/use/networking/
The valueof the Docker daemon's icc parameter determines whether containers
can communicate with each other over the bridge network.
+ The default, -icc=true allows containers to communicate with each other.
+ -icc=false means containers are isolated from each other.
Docker uses iptables under the hood to either accept or drop communication
between containers.
iptablesで
コンテナ間通信を遮断
13
14.
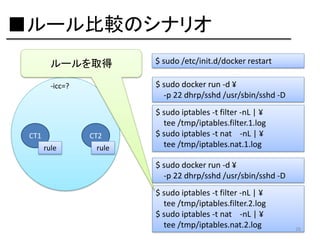
■ ICC
http://docs.docker.io/en/latest/use/networking/
The valueof the Docker daemon's icc parameter determines whether containers
can communicate with each other over the bridge network.
+ The default, -icc=true allows containers to communicate with each other.
+ -icc=false means containers are isolated from each other.
Docker uses iptables under the hood to either accept or drop communication
between containers.
iptablesの詳細は無い
14
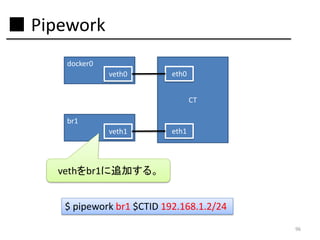
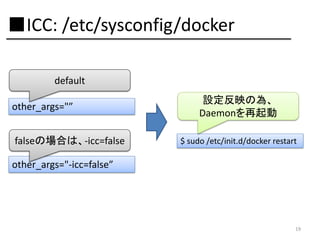
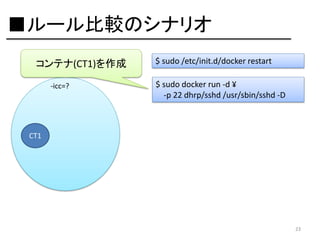
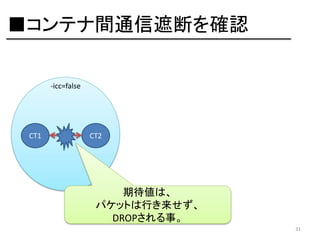
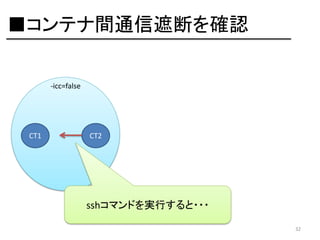
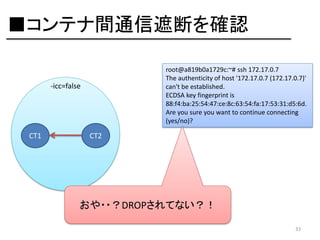
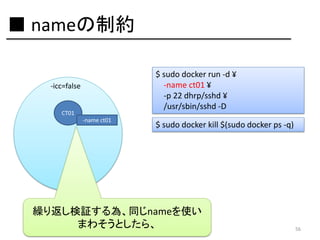
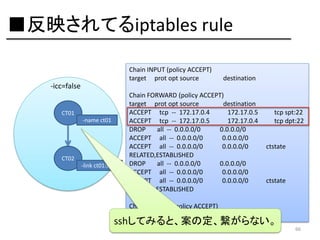
■コンテナ間通信遮断を確認
root@a819b0a1729c:~# ssh 172.17.0.7
Theauthenticity of host '172.17.0.7 (172.17.0.7)'
can't be established.
ECDSA key fingerprint is
88:f4:ba:25:54:47:ce:8c:63:54:fa:17:53:31:d5:6d.
Are you sure you want to continue connecting
(yes/no)?
-icc=false
CT1
CT2
おや・・?DROPされてない?!
33
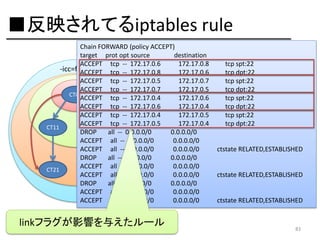
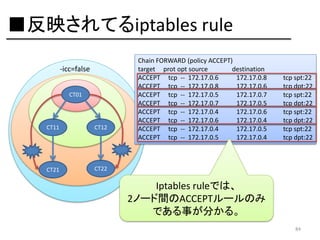
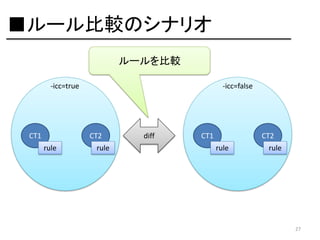
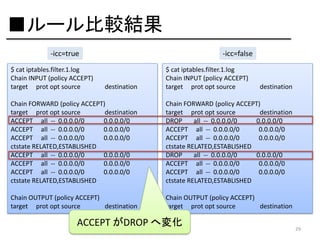
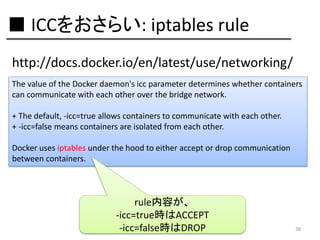
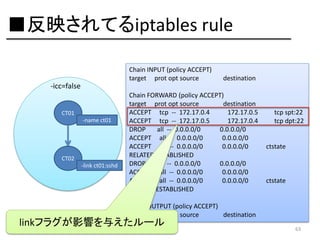
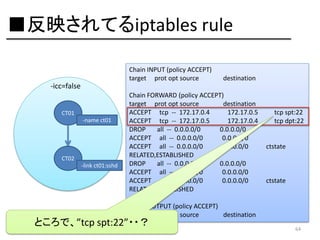
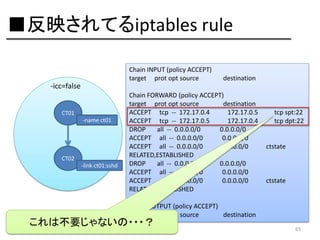
■ ICCをおさらい: iptablesrule
http://docs.docker.io/en/latest/use/networking/
The value of the Docker daemon's icc parameter determines whether containers
can communicate with each other over the bridge network.
+ The default, -icc=true allows containers to communicate with each other.
+ -icc=false means containers are isolated from each other.
Docker uses iptables under the hood to either accept or drop communication
between containers.
rule内容が、
-icc=true時はACCEPT
-icc=false時はDROP
38
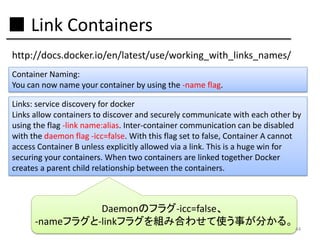
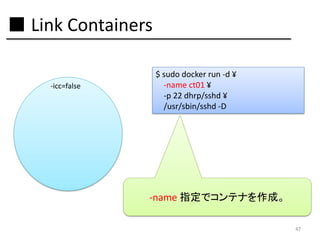
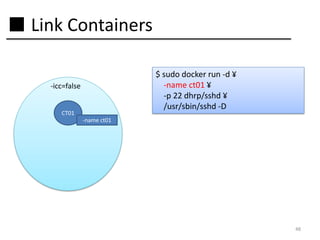
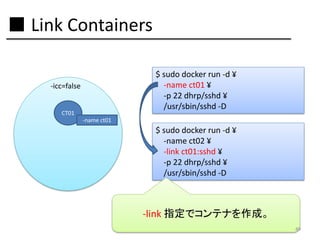
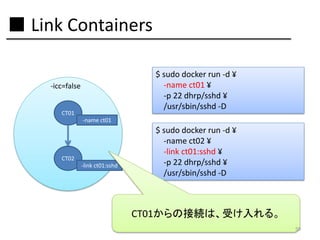
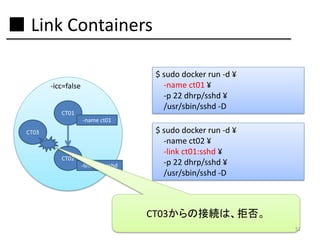
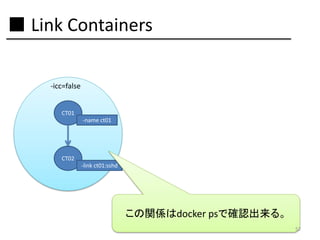
■ Link Containers
http://docs.docker.io/en/latest/use/working_with_links_names/
ContainerNaming:
You can now name your container by using the -name flag.
Links: service discovery for docker
Links allow containers to discover and securely communicate with each other by
using the flag -link name:alias. Inter-container communication can be disabled
with the daemon flag -icc=false. With this flag set to false, Container A cannot
access Container B unless explicitly allowed via a link. This is a huge win for
securing your containers. When two containers are linked together Docker
creates a parent child relationship between the containers.
Daemonのフラグ-icc=false、
-nameフラグと-linkフラグを組み合わせて使う事が分かる。
44
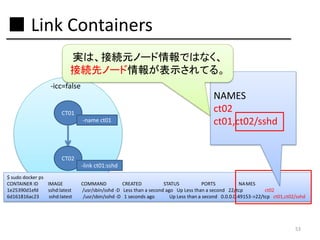
■ Link Containers
実は、接続元ノード情報ではなく、
接続先ノード情報が表示されてる。
-icc=false
CT01
-namect01
NAMES
ct02
ct01,ct02/sshd
CT02
-link ct01:sshd
$ sudo docker ps
CONTAINER ID
IMAGE
1e25390d1efd
sshd:latest
6d161816ac23
sshd:latest
COMMAND
CREATED
STATUS
PORTS
NA MES
/usr/sbin/sshd -D Less than a second ago Up Less than a second 22/tcp
ct02
/usr/sbin/sshd -D 1 seconds ago
Up Less than a second 0.0.0.0:49153->22/tcp ct01,ct02/sshd
53
■ Link Containers
実は、接続元ノード情報ではなく、
接続先ノード情報が表示されてる。
-icc=false
CT01
-namect01
NAMES
ct02
ct01,ct02/sshd
CT02
-link ct01:sshd
$ sudo docker ps
CONTAINER ID
IMAGE
1e25390d1efd
sshd:latest
6d161816ac23
sshd:latest
COMMAND
CREATED
STATUS
PORTS
NA MES
/usr/sbin/sshd -D Less than a second ago Up Less than a second 22/tcp
ct02
/usr/sbin/sshd -D 1 seconds ago
Up Less than a second 0.0.0.0:49153->22/tcp ct01,ct02/sshd
61
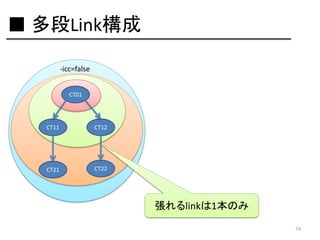
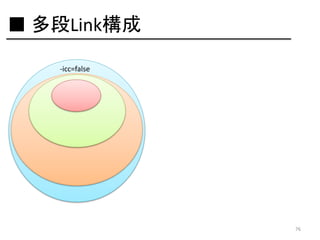
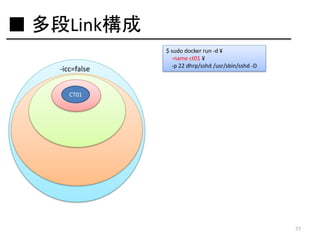
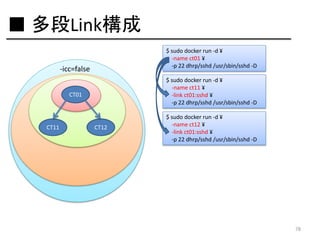
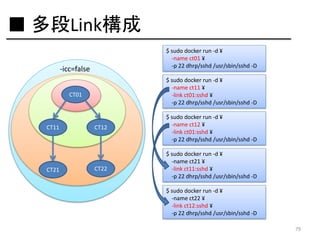
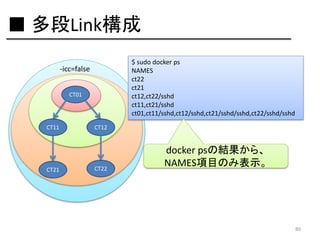
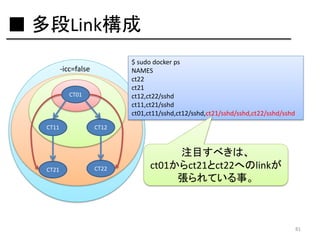
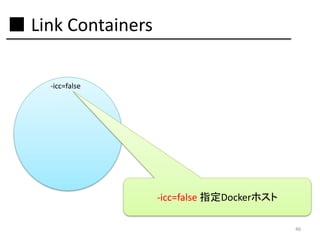
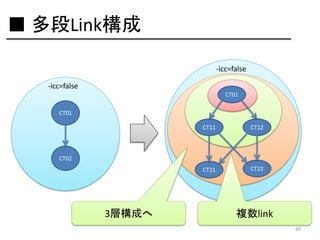
■ 多段Link構成
man dockerより
Usage: docker run [OPTIONS] IMAGE[:TAG] [COMMAND] [ARG...]
Run a command in a new container
-a=map[]: Attach to stdin, stdout or stderr
-c=0: CPU shares (relative weight)
-cidfile="": Write the container ID to the file
-d=false: Detached mode: Run container in the background, print new container id
-e=[]: Set environment variables
-h="": Container host name
-i=false: Keep stdin open even if not attached
-privileged=false: Give extended privileges to this container
-m="": Memory limit (format: <number><optional unit>, where unit = b, k, m or g)
-n=true: Enable networking for this container
-p=[]: Map a network port to the container
-rm=false: Automatically remove the container when it exits (incompatible with -d)
-t=false: Allocate a pseudo-tty
-u="": Username or UID
-dns=[]: Set custom dns servers for the container
-v=[]: Create a bind mount with: [host-dir]:[container-dir]:[rw|ro]. If "container-dir" is missing, then docker creates a new volume.
-volumes-from="": Mount all volumes from the given container(s)
-entrypoint="": Overwrite the default entrypoint set by the image
-w="": Working directory inside the container
-lxc-conf=[]: Add custom lxc options -lxc-conf="lxc.cgroup.cpuset.cpus = 0,1"
-sig-proxy=true: Proxify all received signal to the process (even in non-tty mode)
-expose=[]: Expose a port from the container without publishing it to your host
-link="": Add link to another container (name:alias)
-name="": Assign the specified name to the container. If no name is specific docker will generate a random name
-P=false: Publish all exposed ports to the host interfaces
これが、
-link=[] だったなら・・・
-link="": Add link to another container (name:alias)
72


![■ 多段Link構成
man docker より
Usage: docker run [OPTIONS] IMAGE[:TAG] [COMMAND] [ARG...]
Run a command in a new container
-a=map[]: Attach to stdin, stdout or stderr
-c=0: CPU shares (relative weight)
-cidfile="": Write the container ID to the file
-d=false: Detached mode: Run container in the background, print new container id
-e=[]: Set environment variables
-h="": Container host name
-i=false: Keep stdin open even if not attached
-privileged=false: Give extended privileges to this container
-m="": Memory limit (format: <number><optional unit>, where unit = b, k, m or g)
-n=true: Enable networking for this container
-p=[]: Map a network port to the container
-rm=false: Automatically remove the container when it exits (incompatible with -d)
-t=false: Allocate a pseudo-tty
-u="": Username or UID
-dns=[]: Set custom dns servers for the container
-v=[]: Create a bind mount with: [host-dir]:[container-dir]:[rw|ro]. If "container-dir" is missing, then docker creates a new volume.
-volumes-from="": Mount all volumes from the given container(s)
-entrypoint="": Overwrite the default entrypoint set by the image
-w="": Working directory inside the container
-lxc-conf=[]: Add custom lxc options -lxc-conf="lxc.cgroup.cpuset.cpus = 0,1"
-sig-proxy=true: Proxify all received signal to the process (even in non-tty mode)
-expose=[]: Expose a port from the container without publishing it to your host
-link="": Add link to another container (name:alias)
-name="": Assign the specified name to the container. If no name is specific docker will generate a random name
-P=false: Publish all exposed ports to the host interfaces
これが、
-link=[] だったなら・・・
-link="": Add link to another container (name:alias)
72](https://image.slidesharecdn.com/20140212-hack-for-docker-network-140212212814-phpapp01/85/Hack-for-Docker-s-Network-72-320.jpg)