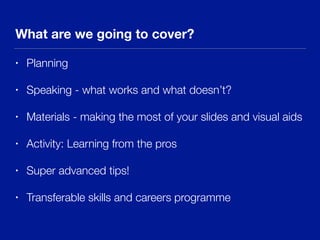
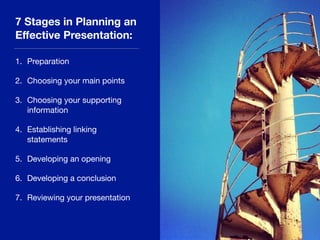
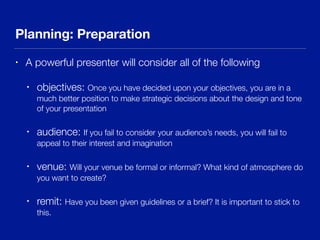
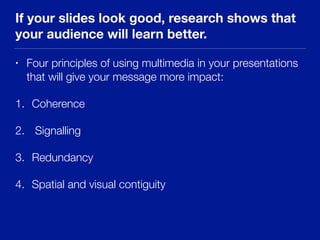
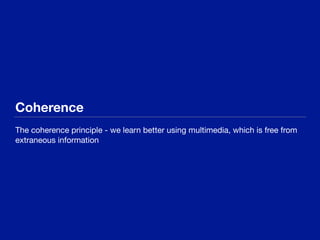
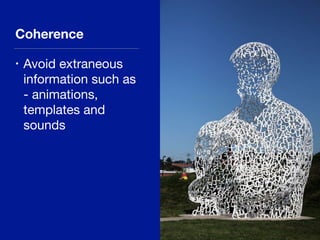
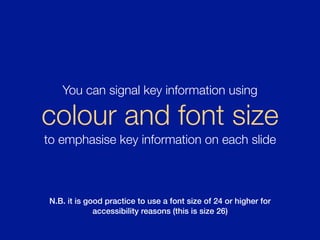
Good Presentations Matter
BA2 Academic Skills Programme - Advanced Presentation Skills
What are we going to cover?
• Planning
• Speaking - what works and what doesn’t?
• Materials - making the most of your slides and visual aids
• Activity: Learning from the pros
• Super advanced tips!
• Transferable skills and careers programme
7 Stages in Planning an
Effective Presentation:
1. Preparation

2. Choosing your main points

3. Choosing your supporting
information

4. Establishing linking
statements

5. Developing an opening

6. Developing a conclusion

7. Reviewing your presentation
Planning: Preparation
• A powerful presenter will consider all of the following
• objectives: Once you have decided upon your objectives, you are in a
much better position to make strategic decisions about the design and tone
of your presentation
• audience: If you fail to consider your audience’s needs, you will fail to
appeal to their interest and imagination
• venue: Will your venue be formal or informal? What kind of atmosphere do
you want to create?
• remit: Have you been given guidelines or a brief? It is important to stick to
this.
2. Choosing your
main points:
• Try presenting no more than three
main points 

• Always allow time for your
conclusion and introduction 

• It is difficult for your audience to
follow a complex audience
without help from you!

• What are your main points?

• Are these points structured in a
logical, coherent way?

• Do your points work for your
audience and reflect the
objectives you set yourself?
3. Choosing your
supporting information
• Your supporting information should:
help your audience understand, believe
in and agree with your main points

1. What will add clarity to your
argument?

2. What will add authority to your
argument?

3. What will add colour to your
argument?

• What kind of supporting information do
we frequently use in history of art
seminars and lectures?

• What kind of supporting information
might you use in a gallery talk, for
example?
4. Establishing
linking statements
• Remember - it is hard for your
audience to follow your argument
with our your help

• There are phrases you can use that
help establish the direction and flow
of your argument, such as:

‘In the next section of this text, Pollock
goes on to …’

‘Another important issue to consider is
…’

‘If we follow this line of argument we
can see …’

For more helpful vocabulary - use the
University of Manchester Phrasebank
5 and 6: Developing your introduction and
conclusion
• Your opening is crucial - this is where you can either
capture or lose your audience
• Use your introduction to lay a clear foundation for the
presentation to follow
• Use your conclusion to remind your audience of the main
points
• Draw these points to a stimulating conclusion
7. Reviewing your
presentation
Once you have written your
presentation make sure that you
review its content. Ask yourself:
• does the presentation meet
your objectives?
• is it logically structured?
• have you targeted the material
at the right level for your
audience?
• is the presentation too long or
too short?
Speaking: What works …
Practice your presentation in a meaningful
way.
Don’t just read over your notes in your head. You need to ‘perform’ your
presentation out loud.
Get your presentation down to the right length
(the time limit you have been given).
Then try trimming it down by about 10% - this gives you some space to ad lib
and too short is always better than too long!
Familiarise yourself with the facilities.
If you are speaking a new or unfamiliar room - try to get there early or try out the laptop/projector, mic etc
in advance if you can. If you are showing videos - make sure they will run on the computer you will be
using.
Speaking: What doesn’t work
It is hard to get away with reading straight
from a script.
Why isn’t this an effective presentation technique?
Don’t read out a long list of bullet points
straight from your slide
This is redundant (the audience can read the information) and boring.
Facing the projection screen/wall is never a
good idea.
Look at the screen or monitor in front of you instead. Face the front so that your
audience can see and hear you properly (consider people with hearing difficulties)
Don’t draw attention to things that go wrong
by apologising - most of the time your
audience won’t know/don’t notice
Move on swiftly and don’t mention it!
Making the most of
your visual materials
Everyone likes
pretty slides
Nobody likes:
• Old-school powerpoint (think
clip art and animations)

• With Times New Roman

• Too many bullet points

• Cheesy templates
Is its worth taking the time to put together a
smart looking presentation?
Emphatically YES!
If your slides look good, research shows that
your audience will learn better.
• Four principles of using multimedia in your presentations
that will give your message more impact:
1. Coherence
2. Signalling
3. Redundancy
4. Spatial and visual contiguity
Coherence
The coherence principle - we learn better using multimedia, which is free from
extraneous information
Coherence
• Avoid extraneous
information such as
- animations,
templates and
sounds
Signalling
The signalling principle - learning is improved when our attention is focussed on
the parts of the presentation, which highlight key material
N.B. it is good practice to use a font size of 24 or higher for
accessibility reasons (this is size 26)
You can signal key information using
colour and font size
to emphasise key information on each slide
To help with
signalling, it is a
good idea to stick to
communicating one
key point per slide.
Redundancy
The redundancy principle: learning is reduced when the information presented
is redundant - i.e. if you read the text from your slides verbatim
How can you avoid
redundancy?
• Avoid packing slides with too
many bullet points - this will
only encourage you to read
them out

• You don’t need to include your
name or the logo of the
organisation you’re
representing on every slide -
once or twice is enough
Research shows that people are able to recall
your main points better if you have a full
sentence headline on your slide - as opposed
to a word or phrase as a headline.
Spatial and temporal contiguity
Learning improves when words are placed near relevant pictures 

Learning also improves when narration (your speech) occurs at the same time as looking

at relevant pictures
The spatial and
temporal contiguity
principle is good
news for art
historians as we
use so many
images in our
presentations and
papers!
Finding relevant images to illustrate your
presentations
• For art historical/architectural images - ARTStor,
Bridgeman Education, Oxford Art Online, Art & Architecture,
Slide Library E-Museum, Museum and Gallery databases
• Thematic or illustrative images:
• morguefile.com
• TinEye Labs - allows you to sear Flickr for images to fit in
with your colour scheme
• Photofunia - good for more creative images you can
manipulate
A good way of developing your skills is to
observe and learn from people who are more
experienced than you.
Watch Thelma Golden’s ‘How art gives shape to cultural change’ TED Talk.

How does she conform/deviate from the TED Talk model?
Some super advanced tips …
Using a blank slide before or after a really
important point, i.e. when you want the
audience to stop looking at the screen and
look at you, is a great technique when you
want to make your message really clear.
If you need to introduce a lot of theoretical or
background information, using the ‘flashback’
technique can a be really effective way of
holding on to your audience’s attention.
For example …
• Can you think of a film with a
really gripping opening scene?

• Films start with an exciting/
scary/mysterious premise (or
ridiculous action scene) to get
you hooked.

• Then they go into the
exposition, setting the scene,
introducing the characters etc.

• How could you apply the
flashback technique to an art
history presentation?
Useful tips and
resources:
• My presentation tips guide and
guru is Ned Potter - an
academic liaison librarian at
the University of York

• Lots of the tips and guidance
came from his slideshare
presentations - which can be
found at: 

https://www.slideshare.net/
thewikiman

Good Presentations Matter

  • 1.
    Good Presentations Matter BA2Academic Skills Programme - Advanced Presentation Skills
  • 2.
    What are wegoing to cover? • Planning • Speaking - what works and what doesn’t? • Materials - making the most of your slides and visual aids • Activity: Learning from the pros • Super advanced tips! • Transferable skills and careers programme
  • 3.
    7 Stages inPlanning an Effective Presentation: 1. Preparation 2. Choosing your main points 3. Choosing your supporting information 4. Establishing linking statements 5. Developing an opening 6. Developing a conclusion 7. Reviewing your presentation
  • 4.
    Planning: Preparation • Apowerful presenter will consider all of the following • objectives: Once you have decided upon your objectives, you are in a much better position to make strategic decisions about the design and tone of your presentation • audience: If you fail to consider your audience’s needs, you will fail to appeal to their interest and imagination • venue: Will your venue be formal or informal? What kind of atmosphere do you want to create? • remit: Have you been given guidelines or a brief? It is important to stick to this.
  • 5.
    2. Choosing your mainpoints: • Try presenting no more than three main points • Always allow time for your conclusion and introduction • It is difficult for your audience to follow a complex audience without help from you! • What are your main points? • Are these points structured in a logical, coherent way? • Do your points work for your audience and reflect the objectives you set yourself?
  • 6.
    3. Choosing your supportinginformation • Your supporting information should: help your audience understand, believe in and agree with your main points 1. What will add clarity to your argument? 2. What will add authority to your argument? 3. What will add colour to your argument? • What kind of supporting information do we frequently use in history of art seminars and lectures? • What kind of supporting information might you use in a gallery talk, for example?
  • 7.
    4. Establishing linking statements •Remember - it is hard for your audience to follow your argument with our your help • There are phrases you can use that help establish the direction and flow of your argument, such as: ‘In the next section of this text, Pollock goes on to …’ ‘Another important issue to consider is …’ ‘If we follow this line of argument we can see …’ For more helpful vocabulary - use the University of Manchester Phrasebank
  • 8.
    5 and 6:Developing your introduction and conclusion • Your opening is crucial - this is where you can either capture or lose your audience • Use your introduction to lay a clear foundation for the presentation to follow • Use your conclusion to remind your audience of the main points • Draw these points to a stimulating conclusion
  • 9.
    7. Reviewing your presentation Onceyou have written your presentation make sure that you review its content. Ask yourself: • does the presentation meet your objectives? • is it logically structured? • have you targeted the material at the right level for your audience? • is the presentation too long or too short?
  • 10.
  • 11.
    Practice your presentationin a meaningful way. Don’t just read over your notes in your head. You need to ‘perform’ your presentation out loud.
  • 12.
    Get your presentationdown to the right length (the time limit you have been given). Then try trimming it down by about 10% - this gives you some space to ad lib and too short is always better than too long!
  • 13.
    Familiarise yourself withthe facilities. If you are speaking a new or unfamiliar room - try to get there early or try out the laptop/projector, mic etc in advance if you can. If you are showing videos - make sure they will run on the computer you will be using.
  • 14.
  • 15.
    It is hardto get away with reading straight from a script. Why isn’t this an effective presentation technique?
  • 16.
    Don’t read outa long list of bullet points straight from your slide This is redundant (the audience can read the information) and boring.
  • 17.
    Facing the projectionscreen/wall is never a good idea. Look at the screen or monitor in front of you instead. Face the front so that your audience can see and hear you properly (consider people with hearing difficulties)
  • 18.
    Don’t draw attentionto things that go wrong by apologising - most of the time your audience won’t know/don’t notice Move on swiftly and don’t mention it!
  • 19.
    Making the mostof your visual materials
  • 20.
    Everyone likes pretty slides Nobodylikes: • Old-school powerpoint (think clip art and animations) • With Times New Roman • Too many bullet points • Cheesy templates
  • 21.
    Is its worthtaking the time to put together a smart looking presentation?
  • 22.
  • 23.
    If your slideslook good, research shows that your audience will learn better. • Four principles of using multimedia in your presentations that will give your message more impact: 1. Coherence 2. Signalling 3. Redundancy 4. Spatial and visual contiguity
  • 24.
    Coherence The coherence principle- we learn better using multimedia, which is free from extraneous information
  • 25.
    Coherence • Avoid extraneous informationsuch as - animations, templates and sounds
  • 26.
    Signalling The signalling principle- learning is improved when our attention is focussed on the parts of the presentation, which highlight key material
  • 27.
    N.B. it isgood practice to use a font size of 24 or higher for accessibility reasons (this is size 26) You can signal key information using colour and font size to emphasise key information on each slide
  • 28.
    To help with signalling,it is a good idea to stick to communicating one key point per slide.
  • 29.
    Redundancy The redundancy principle:learning is reduced when the information presented is redundant - i.e. if you read the text from your slides verbatim
  • 30.
    How can youavoid redundancy? • Avoid packing slides with too many bullet points - this will only encourage you to read them out • You don’t need to include your name or the logo of the organisation you’re representing on every slide - once or twice is enough
  • 31.
    Research shows thatpeople are able to recall your main points better if you have a full sentence headline on your slide - as opposed to a word or phrase as a headline.
  • 32.
    Spatial and temporalcontiguity Learning improves when words are placed near relevant pictures Learning also improves when narration (your speech) occurs at the same time as looking at relevant pictures
  • 33.
    The spatial and temporalcontiguity principle is good news for art historians as we use so many images in our presentations and papers!
  • 34.
    Finding relevant imagesto illustrate your presentations • For art historical/architectural images - ARTStor, Bridgeman Education, Oxford Art Online, Art & Architecture, Slide Library E-Museum, Museum and Gallery databases • Thematic or illustrative images: • morguefile.com • TinEye Labs - allows you to sear Flickr for images to fit in with your colour scheme • Photofunia - good for more creative images you can manipulate
  • 35.
    A good wayof developing your skills is to observe and learn from people who are more experienced than you. Watch Thelma Golden’s ‘How art gives shape to cultural change’ TED Talk. How does she conform/deviate from the TED Talk model?
  • 36.
  • 37.
    Using a blankslide before or after a really important point, i.e. when you want the audience to stop looking at the screen and look at you, is a great technique when you want to make your message really clear.
  • 38.
    If you needto introduce a lot of theoretical or background information, using the ‘flashback’ technique can a be really effective way of holding on to your audience’s attention.
  • 39.
    For example … •Can you think of a film with a really gripping opening scene? • Films start with an exciting/ scary/mysterious premise (or ridiculous action scene) to get you hooked. • Then they go into the exposition, setting the scene, introducing the characters etc. • How could you apply the flashback technique to an art history presentation?
  • 40.
    Useful tips and resources: •My presentation tips guide and guru is Ned Potter - an academic liaison librarian at the University of York • Lots of the tips and guidance came from his slideshare presentations - which can be found at: https://www.slideshare.net/ thewikiman