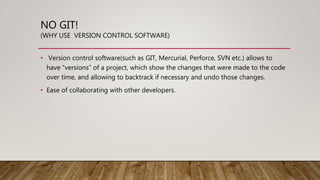
2. NO GIT!
(WHY USE VERSION CONTROL SOFTWARE)
• Version control software(such as GIT, Mercurial, Perforce, SVN etc.) allows to
have “versions” of a project, which show the changes that were made to the code
over time, and allowing to backtrack if necessary and undo those changes.
• Ease of collaborating with other developers.
3. GIT THE HELL OUT
(WHY GIT IS *BEST* VERSION CONTROL SOFTWARE AVAILABLE)
• Performance:
• Git tracks state, history and integrity of the source tree.
• Git works with the whole repo instead of individual files.
• Git is distributed which allows offline work.
4. • Ok, No more Jokes. Lets Git started(ok maybe one more)
5. CHECKOUT A REPOSITORY
• create a working copy of a local repository by running the command
git clone /path/to/repository
• when using a remote server, your command will be
git clone username@host:/path/to/repository
6. WORKFLOW
• your local repository consists of three "trees" maintained by git. the first one is
your Working Directory which holds the actual files. the second one is the Index
which acts as a staging area and finally the HEAD which points to the last
commit you've made
Working git add Index/stage git commit HEAD
7. ADD & COMMIT
• You can propose changes (add it to the Index) using
git add <filename>
git add *
• This is the first step in the basic git workflow. To actually commit these changes
use
git commit -m "Commit message”
• Now the file is committed to the HEAD, but not in your remote repository yet.
8. PUSHING CHANGES
• Your changes are now in the HEAD of your local working copy. To send those changes to your
remote repository, execute
git push origin master
• Change master to whatever branch you want to push your changes to.
• If you have not cloned an existing repository and want to connect your repository to a remote
server, you need to add it with
git remote add origin <server>
• Now you are able to push your changes to the selected remote server
9. BRANCHING
• Branches are used to develop features isolated from each other. The master branch is the "default"
branch when you create a repository. Use other branches for development and merge them back to
the master branch upon completion.
• create a new branch named "feature_x" and switch to it using
git checkout -b feature_x
• switch back to master
git checkout master
• and delete the branch again
git branch -d feature_x
• a branch is not available to others unless you push the branch to your remote repository
git push origin <branch>.
10. UPDATE & MERGE
• to update your local repository to the newest commit, execute
git pull
• in your working directory to fetch and merge remote changes.
to merge another branch into your active branch (e.g. master), use
git merge <branch>
• in both cases git tries to auto-merge changes. Unfortunately, this is not always possible and
results in conflicts. You are responsible to merge those conflicts manually by editing the files
shown by git. After changing, you need to mark them as merged with
git add <filename>
• before merging changes, you can also preview them by using
git diff <source_branch> <target_branch>
11. LOG
• in its simplest form, you can study repository history using.. git log
You can add a lot of parameters to make the log look like what you want. To see only the commits of a certain
author:
git log --author=bob
• To see a very compressed log where each commit is one line:
git log --pretty=oneline
• Or maybe you want to see an ASCII art tree of all the branches, decorated with the names of tags and branches:
git log --graph --oneline --decorate –all
• See only which files have changed:
git log --name-status
• These are just a few of the possible parameters you can use. For more, see 'git log –help’
12. REPLACE LOCAL CHANGES
• In case you did something wrong, which for sure never happens ;), you can
replace local changes using the command
git checkout -- <filename>
• this replaces the changes in your working tree with the last content in HEAD.
Changes already added to the index, as well as new files, will be kept.
• If you instead want to drop all your local changes and commits, fetch the latest
history from the server and point your local master branch at it like this
git fetch origin
git reset --hard origin/master
13. USEFUL HINTS
• built-in git GUI
gitk
• use colorful git output
git config color.ui true
• show log on just one line per commit
git config format.pretty oneline
• use interactive adding
git add -i /git add –p
• Status of the local tree
git status