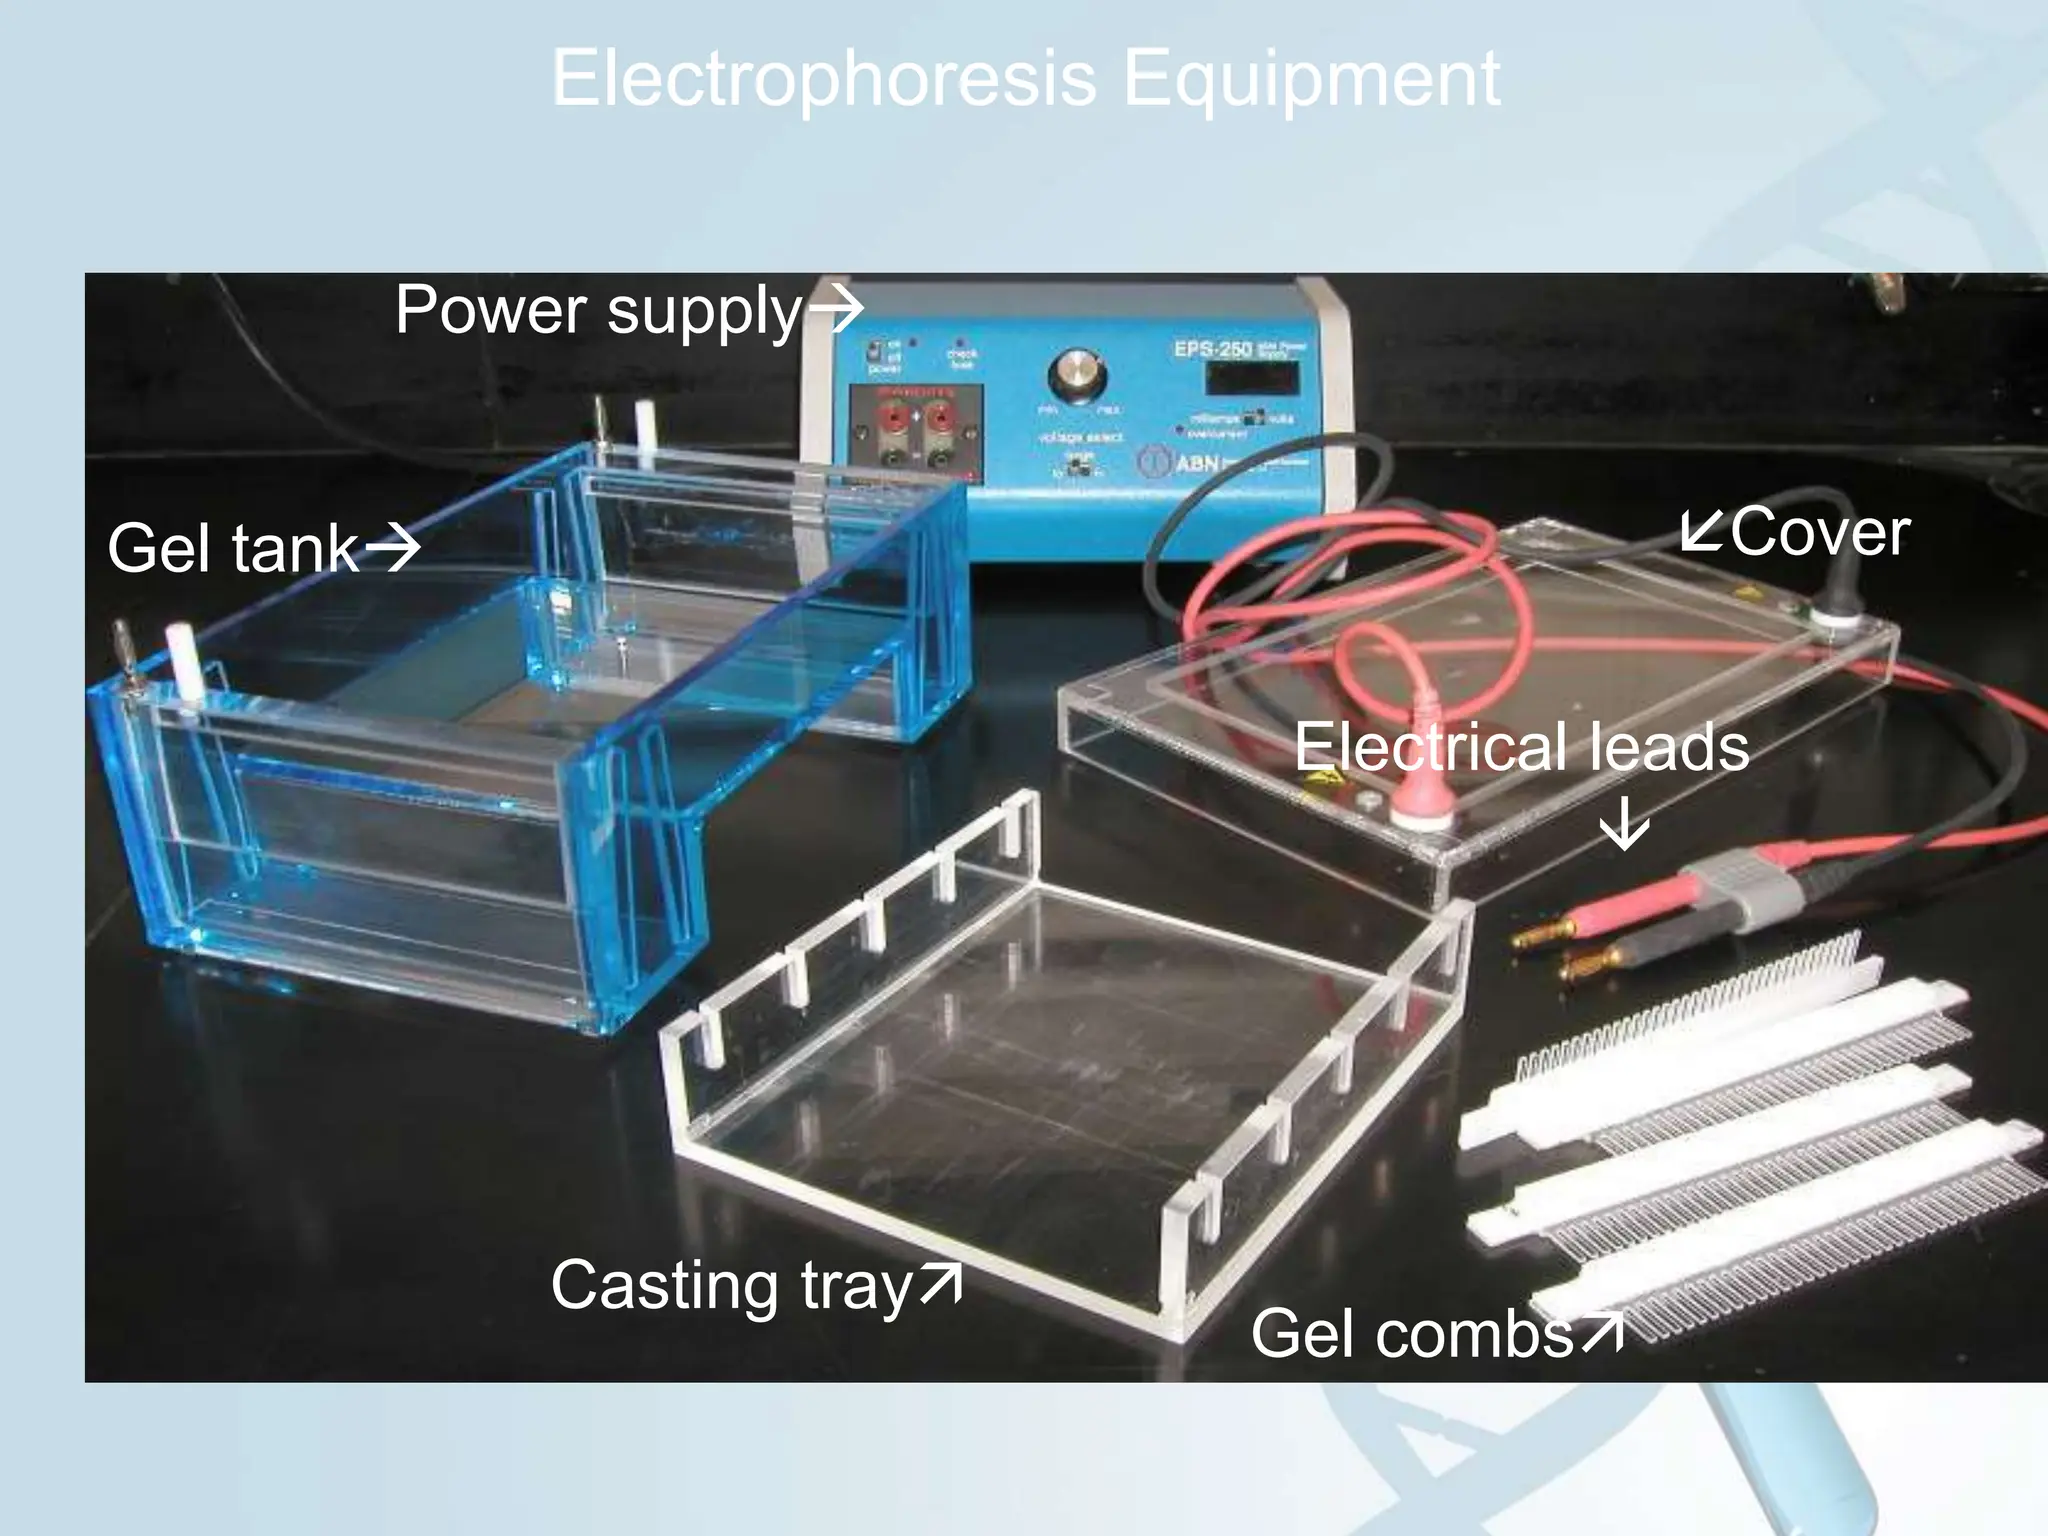
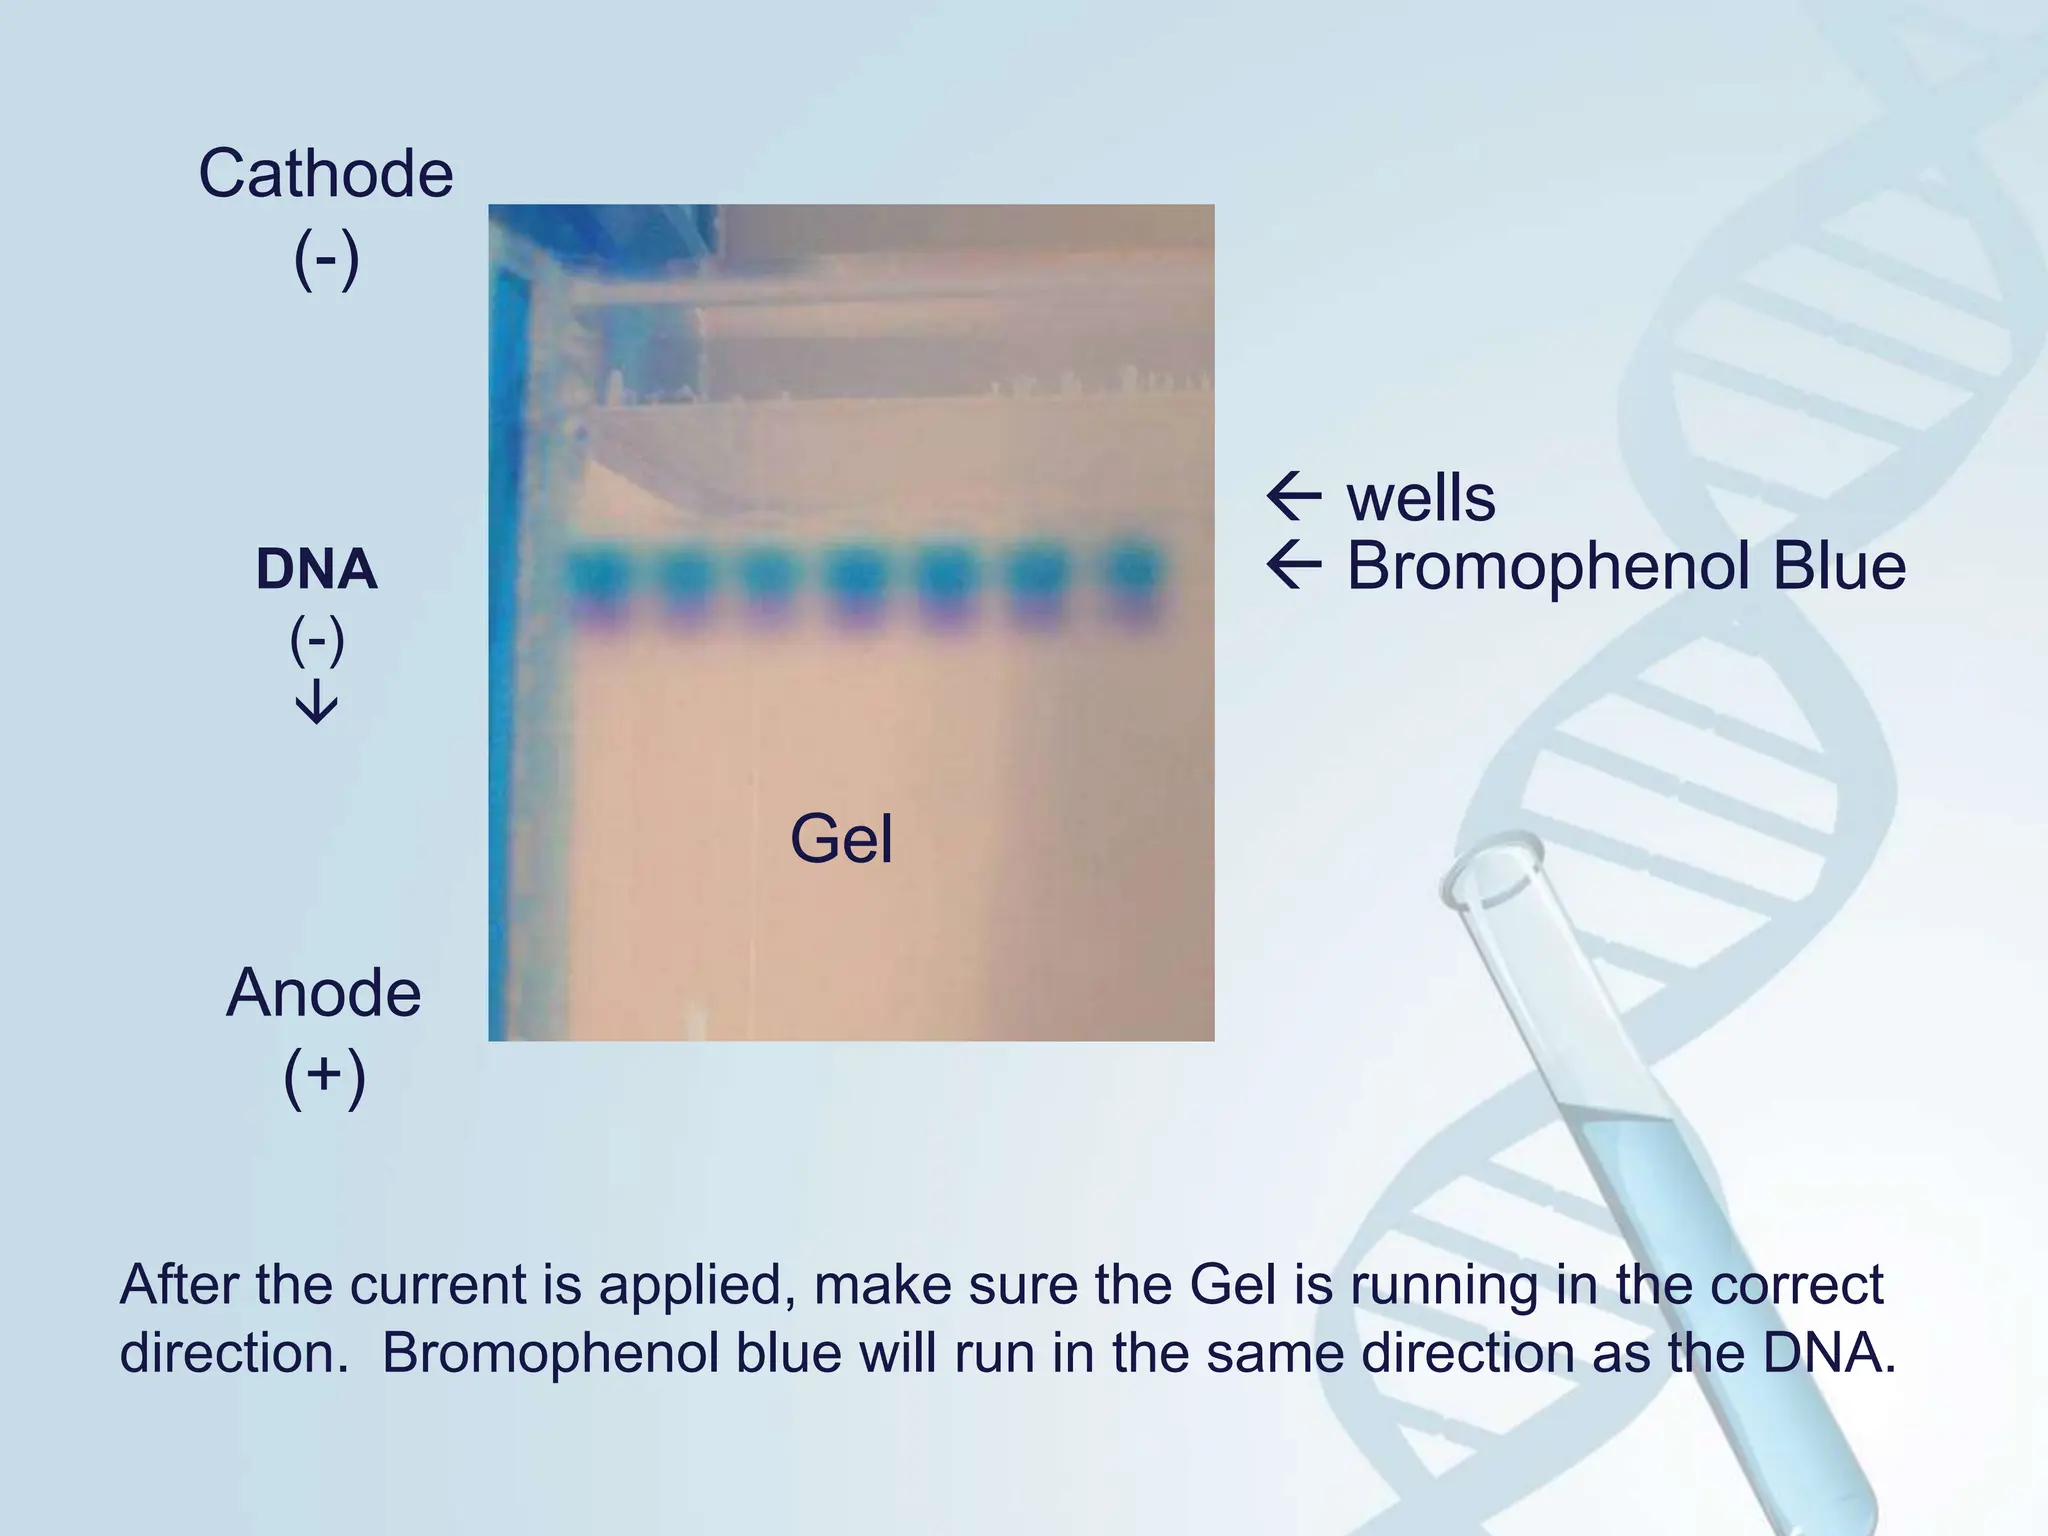
2. Agarose Gel Electrophoresis
Gel electrophoresis is a widely used technique for the
analysis of nucleic acids and proteins. Agarose gel
electrophoresis is routinely used for the preparation and
analysis of DNA.
3. Gel electrophoresis is a procedure that separates
molecules on the basis of their rate of movement
through a gel under the influence of an electrical
field.
Purpose: To determine the presence or absence of PCR
products and quantify the size (length of the DNA molecule)
of the product.
4. • DNA is negatively charged.
Power
DNA
• When placed in an electrical field, DNA will migrate
toward the positive
pole (anode).
- +
5. • An agarose gel is used to slow the movement of DNA
and separate by size.
• Polymerized agarose is porous, allowing for the
movement of DNA.
Scanning Electron Micrograph of
Agarose Gel (1×1 µm)
6. Factors affect DNA migration :
• Strength of the electrical field.
• Buffer.
• Density of agarose gel.
• Size of the DNA.
*Small DNA move faster than large DNA, gel
electrophoresis separates DNA according to size.
8. Materials needed: Agarose
TAE Buffer
6X Sample Loading Buffer
DNA ladder standard
Electrophoresis chamber
Power supply
Gel casting tray and combs
DNA stain
Staining tray
Gloves
Pipette and tips
9. Recipes: TAE Buffer
4.84 g Tris Base
1.14 ml Glacial Acetic Acid
2 ml 0.5M EDTA (pH 8.0)
- bring the total volume up to 1L with water
6X Sample Loading Buffer
1 ml sterile H2O
1 ml Glycerol
enough bromophenol blue to make the buffer deep blue (~ 0.05 mg)
-for long term storage, keep sample loading buffer frozen.
QUIKView DNA Stain
25 ml WARDS QUIKView DNA Stain
12. Agarose
Agarose is a linear polymer extracted from seaweed.
D-galactose 3,6-anhydro
L-galactose
•Agarose was first used in biology
when Robert Koch* used it as a
culture medium for Tuberculosis
bacteria in 1882
13. Agarose
Buffer
Flask for boiling
• Measure 1.25 g Agarose
powder and add it to a 500
ml flask.
• Add 125 ml TAE Buffer to
the flask. (the total gel
volume well vary
depending on the size of
the casting tray)
14. Agarose Buffer Solution
Combine the agarose powder and buffer solution. Use a flask that is
several times larger than the volume of buffer.
15. • Melt the agarose in a microwave or hot water bath
until the solution becomes clear. (if using a
microwave, heat the solution for several short intervals
- do not let the solution boil for long periods as it may
boil out of the flask).
• Let the solution cool to about 50-55°C.
16. Agarose is insoluble at room temperature (left).
The agarose solution is boiled until clear (right).
* Gently swirl the solution periodically when heating to allow all the grains of
agarose to dissolve.
Melting the Agarose
17. Gel casting tray & combs
• Seal the ends of the casting tray with two layers of tape.
• Place the combs in the gel casting tray.
18. Seal the edges of the casting tray and put in the combs. Place the casting
tray on a level surface. None of the gel combs should be touching the
surface of the casting tray.
Preparing the Casting Tray
19. • Pour the melted agarose solution into the
casting tray and let cool until it is solid (it
should appear milky white).
21. Each of the gel combs should be submerged in the melted agarose solution.
22.
23. • Carefully pull out the combs and remove the tape.
• Place the gel in the electrophoresis chamber.
• Add enough TAE Buffer so that there is about 2-3
mm of buffer over the gel.
25. buffer
Add enough electrophoresis buffer to cover the gel to a depth of
at least 1 mm. Make sure each well is filled with buffer.
Cathode
(negative)
Anode
(positive)
wells
DNA
26. 6X Loading Buffer:
Bromophenol Blue (for color)
Glycerol (for weight)
Sample Preparation
Mix the samples of DNA with the 6X sample loading . This allows the
samples to be seen when loading onto the gel, and increases the density
of the samples, causing them to sink into the gel wells.
27. Loading the Gel
Carefully place the pipette tip over a well and gently expel the sample.
The sample should sink into the well. Be careful not to puncture the
gel with the pipette tip.
28. Place the cover on the electrophoresis chamber, connecting the electrical
leads. Connect the electrical leads to the power supply. Be sure the leads
are attached correctly - DNA migrates toward the anode (red). When the
power is turned on, bubbles should form on the electrodes in the
electrophoresis chamber.
Running the Gel
29. wells
Bromophenol Blue
Cathode
(-)
Anode
(+)
Gel
After the current is applied, make sure the Gel is running in the correct
direction. Bromophenol blue will run in the same direction as the DNA.
DNA
(-)
30. 100
200
300
1,650
1,000
500
850
650
400
12,000 bp
5,000
2,000
DNA Ladder Standard
Inclusion of a Marker DNA (DNAs of know sizes) on the gel
makes it easy to determine the sizes of unknown DNAs.
-
+
DNA
migration
bromophenol blue
Note: bromophenol
blue migrates at
approximately the
same rate as a 300
bp DNA molecule
31. Staining the Gel
***CAUTION! Ethidium bromide is a powerful mutagen and is
moderately toxic. Gloves should be worn at all times.
• Ethidium bromide binds to DNA and fluoresces under UV light,
allowing the visualization of DNA on a Gel.
• Ethidium bromide can be added to the gel and/or running buffer
before the gel is run or the gel can be stained after it has run.
32. Staining the Gel
• Place the gel in the staining tray containing warm diluted stain.
• Allow the gel to stain for 25-30 minutes.
• To remove excess stain, allow the gel to destain in water.
• Replace water several times for efficient destain.