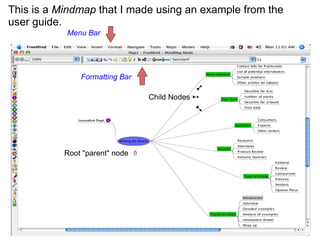
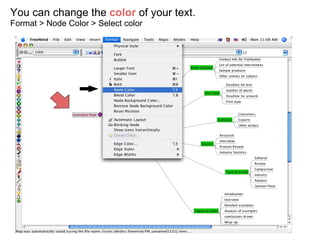
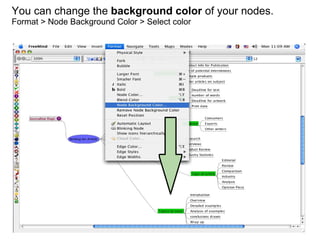
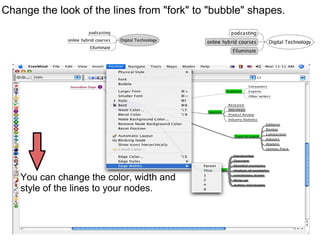
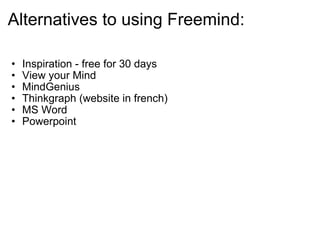
4. This is a Mindmap that I made using an example from the user guide. Root "parent" node ⇑ ➹ Child Nodes ➸ ➷ Menu Bar Formatting Bar
5.
6. Let's get you started: When you open a New map ( Command N ) you will see a blank screen with a grey ellipse "node" that says New Mindmap . Click on the "node" and begin typing, this is the "Root node." A " Child " node branches off from the " Parent " (root) node. Go to Menu Bar> Insert> New Child Node A " Sibling " node is positioned at the same level of the reference. -To create a sibling node below the active node press Enter -To create a sibling node above the active node, press Shift+Enter
7. Collapse and open information on a node by clicking the circle. Drag nodes into different postions: by placing your cursor at the end of a node, an ellipse will appear, click on the ellipse, then drag the node into any position. Highlighting nodes with clouds: Select the node(s) of your choice, go to Insert > Cloud. Change the cloud color: Select the main node of the cloud, then go to Format > Cloud color > select color
8. You can change the color of your text. Format > Node Color > Select color
9. You can change the background color of your nodes. Format > Node Background Color > Select color
10. You can change the color, width and style of the lines to your nodes. Change the look of the lines from "fork" to "bubble" shapes.