1. 611 Rock Springs Road, Escondido, CA 92025 (760) 735-6277 Phone (760) 735-6274 Fax
www.Fibertecheng.com 888-NEED FRP (888-633-3377) fibertech@fibertecheng.com
Fiberglass Tank & Piping Fundamentals
Fiberglass reinforced thermosetting plastic (“fiberglass”) first became a viable alternative to protected
steel, stainless steel and exotic materials in 1950. That year centrifugal cast fiberglass piping was first
used in the crude oil production industry as a solution to corrosion problems. It was during the 1960’s
that manufacturers began to develop nationally recognized standards and test methods for fiberglass
storage and fiberglass piping systems. Today, there are a number of nationally recognized standards
and specifications for fiberglass tanks and fiberglass piping. While there are standards developed for
military applications, e.g., MIL standards for helicopter rotor blades, following is a list of the most
common civilian organizations with published standards and specifications:
Fiberglass Civilian Organizations
Tanks & Piping API American Petroleum Institute
ASME American Society of Mechanical Engineers
ASTM American Society for Testing and Material
AWWA American Water Works Association
FM Factory Mutual Research
NSF National Sanitation Foundation
UL Underwriters Laboratories Inc.
What is Fiberglass?
Fiberglass tanks and fiberglass piping contain glass fiber reinforcement embedded in cured
thermosetting resin, hence the term Fiberglass Reinforced Plastic (FRP) describes the fiberglass
material system. This composite structure typically contains additives such as pigments and dyes. By
selecting the proper combination of resin, glass fibers, additives and design, the fabricator can create a
product that meets the equipment designer’s performance standard.
Glass Fibers: All fiberglass begins as individual filaments of glass drawn from a furnace of molten
glass. Many filaments of glass are formed simultaneously and gathered into a “strand” and a surface
treatment “sizing” is added to maintain fiber properties. Glass fibers are designed for several
applications, some of which are for applications in an acid, alkali or other chemical environment. The
mechanical strength of a fiberglass product depends upon the amount, type and arrangement of glass
fiber reinforcement within the material system and increases proportionally with the amount of glass
fiber reinforcement.
Seven types of fiberglass reinforcement are commonly used:
Surfacing veil
Chopped Strand
Chopped Strand Mat
Woven Roving
Biaxial Mat
Continuous Strand
Unidirectional Mat
2. Resins: The second major component of fiberglass tanks and piping is the thermosetting resin system.
Thermoplastic resin systems are one of two basic groups of resins, but they are not used with glass
fiber reinforcing. A comparison of the two resin systems is shown below:
Thermoplastics are resins that are normally solid at room temperature, but are softened by heat and
will flow under pressure. Typical applications include household kitchenware, children’s toys, bottles
and other common items.
Thermosetting plastics are resins that undergo an irreversible reaction when cured in the presence of
a catalyst. They cannot be re-melted and are insoluble.
Fiberglass products use only thermosetting resin systems of which there are two generic types, epoxy
and polyester resins. The resin system is chosen for its chemical, mechanical and thermal properties.
Epoxy resins are used primarily for the manufacture of small diameter piping, whereas polyester resins
are commonly used for large diameter piping and storage tanks. Polyester resins come in many
variations with different properties to resist acids, caustics and high temperatures.
Resistance to corrosion in aggressive environments is one of the primary reasons for specifying
fiberglass tanks or piping. Typical types of corrosion do not affect fiberglass. This would include
galvanic, aerobic, pitting and inter-granular corrosion which harms metals but not fiberglass. Although
fiberglass resists a wide range of chemicals and temperatures, it requires the right design, fabrication
and installation to match the appropriate application. For example, fiberglass may be subject to
chemical attack from hydrolysis, oxidation, or incompatible solutions. However, the proper resin/glass
matrix will address this chemical attack.
Today, off-the-shelf or custom fiberglass tanks and fiberglass piping is used in corrosive environments
and high pressure (e.g. 60 psi) process applications. These fiberglass systems are widely used in retail
petroleum, exploration & production, chemical, municipal and industrial applications.
3. FRP Ducting & Chemical Storage Tanks
FRP consists of two basic parts:
1) The liner or inner surface,
2) The structural or exterior layers.
The liner is a resin-rich barrier which prevents corrosive
fumes or liquids from attacking the fiberglass. The liner is
made up of one or more synthetic veils and two or more
layers of 1.5 oz mat. The liner is the most critical part for
corrosive environments and must be free of air and other
imperfections that could allow chemicals to reach the
structural layers. The structural layers consist of layers of
mat, woven roving, filament-winding and synthetic veils.
The amount and order of these layers is determined by
structural calculations or existing standards based upon the
chemical environment and pressures present in the
application.
Every layer of woven roving needs to be sandwiched between at least one mat on each side, and veils
can only be used in a layer next to another veil or a mat. Every structural sequence/layer (except for
the finishing layer, which can have a veil or mat as the last layer) should have mat as the initial and
final layer.
Fabrication Processes
Hand Lay-up
Hand lay-up is the simplest, but most labor intensive fabrication
method. It is well suited for low volume production and can be
used for both the liner and the structure.
This process uses a room
temperature cure system where
catalyzed resin is applied to the
surface of a mold, then fiberglass, usually veil, chopped mat or roving
is placed on top of the resin. The fiberglass is then saturated with
resin. Next the resin is dispersed equally by rolling the resin into the
fiberglass with a roller, this also assists in removing air bubbles which
could be detrimental to the laminate. After rolling this layer, additional
layers can be added using the same procedure as the first.
Spray-up
Spray-up is a faster process and is less labor intensive than hand
layup. However there are drawbacks;
1.) The possibility of more air entrapment.
2.) It is more difficult to control overall thickness,
3.) Uniformity of thickness can vary some
4.) It is more difficult to control resin-to-glass ratios. Spray-up can
be used for the liner and structure. It is a room temperature cure
process in which continuous strand roving is fed through a chopper
gun, combined with catalyzed resin and sprayed onto a mold
surface. The surface is then rolled to remove air bubbles and to obtain uniformity. Additional layers
of resin/glass are applied and rolled in the same manner.
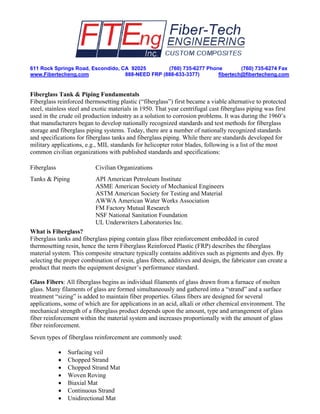
4. Filament Winding
Filament winding is an excellent process for fabricating round
equipment, it is less labor intensive and produces very uniform
structures as far as thickness and resin-to-glass ratios. Filament
winding is only recommended for the structural portion of FRP
equipment. The liner should be fabricated using either hand
lay-up or spray-up.
Filament winding typically uses a room
temperature cure system, but generally
with long gel times. A resin-rich liner is
applied to a mandrel and allowed to cure. Continuous strand glass or roving is
then pulled through guides, impregnated with resin and guided onto a rotating
mandrel in a helical pattern.
The mandrel is held under tension in the
filament winding machine and, while
the mandrel is spun at precise rates to
ensure proper winding, a carriage containing the fiber spools
and resin bath travels back and forth down the length of the
mandrel.
This produces the structural portion of the equipment which is
typically 60% glass. Chopped mat and/or roving may also be
added in between completed winds, to accelerate the build-up
of the structural portion.
Linings
An FRP lining can be put on existing steel equipment or applied over concrete; existing FRP
equipment can also be re-lined if the structural part of the tank is in good condition. In each of these
cases the FRP lining is used to extend the life span of the equipment and/or to protect the equipment
from the corrosive environments.
Whether lining an existing structure or putting in a new
lining, the surface must be properly prepared in order to
insure good bonding between the fiberglass and the existing
structure.
In lining a steel tank, the surface should be sandblasted to
“white metal” and should conform to SSPC-SP-5 or NACE
No. 1 white metal blast profiles. In the case of concrete, the
Portland cement lattice should be removed to expose stone.
Several sanding methods are acceptable, however grit blasting
and sand blasting are the preferred methods. When lining a
concrete structure, the concrete should be at least 28 days old and
completely dry. Sandblasting should be performed the same as
with metal. After blasting, any cracks, pits, etc. should be filled
in with putty, allowed to cure, and then sanded smooth. After all
sanding is complete, the surface should be thoroughly vacuumed
to remove all dust and dirt. In an eroded or damaged FRP lining,
the equipment should first be washed thoroughly to remove all
chemicals and debris; then ground back to the structural layer.
5. The surface of the equipment to be relined should not exceed 100°F. A uniform primer coat of resin,
1-3 mils thick, is then applied using a paintbrush or other suitable equipment. The primer coat
prevents surface corrosion prior to the application of the laminating resin and also provides a bonding
surface for the laminating resin. The primer coat should be allowed to cure under ambient conditions
60-100°F to a tack-free state before applying the laminating resin. The laminating procedure should
follow the primer application as soon as possible. No condensation should be allowed to form over the
primer coat. If the primer coat is allowed to develop a hard cure, the surface should be lightly sanded
and another prime coat applied prior to applying the laminating resin.
Finishing Processes
There are a variety of methods available to finish the exterior surface of FRP equipment. In many
cases a topcoat of resin containing dissolved wax is sprayed, rolled, or brushed onto the surface of the
FRP equipment. This wax forms a film preventing air inhibition of the resin. Air inhibition can lead
to a tacky surface. However, care must be taken if there is any future laminating to be done, such as
the addition of manways or nozzles because the wax will interfere with secondary bonding.
If the equipment needs to be of a certain color, it may be gel-
coated or painted. These coatings have the added advantages
of providing opacity for light-
sensitive contents and protection
from the weather. These may
be applied with rollers or a
pressurized system of spraying
the coatings on the product.
Each coating has a
recommended thickness to
obtain optimum performance.
In a highly corrosive environment, FRP equipment may also have an
additional liner or veils placed on the outside of the structural wall of the
equipment. This layer would be applied same as the others, except it
should only be applied after the structural wall is cured.
Inspecting FRP
FRP composite should be inspected after all fabrication is completed and prior to putting the
equipment into service. Any non-conforming areas can be easily repaired by an experienced
laminator. A thorough inspection should be performed at all of the following milestones: 1) before
leaving the fabricators shop, 2) once the equipment arrives on-site, and 3) once the equipment has been
installed. The most common inspections are visual inspections, Barcol hardness readings, and acetone
sensitivity.
After the equipment has been put in use, periodic inspections should be performed in order to monitor
the integrity of the equipment and to make minor repairs if necessary. FTE offers an annual inspection
contract for all FRP products which includes the inspection, repairs, relines, as well as
recommendations for current and future conditions/operations.
6. Joining and Bonding Procedures
The methods described here can be applied to bonding, welding, joining or repair of FRP components.
Recommended Tools:
Sanding and Cutting Tools:
1. Power disc sander – 3” or 5”
2. Carbide grit cutting wheel
3. Saber saw with carbide grit tipped cutting blades
4. 24, 60, 100 grit paper/sanding discs
Bonding Tools:
1. Premium grade Vinylester or polyester promoted resin
2. MEKP or BPO catalyst (depends on corrosive environment)
3. 1 ½ oz. chopped strand mat
4. Surfacing veil – C-veils or Nexus (see spec or calcs)
5. 24 oz. woven roving
6. Acetone
7. Assorted stiff bristle paint brushes and rollers– 3 to 6 inches wide
8. Aluminum rollers – 1/8” to 1” diameter, 3 to 6 inches wide
9. Plastic rollers – 1/8” to ¼” diameter, 3 to 6 inches wide
10. Buckets/cans (for acetone)
11. Utility knife or scissors (for cutting materials)
12. Plastic measuring graduate
13. Paper cups and half gallon plastic containers (for mixing resin)
14. Wooden or plastic paint sticks (for mixing resin)
15. Personal protective equipment:
a. Rubber gloves
b. Safety glasses
c. Respirators
d. Dust masks
e. Any other OSHA required equipment
Surface Preparation
Thoroughly clean the area with a solvent agent to remove surface contamination. If vessel has been in
use, be cautious of chemical pockets in the walls or floors.
All surface area to be covered with
fiberglass and resin must be
thoroughly sanded. The surface then
needs to be cleaned and thoroughly
dry before beginning. Apply materials
as soon as possible to prevent possible
recontamination of the prepared area.
Mixing Resin
Resin used for repairing or joining should be the same type as the resin used in the original vessel.
Under no circumstance should the catalyst and promoter be mixed in the same container or poured into
the resin at the same time. If they come into contact with each other, they react explosively. Mix the
promoter into the resin first or buy pre-promoted resin, then after thoroughly mixing, add the catalyst.
The catalyst should be calculated by using the weight of the resin and the recommended percentage of
catalyst recommended by the resin manufacturer for the atmospheric conditions present and the
preferred gel and cure times.
7. The process is affected dramatically by temperature. Work should not be done at temperatures below
55° F unless an outside source of heat is applied. High temperatures can also speed up gel and cure
times, leaving the operator with inadequate working time. It is recommended to always do a sample
resin gel test before starting any work. After determining the proper amount of catalyst to mix in the
resin to achieve the optimum working time, the operator can begin work.
Resin Cure
Resin must be allowed to cure (or harden). The time to fully cure will vary according to the weather,
temperature, type of resin, promoter, and catalyst used, as well as the sequence and amount of
fiberglass reinforcement used.
An external heat source such as a heat lamp or portable heat gun will
decrease cure time and in cold temperatures, it may be required to
achieve a proper cure. Since most resins are flammable liquids,
external heat sources should be used with extreme caution- for
example, NEVER place a heater on a drum of resin (empty or full),
as the gases coming from the drum may ignite the whole drum.
Also, if the heat source is too close to the part, the resin may cure too
rapidly which can cause cracking, crazing, or discoloration.
There are two industry accepted ways to test for an adequate cure:
1. Acetone wipe test: using a piece of clean cloth, lightly rub some acetone on an exposed surface of
the FRP. If the surface softens or becomes tacky, it is not cured.
2. Barcol hardness test: (this requires a Barcol hardness tool) using the tester, you randomly take at
least 10 readings on the FRP and throw out the low and high, then average the rest. Compare this
number with the resin manufacturer’s recommended Barcol reading to determine if you have an
adequate cure. **Remember to resin coat all places that you use the Barcol Impresser.
If an acceptable cure can’t be achieved after post-curing, then the FRP will not cure and should be
scrapped.
Joining FRP
Cut FRP to desired length making sure that the ends are squared and butt closely together. Roughen
the edges of the FRP and the surface where the joint will be applied to. Make sure the FRP is properly
supported and restricted so that no movement occurs during assembly or curing. Fill all voids with
putty (resin mixed with silica) and let cure.
The thickness and sequence of the joints should be provided by the
structural calculations or the specification for the job, but as a general rule
joint thickness should be at least as thick as the parts to be joined. All FRP
parts 22” and larger need to have an internal joint equal to the liner of the
pieces being joined. Once you know the sequence and sizes, pre-cut as
many materials as possible.
Lay the first section of fiberglass mat on a flat surface, such as cardboard;
then wet the entire surface with resin using a brush and/or roller. Position
the second layer of fiberglass offsetting the previous layer by approximately
1” on all sides. Wet out this layer with resin and remove any visible air
while rolling toward the edges of the laminate section. Excessive pressure
is not necessary and could hinder the cure if too much resin is pushed out.
Repeat with the proper sequence of fiberglass until 3-5 plies have been
saturated with resin and formed into one integral unit.
8. Apply resin with brush and/or roller over all prepared areas of the joint.
Take the integral unit from above and center it over the butt seam. Roll
out as smooth as possible, blending the edges of the joint overlay with the
piece being joined. Remove all wrinkles and entrapped air by rolling from
the center of the joint to the outside edge. Additional resin may be applied
to provide a resin rich surface. Care must be taken to avoid sagging at the
bottom of the joint. Apply additional layers in the same fashion, always
remembering to overlap by 1”.
After the joint has hardened, a topcoat of resin mixed with wax should be
applied to all interior laminates. Any area that was sanded needs to be
coated as well.
Repair of Interior and Exterior Surfaces
The same procedures for joining FRP pieces are generally applicable.
Prepare the surface by grinding out the area that needs repaired. Add back
the reinforcing layers that needed repaired, then cover the repaired area
with a liner equivalent to the existing liner. Make sure all layers overlap
by a minimum of ½” and make sure that all bonding areas are sanded and
clean to ensure a proper bond. Wax-coat all inside repairs and UV protect
all outside repairs. Allow the repair to cure thoroughly prior to returning to
service.