Recommended
PPT
Unit 3 physical examination
PPTX
Approach to the physical Assessment
PDF
yes health assessment lacture.pdf
PDF
Physical Assessment Handouts
PPTX
Physical Assessment strategies & Technique.pptx
PPTX
INTRODUCTION TO PHYSICAL EXAMINATION
PPTX
Physical Assessment Techniques (IPPA) pdf
PPTX
PHYSICAL EXAMINATION ,introduction , definition, purpose , principle , methods,
PPTX
methods of health assessment for nursing students.pptx
PPTX
IPPA-ASSESSMENT.pptx ajshajszhajshajshajshuas
PDF
Health Assessment Lecture.pdf
PPTX
history taking and physical examination.pptx
PPTX
Nursing assessment chapter 3.pptxnjjjjjnjj
PDF
Principles of physical assessment.pdf pdf
PPTX
PPTX
Health_assessment1-1.pptx
PPTX
Physical examination, Fundamentals of Nursing
PPTX
PPTX
The techniques of physical examination
PPT
Assessment techniues Assessment techniues Assessment techniues
PDF
final cut pro torrent Crack Latest Version 2025
PDF
✅ CCleaner Pro Free Crack 6.34 + Activation Key [APRIL-2025]
PDF
✅ Download CCleaner Pro Key 2025 with Crack [Latest]
PPTX
physical examination .pptx
PPTX
Enhancing Patient Outcomes Through Accurate Nursing Assessment
PPTX
pptx_20240207_110758_00008w7r627wiwidhdeu8w..
PPT
health assessment For B.Sc Nursing 2024 PPT
PPT
PPTX
feeding of dog (1).pptx of animal science
PDF
Learn about different finance career pathways here!
More Related Content
PPT
Unit 3 physical examination
PPTX
Approach to the physical Assessment
PDF
yes health assessment lacture.pdf
PDF
Physical Assessment Handouts
PPTX
Physical Assessment strategies & Technique.pptx
PPTX
INTRODUCTION TO PHYSICAL EXAMINATION
PPTX
Physical Assessment Techniques (IPPA) pdf
PPTX
PHYSICAL EXAMINATION ,introduction , definition, purpose , principle , methods,
Similar to Fenske_4e_ch07_Physical Assessment Techniques and Equipment.pptxafafssf
PPTX
methods of health assessment for nursing students.pptx
PPTX
IPPA-ASSESSMENT.pptx ajshajszhajshajshajshuas
PDF
Health Assessment Lecture.pdf
PPTX
history taking and physical examination.pptx
PPTX
Nursing assessment chapter 3.pptxnjjjjjnjj
PDF
Principles of physical assessment.pdf pdf
PPTX
PPTX
Health_assessment1-1.pptx
PPTX
Physical examination, Fundamentals of Nursing
PPTX
PPTX
The techniques of physical examination
PPT
Assessment techniues Assessment techniues Assessment techniues
PDF
final cut pro torrent Crack Latest Version 2025
PDF
✅ CCleaner Pro Free Crack 6.34 + Activation Key [APRIL-2025]
PDF
✅ Download CCleaner Pro Key 2025 with Crack [Latest]
PPTX
physical examination .pptx
PPTX
Enhancing Patient Outcomes Through Accurate Nursing Assessment
PPTX
pptx_20240207_110758_00008w7r627wiwidhdeu8w..
PPT
health assessment For B.Sc Nursing 2024 PPT
PPT
Recently uploaded
PPTX
feeding of dog (1).pptx of animal science
PDF
Learn about different finance career pathways here!
PPTX
Artificial Intelligence for Your Job Search
PPTX
AI IN SMART CITIES AND INFRASTRUCTURE.pptx
PDF
Office of the Director of National Intelligence: Randy Siwiec
PDF
Complete biodata of I Gusti Haris pradana or Muhamad Abdul Haris
PPTX
The Rule of 3: A Time Management System That Actually Works
DOCX
Health Question for Practice , Class 8.docx
PPTX
Your Guide for a Winning Interview Feb 2026
PPTX
CNN-Pooling-Layer detail explanation cnn
PPTX
English eight _Quarter4_WEEK3 SY 2526_LESSON3.pptx
PDF
PMI - Introduction Certified Professional in Managing AI (PMI-CPMAI)™
PDF
ELISA, MICRO ARRAY TECHNIQUE, SDS PAGE, WESTERN BLOTIING
PDF
Molly Gudger's Marketing Portfolio detailing extensive marketing support and ...
PDF
7 Place to Buying a Old or Aged Verified WebMoney Accounts in European Countr...
PDF
ABAPConf 2024 - Key User and Developer Extensibility Options - Best Practices...
PPTX
PRERNA_UTSAV_2026. New Adition 2.0 pptx
PDF
Jr AIIMS S60 - NEET -2027 Teaching schedule @ 30-12-2025 final.pdf
PDF
Bow Spring Centralizer -API 10d 7th edition training
PDF
KidsCodelab STEM Career Symposium - Original.pdf
Fenske_4e_ch07_Physical Assessment Techniques and Equipment.pptxafafssf 1. Health & Physical Assessment in
Nursing
Fourth Edition
Chapter 7
Physical Assessment
Techniques and
Equipment
Copyright © 2020, 2016, 2012 Pearson Education, Inc. All Rights Reserved
2. Copyright © 2020, 2016, 2012 Pearson Education, Inc. All Rights Reserved
Learning Outcomes (1 of 2)
7.1 Differentiate between the four basic techniques
used by a professional nurse when performing physical
assessment.
7.2 Compare and contrast the purpose of equipment
required to perform a complete physical assessment.
3. Copyright © 2020, 2016, 2012 Pearson Education, Inc. All Rights Reserved
Learning Outcomes (2 of 2)
7.3 Discuss professional responsibilities related to
critical thinking, patient safety and comfort, and
principles of standard precautions in nursing practice.
4. Copyright © 2020, 2016, 2012 Pearson Education, Inc. All Rights Reserved
Introduction
• Physical assessment requires hands-on examination
of the patient and is an integral part of health
assessment process in order to provide safe, effective,
high-quality care (Douglas et al., 2016; Douglas,
Windsor, and Lewis, 2015).
• Together, the subjective and objective data provide
essential information for the nurse to use when
making decisions and caring for the patient.
5. Copyright © 2020, 2016, 2012 Pearson Education, Inc. All Rights Reserved
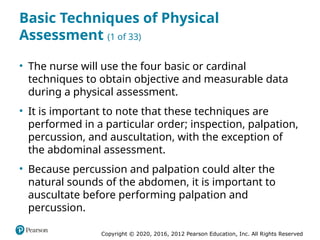
Basic Techniques of Physical
Assessment (1 of 33)
• The nurse will use the four basic or cardinal
techniques to obtain objective and measurable data
during a physical assessment.
• It is important to note that these techniques are
performed in a particular order; inspection, palpation,
percussion, and auscultation, with the exception of
the abdominal assessment.
• Because percussion and palpation could alter the
natural sounds of the abdomen, it is important to
auscultate before performing palpation and
percussion.
6. Copyright © 2020, 2016, 2012 Pearson Education, Inc. All Rights Reserved
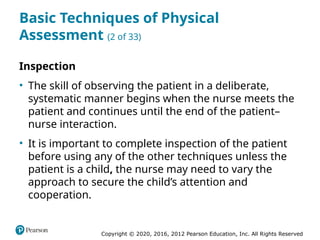
Basic Techniques of Physical
Assessment (2 of 33)
Inspection
• The skill of observing the patient in a deliberate,
systematic manner begins when the nurse meets the
patient and continues until the end of the patient–
nurse interaction.
• It is important to complete inspection of the patient
before using any of the other techniques unless the
patient is a child, the nurse may need to vary the
approach to secure the child’s attention and
cooperation.
7. Copyright © 2020, 2016, 2012 Pearson Education, Inc. All Rights Reserved
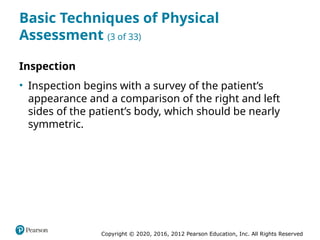
Basic Techniques of Physical
Assessment (3 of 33)
Inspection
• Inspection begins with a survey of the patient’s
appearance and a comparison of the right and left
sides of the patient’s body, which should be nearly
symmetric.
8. Copyright © 2020, 2016, 2012 Pearson Education, Inc. All Rights Reserved
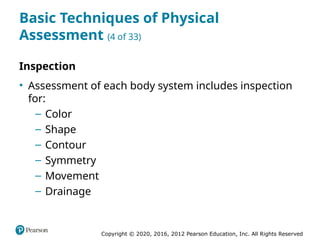
Basic Techniques of Physical
Assessment (4 of 33)
Inspection
• Assessment of each body system includes inspection
for:
– Color
– Shape
– Contour
– Symmetry
– Movement
– Drainage
9. Copyright © 2020, 2016, 2012 Pearson Education, Inc. All Rights Reserved
Basic Techniques of Physical
Assessment (5 of 33)
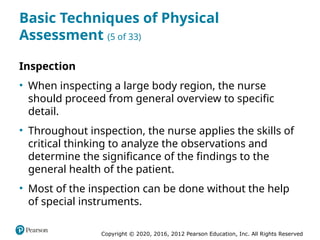
Inspection
• When inspecting a large body region, the nurse
should proceed from general overview to specific
detail.
• Throughout inspection, the nurse applies the skills of
critical thinking to analyze the observations and
determine the significance of the findings to the
general health of the patient.
• Most of the inspection can be done without the help
of special instruments.
10. Copyright © 2020, 2016, 2012 Pearson Education, Inc. All Rights Reserved
Basic Techniques of Physical
Assessment (6 of 33)
Palpation
• Palpation is the skill of assessing the patient through
the sense of touch to determine specific
characteristics of the body.
11. Copyright © 2020, 2016, 2012 Pearson Education, Inc. All Rights Reserved
Basic Techniques of Physical
Assessment (7 of 33)
Palpation
• Characteristics obtained through palpation include:
– Size
– Shape
– Location
– Mobility of a part
– Position
– Vibrations
12. Copyright © 2020, 2016, 2012 Pearson Education, Inc. All Rights Reserved
Basic Techniques of Physical
Assessment (8 of 33)
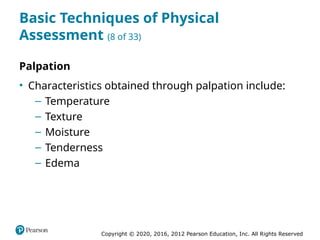
Palpation
• Characteristics obtained through palpation include:
– Temperature
– Texture
– Moisture
– Tenderness
– Edema
13. Copyright © 2020, 2016, 2012 Pearson Education, Inc. All Rights Reserved
Basic Techniques of Physical
Assessment (9 of 33)
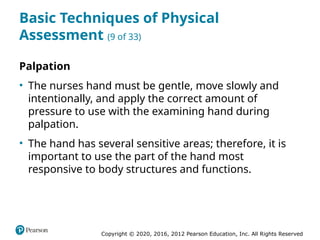
Palpation
• The nurses hand must be gentle, move slowly and
intentionally, and apply the correct amount of
pressure to use with the examining hand during
palpation.
• The hand has several sensitive areas; therefore, it is
important to use the part of the hand most
responsive to body structures and functions.
14. Copyright © 2020, 2016, 2012 Pearson Education, Inc. All Rights Reserved
Basic Techniques of Physical
Assessment (10 of 33)
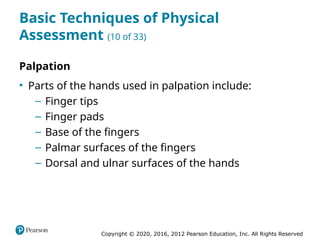
Palpation
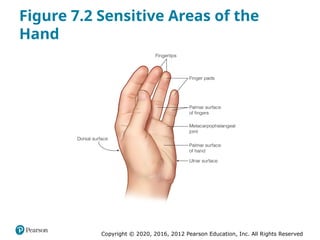
• Parts of the hands used in palpation include:
– Finger tips
– Finger pads
– Base of the fingers
– Palmar surfaces of the fingers
– Dorsal and ulnar surfaces of the hands
15. Copyright © 2020, 2016, 2012 Pearson Education, Inc. All Rights Reserved
Figure 7.2 Sensitive Areas of the
Hand
16. Copyright © 2020, 2016, 2012 Pearson Education, Inc. All Rights Reserved
Basic Techniques of Physical
Assessment (11 of 33)
Palpation
• The finger pads are used for discrimination of
underlying structures and functions such as pulses,
superficial lymph nodes, or crepitus.
• Vibrations are best perceived by the examiner when
using the base of the fingers (metacarpophalangeal
joints).
• The ulnar surface of the hand, including the finger, is
most sensitive to vibrations such as fremitus.
17. Copyright © 2020, 2016, 2012 Pearson Education, Inc. All Rights Reserved
Basic Techniques of Physical
Assessment (12 of 33)
Palpation
• The palmar aspect of the fingers is used to determine
position, consistency, texture, size of structures, pain,
and tenderness.
• The dorsal surface of the fingers is most sensitive to
temperature.
• The dominant hand is always more sensitive than the
nondominant hand.
18. Copyright © 2020, 2016, 2012 Pearson Education, Inc. All Rights Reserved
Basic Techniques of Physical
Assessment (13 of 33)
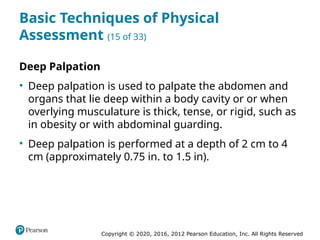
Light Palpation
• The safest, least uncomfortable method and allows
the patient to become accustomed to the nurse’s
touch.
• Light palpation is used to assess surface
characteristics, such as skin texture, pulse, or a tender,
inflamed area near the surface of the skin.
19. Copyright © 2020, 2016, 2012 Pearson Education, Inc. All Rights Reserved
Basic Techniques of Physical
Assessment (14 of 33)
Light Palpation
• For light palpation, the finger pads of the dominant
hand are placed on the surface of the area to be
examined. The hand is moved slowly, and the finger
pads, at a depth of 1 cm (0.39 in.), form circles on the
skin during assessment.
20. Copyright © 2020, 2016, 2012 Pearson Education, Inc. All Rights Reserved
Figure 7.3 Light Palpation
21. Copyright © 2020, 2016, 2012 Pearson Education, Inc. All Rights Reserved
Basic Techniques of Physical
Assessment (15 of 33)
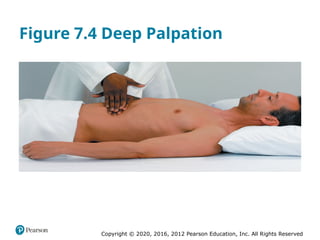
Deep Palpation
• Deep palpation is used to palpate the abdomen and
organs that lie deep within a body cavity or or when
overlying musculature is thick, tense, or rigid, such as
in obesity or with abdominal guarding.
• Deep palpation is performed at a depth of 2 cm to 4
cm (approximately 0.75 in. to 1.5 in).
22. Copyright © 2020, 2016, 2012 Pearson Education, Inc. All Rights Reserved
Basic Techniques of Physical
Assessment (16 of 33)
Deep Palpation
• When performing deep palpation, more than
moderate pressure is used by placing the palmar
surface of the fingers of the dominant hand on the
skin surface.
• Two-handed deep palpation may also be performed.
Performing palpation with the two-handed approach
provides extra support and pressure and allows the
nurse to palpate at a deeper level.
23. Copyright © 2020, 2016, 2012 Pearson Education, Inc. All Rights Reserved
Figure 7.4 Deep Palpation
24. Copyright © 2020, 2016, 2012 Pearson Education, Inc. All Rights Reserved
Basic Techniques of Physical
Assessment (17 of 33)
Deep Palpation
• Deep palpation is contraindicated if one suspects that
the rigidity is caused by inflammation or alterations in
underlying organs and structures due to conditions
such as dissecting aneurysms, peritonitis, or ectopic
pregnancy.
25. Copyright © 2020, 2016, 2012 Pearson Education, Inc. All Rights Reserved
Basic Techniques of Physical
Assessment (18 of 33)
• Additional considerations when performing palpation
include:
– Explain the procedure.
– Help the patient relax and promote comfort by
keeping the patient warm, fingernails short, avoiding
wearing jewelry.
– Nonsterile gloves should be used if open skin areas
or drainage were noted during inspection.
26. Copyright © 2020, 2016, 2012 Pearson Education, Inc. All Rights Reserved
Basic Techniques of Physical
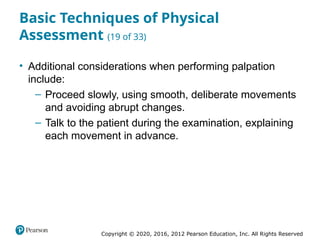
Assessment (19 of 33)
• Additional considerations when performing palpation
include:
– Proceed slowly, using smooth, deliberate movements
and avoiding abrupt changes.
– Talk to the patient during the examination, explaining
each movement in advance.
27. Copyright © 2020, 2016, 2012 Pearson Education, Inc. All Rights Reserved
Basic Techniques of Physical
Assessment (20 of 33)
Percussion
• Percussion is the third technique used by the nurse to
obtain data when performing physical assessment.
• Therefore, the nurse strikes through a body part with
an object, fingers, or reflex hammer, ultimately
producing a measurable sound.
• Three methods of percussion can be used: direct
percussion, blunt percussion, and indirect percussion.
28. Copyright © 2020, 2016, 2012 Pearson Education, Inc. All Rights Reserved
Basic Techniques of Physical
Assessment (21 of 33)
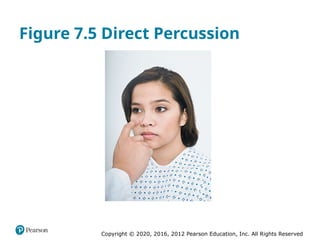
Direct Percussion
• Direct percussion is the technique of tapping the body
with the fingertips of the dominant hand.
• Direct percussion is used to examine the thorax of an
infant and to assess the sinuses of an adult.
29. Copyright © 2020, 2016, 2012 Pearson Education, Inc. All Rights Reserved
Figure 7.5 Direct Percussion
30. Copyright © 2020, 2016, 2012 Pearson Education, Inc. All Rights Reserved
Basic Techniques of Physical
Assessment (22 of 33)
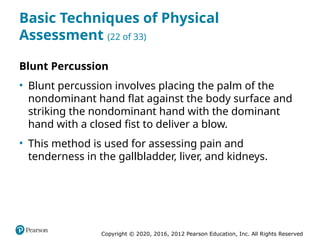
Blunt Percussion
• Blunt percussion involves placing the palm of the
nondominant hand flat against the body surface and
striking the nondominant hand with the dominant
hand with a closed fist to deliver a blow.
• This method is used for assessing pain and
tenderness in the gallbladder, liver, and kidneys.
31. Copyright © 2020, 2016, 2012 Pearson Education, Inc. All Rights Reserved
Figure 7.6 Blunt Percussion
32. Copyright © 2020, 2016, 2012 Pearson Education, Inc. All Rights Reserved
Basic Techniques of Physical
Assessment (23 of 33)
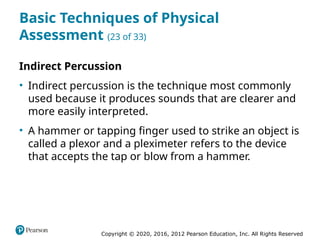
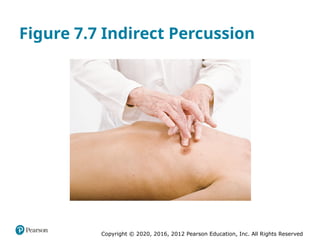
Indirect Percussion
• Indirect percussion is the technique most commonly
used because it produces sounds that are clearer and
more easily interpreted.
• A hammer or tapping finger used to strike an object is
called a plexor and a pleximeter refers to the device
that accepts the tap or blow from a hammer.
33. Copyright © 2020, 2016, 2012 Pearson Education, Inc. All Rights Reserved
Figure 7.7 Indirect Percussion
34. Copyright © 2020, 2016, 2012 Pearson Education, Inc. All Rights Reserved
Basic Techniques of Physical
Assessment (24 of 33)
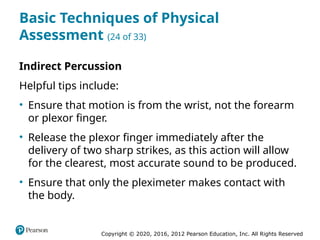
Indirect Percussion
Helpful tips include:
• Ensure that motion is from the wrist, not the forearm
or plexor finger.
• Release the plexor finger immediately after the
delivery of two sharp strikes, as this action will allow
for the clearest, most accurate sound to be produced.
• Ensure that only the pleximeter makes contact with
the body.
35. Copyright © 2020, 2016, 2012 Pearson Education, Inc. All Rights Reserved
Basic Techniques of Physical
Assessment (25 of 33)
Indirect Percussion
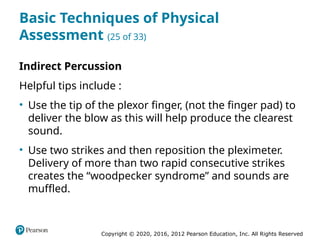
Helpful tips include :
• Use the tip of the plexor finger, (not the finger pad) to
deliver the blow as this will help produce the clearest
sound.
• Use two strikes and then reposition the pleximeter.
Delivery of more than two rapid consecutive strikes
creates the “woodpecker syndrome” and sounds are
muffled.
36. Copyright © 2020, 2016, 2012 Pearson Education, Inc. All Rights Reserved
Basic Techniques of Physical
Assessment (26 of 33)
Sounds of Percussion
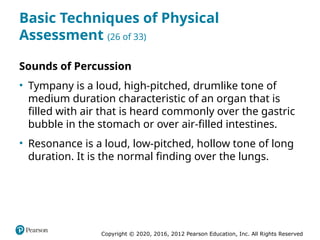
• Tympany is a loud, high-pitched, drumlike tone of
medium duration characteristic of an organ that is
filled with air that is heard commonly over the gastric
bubble in the stomach or over air-filled intestines.
• Resonance is a loud, low-pitched, hollow tone of long
duration. It is the normal finding over the lungs.
37. Copyright © 2020, 2016, 2012 Pearson Education, Inc. All Rights Reserved
Basic Techniques of Physical
Assessment (27 of 33)
Sounds of Percussion
• Hyperresonance is an abnormally loud, low-pitched
tone of longer duration than resonance. It is heard
when air becomes trapped and overinflates the lungs.
• Dullness is a high-pitched tone that is soft and of
short duration. It is usually heard over solid body
organs such as the liver or a stool-filled colon.
38. Copyright © 2020, 2016, 2012 Pearson Education, Inc. All Rights Reserved
Basic Techniques of Physical
Assessment (28 of 33)
Sounds of Percussion
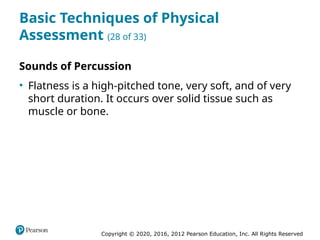
• Flatness is a high-pitched tone, very soft, and of very
short duration. It occurs over solid tissue such as
muscle or bone.
39. Copyright © 2020, 2016, 2012 Pearson Education, Inc. All Rights Reserved
Basic Techniques of Physical
Assessment (29 of 33)
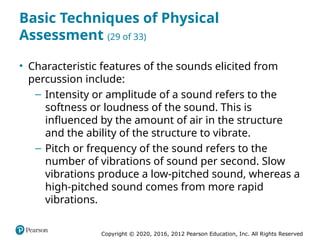
• Characteristic features of the sounds elicited from
percussion include:
– Intensity or amplitude of a sound refers to the
softness or loudness of the sound. This is
influenced by the amount of air in the structure
and the ability of the structure to vibrate.
– Pitch or frequency of the sound refers to the
number of vibrations of sound per second. Slow
vibrations produce a low-pitched sound, whereas a
high-pitched sound comes from more rapid
vibrations.
40. Copyright © 2020, 2016, 2012 Pearson Education, Inc. All Rights Reserved
Basic Techniques of Physical
Assessment (30 of 33)
• Characteristic features of the sounds elicited from
percussion include :
– Duration refers to the length of time of the
produced sound. This time frame ranges from very
short to very long, with variation in between.
– Quality refers to the recognizable overtones
produced by the vibration. This will be described
as clear, hollow, muffled, or dull.
41. Copyright © 2020, 2016, 2012 Pearson Education, Inc. All Rights Reserved
Basic Techniques of Physical
Assessment (31 of 33)
Auscultation
• When auscultating, one uses both the unassisted
sense of hearing and special instruments such as a
stethoscope.
• Body sounds that can be heard with the ears alone
include speech, coughing, respirations, and
percussion tones.
• Stethoscopes work by blocking out other noises in the
environment.
42. Copyright © 2020, 2016, 2012 Pearson Education, Inc. All Rights Reserved
Basic Techniques of Physical
Assessment (32 of 33)
Auscultation
• Auscultating body sounds requires a quiet
environment in which the nurse can listen not just for
the presence or absence of sounds but also for the
characteristics of each sound.
• Avoid auscultating over clothing, gowns, and sheets;
rubbing against patients’ clothes or drapes; or
touching the stethoscope tubing.
43. Copyright © 2020, 2016, 2012 Pearson Education, Inc. All Rights Reserved
Basic Techniques of Physical
Assessment (33 of 33)
Auscultation
• Movement of the stethoscope over thick or coarse
hair on the chest or back may alter or obscure
sounds.
• Because many sounds may be heard at the same
time, it is important to focus on one sound at a time.
44. Copyright © 2020, 2016, 2012 Pearson Education, Inc. All Rights Reserved
Equipment (1 of 9)
• Special equipment will help visualize, hear, and
measure data during an assessment
• Before beginning the physical assessment, the nurse
should gather all the equipment, organize it, and
place it within easy reach.
45. Copyright © 2020, 2016, 2012 Pearson Education, Inc. All Rights Reserved
Equipment (2 of 9)
• Special equipment that may be used during a physical
assessment include:
– Goniometer: Measures the degree of joint and
flexion and extension.
– Skinfold calipers: Measure the thickness of
subcutaneous tissue.
– Transilluminator: Detects blood, fluid, or masses in
body cavities.
46. Copyright © 2020, 2016, 2012 Pearson Education, Inc. All Rights Reserved
Equipment (3 of 9)
• Special equipment that may be used during a physical
assessment includes :
– Woods lamp: Detects fungal infections of the skin.
– Monofilament: Assesses peripheral nerve
sensation in the feet of a patient with diabetes, or
other neuropathic or circulatory disorders.
47. Copyright © 2020, 2016, 2012 Pearson Education, Inc. All Rights Reserved
Equipment (4 of 9)
Stethoscope
• The stethoscope is used to auscultate body sounds
such as blood pressure, heart sounds, respirations,
and bowel sounds.
• The stethoscope has three parts: the binaurals
(earpieces), the flexible tubing, and the end piece. The
end piece contains the diaphragm and the bell.
48. Copyright © 2020, 2016, 2012 Pearson Education, Inc. All Rights Reserved
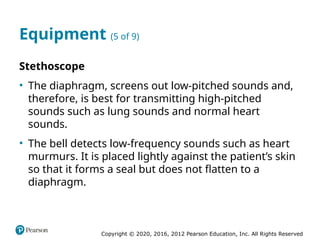
Equipment (5 of 9)
Stethoscope
• The diaphragm, screens out low-pitched sounds and,
therefore, is best for transmitting high-pitched
sounds such as lung sounds and normal heart
sounds.
• The bell detects low-frequency sounds such as heart
murmurs. It is placed lightly against the patient’s skin
so that it forms a seal but does not flatten to a
diaphragm.
49. Copyright © 2020, 2016, 2012 Pearson Education, Inc. All Rights Reserved
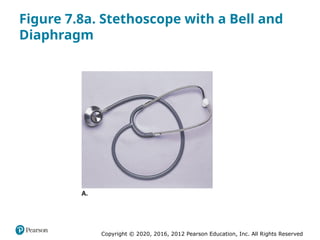
Figure 7.8a. Stethoscope with a Bell and
Diaphragm
50. Copyright © 2020, 2016, 2012 Pearson Education, Inc. All Rights Reserved
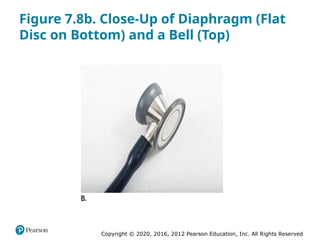
Figure 7.8b. Close-Up of Diaphragm (Flat
Disc on Bottom) and a Bell (Top)
51. Copyright © 2020, 2016, 2012 Pearson Education, Inc. All Rights Reserved
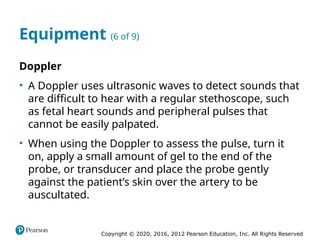
Equipment (6 of 9)
Doppler
• A Doppler uses ultrasonic waves to detect sounds that
are difficult to hear with a regular stethoscope, such
as fetal heart sounds and peripheral pulses that
cannot be easily palpated.
• When using the Doppler to assess the pulse, turn it
on, apply a small amount of gel to the end of the
probe, or transducer and place the probe gently
against the patient’s skin over the artery to be
auscultated.
52. Copyright © 2020, 2016, 2012 Pearson Education, Inc. All Rights Reserved
Figure 7.11 Using a Doppler Ultrasound
53. Copyright © 2020, 2016, 2012 Pearson Education, Inc. All Rights Reserved
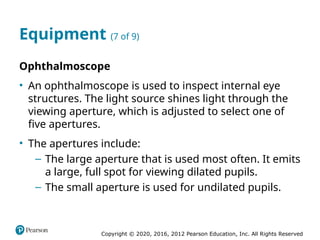
Equipment (7 of 9)
Ophthalmoscope
• An ophthalmoscope is used to inspect internal eye
structures. The light source shines light through the
viewing aperture, which is adjusted to select one of
five apertures.
• The apertures include:
– The large aperture that is used most often. It emits
a large, full spot for viewing dilated pupils.
– The small aperture is used for undilated pupils.
54. Copyright © 2020, 2016, 2012 Pearson Education, Inc. All Rights Reserved
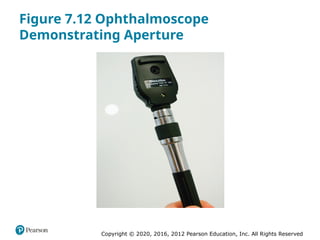
Figure 7.12 Ophthalmoscope
Demonstrating Aperture
55. Copyright © 2020, 2016, 2012 Pearson Education, Inc. All Rights Reserved
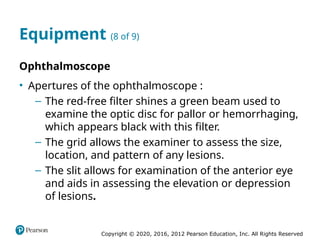
Equipment (8 of 9)
Ophthalmoscope
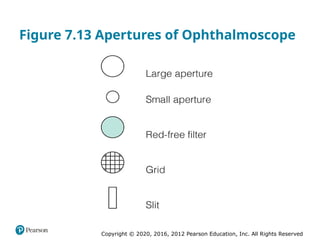
• Apertures of the ophthalmoscope :
– The red-free filter shines a green beam used to
examine the optic disc for pallor or hemorrhaging,
which appears black with this filter.
– The grid allows the examiner to assess the size,
location, and pattern of any lesions.
– The slit allows for examination of the anterior eye
and aids in assessing the elevation or depression
of lesions.
56. Copyright © 2020, 2016, 2012 Pearson Education, Inc. All Rights Reserved
Figure 7.13 Apertures of Ophthalmoscope
57. Copyright © 2020, 2016, 2012 Pearson Education, Inc. All Rights Reserved
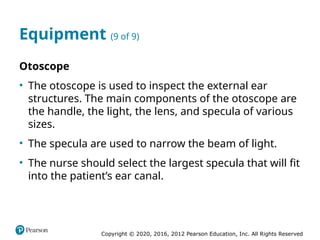
Equipment (9 of 9)
Otoscope
• The otoscope is used to inspect the external ear
structures. The main components of the otoscope are
the handle, the light, the lens, and specula of various
sizes.
• The specula are used to narrow the beam of light.
• The nurse should select the largest specula that will fit
into the patient’s ear canal.
58. Copyright © 2020, 2016, 2012 Pearson Education, Inc. All Rights Reserved
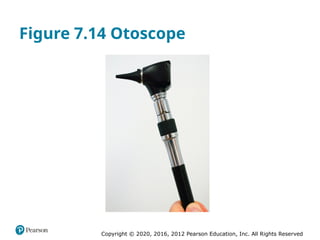
Figure 7.14 Otoscope
59. Copyright © 2020, 2016, 2012 Pearson Education, Inc. All Rights Reserved
Professional Responsibilities (1 of 14)
Cues
• Cues are bits of information that hint at the possibility
of a health problem.
• To become skilled at cue recognition, nurses should
cultivate their senses until they readily perceive even
slight cues.
• Grimacing, guarding (protective posture), or wincing
when a patient moves or when a body part is moved
during assessment are cues to examine the
underlying joint and muscles for problems or masses.
60. Copyright © 2020, 2016, 2012 Pearson Education, Inc. All Rights Reserved
Professional Responsibilities (2 of 14)
Cues
• Cues that suggest hearing loss include not following
directions, looking at the examiner’s lips during
conversation, or speaking in a loud voice.
• Asymmetry of facial expression is a cue to assess
function of the cranial nerves.
• Odors are cues to suggest a problem with hygiene or
drainage from an orifice or wound.
61. Copyright © 2020, 2016, 2012 Pearson Education, Inc. All Rights Reserved
Professional Responsibilities (3 of 14)
Critical Thinking
• The interpretation of cues and other collected data
uses the process of critical thinking.
• Once cues are recognized and data are collected, the
findings must be interpreted.
• The data are compared to normative values and
ranges.
• Data are clustered, and patterns are identified.
62. Copyright © 2020, 2016, 2012 Pearson Education, Inc. All Rights Reserved
Professional Responsibilities (4 of 14)
Critical Thinking
• Missing information is identified and, after the
database is completed, valid conclusions are drawn.
At this time, the nurse establishes priorities of care.
• In collaboration with the patient, the nurse identifies
desired patient outcomes and develops the patient’s
nursing care plan.
• Evaluation follows implementation of each nursing
intervention.
63. Copyright © 2020, 2016, 2012 Pearson Education, Inc. All Rights Reserved
Professional Responsibilities (5 of 14)
Providing a Safe and Comfortable Environment
• Provide a space that is appropriate for the setting,
ensures maintenance of dignity and privacy for the
patient, noting special considerations for each
patient.
• The examination room should be warm, private, and
free from distractions and interruptions.
• Overhead lighting must ensure good visibility and be
free of distortion.
64. Copyright © 2020, 2016, 2012 Pearson Education, Inc. All Rights Reserved
Professional Responsibilities (6 of 14)
Providing a Safe and Comfortable Environment
• Before beginning the assessment, the nurse should
thoroughly explain to the patient what is to follow and
encourage the patient to ask questions.
• Provide an interpreter as needed.
65. Copyright © 2020, 2016, 2012 Pearson Education, Inc. All Rights Reserved
Professional Responsibilities (7 of 14)
Providing a Safe and Comfortable Environment
• It is the nurse’s responsibility to ensure that the
patient understands the procedures to be performed
and that all necessary consent forms are signed.
• In most cases, patients should empty their bladder
before the examination.
66. Copyright © 2020, 2016, 2012 Pearson Education, Inc. All Rights Reserved
Professional Responsibilities (8 of 14)
Providing a Safe and Comfortable Environment
• Ensure the room is warm prior to having the patient
change into a gown.
• Before reentering the examination room knock to
alert the patient.
• Use drapes to preserve the patient’s privacy and to
provide warmth. Use the drape to expose only the
part of the body being examined and cover the
surrounding area.
67. Copyright © 2020, 2016, 2012 Pearson Education, Inc. All Rights Reserved
Professional Responsibilities (9 of 14)
Providing a Safe and Comfortable Environment
• To begin the assessment, the patient should be
positioned on a sturdy examination table with a firm
surface that is covered with a clean sheet or paper
cover.
• The table’s height should allow the examination to be
performed without stooping. The nurse should also
have a stool to sit on during certain parts of the
examination and a small table or stand to hold the
examination equipment.
68. Copyright © 2020, 2016, 2012 Pearson Education, Inc. All Rights Reserved
Professional Responsibilities (10 of 14)
Providing a Safe and Comfortable Environment
• During the assessment, the nurse should explain each
step in advance so that the patient can anticipate the
nurse’s movements.
• Alleviate the patient’s anxiety by approaching the
examination gradually, first by communicating with
the patient, then by performing simple
measurements such as height, weight, temperature,
and pulse, which most patients find familiar and
nonthreatening.
69. Copyright © 2020, 2016, 2012 Pearson Education, Inc. All Rights Reserved
Professional Responsibilities (11 of 14)
Providing a Safe and Comfortable Environment
• The examination should be individualized according
to the patient’s personal values and beliefs.
• Consider the patient’s age, health status, level of
functioning, and severity of illness at all times and
adapt the examination accordingly.
70. Copyright © 2020, 2016, 2012 Pearson Education, Inc. All Rights Reserved
Professional Responsibilities (12 of 14)
Techniques and Equipment for the Assessment of
the Obese Patient
• To ensure both comfort and safety, chairs in the
waiting and examination areas and wheelchairs used
for transport must be wide and sturdy.
• Extra-large examination gowns should be available.
• Scales with a capacity of greater than 350 pounds are
required.
71. Copyright © 2020, 2016, 2012 Pearson Education, Inc. All Rights Reserved
Professional Responsibilities (13 of 14)
Techniques and Equipment for the Assessment of
the Obese Patient
• Examination tables should be wide and sturdy with
hand bars or footstools to help the patient move onto
the table.
• Examination tables should be bolted to the floor to
avoid tipping.
• If the patient needs helps stepping up or sitting on
the exam table, use a gait belt or other assistive
device to provide stability and support.
72. Copyright © 2020, 2016, 2012 Pearson Education, Inc. All Rights Reserved
Professional Responsibilities (14 of 14)
Techniques and Equipment for the Assessment of
the Obese Patient
• A large adult-size cuff, a thigh cuff, or special cuffs
designed for an obese patient must be considered for
accurate measurement of the blood pressure
(Dambaugh and Ecklund, 2016).
• Keep the head of the examination table elevated as
much as possible during the examination. If the
patient’s head must be lowered, the nurse should
continually monitor the patient’s respiratory status.
73. Copyright © 2020, 2016, 2012 Pearson Education, Inc. All Rights Reserved
Standard Precautions (1 of 6)
• Throughout the physical assessment, the professional
nurse is required to apply the principles of asepsis.
• Before beginning the physical assessment, the nurse
should wash her hands in the presence of the patient.
74. Copyright © 2020, 2016, 2012 Pearson Education, Inc. All Rights Reserved
Standard Precautions (2 of 6)
• According to the World Health Organization (WHO,
2009) recommendations, nurses should scrub and
rinse hands with soap for 40 to 60 seconds when the
hands are visibly soiled, after using the restroom,
after removing gloves, and before and after contact
with medical equipment.
• Alcohol-based antiseptic hand rubs in the form of
rinses, gels, or foams should be used before and after
direct patient contact.
75. Copyright © 2020, 2016, 2012 Pearson Education, Inc. All Rights Reserved
Standard Precautions (3 of 6)
• Nonsterile examination gloves should be available
and used appropriately during the assessment.
• The bell and diaphragm of the stethoscope should be
cleaned after the assessment of each patient to
prevent the spread of infection.
• Healthcare-associated infections (HAIs) are of
concern. Hand washing and the use of antiseptic hand
rubs are the most effective ways to prevent transfer of
infection from one patient to another in both clinical
and hospital settings.
76. Copyright © 2020, 2016, 2012 Pearson Education, Inc. All Rights Reserved
Standard Precautions (4 of 6)
• To decrease the risk of infection transfer between
patients, medical staff should ensure the proper
cleaning, use, and disposal of medical equipment
used during the physical assessment.
• A light disinfectant should be used to cleanse the
surface between use on different patients.
• Equipment that touches nonintact skin or mucous
membranes should be cleaned with a high-level
disinfectant between all patients.
77. Copyright © 2020, 2016, 2012 Pearson Education, Inc. All Rights Reserved
Standard Precautions (5 of 6)
• Equipment that enters normally sterile areas or the
bloodstream should be cleaned and sterilized
between every use.
• When using medical equipment during a physical
examination, the nurse should prepare all the needed
instruments and tools in a clean area. The clean area
should be draped with a sterile cloth or paper liner,
and clean or sterile instruments should be placed on
the clean surface.
78. Copyright © 2020, 2016, 2012 Pearson Education, Inc. All Rights Reserved
Standard Precautions (6 of 6)
• Dirty equipment should be separated from clean
equipment to prevent potential cross-contamination
of infectious agents between different areas of the
body.
79. Copyright © 2020, 2016, 2012 Pearson Education, Inc. All Rights Reserved
Patient Hazards
• Throughout the procedure, it is necessary to
anticipate potential hazards and modify the
assessment to prevent them.
• Some assessment techniques may injure the patient if
used indiscriminately.
80. Copyright © 2020, 2016, 2012 Pearson Education, Inc. All Rights Reserved
Copyright
This work is protected by United States copyright laws and is
provided solely for the use of instructors in teaching their
courses and assessing student learning. Dissemination or sale of
any part of this work (including on the World Wide Web) will
destroy the integrity of the work and is not permitted. The work
and materials from it should never be made available to students
except by instructors using the accompanying text in their
classes. All recipients of this work are expected to abide by these
restrictions and to honor the intended pedagogical purposes and
the needs of other instructors who rely on these materials.
Editor's Notes #1 If this PowerPoint presentation contains mathematical equations, you may need to check that your computer has the following installed:
1) MathType Plugin
2) Math Player (free versions available)
3) NVDA Reader (free versions available) #52 Source: Monkey Business Images. Shutterstock


![✅ CCleaner Pro Free Crack 6.34 + Activation Key [APRIL-2025]](https://cdn.slidesharecdn.com/ss_thumbnails/physicalexamination-250415070608-e7301bc1-250415080446-ea0ab5fb-thumbnail.jpg?width=640&height=640&fit=bounds)
![✅ Download CCleaner Pro Key 2025 with Crack [Latest]](https://cdn.slidesharecdn.com/ss_thumbnails/physicalexamination-250415070608-e7301bc1-250415082125-6d1be3de-thumbnail.jpg?width=640&height=640&fit=bounds)


