Fastback 9 open box and set up
•Download as PPT, PDF•
1 like•316 views

http://www.MyBinding.com brings you this demonstration of the Powis Parker Fastback 9. The Fastback 9 is an excellent thermal binding system that leaves your documents looking crisp and professional. For more details and product specifications, please visit: http://www.mybinding.com/.sc/ms/dd/ee/26663/Fastback-Model-9-Binding-Machine Take a look and if you have any questions feel free to give us a call toll-free at 1-800-944-4573. We have a huge selection of binding machines, supplies, and more from Fastback. You can also find us online on Twitter, Facebook, and our blog. Twitter - http://twitter.com/mybinding Facebook - http://www.facebook.com/MyBinding Blog - http://www.mybindingblog.com

Recommended
Recommended
More Related Content
Featured
Featured (20)
Fastback 9 open box and set up
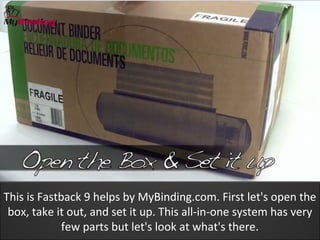
- 1. This is Fastback 9 helps by MyBinding.com. First let's open the box, take it out, and set it up. This all-in-one system has very few parts but let's look at what's there.
- 2. A small box inside contains an extension cord, three support fences, and a starter kit of some LX strips and Image strips, just a sneak peak at many options you have.
- 3. And there's a user manual with a starter kit of covers.
- 4. Remove the foam packaging supports and the machine itself.
- 5. Printed on the inside cover of the box is a very straightforward and simple three step process of assembling your machine.
- 6. Continue to carefully unpack the machine by pulling off all the plastic covering as well as the protective sealant over the clear plastic plating.
- 7. Turn the machine around so the back end, or the narrow end, faces you and plug the power cord in.
- 8. Press the power switch and you're all set.
- 9. Once you've pressed the power switch on, you'll notice the throat will open just a little bit.
- 10. This is when you can remove that cardboard block. It's only used for packaging, so store it back in the main box.
- 11. Attached to the base of the machine is a cheat sheet, six steps on how to bind a book.
- 12. Next, carefully remove the three book support fences and peel back the plastic protective sheeting.
- 13. Printed on the bottom of each fence is the word "front". Keeping the word facing toward you,
- 14. you're going to load all three fences into the three different slots. They're the same, so it doesn't matter which one goes in which, one, two, and three.
- 15. There you are, you're all set and ready to bind your first book. This is the Fastback 9.
- 16. For more demos, reviews, and how-tos, check out MyBinding.com.
Editor's Notes
- This is Fastback 9 helps by MyBinding.com. First let's open the box, take it out, and set it up. This all-in-one system has very few parts but let's look at what's there.
- A small box inside contains an extension cord, three support fences, and a starter kit of some LX strips and Image strips, just a sneak peak at many options you have.
- And there's a user manual with a starter kit of covers.
- Remove the foam packaging supports and the machine itself.
- Printed on the inside cover of the box is a very straightforward and simple three step process of assembling your machine.
- Continue to carefully unpack the machine by pulling off all the plastic covering as well as the protective sealant over the clear plastic plating.
- Turn the machine around so the back end, or the narrow end, faces you and plug the power cord in.
- Press the power switch and you're all set.
- Once you've pressed the power switch on, you'll notice the throat will open just a little bit.
- This is when you can remove that cardboard block. It's only used for packaging, so store it back in the main box.
- Attached to the base of the machine is a cheat sheet, six steps on how to bind a book.
- Next, carefully remove the three book support fences and peel back the plastic protective sheeting.
- Printed on the bottom of each fence is the word "front". Keeping the word facing toward you,
- you're going to load all three fences into the three different slots. They're the same, so it doesn't matter which one goes in which, one, two, and three.
- There you are, you're all set and ready to bind your first book. This is the Fastback 9.
- For more demos, reviews, and how-tos, check out MyBinding.com.