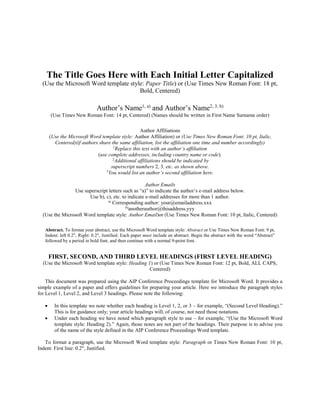
This document provides guidelines for formatting a paper using the AIP Conference Proceedings template in Microsoft Word. It demonstrates how to apply the predefined styles for headings, paragraphs, equations, figures, and other elements. Guidelines are provided for capitalization in headings, inserting mathematics using the Old or New Equation Editors, and numbering equations and figures. The document contains examples of level 1, 2, and 3 headings, equations, and other styles defined in the template.
This document provides instructions for formatting different elements of a thesis document using styles in Microsoft Word, including:
- Chapter titles
- Headings, body text, quotations, lists, tables, figures, and captions
- The reference list heading and referencing styles
- Appendix titles
It describes how to apply the appropriate styles to these elements to maintain consistent formatting and structure throughout the document.
This document provides a template for formatting conference papers. It specifies styles and formatting guidelines for paper elements like the title, authors, affiliations, headings, paragraphs, equations, references, figures, and tables. The template aims to ease paper formatting, ensure consistency across papers, and facilitate electronic distribution of the conference proceedings. Key guidelines include using Times New Roman font, embedding all fonts, placing affiliations under each author in multiple columns, and numbering equations, figures and tables consistently.
This document provides a template for formatting IEEE conference papers. It includes guidelines for paper structure and formatting, including sections for authors and affiliations, headings, equations, references, and more. The template outlines the proper format for elements such as title, abstract, keywords, text components, citations, units of measurement, and common mistakes to avoid. It describes inserting author names, affiliations, and paper components into the template to prepare the final paper for submission.
This document provides a template for formatting conference papers. It includes guidelines for paper structure and formatting, including sections for authors and affiliations, headings, figures, tables, references, and acknowledgements. The document contains sample text and equations to demonstrate the formatting specifications, such as font sizes and styles for different elements. Authors are instructed to use the template to format their conference papers according to the specified layout and design.
This document provides a template for formatting a conference paper. It includes instructions for formatting authors and affiliations, headings, text components like the abstract and keywords, equations, references, and more. The template specifies styles for six paper authors from different organizations, cities and countries. It describes the appropriate format for names, affiliations, paper title, abstract, keywords, headings, equations, units, references, and other elements to ensure conformity across conference papers.
This document provides a template for formatting a paper according to specific guidelines. It includes examples and instructions for formatting various sections and elements of a paper like the title, text, figures, tables, references, etc. The template aims to ease the formatting process and ensure conformity across papers in terms of style and formatting specifications. Authors are instructed to use the template to format their paper while maintaining the prescribed designations and not altering any margins, fonts, or other specifications.
This document provides guidelines for writing a research paper, including formatting instructions for headings, figures, tables, citations, and references. Key aspects covered include using the template document to ensure formatting consistency, structuring the paper with different heading levels, numbering equations and figures with captions, and creating a reference list in the specified style.
Scanned by CamScannerDateMonth Day, Year or mmddyyy.docxanhlodge
Scanned by CamScanner
Date: Month Day, Year or mm/dd/yyyy
To: Name the person or persons by first and last name in a line
From: Your name
Subject: Name the memo
The first paragraph of a memo states the reason you’re writing it. Cite the problem or challenge you’ll address, and describe the structure the memo. Keep the first paragraph to about 5-6 lines, made up of 3-4 sentences. In all paragraphs, write sentences between 10-15 words to maintain a high comprehension rate, typically between 90-95 percent. At times, you’ll write a few shorter sentences (5-7 words), and you’ll write a few longer ones (20-25 words). Any sentence composed of two independent thoughts will be connected by a comma followed by a coordinating conjunction (For, And, Nor, But, Or, Yet, and So, spelling FANBOYS). Keep your writing simple and direct. In this memo, you will read about memo structure tools, using headers, inserting tables, figures, and graphs, and end with a recommendation.
Incorporating Memo Structure Tools
The second paragraph starts to explain your issue, and introduce it with a header if you write a memo longer than one page. You build on your opening paragraph with specific information, following the description of the structure of the memo. For all business documents use one inch margins all the way around (top, bottom, left, and right). For font size, choose 11 point, and use either Times New Roman or Ariel. To reveal the “paragraph marks and other hidden formatting symbols” symbol, , click on the icon in the middle of the Home tab or use (Ctrl + Shift + *) to see paragraph symbols. Keep all table information on the same page.
With all paragraphs, don’t exceed eight lines in length (I count the number of lines), and write between 4-6 clear and concise sentences, following the average word count per sentence. Start with the noun and verb, add appropriate adjectives and limit adverbs. For me, adverbs don’t add much to a message: What’s the difference between hot and very hot? Hot is hot!!! Also, people use “very” too often, but what does it add? NOT much. Lastly, Don’t Get Wordy!!!
With documents more than one page, use headers and subheaders. A one-page memo would not need headers, unless you want to stress the last two paragraphs: Conclusion & Recommendation. The first paragraph, which functions as an introduction, does not need a heading since it provides direction, lists activities, and makes a recommendation.
A header and subheaders need a few paragraphs to explain or support a header/subheader. Don’t go from a header to a subheader without a paragraph after the header to introduce that section. Don’t use a header, one paragraph, a header, a paragraph, a header, a paragraph, and so on, and applies to subheader use. With headers or subheaders, they don’t stand alone, especially at the end of a page so hit the Enter key to move it to the top of the next page.
A header introduces the next section (composed of a few paragraphs). Head.
This document contains instructions and formatting guidelines for authors submitting papers to conferences. It details how to format the paper title, author list, abstract, headings, body text, equations, references, and other components. The guidelines specify font styles, paragraph spacing, equation numbering, abbreviation usage, and other style rules to ensure formatting consistency across papers.
D30ICTopicStudent Name (Student ID)Introduction [Headingjeniihykdevara
D30ICTopic
Student Name (Student ID)Introduction [Heading 1]
To write your report, we are required to use the formatting that is permitted as detailed below and shown in the Styles list (see Styles section in the Home banner). This will ensure that everybody hands-in a similar document and that all those documents can be neatly put together.
MS Word (2010 and above) for Windows is the preferred editor to be used to prepare your report. However, this template should work with MS Word for Mac as well.
To apply a Style, you must first type the text (e.g. in the default Normal style), then select it, and finally apply the style by selecting it in the Styles list. In the rest of this document, each style is shown in brackets “[…]” the first time it is applied.
If you experience any issue with the formatting
Sub-section [Heading 2]
Use sub-sections and sub-sub-sections whenever needed, in order to structure your text. [Paragraph]
This is a Paragraph. Within the text, you can emphasize [Emphasis] text, bold [strong] text or underline [Underline] text. You can also use subscript [subscript] and superscript [superscript] formatting. Do not use standard short-cuts for character formatting (e.g. Ctrl + i), but use the pre-defined character styles.
Note that, like in any other scientific work, it is important to make proper references. Please use “(Lastname, Year)” citation formatting. Then, all references go at the end of your document in the section References (see below).
Figures and tables are allowed. They must be inserted as shown below. Both of them should be inserted “as character”.
[Figure]
Figure 1: The figure’s caption [Caption]
Table Header [Table Content Left + Strong]
Table Content left [Table Content Left]
Table content right [Table Content Right]
Table 1: The table’s caption [Caption]References [Heading 1]
Cameron D. and Osborne G. (2003), “The best paper of their life”, The best journal where the paper could be published, Volume(Issue), pp 1-10. [Reference]
Page 1 of 2
Page 2 of 2
Page
1
of
2
T
opic
Student Name (Student ID)
Introduction
[Heading 1]
To write your report, we are required to
use the formatting that is permitted as
detailed below and
shown in the
Styles
list
(see
Styles
section in the
Home
banner)
. This will
ensure that everybody
hands
-
in a similar document and that all those docume
nts can be neatly put together.
MS Word
(
2010
and above)
for Windows is the preferred editor to be used to prepare your report.
However, this template should work with MS Word for M
ac as well.
To apply a Style, you must first type the text (e.g. in the default Normal style), then select it, and
finally apply the style by selecting it in the Styles list.
In the rest of this document, each style is
shown in brackets “[…]” the first tim
e it is applied.
If you experience any issue with the formatting
Sub
-
section
[Heading 2]
Use sub
-
sections and sub
-
sub
-
sections whenever need ...
This document provides a template for formatting academic papers. It includes guidelines for paper structure and components such as the title, author list, affiliations, abstract, keywords, headings, body text, equations, references, and more. The template aims to help authors prepare papers that are easy to use, electronically compliant, and uniform in style.
DateMonth Day, Year or mmddyyyyToName the person or p.docxsimonithomas47935
Date: Month Day, Year or mm/dd/yyyy
To: Name the person or persons by first and last name in a line
From: Your name
Subject: Name the memo
The first paragraph of a memo states the reason you’re writing it. Cite the problem or challenge you’ll address, and describe the structure the memo. Keep the first paragraph to about 5-6 lines, made up of 3-4 sentences. In all paragraphs, write sentences between 10-15 words to maintain a high comprehension rate, typically between 90-95 percent. At times, you’ll write a few shorter sentences (5-7 words), and you’ll write a few longer ones (20-25 words). Any sentence composed of two independent thoughts will be connected by a comma followed by a coordinating conjunction (For, And, Nor, But, Or, Yet, and So, spelling FANBOYS). Keep your writing simple and direct. In this memo, you will read about memo structure tools, using headers, inserting tables, figures, and graphs, and end with a recommendation.
Incorporating Memo Structure Tools
The second paragraph starts to explain your issue, and introduce it with a header if you write a memo longer than one page. You build on your opening paragraph with specific information, following the description of the structure of the memo. For all business documents use one inch margins all the way around (top, bottom, left, and right). For font size, choose 11 point, and use either Times New Roman or Ariel. To reveal the “paragraph marks and other hidden formatting symbols” symbol, , click on the icon in the middle of the Home tab or use (Ctrl + Shift + *) to see paragraph symbols. Keep all table information on the same page.
With all paragraphs, don’t exceed eight lines in length (I count the number of lines), and write between 4-6 clear and concise sentences, following the average word count per sentence. Start with the noun and verb, add appropriate adjectives and limit adverbs. For me, adverbs don’t add much to a message: What’s the difference between hot and very hot? Hot is hot!!! Also, people use “very” too often, but what does it add? NOT much. Lastly, Don’t Get Wordy!!!
With documents more than one page, use headers and subheaders. A one-page memo would not need headers, unless you want to stress the last two paragraphs: Conclusion & Recommendation. The first paragraph, which functions as an introduction, does not need a heading since it provides direction, lists activities, and makes a recommendation.
A header and subheaders need a few paragraphs to explain or support a header/subheader. Don’t go from a header to a subheader without a paragraph after the header to introduce that section. Don’t use a header, one paragraph, a header, a paragraph, a header, a paragraph, and so on, and applies to subheader use. With headers or subheaders, they don’t stand alone, especially at the end of a page so hit the Enter key to move it to the top of the next page.
A header introduces the next section (composed of a few paragraphs). Headers are centered, justif.
a. Collect at least six published papers in one of the new tre.docxdaniahendric
a. Collect at least six published papers in one of the new trending technologies in
networking and data communications.
b. Read and prepare a report to summarize and discuss the papers you collected.
c. The report should include the following parts.
• Introduction.
• Detailed discussion of what you read (add your point of view if any on
the topic you are discussing).
• Summery.
d. Your report should be written in the following format.
• Four papers in minimum.
• Font type: Times New Romans.
• Font size: 12 pt.
• Line spacing 1.5
Paper Title* (use style: paper title)
*Note: Sub-titles are not captured in Xplore and should not be used
line 1: 1st Given Name Surname
line 2: dept. name of organization
(of Affiliation)
line 3: name of organization
(of Affiliation)
line 4: City, Country
line 5: email address or ORCID
line 1: 4th Given Name Surname
line 2: dept. name of organization(of Affiliation)
line 3: name of organization
(of Affiliation)
line 4: City, Country
line 5: email address or ORCID
line 1: 2nd Given Name Surname
line 2: dept. name of organization
(of Affiliation)
line 3: name of organization
(of Affiliation)
line 4: City, Country
line 5: email address or ORCID
line 1: 5th Given Name Surname
line 2: dept. name of organization
(of Affiliation)
line 3: name of organization
(of Affiliation)
line 4: City, Country
line 5: email address or ORCID
line 1: 3rd Given Name Surname
line 2: dept. name of organization
(of Affiliation)
line 3: name of organization
(of Affiliation)
line 4: City, Country
line 5: email address or ORCID
line 1: 6th Given Name Surname
line 2: dept. name of organization
(of Affiliation)
line 3: name of organization
(of Affiliation)
line 4: City, Country
line 5: email address or ORCID
Abstract—This electronic document is a “live” template and already defines the components of your paper [title, text, heads, etc.] in its style sheet. *CRITICAL: Do Not Use Symbols, Special Characters, Footnotes, or Math in Paper Title or Abstract. (Abstract)
Keywords—component, formatting, style, styling, insert (key words)
I. Introduction (Heading 1)
This template, modified in MS Word 2007 and saved as a “Word 97-2003 Document” for the PC, provides authors with most of the formatting specifications needed for preparing electronic versions of their papers. All standard paper components have been specified for three reasons: (1) ease of use when formatting individual papers, (2) automatic compliance to electronic requirements that facilitate the concurrent or later production of electronic products, and (3) conformity of style throughout a conference proceedings. Margins, column widths, line spacing, and type styles are built-in; examples of the type styles are provided throughout this document and are identified in italic type, within parentheses, following the example. Some components, such as multi-leveled equations, graphics, and tables are not prescribed, although the various table text style ...
IJSER Template (International Journal of Scientific & Engineering Research- i...IJSER
This document provides guidelines for preparing and submitting papers to the International Journal of Scientific & Engineering Research (IJSER). It discusses formatting papers, including section numbering, citations, equations, figures, and tables. Authors are instructed to follow the template and submission guidelines closely to ensure their papers are properly formatted for publication.
The document discusses various formatting options in Microsoft Word, including formatting text with different fonts, styles, sizes, and colors. It also covers formatting paragraphs by changing line and paragraph spacing, alignment, indents, and adding bullets and numbers. Formatting tools like themes, styles, and the format painter are also explained.
This document provides guidelines for preparing and submitting papers for IEEE transactions and journals. It discusses paper formatting, including templates, styles, and fonts. It also covers the inclusion of figures, equations, units, and references. Key points covered include using the IEEE template, defining symbols, numbering equations, using SI units, checking for common mistakes, and submitting graphics in a suitable file format.
New folderfac_lee023_HW06_WR5_FuncDecomp (3).pdfECE380 Pr.docxcurwenmichaela
New folder/fac_lee023_HW06_WR5_FuncDecomp (3).pdf
ECE380 Professional Seminar
Spring 2017
HW5 (WR5): Functional Decomposition
Date assigned: 3/13/17, Monday
Due date: Noon, 3/20/17, Monday
Max points: 20 pts.
Description:
Written Report 5 is on completing 3-level (i.e., Level 0, Level 1, and Level 2) functional
decomposition of your project. Each student shall individually submit one report that
shows complete functional decomposition of the project but also clearly identified
individual responsibilities for implementation. As such, all team members of a project
should first discuss and come up with a complete set of Level 1 subsystems that could be
implemented under balanced workloads among the team members. Then, each member
shall further elaborate his/her assigned Level 1 subsystems into Level 2.
This report should include block diagrams of all Level 0 ~ Level 2 subsystems and
corresponding tables of ALL subsystems with module name, inputs, outputs,
functionality (see pp. 93 ~ 98 of textbook by Ford and Coulston), AND responsible team
member.
Submission instructions:
Report length: No limit
How to submit: Upload onto EvalTools by the deadline shown above.
Grading:
Overall functional decomposition – team performance
Subsystems – individual performance
New folder/fac_lee023_HW11_WR6_FinalReport (1) (1).pdf
ECE380 Professional Seminar
Spring 2017
HW11: Final Report
Date assigned: 4/10/16, Monday
Due date: Noon, Monday, 4/24/17
Max points: 100 pts.
Description:
Each team’s final report must contain properly revised details of all project aspects covered
in this course, i.e., marketing and engineering requirements, proper description of the
project, 3-level functional decomposition, and project management including a well-
planned project plan presented in a Gantt chart.
To give incentive to a proper revision of functional decomposition, the final report will
carry 100 points of which 40 points will be allocated to the revised functional
decomposition (presented within the final report). Gantt chart (presented within the final
report) will have 10 points among the total of 100 points for the final report. The rest 50
points will go to the overall quality of the report as described in the review criteria.
Submission instructions:
Final Reports are team submissions so each document shall have all team member names
and only one person in the team shall upload the report to the designated submission link.
New folder/fac_lee023_HW11_WR6_FinalRpt_Guideline (1) (1).docxFinal Project Report Title ECE 380 Professional Seminar
by
Author(s) Name(s)
Author Affiliation(s)
E-mail
Date
Department of Electrical and Computer Engineering
Gannon University, Erie, PA
Acknowledgement
If you have any positive remarks this is the place to show your gratitude.
Abstract
The abstract is to be in fully-justified italicized text, as it is here, ...
Paper Title (use style paper title)Note Sub-titles are not.docxaman341480
Paper Title* (use style: paper title)
*Note: Sub-titles are not captured in Xplore and should not be used
line 1: 1st Given Name Surname
line 2: dept. name of organization
(of Affiliation)
line 3: name of organization
(of Affiliation)
line 4: City, Country
line 5: email address
line 1: 4th Given Name Surname
line 2: dept. name of organization(of Affiliation)
line 3: name of organization
(of Affiliation)
line 4: City, Country
line 5: email address
line 1: 2nd Given Name Surname
line 2: dept. name of organization
(of Affiliation)
line 3: name of organization
(of Affiliation)
line 4: City, Country
line 5: email address
line 1: 5th Given Name Surname
line 2: dept. name of organization
(of Affiliation)
line 3: name of organization
(of Affiliation)
line 4: City, Country
line 5: email address
line 1: 3rd Given Name Surname
line 2: dept. name of organization
(of Affiliation)
line 3: name of organization
(of Affiliation)
line 4: City, Country
line 5: email address
line 1: 6th Given Name Surname
line 2: dept. name of organization
(of Affiliation)
line 3: name of organization
(of Affiliation)
line 4: City, Country
line 5: email address
Abstract—This electronic document is a “live” template and already defines the components of your paper [title, text, heads, etc.] in its style sheet. *CRITICAL: Do Not Use Symbols, Special Characters, Footnotes, or Math in Paper Title or Abstract. (Abstract)
Keywords—component, formatting, style, styling, insert (key words)
I. Introduction (Heading 1)
This template, modified in MS Word 2007 and saved as a “Word 97-2003 Document” for the PC, provides authors with most of the formatting specifications needed for preparing electronic versions of their papers. All standard paper components have been specified for three reasons: (1) ease of use when formatting individual papers, (2) automatic compliance to electronic requirements that facilitate the concurrent or later production of electronic products, and (3) conformity of style throughout a conference proceedings. Margins, column widths, line spacing, and type styles are built-in; examples of the type styles are provided throughout this document and are identified in italic type, within parentheses, following the example. Some components, such as multi-leveled equations, graphics, and tables are not prescribed, although the various table text styles are provided. The formatter will need to create these components, incorporating the applicable criteria that follow.
II. Ease of Use
A. Selecting a Template (Heading 2)
First, confirm that you have the correct template for your paper size. This template has been tailored for output on the A4 paper size. If you are using US letter-sized paper, please close this file and download the Microsoft Word, Letter file.
B. Maintaining the Integrity of the Specifications
The template is used to format your paper and style the text. All margins, column widths, line spaces, and text fonts are prescribed; please do n.
This document provides formatting guidelines for submitting papers to the International Journal of Recent Technology and Engineering. It specifies the font, spacing, and formatting requirements for paper elements like the title, author names, headings, figures, tables, equations, and references. Key aspects include using Times New Roman font size 10 for the main text, size 24 and bold for the title, and specific spacing and formatting for headings, authors' names, abstracts, and other sections. It also provides guidance on references, abbreviations, equations, figures, and tables. Papers submitted must follow these formatting guidelines.
This document provides guidelines for preparing and formatting papers to submit to IEEE Transactions and Journals. It addresses paper elements like the title, author list, abstract, references, and index terms. It also provides instructions on formatting the paper in Microsoft Word, including using styles and inserting images. The document describes guidelines for sections, equations, units, and other content, as well as common mistakes to avoid.
This document provides a template for formatting academic papers. It includes guidelines for paper structure such as title, author names and affiliations, abstract, keywords, headings, and components like equations, figures, and references. The summary focuses on the high-level document structure and purpose.
This document provides guidelines for preparing and formatting papers to submit to IEEE Transactions and Journals. It details how to structure the paper, format equations and units, and address common mistakes. The guidelines include using the template document to write the paper, using the IEEE style menu for formatting, and inserting figures. Key elements that should be defined include abbreviations, symbols, and noting author affiliations and biographies in footnotes. Mathematical expressions should be numbered and defined, and units should follow SI standard formatting.
Microsoft Word allows users to write documents through various components and functions. It can be opened from the desktop or start menu by selecting a template or blank document. Documents can be saved by going to File > Save and selecting a location and file name. Common shortcuts include Ctrl+B for bold, Ctrl+X for cut, Ctrl+C for copy, and Ctrl+V for paste. Headers display information like page numbers and dates at the top of pages while footers display this information at the bottom. Mail merge allows creating personalized letters or labels by merging a database with a template document. Formatting options include setting line spacing, adding columns, and formatting paragraphs.
This document provides guidelines for preparing and submitting papers for IEEE transactions and journals. It discusses formatting the paper, inserting figures and images, submitting for review, and final submission requirements including sending electronic or printed copies of figures and contact information. Authors are instructed to use the document as a template and to follow the specified formatting and submission instructions.
Week 1 Assignment InstructionsGOAL Create the initial element o.docxjessiehampson
This document provides instructions for a week 1 assignment to create an initial business model canvas. Students are asked to create a canvas for the business organization they work for using the Business Model Canvas template. The submission should include a cover page with details about the organization, the completed canvas using post-it notes to describe each element, and a memo reflecting on what was learned about the organization from the exercise. The assignment is to be submitted by the deadline in the required file format and naming convention.
This document provides guidelines for formatting equations, figures, and tables in a manuscript. It recommends using MathType or Equation Editor to edit equations, setting the equation size to 10 pts with 10 pt spacing above and below. Equations should be numbered consistently and referenced in text as Eq. (1). Figures and tables should be placed close to references in text and have 10 pt spacing between caption and table/figure. Author names and affiliations should be formatted with superscript numbers to match and the corresponding author marked with an asterisk.
Learnings from Successful Jobs SearchersBruce Bennett
Are you interested to know what actions help in a job search? This webinar is the summary of several individuals who discussed their job search journey for others to follow. You will learn there are common actions that helped them succeed in their quest for gainful employment.
Joyce M Sullivan, Founder & CEO of SocMediaFin, Inc. shares her "Five Questions - The Story of You", "Reflections - What Matters to You?" and "The Three Circle Exercise" to guide those evaluating what their next move may be in their careers.
5 key differences between Hard skill and Soft skillsRuchiRathor2
𝐓𝐡𝐞 𝐏𝐞𝐫𝐟𝐞𝐜𝐭 𝐁𝐥𝐞𝐧𝐝:
𝐖𝐡𝐲 𝐘𝐨𝐮 𝐍𝐞𝐞𝐝 𝐁𝐨𝐭𝐡 𝐇𝐚𝐫𝐝 & 𝐒𝐨𝐟𝐭 𝐒𝐤𝐢𝐥𝐥𝐬 𝐭𝐨 𝐓𝐡𝐫𝐢𝐯𝐞 💯
In today's dynamic and competitive market, a well-rounded skillset is no longer a luxury - it's a necessity.
While technical expertise (hard skills) is crucial for getting your foot in the door, it's the combination of hard and soft skills that propels you towards long-term success and career advancement. ✨
Think of it like this: Imagine a highly skilled carpenter with a masterful understanding of woodworking (hard skills). But if they struggle to communicate effectively with clients, collaborate with builders, or adapt to project changes (soft skills), their true potential remains untapped. 😐
The synergy between hard and soft skills is what creates true value in the workplace. Strong communication allows you to clearly articulate your technical expertise, while problem-solving skills help you navigate complex challenges alongside your team. 💫
By actively developing both sets of skills, you position yourself as a well-rounded professional who can not only perform tasks efficiently but also contribute meaningfully to a collaborative and dynamic work environment.
Go through the carousel and let me know your views 🤩
Parabolic antenna alignment system with Real-Time Angle Position FeedbackStevenPatrick17
Introduction
Parabolic antennas are a crucial component in many communication systems, including satellite communications, radio telescopes, and television broadcasting. Ensuring these antennas are properly aligned is vital for optimal performance and signal strength. A parabolic antenna alignment system, equipped with real-time angle position feedback and fault tracking, is designed to address this need. This document delves into the components, design, and implementation of such a system, highlighting its significance and applications.
Importance of Parabolic Antenna Alignment
The alignment of a parabolic antenna directly affects its performance. Even minor misalignments can lead to significant signal loss, which can degrade the quality of the received signal or cause communication failures. Proper alignment ensures that the antenna's focal point is accurately directed toward the signal source, maximizing the antenna's gain and efficiency. This precision is especially crucial in applications like satellite communications, where the antenna must track geostationary satellites with high accuracy.
Components of a Parabolic Antenna Alignment System
A parabolic antenna alignment system typically includes the following components:
Parabolic Dish: The primary reflector that collects and focuses incoming signals.
Feedhorn and Low Noise Block (LNB): Positioned at the dish's focal point to receive signals.
Stepper or Servo Motors: Adjust the azimuth (horizontal) and elevation (vertical) angles of the antenna.
Microcontroller (e.g., Arduino, Raspberry Pi): Processes sensor data and controls the motors.
Potentiometers: Provide feedback on the antenna's current angle positions.
Fault Detection Sensors: Monitor for potential faults such as cable discontinuities or LNB failures.
Control Software: Runs on the microcontroller, handling real-time processing and decision-making.
Real-Time Angle Position Feedback
Real-time feedback on the antenna's angle position is essential for maintaining precise alignment. This feedback is typically provided by potentiometers or rotary encoders, which continuously monitor the azimuth and elevation angles. The microcontroller reads this data and adjusts the motors accordingly to keep the antenna aligned with the signal source.
Fault Tracking in Antenna Alignment Systems
Fault tracking is vital for the reliability and performance of the antenna system. Common faults include cable discontinuities, LNB malfunctions, and motor failures. Sensors integrated into the system can detect these faults and either notify the user or initiate corrective actions automatically.
Design and Implementation
1. Parabolic Dish and Feedhorn
The parabolic dish is designed to reflect incoming signals to a focal point where the feedhorn and LNB are located. The dish's size and shape depend on the specific application and frequency range.
2. Motors and Position Control
Stepper motors or servo motors are used to control the azimuth and elevation of
We recently hosted the much-anticipated Community Skill Builders Workshop during our June online meeting. This event was a culmination of six months of listening to your feedback and crafting solutions to better support your PMI journey. Here’s a look back at what happened and the exciting developments that emerged from our collaborative efforts.
A Gathering of Minds
We were thrilled to see a diverse group of attendees, including local certified PMI trainers and both new and experienced members eager to contribute their perspectives. The workshop was structured into three dynamic discussion sessions, each led by our dedicated membership advocates.
Key Takeaways and Future Directions
The insights and feedback gathered from these discussions were invaluable. Here are some of the key takeaways and the steps we are taking to address them:
• Enhanced Resource Accessibility: We are working on a new, user-friendly resource page that will make it easier for members to access training materials and real-world application guides.
• Structured Mentorship Program: Plans are underway to launch a mentorship program that will connect members with experienced professionals for guidance and support.
• Increased Networking Opportunities: Expect to see more frequent and varied networking events, both virtual and in-person, to help you build connections and foster a sense of community.
Moving Forward
We are committed to turning your feedback into actionable solutions that enhance your PMI journey. This workshop was just the beginning. By actively participating and sharing your experiences, you have helped shape the future of our Chapter’s offerings.
Thank you to everyone who attended and contributed to the success of the Community Skill Builders Workshop. Your engagement and enthusiasm are what make our Chapter strong and vibrant. Stay tuned for updates on the new initiatives and opportunities to get involved. Together, we are building a community that supports and empowers each other on our PMI journeys.
Stay connected, stay engaged, and let’s continue to grow together!
About PMI Silver Spring Chapter
We are a branch of the Project Management Institute. We offer a platform for project management professionals in Silver Spring, MD, and the DC/Baltimore metro area. Monthly meetings facilitate networking, knowledge sharing, and professional development. For more, visit pmissc.org.
Community Skills Building Workshop | PMI Silver Spring Chapter | June 12, 2024
emplate.docx
1. The Title Goes Here with Each Initial Letter Capitalized
(Use the Microsoft Word template style: Paper Title) or (Use Times New Roman Font: 18 pt,
Bold, Centered)
Author’s Name1, a)
and Author’s Name2, 3, b)
(Use Times New Roman Font: 14 pt, Centered) (Names should be written in First Name Surname order)
Author Affiliations
(Use the Microsoft Word template style: Author Affiliation) or (Use Times New Roman Font: 10 pt, Italic,
Centered)(if authors share the same affiliation, list the affiliation one time and number accordingly)
1
Replace this text with an author’s affiliation
(use complete addresses, including country name or code).
2
Additional affiliations should be indicated by
superscript numbers 2, 3, etc. as shown above.
3
You would list an author’s second affiliation here.
Author Emails
Use superscript letters such as “a)” to indicate the author’s e-mail address below.
Use b), c), etc. to indicate e-mail addresses for more than 1 author.
a)
Corresponding author: your@emailaddress.xxx
b)
anotherauthor@thisaddress.yyy
(Use the Microsoft Word template style: Author Email)or (Use Times New Roman Font: 10 pt, Italic, Centered)
Abstract. To format your abstract, use the Microsoft Word template style: Abstract or Use Times New Roman Font: 9 pt,
Indent: left 0.2", Right: 0.2", Justified. Each paper must include an abstract. Begin the abstract with the word “Abstract”
followed by a period in bold font, and then continue with a normal 9-point font.
FIRST, SECOND, AND THIRD LEVEL HEADINGS (FIRST LEVEL HEADING)
(Use the Microsoft Word template style: Heading 1) or (Use Times New Roman Font: 12 pt, Bold, ALL CAPS,
Centered)
This document was prepared using the AIP Conference Proceedings template for Microsoft Word. It provides a
simple example of a paper and offers guidelines for preparing your article. Here we introduce the paragraph styles
for Level 1, Level 2, and Level 3 headings. Please note the following:
In this template we note whether each heading is Level 1, 2, or 3 – for example, “(Second Level Heading).”
This is for guidance only; your article headings will, of course, not need those notations.
Under each heading we have noted which paragraph style to use – for example, “(Use the Microsoft Word
template style: Heading 2).” Again, those notes are not part of the headings. Their purpose is to advise you
of the name of the style defined in the AIP Conference Proceedings Word template.
To format a paragraph, use the Microsoft Word template style: Paragraph or Times New Roman Font: 10 pt,
Indent: First line: 0.2", Justified.
2. How to Apply the AIP Conference Proceedings Template Paragraph Styles (Second Level
Heading)
(Use the Microsoft Word template style: Heading 2) or (Use Times New Roman Font: 12 PT, Bold, Centered)
Here is how to display a pop-up window from which to select and apply the AIP Conference Proceedings
template paragraph styles:
How to Use this Template (Second Level Heading)
(Use the Microsoft Word template style: Heading 2) or (Use Times New Roman Font: 12 PT, Bold, Centered)
You can edit or delete the content provided in this template and replace it with the text and figures of your
article. Please be sure you do not accidentally leave any of this text as part of your paper!
Heading with Each Initial Letter Capitalized (Second Level Heading)
(Use the Microsoft Word template style: Heading 2) or (Use Times New Roman Font: 12 PT, Bold, Centered)
Apart from prepositions and articles, all words in second and third level headings should have their initial letters
in uppercase. Prepositions are words like “for,” “from,” “with,” “in,” “off,” and articles include words such as “an,”
“a,” “the.”
This is the paragraph spacing that occurs when you use the [ENTER] key.
Heading with Each Initial Letter Capitalized (Third Level Heading)
(Use the Microsoft Word template style: Heading 3) or (Use Times New Roman Font: 10 pt, Italic, Centered)
As with first and second level headings, all words except prepositions and articles (see above) should appear
with initial letters in uppercase.
This is the paragraph spacing that occurs when you use the [ENTER] key.
Click here to display the
Styles window – making it easy
to choose and apply the AIP
Conference Proceedings
template styles.
To apply a style to a
paragraph, click anywhere in the
paragraph text then click on the
appropriate style listed in the
Styles window.
3. MATHEMATICS (FIRST LEVEL HEADING)
(Use the Microsoft Word template style: Heading 1) or (Use Times New Roman Font: 12 pt, Bold, ALL CAPS,
Centered)
Here we provide some basic advice for formatting your mathematics, but we do not attempt to define detailed
styles or specifications for mathematical typesetting. You should use the standard styles, symbols, and conventions
for the field/discipline you are writing about.
A Note on Microsoft Word’s Equation Editors (Second Level Heading)
(Use the Microsoft Word template style: Heading 2) or (Use Times New Roman Font: 12 PT, Bold, Centered)
From Word 2007 onwards, Microsoft Word provides two “Equation Editors,” which, for ease of reference, we’ll
call “Old Style Equations” and “New Style Equations.”
“New Style Equations” (Word 2007 onwards): With Word 2007 Microsoft introduced a powerful new
built-in Equation Editor that enables input of sophisticated mathematics typeset (usually) in the Cambria
Math font. You access it from the Insert menu.
“Old Style Equations” (Word 97–Word 2003): For versions of Microsoft Word between Word 97 and
Word 2003, mathematical input was created by an add-in: Inserting and editing a “Microsoft Equation 3.0
object,” typically by Insert Object and selecting “Microsoft Equation 3.0.”
Newer versions of Microsoft Word (Word 2007 and onwards) still support the original “Old Style Equations”
method of creating mathematics by inserting an equation via Insert Object and selecting “Microsoft Equation
3.0.” Whatever method is used, please make sure the equation is clear and readable.
Which Microsoft Word Equation Editor Should I Use? (Second Level Heading)
(Use the Microsoft Word template style: Heading 2) or (Use Times New Roman Font: 12 PT, Bold, Centered)
Due to technical requirements of OpenType font technology, Microsoft Word’s “New Style” Equation Editor
works only with fonts specially designed for mathematical typesetting. Unless you have obtained and configured
new OpenType math fonts, it is highly likely that your installation of Word will use the Cambria Math font for all
mathematics created with the “New Style” editor. Using the Cambria Math font for mathematics and Times Roman
for your text will cause a mismatch in the visual appearance of your article, so, for consistency, we prefer authors to
use the “Old Style” Equation Editor because it is straightforward to amend the size/style of the fonts it uses.
Formatting and Inserting Equations (Second Level Heading)
(Use the Microsoft Word template style: Heading 2) or (Use Times New Roman Font: 12 PT, Bold, Centered)
Equations should be centered with equation numbers on the right-hand side (flush right). Achieving a pleasing
layout of equations can be tricky in Microsoft Word, so here are some tips. You can either:
1. Copy, paste, and edit the sample equation provided (recommended), or
2. Manually insert an equation and equation number
Copy, Paste, and Edit a Sample Equation (Third Level Heading)
(Use the Microsoft Word template style: Heading 3) or (Use Times New Roman Font: 10 pt, Italic, Centered)
To use this “Old Style Equation” as a “template,” highlight the entire line, then use cut and paste to the new
location. Note that the equation number will automatically update (increment).
cos
,
cos 2
3
1
2
2
1
SAm
d
F
d
SAm
d
F
d
(1)
4. Manually Inserting an Equation and Equation Number (Third Level Heading)
(Use the Microsoft Word template style: Heading 3) or (Use Times New Roman Font: 10 pt, Italic, Centered)
If you prefer to manually insert and number equations, follow this step-by-step guide:
1. Make sure you can see “hidden characters” by switching on “show invisibles” from the Home menu (it
looks like this: ). This allows you to see paragraph markers (¶) and tab characters (), which are usually
hidden from view.
2. Create a blank paragraph by pressing [ENTER].
3. Format your new blank paragraph by applying the Microsoft Word template style: Equation. The Equation
paragraph style sets up the tabs so that you can center the equation and have an equation number appear at
the right.
4. Place your cursor at the start of your new paragraph and press the [TAB] key twice.
5. Place your cursor between the tab characters () and insert your equation using Insert Object Microsoft
Equation 3.0.
6. To add an equation number, place your cursor at the end of the paragraph (just before the paragraph markers
(¶) and after the second tab character ()).
7. On the Insert tab, in the Text group, click Quick Parts and then click Field:
8. A dialog box should appear:
9. From the list of Field Names on the left of the dialog box, select ListNum.
10. From the list of Field properties on the right, select the “Equations” List name and click OK. You should
now see an equation number in parentheses: e.g., (3).
5. OTHER SPECIFICATIONS (FIRST LEVEL HEADING)
(Use the Microsoft Word template style: Heading 1) or (Use Times New Roman Font: 12 pt, Bold, ALL CAPS,
Centered)
Figures, tables, and equations must be inserted in the text and may not be grouped at the end of the paper.
Important: A miscount of figures, tables, or equations may result in revisions. Please double check the numbering of
these elements before you submit your paper to your proceedings editor.
Figures (Second Level Heading)
(Use the Microsoft Word template style: Heading 2) or (Use Times New Roman Font: 12 PT, Bold, Centered)
If you need to arrange many figures, a good tip is to place them in a table, which gives you additional control of
the layout. Leave a line space between your figure and any text above it, and the figure description and any text
below it, like this one:
(a) (b)
FIGURE 1. To format a figure caption, use the Microsoft Word template style: Figure Caption or Times New Roman Font: 9 pt,
Centered. The text “FIGURE 1,” which labels the caption, should be bold and in upper case. If figures have more than one part,
each part should be labeled (a), (b), etc. Using a table, as in the above example, helps you control the layout
Cite all figures in the text in consecutive order. The word “Figure” should be spelled out if it is the first word of
the sentence and abbreviated as “Fig.” elsewhere in the text. Place the figures as close as possible to their first
mention in the text at the top or bottom of the page with the figure caption positioned below, all centered. Figures
must be inserted in the text and may not follow the Reference section.
Color Figures (Third Level Heading)
(Use the Microsoft Word template style: Heading 3) or (Times New Roman Font: 10 pt, Italic, Centered)
Authors are welcome to use color figures within their article. For online publication, there are no costs added for
color figures. However, for printed proceedings (if requested by your conference organizer), there is an additional
cost. Please consult directly with your conference organizer. If your conference organizer has asked AIP Publishing
to produce printed copies (many ask AIP Publishing for online-only publication), then all figures will be printed in
black-and-white unless you make specific arrangements with your organizer(s) to include color figures in your
article and pay to them the associated fee(s) they request. We advise that many color figures can be printed in black-
and-white with no loss of information; however, some figures do lose information when reproduced in black-and-
white. Check your figure legends carefully and, if your figures are to be printed in black-and-white, remove from
your text/descriptions any references to color.
6. Tables (Second Level Heading)
(Use the Microsoft Word template style: Heading 2) or (Use Times New Roman Font: 12 PT, Bold, Centered)
Due to the wide range and complexity of tables, we simply offer an example for guidance. Please follow the
style for table (and figure) captions.
TABLE 1. To format a table caption, use the Microsoft Word template style: Table Caption. The text
“TABLE 1,” which labels the caption, should be bold and all letters capitalized. Center this text above the
Table. Tables should have top and bottom rules, and a rule separating the column heads from the rest of the table
only.
Column Header Goes Here Column Header Goes Here Column Header Goes Here
Row Name Here x x
Row Name Here x x
Row Name Here x x
FINAL KEY POINTS TO CONSIDER (FIRST LEVEL HEADING)
(Use the Microsoft Word template style: Heading 1) or (Use Times New Roman Font: 12 pt, Bold, ALL CAPS,
Centered)
Here are the main points you need to follow (the AIP author template package contains comprehensive
guidance):
Write and prepare your article using the AIP Conference Proceedings template.
Create a PDF file of your paper (making sure to embed all fonts).
Send the following items to your conference organizer:
o PDF file of your paper
o (If it applies) Copies of any permissions to re-use copyrighted materials in your article (e.g., figures
from books/journals)
Font Embedding (Second Level Heading)
(Use the Microsoft Word template style: Heading 2) or (Use Times New Roman Font: 12 PT, Bold, Centered)
As the author and creator of your article PDF, you have the most intimate knowledge of exactly what the PDF
should display. We ask all authors to carefully check their article PDF prior to submission. Perform visual
inspections to detect subtle font errors and ensure that all fonts are embedded. With the wide range of tools and
software that authors use to create PDFs, and the number of devices and platforms that readers use to view/print
them, font embedding by authors is not only “nice-to-have”; it is essential.
Why Should I Care About Font Embedding? (Third Level Heading)
(Use the Microsoft Word template style: Heading 3) or (Times New Roman Font: 10 pt, Italic, Centered)
Embedding fonts into your PDF file is critically important for two reasons:
1. Commercial printing companies are unable to print PDFs without the correct fonts embedded.
2. To ensure that your online article PDF file displays and prints correctly for everyone who wants to read your
work.
Readers of scientific articles use an ever-increasing range of devices and applications to access, view, and print
PDFs – from smart phones and tablets to desktop computers running any one of a number of operating systems. To
ensure that readers of your article can display and print it correctly, it is important for your article’s PDF file to be
truly portable: Your PDF file needs to be fully “self-contained.”
7. CONCLUSION
(Use the Microsoft Word template style: Heading 1) or (Use Times New Roman Font: 12 pt, Bold, ALL CAPS,
Centered)
In this section we welcome you to include a summary of the end results of your research. Font should be Times
New Roman, 10 pt.
ACKNOWLEDGMENTS
(Use the Microsoft Word template style: Heading 1) or (Use Times New Roman Font: 12 pt, Bold, ALL CAPS,
Centered)
If desired, in this section we welcome you to include thank your comments for those who have supported your
research. Font should be Times New Roman, 10 pt.
REFERENCES
(Use the Microsoft Word template style: Heading 1) or (Use Times New Roman Font: 12 pt, Bold, ALL CAPS,
Centered)
References should be numbered using Arabic numerals followed by a period (.) as shown below and should
follow the format in the below examples.
1. M. P. Brown and K. Austin, The New Physique (Publisher Name, Publisher City, 2005), pp. 25–30.
2. M. P. Brown and K. Austin, Appl. Phys. Letters 85, 2503–2504 (2004).
3. R. T. Wang, “Title of Chapter,” in Classic Physiques, edited by R. B. Hamil (Publisher Name, Publisher City,
1999), pp. 212–213.
4. C. D. Smith and E. F. Jones, “Load-cycling in cubic press,” in Shock Compression of Condensed Matter-2001,
AIP Conference Proceedings 620, edited by M. D. Furnish et al. (AIP Publishing, Melville, NY, 2002), pp.
651–654.
5. B. R. Jackson and T. Pitman, U.S. Patent No. 6,345,224 (8 July 2004)
6. D. L. Davids, “Recovery effects in binary aluminum alloys,” Ph.D. thesis, Harvard University, 1998.
7. R. C. Mikkelson (private communication).
8. Where to Find Further Information
We warmly invite you to visit our online platform, Scitation, where you can find further help/advice and publishing
policies for AIP Conference Proceedings:
For authors: https://aip.scitation.org/apc/authors/preppapers
For conference organizers: https://aip.scitation.org/apc/organizers/abstracts
Summary: Points to Consider when Preparing Your Paper
1- Articles should use 8.5 x 11 single column template.
2- Use Times New Roman font, the point size will vary by section.
3- DO NOT alter the margins of our templates. They are carefully designed for AIP’s production process:
Altering them can cause significant delays. Paper size should be 8 ½ x 11 with margins set at:Top – 1 inch,
Left – 1 inch, Bottom – 1.18 inch, Right – 1 inch.
4- DO NOT display the title in ALL CAPS (initial cap only)
5- DO NOT include any headers, footers, or page numbers in your document. They will be added to your
article PDF by AIP Publishing, so please do not amend this template to add them to your paper.
6- Line spacing should be 1.0 throughout the entire article, no double spacing.
7- Make sure all author affiliation associations are correct. This means author vs. affiliation and author vs.
email address. If there is only one affiliation for all authors, association is not needed. Author names
should be listed in First name Surname format.
8- Use clear, legible graphics and diagrams. Readers of your paper will be grateful. If they cannot read it, they
are unlikely to cite it.
9- DO NOT use copyrighted material without permission. Papers using copyrighted material without
appropriate permission and acknowledgment will be excluded from the proceedings.
10- No 1-page papers please. 1-page, abstract-only contributions are not acceptable and will be excluded from
the proceedings.
11- Prepare and format references with care. References should be numbered using Arabic numerals followed
by a period (.).
12- Embed all fonts into your article PDF. The importance of font embedding is discussed in the section Font
Embedding (above). PDFs supplied without embedded fonts are often completely unusable for printing or
publication purposes. In such cases, we must return those PDFs to the proceedings editors for font
embedding. Failure to embed fonts can cause unnecessary inconvenience to your proceedings editor(s) and
publication delays for other authors. Failure to provide a replacement paper in a timely fashion may result in
an article being removed from the proceedings.
13- Check your article PDF file! It is not uncommon for errors to appear in PDFs generated from Microsoft
Word – corrupted math, figures reflowing, etc. It is essential to very carefully check your article PDF file
before sending it to the proceedings editor(s).
14- Avoid large PDF files (10 MB maximum, ideally). For the benefit of your readers, we recommend keeping
your article PDF file below 10 MB. This is a recommendation, not a requirement.