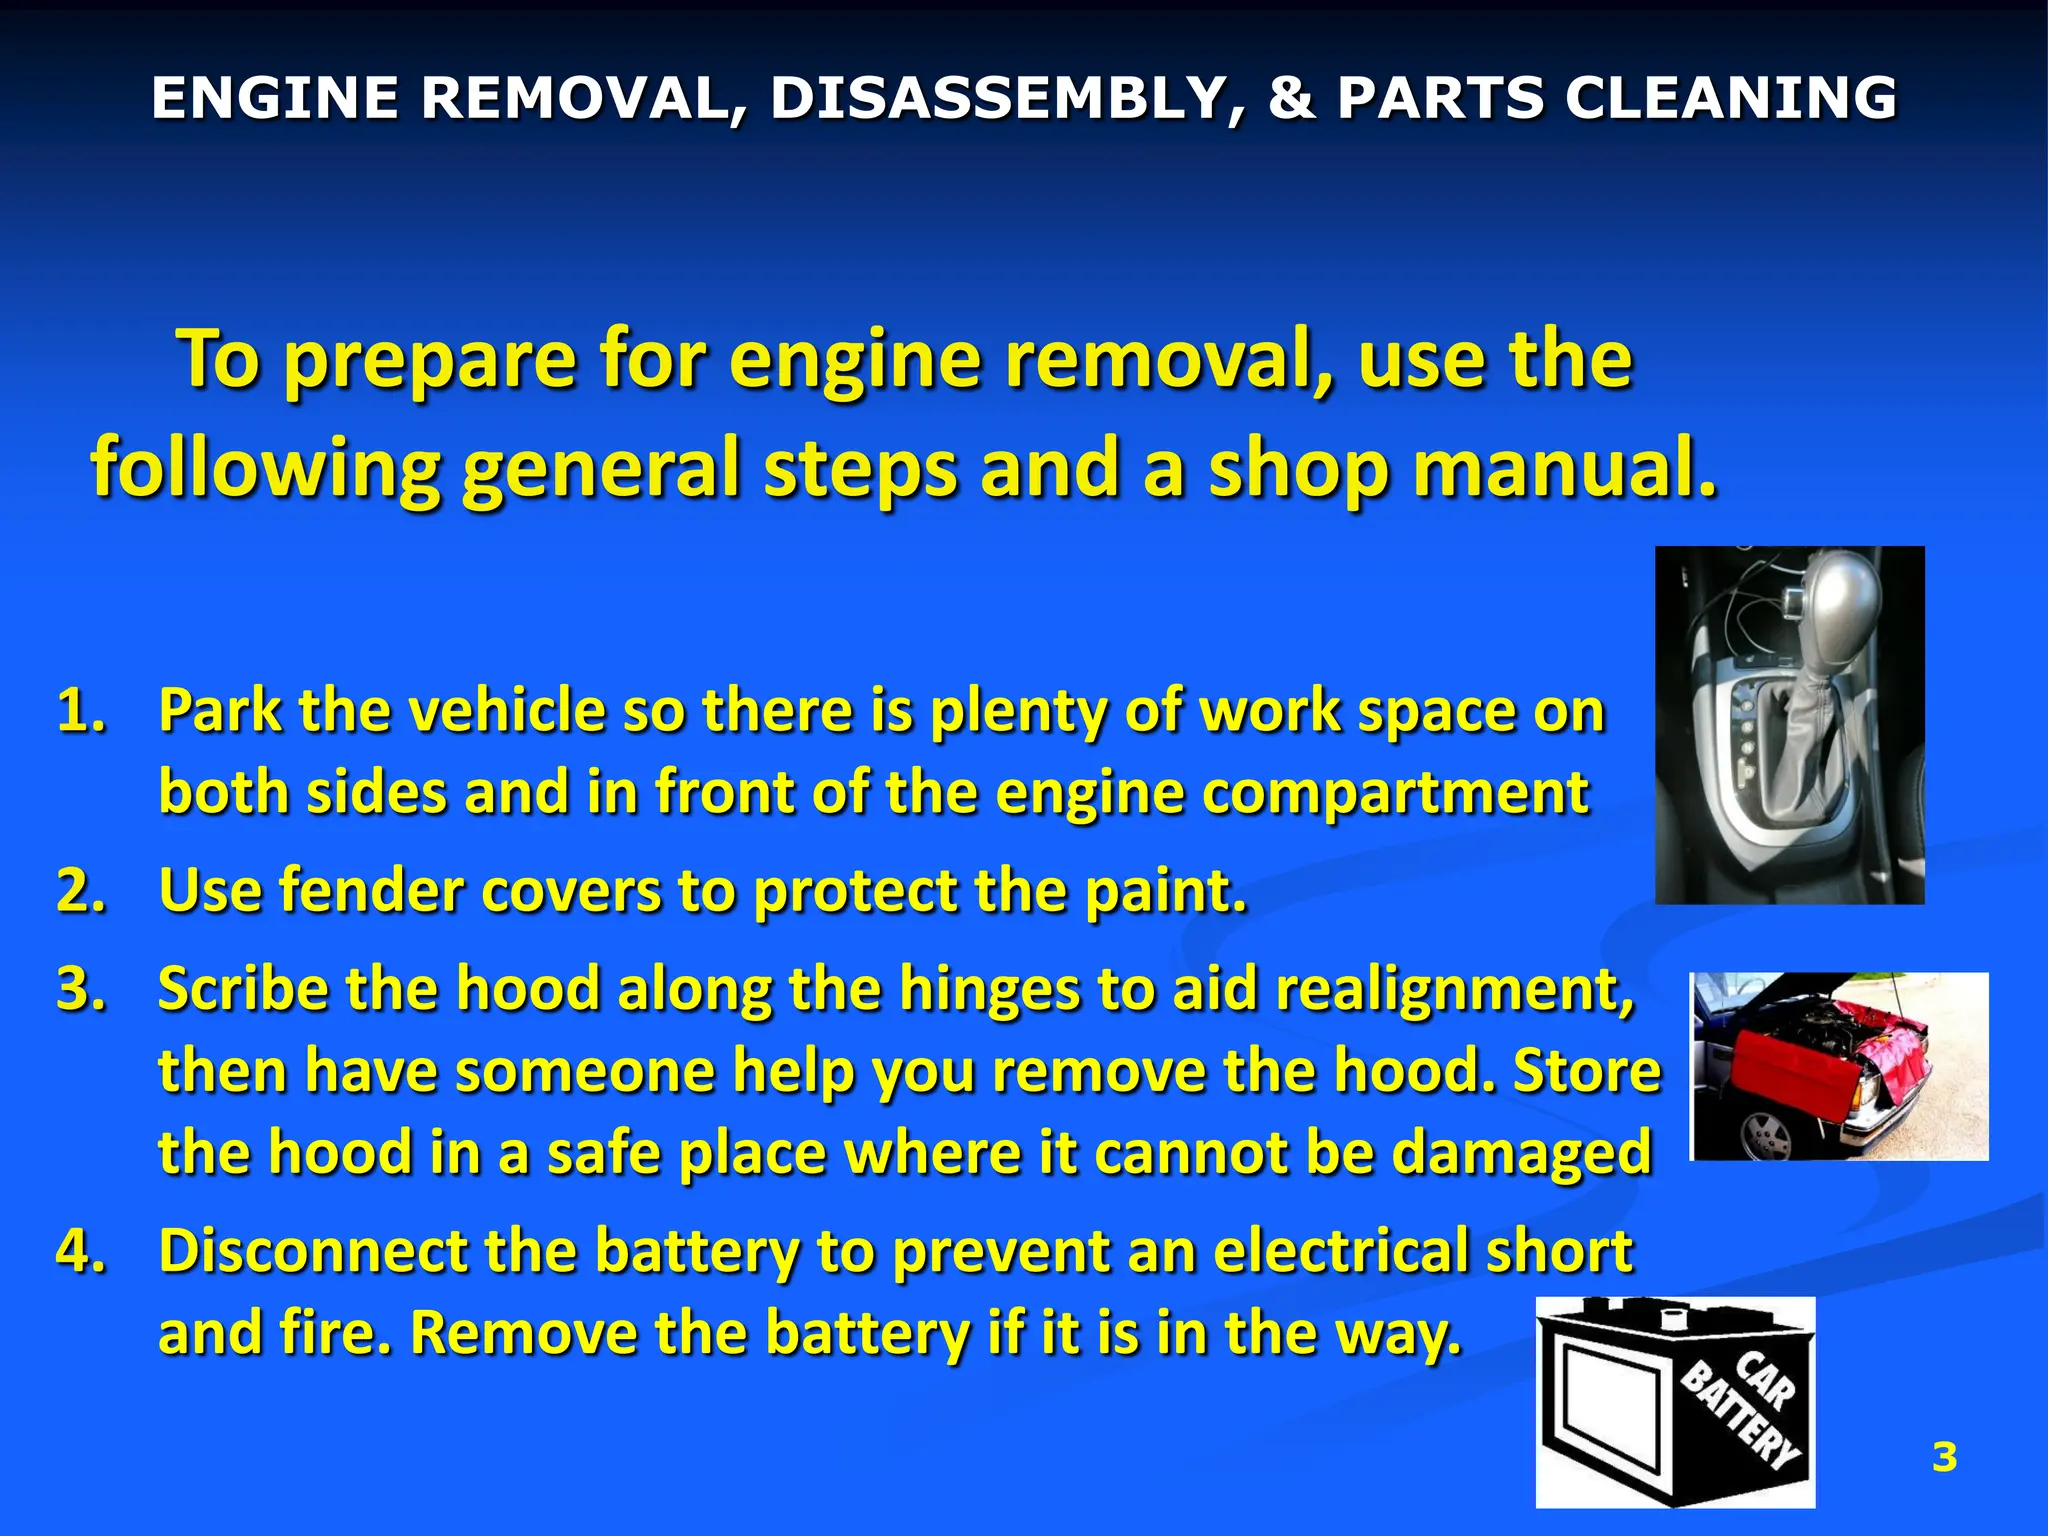
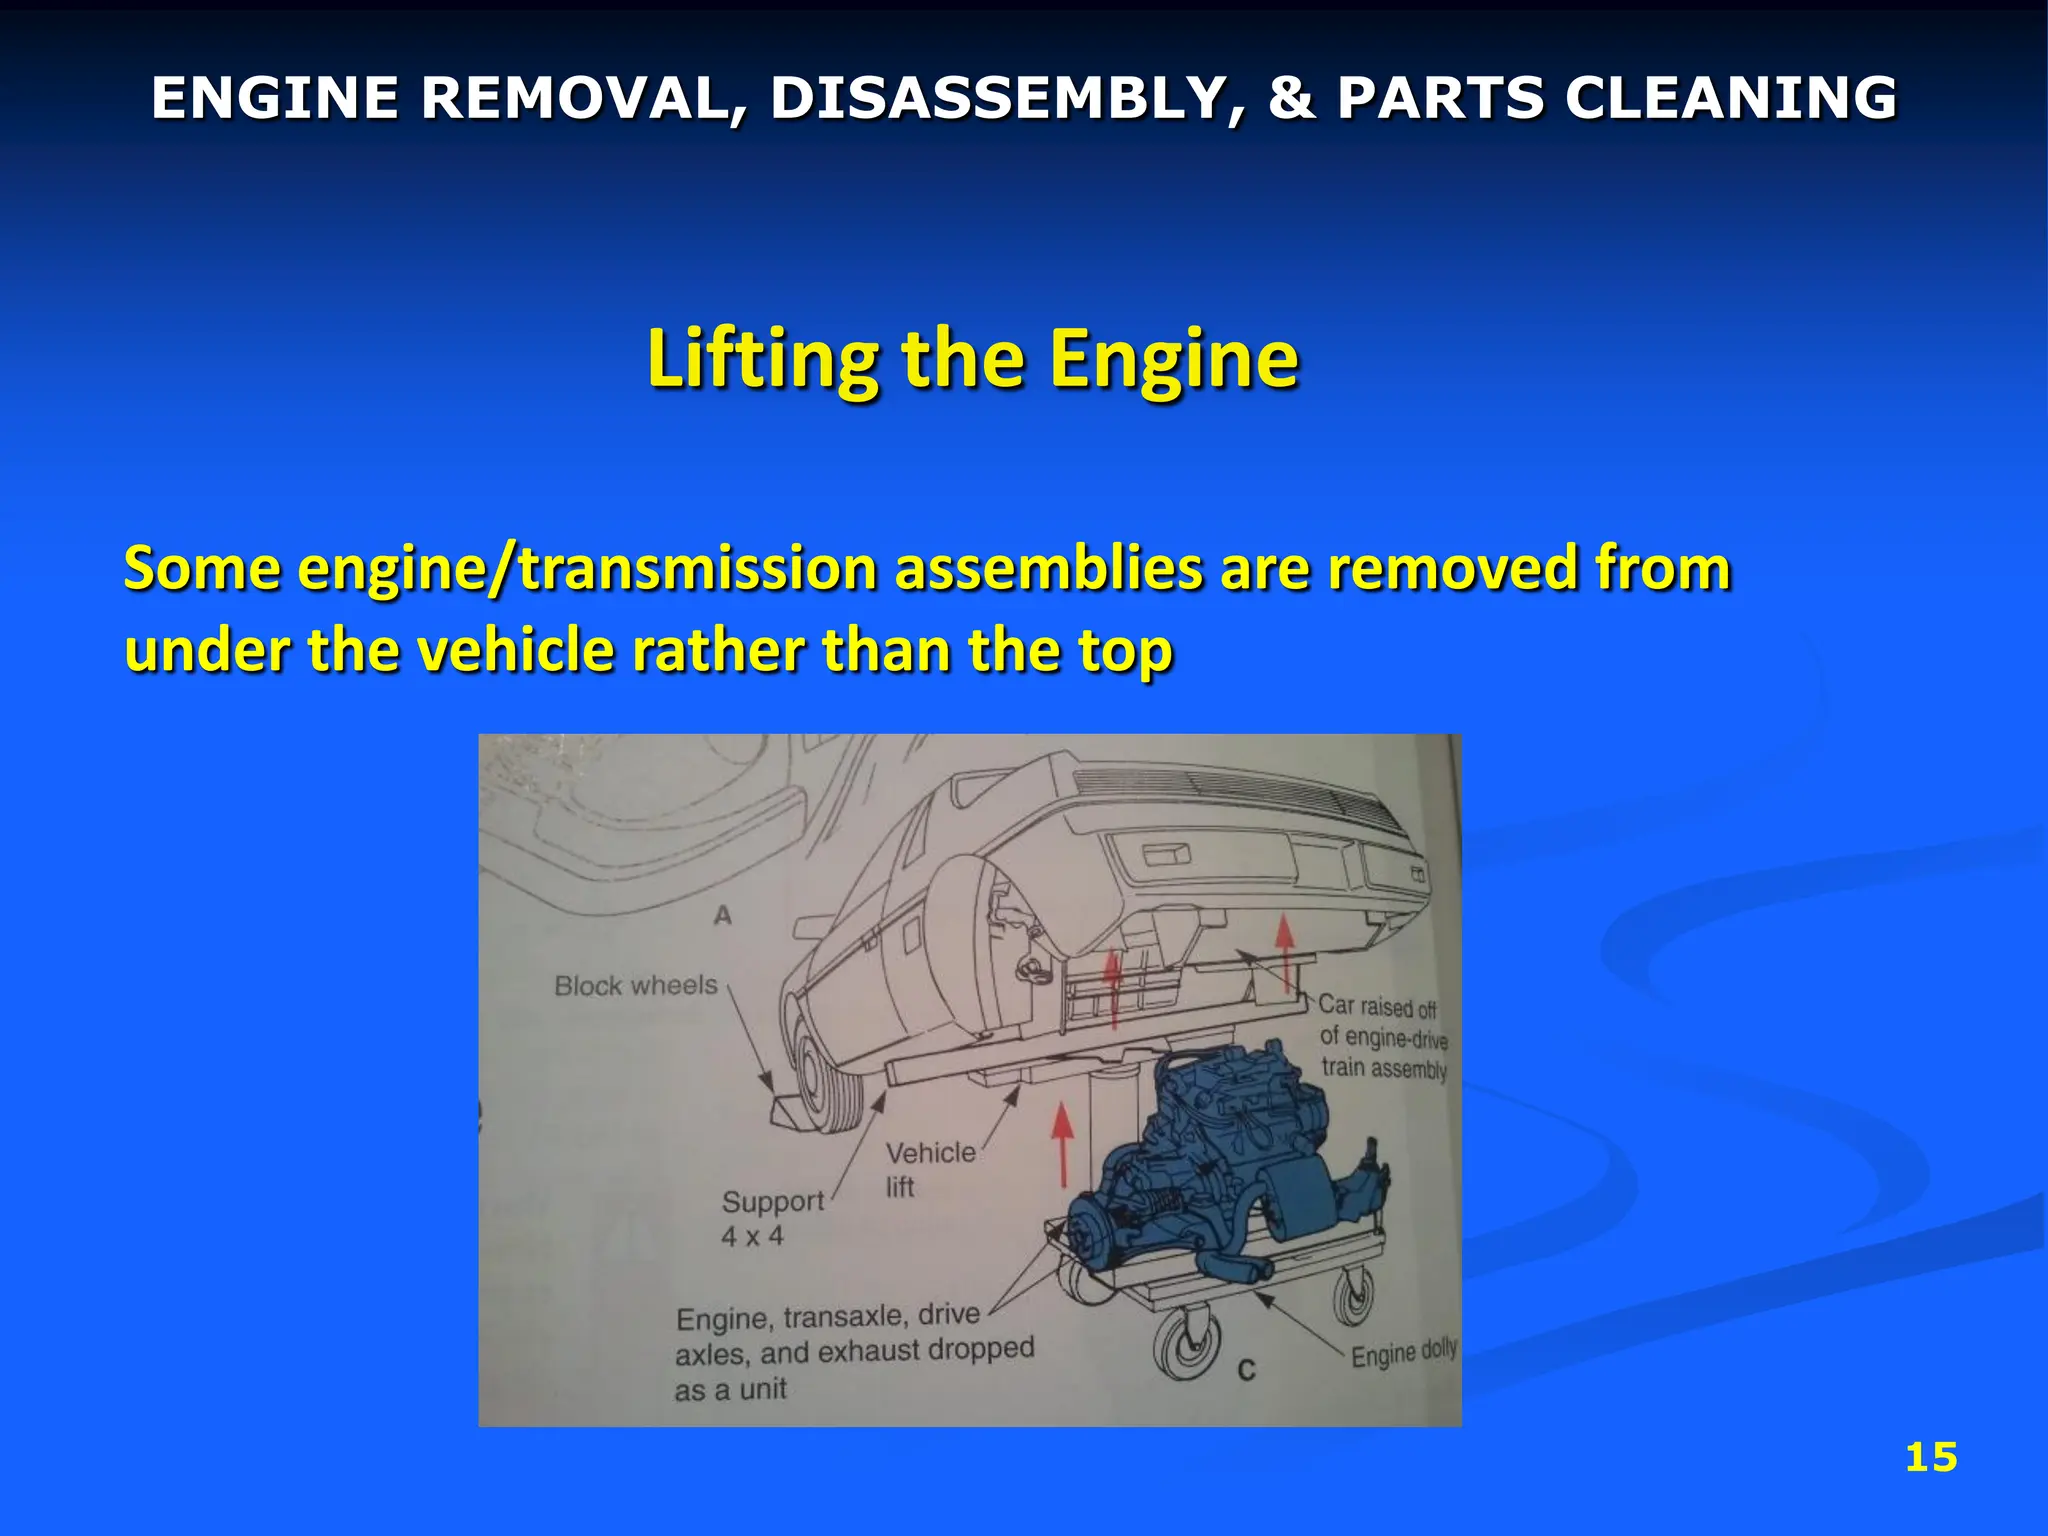
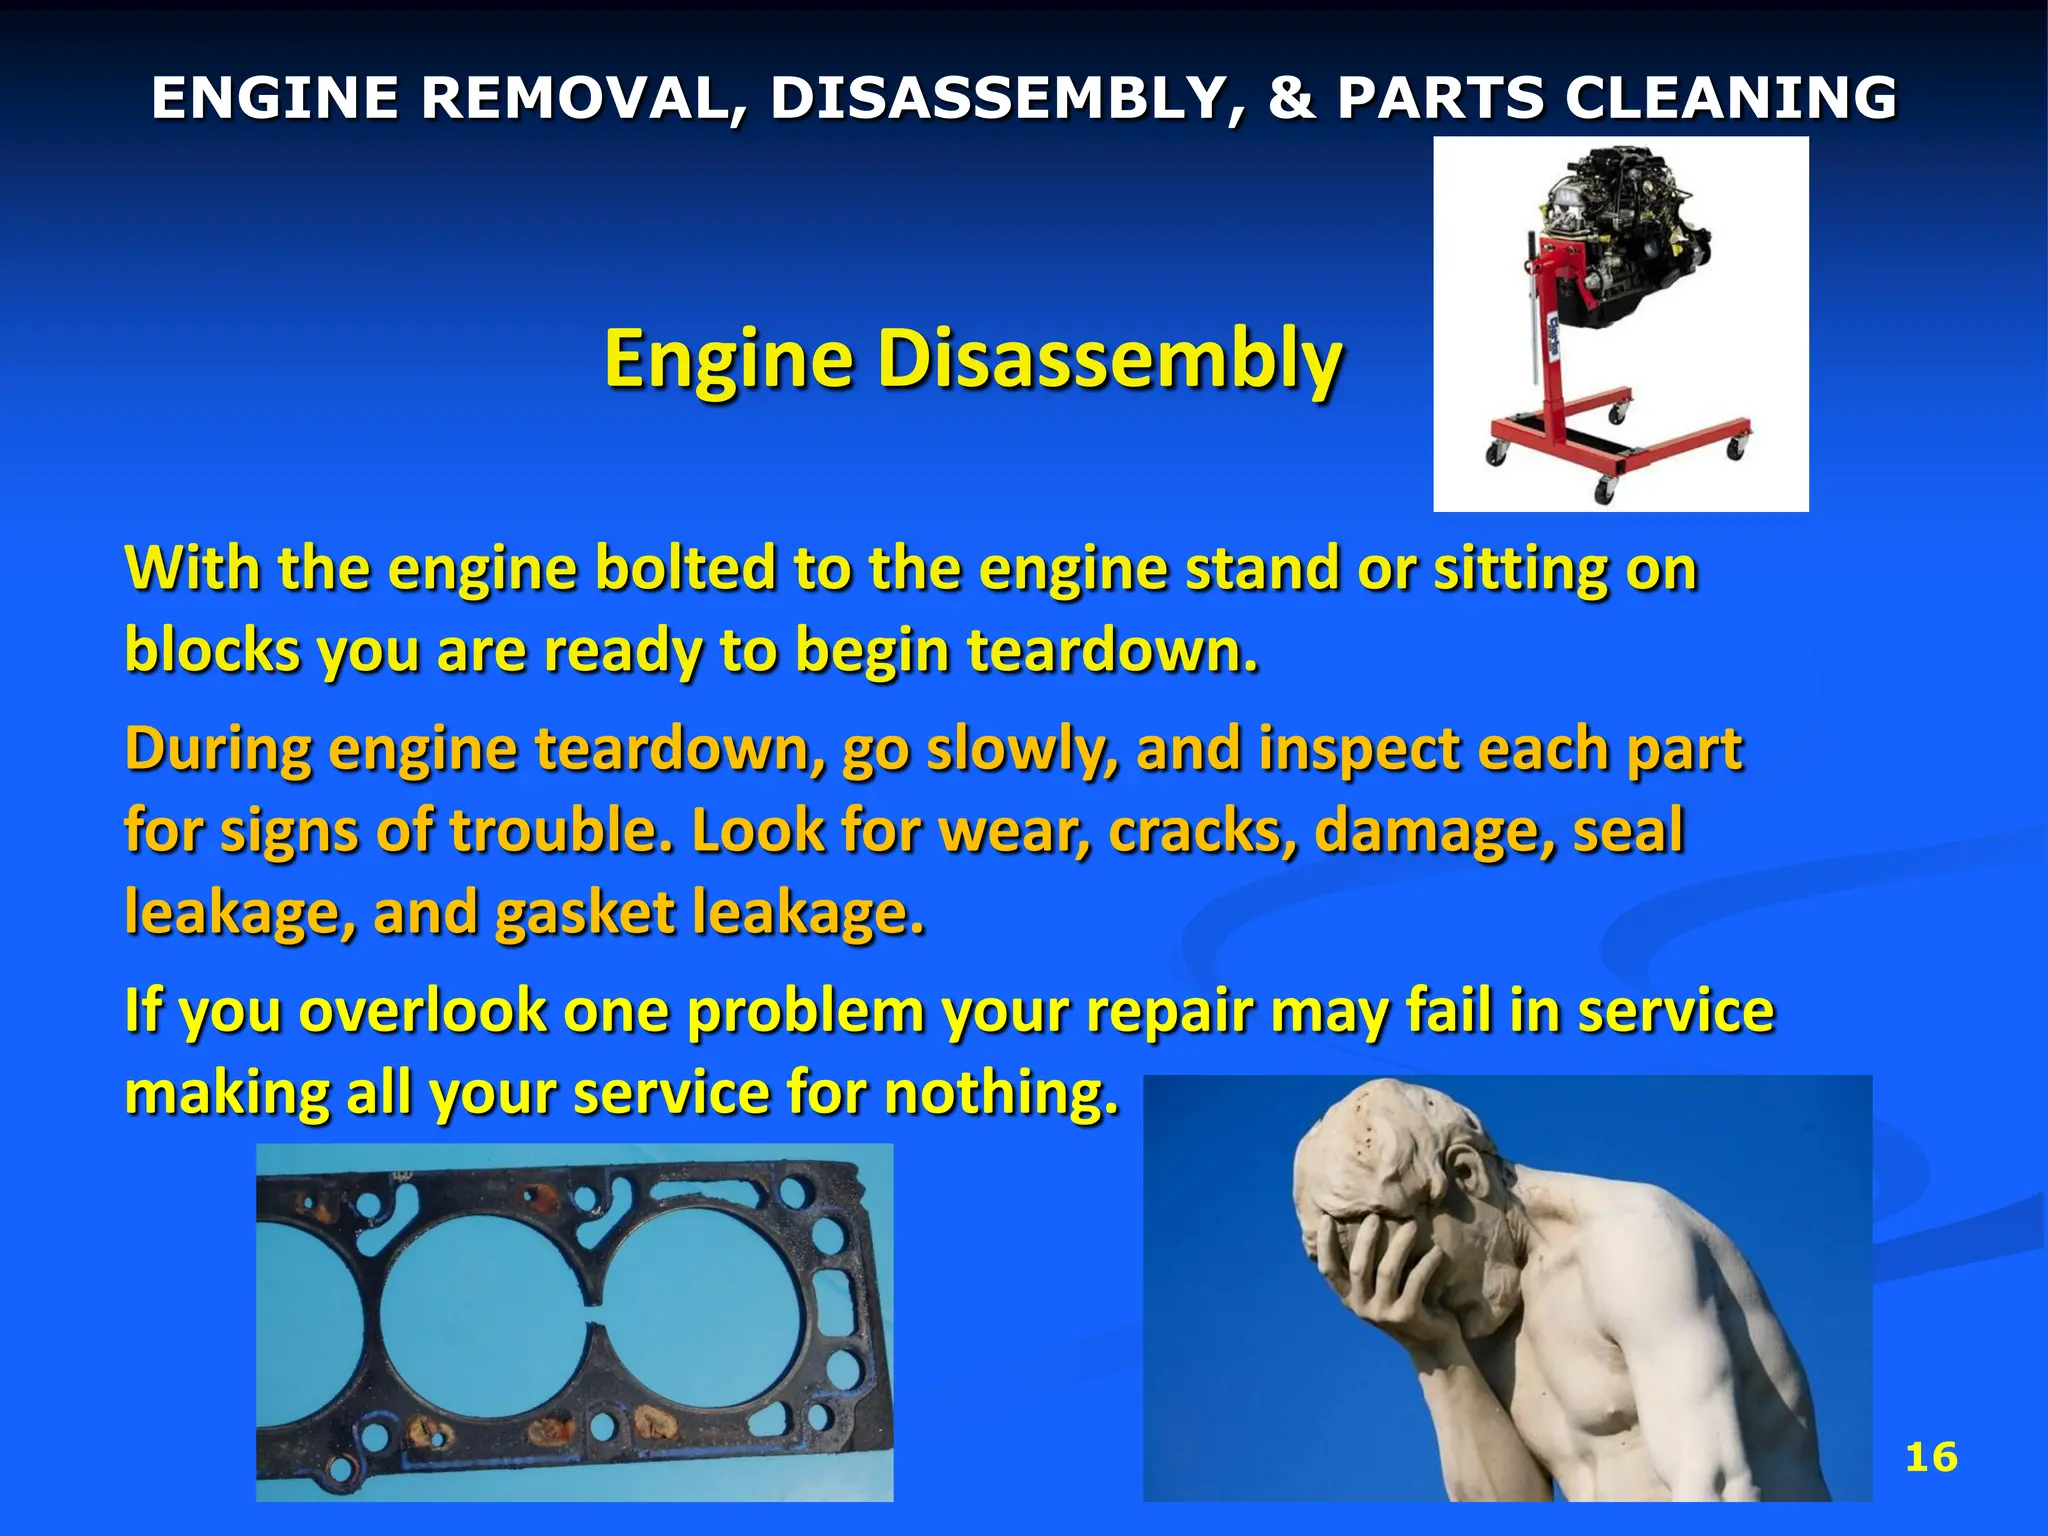
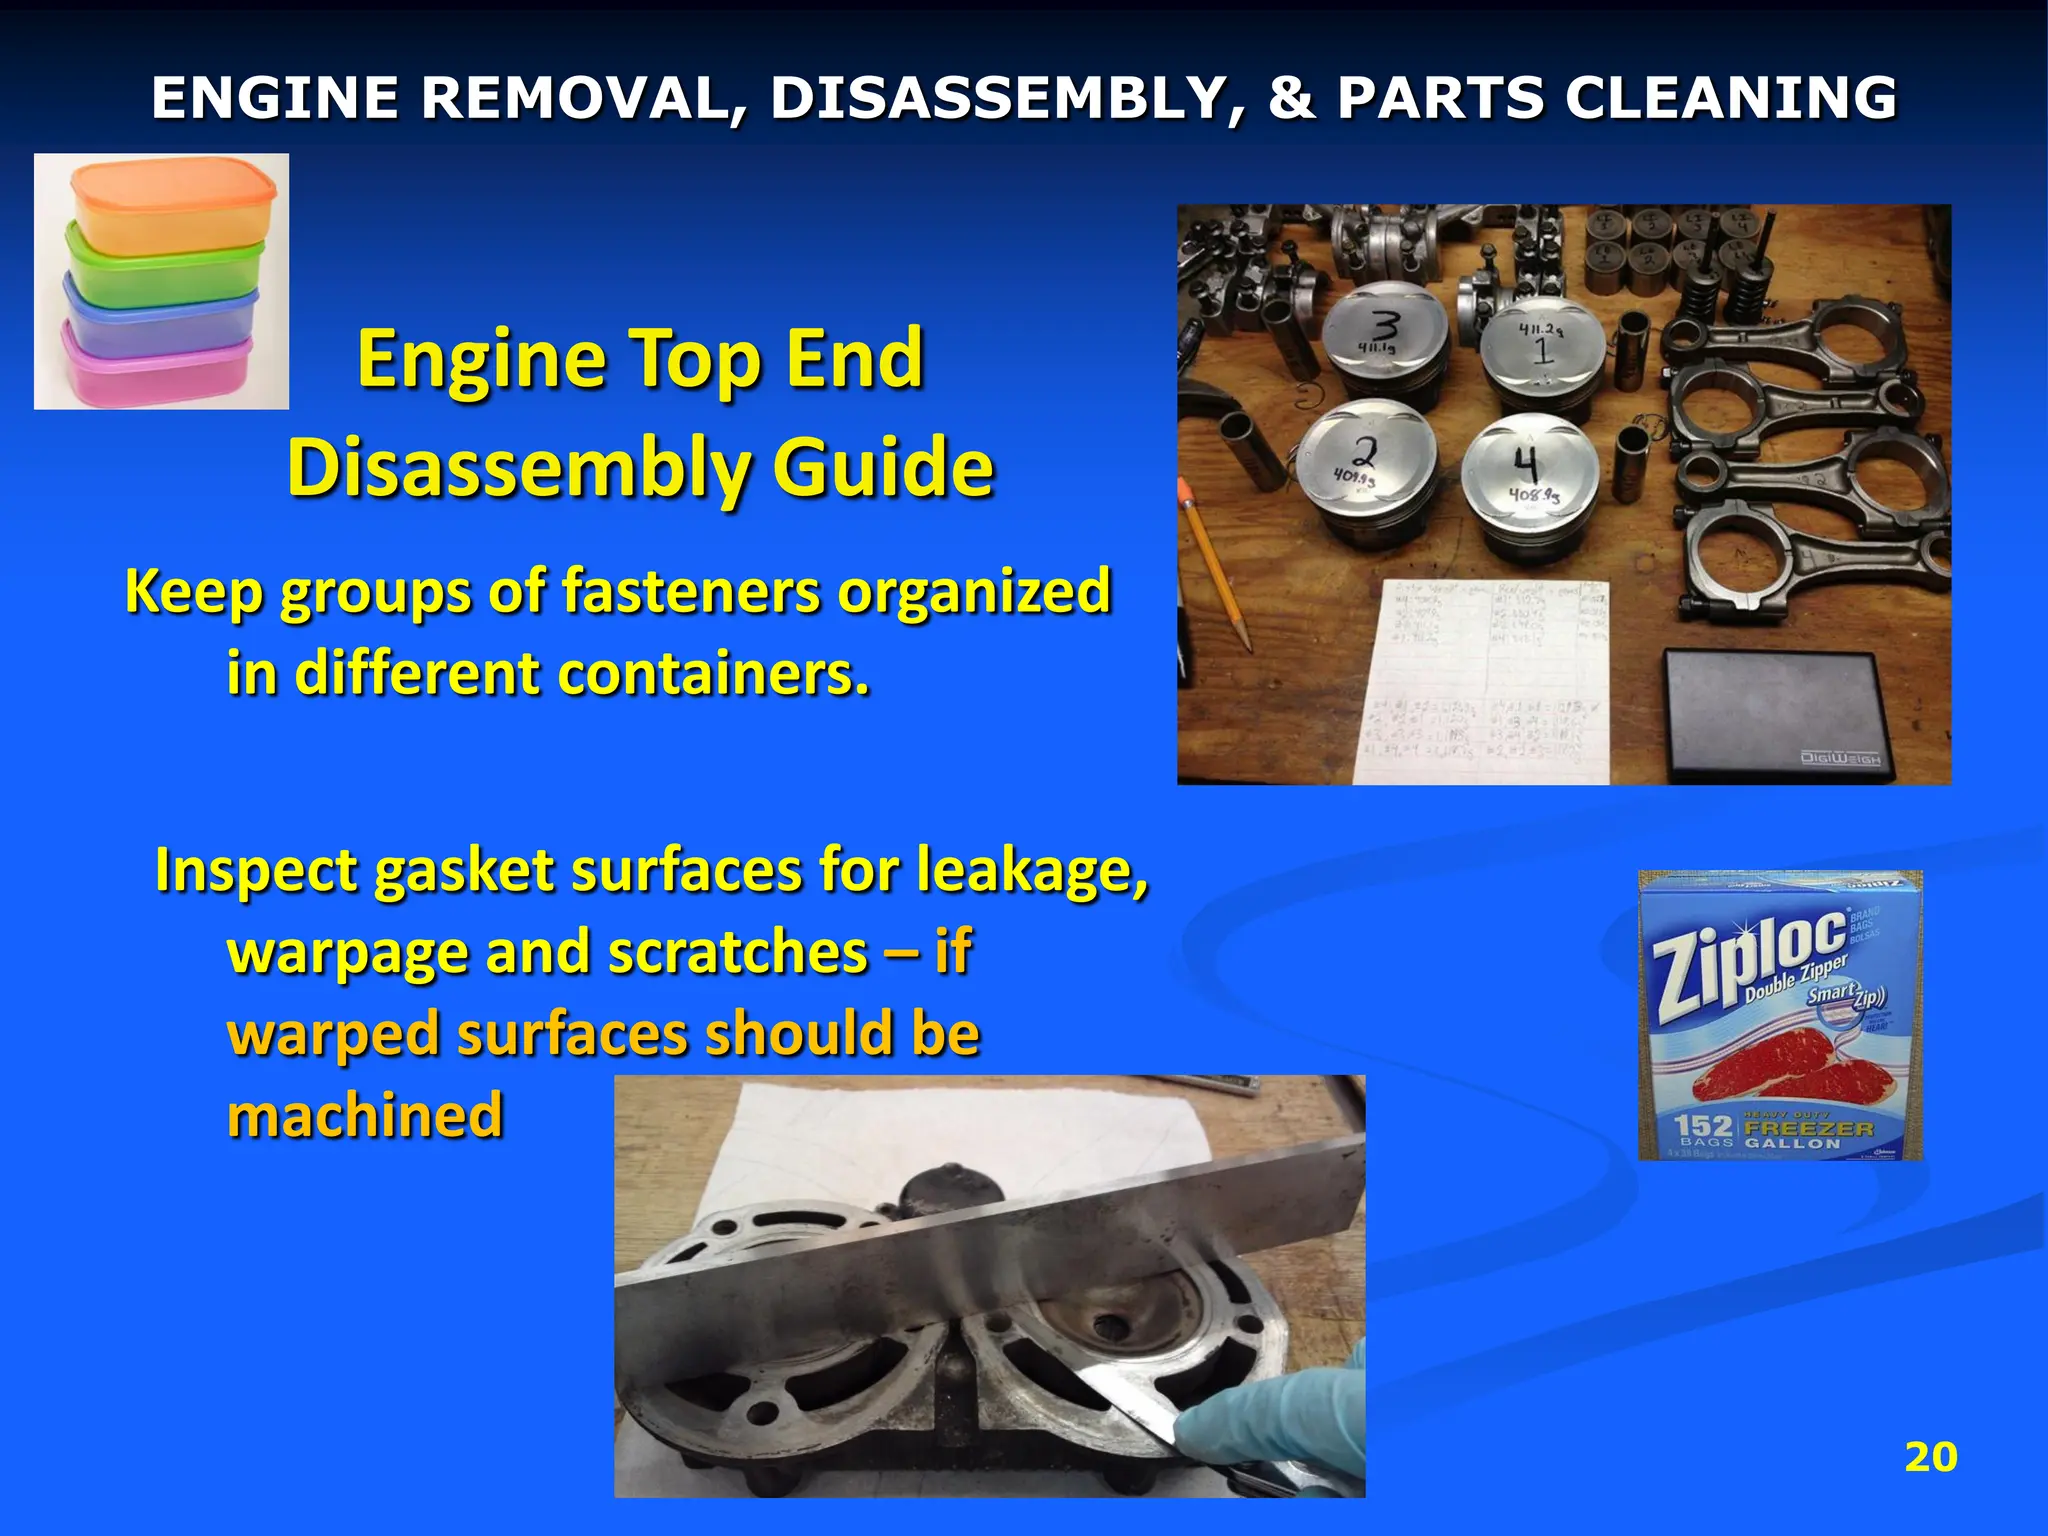
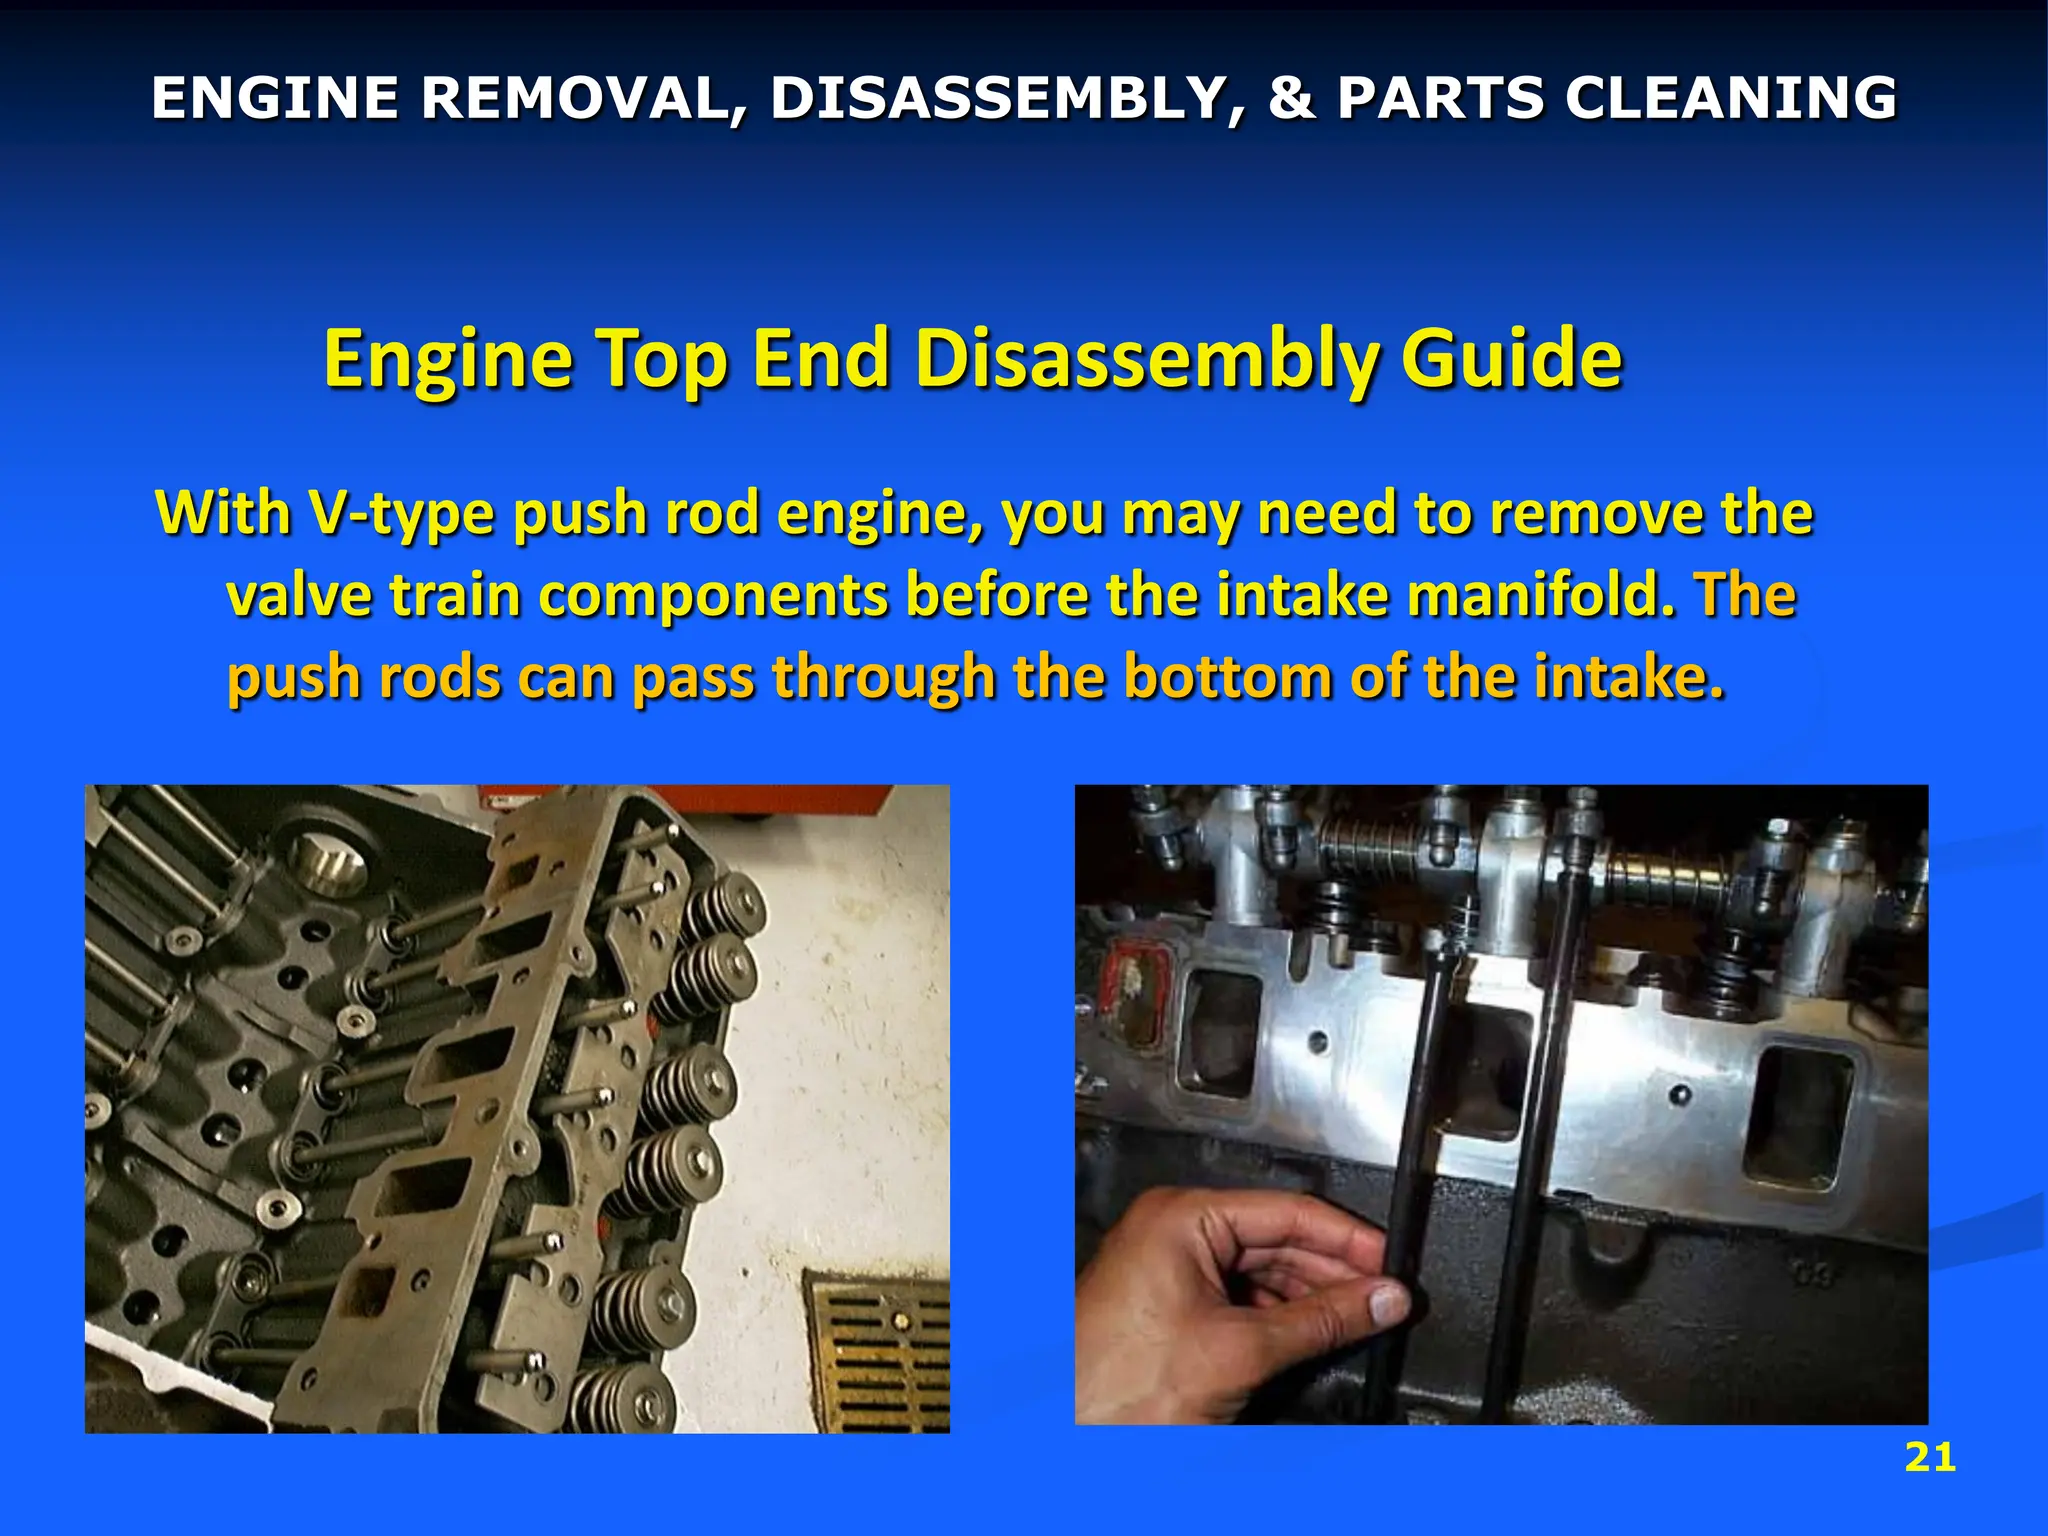
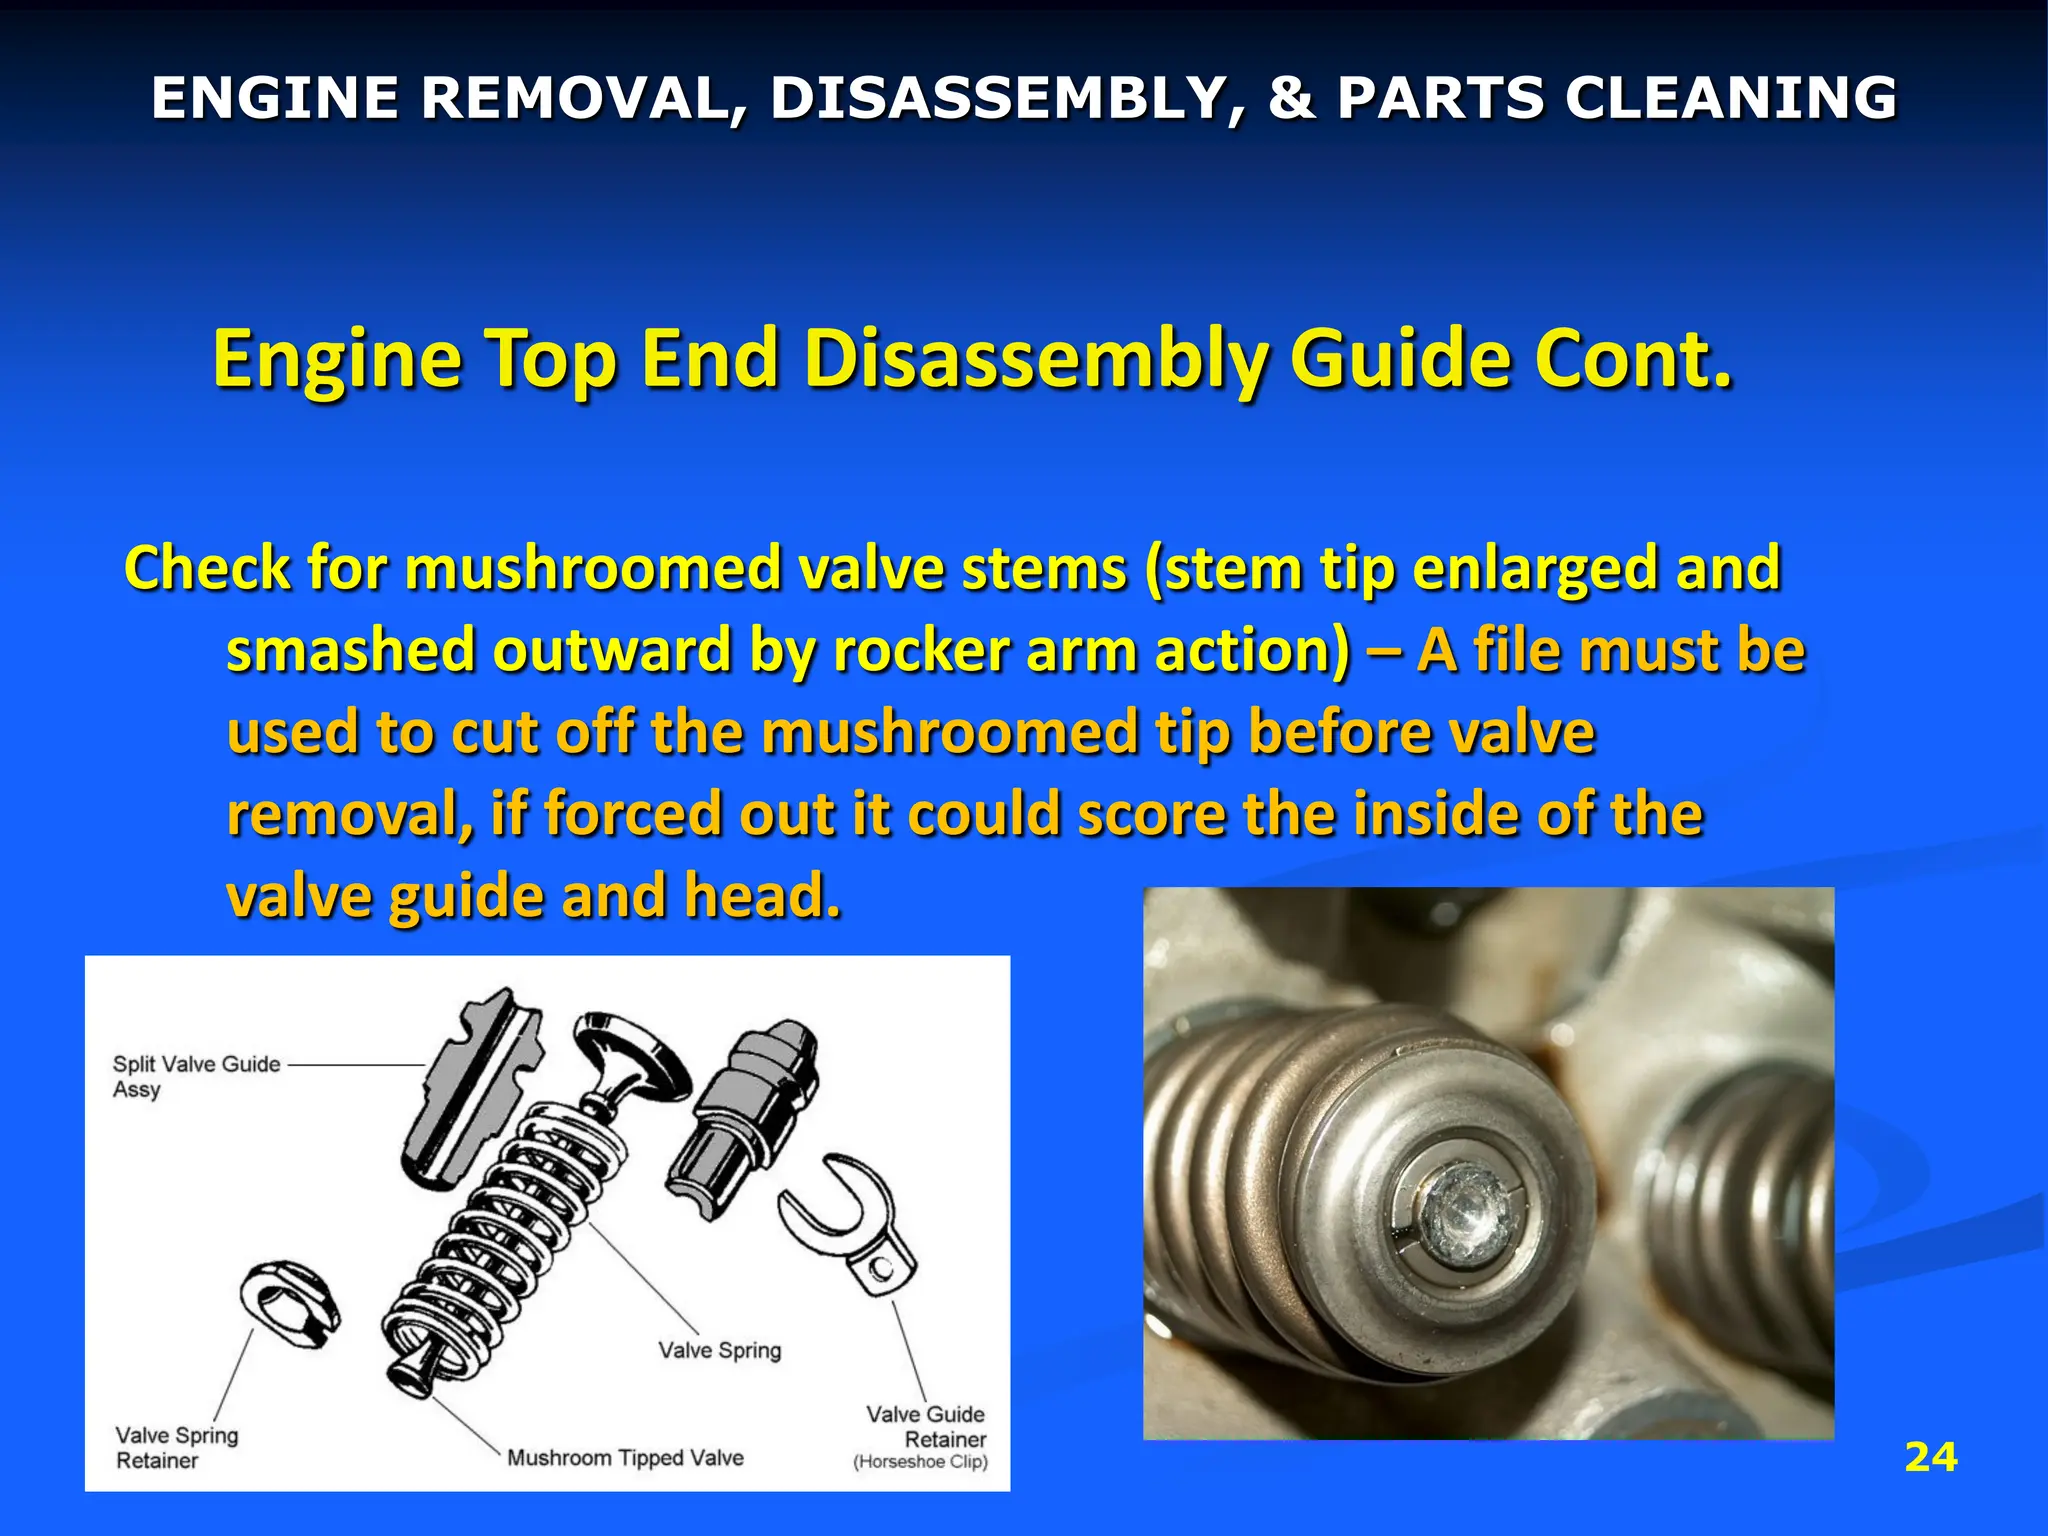
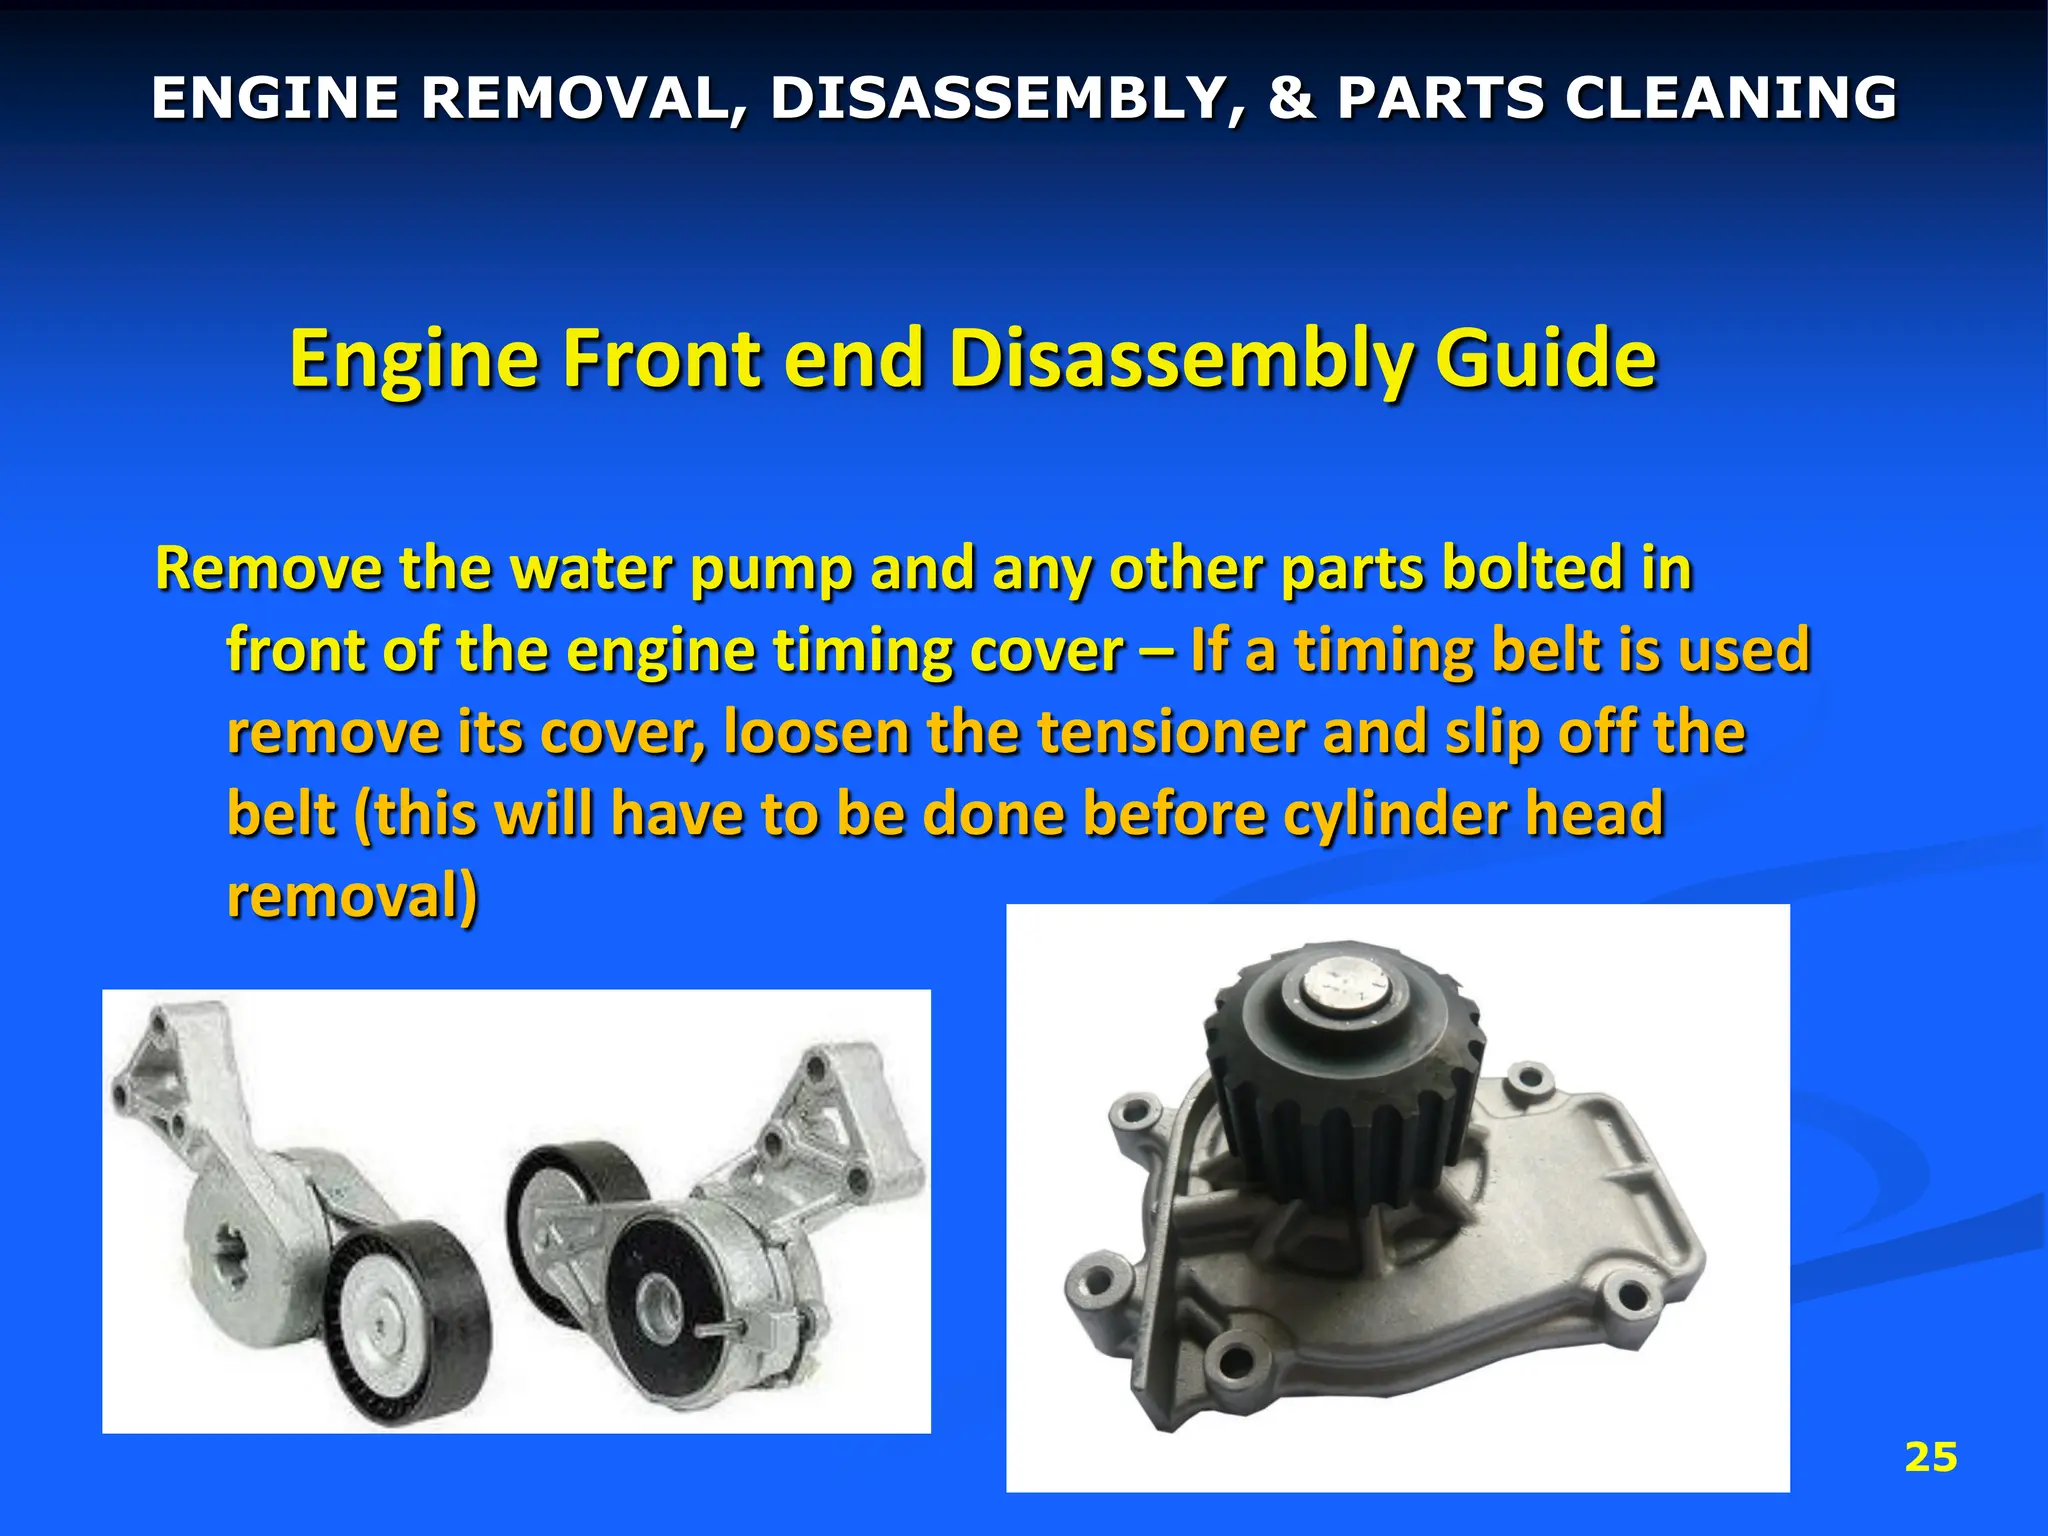
1
ENGINE REMOVAL, DISASSEMBLY, & PARTS CLEANING
CHAPTER 49 – MODERN AUTOMOTIVE
TECHNOLOGY
2
Engines are removed when the cylinder
block or crankshaft is badly damaged
When in doubt, always refer to a
manufacturer’s service manual.
ENGINE REMOVAL, DISASSEMBLY, & PARTS CLEANING
3
To prepare for engine removal, use the
following general steps and a shop manual.
1. Park the vehicle so there is plenty of work space on
both sides and in front of the engine compartment
2. Use fender covers to protect the paint.
3. Scribe the hood along the hinges to aid realignment,
then have someone help you remove the hood. Store
the hood in a safe place where it cannot be damaged
4. Disconnect the battery to prevent an electrical short
and fire. Remove the battery if it is in the way.
ENGINE REMOVAL, DISASSEMBLY, & PARTS CLEANING
4
5. Drain the engine oil and coolant
6. Unplug all electrical wires between the engine and
chassis. If needed, use masking tape to label or identify
the wires.
7. Remove all coolant and vacuum hoses that prevent
engine removal. Label vacuum hoses if necessary for
proper reconnection
8. Disconnect the throttle cable a the throttle body
9. When disconnecting fuel lines, be careful not to let fuel
spray out. Wrap a shop rag around the hose or fitting
during disconnection
ENGINE REMOVAL, DISASSEMBLY, & PARTS CLEANING
5
ENGINE REMOVAL, DISASSEMBLY, & PARTS CLEANING
6
10. Keep fasteners organized in several different
labeled containers.
10. Do not disconnect any power steering or air
conditioning lines unless absolutely necessary. Usually
they can be unbolted from the block and placed to the
side of the engine compartment
11. Remove the radiator, fan, and other accessory units in
front of the engine. Be careful not to hit or drop the
radiator. Only remove parts that hinder engine removal.
12. Remove any other part that prevents engine removal;
exhaust header pipe, automatic transmission flywheel
fasteners, and bell housing bolts.
ENGINE REMOVAL, DISASSEMBLY, & PARTS CLEANING
7
Before Engine removal, double check:
1. Behind and under the engine for hidden wires or ground
straps
2. That the bell housing bolts are out
3. To see that you have removed the torque converter
bolts
4. That all fuel lines are disconnected and plugged
5. That a floor jack or other piece of equipment is
supporting the transmission
6. That motor mounts are unbolted
ENGINE REMOVAL, DISASSEMBLY, & PARTS CLEANING
8
Transmission Removal
It is sometimes necessary to remove the engine and
transmission together. Some front-wheel-drive vehicles that
use a transaxle require that the two be removed as a unit.
Check the service manual for details.
You may want to drain the transmission if it is going to be
removed.
With rear-wheel-drive vehicles the drive shaft, transmission
and clutch linkages, speedometer cable, rear motor mount
and other parts must also be removed. With a transaxle,
the axle shafts must be disconnected / removed
ENGINE REMOVAL, DISASSEMBLY, & PARTS CLEANING
9
Installing a Lifting Fixture
Connect the lifting fixture or chain to the engine at the
recommended lifting points
If a chain is being used be sure to use large enough bolts
and washers to hold the weight and prevent the load from
slipping loose
Generally, position the fixture or chain so that it will raise
the engine in a level manner.
Use common sense and follow manufacture’s instructions
ENGINE REMOVAL, DISASSEMBLY, & PARTS CLEANING
10
Lifting the Engine
Attach the lifting device
Slowly raise the engine about an inch or two, then check
that everything is out of the way and disconnected
Continue raising the engine while pulling forward to
separate the engine from the transmission – Do not let the
engine bind or damage parts
Once clearance is sufficient roll the crane and engine away
from the vehicle
Some engine/transmission assemblies are removed from
under the vehicle rather than the top
ENGINE REMOVAL, DISASSEMBLY, & PARTS CLEANING
11
Lifting the Engine
ENGINE REMOVAL, DISASSEMBLY, & PARTS CLEANING
12
Warning
Never work on an engine
that is held by a crane or
hoist. The engine could
shift and fall, damaging
the engine or causing
serious injury!
ENGINE REMOVAL, DISASSEMBLY, & PARTS CLEANING
13
Warning
Never place any part
of your body under
an engine held in the
air. A heavy engine
can chop off finger,
cripple, or even kill
you if dropped!
ENGINE REMOVAL, DISASSEMBLY, & PARTS CLEANING
14
Lifting the Engine
Attach the lifting device
Slowly raise the engine about an inch or two, then check
that everything is out of the way and disconnected
Continue raising the engine while pulling forward to
separate the engine from the transmission – Do not let the
engine bind or damage parts
Once clearance is sufficient roll the crane and engine away
from the vehicle
ENGINE REMOVAL, DISASSEMBLY, & PARTS CLEANING
15
Lifting the Engine
Some engine/transmission assemblies are removed from
under the vehicle rather than the top
ENGINE REMOVAL, DISASSEMBLY, & PARTS CLEANING
16
Engine Disassembly
With the engine bolted to the engine stand or sitting on
blocks you are ready to begin teardown.
During engine teardown, go slowly, and inspect each part
for signs of trouble. Look for wear, cracks, damage, seal
leakage, and gasket leakage.
If you overlook one problem your repair may fail in service
making all your service for nothing.
ENGINE REMOVAL, DISASSEMBLY, & PARTS CLEANING
17
Engine Top End Disassembly Guide
Remove external engine parts (carburetor, fuel rail or
throttle body unit, spark plug wires and distributor).
Take off all parts that could be damaged or prevent the
removal of the cylinder head.
ENGINE REMOVAL, DISASSEMBLY, & PARTS CLEANING
18
Engine Top End Disassembly Guide
If you are not familiar with the engine take special note
about how everything fits together (take pictures!) –
Always align the timing marks on the chain, gears or
belt before removal.
ENGINE REMOVAL, DISASSEMBLY, & PARTS CLEANING
19
Engine Top End Disassembly Guide
Remove the valve covers, exhaust manifolds and intake
manifold - If light prying is needed be careful not to
damage the mating surfaces.
ENGINE REMOVAL, DISASSEMBLY, & PARTS CLEANING
20
Engine Top End
Disassembly Guide
Keep groups of fasteners organized
in different containers.
Inspect gasket surfaces for leakage,
warpage and scratches – if
warped surfaces should be
machined
ENGINE REMOVAL, DISASSEMBLY, & PARTS CLEANING
21
Engine Top End Disassembly Guide
With V-type push rod engine, you may need to remove the
valve train components before the intake manifold. The
push rods can pass through the bottom of the intake.
ENGINE REMOVAL, DISASSEMBLY, & PARTS CLEANING
22
Engine Top End Disassembly Guide
If the lifter, pushrods, and rocker arms are to be reused,
keep them in exact order. Use an organizing tray (tray or
board with holes in it for push rods and lifters) or label
these parts with masking tape – Wear patterns and
select-fit parts require that most components be
installed in their original location.
ENGINE REMOVAL, DISASSEMBLY, & PARTS CLEANING
23
Engine Top End Disassembly Guide Cont.
Use a Valve spring compressor to compress the valve
springs. This will allow you to lift off the keepers
As you remove the valve, valve springs, keepers & retainers,
keep them organized – it is best to return them to the
same location in the cylinder head.
ENGINE REMOVAL, DISASSEMBLY, & PARTS CLEANING
24
Engine Top End Disassembly Guide Cont.
Check for mushroomed valve stems (stem tip enlarged and
smashed outward by rocker arm action) – A file must be
used to cut off the mushroomed tip before valve
removal, if forced out it could score the inside of the
valve guide and head.
ENGINE REMOVAL, DISASSEMBLY, & PARTS CLEANING
25
Engine Front end Disassembly Guide
Remove the water pump and any other parts bolted in
front of the engine timing cover – If a timing belt is used
remove its cover, loosen the tensioner and slip off the
belt (this will have to be done before cylinder head
removal)
ENGINE REMOVAL, DISASSEMBLY, & PARTS CLEANING
26
Engine Front end Disassembly Guide
Do not attempt to rotate the crankshaft of an overhead cam
engine with the timing belt off (cylinder head still in
place) – The pistons could slide up and hit the valves.
ENGINE REMOVAL, DISASSEMBLY, & PARTS CLEANING
27
Engine Front End Disassembly Guide
A wheel puller is normally needed to remove the harmonic
balancer or damper – the balancer is usually press fit
onto the crankshaft.
ENGINE REMOVAL, DISASSEMBLY, & PARTS CLEANING
28
Engine Front End Disassembly Guide
Unbolt and remove the timing chain or gear cover. – If
prying is necessary, do is lightly while tapping with a
rubber hammer. Do not bend or scar mating surfaces.
Remove the oil slinger and timing mechanism – Usually the
timing gears or sprockets will slide off after light taps
with a brass hammer (if not use a puller).
ENGINE REMOVAL, DISASSEMBLY, & PARTS CLEANING
29
Engine Bottom End Disassembly Guide
After top and front end disassembly, you are ready to take
the bottom end apart. The bottom end typically
includes the pistons, rods, crankshaft, and related .
ENGINE REMOVAL, DISASSEMBLY, & PARTS CLEANING
30
Engine Bottom End Disassembly Guide
Inspect the cylinders for signs of excess wear – Use your
fingernail to feel for a lip or ridge at the top of the
cylinder wall.
A cylinder ridge or ring ridge may be formed at the top of
the cylinder walls, where ring friction does not wear the
cylinders – A ridge reaming tool is needed to cut out and
remove a ridge at the top of a worn cylinder. Removing
this ridge will prevent piston damage upon removal.
ENGINE REMOVAL, DISASSEMBLY, & PARTS CLEANING
31
Engine Bottom End Disassembly Guide
Ridge reamer
ENGINE REMOVAL, DISASSEMBLY, & PARTS CLEANING
32
Engine Bottom End Disassembly Guide
Use compressed air to blow metal shavings out of the
cylinder after ridge reaming – This will prevent cylinder
or piston scoring.
Unbolt and remove the oil pan and oil pump. Inspect the
bottom of the oil pan for debris – Metal chips and
plastic bits may help you diagnose and find engine
problems.
ENGINE REMOVAL, DISASSEMBLY, & PARTS CLEANING
33
Engine Bottom End Disassembly Guide
Unbolt on of the connecting rod caps, then use a wooden
hammer handle to tap the piston and rod out of the
cylinder.
ENGINE REMOVAL, DISASSEMBLY, & PARTS CLEANING
34
Engine Bottom End Disassembly Guide
As soon as the piston is out replace the rod cap and check
the piston head and connecting rod for identification
markings – The piston will usually have an arrow
pointing to the front of the engine. The connecting rod
and cap should have numbers matching them to the
proper cylinder
If needed mark the pistons with arrows and the
connecting rod and cap with appropriate markings –
Severe engine damage if these are installed wrong
ENGINE REMOVAL, DISASSEMBLY, & PARTS CLEANING
FRONT OF ENGINE
35
Engine Bottom End Disassembly Guide
Remove all of the oil rings from their pistons – Spiral the
rings off with your fingers or use a ring expander
ENGINE REMOVAL, DISASSEMBLY, & PARTS CLEANING
36
Engine Bottom End Disassembly Guide
If the vehicle has a manual transmission check for flywheel
warpage – Use a dial indicator setup, if out of
specification send to a machine shop for resurfacing.
ENGINE REMOVAL, DISASSEMBLY, & PARTS CLEANING
37
Engine Bottom End Disassembly Guide
Before removing the main bearing caps make sure they are
numbered – Normally numbers and arrows are cast on
each cap (the number 1 cap is at the front of the
engine).
ENGINE REMOVAL, DISASSEMBLY, & PARTS CLEANING
38
Engine Bottom End Disassembly Guide
If the main bearing caps are mixed up, the crank bore may
be misaligned and the crank can lock in the bore and
main bearings during reassembly
Unbolt the main caps – To remove them wiggle back and
forth while pulling, then lift the crankshaft carefully out
of the block (do not hit or nick the journals).
ENGINE REMOVAL, DISASSEMBLY, & PARTS CLEANING
39
Engine Bottom End Disassembly Guide
If the engine is old, pry out the block and head core or
freeze plugs – They rust out and will leak after
prolonged serviced, this must also be done if the engine
block is going to be boiled (cleaned in strong chemicals
at machine shop to remove mineral deposits in water
jackets).
ENGINE REMOVAL, DISASSEMBLY, & PARTS CLEANING
40
Engine Bottom End Disassembly Guide
If the cylinders have deep ridges, the block must be sent to
a machine shop for boring and hot tank cleaning – Make
sure all external hardware (motor mount brackets, oil
and coolant temperature sending units) are removed.
ENGINE REMOVAL, DISASSEMBLY, & PARTS CLEANING
41
Cleaning Engine Parts
After removal of all parts everything should be cleaned
– Different cleaning techniques are needed depending
upon part construction and type of material.
ENGINE REMOVAL, DISASSEMBLY, & PARTS CLEANING
42
Cleaning Engine Parts
Closer part inspections can be done after cleaning
– Problems can be hard to see when a part is covered
with oil, grease, or carbon deposits.
ENGINE REMOVAL, DISASSEMBLY, & PARTS CLEANING
43
Cleaning Engine Parts
Begin engine parts cleaning by scraping off all old gasket
material and hard deposits – Use a dull scrapers and
work carefully when cleaning soft aluminum parts (the
slightest nick could cause leakage when returned to
service.
ENGINE REMOVAL, DISASSEMBLY, & PARTS CLEANING
44
Cleaning Engine Parts
When using a gasket scraper, push the scraper away from
your body, not toward your body. A scraper can inflict
serious cuts
ENGINE REMOVAL, DISASSEMBLY, & PARTS CLEANING
45
Cleaning Engine Parts
Gasket remover is a chemical that dissolves old gasket
material and sealer to aid in part cleaning – If needed,
spray the remover over the material after scraping. Wait
a few minutes and then scrape the dissolved residue off
the part.
ENGINE REMOVAL, DISASSEMBLY, & PARTS CLEANING
46
Cleaning Engine Parts
There are several power cleaning tools – If used properly,
they can speed up and ease engine repairs.
A power brush is driven by an air or electric drill to remove
hard carbon. It is especially handy inside hard-to-reach
areas such as combustion chambers.
ENGINE REMOVAL, DISASSEMBLY, & PARTS CLEANING
47
Cleaning Engine Parts
A wire wheel on a bench grinder is another common
method of cleaning engine parts. – Frequently it is used
to clean carbon off valves (keep the safety shield and
tool rest in place)
ENGINE REMOVAL, DISASSEMBLY, & PARTS CLEANING
48
Cleaning Engine Parts
Scuff pads are hard plastic cleaning wheels that mount in a
drill for cleaning parts – They are better to use on
aluminum and plastic engine parts because they will not
erode metal as easy as a steel cleaning brush will.
ENGINE REMOVAL, DISASSEMBLY, & PARTS CLEANING
49
Cleaning Solvent
After cleaning off the gaskets, use cleaning solvent to
remove hard to reach deposits – Cold soak tanks
(solvent tanks) are cleaning machines for removing oil
and grease from parts. (will not remove hard carbon or
mineral deposits)
ENGINE REMOVAL, DISASSEMBLY, & PARTS CLEANING
50
WARNING
Never use gasoline to clean parts. The slightest spark or
flame could ignite the fumes, causing a deadly fire!
ENGINE REMOVAL, DISASSEMBLY, & PARTS CLEANING
51
Cleaning Solvent
Hot tanks are large cleaning machine filled with strong,
corrosive chemical. – Will remove mineral deposits in
the water jackets, hard carbon deposits, oil , grease, and
even paint. Automotive machine shops normally have a
hot tank.
CAUTION
Aluminum components can be corroded or etched by
soaking in a hot tank
ENGINE REMOVAL, DISASSEMBLY, & PARTS CLEANING
52
Special Cleaning tools
A ring groove cleaner is used to scrape carbon from inside
piston ring grooves. – Common tool used during piston
service, the groove cleaner is rotated around the piston.
A scraper bit the same size as the groove removes the
carbon.
ENGINE REMOVAL, DISASSEMBLY, & PARTS CLEANING
53
Special Cleaning tools
A valve guide cleaner is inserted into each valve guide. An
electric or air drill spins the tool to remove deposits.
ENGINE REMOVAL, DISASSEMBLY, & PARTS CLEANING
54
Special Cleaning tools
An air blow gun is normally the last method of cleaning
parts. It uses pressure from the shop’s air compressor to
blow off small bits of dirt, solvent, water and other
debris.
When using an air blow gun, direct the blast of air into all
pockets and holes in parts. This will prepare the parts
for reassembly.
Warning
Use extreme care when using an air gun. Wear goggles and
avoid aiming the gun at your body. If air bubbles enter
your bloodstream, the result could be DEATH
ENGINE REMOVAL, DISASSEMBLY, & PARTS CLEANING
55
ENGINE MECHANICAL PROBLEMS - REVIEW
What are some proper, appropriate methods of disassembling an
engine?
Note the lengths and organize bolts in containers
Inspect gasket mating surfaces
Keep critical parts organized so they can be installed in
the same location
56
ENGINE MECHANICAL PROBLEMS - REVIEW
Are air conditioning line to be removed from an engine? Why or
why not?
No, not unless they have been evacuated, there are toxic
chemicals (freon) in the lines.
57
ENGINE MECHANICAL PROBLEMS - REVIEW
When servicing a vehicle with a manual transmission, the
______________ should be checked for warpage (runout)
Flywheel
58
ENGINE MECHANICAL PROBLEMS - REVIEW
Are power steering hoses usually disconnected during engine
removal?
No, the are removed from the engine and placed aside
out of the way. (not opening the system)
59
ENGINE MECHANICAL PROBLEMS - REVIEW
Is it required to always remove the engine to remove the oil pan
from it?
No, some oil pans can be removed from the engine
without removing the engine from the vehicle.
60
ENGINE MECHANICAL PROBLEMS - REVIEW
What do you have to do to the battery before removing anything
from the engine compartment?
Disconnect it, remove it if needed.
61
ENGINE MECHANICAL PROBLEMS - REVIEW
Is it always necessary to remove the engine from the vehicle to
replace piston rings?
No, some piston rings can be changed with the engine
still in the vehicle.
62
ENGINE MECHANICAL PROBLEMS - REVIEW
When removing a manual transmission with an engine what must
you disconnect from the transmission?
Shifter linkages
63
ENGINE MECHANICAL PROBLEMS - REVIEW
All fuel lines must be disconnected and plugged when removing an
engine from a vehicle.
True False
64
ENGINE MECHANICAL PROBLEMS - REVIEW
Ground straps must not be disconnect when removing an engine
from a vehicle
True False
Ground straps must be disconnected from the engine before
removal
65
ENGINE MECHANICAL PROBLEMS - REVIEW
How do you remove a valve with a “mushroomed tip” on it from
the head of an engine?
File off the “mushroomed tip” and then carefully take out
the valve.
66
ENGINE MECHANICAL PROBLEMS - REVIEW
How do you remove a harmonic balancer from a crankshaft?
Using a wheel puller
67
ENGINE MECHANICAL PROBLEMS - REVIEW
Is a “ring ridge” removed before or after piston removal?
Before, so the piston can come out easily
68
ENGINE MECHANICAL PROBLEMS - REVIEW
What is the tool called used to remove a “ring ridge”?
Ridge reamer
69
ENGINE MECHANICAL PROBLEMS - REVIEW
A hot tank is the best way to clean an aluminum head from an
engine.
True False
Hot tanks will corrode or etch aluminum
70
ENGINE MECHANICAL PROBLEMS - REVIEW
The number one main bearing cap is located at the transmission
end (back) of the engine.
True False
It is located at the front (timing end) of the engine
71
ENGINE MECHANICAL PROBLEMS - REVIEW
What will a cold soak tank NOT remove from parts?
Hard carbon
Mineral deposits
72
ENGINE MECHANICAL PROBLEMS - REVIEW
Repairs to the cylinder head and valve train normally require
engine removal.
True False
Most cylinder heads can be removed for service without engine
removal.
73
ENGINE MECHANICAL PROBLEMS - REVIEW
A wire wheel is commonly used to clean carbon from valves.
True False
74
ENGINE MECHANICAL PROBLEMS - REVIEW
The radiator and fan are normally removed during engine removal.
True False
75
ENGINE MECHANICAL PROBLEMS - REVIEW
All engines are removed from above.
True False
Some engines need to be removed from under the vehicle
76
ENGINE MECHANICAL PROBLEMS - REVIEW
List at least 3 check to do right after lifting an engine a couple
inches out of its chassis.
Hiding wires or ground straps
Bell housing bolts are removed
Torque converter bolts removed (automatic trans.)
Fuel lines are disconnected and plugged
Transmission is supported
Motor mounts are unbolted
77
ENGINE MECHANICAL PROBLEMS - REVIEW
Why should you support the transmission after engine removal?
Damage to the rear rubber mount or drive shaft could
occur
78
ENGINE MECHANICAL PROBLEMS - REVIEW
When using a chain to lift an engine from a vehicle and using a
bolt, nut and washer to support the chain, what do you need to be
careful of?
The bolt, nut and washer combination used is large
enough to not slip through the chain when tension from
the engine’s weight is applied to it.
79
ENGINE MECHANICAL PROBLEMS - REVIEW
Are you ready for a Test???
If YES…..GREAT!
If NO…..Start studying!
Remember to write out notes by hand.

Disassemble Engine Parts and repair steps.pdf

  • 1.
    1 ENGINE REMOVAL, DISASSEMBLY,& PARTS CLEANING CHAPTER 49 – MODERN AUTOMOTIVE TECHNOLOGY
  • 2.
    2 Engines are removedwhen the cylinder block or crankshaft is badly damaged When in doubt, always refer to a manufacturer’s service manual. ENGINE REMOVAL, DISASSEMBLY, & PARTS CLEANING
  • 3.
    3 To prepare forengine removal, use the following general steps and a shop manual. 1. Park the vehicle so there is plenty of work space on both sides and in front of the engine compartment 2. Use fender covers to protect the paint. 3. Scribe the hood along the hinges to aid realignment, then have someone help you remove the hood. Store the hood in a safe place where it cannot be damaged 4. Disconnect the battery to prevent an electrical short and fire. Remove the battery if it is in the way. ENGINE REMOVAL, DISASSEMBLY, & PARTS CLEANING
  • 4.
    4 5. Drain theengine oil and coolant 6. Unplug all electrical wires between the engine and chassis. If needed, use masking tape to label or identify the wires. 7. Remove all coolant and vacuum hoses that prevent engine removal. Label vacuum hoses if necessary for proper reconnection 8. Disconnect the throttle cable a the throttle body 9. When disconnecting fuel lines, be careful not to let fuel spray out. Wrap a shop rag around the hose or fitting during disconnection ENGINE REMOVAL, DISASSEMBLY, & PARTS CLEANING
  • 5.
  • 6.
    6 10. Keep fastenersorganized in several different labeled containers. 10. Do not disconnect any power steering or air conditioning lines unless absolutely necessary. Usually they can be unbolted from the block and placed to the side of the engine compartment 11. Remove the radiator, fan, and other accessory units in front of the engine. Be careful not to hit or drop the radiator. Only remove parts that hinder engine removal. 12. Remove any other part that prevents engine removal; exhaust header pipe, automatic transmission flywheel fasteners, and bell housing bolts. ENGINE REMOVAL, DISASSEMBLY, & PARTS CLEANING
  • 7.
    7 Before Engine removal,double check: 1. Behind and under the engine for hidden wires or ground straps 2. That the bell housing bolts are out 3. To see that you have removed the torque converter bolts 4. That all fuel lines are disconnected and plugged 5. That a floor jack or other piece of equipment is supporting the transmission 6. That motor mounts are unbolted ENGINE REMOVAL, DISASSEMBLY, & PARTS CLEANING
  • 8.
    8 Transmission Removal It issometimes necessary to remove the engine and transmission together. Some front-wheel-drive vehicles that use a transaxle require that the two be removed as a unit. Check the service manual for details. You may want to drain the transmission if it is going to be removed. With rear-wheel-drive vehicles the drive shaft, transmission and clutch linkages, speedometer cable, rear motor mount and other parts must also be removed. With a transaxle, the axle shafts must be disconnected / removed ENGINE REMOVAL, DISASSEMBLY, & PARTS CLEANING
  • 9.
    9 Installing a LiftingFixture Connect the lifting fixture or chain to the engine at the recommended lifting points If a chain is being used be sure to use large enough bolts and washers to hold the weight and prevent the load from slipping loose Generally, position the fixture or chain so that it will raise the engine in a level manner. Use common sense and follow manufacture’s instructions ENGINE REMOVAL, DISASSEMBLY, & PARTS CLEANING
  • 10.
    10 Lifting the Engine Attachthe lifting device Slowly raise the engine about an inch or two, then check that everything is out of the way and disconnected Continue raising the engine while pulling forward to separate the engine from the transmission – Do not let the engine bind or damage parts Once clearance is sufficient roll the crane and engine away from the vehicle Some engine/transmission assemblies are removed from under the vehicle rather than the top ENGINE REMOVAL, DISASSEMBLY, & PARTS CLEANING
  • 11.
    11 Lifting the Engine ENGINEREMOVAL, DISASSEMBLY, & PARTS CLEANING
  • 12.
    12 Warning Never work onan engine that is held by a crane or hoist. The engine could shift and fall, damaging the engine or causing serious injury! ENGINE REMOVAL, DISASSEMBLY, & PARTS CLEANING
  • 13.
    13 Warning Never place anypart of your body under an engine held in the air. A heavy engine can chop off finger, cripple, or even kill you if dropped! ENGINE REMOVAL, DISASSEMBLY, & PARTS CLEANING
  • 14.
    14 Lifting the Engine Attachthe lifting device Slowly raise the engine about an inch or two, then check that everything is out of the way and disconnected Continue raising the engine while pulling forward to separate the engine from the transmission – Do not let the engine bind or damage parts Once clearance is sufficient roll the crane and engine away from the vehicle ENGINE REMOVAL, DISASSEMBLY, & PARTS CLEANING
  • 15.
    15 Lifting the Engine Someengine/transmission assemblies are removed from under the vehicle rather than the top ENGINE REMOVAL, DISASSEMBLY, & PARTS CLEANING
  • 16.
    16 Engine Disassembly With theengine bolted to the engine stand or sitting on blocks you are ready to begin teardown. During engine teardown, go slowly, and inspect each part for signs of trouble. Look for wear, cracks, damage, seal leakage, and gasket leakage. If you overlook one problem your repair may fail in service making all your service for nothing. ENGINE REMOVAL, DISASSEMBLY, & PARTS CLEANING
  • 17.
    17 Engine Top EndDisassembly Guide Remove external engine parts (carburetor, fuel rail or throttle body unit, spark plug wires and distributor). Take off all parts that could be damaged or prevent the removal of the cylinder head. ENGINE REMOVAL, DISASSEMBLY, & PARTS CLEANING
  • 18.
    18 Engine Top EndDisassembly Guide If you are not familiar with the engine take special note about how everything fits together (take pictures!) – Always align the timing marks on the chain, gears or belt before removal. ENGINE REMOVAL, DISASSEMBLY, & PARTS CLEANING
  • 19.
    19 Engine Top EndDisassembly Guide Remove the valve covers, exhaust manifolds and intake manifold - If light prying is needed be careful not to damage the mating surfaces. ENGINE REMOVAL, DISASSEMBLY, & PARTS CLEANING
  • 20.
    20 Engine Top End DisassemblyGuide Keep groups of fasteners organized in different containers. Inspect gasket surfaces for leakage, warpage and scratches – if warped surfaces should be machined ENGINE REMOVAL, DISASSEMBLY, & PARTS CLEANING
  • 21.
    21 Engine Top EndDisassembly Guide With V-type push rod engine, you may need to remove the valve train components before the intake manifold. The push rods can pass through the bottom of the intake. ENGINE REMOVAL, DISASSEMBLY, & PARTS CLEANING
  • 22.
    22 Engine Top EndDisassembly Guide If the lifter, pushrods, and rocker arms are to be reused, keep them in exact order. Use an organizing tray (tray or board with holes in it for push rods and lifters) or label these parts with masking tape – Wear patterns and select-fit parts require that most components be installed in their original location. ENGINE REMOVAL, DISASSEMBLY, & PARTS CLEANING
  • 23.
    23 Engine Top EndDisassembly Guide Cont. Use a Valve spring compressor to compress the valve springs. This will allow you to lift off the keepers As you remove the valve, valve springs, keepers & retainers, keep them organized – it is best to return them to the same location in the cylinder head. ENGINE REMOVAL, DISASSEMBLY, & PARTS CLEANING
  • 24.
    24 Engine Top EndDisassembly Guide Cont. Check for mushroomed valve stems (stem tip enlarged and smashed outward by rocker arm action) – A file must be used to cut off the mushroomed tip before valve removal, if forced out it could score the inside of the valve guide and head. ENGINE REMOVAL, DISASSEMBLY, & PARTS CLEANING
  • 25.
    25 Engine Front endDisassembly Guide Remove the water pump and any other parts bolted in front of the engine timing cover – If a timing belt is used remove its cover, loosen the tensioner and slip off the belt (this will have to be done before cylinder head removal) ENGINE REMOVAL, DISASSEMBLY, & PARTS CLEANING
  • 26.
    26 Engine Front endDisassembly Guide Do not attempt to rotate the crankshaft of an overhead cam engine with the timing belt off (cylinder head still in place) – The pistons could slide up and hit the valves. ENGINE REMOVAL, DISASSEMBLY, & PARTS CLEANING
  • 27.
    27 Engine Front EndDisassembly Guide A wheel puller is normally needed to remove the harmonic balancer or damper – the balancer is usually press fit onto the crankshaft. ENGINE REMOVAL, DISASSEMBLY, & PARTS CLEANING
  • 28.
    28 Engine Front EndDisassembly Guide Unbolt and remove the timing chain or gear cover. – If prying is necessary, do is lightly while tapping with a rubber hammer. Do not bend or scar mating surfaces. Remove the oil slinger and timing mechanism – Usually the timing gears or sprockets will slide off after light taps with a brass hammer (if not use a puller). ENGINE REMOVAL, DISASSEMBLY, & PARTS CLEANING
  • 29.
    29 Engine Bottom EndDisassembly Guide After top and front end disassembly, you are ready to take the bottom end apart. The bottom end typically includes the pistons, rods, crankshaft, and related . ENGINE REMOVAL, DISASSEMBLY, & PARTS CLEANING
  • 30.
    30 Engine Bottom EndDisassembly Guide Inspect the cylinders for signs of excess wear – Use your fingernail to feel for a lip or ridge at the top of the cylinder wall. A cylinder ridge or ring ridge may be formed at the top of the cylinder walls, where ring friction does not wear the cylinders – A ridge reaming tool is needed to cut out and remove a ridge at the top of a worn cylinder. Removing this ridge will prevent piston damage upon removal. ENGINE REMOVAL, DISASSEMBLY, & PARTS CLEANING
  • 31.
    31 Engine Bottom EndDisassembly Guide Ridge reamer ENGINE REMOVAL, DISASSEMBLY, & PARTS CLEANING
  • 32.
    32 Engine Bottom EndDisassembly Guide Use compressed air to blow metal shavings out of the cylinder after ridge reaming – This will prevent cylinder or piston scoring. Unbolt and remove the oil pan and oil pump. Inspect the bottom of the oil pan for debris – Metal chips and plastic bits may help you diagnose and find engine problems. ENGINE REMOVAL, DISASSEMBLY, & PARTS CLEANING
  • 33.
    33 Engine Bottom EndDisassembly Guide Unbolt on of the connecting rod caps, then use a wooden hammer handle to tap the piston and rod out of the cylinder. ENGINE REMOVAL, DISASSEMBLY, & PARTS CLEANING
  • 34.
    34 Engine Bottom EndDisassembly Guide As soon as the piston is out replace the rod cap and check the piston head and connecting rod for identification markings – The piston will usually have an arrow pointing to the front of the engine. The connecting rod and cap should have numbers matching them to the proper cylinder If needed mark the pistons with arrows and the connecting rod and cap with appropriate markings – Severe engine damage if these are installed wrong ENGINE REMOVAL, DISASSEMBLY, & PARTS CLEANING FRONT OF ENGINE
  • 35.
    35 Engine Bottom EndDisassembly Guide Remove all of the oil rings from their pistons – Spiral the rings off with your fingers or use a ring expander ENGINE REMOVAL, DISASSEMBLY, & PARTS CLEANING
  • 36.
    36 Engine Bottom EndDisassembly Guide If the vehicle has a manual transmission check for flywheel warpage – Use a dial indicator setup, if out of specification send to a machine shop for resurfacing. ENGINE REMOVAL, DISASSEMBLY, & PARTS CLEANING
  • 37.
    37 Engine Bottom EndDisassembly Guide Before removing the main bearing caps make sure they are numbered – Normally numbers and arrows are cast on each cap (the number 1 cap is at the front of the engine). ENGINE REMOVAL, DISASSEMBLY, & PARTS CLEANING
  • 38.
    38 Engine Bottom EndDisassembly Guide If the main bearing caps are mixed up, the crank bore may be misaligned and the crank can lock in the bore and main bearings during reassembly Unbolt the main caps – To remove them wiggle back and forth while pulling, then lift the crankshaft carefully out of the block (do not hit or nick the journals). ENGINE REMOVAL, DISASSEMBLY, & PARTS CLEANING
  • 39.
    39 Engine Bottom EndDisassembly Guide If the engine is old, pry out the block and head core or freeze plugs – They rust out and will leak after prolonged serviced, this must also be done if the engine block is going to be boiled (cleaned in strong chemicals at machine shop to remove mineral deposits in water jackets). ENGINE REMOVAL, DISASSEMBLY, & PARTS CLEANING
  • 40.
    40 Engine Bottom EndDisassembly Guide If the cylinders have deep ridges, the block must be sent to a machine shop for boring and hot tank cleaning – Make sure all external hardware (motor mount brackets, oil and coolant temperature sending units) are removed. ENGINE REMOVAL, DISASSEMBLY, & PARTS CLEANING
  • 41.
    41 Cleaning Engine Parts Afterremoval of all parts everything should be cleaned – Different cleaning techniques are needed depending upon part construction and type of material. ENGINE REMOVAL, DISASSEMBLY, & PARTS CLEANING
  • 42.
    42 Cleaning Engine Parts Closerpart inspections can be done after cleaning – Problems can be hard to see when a part is covered with oil, grease, or carbon deposits. ENGINE REMOVAL, DISASSEMBLY, & PARTS CLEANING
  • 43.
    43 Cleaning Engine Parts Beginengine parts cleaning by scraping off all old gasket material and hard deposits – Use a dull scrapers and work carefully when cleaning soft aluminum parts (the slightest nick could cause leakage when returned to service. ENGINE REMOVAL, DISASSEMBLY, & PARTS CLEANING
  • 44.
    44 Cleaning Engine Parts Whenusing a gasket scraper, push the scraper away from your body, not toward your body. A scraper can inflict serious cuts ENGINE REMOVAL, DISASSEMBLY, & PARTS CLEANING
  • 45.
    45 Cleaning Engine Parts Gasketremover is a chemical that dissolves old gasket material and sealer to aid in part cleaning – If needed, spray the remover over the material after scraping. Wait a few minutes and then scrape the dissolved residue off the part. ENGINE REMOVAL, DISASSEMBLY, & PARTS CLEANING
  • 46.
    46 Cleaning Engine Parts Thereare several power cleaning tools – If used properly, they can speed up and ease engine repairs. A power brush is driven by an air or electric drill to remove hard carbon. It is especially handy inside hard-to-reach areas such as combustion chambers. ENGINE REMOVAL, DISASSEMBLY, & PARTS CLEANING
  • 47.
    47 Cleaning Engine Parts Awire wheel on a bench grinder is another common method of cleaning engine parts. – Frequently it is used to clean carbon off valves (keep the safety shield and tool rest in place) ENGINE REMOVAL, DISASSEMBLY, & PARTS CLEANING
  • 48.
    48 Cleaning Engine Parts Scuffpads are hard plastic cleaning wheels that mount in a drill for cleaning parts – They are better to use on aluminum and plastic engine parts because they will not erode metal as easy as a steel cleaning brush will. ENGINE REMOVAL, DISASSEMBLY, & PARTS CLEANING
  • 49.
    49 Cleaning Solvent After cleaningoff the gaskets, use cleaning solvent to remove hard to reach deposits – Cold soak tanks (solvent tanks) are cleaning machines for removing oil and grease from parts. (will not remove hard carbon or mineral deposits) ENGINE REMOVAL, DISASSEMBLY, & PARTS CLEANING
  • 50.
    50 WARNING Never use gasolineto clean parts. The slightest spark or flame could ignite the fumes, causing a deadly fire! ENGINE REMOVAL, DISASSEMBLY, & PARTS CLEANING
  • 51.
    51 Cleaning Solvent Hot tanksare large cleaning machine filled with strong, corrosive chemical. – Will remove mineral deposits in the water jackets, hard carbon deposits, oil , grease, and even paint. Automotive machine shops normally have a hot tank. CAUTION Aluminum components can be corroded or etched by soaking in a hot tank ENGINE REMOVAL, DISASSEMBLY, & PARTS CLEANING
  • 52.
    52 Special Cleaning tools Aring groove cleaner is used to scrape carbon from inside piston ring grooves. – Common tool used during piston service, the groove cleaner is rotated around the piston. A scraper bit the same size as the groove removes the carbon. ENGINE REMOVAL, DISASSEMBLY, & PARTS CLEANING
  • 53.
    53 Special Cleaning tools Avalve guide cleaner is inserted into each valve guide. An electric or air drill spins the tool to remove deposits. ENGINE REMOVAL, DISASSEMBLY, & PARTS CLEANING
  • 54.
    54 Special Cleaning tools Anair blow gun is normally the last method of cleaning parts. It uses pressure from the shop’s air compressor to blow off small bits of dirt, solvent, water and other debris. When using an air blow gun, direct the blast of air into all pockets and holes in parts. This will prepare the parts for reassembly. Warning Use extreme care when using an air gun. Wear goggles and avoid aiming the gun at your body. If air bubbles enter your bloodstream, the result could be DEATH ENGINE REMOVAL, DISASSEMBLY, & PARTS CLEANING
  • 55.
    55 ENGINE MECHANICAL PROBLEMS- REVIEW What are some proper, appropriate methods of disassembling an engine? Note the lengths and organize bolts in containers Inspect gasket mating surfaces Keep critical parts organized so they can be installed in the same location
  • 56.
    56 ENGINE MECHANICAL PROBLEMS- REVIEW Are air conditioning line to be removed from an engine? Why or why not? No, not unless they have been evacuated, there are toxic chemicals (freon) in the lines.
  • 57.
    57 ENGINE MECHANICAL PROBLEMS- REVIEW When servicing a vehicle with a manual transmission, the ______________ should be checked for warpage (runout) Flywheel
  • 58.
    58 ENGINE MECHANICAL PROBLEMS- REVIEW Are power steering hoses usually disconnected during engine removal? No, the are removed from the engine and placed aside out of the way. (not opening the system)
  • 59.
    59 ENGINE MECHANICAL PROBLEMS- REVIEW Is it required to always remove the engine to remove the oil pan from it? No, some oil pans can be removed from the engine without removing the engine from the vehicle.
  • 60.
    60 ENGINE MECHANICAL PROBLEMS- REVIEW What do you have to do to the battery before removing anything from the engine compartment? Disconnect it, remove it if needed.
  • 61.
    61 ENGINE MECHANICAL PROBLEMS- REVIEW Is it always necessary to remove the engine from the vehicle to replace piston rings? No, some piston rings can be changed with the engine still in the vehicle.
  • 62.
    62 ENGINE MECHANICAL PROBLEMS- REVIEW When removing a manual transmission with an engine what must you disconnect from the transmission? Shifter linkages
  • 63.
    63 ENGINE MECHANICAL PROBLEMS- REVIEW All fuel lines must be disconnected and plugged when removing an engine from a vehicle. True False
  • 64.
    64 ENGINE MECHANICAL PROBLEMS- REVIEW Ground straps must not be disconnect when removing an engine from a vehicle True False Ground straps must be disconnected from the engine before removal
  • 65.
    65 ENGINE MECHANICAL PROBLEMS- REVIEW How do you remove a valve with a “mushroomed tip” on it from the head of an engine? File off the “mushroomed tip” and then carefully take out the valve.
  • 66.
    66 ENGINE MECHANICAL PROBLEMS- REVIEW How do you remove a harmonic balancer from a crankshaft? Using a wheel puller
  • 67.
    67 ENGINE MECHANICAL PROBLEMS- REVIEW Is a “ring ridge” removed before or after piston removal? Before, so the piston can come out easily
  • 68.
    68 ENGINE MECHANICAL PROBLEMS- REVIEW What is the tool called used to remove a “ring ridge”? Ridge reamer
  • 69.
    69 ENGINE MECHANICAL PROBLEMS- REVIEW A hot tank is the best way to clean an aluminum head from an engine. True False Hot tanks will corrode or etch aluminum
  • 70.
    70 ENGINE MECHANICAL PROBLEMS- REVIEW The number one main bearing cap is located at the transmission end (back) of the engine. True False It is located at the front (timing end) of the engine
  • 71.
    71 ENGINE MECHANICAL PROBLEMS- REVIEW What will a cold soak tank NOT remove from parts? Hard carbon Mineral deposits
  • 72.
    72 ENGINE MECHANICAL PROBLEMS- REVIEW Repairs to the cylinder head and valve train normally require engine removal. True False Most cylinder heads can be removed for service without engine removal.
  • 73.
    73 ENGINE MECHANICAL PROBLEMS- REVIEW A wire wheel is commonly used to clean carbon from valves. True False
  • 74.
    74 ENGINE MECHANICAL PROBLEMS- REVIEW The radiator and fan are normally removed during engine removal. True False
  • 75.
    75 ENGINE MECHANICAL PROBLEMS- REVIEW All engines are removed from above. True False Some engines need to be removed from under the vehicle
  • 76.
    76 ENGINE MECHANICAL PROBLEMS- REVIEW List at least 3 check to do right after lifting an engine a couple inches out of its chassis. Hiding wires or ground straps Bell housing bolts are removed Torque converter bolts removed (automatic trans.) Fuel lines are disconnected and plugged Transmission is supported Motor mounts are unbolted
  • 77.
    77 ENGINE MECHANICAL PROBLEMS- REVIEW Why should you support the transmission after engine removal? Damage to the rear rubber mount or drive shaft could occur
  • 78.
    78 ENGINE MECHANICAL PROBLEMS- REVIEW When using a chain to lift an engine from a vehicle and using a bolt, nut and washer to support the chain, what do you need to be careful of? The bolt, nut and washer combination used is large enough to not slip through the chain when tension from the engine’s weight is applied to it.
  • 79.
    79 ENGINE MECHANICAL PROBLEMS- REVIEW Are you ready for a Test??? If YES…..GREAT! If NO…..Start studying! Remember to write out notes by hand.