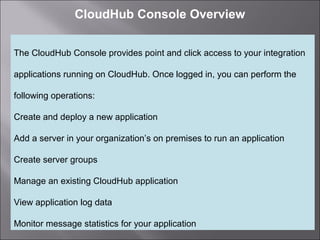
CloudHub Console Overview
2
CloudHub Console Overview
The CloudHub Console provides point and click access to your integration
applications running on CloudHub. Once logged in, you can perform the
following operations:
Create and deploy a new application
Add a server in your organization’s on premises to run an application
Create server groups
Manage an existing CloudHub application
View application log data
Monitor message statistics for your application
3
Before accessing the CloudHub Console, you must first create an account.
After you have an account, you can log into CloudHub from the CloudHub
login page.
4
When you first log into the Anypoint Platform, click CloudHub from the top
menu:
5
You then see the Applications menu where you can get a quick view of the
applications that are currently deployed and running for your account. Click
an entry to display additional information (as shown below), or click
Manage Application to see the CloudHub dashboard and the detailed page
for the application:
6
Creating an application is the first step to Deploying a CloudHub
Application. Each application must have a unique application domain. If you
use the Command Line Tools or Anyooint Studio, you do not need to
perform this step using the console. After you create at least one
application, you can see your applications listed here, including the number
of transactions and the percentage of CPU usage over the past hour.
7
You can also investigate the Servers menu. For more information, see
Managing Applications and Servers in the Cloud and On Premises. You
can use servers in your organization to run applications that you manage
with CloudHub. In addition, you can create groups of servers to run an
application and manage the server group from CloudHub.
8
Next to each application name, you can see an icon that represents the
current status of the application. The meaning of the status icons is
summarized below:
9
Application Dashboard
Click an application to show its overview menu, and click Manage
Applications from the overview. This opens the dashboard where you can
select one of the following menu options on the left:
cloud hub console overview

cloud hub console overview

  • 1.
  • 2.
    2 CloudHub Console Overview TheCloudHub Console provides point and click access to your integration applications running on CloudHub. Once logged in, you can perform the following operations: Create and deploy a new application Add a server in your organization’s on premises to run an application Create server groups Manage an existing CloudHub application View application log data Monitor message statistics for your application
  • 3.
    3 Before accessing theCloudHub Console, you must first create an account. After you have an account, you can log into CloudHub from the CloudHub login page.
  • 4.
    4 When you firstlog into the Anypoint Platform, click CloudHub from the top menu:
  • 5.
    5 You then seethe Applications menu where you can get a quick view of the applications that are currently deployed and running for your account. Click an entry to display additional information (as shown below), or click Manage Application to see the CloudHub dashboard and the detailed page for the application:
  • 6.
    6 Creating an applicationis the first step to Deploying a CloudHub Application. Each application must have a unique application domain. If you use the Command Line Tools or Anyooint Studio, you do not need to perform this step using the console. After you create at least one application, you can see your applications listed here, including the number of transactions and the percentage of CPU usage over the past hour.
  • 7.
    7 You can alsoinvestigate the Servers menu. For more information, see Managing Applications and Servers in the Cloud and On Premises. You can use servers in your organization to run applications that you manage with CloudHub. In addition, you can create groups of servers to run an application and manage the server group from CloudHub.
  • 8.
    8 Next to eachapplication name, you can see an icon that represents the current status of the application. The meaning of the status icons is summarized below:
  • 9.
    9 Application Dashboard Click anapplication to show its overview menu, and click Manage Applications from the overview. This opens the dashboard where you can select one of the following menu options on the left: