Download to read offline


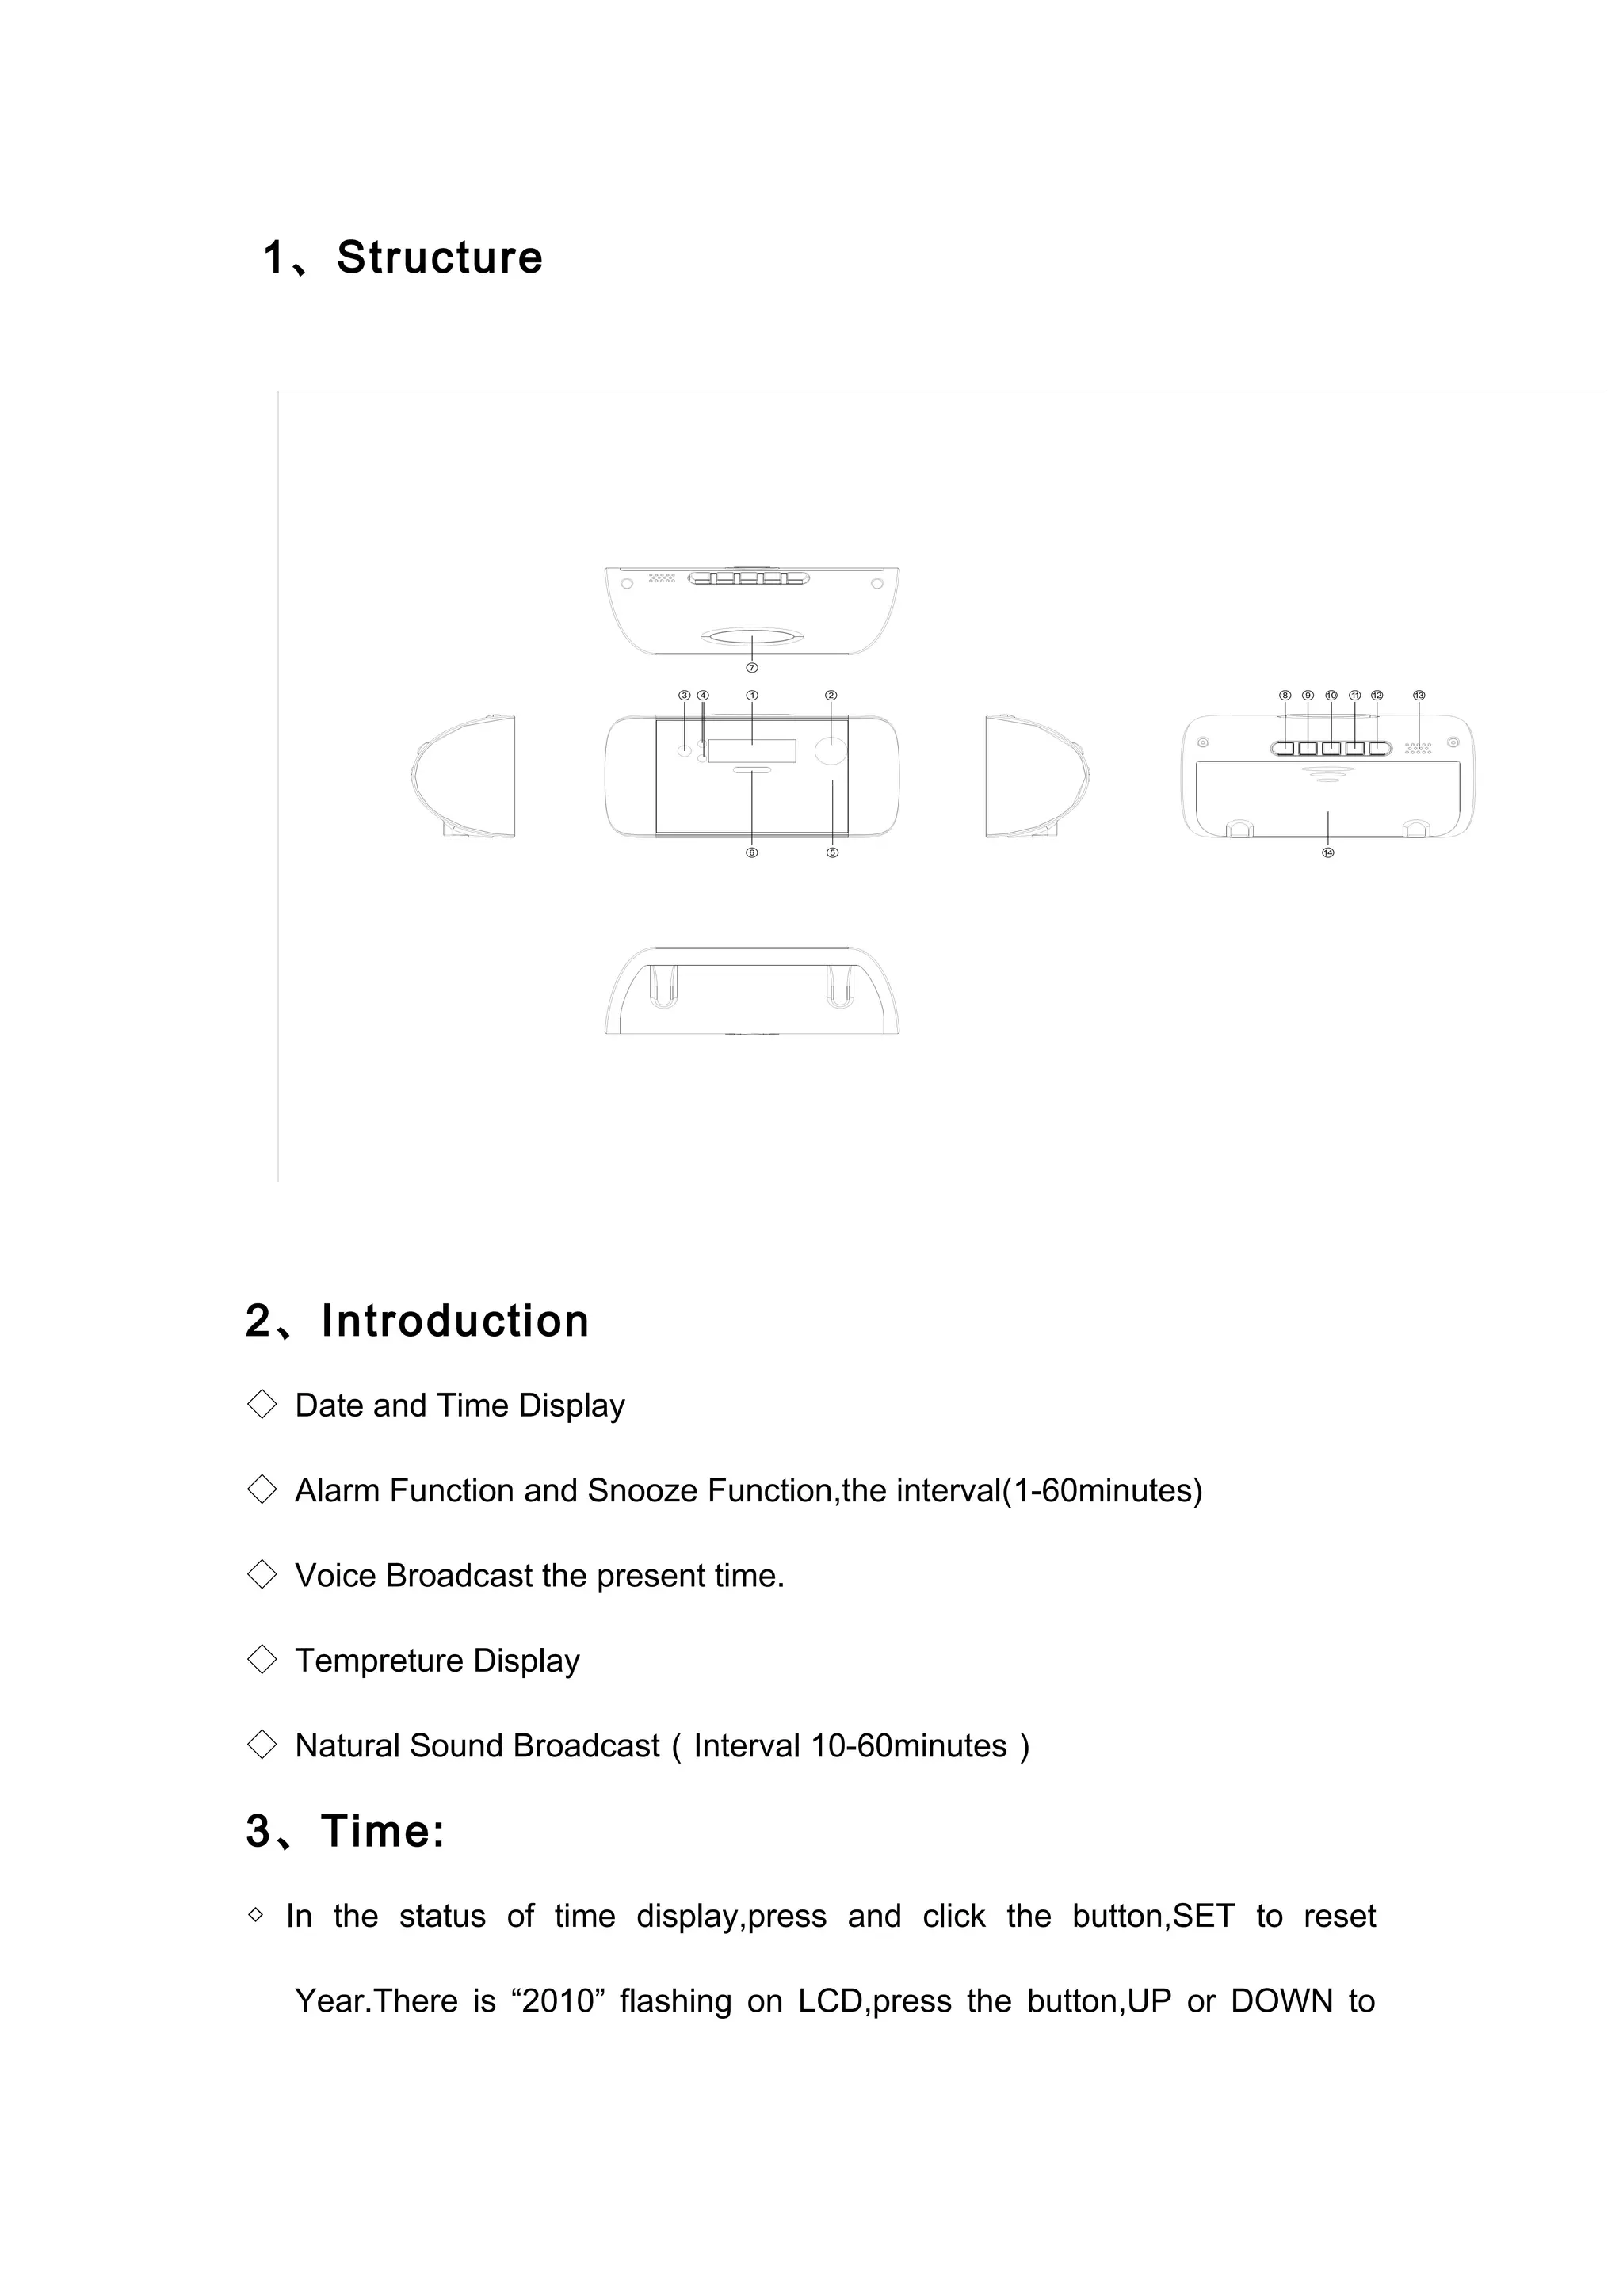
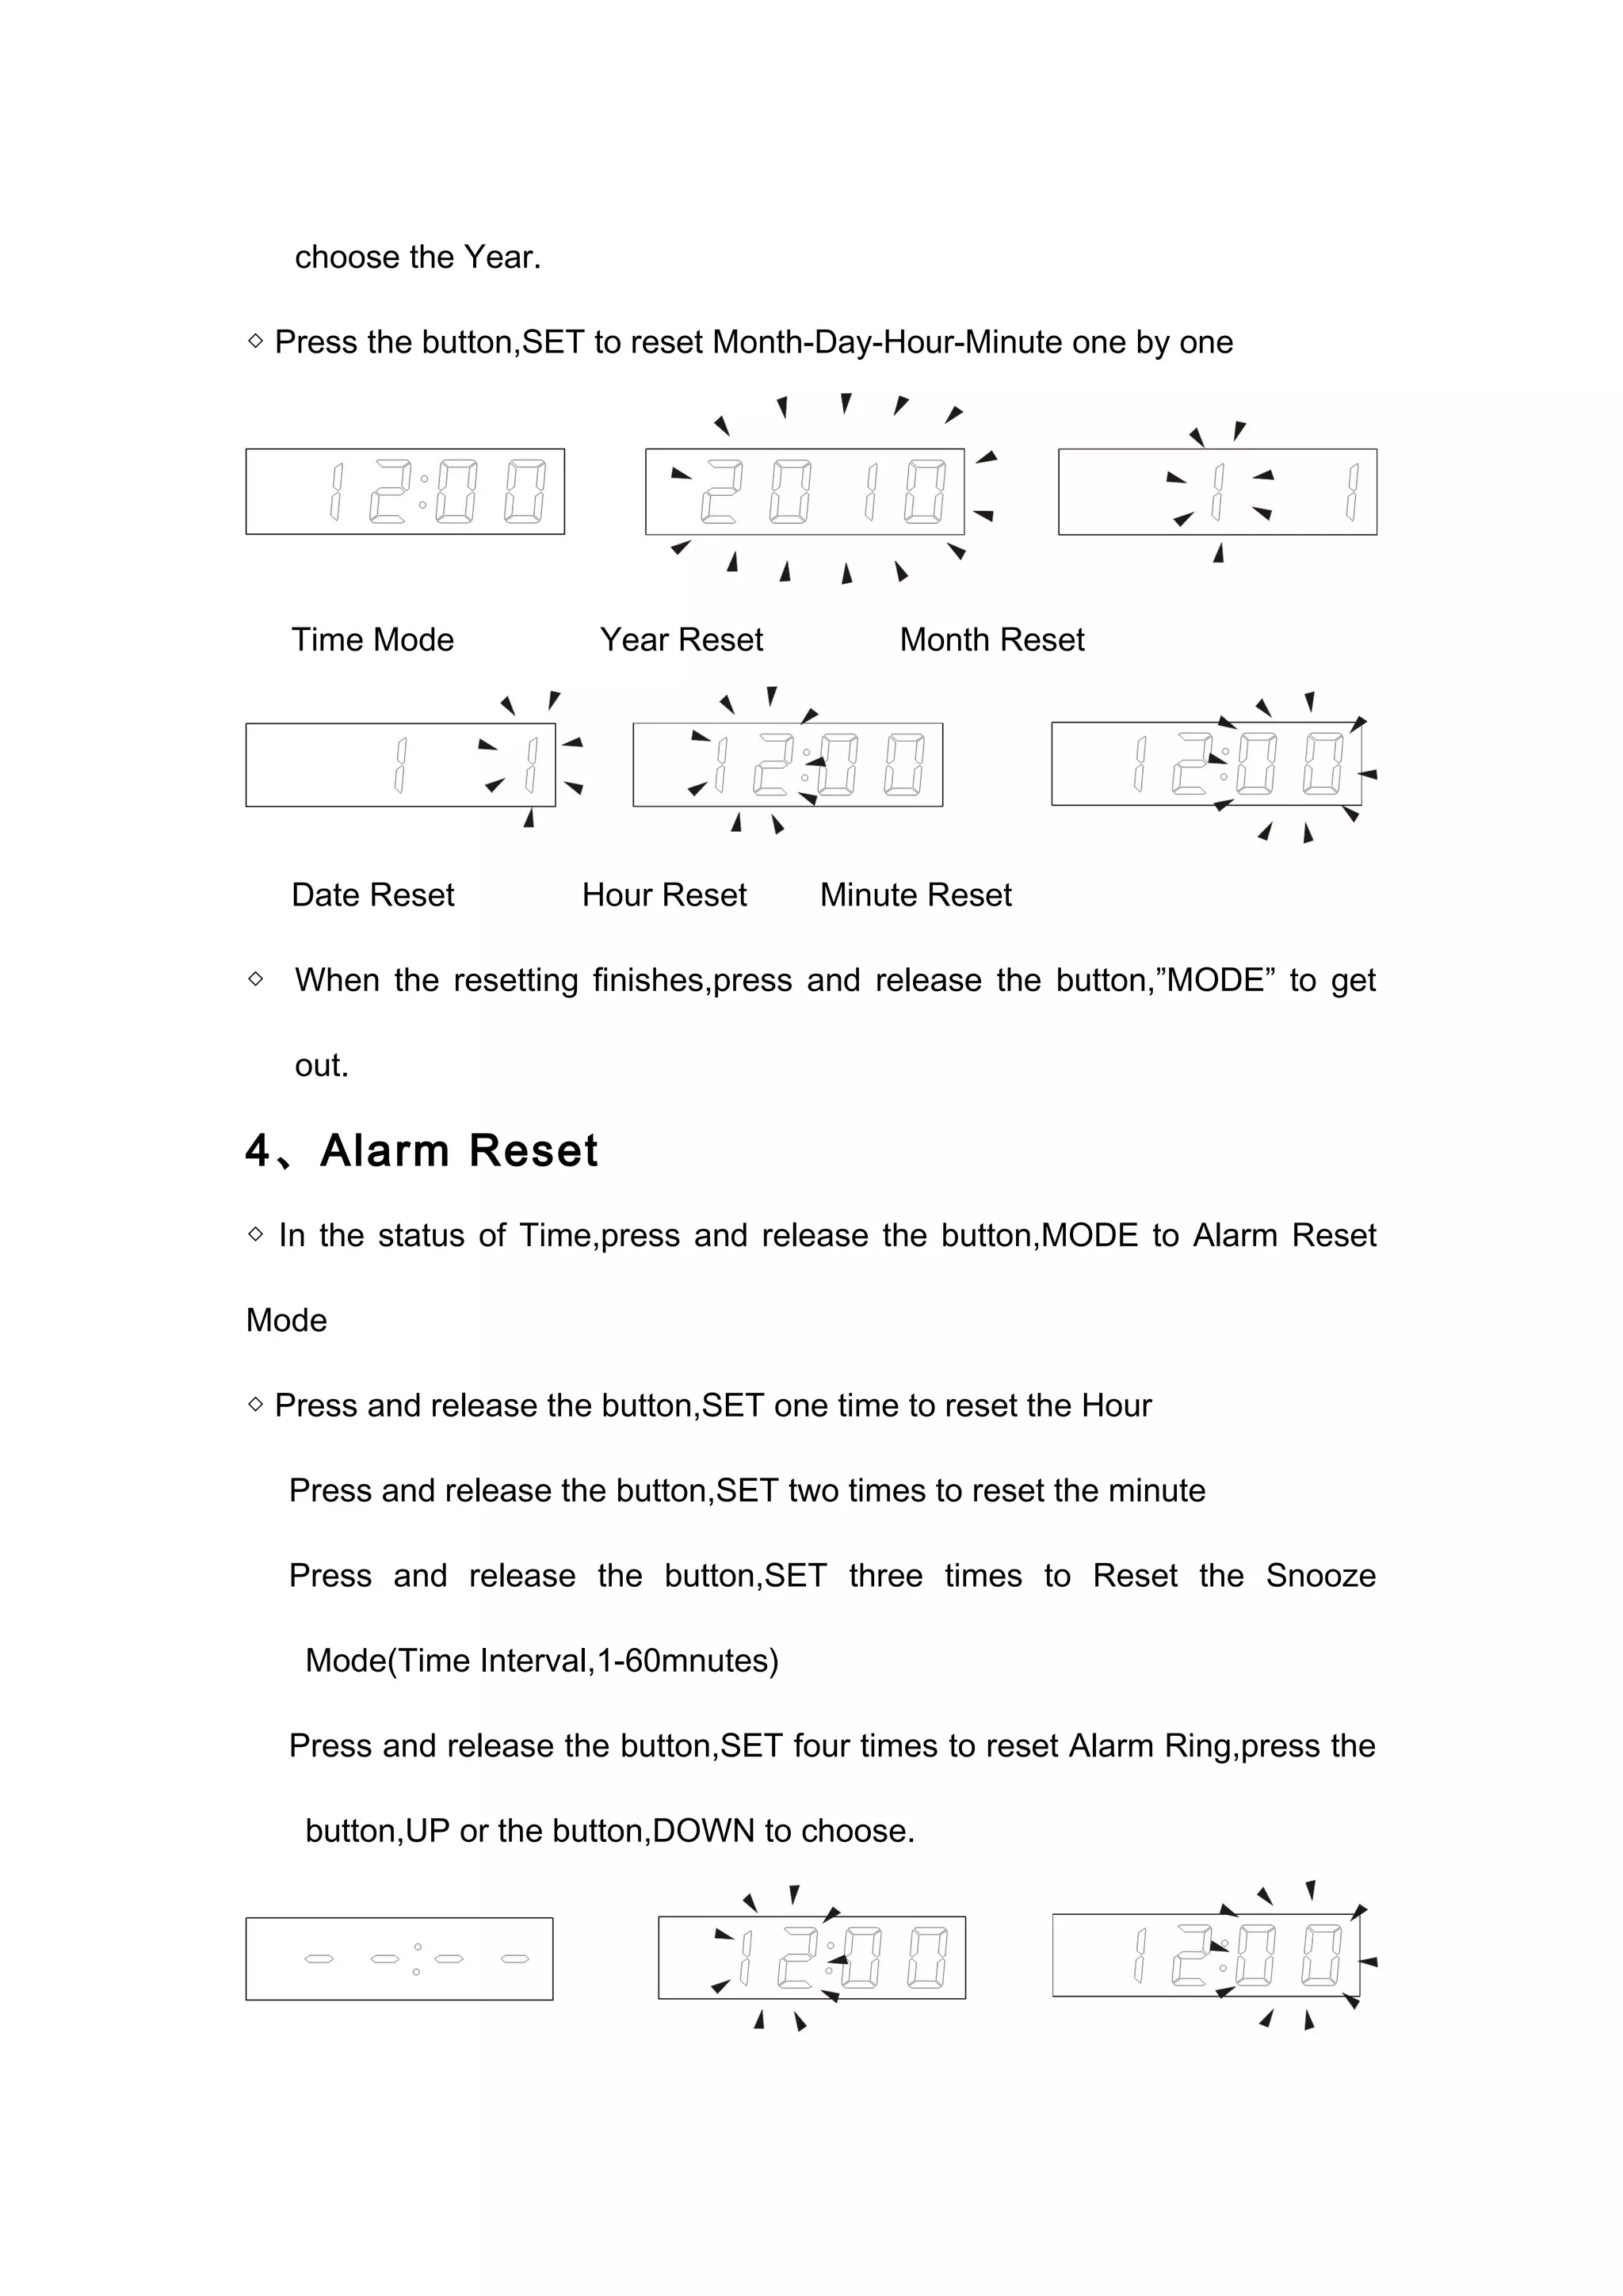
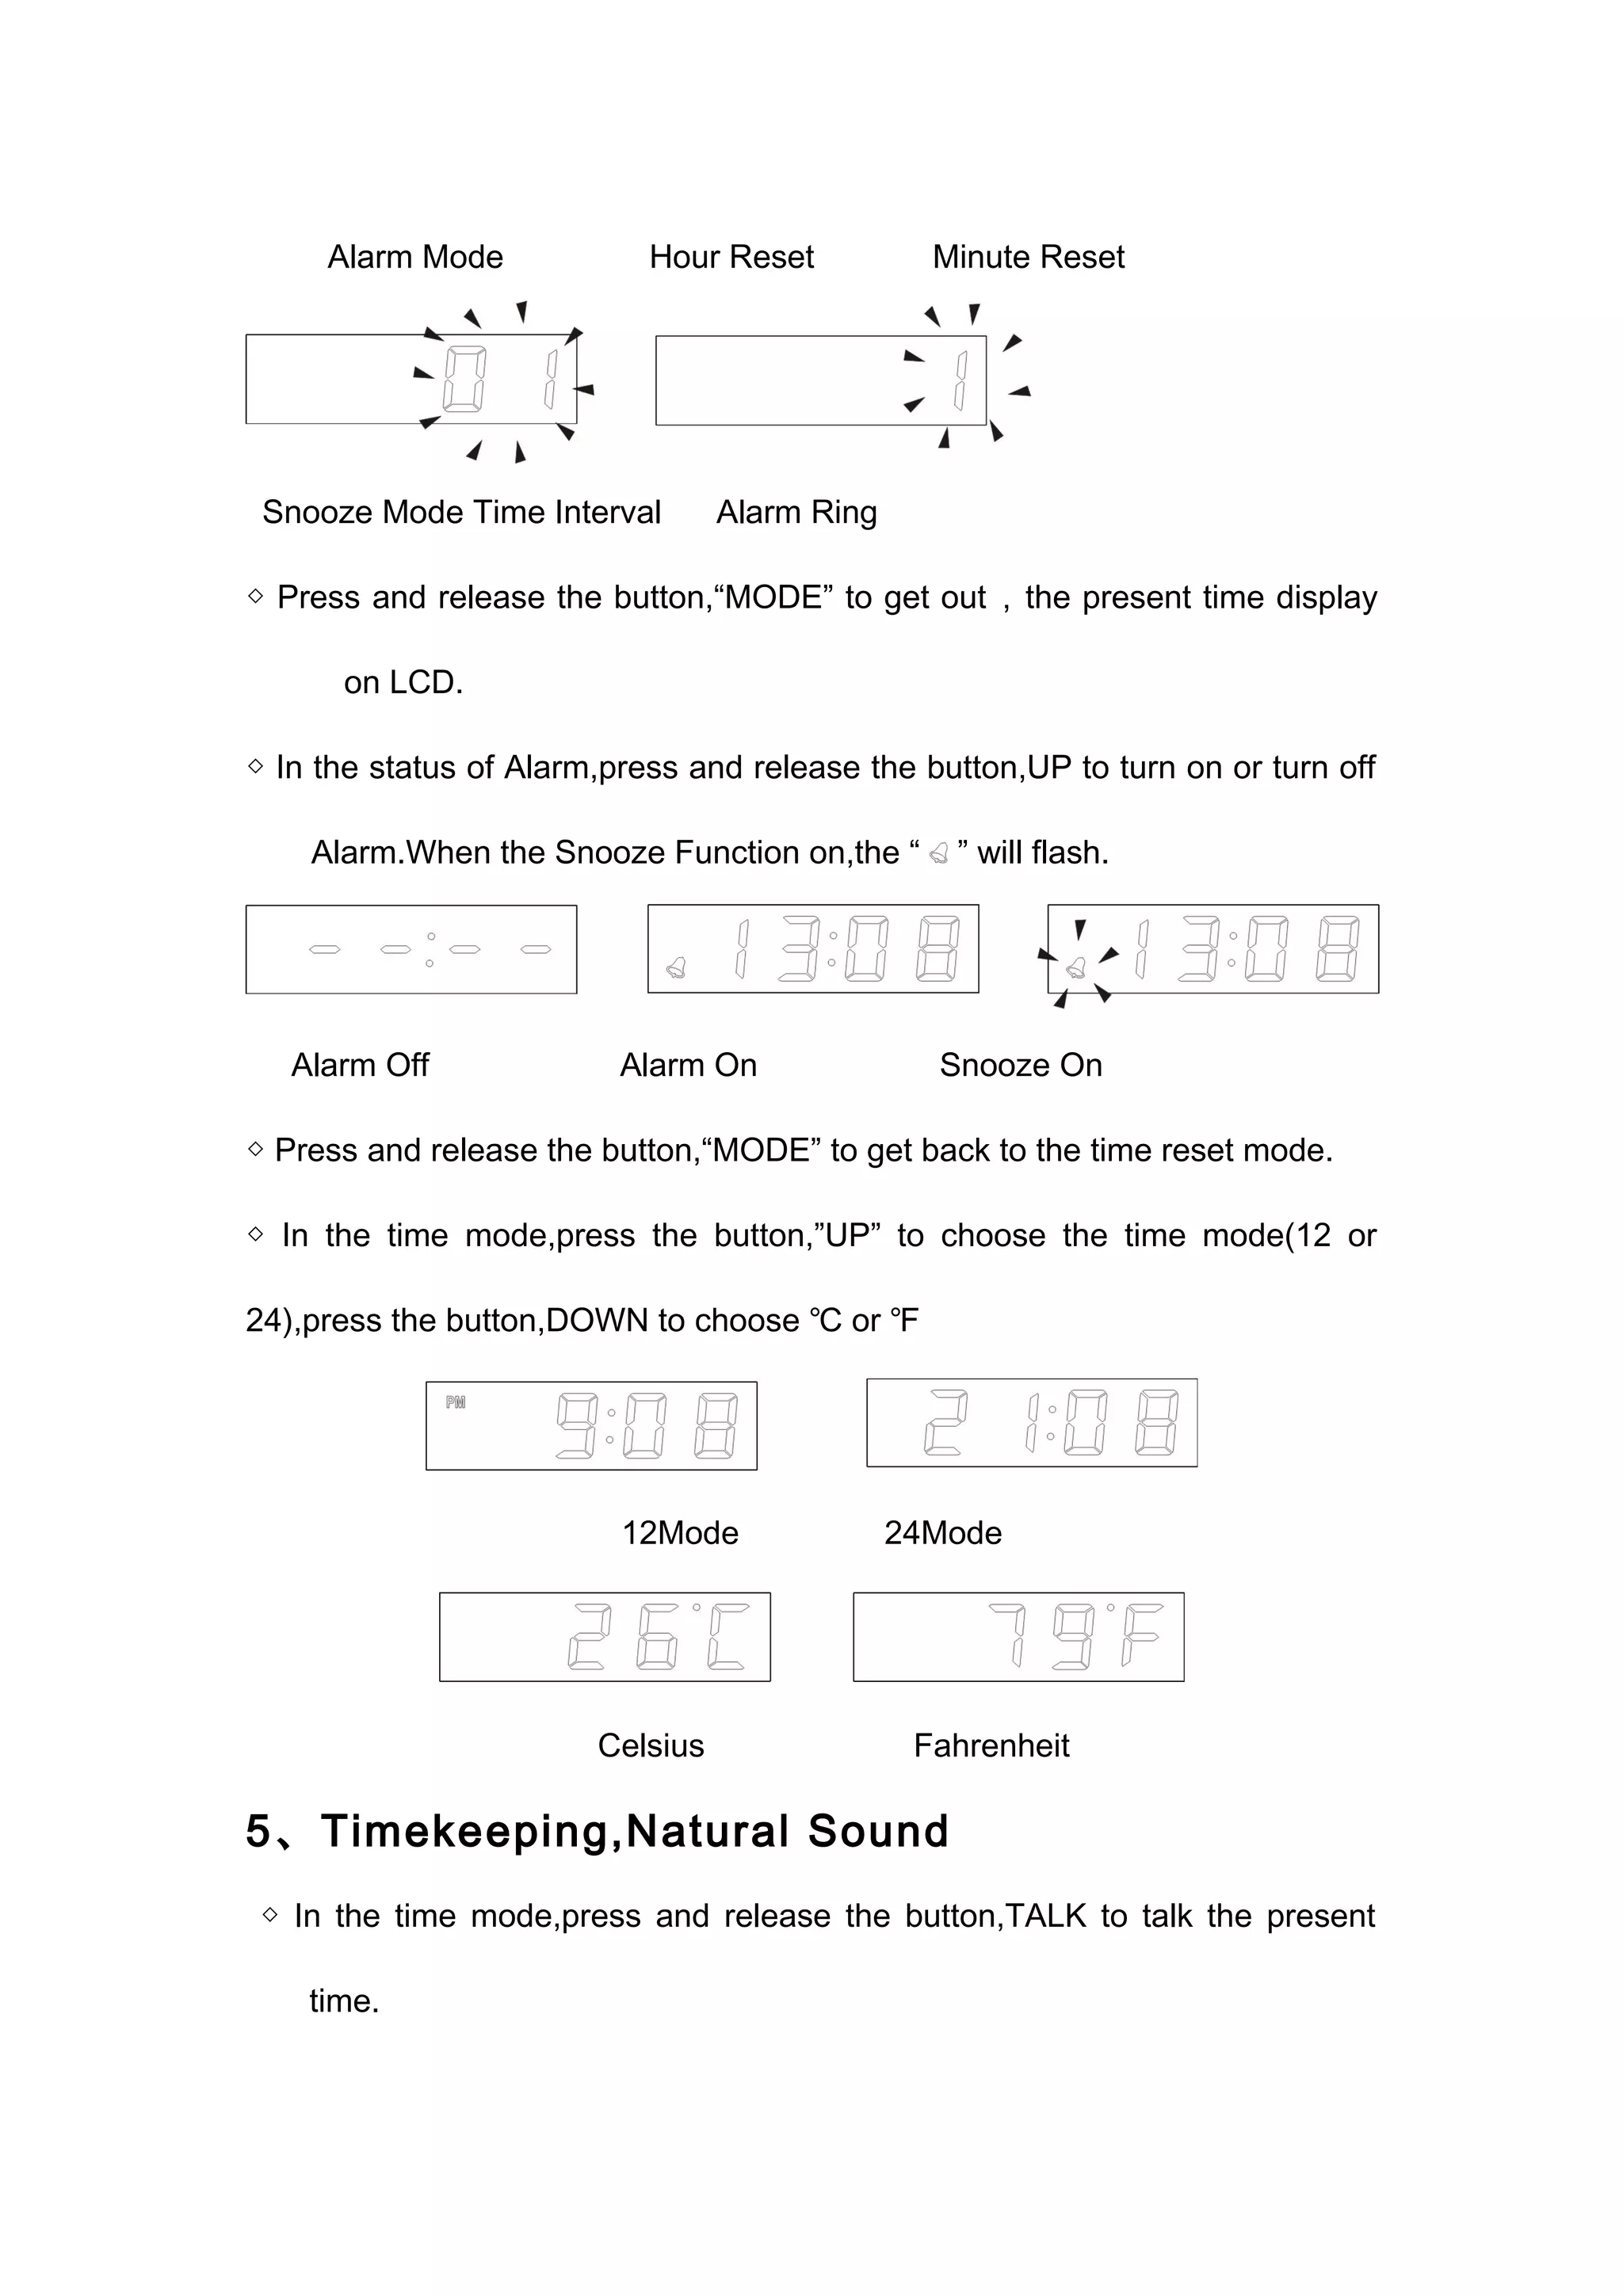
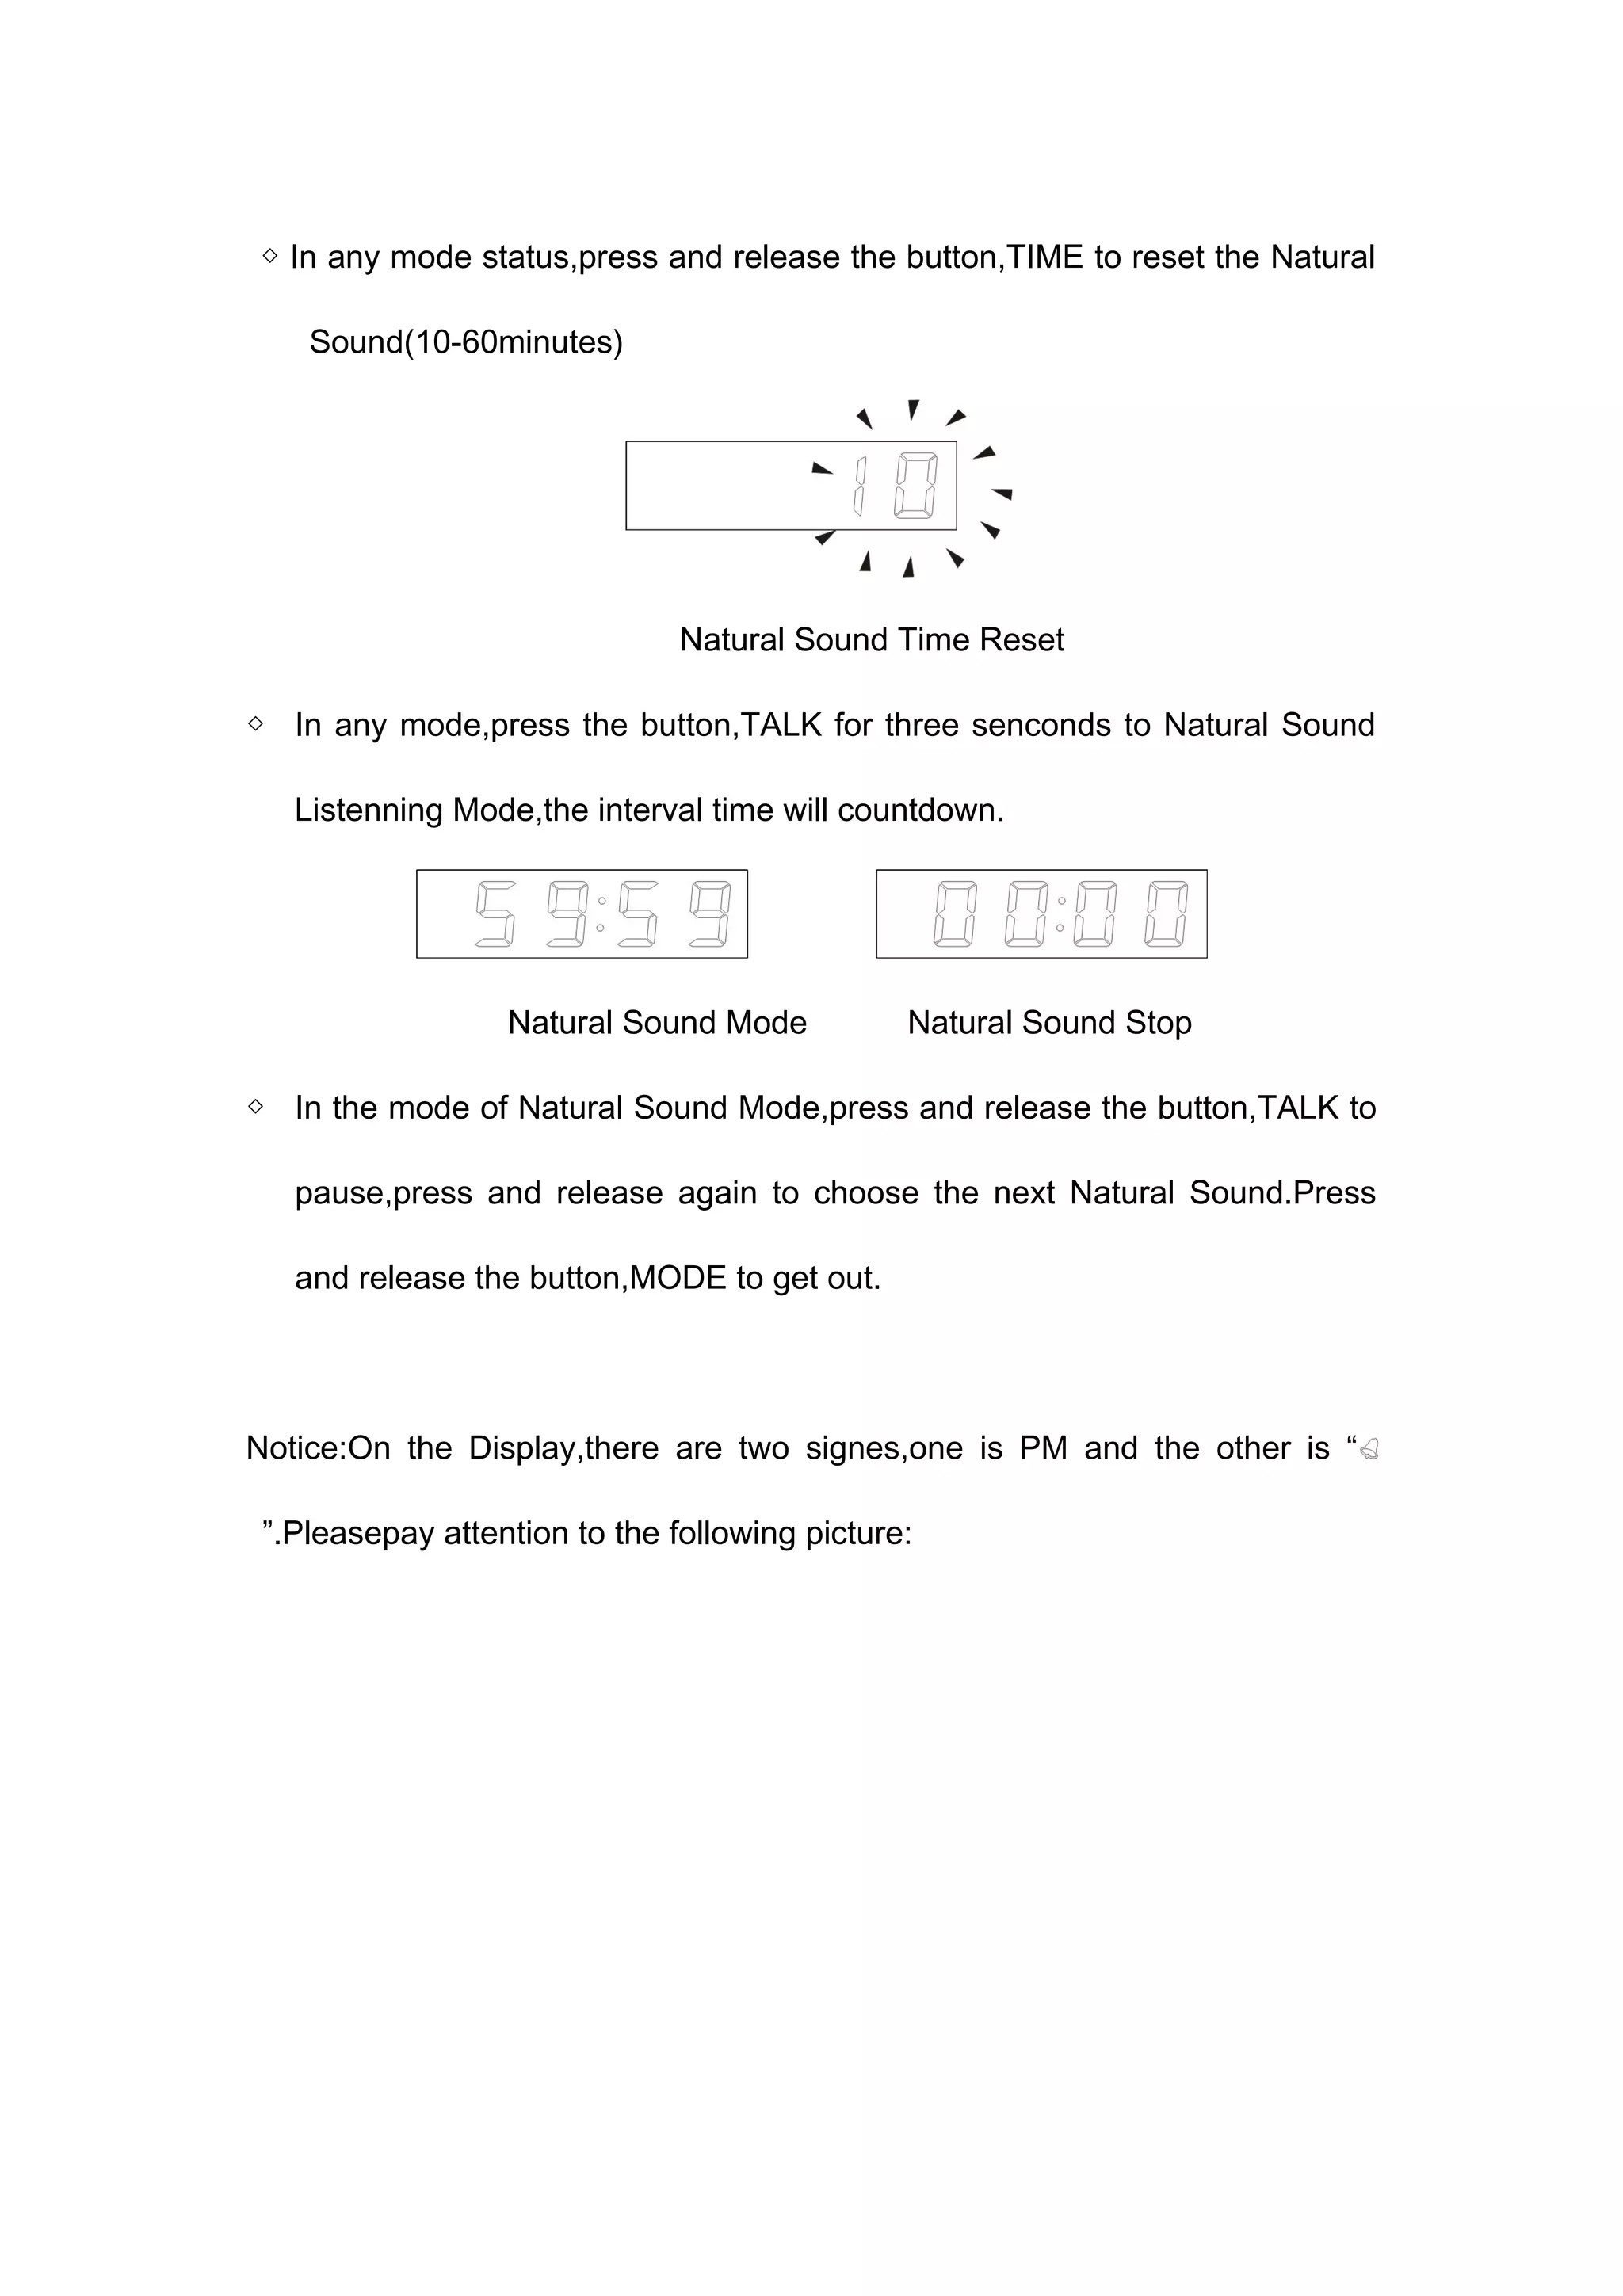


The document is a user manual for a multifunctional clock DVR, detailing its operation features such as time display, alarm settings, and video/audio recording functionalities. It includes instructions on setup, operation modes, and specifications, and emphasizes the importance of understanding the manual before use. Additionally, it provides guidelines on usage, charging, and precautions regarding temperature and humidity.


![Vibe Coding vs. Spec-Driven Development [Free Meetup]](https://cdn.slidesharecdn.com/ss_thumbnails/vibecodingvsspecdrivendevelopment-251209105622-43f455e7-thumbnail.jpg?width=640&height=640&fit=bounds)


