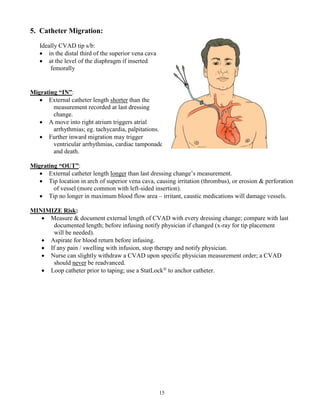
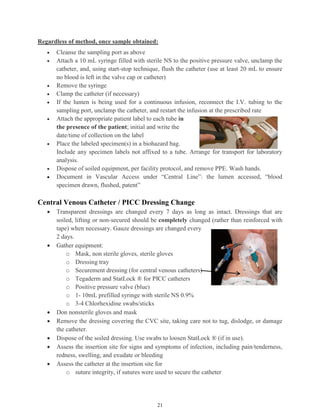
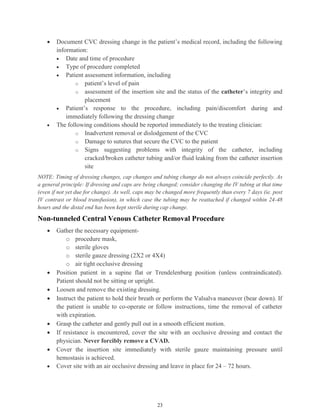
CENTRAL VENOUS ACCESS DEVICES
LEARNING GUIDE
On File with Professional Practice
O: 2000:06 R: 2005:02; 2008:02: 2017:01, 2020:02
1
Contents
Central Venous Access Device ................................................................................................................................................... 2
Section I: CVAD Designs – Lumens, Open-ended or Valved........................................................................................... 4
Lumens:............................................................................................................................................................................... 4
Section II: Catheter Type and Features (4) ......................................................................................................................... 5
1. Percutaneous Central Catheter (Non-Tunneled):........................................................................................................... 5
2. Peripherally Inserted Central Catheter – PICC (Non-Tunneled):................................................................................. 6
3. Tunneled CVAD (i.e. Hickman or Broviac Catheter): ................................................................................................... 7
4. Totally Implanted Catheter (Port-a-Cath)...................................................................................................................... 7
Section III: Risks, Complications, Actions to Minimize Risks................................................................................. 10
1. Infection: ...................................................................................................................................................................... 10
2. Air Embolism: .............................................................................................................................................................. 11
3. Catheter Occlusions:...................................................................................................................................................... 12
4. Superior Vena Cava Syndrome (Scvs): ........................................................................................................................ 14
5. Catheter Migration: ...................................................................................................................................................... 15
6. Catheter Damage:......................................................................................................................................................... 16
7. Port-Specific Complications:........................................................................................................................................ 17
8. Insertion complications: ............................................................................................................................................... 17
Section IV: Common activities associated with ALL central venous access devices ........................................................... 18
Prior to accessing ports/lines:............................................................................................................................................ 18
How to Flush an Implanted Venous Access Port (IVAP) ................................................................................................. 18
How to Flush and Lock the Central Venous Catheter or Peripherally Inserted Central Catheter (PICC) ......................... 19
How to Obtain a Blood Sample through a Central Venous Access Device ...................................................................... 19
Central Venous Catheter / PICC Dressing Change ........................................................................................................... 21
Non-tunneled Central Venous Catheter Removal Procedure ............................................................................................ 23
References ............................................................................................................................................................................. 24
2
Central Venous Access Device
Objectives At the end of the educational program the learner will be able to:
 Define a central venous access device (CVAD) and state
implications for use.
 Identify the anatomy utilized in CVAD placement.
 Explain the 2 distal tip types, including advantages and
disadvantages.
 Explain the 4 CVAD types, including advantages,
disadvantages and indications for use.
 Describe risks and complications associated with CVADs,
and actions to minimize risk.
 Apply principles of CVAD care in a written test and skill
station demonstration.
Central Venous Access
Device
Central venous therapy involves the placement of a radiopaque,
flexible catheter into a patient’s large veins, with the distal tip
being ultimately located:
 in the lower third of the superior vena cava (caval-atrial
junction), or
 in the inferior vena cava at the level of the diaphragm (if the
CVAD is placed through the femoral vein).
CVAD insertion may be done directly, or may require surgical
placement, dependant upon the specific type of device.
CVAD distal tip location is radiologically confirmed upon
insertion and before initial usage, and whenever catheter
migration is suspected.
A CVAD can be used for all types of IV infusions, for central
venous pressure monitoring and for venous blood sampling.
The best device option for the patient depends on the type,
duration, nature and complexity of therapy, patient diagnosis,
condition, and ability to manage the device.
Basic, Advanced and
Specially Certified
Competencies
Basic Competency
 maintaining a pre-established infusion
Advanced Competency
● accessing / de-accessing ● Positive Fluid Displacement
Valve (MP1000 or Ultrasite)
initiation /change
● dressing change
● blood specimen collection
● flushing ● central venous pressure
monitoring (Critical Care areas)
3
Specially Certified Nurse
Nurses whose practice area is in Oncology or Diagnostic Imaging
(D.I.) and who maintain current Certification through the
Canadian Vascular Access Association (CVAA) and complete the
CKHA specified Advanced Competencies, may also:
● Attempt to lyse a thrombotic CVAD occlusion with Alteplase
(Cathflo) under a physician’s order.
● Remove a PICC device under a physician’s order.
● Insert a PICC device under fluoroscopy in the D.I. under the
supervision and responsibility of the Radiologist.
● Repair a PICC device under a physician’s order.
Advanced Competency
… acquiring competence
The nurse caring for a patient with a CVAD will acquire an
advanced competence with the non-tunneled, tunneled and totally
implanted central venous access devices by:
 Reviewing the Learning Guide.
 Attending a Certification class.
 Successfully completing a written examination (80%).
 Successfully completing a skill station demonstration with
each type of CVAD, witnessed by a Practice Champion
using the Performance Checklist.
 Demonstrating knowledge of each type of CVAD in 2 patient
care sessions, witnessed by a Practice Champion using a
Performance Checklist.
 Presenting the completed Performance Checklist to
Professional Practice for validation of competence within 3
months of orientation date.
Advance Competency …
maintaining ongoing
competence
Accountability to maintain competence ultimately rests with the
individual nurse.
If the opportunity to use this skill frequently is not available, in-
service is available through your CVAD Class at Clinical
Orientation or by performing this skill with a Practice Champion.
Refer to PRO-3-001:Nursing Competencies Required at CKHA
Policy
4
Section I: CVAD Designs – Lumens, Open-ended or Valved
Lumens:
 Available in single lumen or multiple lumens
 With multiple-lumen CVADs each separate lumen is enclosed within a single sheath, making the
CVAD appear to have only one line; each line allows for separate infusions through an individual
lumen.
 Each lumen is labeled at the CVADs proximal end; distal, median / middle, proximal, reflecting the
three internal exits. The distal lumen exits at or closest to the CVAD tip. The median / middle exits
from an opening along the side of the catheter, often about 2cm from the tip. The proximal lumen
exits at a side opening farthest from the tip, often about 5cm.
 The distal lumen is usually reserved for blood sampling and transfusions of blood products.
Key Point: Maintain patency of all lumens of single or multi-lumen catheters.
Open-ended:
 Distal end is open into the vessel.
Groshong with closed distal tip and 3-position value:
 Distal catheter has a unique 3-way slit valve along the side, adjacent to the rounded, closed distal tip.
 This pressure sensitive slit valve remains closed unless fluids are infused (valve opens outward) or
blood is withdrawn (valve opens inward). When not in use the closed valve seals fluid inside the
CVAD lumen and prevents blood from entering into the lumen, reducing the potential for retrograde
blood flow and catheter occlusion, and the potential for air embolism.
 Valve function may be altered by a blood clot, particulate matter, or malposition of the CVAD tip
(placement in the right atrium or ventricle). In this case, bleed-back into the lumen may be evident,
and the CVAD should be flushed to correct the problem.
PASV Valve:
 CVAD valves are located at the hub-end
of the CVAD – outside of the body.
5
Section II: Catheter Type and Features (4)
1. Percutaneous Central Catheter (Non-Tunneled):
 Designed to be left indwelling for days to weeks (usually less than a month), and generally used in
an acute care setting.
 Single or multiple lumens available.
 Open-ended distal tip.
 Most appropriate sites include the internal jugular and subclavian veins, with the distal tip located in
the lower third of the superior vena cava (caval-atrial junction).
 The femoral vein may also be used; indications for femoral vein access include thrombosis of the
internal jugular or subclavian veins and /or Superior Vena Cava Syndrome (SVCS). When the
femoral vein is used, correct tip location should be in the inferior vena cava at the level of the
diaphragm.
Advantages Disadvantages
 Inserted by the physician at the bedside or
in O.R. / E.D.
 Economical
 Easily removed; may be removed by RN
(Advanced Competency)
 Appropriate for short-term therapies
including central venous pressure
monitoring
 Can be exchanged over a guide wire
 Placement time limited
 Requires routine sterile dressing changes
 Requires frequent flushing (q 24 h.)
 External catheter breakage possible
 Body image impact
 Activity restrictions
 Increased infection risk with jugular
placement
6
2. Peripherally Inserted Central Catheter – PICC (Non-Tunneled):
 Used primarily for patients requiring several weeks or months of vascular access.
 Single dual or triple lumens available.
 Distal tip may be open-ended, or Groshong with close-ended 3-position valve.
 Usually inserted in the basilic or cephalic vein at the antecubital fossa or 3 inches above or below it,
then threaded into the superior vena cava above the right atrium.
 Do not use PICC arm for measuring BP, peripheral IV sites or venipuncture.
 Removal by physician or Specially Certified nurses only.
ADVANTAGES DISADVANTAGES
 Less traumatic to place
 No surgical requirements
 Lessens the infection risks associated with
neck, chest or femoral insertions (decreased
peripheral bacterial colonies vs. neck,
thoracic or femoral area)
 Preservation of peripheral vascular system
 Cost and time efficient
 Reliable long-term access
 Usually easily removed (removal only by
physician or Specially Certified nurse
 May be repaired
 Requires routine flushing (q 7 days)
 Requires routine sterile dressing changes
 Care costs on a long-term basis
 Some PICCs (small gauge) are not
recommended for blood sampling
 Patient self-care is difficult
 External catheter breakage possible
 Body image impact
 Activity restrictions
 Requires adequate peripheral access
 Post-insertion phlebitis common
7
3. Tunneled CVAD (i.e. Hickman or Broviac Catheter):
 Used for long-term intermittent, continuous, or daily vascular access.
 May be appropriate for short-term use if reliable access needed.
 Available with multiple lumens (single, double, triple).
 An antimicrobial dacron or collagen cuff is located along the catheter sheath approximately 5cm
from the CVAD exit site. Within 3-4 weeks post-insertion, fibrous tissue enmeshes into the cuff.
This assists in stabilizing the device, and helps to prevent microorganisms from migrating along the
outside of the catheter lumen.
 Distal tip may be open-ended, or Groshong close-ended with 3-position valve.
 Surgically implanted, the CVAD tip is placed via one of the large central veins into the superior vena
cava; the proximal end is tunneled subcutaneously for several inches to the desired exit site on the
anterior chest.
 Initially there are 2 wound sites. Sutures remain in place for a minimum of 10 days; up to 6 weeks if
patient is immuno-suppressed.
ADVANTAGES DISADVANTAGES
 Decreased infection rate
 Patient self-care
 Can be left in indefinitely
 Once exit site is healed, modified clean
dressing technique used
 Can be repaired externally
 Requires routine flushing (q 7 days)
 External device, body image impact,
catheter breakage possible
 Daily to weekly site care
 Surgical insertion (may be an outpatient)
 Requires surgical removal
8
4. Totally Implanted Catheter (Port-a-Cath)
 Used for very long-term intermittent, continuous or daily vascular access.
 Consists of a catheter attached to a plastic or metal reservoir; also has a dense silicone septum for
access to the reservoir. Port septums are designed to withstand up to 2000 punctures, depending on
the manufacturer and the gauge of needle used.
 Available features include distal tip with open-ended or Groshong valve, single or dual ports, side-
access ports, dome ports (accessed from any angle), or peripheral ports.
 A medic-alert identifier is strongly recommended to provide specific information on the type of
implanted device.
 Adequate subcutaneous tissue is required over the port to prevent erosion through the skin.
Conversely, the port must not be placed too deep as excess adipose tissue over the port can make it
difficult to locate the port for access.
ADVANTAGES DISADVANTAGES
 No dressing (unless accessed for
therapy)
 Flush every 4 weeks (if not accessed)
 Body image intact
 Unrestricted activity
 Decreased risk of infection
 No external components to break
 Self care possible
 Needle access required, use a special non-coring
Huber needle ONLY. (These have a deflected
point that helps prevent damage to the septum.)
 Displacement of needle is possible
 Most expensive vascular access device
 Requires routine flushing (monthly)
 Surgical procedure to place and remove
 Painful to access; use of topical anesthesia
(EMLA®
Cream) recommended.
Backing cannot be
punctured by needle
9
Accessing Totally Implanted Port
Cleanse skin with Chlorhexidine 2%, from the centre
of the port to the periphery, 3 times, using a new swab
each time.
Allow to air dry.
The tip of a non-coring needle is designed to help
preserve the integrity and durability of the septum.
Insert needle perpendicular to port septum.
Advance needle through skin and septum until
reaching bottom of reservoir.
Verify correct needle placement by blood
aspiration.
Do not begin injection until proper needle
placement has been confirmed.
Do not manipulate the needle once it is in the septum.
Secure needle to skin with transparent dressing.
10
Section III: Risks, Complications, Actions to Minimize Risks
1. Infection:
 most common CVAD complication
 strong correlation between CVAD
infection and thrombus formation
 locations: - at site
- internal lumen
- systemic (sepsis)
RISK FACTORS: - not using aseptic technique (mask & sterile gloves) when accessing CVAD
- multiple lumen catheters
- use of stopcocks
- catheter location (jugular & femoral locations have higher infection risks)
- catheter secured with sutures
- long catheter dwell time duration
- frequent dressing changes
- thrombus formation
- compromised immune status
- distant infection site (seeding)
PREVENTION: - mask & sterile gloves when accessing
- watch for  temp / pain / redness / edema (CVAD infusions should never
cause edema)
- change semipermeable dressing (Tegaderm) q 7 days
- change gauze dressing q 48 hours
- stabilize using an adherent securement device (StatLock) – change with
each dressing change
- fibrinolytic therapy to treat thrombus formations promptly
(Specially Certified nurse or physician)
11
2. Air Embolism:
 Occurs when the CVAD is open to air.
 Intra-thoracic pressure is less than air pressure, drawing air into the vein through an open device.
RISK FACTORS - on insertion & removal
- change of tubing, access cap or Positive Fluid Displacement Valve (eg. MP1000
or Ultrasite)
- catheter break or hole
- tubing & catheter are disconnected
- patient sits up, coughs, laughs, cries, sighs or sneezes during CVAD access
- failure to apply occlusive dressing upon removal
SIGNS & SYMPTOMS: - chest pain, respiratory distress, tachycardia, cyanosis,
hypotension,  level of consciousness.
PREVENTION: - ensure tubing, syringe and positive fluid displacement valve are air-free
Prior to accessing: - always clamp line
- place patient in Trendelenburg position
- increase intrathoracic pressure by requesting patient do Valsalva maneuver
or slowly exhale
Removing CVAD: - cover site with occlusive dressing
(eg. Betadine ointment on a gauze square)
SUSPECT Air Embolism?
- close clamp, cap end, or reattach IV tubing immediately
- if a catheter break or hole, fold catheter back on itself & clamp
- turn patient onto left side so air collects in right atrium
- administer oxygen
- notify physician
12
3. Catheter Occlusions:
Mechanical: - catheter kinked or sutures too tight.
- catheter tip up against vessel wall (esp. left-sided insertion).
- “Pinch-Off Syndrome”; subclavian catheter pinched between clavicle & 1st
rib.
Chemical: - drug precipitate, especially strongly acidic or alkaline medications.
- lipid builds up on internal lumen.
Thrombus:
RISK FACTORS: traumatic insertion, infection, dehydration, venous stasis (bed rest), hypotension,
heart failure, hypertonic fluids, hyper-coagulable states, pistoning movement,
insufficient / ineffective flushing.
SIGNS & SYMPTOMS: - inability to withdraw blood.
- progressive difficulty  inability to infuse fluids.
- edema at insertion site or anywhere distal from the catheter tip
(i.e. affected arm).
PREVENTION: - aspirate to check for blood return before infusing.
- routine catheter flushing & heparin rinses (if ordered)
- watch for limb edema or pain with infusions.
- attach a positive fluid displacement device to each lumen (MP1000 or Ultrasite).
- minimize venous stasis.
- promptly treat dehydration, infection, heart failure.
- aseptic accessing technique.
- fibrinolytic therapy to treat thrombus formations promptly
(Specially Certified nurse or physician).
- stabilize to prevent pistoning, using an adherent securement device (StatLock)
13
Types / Sites of Thrombotic Occlusions:
Type Description Appearance
Intraluminal Clot forms within the lumen of
the catheter, resulting in a partial
obstruction with increased
resistance / sluggishness to fluid
administration. Frequently and
quickly may progress to complete
lumen obstruction.
Fibrin Tail / Flap
(“Toilet-Seat”)
A fibrin layer forms, encasing the
CVAD at the tip. As blood and
cellular components are
progressively deposited a fibrin
“tail” can grow. Fluids and
flushing are usually permitted, but
when aspiration is attempted the
“tail” acts as a one-way-valve
covering the CVAD tip.
Fibrin Sheath /
Sleeve
A fibrin layer forms encasing the
CVAD at the tip. As blood and
cellular components are
progressively deposited a fibrin
“sock” or sleeve can form, coating
the entire end of the catheter.
Flushing may allow fluid to travel
in a retrograde fashion along the
sheath, but blood aspiration is
generally not possible.
Mural Catheter tip irritation of the vessel
wall causes thrombus accumulation
between the CVAD and the injury
site, eventually adhering the
catheter to the vessel wall. This
type of thrombosis is at increased
risk for Superior Vena Cava
Syndrome (SVCS).
14
4. Superior Vena Cava Syndrome (Scvs):
 Thrombus develops to occlude the superior vena cava.
 Prevents blood return to the heart.
 May develop within 96 hr of insertion.
Early Signs & Symptoms (worse when lying down):
- head feels “full”
- discomfort in shoulder, neck or arm
on catheter placement side.
- collar, necklace or rings feel tight
- edema of face, eyes, hands
- swollen, cyanotic lips
Quick Progression to:
- dyspnea, coughing, hoarseness, hemoptysis,
suffocating feeling.
- chest wall veins become visible
(mammary veins engorge).
- jugular vein distention
- confusion, headache
- visual disturbances
Late S/S: - sepsis
- emboli
- cerebral edema
- airway obstruction
- death
SUSPECT SVCS? - stop infusion
- elevate head of bed
- administer oxygen
- notify physician
- do not remove CVAD (may embolize the thrombus)
Prevention: - aseptic technique (close link with infection).
- prevent pistoning movement (irritates vein wall).
- tip placement in lower third of superior vena cava (fluttering against SVC arch
causes irritation & thrombus formation).
- aspirate to check for blood return before therapy delivery.
- notify physician if edema or pain during infusion.
- prompt fibrinolytic therapy for thrombotic occlusions
(Specially Certified nurse or physician).
15
5. Catheter Migration:
Ideally CVAD tip s/b:
 in the distal third of the superior vena cava
 at the level of the diaphragm if inserted
femorally
Migrating “IN”:
 External catheter length shorter than the
measurement recorded at last dressing
change.
 A move into right atrium triggers atrial
arrhythmias; eg. tachycardia, palpitations.
 Further inward migration may trigger
ventricular arrhythmias, cardiac tamponade
and death.
Migrating “OUT”:
 External catheter length longer than last dressing change’s measurement.
 Tip location in arch of superior vena cava, causing irritation (thrombus), or erosion & perforation
of vessel (more common with left-sided insertion).
 Tip no longer in maximum blood flow area – irritant, caustic medications will damage vessels.
MINIMIZE Risk:
 Measure & document external length of CVAD with every dressing change; compare with last
documented length; before infusing notify physician if changed (x-ray for tip placement
will be needed).
 Aspirate for blood return before infusing.
 If any pain / swelling with infusion, stop therapy and notify physician.
 Nurse can slightly withdraw a CVAD upon specific physician measurement order; a CVAD
should never be readvanced.
 Loop catheter prior to taping; use a StatLock to anchor catheter.
16
6. Catheter Damage:
 Hole, tear, break or perforation of CVAD,
either internally or externally.
INTERNAL Causes & S/S:
 “Pinch-Off” syndrome – catheter
fatigue results in damage or severing
of CVAD segment.
 Using a syringe size smaller than 10mL for
access; a small syringe exerts higher
pressure ( 25 psi), rupturing the CVAD.
 Infusion can leak into tissue; may cause
extravasation and necrosis of tissue
surrounding the leak.
 Catheter segment may embolize to the heart or pulmonary artery.
 S/S includes pain & edema at site of leakage (clavicle most common); if embolizes - sudden
chest pain, dyspnea, cyanosis, arrhythmias, shock.
EXTERNAL Causes & S/S:
 Improper clamping of device, or use of sharp objects near catheter; i.e. using scissors to remove
dressing or using needle to access the CVAD.
 S/S (air emboli); chest pain, respiratory distress, tachycardia, cyanosis, hypotension,  level of
consciousness.
PREVENTION:
 Aspirate for blood return before infusing.
 When infusing, monitor for undue resistance or swelling, stinging, pain.
 Use a 10mL sized syringe (or larger) when accessing.
 Use needleless or needle-free product to access CVAD.
 Carefully insert & secure non-coring needle into implanted port.
 Careful clamping procedures; no metal clamps.
 Avoid using scissors or other sharp objects near catheter.
SUSPECT AIR EMBOLI / CVAD DAMAGE?
 Fold catheter back on itself & clamp.
 Turn patient onto left side so air collects in right atrium.
 Administer oxygen.
 Notify physician.
17
7. Port-Specific Complications:
 The port may dislodge within the subcutaneous pocket. When this occurs, the port is noted to move
easily under the skin. Resistance may also be evident when attempting to flush or infuse, and
swelling may occur at the site. This complication may occur as a result of trauma to the site or from
manipulation of the port by the patient (Twiddler’s Syndrome). The port should be resutured if
possible to allow for reliable, safe access of the port.
 The port may separate from the catheter as a result of trauma to the site or from high-pressure
flushing or infusion.
 Aspirating to check for blood return is important before initiating infusions, particularly when
administering vesicant drugs. If there is doubt about the functional ability of the CVAD after
flushing and aspiration, the physician should be consulted before initiating infusion.
8. Insertion complications:
 Insertion complications of non-tunneled percutaneous CVADs, tunneled catheters and totally
implanted ports may include pneumothorax, hemothorax, air emboli and arterial puncture.
 Insertion complications of PICCs may include arterial puncture, difficult cannulation, difficult
threading, and nerve injury.
18
Section IV: Common activities associated with ALL central venous access
devices
Prior to accessing ports/lines:
 Perform hand hygiene and don PPE if indicated
 Identify the patient using 2 patient identifiers
 Obtain the patient’s verbal consent prior to beginning the procedure
 Position the patient in bed or reclining chair to facilitate easier access
How to Flush an Implanted Venous Access Port (IVAP)
 First perform a preliminary assessment of the patient’s IVAP
 Palpate the skin overlying the IVAP:
 To verify the skin is intact and non-tender
 to determine the amount of adipose tissue present to aid in selection of the
appropriate-sized needle (if information is not available in the patient’s
medical record)
 to confirm the IVAP has not migrated or flipped over
 Flush the IVAP using the following steps
o Don mask and sterile gloves
o Disinfect the positive pressure valve cap on the extension tubing using 2%
chlorhexidine/70% alcohol antiseptic swab and allow it to air dry
o Use aseptic technique to attach a 10 mL NS flush syringe to the extension tubing
o Open the clamp on the tubing
o Gently flush the tubing using start-stop technique
 Observe for leakage and/or infiltration
 The tubing should never be flushed with force due to the risk of
thrombus dislodgement or catheter rupture
o Remove the syringe and discard in appropriate receptacle
o If a heparinized flush (i.e., heparin lock) is indicated because the catheter
will not be used for continuous infusion,
 disinfect the positive pressure valve cap on the extension tubing
again using a 2% chlorhexidine/70% alcohol antiseptic swab and
allow it to air dry
 attach the 10 mL syringe filled with 3–5 mL heparin 100iu/mL
concentration
 gently flush the IVAP
 clamp the extension tubing and remove the syringe
 Discard procedure materials in the appropriate receptacles according to facility protocol
 Discard PPE and perform hand hygiene
 Document flushing the IVAP in the patient’s medical record
19
How to Flush and Lock the Central Venous Catheter or Peripherally Inserted
Central Catheter (PICC)
 Don mask and sterile gloves
 Remove the syringe cap from a pre-filled 10 mL syringe containing sterile saline and
expel any air
 Replace the syringe cap loosely so that it can be removed easily with one hand
 For each lumen to be flushed:
o Hold the CVC tubing with the non-dominant hand
o Use the dominant hand to confirm the lumen to be flushed is clamped
o Scrub the access port/needleless connector with 2%
Chlorhexidine solution for 15 seconds & allow to air-dry
o Remove the syringe cap from the pre-filled syringe
and attach the syringe to the positive pressure valve cap
o Unclamp the CVC tubing
o Aspirate for blood return to verify patency; observe for brisk, positive blood return
and for the color and consistency of whole blood
o Inject the flush solution into the lumen utilizing the stop-start technique
o remove the syringe and re-clamp the device
 Discard the syringe in sharps disposal container
 Repeat the above steps for each lumen to be flushed
 Document flush(s) on CMAR
 If unable to inject solution reposition patient as necessary and/or troubleshoot for
mechanical-related causes (e.g., kinked tubing, closed clamps, compressed dressing)
How to Obtain a Blood Sample through a Central Venous Access Device
 Place order in computer and obtain labels
 Collect the required equipment
o Labels (bring to patient bedside- initials and time indicated on label)
o Blood tubes (include extra red top tube for waste if using vacutainer technique)
o If using syringe technique; 2-3, 10mL syringes ( 1 for waste; 1-2 for sample)
o Sterile cap for administration sets that may need to be disconnected
o 3 – 10mL preservative free NaCl 0.9% prefilled syringes
o Procedure mask
o Sterile gloves
o 2 - Chlorhexidine 2%/Alcohol 70% swabs
 Assemble necessary equipment and arrange vacutainer tubes according to CKHA draw
order.
 Don mask and sterile gloves
 Ask the patient to turn his or her head away from the procedure area, or put a mask on the
patient
20
 Pause all infusions into the catheter (if patient’s condition permits). If necessary,
disconnect the tubing for all solutions/medications infusing through the affected port—
cover the proximal end of the tubing with a sterile cap to maintain sterility
 In multi-lumen CVADs, select the appropriate lumen for blood sampling (largest, most
distal).
 Scrub port for 15 seconds with chlorhexidine 2%/alcohol 70%, let dry.
 Attach 10mL syringe with 0.9% NS, verify blood return and flush lumen with 10mL of
NS (20mL if lumen used for TPN). Wait at least one (1) minute before withdrawing
blood sample. If using syringe technique, leave syringe attached as it can be used to
aspirate waste volume. Flushing and waiting allows medications that may be infusing to
be dispersed away from catheter tip and diminishes the risk of specimen contamination.
To obtain blood sample using syringe technique:
 Unclamp catheter (if applicable)
 Aspirate 1.5 to 2 times the fill volume of the catheter in order to clear the catheter of any
other contents (approximately 6 mL)
 Clamp the catheter
 Detach the syringe and discard into an appropriate biohazard container
 Cleanse the sampling port as above
 Attach a new 10 mL syringe unit to the sampling port
 Unclamp the catheter
 Aspirate the appropriate amount of blood to perform the desired laboratory test(s)
 Clamp the catheter
 Detach the syringe
 Repeat with a new syringe as needed
 Clamp the catheter
 Transfer blood to a blood collection tube using a needleless blood transfer device (blunt
red cannula). Keep stoppers upright and fill according to order of draw.
 Gently rotate all tubes 8 times
To obtain blood sample directly into the blood collection tube (vacutainer technique):
 Use clamp mechanism if present
 Connect the vacutainer draw device directly to the valve cap on the port
 Unclamp the catheter (if applicable)
 Insert a red top tube into the direct-draw device (vacutainer sleeve) for discard.
 Remove the red top tube, discard into sharps container and insert the next tube according
to CKHA draw order until all required tubes have been collected
 Gently rotate all tubes 8 times
 Remove the blood sampling device, dispose in appropriate receptacle
 Clamp the catheter (if applicable)
21
Regardless of method, once sample obtained:
 Cleanse the sampling port as above
 Attach a 10 mL syringe filled with sterile NS to the positive pressure valve, unclamp the
catheter, and, using start-stop technique, flush the catheter (use at least 20 mL to ensure
no blood is left in the valve cap or catheter)
 Remove the syringe
 Clamp the catheter (if necessary)
 If the lumen is being used for a continuous infusion, reconnect the I.V. tubing to the
sampling port, unclamp the catheter, and restart the infusion at the prescribed rate
 Attach the appropriate patient label to each tube in
the presence of the patient; initial and write the
date/time of collection on the label
 Place the labeled specimen(s) in a biohazard bag.
Include any specimen labels not affixed to a tube. Arrange for transport for laboratory
analysis.
 Dispose of soiled equipment, per facility protocol, and remove PPE. Wash hands.
 Document in Vascular Access under “Central Line”: the lumen accessed, “blood
specimen drawn, flushed, patent”
Central Venous Catheter / PICC Dressing Change
 Transparent dressings are changed every 7 days as long as intact. Dressings that are
soiled, lifting or non-secured should be completely changed (rather than reinforced with
tape) when necessary. Gauze dressings are changed every
2 days.
 Gather equipment:
o Mask, non sterile gloves, sterile gloves
o Dressing tray
o Securement dressing (for central venous catheters)
o Tegaderm and StatLock ® for PICC catheters
o Positive pressure valve (blue)
o 1- 10mL prefilled syringe with sterile NS 0.9%
o 3-4 Chlorhexidine swabs/sticks
 Don nonsterile gloves and mask
 Remove the dressing covering the CVC site, taking care not to tug, dislodge, or damage
the catheter.
 Dispose of the soiled dressing. Use swabs to loosen StatLock ® (if in use).
 Assess the insertion site for signs and symptoms of infection, including pain/tenderness,
redness, swelling, and exudate or bleeding
 Assess the catheter at the insertion site for
o suture integrity, if sutures were used to secure the catheter
22
o the absence of cracks, kinks, or breakage
o migration. Note the length of catheter extending the from insertion site
 Dispose of soiled gloves and perform hand hygiene
 Create a sterile field, open supplies onto the sterile field, and don sterile gloves.
 Attach NS syringe to positive pressure valve(s), flush and place syringe(s) and valve(s)
on sterile field
 Gently cleanse the area over and around the CVC insertion site using Chlorhexidine 2%/
Alcohol 70% swabs. Preferred technique is up/down, back/forth (versus starting at
insertion site and moving outwards in a circle).
 Hold the catheter at the insertion site with an alcohol pad using your nondominant
hand:use your dominant hand to gently clean the catheter with Chlorhexidine. Begin from
the insertion site and move distally away from the insertion site. Repeat this process for
all lumen/tubes of the catheter; allow the solution to air-dry.
 Apply skin prep to the area of skin where any adhesive product will be placed (optional).
Note: The use of a skin preparatory agent (e.g., Benzoin) is recommended to promote
adherence when the patient is diaphoretic
 Place StatLock® anchor pad so the directional
arrows point toward insertion site. Guide catheter
wings over posts and close retainer doors.
 Peel paper backing away one side at a time
and press StatLock® in place
 Loop and tape the catheter close to the insertion site to reduce tension on the catheter and
sutures and reduce the risk of dislodgement
 Place an occlusive dressing over the insertion site, depending on the patient’s condition.
Be careful to avoid touching any skin that has been cleaned with the antiseptic
 To change positive pressure valves:
o Clamp lumen
o Remove cap and replace with new cap, pre-flushed with syringe
attached
o Unclamp lumen
o Flush, then clamp
o If ‘valved’ catheter (no clamps), instruct patient to take a breath and hold while
changing caps. If patient unable to follow commands-change valve on expiration
(done in order to prevent air from entering system)
o If neutral pressure valve in place (patient is admitted from another facility); may
continue to use until due to be changed.
 Mark the dressing with the date and time of dressing change and the initials of the
clinician performing the dressing change, and label each lumen with the name of the I.V.
medication Dispose of soiled materials and perform hand hygiene
23
 Document CVC dressing change in the patient’s medical record, including the following
information:
 Date and time of procedure
 Type of procedure completed
 Patient assessment information, including
o patient’s level of pain
o assessment of the insertion site and the status of the catheter’s integrity and
placement
 Patient’s response to the procedure, including pain/discomfort during and
immediately following the dressing change
 The following conditions should be reported immediately to the treating clinician:
o Inadvertent removal or dislodgement of the CVC
o Damage to sutures that secure the CVC to the patient
o Signs suggesting problems with integrity of the catheter, including
cracked/broken catheter tubing and/or fluid leaking from the catheter insertion
site
NOTE: Timing of dressing changes, cap changes and tubing change do not always coincide perfectly. As
a general principle: If dressing and caps are being changed; consider changing the IV tubing at that time
(even if not yet due for change). As well, caps may be changed more frequently than every 7 days (ie. post
IV contrast or blood transfusion), in which case the tubing may be reattached if changed within 24-48
hours and the distal end has been kept sterile during cap change.
Non-tunneled Central Venous Catheter Removal Procedure
 Gather the necessary equipment-
o procedure mask,
o sterile gloves
o sterile gauze dressing (2X2 or 4X4)
o air tight occlusive dressing
 Position patient in a supine flat or Trendelenburg position (unless contraindicated).
Patient should not be sitting or upright.
 Loosen and remove the existing dressing.
 Instruct the patient to hold their breath or perform the Valsalva maneuver (bear down). If
the patient is unable to co-operate or follow instructions, time the removal of catheter
with expiration.
 Grasp the catheter and gently pull out in a smooth efficient motion.
 If resistance is encountered, cover the site with an occlusive dressing and contact the
physician. Never forcibly remove a CVAD.
 Cover the insertion site immediately with sterile gauze maintaining pressure until
hemostasis is achieved.
 Cover site with an air occlusive dressing and leave in place for 24 – 72 hours.
24
References
Author: multiple. (2002). IV Therapy Made Incredibly Easy (2nd
Ed.). Lippincott Williams & Wilkins:
Philadelphia, Pa.
Ballantine, L. (2000). Maintenance of tunneled hemodialysis catheters – A nursing perspective. C.I.N.A. 2000,
16, 45-47.
Caruselli, M. et al. (2004). Secondary migration of a central venous catheter: A rare complication. The Journal of
Vascular Access, 5, 36-38.
Camp-Sorrell, D. (2004). Access device guidelines: Recommendations for nursing practice and education.
Pittsburgh, PA: Oncology Nursing Society.
Canadian Intravenous Nurses Association (1999). Intravenous Therapy Guidelines (2nd
Ed.). C.I.N.A.,
Scarborough, Ont.
Center for Disease Control. (2002). Guidelines for the prevention of intravascular catheter-related infections.
Morbidity and Mortality Weekly Report, August 9, 2002. 51(RR10). Retrieved April 16, 2004 from
http://www.cdc.gov/mmwr/preview/mmwrhtml.
Corrigan, A. et al. (2000). Core Curriculum for Intravenous Nursing (2nd
Ed.). Intravenous Nurses Society,
Lippincott: Philadelphia, Pa.
Gorski, L.A. & Czaplewski, L.M. (2005). Managing complications of midlines and PICCs. Nursing 2005, 36(6),
68-9.
Gorski, L.A. (2004). Peripherally inserted central catheters and midline catheters. Home Healthcare Nurse,
22(11), 759-773.
Gorski, L.A. (2003). Central venous access device occlusions: Part 1, Thrombotic causes & treatment. Home
Healthcare Nurse, 21(2), 115-122.
Gorski, L.A. (2003). Central venous access device occlusions: Part II, Non-thrombotic causes & treatment.
Home Healthcare Nurse, 21(3), 168-178.
Hadaway, L. (2005). Reopen the pipeline. Nursing 2005, 35(8), 54-63.
Institute for Healthcare Improvement (IHI). (2005). Preventing central line infections. Retrieved August 12,
2005 from www.IHI.com.
Knue, M., Doellman, D., Rabin, K., & Jacobs, B. (2005). The efficacy and safety of blood sampling through
peripherally inserted central catheter devices in children. Journal of Infusion Nursing, 28(1), 30-35.
Krzywda, E. & Edminson, C. (2002). Central catheter infections. Journal of Infusion Nursing, 25(1), 29-35.
Lenhart, C. (2001). Preventing central venous access device occlusions with saline only flush by use of an
adapter. Journal of Vascular Access Devices. Summer, 2001.
Masoorli, S. (2005). Legal issues related to vascular access devices and infusion therapy. Journal of Infusion
Nursing, 28(35), S18-S21.
Masoorli, S. & Angeles, T. (2002). Getting a line on central vascular access devices. Nursing 2002, 32(4), 36-43.
McKnight, S. (2004). A nurse’s guide to understanding thrombotic occlusion of central venous access devices.
C.I.N.A. 2004, 20, 36-38.
Parkin, V. (2000). A comprehensive learning approach for central venous catheter skill. C.I.N.A 2000.
Pieger-Mooney, S. (2005). Innovations in central vascular access device insertion. Journal of Infusion Nursing.
28(35), S7-S12.
Pronovost, P. et al. (2004). Acute decompensation after removing a central line: Practical approaches to
increasing safety in the Intensive Care Unit. American College of Physicians, 140(12), 1025-1033.
RNAO. (2005). Nursing best practice guidelines: Care and maintenance to reduce vascular access
complications. Toronto, On: Registered Nurses Association of Ontario.
25
RNAO. (2004). Nursing best practice guidelines: Assessment and device selection for vascular access. Toronto,
ON: Registered Nurses Association of Ontario.
Rakhtawane, J. et al. (2004). Migration of a central catheter into the pulmonary artery. European Association of
Radiology Web Programming. Retrieved August 18, 2004, from http://www.eurorad.org/case.cfm?uid=2158.
Saint, S. et al. (2002). Enhancing the safety of critically ill patients by reducing urinary and central venous
catheter-related infections. American Journal of Respiratory Critical Care Medicine, 65(11), 1475-1479.
Skokal, W. (1999). How to spot this catheter complication. RN, 62(10), 27-29.
Tezak, B. (2003). Leading change: Validating central line practices with research. C.I.N.A. 2003, 19: 34-37.
Vesely, T. (2003). Central venous catheter tip position: A continuing controversy. Journal Of Intervascular
Radiology, 14: 527-534.
Weinstein, S. (2001). Plumer’s Principles & Practice of Intravenous Therapy (7th
Ed.). Lippincott: Philadelphia,
Pa.

Central Venous Access Device Learning Package

  • 1.
    CENTRAL VENOUS ACCESSDEVICES LEARNING GUIDE On File with Professional Practice O: 2000:06 R: 2005:02; 2008:02: 2017:01, 2020:02
  • 2.
    1 Contents Central Venous AccessDevice ................................................................................................................................................... 2 Section I: CVAD Designs – Lumens, Open-ended or Valved........................................................................................... 4 Lumens:............................................................................................................................................................................... 4 Section II: Catheter Type and Features (4) ......................................................................................................................... 5 1. Percutaneous Central Catheter (Non-Tunneled):........................................................................................................... 5 2. Peripherally Inserted Central Catheter – PICC (Non-Tunneled):................................................................................. 6 3. Tunneled CVAD (i.e. Hickman or Broviac Catheter): ................................................................................................... 7 4. Totally Implanted Catheter (Port-a-Cath)...................................................................................................................... 7 Section III: Risks, Complications, Actions to Minimize Risks................................................................................. 10 1. Infection: ...................................................................................................................................................................... 10 2. Air Embolism: .............................................................................................................................................................. 11 3. Catheter Occlusions:...................................................................................................................................................... 12 4. Superior Vena Cava Syndrome (Scvs): ........................................................................................................................ 14 5. Catheter Migration: ...................................................................................................................................................... 15 6. Catheter Damage:......................................................................................................................................................... 16 7. Port-Specific Complications:........................................................................................................................................ 17 8. Insertion complications: ............................................................................................................................................... 17 Section IV: Common activities associated with ALL central venous access devices ........................................................... 18 Prior to accessing ports/lines:............................................................................................................................................ 18 How to Flush an Implanted Venous Access Port (IVAP) ................................................................................................. 18 How to Flush and Lock the Central Venous Catheter or Peripherally Inserted Central Catheter (PICC) ......................... 19 How to Obtain a Blood Sample through a Central Venous Access Device ...................................................................... 19 Central Venous Catheter / PICC Dressing Change ........................................................................................................... 21 Non-tunneled Central Venous Catheter Removal Procedure ............................................................................................ 23 References ............................................................................................................................................................................. 24
  • 3.
    2 Central Venous AccessDevice Objectives At the end of the educational program the learner will be able to:  Define a central venous access device (CVAD) and state implications for use.  Identify the anatomy utilized in CVAD placement.  Explain the 2 distal tip types, including advantages and disadvantages.  Explain the 4 CVAD types, including advantages, disadvantages and indications for use.  Describe risks and complications associated with CVADs, and actions to minimize risk.  Apply principles of CVAD care in a written test and skill station demonstration. Central Venous Access Device Central venous therapy involves the placement of a radiopaque, flexible catheter into a patient’s large veins, with the distal tip being ultimately located:  in the lower third of the superior vena cava (caval-atrial junction), or  in the inferior vena cava at the level of the diaphragm (if the CVAD is placed through the femoral vein). CVAD insertion may be done directly, or may require surgical placement, dependant upon the specific type of device. CVAD distal tip location is radiologically confirmed upon insertion and before initial usage, and whenever catheter migration is suspected. A CVAD can be used for all types of IV infusions, for central venous pressure monitoring and for venous blood sampling. The best device option for the patient depends on the type, duration, nature and complexity of therapy, patient diagnosis, condition, and ability to manage the device. Basic, Advanced and Specially Certified Competencies Basic Competency  maintaining a pre-established infusion Advanced Competency ● accessing / de-accessing ● Positive Fluid Displacement Valve (MP1000 or Ultrasite) initiation /change ● dressing change ● blood specimen collection ● flushing ● central venous pressure monitoring (Critical Care areas)
  • 4.
    3 Specially Certified Nurse Nurseswhose practice area is in Oncology or Diagnostic Imaging (D.I.) and who maintain current Certification through the Canadian Vascular Access Association (CVAA) and complete the CKHA specified Advanced Competencies, may also: ● Attempt to lyse a thrombotic CVAD occlusion with Alteplase (Cathflo) under a physician’s order. ● Remove a PICC device under a physician’s order. ● Insert a PICC device under fluoroscopy in the D.I. under the supervision and responsibility of the Radiologist. ● Repair a PICC device under a physician’s order. Advanced Competency … acquiring competence The nurse caring for a patient with a CVAD will acquire an advanced competence with the non-tunneled, tunneled and totally implanted central venous access devices by:  Reviewing the Learning Guide.  Attending a Certification class.  Successfully completing a written examination (80%).  Successfully completing a skill station demonstration with each type of CVAD, witnessed by a Practice Champion using the Performance Checklist.  Demonstrating knowledge of each type of CVAD in 2 patient care sessions, witnessed by a Practice Champion using a Performance Checklist.  Presenting the completed Performance Checklist to Professional Practice for validation of competence within 3 months of orientation date. Advance Competency … maintaining ongoing competence Accountability to maintain competence ultimately rests with the individual nurse. If the opportunity to use this skill frequently is not available, in- service is available through your CVAD Class at Clinical Orientation or by performing this skill with a Practice Champion. Refer to PRO-3-001:Nursing Competencies Required at CKHA Policy
  • 5.
    4 Section I: CVADDesigns – Lumens, Open-ended or Valved Lumens:  Available in single lumen or multiple lumens  With multiple-lumen CVADs each separate lumen is enclosed within a single sheath, making the CVAD appear to have only one line; each line allows for separate infusions through an individual lumen.  Each lumen is labeled at the CVADs proximal end; distal, median / middle, proximal, reflecting the three internal exits. The distal lumen exits at or closest to the CVAD tip. The median / middle exits from an opening along the side of the catheter, often about 2cm from the tip. The proximal lumen exits at a side opening farthest from the tip, often about 5cm.  The distal lumen is usually reserved for blood sampling and transfusions of blood products. Key Point: Maintain patency of all lumens of single or multi-lumen catheters. Open-ended:  Distal end is open into the vessel. Groshong with closed distal tip and 3-position value:  Distal catheter has a unique 3-way slit valve along the side, adjacent to the rounded, closed distal tip.  This pressure sensitive slit valve remains closed unless fluids are infused (valve opens outward) or blood is withdrawn (valve opens inward). When not in use the closed valve seals fluid inside the CVAD lumen and prevents blood from entering into the lumen, reducing the potential for retrograde blood flow and catheter occlusion, and the potential for air embolism.  Valve function may be altered by a blood clot, particulate matter, or malposition of the CVAD tip (placement in the right atrium or ventricle). In this case, bleed-back into the lumen may be evident, and the CVAD should be flushed to correct the problem. PASV Valve:  CVAD valves are located at the hub-end of the CVAD – outside of the body.
  • 6.
    5 Section II: CatheterType and Features (4) 1. Percutaneous Central Catheter (Non-Tunneled):  Designed to be left indwelling for days to weeks (usually less than a month), and generally used in an acute care setting.  Single or multiple lumens available.  Open-ended distal tip.  Most appropriate sites include the internal jugular and subclavian veins, with the distal tip located in the lower third of the superior vena cava (caval-atrial junction).  The femoral vein may also be used; indications for femoral vein access include thrombosis of the internal jugular or subclavian veins and /or Superior Vena Cava Syndrome (SVCS). When the femoral vein is used, correct tip location should be in the inferior vena cava at the level of the diaphragm. Advantages Disadvantages  Inserted by the physician at the bedside or in O.R. / E.D.  Economical  Easily removed; may be removed by RN (Advanced Competency)  Appropriate for short-term therapies including central venous pressure monitoring  Can be exchanged over a guide wire  Placement time limited  Requires routine sterile dressing changes  Requires frequent flushing (q 24 h.)  External catheter breakage possible  Body image impact  Activity restrictions  Increased infection risk with jugular placement
  • 7.
    6 2. Peripherally InsertedCentral Catheter – PICC (Non-Tunneled):  Used primarily for patients requiring several weeks or months of vascular access.  Single dual or triple lumens available.  Distal tip may be open-ended, or Groshong with close-ended 3-position valve.  Usually inserted in the basilic or cephalic vein at the antecubital fossa or 3 inches above or below it, then threaded into the superior vena cava above the right atrium.  Do not use PICC arm for measuring BP, peripheral IV sites or venipuncture.  Removal by physician or Specially Certified nurses only. ADVANTAGES DISADVANTAGES  Less traumatic to place  No surgical requirements  Lessens the infection risks associated with neck, chest or femoral insertions (decreased peripheral bacterial colonies vs. neck, thoracic or femoral area)  Preservation of peripheral vascular system  Cost and time efficient  Reliable long-term access  Usually easily removed (removal only by physician or Specially Certified nurse  May be repaired  Requires routine flushing (q 7 days)  Requires routine sterile dressing changes  Care costs on a long-term basis  Some PICCs (small gauge) are not recommended for blood sampling  Patient self-care is difficult  External catheter breakage possible  Body image impact  Activity restrictions  Requires adequate peripheral access  Post-insertion phlebitis common
  • 8.
    7 3. Tunneled CVAD(i.e. Hickman or Broviac Catheter):  Used for long-term intermittent, continuous, or daily vascular access.  May be appropriate for short-term use if reliable access needed.  Available with multiple lumens (single, double, triple).  An antimicrobial dacron or collagen cuff is located along the catheter sheath approximately 5cm from the CVAD exit site. Within 3-4 weeks post-insertion, fibrous tissue enmeshes into the cuff. This assists in stabilizing the device, and helps to prevent microorganisms from migrating along the outside of the catheter lumen.  Distal tip may be open-ended, or Groshong close-ended with 3-position valve.  Surgically implanted, the CVAD tip is placed via one of the large central veins into the superior vena cava; the proximal end is tunneled subcutaneously for several inches to the desired exit site on the anterior chest.  Initially there are 2 wound sites. Sutures remain in place for a minimum of 10 days; up to 6 weeks if patient is immuno-suppressed. ADVANTAGES DISADVANTAGES  Decreased infection rate  Patient self-care  Can be left in indefinitely  Once exit site is healed, modified clean dressing technique used  Can be repaired externally  Requires routine flushing (q 7 days)  External device, body image impact, catheter breakage possible  Daily to weekly site care  Surgical insertion (may be an outpatient)  Requires surgical removal
  • 9.
    8 4. Totally ImplantedCatheter (Port-a-Cath)  Used for very long-term intermittent, continuous or daily vascular access.  Consists of a catheter attached to a plastic or metal reservoir; also has a dense silicone septum for access to the reservoir. Port septums are designed to withstand up to 2000 punctures, depending on the manufacturer and the gauge of needle used.  Available features include distal tip with open-ended or Groshong valve, single or dual ports, side- access ports, dome ports (accessed from any angle), or peripheral ports.  A medic-alert identifier is strongly recommended to provide specific information on the type of implanted device.  Adequate subcutaneous tissue is required over the port to prevent erosion through the skin. Conversely, the port must not be placed too deep as excess adipose tissue over the port can make it difficult to locate the port for access. ADVANTAGES DISADVANTAGES  No dressing (unless accessed for therapy)  Flush every 4 weeks (if not accessed)  Body image intact  Unrestricted activity  Decreased risk of infection  No external components to break  Self care possible  Needle access required, use a special non-coring Huber needle ONLY. (These have a deflected point that helps prevent damage to the septum.)  Displacement of needle is possible  Most expensive vascular access device  Requires routine flushing (monthly)  Surgical procedure to place and remove  Painful to access; use of topical anesthesia (EMLA® Cream) recommended. Backing cannot be punctured by needle
  • 10.
    9 Accessing Totally ImplantedPort Cleanse skin with Chlorhexidine 2%, from the centre of the port to the periphery, 3 times, using a new swab each time. Allow to air dry. The tip of a non-coring needle is designed to help preserve the integrity and durability of the septum. Insert needle perpendicular to port septum. Advance needle through skin and septum until reaching bottom of reservoir. Verify correct needle placement by blood aspiration. Do not begin injection until proper needle placement has been confirmed. Do not manipulate the needle once it is in the septum. Secure needle to skin with transparent dressing.
  • 11.
    10 Section III: Risks,Complications, Actions to Minimize Risks 1. Infection:  most common CVAD complication  strong correlation between CVAD infection and thrombus formation  locations: - at site - internal lumen - systemic (sepsis) RISK FACTORS: - not using aseptic technique (mask & sterile gloves) when accessing CVAD - multiple lumen catheters - use of stopcocks - catheter location (jugular & femoral locations have higher infection risks) - catheter secured with sutures - long catheter dwell time duration - frequent dressing changes - thrombus formation - compromised immune status - distant infection site (seeding) PREVENTION: - mask & sterile gloves when accessing - watch for  temp / pain / redness / edema (CVAD infusions should never cause edema) - change semipermeable dressing (Tegaderm) q 7 days - change gauze dressing q 48 hours - stabilize using an adherent securement device (StatLock) – change with each dressing change - fibrinolytic therapy to treat thrombus formations promptly (Specially Certified nurse or physician)
  • 12.
    11 2. Air Embolism: Occurs when the CVAD is open to air.  Intra-thoracic pressure is less than air pressure, drawing air into the vein through an open device. RISK FACTORS - on insertion & removal - change of tubing, access cap or Positive Fluid Displacement Valve (eg. MP1000 or Ultrasite) - catheter break or hole - tubing & catheter are disconnected - patient sits up, coughs, laughs, cries, sighs or sneezes during CVAD access - failure to apply occlusive dressing upon removal SIGNS & SYMPTOMS: - chest pain, respiratory distress, tachycardia, cyanosis, hypotension,  level of consciousness. PREVENTION: - ensure tubing, syringe and positive fluid displacement valve are air-free Prior to accessing: - always clamp line - place patient in Trendelenburg position - increase intrathoracic pressure by requesting patient do Valsalva maneuver or slowly exhale Removing CVAD: - cover site with occlusive dressing (eg. Betadine ointment on a gauze square) SUSPECT Air Embolism? - close clamp, cap end, or reattach IV tubing immediately - if a catheter break or hole, fold catheter back on itself & clamp - turn patient onto left side so air collects in right atrium - administer oxygen - notify physician
  • 13.
    12 3. Catheter Occlusions: Mechanical:- catheter kinked or sutures too tight. - catheter tip up against vessel wall (esp. left-sided insertion). - “Pinch-Off Syndrome”; subclavian catheter pinched between clavicle & 1st rib. Chemical: - drug precipitate, especially strongly acidic or alkaline medications. - lipid builds up on internal lumen. Thrombus: RISK FACTORS: traumatic insertion, infection, dehydration, venous stasis (bed rest), hypotension, heart failure, hypertonic fluids, hyper-coagulable states, pistoning movement, insufficient / ineffective flushing. SIGNS & SYMPTOMS: - inability to withdraw blood. - progressive difficulty  inability to infuse fluids. - edema at insertion site or anywhere distal from the catheter tip (i.e. affected arm). PREVENTION: - aspirate to check for blood return before infusing. - routine catheter flushing & heparin rinses (if ordered) - watch for limb edema or pain with infusions. - attach a positive fluid displacement device to each lumen (MP1000 or Ultrasite). - minimize venous stasis. - promptly treat dehydration, infection, heart failure. - aseptic accessing technique. - fibrinolytic therapy to treat thrombus formations promptly (Specially Certified nurse or physician). - stabilize to prevent pistoning, using an adherent securement device (StatLock)
  • 14.
    13 Types / Sitesof Thrombotic Occlusions: Type Description Appearance Intraluminal Clot forms within the lumen of the catheter, resulting in a partial obstruction with increased resistance / sluggishness to fluid administration. Frequently and quickly may progress to complete lumen obstruction. Fibrin Tail / Flap (“Toilet-Seat”) A fibrin layer forms, encasing the CVAD at the tip. As blood and cellular components are progressively deposited a fibrin “tail” can grow. Fluids and flushing are usually permitted, but when aspiration is attempted the “tail” acts as a one-way-valve covering the CVAD tip. Fibrin Sheath / Sleeve A fibrin layer forms encasing the CVAD at the tip. As blood and cellular components are progressively deposited a fibrin “sock” or sleeve can form, coating the entire end of the catheter. Flushing may allow fluid to travel in a retrograde fashion along the sheath, but blood aspiration is generally not possible. Mural Catheter tip irritation of the vessel wall causes thrombus accumulation between the CVAD and the injury site, eventually adhering the catheter to the vessel wall. This type of thrombosis is at increased risk for Superior Vena Cava Syndrome (SVCS).
  • 15.
    14 4. Superior VenaCava Syndrome (Scvs):  Thrombus develops to occlude the superior vena cava.  Prevents blood return to the heart.  May develop within 96 hr of insertion. Early Signs & Symptoms (worse when lying down): - head feels “full” - discomfort in shoulder, neck or arm on catheter placement side. - collar, necklace or rings feel tight - edema of face, eyes, hands - swollen, cyanotic lips Quick Progression to: - dyspnea, coughing, hoarseness, hemoptysis, suffocating feeling. - chest wall veins become visible (mammary veins engorge). - jugular vein distention - confusion, headache - visual disturbances Late S/S: - sepsis - emboli - cerebral edema - airway obstruction - death SUSPECT SVCS? - stop infusion - elevate head of bed - administer oxygen - notify physician - do not remove CVAD (may embolize the thrombus) Prevention: - aseptic technique (close link with infection). - prevent pistoning movement (irritates vein wall). - tip placement in lower third of superior vena cava (fluttering against SVC arch causes irritation & thrombus formation). - aspirate to check for blood return before therapy delivery. - notify physician if edema or pain during infusion. - prompt fibrinolytic therapy for thrombotic occlusions (Specially Certified nurse or physician).
  • 16.
    15 5. Catheter Migration: IdeallyCVAD tip s/b:  in the distal third of the superior vena cava  at the level of the diaphragm if inserted femorally Migrating “IN”:  External catheter length shorter than the measurement recorded at last dressing change.  A move into right atrium triggers atrial arrhythmias; eg. tachycardia, palpitations.  Further inward migration may trigger ventricular arrhythmias, cardiac tamponade and death. Migrating “OUT”:  External catheter length longer than last dressing change’s measurement.  Tip location in arch of superior vena cava, causing irritation (thrombus), or erosion & perforation of vessel (more common with left-sided insertion).  Tip no longer in maximum blood flow area – irritant, caustic medications will damage vessels. MINIMIZE Risk:  Measure & document external length of CVAD with every dressing change; compare with last documented length; before infusing notify physician if changed (x-ray for tip placement will be needed).  Aspirate for blood return before infusing.  If any pain / swelling with infusion, stop therapy and notify physician.  Nurse can slightly withdraw a CVAD upon specific physician measurement order; a CVAD should never be readvanced.  Loop catheter prior to taping; use a StatLock to anchor catheter.
  • 17.
    16 6. Catheter Damage: Hole, tear, break or perforation of CVAD, either internally or externally. INTERNAL Causes & S/S:  “Pinch-Off” syndrome – catheter fatigue results in damage or severing of CVAD segment.  Using a syringe size smaller than 10mL for access; a small syringe exerts higher pressure ( 25 psi), rupturing the CVAD.  Infusion can leak into tissue; may cause extravasation and necrosis of tissue surrounding the leak.  Catheter segment may embolize to the heart or pulmonary artery.  S/S includes pain & edema at site of leakage (clavicle most common); if embolizes - sudden chest pain, dyspnea, cyanosis, arrhythmias, shock. EXTERNAL Causes & S/S:  Improper clamping of device, or use of sharp objects near catheter; i.e. using scissors to remove dressing or using needle to access the CVAD.  S/S (air emboli); chest pain, respiratory distress, tachycardia, cyanosis, hypotension,  level of consciousness. PREVENTION:  Aspirate for blood return before infusing.  When infusing, monitor for undue resistance or swelling, stinging, pain.  Use a 10mL sized syringe (or larger) when accessing.  Use needleless or needle-free product to access CVAD.  Carefully insert & secure non-coring needle into implanted port.  Careful clamping procedures; no metal clamps.  Avoid using scissors or other sharp objects near catheter. SUSPECT AIR EMBOLI / CVAD DAMAGE?  Fold catheter back on itself & clamp.  Turn patient onto left side so air collects in right atrium.  Administer oxygen.  Notify physician.
  • 18.
    17 7. Port-Specific Complications: The port may dislodge within the subcutaneous pocket. When this occurs, the port is noted to move easily under the skin. Resistance may also be evident when attempting to flush or infuse, and swelling may occur at the site. This complication may occur as a result of trauma to the site or from manipulation of the port by the patient (Twiddler’s Syndrome). The port should be resutured if possible to allow for reliable, safe access of the port.  The port may separate from the catheter as a result of trauma to the site or from high-pressure flushing or infusion.  Aspirating to check for blood return is important before initiating infusions, particularly when administering vesicant drugs. If there is doubt about the functional ability of the CVAD after flushing and aspiration, the physician should be consulted before initiating infusion. 8. Insertion complications:  Insertion complications of non-tunneled percutaneous CVADs, tunneled catheters and totally implanted ports may include pneumothorax, hemothorax, air emboli and arterial puncture.  Insertion complications of PICCs may include arterial puncture, difficult cannulation, difficult threading, and nerve injury.
  • 19.
    18 Section IV: Commonactivities associated with ALL central venous access devices Prior to accessing ports/lines:  Perform hand hygiene and don PPE if indicated  Identify the patient using 2 patient identifiers  Obtain the patient’s verbal consent prior to beginning the procedure  Position the patient in bed or reclining chair to facilitate easier access How to Flush an Implanted Venous Access Port (IVAP)  First perform a preliminary assessment of the patient’s IVAP  Palpate the skin overlying the IVAP:  To verify the skin is intact and non-tender  to determine the amount of adipose tissue present to aid in selection of the appropriate-sized needle (if information is not available in the patient’s medical record)  to confirm the IVAP has not migrated or flipped over  Flush the IVAP using the following steps o Don mask and sterile gloves o Disinfect the positive pressure valve cap on the extension tubing using 2% chlorhexidine/70% alcohol antiseptic swab and allow it to air dry o Use aseptic technique to attach a 10 mL NS flush syringe to the extension tubing o Open the clamp on the tubing o Gently flush the tubing using start-stop technique  Observe for leakage and/or infiltration  The tubing should never be flushed with force due to the risk of thrombus dislodgement or catheter rupture o Remove the syringe and discard in appropriate receptacle o If a heparinized flush (i.e., heparin lock) is indicated because the catheter will not be used for continuous infusion,  disinfect the positive pressure valve cap on the extension tubing again using a 2% chlorhexidine/70% alcohol antiseptic swab and allow it to air dry  attach the 10 mL syringe filled with 3–5 mL heparin 100iu/mL concentration  gently flush the IVAP  clamp the extension tubing and remove the syringe  Discard procedure materials in the appropriate receptacles according to facility protocol  Discard PPE and perform hand hygiene  Document flushing the IVAP in the patient’s medical record
  • 20.
    19 How to Flushand Lock the Central Venous Catheter or Peripherally Inserted Central Catheter (PICC)  Don mask and sterile gloves  Remove the syringe cap from a pre-filled 10 mL syringe containing sterile saline and expel any air  Replace the syringe cap loosely so that it can be removed easily with one hand  For each lumen to be flushed: o Hold the CVC tubing with the non-dominant hand o Use the dominant hand to confirm the lumen to be flushed is clamped o Scrub the access port/needleless connector with 2% Chlorhexidine solution for 15 seconds & allow to air-dry o Remove the syringe cap from the pre-filled syringe and attach the syringe to the positive pressure valve cap o Unclamp the CVC tubing o Aspirate for blood return to verify patency; observe for brisk, positive blood return and for the color and consistency of whole blood o Inject the flush solution into the lumen utilizing the stop-start technique o remove the syringe and re-clamp the device  Discard the syringe in sharps disposal container  Repeat the above steps for each lumen to be flushed  Document flush(s) on CMAR  If unable to inject solution reposition patient as necessary and/or troubleshoot for mechanical-related causes (e.g., kinked tubing, closed clamps, compressed dressing) How to Obtain a Blood Sample through a Central Venous Access Device  Place order in computer and obtain labels  Collect the required equipment o Labels (bring to patient bedside- initials and time indicated on label) o Blood tubes (include extra red top tube for waste if using vacutainer technique) o If using syringe technique; 2-3, 10mL syringes ( 1 for waste; 1-2 for sample) o Sterile cap for administration sets that may need to be disconnected o 3 – 10mL preservative free NaCl 0.9% prefilled syringes o Procedure mask o Sterile gloves o 2 - Chlorhexidine 2%/Alcohol 70% swabs  Assemble necessary equipment and arrange vacutainer tubes according to CKHA draw order.  Don mask and sterile gloves  Ask the patient to turn his or her head away from the procedure area, or put a mask on the patient
  • 21.
    20  Pause allinfusions into the catheter (if patient’s condition permits). If necessary, disconnect the tubing for all solutions/medications infusing through the affected port— cover the proximal end of the tubing with a sterile cap to maintain sterility  In multi-lumen CVADs, select the appropriate lumen for blood sampling (largest, most distal).  Scrub port for 15 seconds with chlorhexidine 2%/alcohol 70%, let dry.  Attach 10mL syringe with 0.9% NS, verify blood return and flush lumen with 10mL of NS (20mL if lumen used for TPN). Wait at least one (1) minute before withdrawing blood sample. If using syringe technique, leave syringe attached as it can be used to aspirate waste volume. Flushing and waiting allows medications that may be infusing to be dispersed away from catheter tip and diminishes the risk of specimen contamination. To obtain blood sample using syringe technique:  Unclamp catheter (if applicable)  Aspirate 1.5 to 2 times the fill volume of the catheter in order to clear the catheter of any other contents (approximately 6 mL)  Clamp the catheter  Detach the syringe and discard into an appropriate biohazard container  Cleanse the sampling port as above  Attach a new 10 mL syringe unit to the sampling port  Unclamp the catheter  Aspirate the appropriate amount of blood to perform the desired laboratory test(s)  Clamp the catheter  Detach the syringe  Repeat with a new syringe as needed  Clamp the catheter  Transfer blood to a blood collection tube using a needleless blood transfer device (blunt red cannula). Keep stoppers upright and fill according to order of draw.  Gently rotate all tubes 8 times To obtain blood sample directly into the blood collection tube (vacutainer technique):  Use clamp mechanism if present  Connect the vacutainer draw device directly to the valve cap on the port  Unclamp the catheter (if applicable)  Insert a red top tube into the direct-draw device (vacutainer sleeve) for discard.  Remove the red top tube, discard into sharps container and insert the next tube according to CKHA draw order until all required tubes have been collected  Gently rotate all tubes 8 times  Remove the blood sampling device, dispose in appropriate receptacle  Clamp the catheter (if applicable)
  • 22.
    21 Regardless of method,once sample obtained:  Cleanse the sampling port as above  Attach a 10 mL syringe filled with sterile NS to the positive pressure valve, unclamp the catheter, and, using start-stop technique, flush the catheter (use at least 20 mL to ensure no blood is left in the valve cap or catheter)  Remove the syringe  Clamp the catheter (if necessary)  If the lumen is being used for a continuous infusion, reconnect the I.V. tubing to the sampling port, unclamp the catheter, and restart the infusion at the prescribed rate  Attach the appropriate patient label to each tube in the presence of the patient; initial and write the date/time of collection on the label  Place the labeled specimen(s) in a biohazard bag. Include any specimen labels not affixed to a tube. Arrange for transport for laboratory analysis.  Dispose of soiled equipment, per facility protocol, and remove PPE. Wash hands.  Document in Vascular Access under “Central Line”: the lumen accessed, “blood specimen drawn, flushed, patent” Central Venous Catheter / PICC Dressing Change  Transparent dressings are changed every 7 days as long as intact. Dressings that are soiled, lifting or non-secured should be completely changed (rather than reinforced with tape) when necessary. Gauze dressings are changed every 2 days.  Gather equipment: o Mask, non sterile gloves, sterile gloves o Dressing tray o Securement dressing (for central venous catheters) o Tegaderm and StatLock ® for PICC catheters o Positive pressure valve (blue) o 1- 10mL prefilled syringe with sterile NS 0.9% o 3-4 Chlorhexidine swabs/sticks  Don nonsterile gloves and mask  Remove the dressing covering the CVC site, taking care not to tug, dislodge, or damage the catheter.  Dispose of the soiled dressing. Use swabs to loosen StatLock ® (if in use).  Assess the insertion site for signs and symptoms of infection, including pain/tenderness, redness, swelling, and exudate or bleeding  Assess the catheter at the insertion site for o suture integrity, if sutures were used to secure the catheter
  • 23.
    22 o the absenceof cracks, kinks, or breakage o migration. Note the length of catheter extending the from insertion site  Dispose of soiled gloves and perform hand hygiene  Create a sterile field, open supplies onto the sterile field, and don sterile gloves.  Attach NS syringe to positive pressure valve(s), flush and place syringe(s) and valve(s) on sterile field  Gently cleanse the area over and around the CVC insertion site using Chlorhexidine 2%/ Alcohol 70% swabs. Preferred technique is up/down, back/forth (versus starting at insertion site and moving outwards in a circle).  Hold the catheter at the insertion site with an alcohol pad using your nondominant hand:use your dominant hand to gently clean the catheter with Chlorhexidine. Begin from the insertion site and move distally away from the insertion site. Repeat this process for all lumen/tubes of the catheter; allow the solution to air-dry.  Apply skin prep to the area of skin where any adhesive product will be placed (optional). Note: The use of a skin preparatory agent (e.g., Benzoin) is recommended to promote adherence when the patient is diaphoretic  Place StatLock® anchor pad so the directional arrows point toward insertion site. Guide catheter wings over posts and close retainer doors.  Peel paper backing away one side at a time and press StatLock® in place  Loop and tape the catheter close to the insertion site to reduce tension on the catheter and sutures and reduce the risk of dislodgement  Place an occlusive dressing over the insertion site, depending on the patient’s condition. Be careful to avoid touching any skin that has been cleaned with the antiseptic  To change positive pressure valves: o Clamp lumen o Remove cap and replace with new cap, pre-flushed with syringe attached o Unclamp lumen o Flush, then clamp o If ‘valved’ catheter (no clamps), instruct patient to take a breath and hold while changing caps. If patient unable to follow commands-change valve on expiration (done in order to prevent air from entering system) o If neutral pressure valve in place (patient is admitted from another facility); may continue to use until due to be changed.  Mark the dressing with the date and time of dressing change and the initials of the clinician performing the dressing change, and label each lumen with the name of the I.V. medication Dispose of soiled materials and perform hand hygiene
  • 24.
    23  Document CVCdressing change in the patient’s medical record, including the following information:  Date and time of procedure  Type of procedure completed  Patient assessment information, including o patient’s level of pain o assessment of the insertion site and the status of the catheter’s integrity and placement  Patient’s response to the procedure, including pain/discomfort during and immediately following the dressing change  The following conditions should be reported immediately to the treating clinician: o Inadvertent removal or dislodgement of the CVC o Damage to sutures that secure the CVC to the patient o Signs suggesting problems with integrity of the catheter, including cracked/broken catheter tubing and/or fluid leaking from the catheter insertion site NOTE: Timing of dressing changes, cap changes and tubing change do not always coincide perfectly. As a general principle: If dressing and caps are being changed; consider changing the IV tubing at that time (even if not yet due for change). As well, caps may be changed more frequently than every 7 days (ie. post IV contrast or blood transfusion), in which case the tubing may be reattached if changed within 24-48 hours and the distal end has been kept sterile during cap change. Non-tunneled Central Venous Catheter Removal Procedure  Gather the necessary equipment- o procedure mask, o sterile gloves o sterile gauze dressing (2X2 or 4X4) o air tight occlusive dressing  Position patient in a supine flat or Trendelenburg position (unless contraindicated). Patient should not be sitting or upright.  Loosen and remove the existing dressing.  Instruct the patient to hold their breath or perform the Valsalva maneuver (bear down). If the patient is unable to co-operate or follow instructions, time the removal of catheter with expiration.  Grasp the catheter and gently pull out in a smooth efficient motion.  If resistance is encountered, cover the site with an occlusive dressing and contact the physician. Never forcibly remove a CVAD.  Cover the insertion site immediately with sterile gauze maintaining pressure until hemostasis is achieved.  Cover site with an air occlusive dressing and leave in place for 24 – 72 hours.
  • 25.
    24 References Author: multiple. (2002).IV Therapy Made Incredibly Easy (2nd Ed.). Lippincott Williams & Wilkins: Philadelphia, Pa. Ballantine, L. (2000). Maintenance of tunneled hemodialysis catheters – A nursing perspective. C.I.N.A. 2000, 16, 45-47. Caruselli, M. et al. (2004). Secondary migration of a central venous catheter: A rare complication. The Journal of Vascular Access, 5, 36-38. Camp-Sorrell, D. (2004). Access device guidelines: Recommendations for nursing practice and education. Pittsburgh, PA: Oncology Nursing Society. Canadian Intravenous Nurses Association (1999). Intravenous Therapy Guidelines (2nd Ed.). C.I.N.A., Scarborough, Ont. Center for Disease Control. (2002). Guidelines for the prevention of intravascular catheter-related infections. Morbidity and Mortality Weekly Report, August 9, 2002. 51(RR10). Retrieved April 16, 2004 from http://www.cdc.gov/mmwr/preview/mmwrhtml. Corrigan, A. et al. (2000). Core Curriculum for Intravenous Nursing (2nd Ed.). Intravenous Nurses Society, Lippincott: Philadelphia, Pa. Gorski, L.A. & Czaplewski, L.M. (2005). Managing complications of midlines and PICCs. Nursing 2005, 36(6), 68-9. Gorski, L.A. (2004). Peripherally inserted central catheters and midline catheters. Home Healthcare Nurse, 22(11), 759-773. Gorski, L.A. (2003). Central venous access device occlusions: Part 1, Thrombotic causes & treatment. Home Healthcare Nurse, 21(2), 115-122. Gorski, L.A. (2003). Central venous access device occlusions: Part II, Non-thrombotic causes & treatment. Home Healthcare Nurse, 21(3), 168-178. Hadaway, L. (2005). Reopen the pipeline. Nursing 2005, 35(8), 54-63. Institute for Healthcare Improvement (IHI). (2005). Preventing central line infections. Retrieved August 12, 2005 from www.IHI.com. Knue, M., Doellman, D., Rabin, K., & Jacobs, B. (2005). The efficacy and safety of blood sampling through peripherally inserted central catheter devices in children. Journal of Infusion Nursing, 28(1), 30-35. Krzywda, E. & Edminson, C. (2002). Central catheter infections. Journal of Infusion Nursing, 25(1), 29-35. Lenhart, C. (2001). Preventing central venous access device occlusions with saline only flush by use of an adapter. Journal of Vascular Access Devices. Summer, 2001. Masoorli, S. (2005). Legal issues related to vascular access devices and infusion therapy. Journal of Infusion Nursing, 28(35), S18-S21. Masoorli, S. & Angeles, T. (2002). Getting a line on central vascular access devices. Nursing 2002, 32(4), 36-43. McKnight, S. (2004). A nurse’s guide to understanding thrombotic occlusion of central venous access devices. C.I.N.A. 2004, 20, 36-38. Parkin, V. (2000). A comprehensive learning approach for central venous catheter skill. C.I.N.A 2000. Pieger-Mooney, S. (2005). Innovations in central vascular access device insertion. Journal of Infusion Nursing. 28(35), S7-S12. Pronovost, P. et al. (2004). Acute decompensation after removing a central line: Practical approaches to increasing safety in the Intensive Care Unit. American College of Physicians, 140(12), 1025-1033. RNAO. (2005). Nursing best practice guidelines: Care and maintenance to reduce vascular access complications. Toronto, On: Registered Nurses Association of Ontario.
  • 26.
    25 RNAO. (2004). Nursingbest practice guidelines: Assessment and device selection for vascular access. Toronto, ON: Registered Nurses Association of Ontario. Rakhtawane, J. et al. (2004). Migration of a central catheter into the pulmonary artery. European Association of Radiology Web Programming. Retrieved August 18, 2004, from http://www.eurorad.org/case.cfm?uid=2158. Saint, S. et al. (2002). Enhancing the safety of critically ill patients by reducing urinary and central venous catheter-related infections. American Journal of Respiratory Critical Care Medicine, 65(11), 1475-1479. Skokal, W. (1999). How to spot this catheter complication. RN, 62(10), 27-29. Tezak, B. (2003). Leading change: Validating central line practices with research. C.I.N.A. 2003, 19: 34-37. Vesely, T. (2003). Central venous catheter tip position: A continuing controversy. Journal Of Intervascular Radiology, 14: 527-534. Weinstein, S. (2001). Plumer’s Principles & Practice of Intravenous Therapy (7th Ed.). Lippincott: Philadelphia, Pa.