This document provides instructions for disassembling the transmission and torque converter of a wheel loader. It describes removing over 30 components in a specific sequence, including removing identification marks, cleaning parts, draining fluids, and using various tools to separate housings, remove seals, bearings, gears, plates, rings, and other parts. Precautions are outlined for releasing spring forces and preventing fluid loss or contamination during disassembly.
Caterpillar Cat 924H and 924Hz Wheel Loader (Prefix JTM) Service Repair Manua...fijsekkdmdm2w
The document provides disassembly instructions for a transmission and torque converter on a wheel loader model. It lists over 40 steps to disassemble various components using specialized tools, including removing housing assemblies, gears, bearings, seals, plates, discs, pistons, springs, and sensors. Cleanliness is emphasized throughout the process to prevent contamination of parts.
Caterpillar Cat 924H and 924Hz Wheel Loader (Prefix JTM) Service Repair Manua...onyvzcwadtu05
This document provides disassembly instructions for a 924H wheel loader transmission and torque converter. It describes 34 steps to disassemble the components, including removing bolts, seals, gears, bearings, plates, discs, pistons, springs, and other parts. Precautions are outlined for releasing spring tension and containing fluids. Required tools include lever pullers, link brackets, jack stands, shackles, forcing screws, retaining ring pliers, slide hammers, compressors, drivers, crossblocks, legs, and puller plates.
Caterpillar Cat 924H and 924Hz Wheel Loader (Prefix JTM) Service Repair Manua...ze3xiandiao
This document provides disassembly instructions for a 924H wheel loader transmission and torque converter. It describes 34 steps to disassemble the components, including removing bolts, seals, gears, bearings, plates, discs, pistons, springs, and other parts. Precautions are outlined for releasing spring tension and containing fluids. Required tools include lever pullers, link brackets, jack stands, shackles, forcing screws, retaining ring pliers, slide hammers, compressors, drivers, crossblocks, legs, and puller plates.
This document provides instructions for disassembling the transmission and torque converter of wheel loader models 924H and 924HZ. It outlines 34 steps to fully disassemble the components, including removing housing assemblies, gears, bearings, seals, plates, discs, pistons, springs, and other parts. Precautions are provided regarding fluid containment, cleanliness, and safety when releasing spring forces. A list of 18 required specialty tools is also included.
This document provides instructions for disassembling the transmission and torque converter of a wheel loader model. It lists over 40 detailed steps and accompanying illustrations to remove components like gears, clutches, seals, bearings, and housings. Special tools are required for tasks like compressing springs and removing press-fit parts. Cleanliness and fluid containment are emphasized throughout the process.
Caterpillar Cat 924H and 924Hz Wheel Loader (Prefix PED) Service Repair Manua...9fiisekodkdmd
This document provides instructions for disassembling the transmission and torque converter of a wheel loader model. It lists over 40 detailed steps and refers to various tools needed to remove parts like housing assemblies, gears, bearings, seals, plates, and clutch groups. Safety notices are included to handle parts and release spring forces carefully. The high-level goal is to disassemble the transmission and torque converter into their individual components to allow for inspection and repair of parts.
This document provides instructions for disassembling the transmission and torque converter of a wheel loader model. It lists over 40 detailed steps and accompanying illustrations to remove components like housing assemblies, gears, clutches, seals, bearings and more. Special tools are required and safety precautions mentioned include preventing fluid loss, cleaning parts, and protecting from spring forces. The goal is a fully disassembled transmission for inspection or repair of internal parts.
This document provides instructions for disassembling the transmission and torque converter of a wheel loader model. It lists over 40 detailed steps and accompanying illustrations to remove components like gears, clutches, seals, bearings, and housings. Special tools are required for tasks like compressing springs and removing press-fit parts. Cleanliness and fluid containment are emphasized throughout the process.
Caterpillar Cat 924H and 924Hz Wheel Loader (Prefix PED) Service Repair Manua...9fikslkddmd8u
This document provides instructions for disassembling the transmission and torque converter of a wheel loader model. It lists over 40 detailed steps and refers to various tools needed to remove parts like housing assemblies, gears, bearings, seals, plates, and clutch groups. Safety notices are included to handle parts and release spring forces carefully. The high-level goal is to disassemble the transmission and torque converter into their individual components to allow for inspection and repair of parts.
This document provides disassembly instructions for a 924H wheel loader transmission and torque converter. It outlines 49 steps to fully disassemble the components, including removing housing assemblies, gears, clutches, bearings, seals and other parts. Special tools are required for tasks like removing retaining rings, compressing springs and separating connected pieces. Cleanliness is important during disassembly to prevent contamination of parts.
This document provides disassembly instructions for a 924H wheel loader transmission and torque converter. It describes in detail how to remove over 30 components using various tools. Key steps include removing the transmission oil pump, then lifting out the transmission and torque converter as a unit. Multiple gears, bearings, seals, and clutch assemblies must then be dismantled using retaining ring pliers and pullers to access all internal parts. Cleanliness is emphasized throughout to prevent contamination.
This document provides disassembly instructions for a 924H wheel loader transmission and torque converter. It outlines 49 steps to fully disassemble the components, including removing housing assemblies, gears, clutches, bearings, seals and other parts. Special tools are required for tasks like removing retaining rings, compressing springs and separating connected pieces. Cleanliness is important during disassembly to prevent contamination of parts.
This document provides instructions for disassembling the transmission and torque converter of a 924HZ wheel loader. It outlines 48 steps to remove various components such as housing assemblies, gears, clutches, seals, bearings and other parts. Precautions are listed to prevent fluid loss and entry of contaminants. Required tools include lever pullers, jack stands, retaining ring pliers, drivers, compressors and other specialized equipment to separate components and remove securing components.
This document provides instructions for disassembling the transmission and torque converter of a 924HZ wheel loader. It outlines 48 steps to remove various components such as housing assemblies, gears, clutches, seals, bearings and other parts. Precautions are listed to prevent fluid loss and entry of contaminants. Required tools include lever pullers, jack stands, retaining ring pliers, drivers, compressors and other specialized equipment to separate components in a clean and safe manner.
This document provides disassembly instructions for a 924HZ wheel loader transmission and torque converter. It outlines 48 steps to fully disassemble the transmission, including removing housing assemblies, gears, shafts, bearings, seals, and clutch groups. Various specialty tools are required to separate components and remove retaining rings. Precautions are listed to prevent fluid loss and contamination during disassembly.
The document provides disassembly instructions for a 924HZ wheel loader transmission and torque converter. It outlines 48 steps to disassemble the transmission housing, remove internal components like gears, shafts, and clutches. Precautions are listed to prevent fluid loss and contamination. Required specialty tools are also identified to aid in disassembly of components like bearings, seals, and springs.
Caterpillar cat m322 c wheeled excavator (prefix h2e) service repair manual (...fjjskekdmnsme
This document provides instructions for disassembling and assembling the swing drive of an M322C wheeled excavator. It outlines 28 steps to disassemble the various components of the swing drive, including removing hoses, the swing brake assembly, gears, seals, bearings and other parts. It then lists 12 steps for reassembling the swing drive, providing details on installing components, setting bearing preloads, and tightening nuts to the specified torques. Precautions are included to contain fluids, release spring forces safely, and clean parts thoroughly during the process.
Caterpillar cat m322 c wheeled excavator (prefix h2e) service repair manual (...fjjskkdmnsme
This document provides instructions for disassembling and assembling the swing drive of an M322C wheeled excavator. It outlines 28 steps to disassemble the various components of the swing drive, including removing hoses, the swing brake assembly, gears, seals, bearings and other parts. It then lists 12 steps for reassembling the swing drive, providing details on installing components, setting bearing preloads, and tightening nuts to the specified torques. Precautions are included to contain fluids, release spring forces safely, and clean parts thoroughly during the process.
Caterpillar Cat 924G and 924Gz Wheel Loader (Prefix RTA) Service Repair Manua...9fikslkddmd8u
This document provides instructions for disassembling the transmission and torque converter of a 924G or 924Gz wheel loader. It lists 50 steps to completely disassemble the transmission, removing components like gears, plates, seals, bearings, and clutch groups. Special tools are required for tasks like compressing clutch springs and removing certain parts. Cleanliness is emphasized throughout to prevent dirt from contaminating internal parts.
Caterpillar Cat TH460B Telehandler (Prefix SLF) Service Repair Manual Instant...ting1499041267
This document provides instructions for removing and installing various engine components on a Caterpillar 3054E engine, including the cylinder head, rocker shaft, lifters, and camshaft. The procedures describe cleaning parts, lubricating bolts, and torquing fasteners to the specified values. Special tools may be required for some steps.
Caterpillar Cat TH350B Telehandler (Prefix SLD) Service Repair Manual Instant...ting1499041267
This document provides instructions for removing and installing the valve mechanism cover on a 3054E engine. It describes:
1) Disconnecting the breather hose and removing nuts and washers to take off the valve cover, gasket and seal.
2) Inspecting the valve cover, gasket surfaces, and replacing worn parts before reinstallation.
3) Reinstalling the valve cover using a new gasket and seal, and reconnecting the breather hose. Tightening the nuts in a sequence is specified.
This document provides instructions for removing and installing various engine components on a Caterpillar 3054B engine, including:
- Removing and installing the rocker arm and shaft, which involves installing new pushrods and oil seals and adjusting valve lash.
- Removing the cylinder head, which requires removing fuel injectors, exhaust manifolds, temperature regulators, rocker arms, and pushrods before loosening bolts and lifting the head off.
- Installing the cylinder head, which involves cleaning surfaces, installing a new gasket, torquing bolts in a specific sequence, and adjusting valve lash.
- Removing and installing the valve lifters using magnets to manipulate the small parts
The document provides instructions for removing and installing a camshaft on a Caterpillar 3054B engine. Key steps include:
1. Removing related components like the rocker shaft and pushrods.
2. Turning the engine upside down and removing the camshaft thrust washer and camshaft.
3. Carefully installing the camshaft, thrust washer, and related components like the rocker shaft and pushrods, taking care not to damage lobes or bearings.
This document provides assembly instructions for components of a TH103 Telehandler 3PN transmission. It includes procedures for assembling the drum assembly for the forward high clutch, the forward high and reverse idler shaft assembly, the output shaft and third clutch assembly, and the reversing clutch assembly. The steps include cleaning parts, heating and installing bearings, installing seals and springs, and securing components with retaining rings. Tools needed include retaining ring pliers, a compressor, and a driver.
This document provides instructions for removing and installing various components of a Caterpillar 3054 engine, including the valve cover, rocker shaft, pushrods, and cylinder head. The removal and installation procedures describe loosening specific bolts and nuts in a particular sequence, removing gaskets and seals, and ensuring proper alignment of components during reassembly.
This document provides instructions for removing and installing the valve mechanism cover, rocker shaft, and pushrods on a Caterpillar 3054 engine. Key steps include removing the valve cover nuts and gasket, removing the rocker shaft nuts and brackets to take off the assembly, and installing new seals before reinstalling the removed components in reverse order and tightening to the specified torques.
This document provides instructions for removing and installing various engine components on a Caterpillar 3054 engine, including the cylinder head, rocker shaft and pushrods, lifter group, and camshaft. The procedures describe removing parts, cleaning them, installing new seals or lubricating components with oil, and tightening fasteners to the specified torques. Special tools may be required for some steps.
This document provides instructions for removing and installing various engine components on a Caterpillar D6R track-type tractor, including:
- Removing and installing the valve mechanism cover and seal.
- Removing and installing the valve cover base and seal.
- Disassembling and assembling the rocker arm components and installing the rocker arm and shaft.
The procedures describe cleaning parts, applying sealant, tightening bolts in a specific sequence, and adjusting valve lash clearance after installing components. Safety notices are included to prevent injury from spring-loaded parts.
More Related Content
Similar to Caterpillar Cat 928Hz Wheel Loader (Prefix BYD) Service Repair Manual Instant Download (BYD00001 and up).pdf
This document provides instructions for disassembling the transmission and torque converter of a wheel loader model. It lists over 40 detailed steps and accompanying illustrations to remove components like housing assemblies, gears, clutches, seals, bearings and more. Special tools are required and safety precautions mentioned include preventing fluid loss, cleaning parts, and protecting from spring forces. The goal is a fully disassembled transmission for inspection or repair of internal parts.
This document provides instructions for disassembling the transmission and torque converter of a wheel loader model. It lists over 40 detailed steps and accompanying illustrations to remove components like gears, clutches, seals, bearings, and housings. Special tools are required for tasks like compressing springs and removing press-fit parts. Cleanliness and fluid containment are emphasized throughout the process.
Caterpillar Cat 924H and 924Hz Wheel Loader (Prefix PED) Service Repair Manua...9fikslkddmd8u
This document provides instructions for disassembling the transmission and torque converter of a wheel loader model. It lists over 40 detailed steps and refers to various tools needed to remove parts like housing assemblies, gears, bearings, seals, plates, and clutch groups. Safety notices are included to handle parts and release spring forces carefully. The high-level goal is to disassemble the transmission and torque converter into their individual components to allow for inspection and repair of parts.
This document provides disassembly instructions for a 924H wheel loader transmission and torque converter. It outlines 49 steps to fully disassemble the components, including removing housing assemblies, gears, clutches, bearings, seals and other parts. Special tools are required for tasks like removing retaining rings, compressing springs and separating connected pieces. Cleanliness is important during disassembly to prevent contamination of parts.
This document provides disassembly instructions for a 924H wheel loader transmission and torque converter. It describes in detail how to remove over 30 components using various tools. Key steps include removing the transmission oil pump, then lifting out the transmission and torque converter as a unit. Multiple gears, bearings, seals, and clutch assemblies must then be dismantled using retaining ring pliers and pullers to access all internal parts. Cleanliness is emphasized throughout to prevent contamination.
This document provides disassembly instructions for a 924H wheel loader transmission and torque converter. It outlines 49 steps to fully disassemble the components, including removing housing assemblies, gears, clutches, bearings, seals and other parts. Special tools are required for tasks like removing retaining rings, compressing springs and separating connected pieces. Cleanliness is important during disassembly to prevent contamination of parts.
This document provides instructions for disassembling the transmission and torque converter of a 924HZ wheel loader. It outlines 48 steps to remove various components such as housing assemblies, gears, clutches, seals, bearings and other parts. Precautions are listed to prevent fluid loss and entry of contaminants. Required tools include lever pullers, jack stands, retaining ring pliers, drivers, compressors and other specialized equipment to separate components and remove securing components.
This document provides instructions for disassembling the transmission and torque converter of a 924HZ wheel loader. It outlines 48 steps to remove various components such as housing assemblies, gears, clutches, seals, bearings and other parts. Precautions are listed to prevent fluid loss and entry of contaminants. Required tools include lever pullers, jack stands, retaining ring pliers, drivers, compressors and other specialized equipment to separate components in a clean and safe manner.
This document provides disassembly instructions for a 924HZ wheel loader transmission and torque converter. It outlines 48 steps to fully disassemble the transmission, including removing housing assemblies, gears, shafts, bearings, seals, and clutch groups. Various specialty tools are required to separate components and remove retaining rings. Precautions are listed to prevent fluid loss and contamination during disassembly.
The document provides disassembly instructions for a 924HZ wheel loader transmission and torque converter. It outlines 48 steps to disassemble the transmission housing, remove internal components like gears, shafts, and clutches. Precautions are listed to prevent fluid loss and contamination. Required specialty tools are also identified to aid in disassembly of components like bearings, seals, and springs.
Caterpillar cat m322 c wheeled excavator (prefix h2e) service repair manual (...fjjskekdmnsme
This document provides instructions for disassembling and assembling the swing drive of an M322C wheeled excavator. It outlines 28 steps to disassemble the various components of the swing drive, including removing hoses, the swing brake assembly, gears, seals, bearings and other parts. It then lists 12 steps for reassembling the swing drive, providing details on installing components, setting bearing preloads, and tightening nuts to the specified torques. Precautions are included to contain fluids, release spring forces safely, and clean parts thoroughly during the process.
Caterpillar cat m322 c wheeled excavator (prefix h2e) service repair manual (...fjjskkdmnsme
This document provides instructions for disassembling and assembling the swing drive of an M322C wheeled excavator. It outlines 28 steps to disassemble the various components of the swing drive, including removing hoses, the swing brake assembly, gears, seals, bearings and other parts. It then lists 12 steps for reassembling the swing drive, providing details on installing components, setting bearing preloads, and tightening nuts to the specified torques. Precautions are included to contain fluids, release spring forces safely, and clean parts thoroughly during the process.
Caterpillar Cat 924G and 924Gz Wheel Loader (Prefix RTA) Service Repair Manua...9fikslkddmd8u
This document provides instructions for disassembling the transmission and torque converter of a 924G or 924Gz wheel loader. It lists 50 steps to completely disassemble the transmission, removing components like gears, plates, seals, bearings, and clutch groups. Special tools are required for tasks like compressing clutch springs and removing certain parts. Cleanliness is emphasized throughout to prevent dirt from contaminating internal parts.
Similar to Caterpillar Cat 928Hz Wheel Loader (Prefix BYD) Service Repair Manual Instant Download (BYD00001 and up).pdf (13)
Caterpillar Cat TH460B Telehandler (Prefix SLF) Service Repair Manual Instant...ting1499041267
This document provides instructions for removing and installing various engine components on a Caterpillar 3054E engine, including the cylinder head, rocker shaft, lifters, and camshaft. The procedures describe cleaning parts, lubricating bolts, and torquing fasteners to the specified values. Special tools may be required for some steps.
Caterpillar Cat TH350B Telehandler (Prefix SLD) Service Repair Manual Instant...ting1499041267
This document provides instructions for removing and installing the valve mechanism cover on a 3054E engine. It describes:
1) Disconnecting the breather hose and removing nuts and washers to take off the valve cover, gasket and seal.
2) Inspecting the valve cover, gasket surfaces, and replacing worn parts before reinstallation.
3) Reinstalling the valve cover using a new gasket and seal, and reconnecting the breather hose. Tightening the nuts in a sequence is specified.
This document provides instructions for removing and installing various engine components on a Caterpillar 3054B engine, including:
- Removing and installing the rocker arm and shaft, which involves installing new pushrods and oil seals and adjusting valve lash.
- Removing the cylinder head, which requires removing fuel injectors, exhaust manifolds, temperature regulators, rocker arms, and pushrods before loosening bolts and lifting the head off.
- Installing the cylinder head, which involves cleaning surfaces, installing a new gasket, torquing bolts in a specific sequence, and adjusting valve lash.
- Removing and installing the valve lifters using magnets to manipulate the small parts
The document provides instructions for removing and installing a camshaft on a Caterpillar 3054B engine. Key steps include:
1. Removing related components like the rocker shaft and pushrods.
2. Turning the engine upside down and removing the camshaft thrust washer and camshaft.
3. Carefully installing the camshaft, thrust washer, and related components like the rocker shaft and pushrods, taking care not to damage lobes or bearings.
This document provides assembly instructions for components of a TH103 Telehandler 3PN transmission. It includes procedures for assembling the drum assembly for the forward high clutch, the forward high and reverse idler shaft assembly, the output shaft and third clutch assembly, and the reversing clutch assembly. The steps include cleaning parts, heating and installing bearings, installing seals and springs, and securing components with retaining rings. Tools needed include retaining ring pliers, a compressor, and a driver.
This document provides instructions for removing and installing various components of a Caterpillar 3054 engine, including the valve cover, rocker shaft, pushrods, and cylinder head. The removal and installation procedures describe loosening specific bolts and nuts in a particular sequence, removing gaskets and seals, and ensuring proper alignment of components during reassembly.
This document provides instructions for removing and installing the valve mechanism cover, rocker shaft, and pushrods on a Caterpillar 3054 engine. Key steps include removing the valve cover nuts and gasket, removing the rocker shaft nuts and brackets to take off the assembly, and installing new seals before reinstalling the removed components in reverse order and tightening to the specified torques.
This document provides instructions for removing and installing various engine components on a Caterpillar 3054 engine, including the cylinder head, rocker shaft and pushrods, lifter group, and camshaft. The procedures describe removing parts, cleaning them, installing new seals or lubricating components with oil, and tightening fasteners to the specified torques. Special tools may be required for some steps.
This document provides instructions for removing and installing various engine components on a Caterpillar D6R track-type tractor, including:
- Removing and installing the valve mechanism cover and seal.
- Removing and installing the valve cover base and seal.
- Disassembling and assembling the rocker arm components and installing the rocker arm and shaft.
The procedures describe cleaning parts, applying sealant, tightening bolts in a specific sequence, and adjusting valve lash clearance after installing components. Safety notices are included to prevent injury from spring-loaded parts.
This document provides instructions for disassembling and assembling the torque divider of a D6G2 track-type tractor. It describes removing over 30 individual components in a specific order, including gears, seals, bearings, and housing pieces. Proper tools are required for pressing, pulling, and installing each part. Precise measurements must be taken during assembly to ensure correct clearance between components. The process is detailed to correctly separate and rebuild each component of the torque divider.
This document provides the disassembly and assembly procedures for the piston pump steering system on a D5R2 track-type tractor. It details 39 steps to disassemble the system and 36 steps to reassemble it, removing and installing various gaskets, seals, springs, valves, and housings. Precautions are provided to prevent injury from parts under pressure. Detailed illustrations accompany each step.
This document provides instructions for removing and installing various components of a 3126B engine for a Caterpillar D5N track-type tractor, including the camshaft, camshaft gear, camshaft bearings, engine oil pan, and piston cooling jets. The procedures describe draining fluids, noting part orientations, cleaning surfaces, and tightening bolts to specified torques. Tools required are also listed for some components.
This document provides assembly instructions for the piston pump on the left side of a D5K XL track-type tractor. It details 40 steps for installing various components like springs, seals, valves, plates, and housing pieces. Special tools are listed and safety precautions are provided for parts under spring pressure. The instructions include determining the correct shim thickness using measuring tools and calculations.
This document provides instructions for removing the cylinder head from a D4K2 XL track-type tractor with a C4.4 engine. It describes disconnecting various components attached to the cylinder head like sensors, tubes, and wiring harnesses. It specifies draining the coolant and loosening the cylinder head bolts in the correct sequence before using a lifting device to remove the cylinder head from the engine block. Proper care is advised to prevent damage to the cylinder head during removal.
This document provides instructions for removing and installing the valve mechanism cover on a Caterpillar D4K2 XL track-type tractor powered by a C4.4 engine. The procedure involves removing bolts and brackets to access the cover, then removing and installing a new gasket before reinstalling the cover and related components. Separate sections provide details on disassembling and assembling the rocker shaft and related parts.
Caterpillar Cat CB564D Vibratory Compactor (Prefix D4M) Service Repair Manual...ting1499041267
This document provides instructions for removing and installing the flywheel housing on a Caterpillar 3054C engine. The flywheel housing must first be supported with lifting equipment as it weighs approximately 39 kg. Setscrews securing the housing must be removed, and the housing can then be lifted off while tapping it with a soft hammer if needed. Cleaning and inspection steps are described before reinstalling the housing using setscrews, ensuring proper torque is applied.
This document provides instructions for removing and installing the front gear group of a C15 Industrial Engine N5F. Key steps include removing the front housing, camshaft gear, and various gears and plates. Installation involves cleaning parts, installing new seals if needed, and reassembling the gear group with proper torque specifications while maintaining timing marks. Proper cleaning and sealing is emphasized to prevent contamination.
This document provides instructions for removing and installing various components on a C13 Industrial Engine N3F, including:
- Air Inlet Elbow - removal and installation procedures involving removing hoses, fittings, sensors and the elbow itself.
- Inlet and Exhaust Valve Springs - procedures for removing and installing valve springs one cylinder at a time to prevent valves from falling into the cylinder.
- Inlet and Exhaust Valves - removal and installation of valves, seals, springs and related components.
- Inlet and Exhaust Valve Guides - removing and installing valve guides and seals using various tools.
- Inlet and Exhaust Valve Seat Inserts - extracting and
The document provides instructions for disassembling and assembling various components of an Industrial C13 engine, including the front cover, front housing, gear group, rocker shaft, and accessory drive. The steps describe removing and installing parts like bolts, gears, covers, and shafts. Safety notices are included to keep parts clean and contain fluids.
This document provides instructions for removing and installing a fuel injector from an industrial engine. It describes required tools, safety notices, and step-by-step procedures for removing the fuel injection lines, disconnecting electrical connectors, and removing the fuel injector. Instructions are also given for installing a new fuel injector, reconnecting lines and connectors, and priming the fuel system.
The Octavia range embodies the design trend of the Škoda brand: a fusion of
aesthetics, safety and practicality. Whether you see the car as a whole or step
closer and explore its unique features, the Octavia range radiates with the
harmony of functionality and emotion
Ever been troubled by the blinking sign and didn’t know what to do?
Here’s a handy guide to dashboard symbols so that you’ll never be confused again!
Save them for later and save the trouble!
Fleet management these days is next to impossible without connected vehicle solutions. Why? Well, fleet trackers and accompanying connected vehicle management solutions tend to offer quite a few hard-to-ignore benefits to fleet managers and businesses alike. Let’s check them out!
Implementing ELDs or Electronic Logging Devices is slowly but surely becoming the norm in fleet management. Why? Well, integrating ELDs and associated connected vehicle solutions like fleet tracking devices lets businesses and their in-house fleet managers reap several benefits. Check out the post below to learn more.
What Could Be Behind Your Mercedes Sprinter's Power Loss on Uphill RoadsSprinter Gurus
Unlock the secrets behind your Mercedes Sprinter's uphill power loss with our comprehensive presentation. From fuel filter blockages to turbocharger troubles, we uncover the culprits and empower you to reclaim your vehicle's peak performance. Conquer every ascent with confidence and ensure a thrilling journey every time.
Caterpillar Cat 928Hz Wheel Loader (Prefix BYD) Service Repair Manual Instant Download (BYD00001 and up).pdf
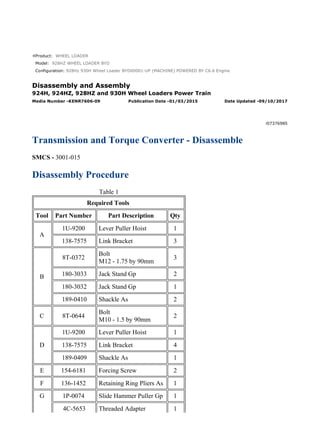
1. Product: WHEEL LOADER
Model: 928HZ WHEEL LOADER BYD
Configuration: 928Hz 930H Wheel Loader BYD00001-UP (MACHINE) POWERED BY C6.6 Engine
Disassembly and Assembly
924H, 924HZ, 928HZ and 930H Wheel Loaders Power Train
Media Number -KENR7606-09 Publication Date -01/03/2015 Date Updated -09/10/2017
i07376985
Transmission and Torque Converter - Disassemble
SMCS - 3001-015
Disassembly Procedure
Table 1
Required Tools
Tool Part Number Part Description Qty
A
1U-9200 Lever Puller Hoist 1
138-7575 Link Bracket 3
B
8T-0372
Bolt
M12 - 1.75 by 90mm
3
180-3033 Jack Stand Gp 2
180-3032 Jack Stand Gp 1
189-0410 Shackle As 2
C 8T-0644
Bolt
M10 - 1.5 by 90mm
2
D
1U-9200 Lever Puller Hoist 1
138-7575 Link Bracket 4
189-0409 Shackle As 1
E 154-6181 Forcing Screw 2
F 136-1452 Retaining Ring Pliers As 1
G 1P-0074 Slide Hammer Puller Gp 1
4C-5653 Threaded Adapter 1
1/33
928Hz 930H Wheel Loader BYD00001-UP (MACHINE) POWERED BY C6.6 Engin...
2022/5/24
https://127.0.0.1/sisweb/sisweb/techdoc/techdoc_print_page.jsp?returnurl=/sis...
2. H 1P-1863 Retaining Ring Pliers 1
J 4C-6136 Lifting Bracket 1
K 1P-1861 Retaining Ring Pliers 1
L 1P-0510 Driver Gp 1
M 4C-3652 Compressor Assembly 1
N 1P-1857 Retaining Ring Pliers 1
P
1P-2322 Combination Puller 1
1P-0510 Driver Gp 1
Q
1U-9889 Crossblock 1
3H-0469 Leg 2
3H-0468 Puller Plate 4
1A-1935 Full Nut 2
1U-7540 Hydraulic Cylinder 1
1U-5230 Hand Hydraulic Pump 1
1H-3110 Bearing Puller Gp 1
R 4C-6399 Compressor Assembly 1
Start By:
a. Remove the transmission oil pump. Refer to Disassembly and Assembly, "Transmission Oil
Pump - Remove".
b. Remove the transmission and the torque converter. Refer to Disassembly and Assembly,
"Transmission and Torque Converter - Remove".
Note: Put identification marks on all hoses, on all hose assemblies, on all harness assemblies, and
on all tube assemblies for installation purposes. Plug all hose assemblies and all tube assemblies.
This helps to prevent fluid loss, and this helps to keep contaminants from entering the system.
Note: Cleanliness is an important factor. Before you begin the disassembly procedure, the exterior
of the components should be thoroughly cleaned. This will help to prevent dirt from entering the
internal mechanism. Precision components can be damaged by contaminants or by dirt. Perform
disassembly procedures on a clean work surface. Keep components covered and protected at all
times.
NOTICE
Care must be taken to ensure that fluids are contained during
performance of inspection, maintenance, testing, adjusting, and repair
of the product. Be prepared to collect the fluid with suitable containers
2/33
928Hz 930H Wheel Loader BYD00001-UP (MACHINE) POWERED BY C6.6 Engin...
2022/5/24
https://127.0.0.1/sisweb/sisweb/techdoc/techdoc_print_page.jsp?returnurl=/sis...
3. before opening any compartment or disassembling any component
containing fluids.
Refer to Special Publication, NENG2500, "Dealer Service Tool
Catalog" for tools and supplies suitable to collect and contain fluids on
Cat®
products.
Dispose of all fluids according to local regulations and mandates.
Illustration 1 g01392601
1. Attach Tooling (A) and a suitable lifting device to the transmission and the torque
converter. The weight of the transmission and torque converter is approximately 476 kg
(1050 lb).
Illustration 2 g01392602
2. Remove bolts (1) and sight gauge (2).
3/33
928Hz 930H Wheel Loader BYD00001-UP (MACHINE) POWERED BY C6.6 Engin...
2022/5/24
https://127.0.0.1/sisweb/sisweb/techdoc/techdoc_print_page.jsp?returnurl=/sis...
4. Illustration 3 g01392621
3. Position the transmission and the torque converter onto Tooling (B), as shown.
Illustration 4 g01392620
4. Remove bolts (3) and coupling (4).
Illustration 5 g01392597
5. Remove torque converter (5).
4/33
928Hz 930H Wheel Loader BYD00001-UP (MACHINE) POWERED BY C6.6 Engin...
2022/5/24
https://127.0.0.1/sisweb/sisweb/techdoc/techdoc_print_page.jsp?returnurl=/sis...
5. Illustration 6 g01392622
Illustration 7 g01392630
6. Remove bolts (6). Use Tooling (C) and suitable prybars to remove plate (7).
Illustration 8 g01392632
7. Remove O-ring seal (8) from plate (7).
5/33
928Hz 930H Wheel Loader BYD00001-UP (MACHINE) POWERED BY C6.6 Engin...
2022/5/24
https://127.0.0.1/sisweb/sisweb/techdoc/techdoc_print_page.jsp?returnurl=/sis...
6. Illustration 9 g01392635
8. Remove O-ring seals (9).
Illustration 10 g01392639
9. Remove hose assembly (10). Disconnect the lower half harness assembly (12) and secure
the harness assembly to control valve (11).
6/33
928Hz 930H Wheel Loader BYD00001-UP (MACHINE) POWERED BY C6.6 Engin...
2022/5/24
https://127.0.0.1/sisweb/sisweb/techdoc/techdoc_print_page.jsp?returnurl=/sis...
7. Illustration 11 g01393407
10. Attach Tooling (D) and a suitable lifting device to housing assembly (13). The weight of
housing assembly (13) is approximately 141 kg (310 lb).
Illustration 12 g01393411
11. Use Tooling (E) to separate the housings. Remove housing assembly (13).
7/33
928Hz 930H Wheel Loader BYD00001-UP (MACHINE) POWERED BY C6.6 Engin...
2022/5/24
https://127.0.0.1/sisweb/sisweb/techdoc/techdoc_print_page.jsp?returnurl=/sis...
9. Illustration 16 g01395864
14. Use Tooling (F) to remove retaining ring (19).
Illustration 17 g01396011
15. Use Tooling (G) in a rotating pattern to remove bearing assembly (20).
Illustration 18 g01396014
9/33
928Hz 930H Wheel Loader BYD00001-UP (MACHINE) POWERED BY C6.6 Engin...
2022/5/24
https://127.0.0.1/sisweb/sisweb/techdoc/techdoc_print_page.jsp?returnurl=/sis...
10. 16. Use Tooling (H) to remove retaining ring (23). Remove bearing support (21). Remove
bearing (22) from bearing support (21).
Illustration 19 g01396015
17. Remove bearing cup (24) and bearings (25).
Illustration 20 g01396258
18. Remove sensors (28).
19. Use Tooling (J) and a suitable lifting device to remove the forward low and the forward
high clutch group (26). The weight of clutch group (26) is approximately 27 kg (60 lb).
Position shaft assembly (27) out of the way and remove clutch group (26).
Note: When the clutch groups are disassembled, remove the plugs in the shaft to clean the
oil passages. Use a punch to drive the plug into the shaft . Drill the remainder of the
aluminum plug out of the bore. Be careful not to drill any portion of the walls of the bore.
Use shop air or a cleaning solution to clean the shafts.
10/33
928Hz 930H Wheel Loader BYD00001-UP (MACHINE) POWERED BY C6.6 Eng...
2022/5/24
https://127.0.0.1/sisweb/sisweb/techdoc/techdoc_print_page.jsp?returnurl=/sis...
11. Illustration 21 g01397406
20. Remove retaining ring (29) and thrust disc (30).
Illustration 22 g01397412
21. Remove gear assembly (31).
Illustration 23 g01396271
22. Use Tooling (H) to remove retaining ring (33). Use Tooling (L) to remove hub (32) from
gear assembly (31).
11/33
928Hz 930H Wheel Loader BYD00001-UP (MACHINE) POWERED BY C6.6 Eng...
2022/5/24
https://127.0.0.1/sisweb/sisweb/techdoc/techdoc_print_page.jsp?returnurl=/sis...
12. Illustration 24 g01396539
23. Use Tooling (K) to remove retaining ring (34). Use Tooling (L) to remove bearing (35)
from hub (32).
Illustration 25 g01396540
24. Remove thrust disc (36).
12/33
928Hz 930H Wheel Loader BYD00001-UP (MACHINE) POWERED BY C6.6 Eng...
2022/5/24
https://127.0.0.1/sisweb/sisweb/techdoc/techdoc_print_page.jsp?returnurl=/sis...
13. Illustration 26 g01397401
25. Remove retaining ring (37) and plate (38). Remove discs (39) and plates (40).
Note: Note the location of plates and discs for assembly purposes.
Illustration 27 g01397484
13/33
928Hz 930H Wheel Loader BYD00001-UP (MACHINE) POWERED BY C6.6 Eng...
2022/5/24
https://127.0.0.1/sisweb/sisweb/techdoc/techdoc_print_page.jsp?returnurl=/sis...
14. Personal injury can result from being struck by parts propelled by a
released spring force.
Make sure to wear all necessary protective equipment.
Follow the recommended procedure and use all recommended tooling to
release the spring force.
26. Install Tooling (M) onto retainer (42). Use Tooling (M) and a suitable press to compress the
clutch spring. Remove retaining ring (41). Slowly release the spring tension.
Illustration 28 g01397502
27. Remove retainer (42) and spring (43).
28. Remove piston (44).
14/33
928Hz 930H Wheel Loader BYD00001-UP (MACHINE) POWERED BY C6.6 Eng...
2022/5/24
https://127.0.0.1/sisweb/sisweb/techdoc/techdoc_print_page.jsp?returnurl=/sis...
16. Personal injury can result from being struck by parts propelled by a
released spring force.
Make sure to wear all necessary protective equipment.
Follow the recommended procedure and use all recommended tooling to
release the spring force.
30. If equipped, remove valve assembly (53). Remove seal (48), retaining ring (47), retainer
(49), spring (50), and ball (51) from body (52).
31. Remove rings (46).
Illustration 31 g01397884
32. Reposition clutch group (26), as shown. Remove retaining ring (54), thrust disc (55), and
hub (56).
Illustration 32 g01397964
33. Use Tooling (K) to remove retaining ring (57) from hub (56). Remove bearing (58).
16/33
928Hz 930H Wheel Loader BYD00001-UP (MACHINE) POWERED BY C6.6 Eng...
2022/5/24
https://127.0.0.1/sisweb/sisweb/techdoc/techdoc_print_page.jsp?returnurl=/sis...
17. Illustration 33 g01397953
34. Remove thrust disc (59).
35. Repeat Steps 25 through 30 to disassemble the clutch pack.
Illustration 34 g01397984
36. Attach Tooling (J) and a suitable lifting device to the reverse and second clutch group (60).
The weight of clutch group (60) is approximately 32 kg (70 lb). Position clutch group (60)
onto suitable blocking.
Illustration 35 g01397987
17/33
928Hz 930H Wheel Loader BYD00001-UP (MACHINE) POWERED BY C6.6 Eng...
2022/5/24
https://127.0.0.1/sisweb/sisweb/techdoc/techdoc_print_page.jsp?returnurl=/sis...
18. 37. Remove retaining ring (61), thrust disc (62), and gear (63).
Illustration 36 g01398268
38. Use Tooling (H) to remove retaining ring (65). Use Tooling (L) to remove hub (64) from
gear (63).
Illustration 37 g01398270
39. Use Tooling (K) to remove retaining ring (66). Use Tooling (L) to remove bearing (67)
from hub (64).
18/33
928Hz 930H Wheel Loader BYD00001-UP (MACHINE) POWERED BY C6.6 Eng...
2022/5/24
https://127.0.0.1/sisweb/sisweb/techdoc/techdoc_print_page.jsp?returnurl=/sis...
19. Illustration 38 g01398284
40. Remove thrust disc (68).
41. Repeat Steps 25 through 30 for the disassembly of the clutch pack.
Illustration 39 g01398178
42. Use Tooling (P) to remove bearing (69).
19/33
928Hz 930H Wheel Loader BYD00001-UP (MACHINE) POWERED BY C6.6 Eng...
2022/5/24
https://127.0.0.1/sisweb/sisweb/techdoc/techdoc_print_page.jsp?returnurl=/sis...
21. 44. Remove gear (75).
Illustration 42 g01398437
45. Use Tooling (H) to remove retaining ring (77). Use Tooling (L) to remove hub (76) from
gear (75).
Illustration 43 g01398456
46. Use Tooling (K) to remove retaining ring (78). Use Tooling (L) to remove bearing (79)
from hub (76).
21/33
928Hz 930H Wheel Loader BYD00001-UP (MACHINE) POWERED BY C6.6 Eng...
2022/5/24
https://127.0.0.1/sisweb/sisweb/techdoc/techdoc_print_page.jsp?returnurl=/sis...
22. Illustration 44 g01398438
47. Remove thrust disc (80).
48. Repeat Steps 25 through 30 for the disassembly of the clutch pack.
Illustration 45 g01398560
49. Attach Tooling (J) and a suitable lifting device to first gear and third gear clutch group (81).
The weight of clutch group (81) is approximately 45 kg (100 lb). Remove clutch group (81).
Illustration 46 g01398561
50. Remove retaining ring (82), thrust disc (83), and gear (84).
22/33
928Hz 930H Wheel Loader BYD00001-UP (MACHINE) POWERED BY C6.6 Eng...
2022/5/24
https://127.0.0.1/sisweb/sisweb/techdoc/techdoc_print_page.jsp?returnurl=/sis...
23. Illustration 47 g01398645
51. Use Tooling (H) to remove retaining ring (86). Use Tooling (L) to remove hub (85) from
gear (84).
Illustration 48 g01398657
52. Use Tooling (K) to remove retaining ring (87). Use Tooling (L) to remove bearing (88)
from hub (85).
23/33
928Hz 930H Wheel Loader BYD00001-UP (MACHINE) POWERED BY C6.6 Eng...
2022/5/24
https://127.0.0.1/sisweb/sisweb/techdoc/techdoc_print_page.jsp?returnurl=/sis...
24. Illustration 49 g01398664
53. Remove thrust disc (89).
54. Repeat Steps 25 through 30 for the disassembly of the clutch pack.
Illustration 50 g01398562
Illustration 51 g01398564
55. Install Tooling (Q), as shown. Use Tooling (Q) to remove bearing (90). Extend the cylinder
several times to remove bearing (90). Use spacers, as needed.
24/33
928Hz 930H Wheel Loader BYD00001-UP (MACHINE) POWERED BY C6.6 Eng...
2022/5/24
https://127.0.0.1/sisweb/sisweb/techdoc/techdoc_print_page.jsp?returnurl=/sis...
25. Illustration 52 g01398565
56. Remove spacer (91) and gear (92).
Illustration 53 g01398567
57. Remove thrust disc (93) and gear (94).
Illustration 54 g01398773
58. Use Tooling (H) to remove retaining ring (95). Remove hub (96) from gear (94). Use
Tooling (L) to remove bearing (97).
Illustration 55 g01398774
25/33
928Hz 930H Wheel Loader BYD00001-UP (MACHINE) POWERED BY C6.6 Eng...
2022/5/24
https://127.0.0.1/sisweb/sisweb/techdoc/techdoc_print_page.jsp?returnurl=/sis...
26. Thank you so much for reading.
Please click the “Buy Now!”
button below to download the
complete manual.
After you pay.
You can download the most
perfect and complete manual in
the world immediately.
Our support email:
ebooklibonline@outlook.com