Download to read offline

![Cassandra
12
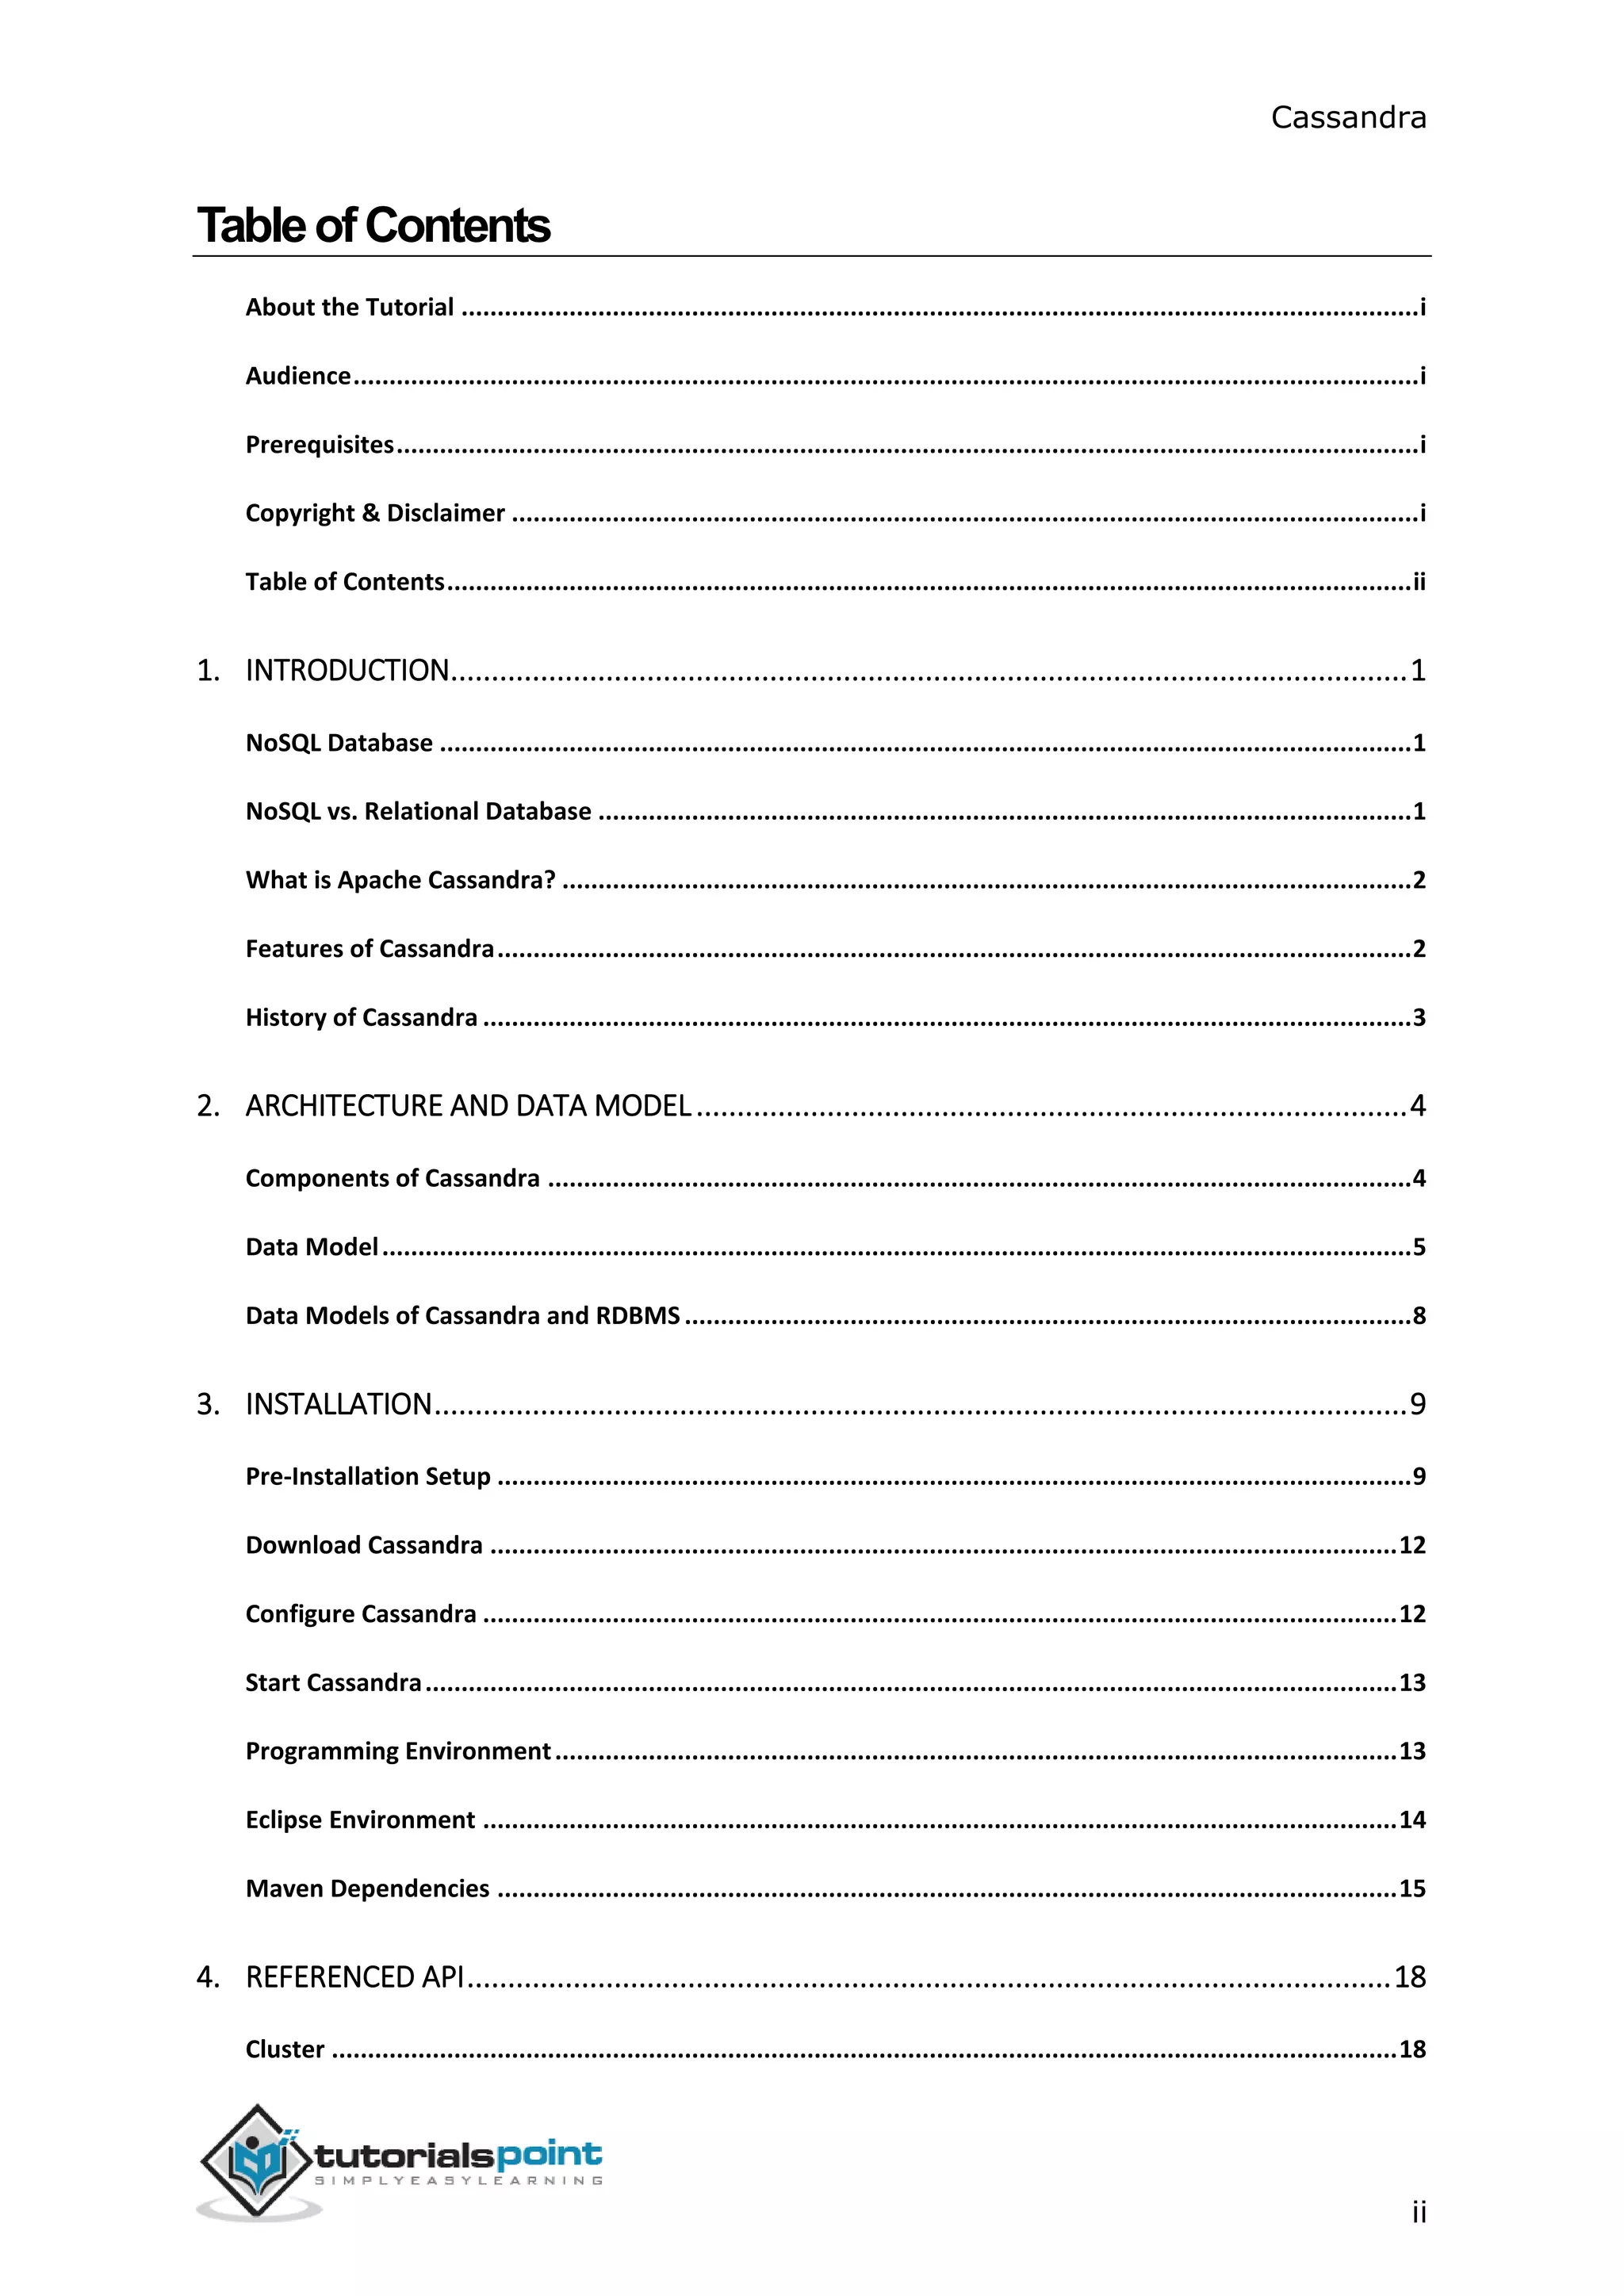
[hadoop@linux ~]$ gedit ~/.bashrc
export CASSANDRA_HOME=~/cassandra
export PATH=$PATH:$CASSANDRA_HOME/bin
DownloadCassandra
Apache Cassandra is available at http://cassandra.apache.org/download/.
Download Cassandra using the following command.
$ wget http://supergsego.com/apache/cassandra/2.1.2/apache-cassandra-
2.1.2-bin.tar.gz
Unzip Cassandra using the command zxvf as shown below.
$ tar zxvf apache-cassandra-2.1.2-bin.tar.gz.
Create a new directory named cassandra and move the contents of the
downloaded file to it as shown below.
$ mkdir Cassandra
$ mv apache-cassandra-2.1.2/* cassandra.
ConfigureCassandra
Open the cassandra.yaml: file, which will be available in the bin directory of
Cassandra.
$ gedit cassandra.yaml
Note: If you have installed Cassandra from a deb or rpm package, the
configuration files will be located in /etc/cassandra directory of Cassandra.
The above command opens the cassandra.yaml file. Verify the following
configurations. By default, these values will be set to the specified directories.
data_file_directories “/var/lib/cassandra/data”
commitlog_directory “/var/lib/cassandra/commitlog”
saved_caches_directory “/var/lib/cassandra/saved_caches”
Make sure these directories exist and can be written to, as shown below.
CreateDirectories
As super-user, create the two directories /var/lib/cassandra and
/var./lib/cassandra into which Cassandra writes its data.](https://image.slidesharecdn.com/cassandratutorial-180620080720/75/Cassandra-tutorial-19-2048.jpg)
![Cassandra
13
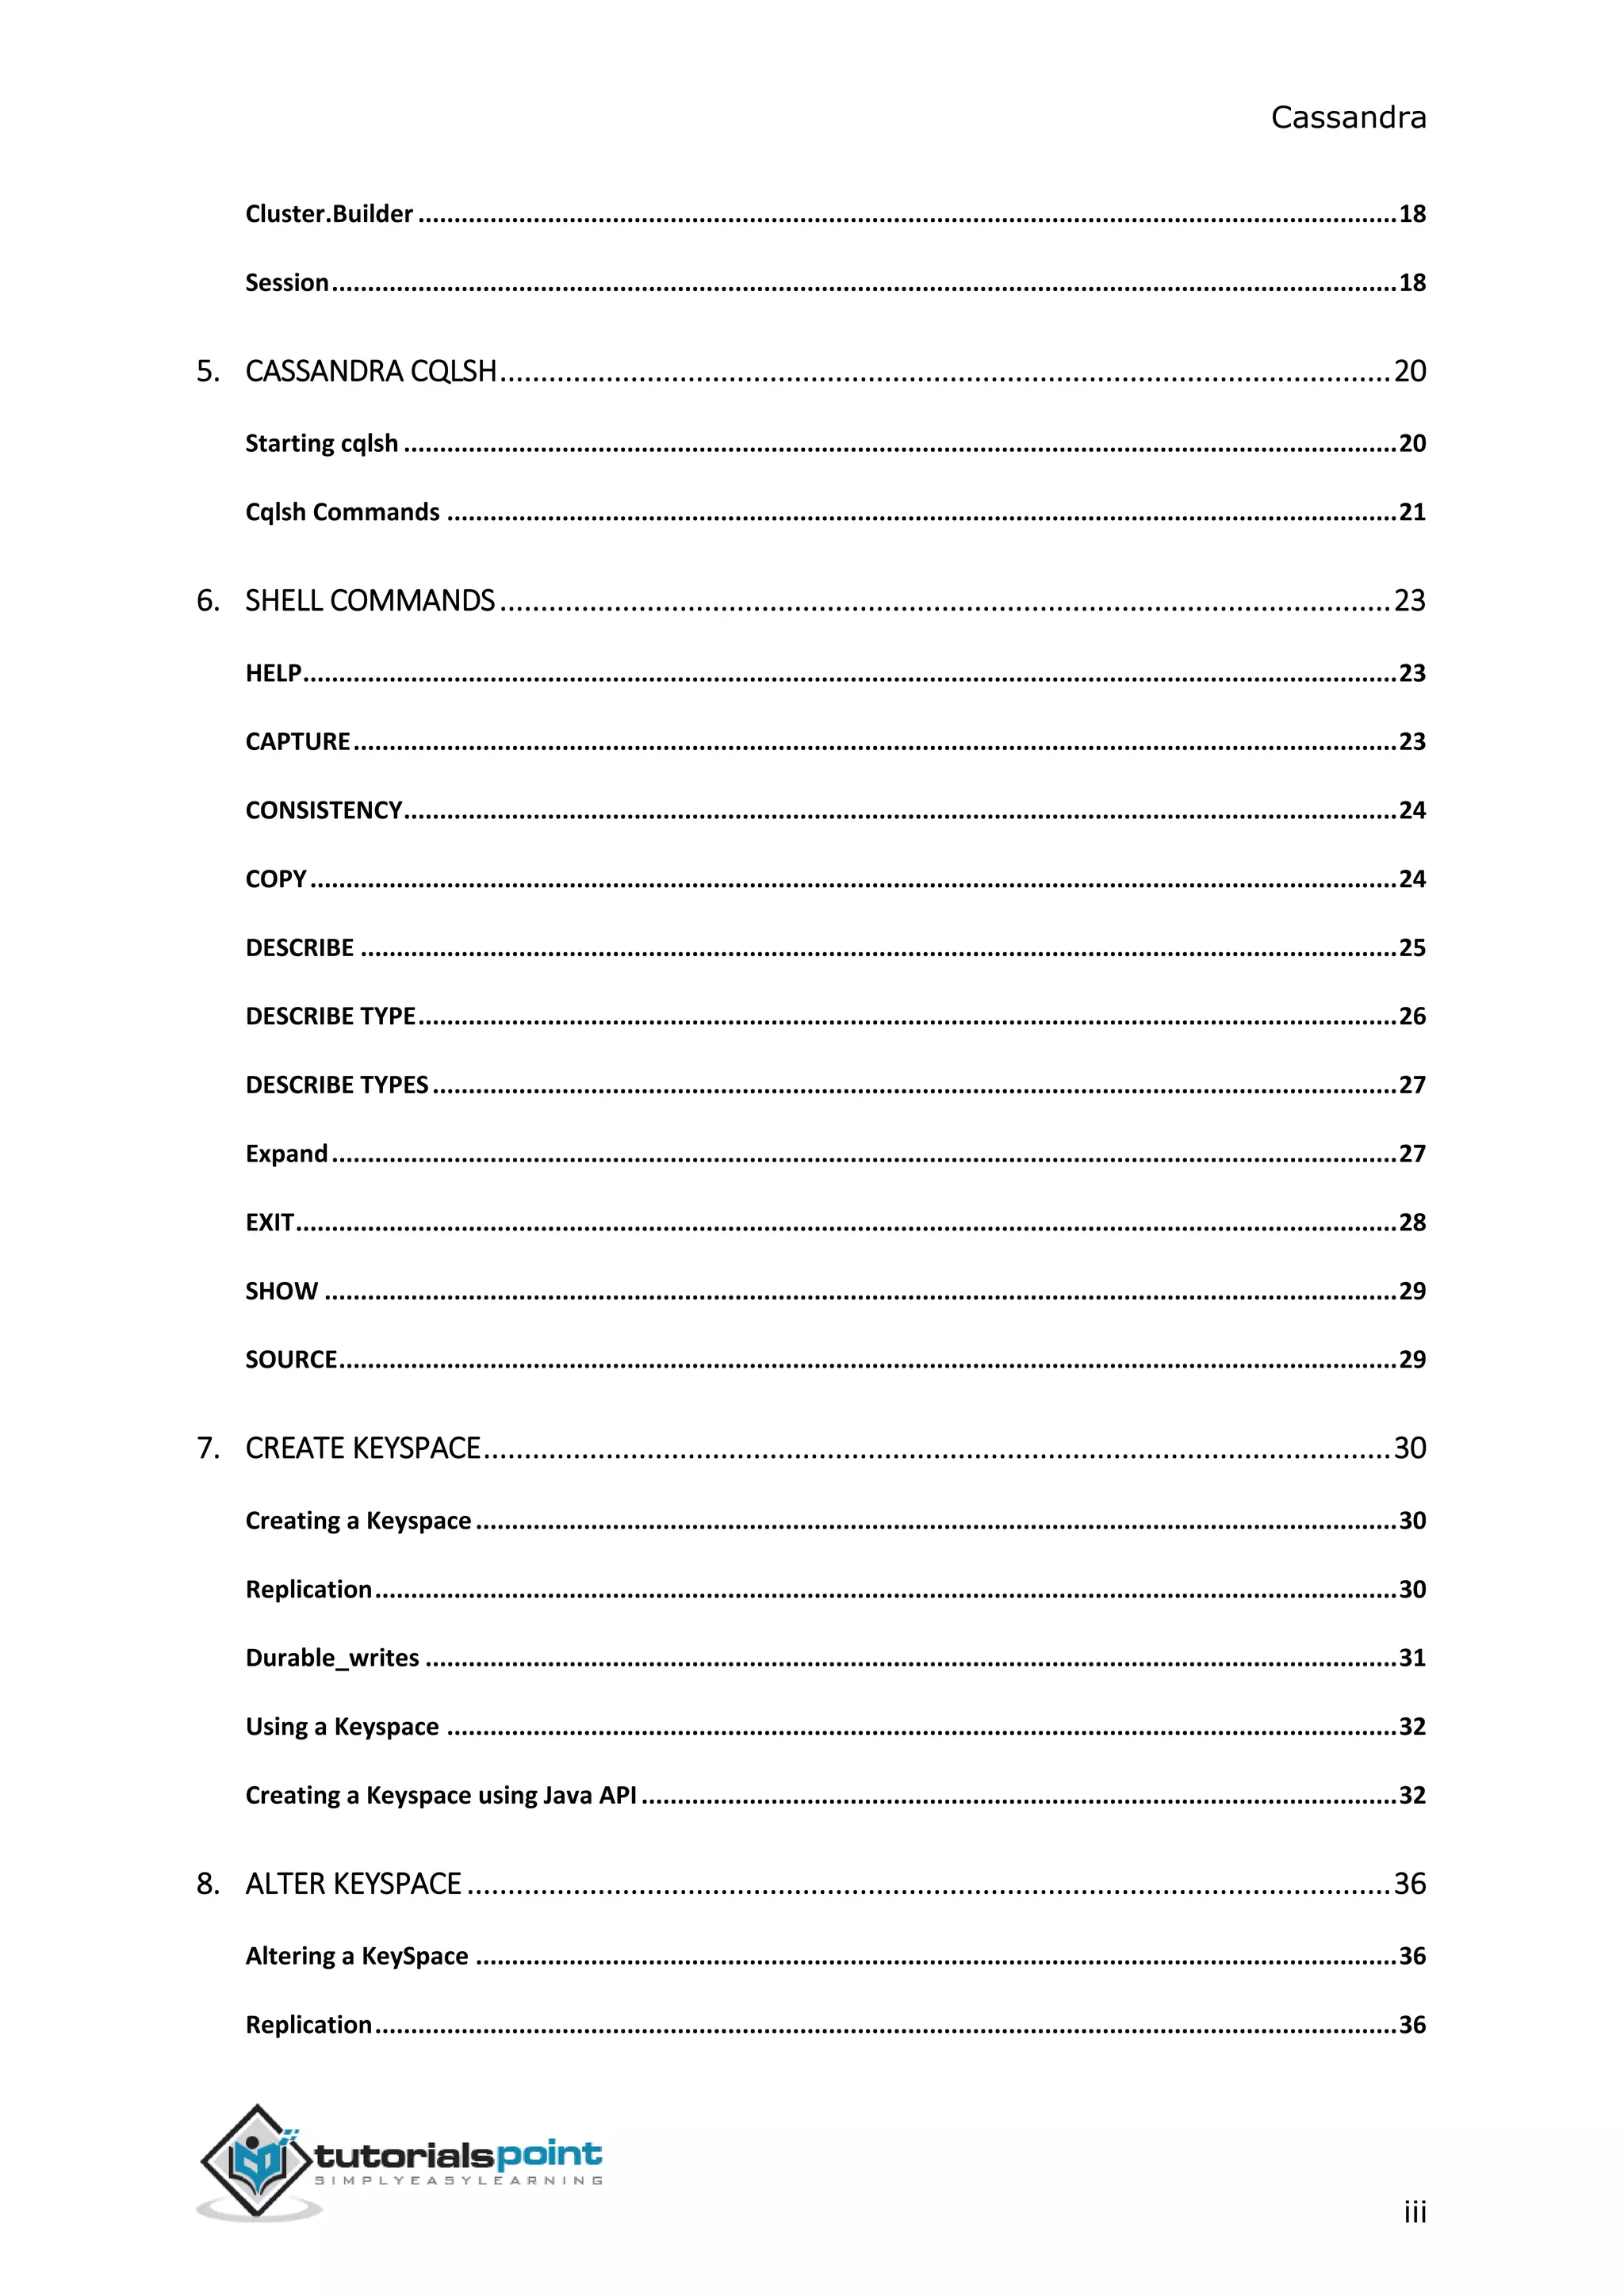
[root@linux cassandra]# mkdir /var/lib/cassandra
[root@linux cassandra]# mkdir /var/log/cassandra
GivePermissionstoFolders
Give read-write permissions to the newly created folders as shown below.
[root@linux /]# chmod 777 /var/lib/cassandra
[root@linux /]# chmod 777 /var/log/cassandra
StartCassandra
To start Cassandra, open the terminal window, navigate to Cassandra home
directory/home, where you unpacked Cassandra, and run the following command
to start your Cassandra server.
$ cd $CASSANDRA_HOME
$./bin/cassandra -f
Using the –f option tells Cassandra to stay in the foreground instead of running as
a background process. If everything goes fine, you can see the Cassandra server
starting.
ProgrammingEnvironment
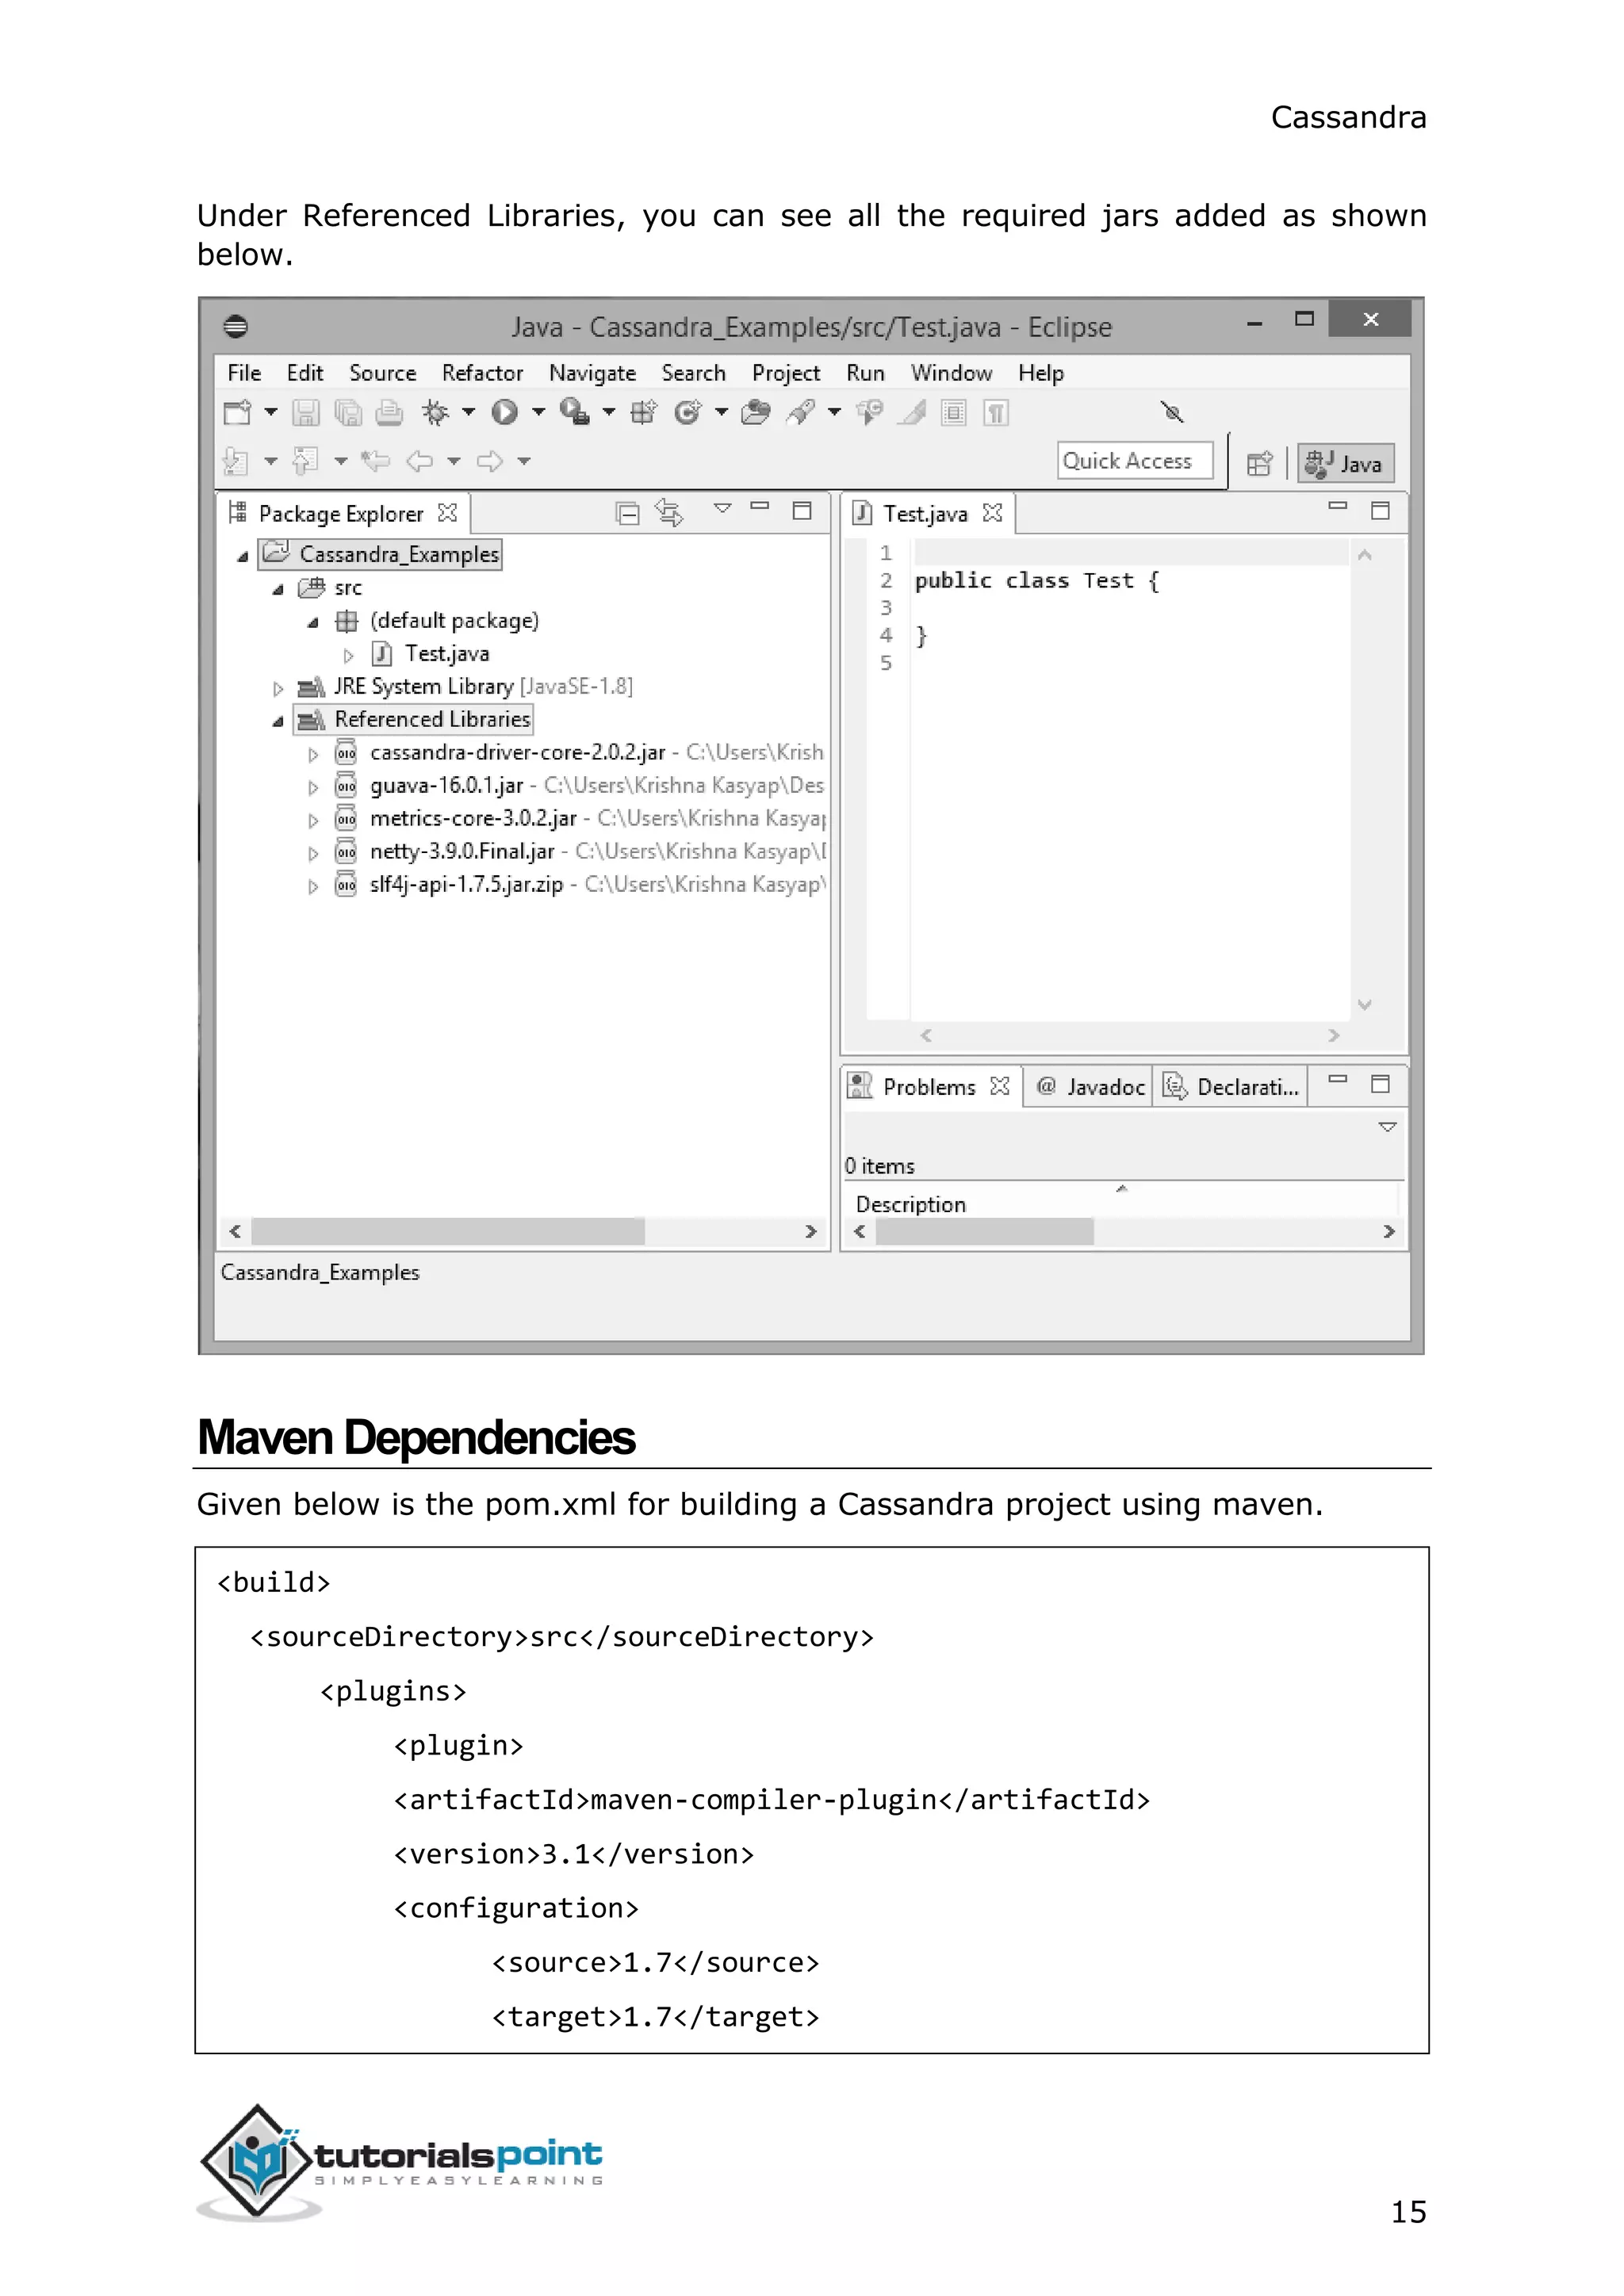
To set up Cassandra programmatically, download the following jar files:
● slf4j-api-1.7.5.jar
● cassandra-driver-core-2.0.2.jar
● guava-16.0.1.jar
● metrics-core-3.0.2.jar
● netty-3.9.0.Final.jar
Place them in a separate folder. For example, we are downloading these jars to a
folder named “Cassandra_jars”.
Set the classpath for this folder in “.bashrc” file as shown below.
[hadoop@linux ~]$ gedit ~/.bashrc
//Set the following class path in the .bashrc file.
export CLASSPATH=$CLASSPATH:/home/hadoop/Cassandra_jars/*](https://image.slidesharecdn.com/cassandratutorial-180620080720/75/Cassandra-tutorial-20-2048.jpg)
![Cassandra
20
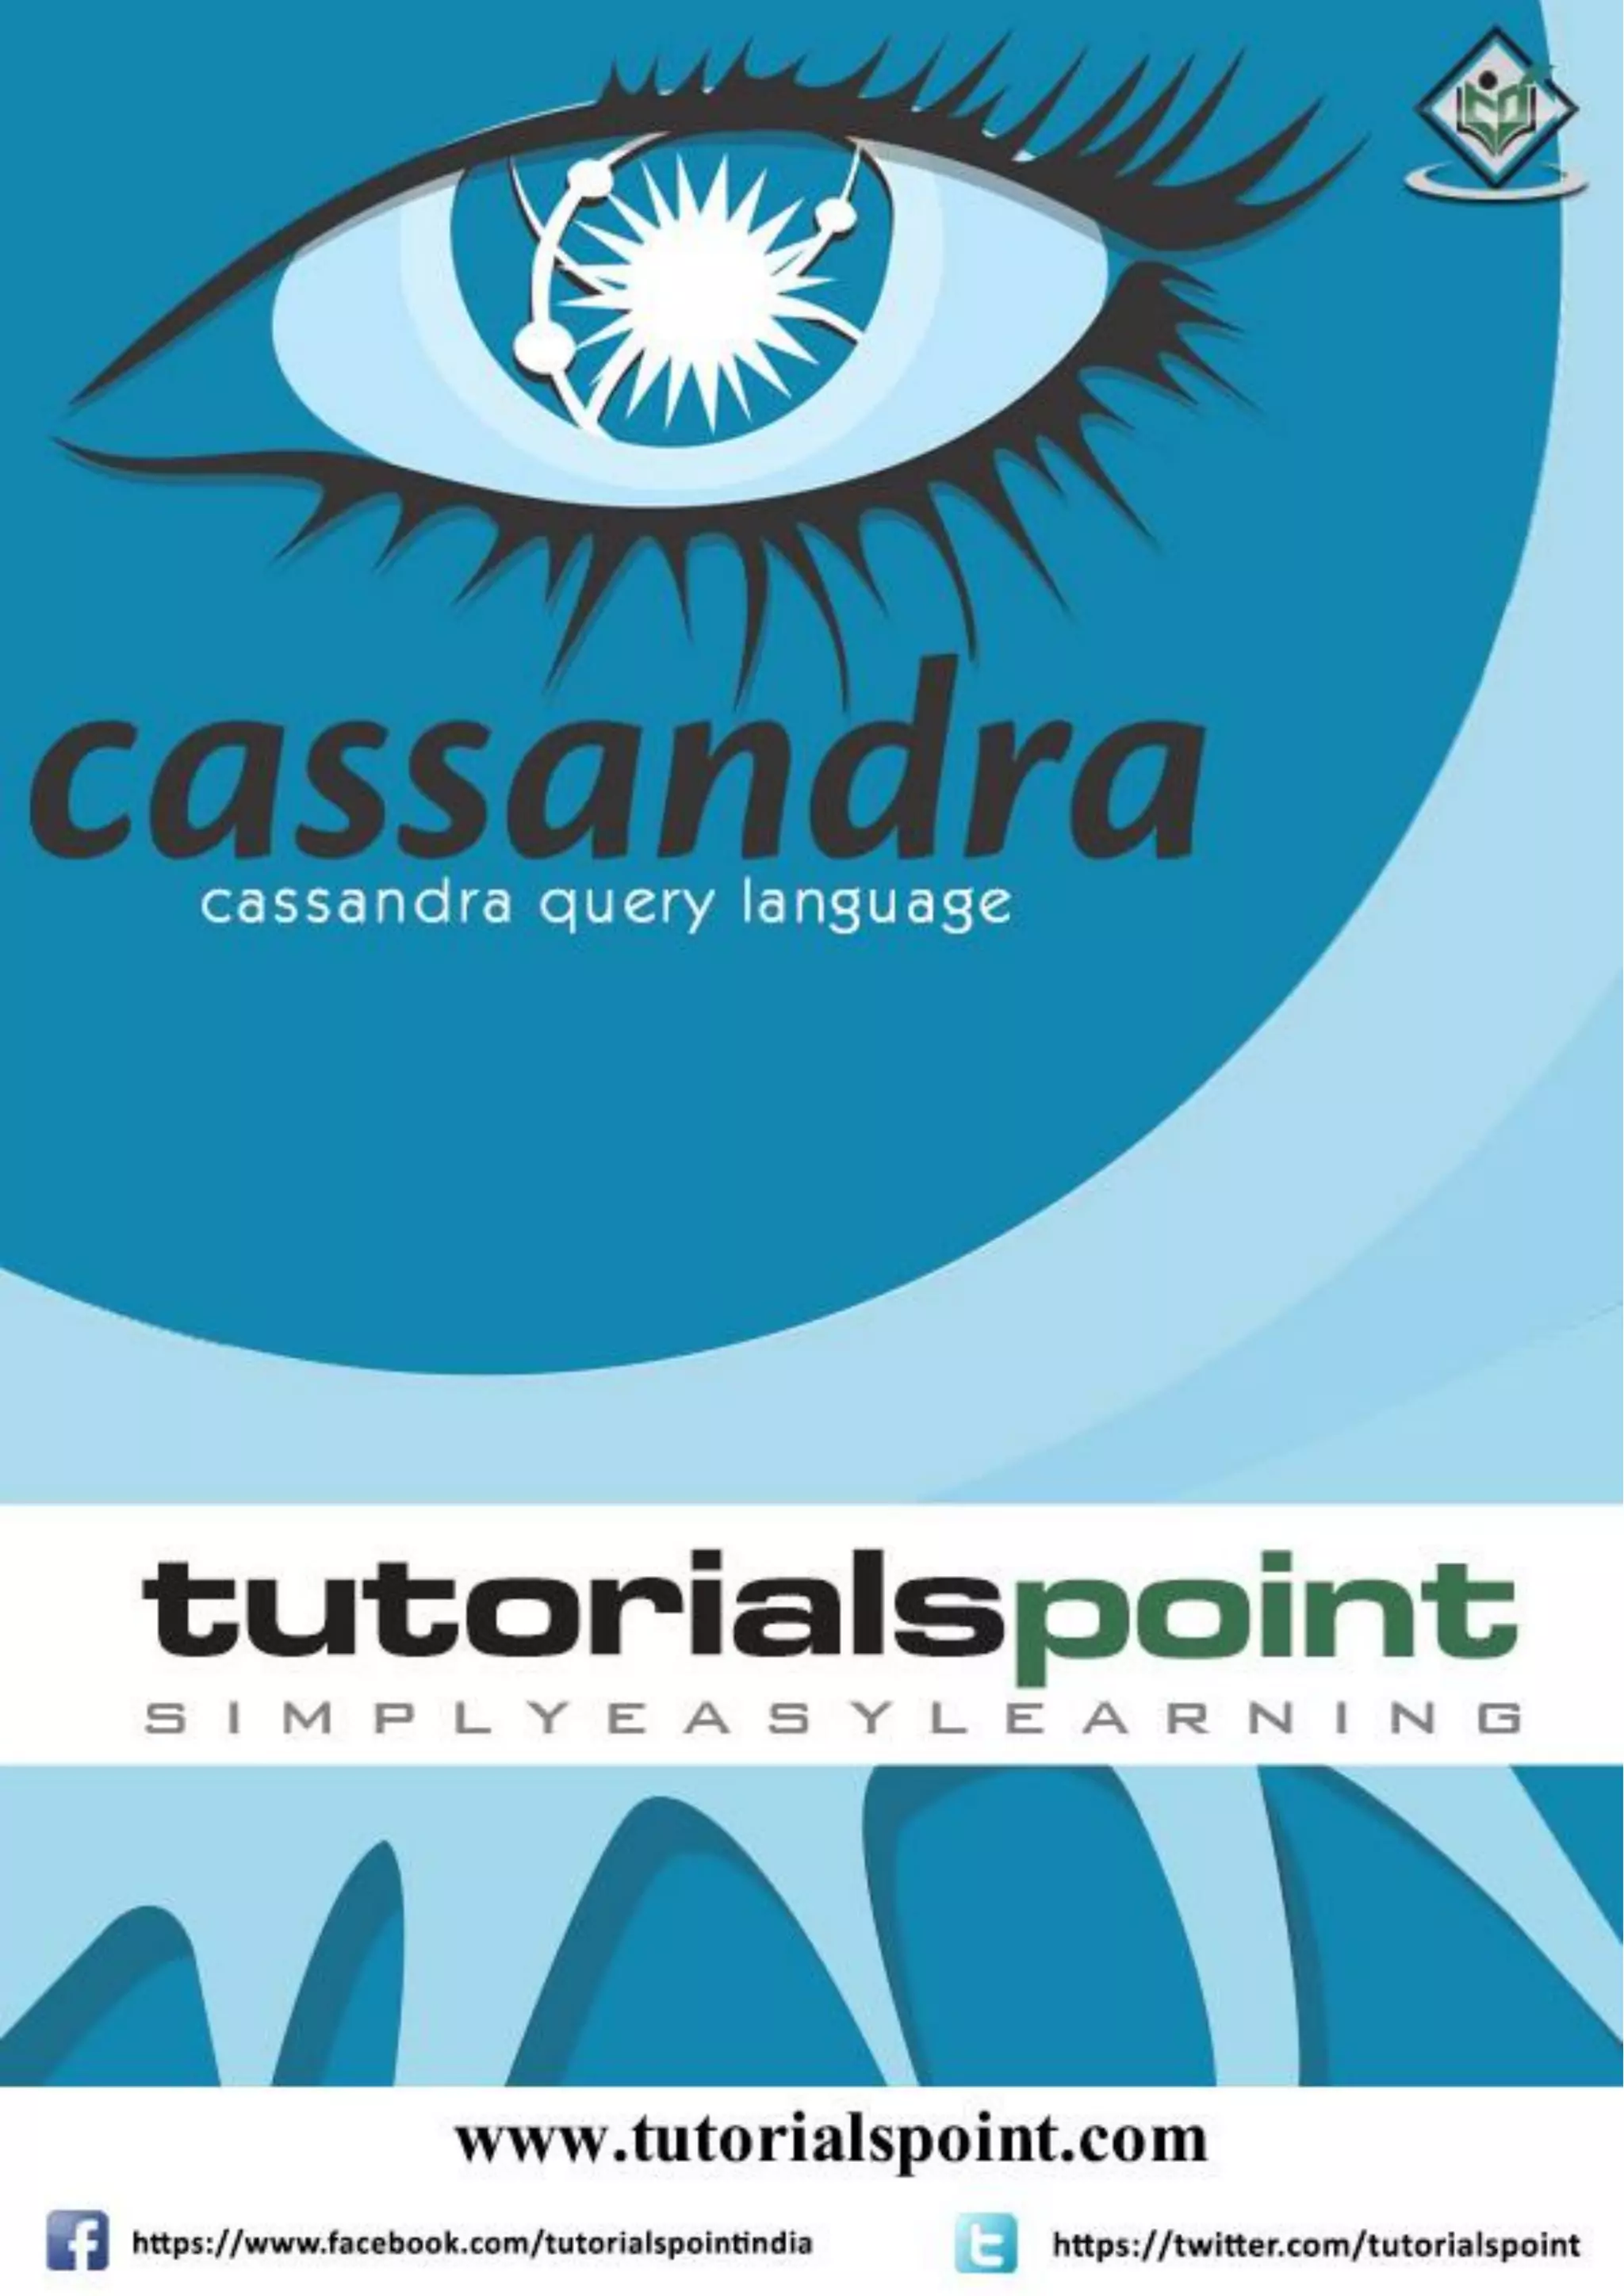
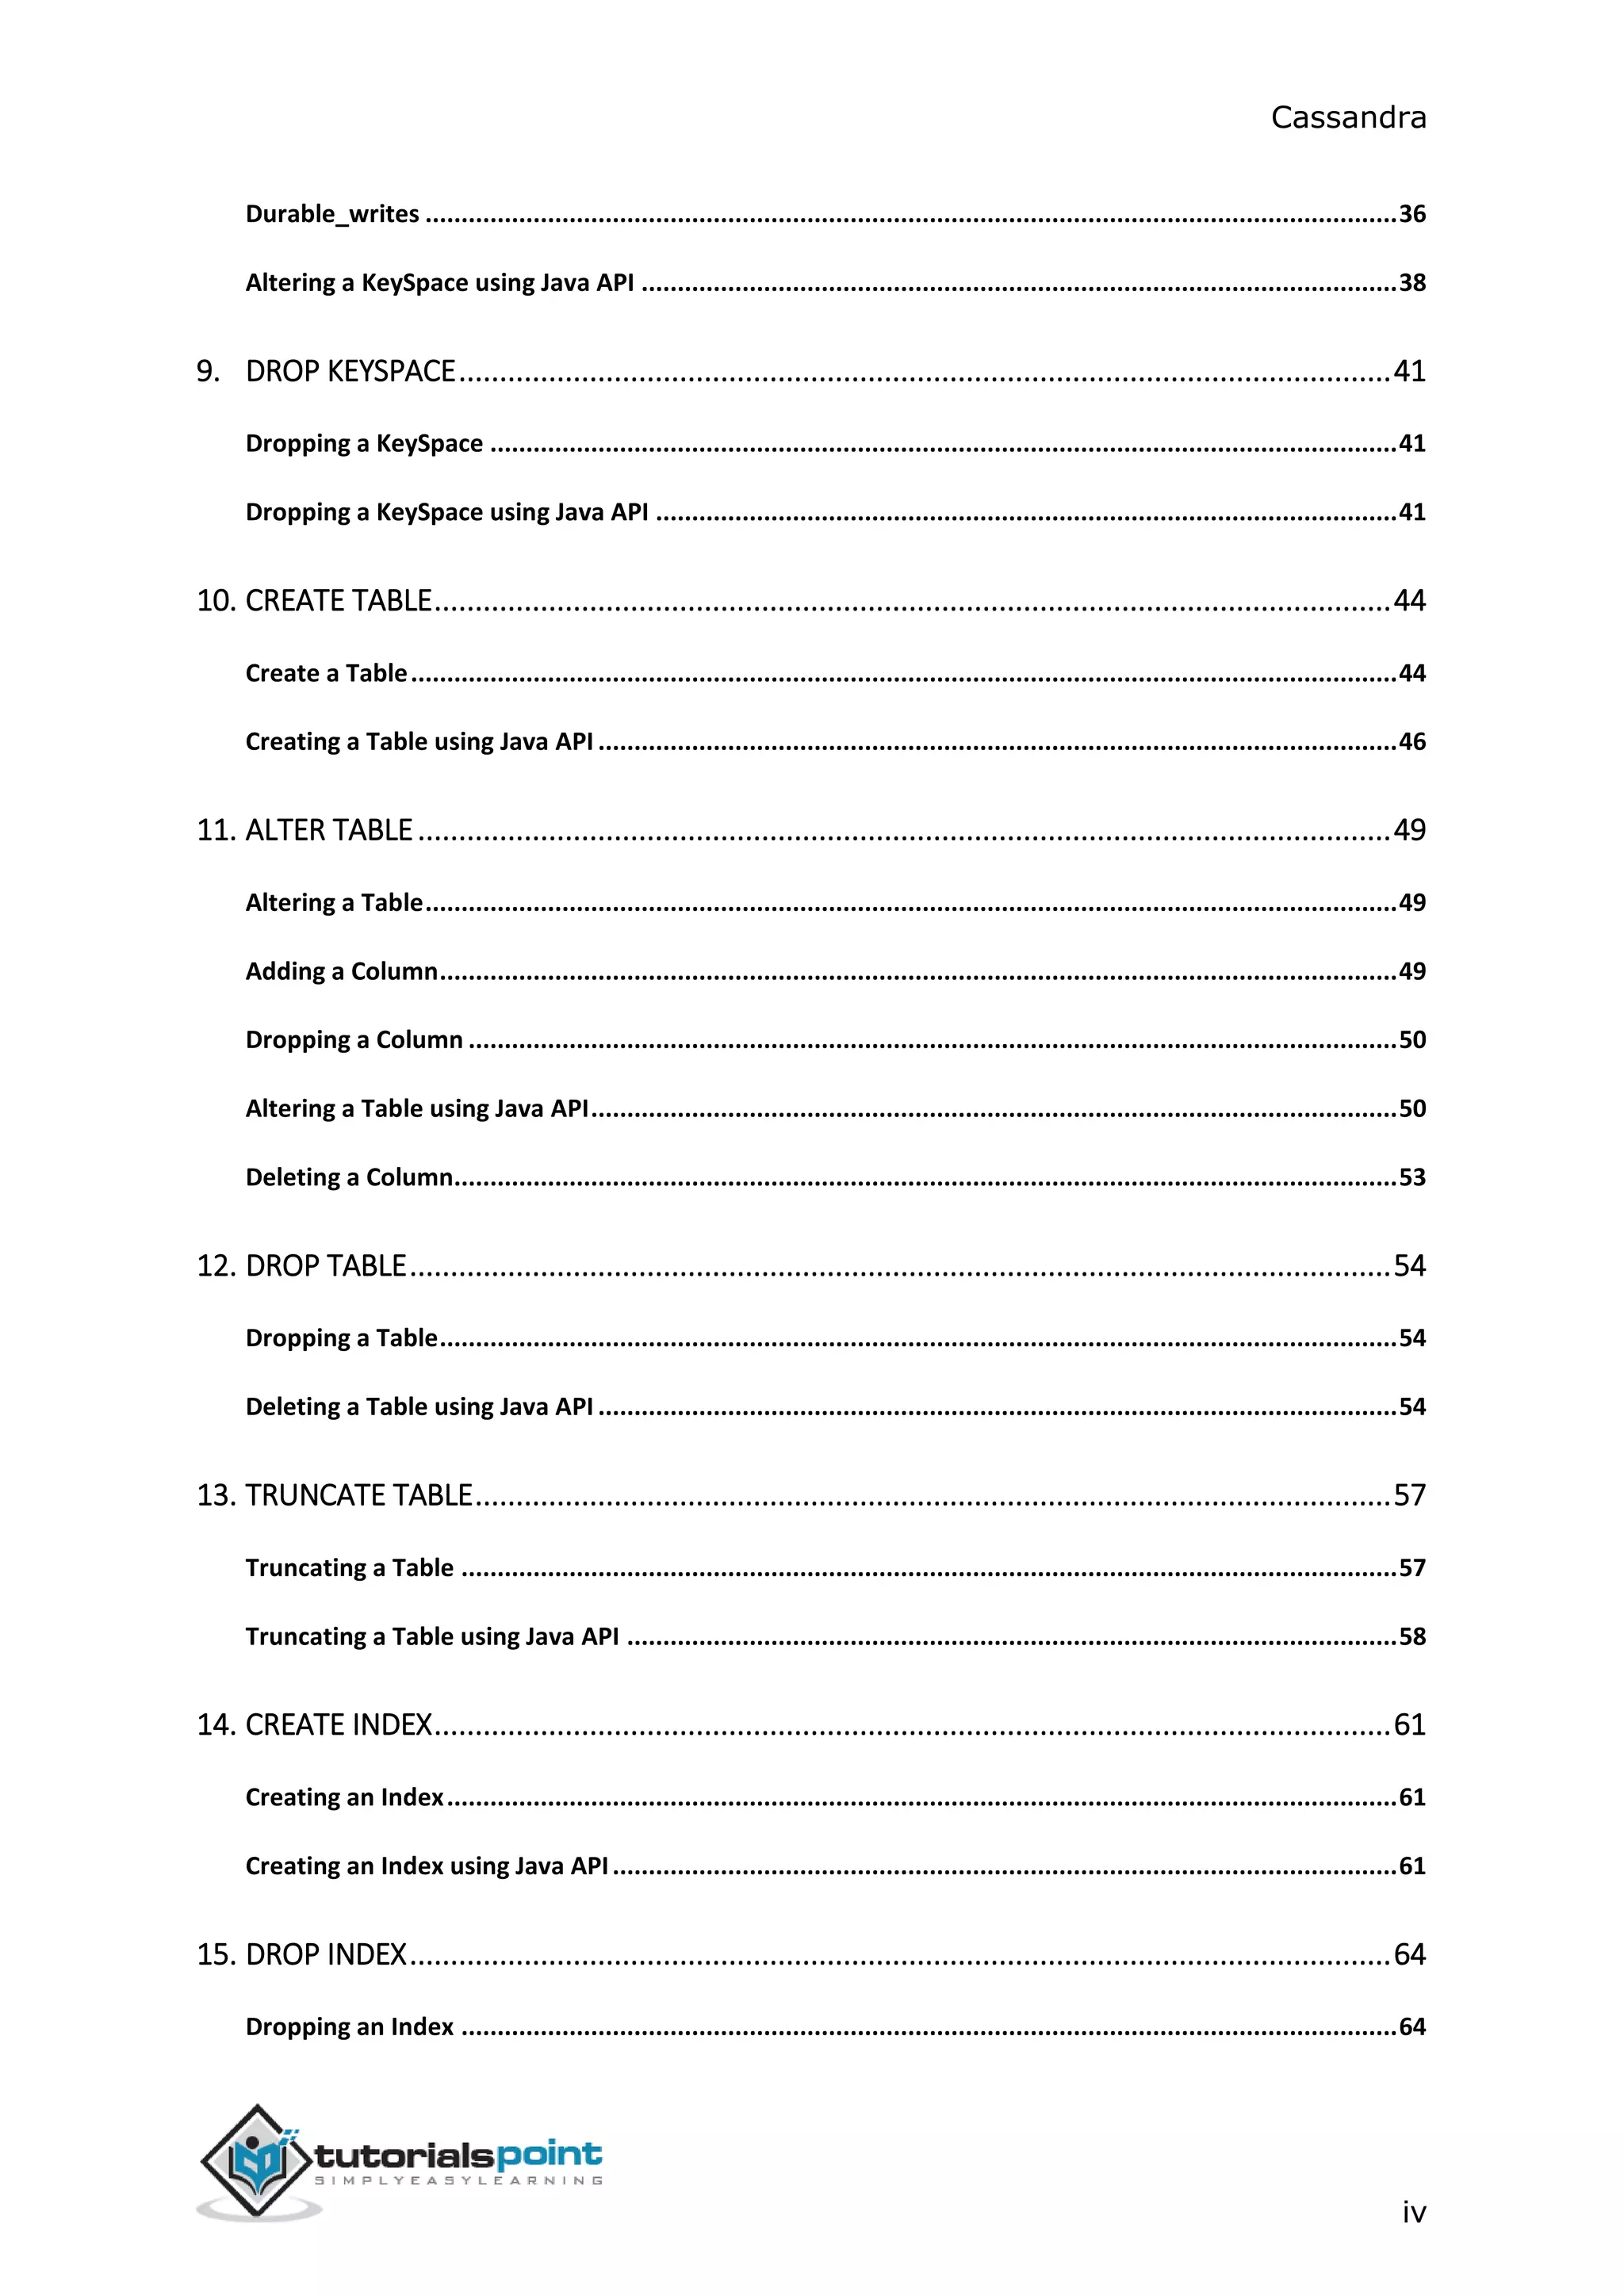
This chapter introduces the Cassandra query language shell and explains how to
use its commands.
By default, Cassandra provides a prompt Cassandra query language shell (cqlsh)
that allows users to communicate with it. Using this shell, you can execute
Cassandra Query Language (CQL).
Using cqlsh, you can
● define a schema,
● insert data, and
● execute a query.
Startingcqlsh
Start cqlsh using the command cqlsh as shown below. It gives the Cassandra
cqlsh prompt as output.
[hadoop@linux bin]$ cqlsh
Connected to Test Cluster at 127.0.0.1:9042.
[cqlsh 5.0.1 | Cassandra 2.1.2 | CQL spec 3.2.0 | Native protocol v3]
Use HELP for help.
cqlsh>
Cqlsh: As discussed above, this command is used to start the cqlsh prompt. In
addition, it supports a few more options as well. The following table explains all
the options of cqlsh and their usage.
Options Usage
cqlsh --help Shows help topics about the options of cqlsh commands.
cqlsh --version Provides the version of the cqlsh you are using.
cqlsh --color Directs the shell to use colored output.
cqlsh --debug Shows additional debugging information.
cqlsh --execute
cql_statement
Directs the shell to accept and execute a CQL command.
5. CASSANDRA CQLSH](https://image.slidesharecdn.com/cassandratutorial-180620080720/75/Cassandra-tutorial-27-2048.jpg)
![Cassandra
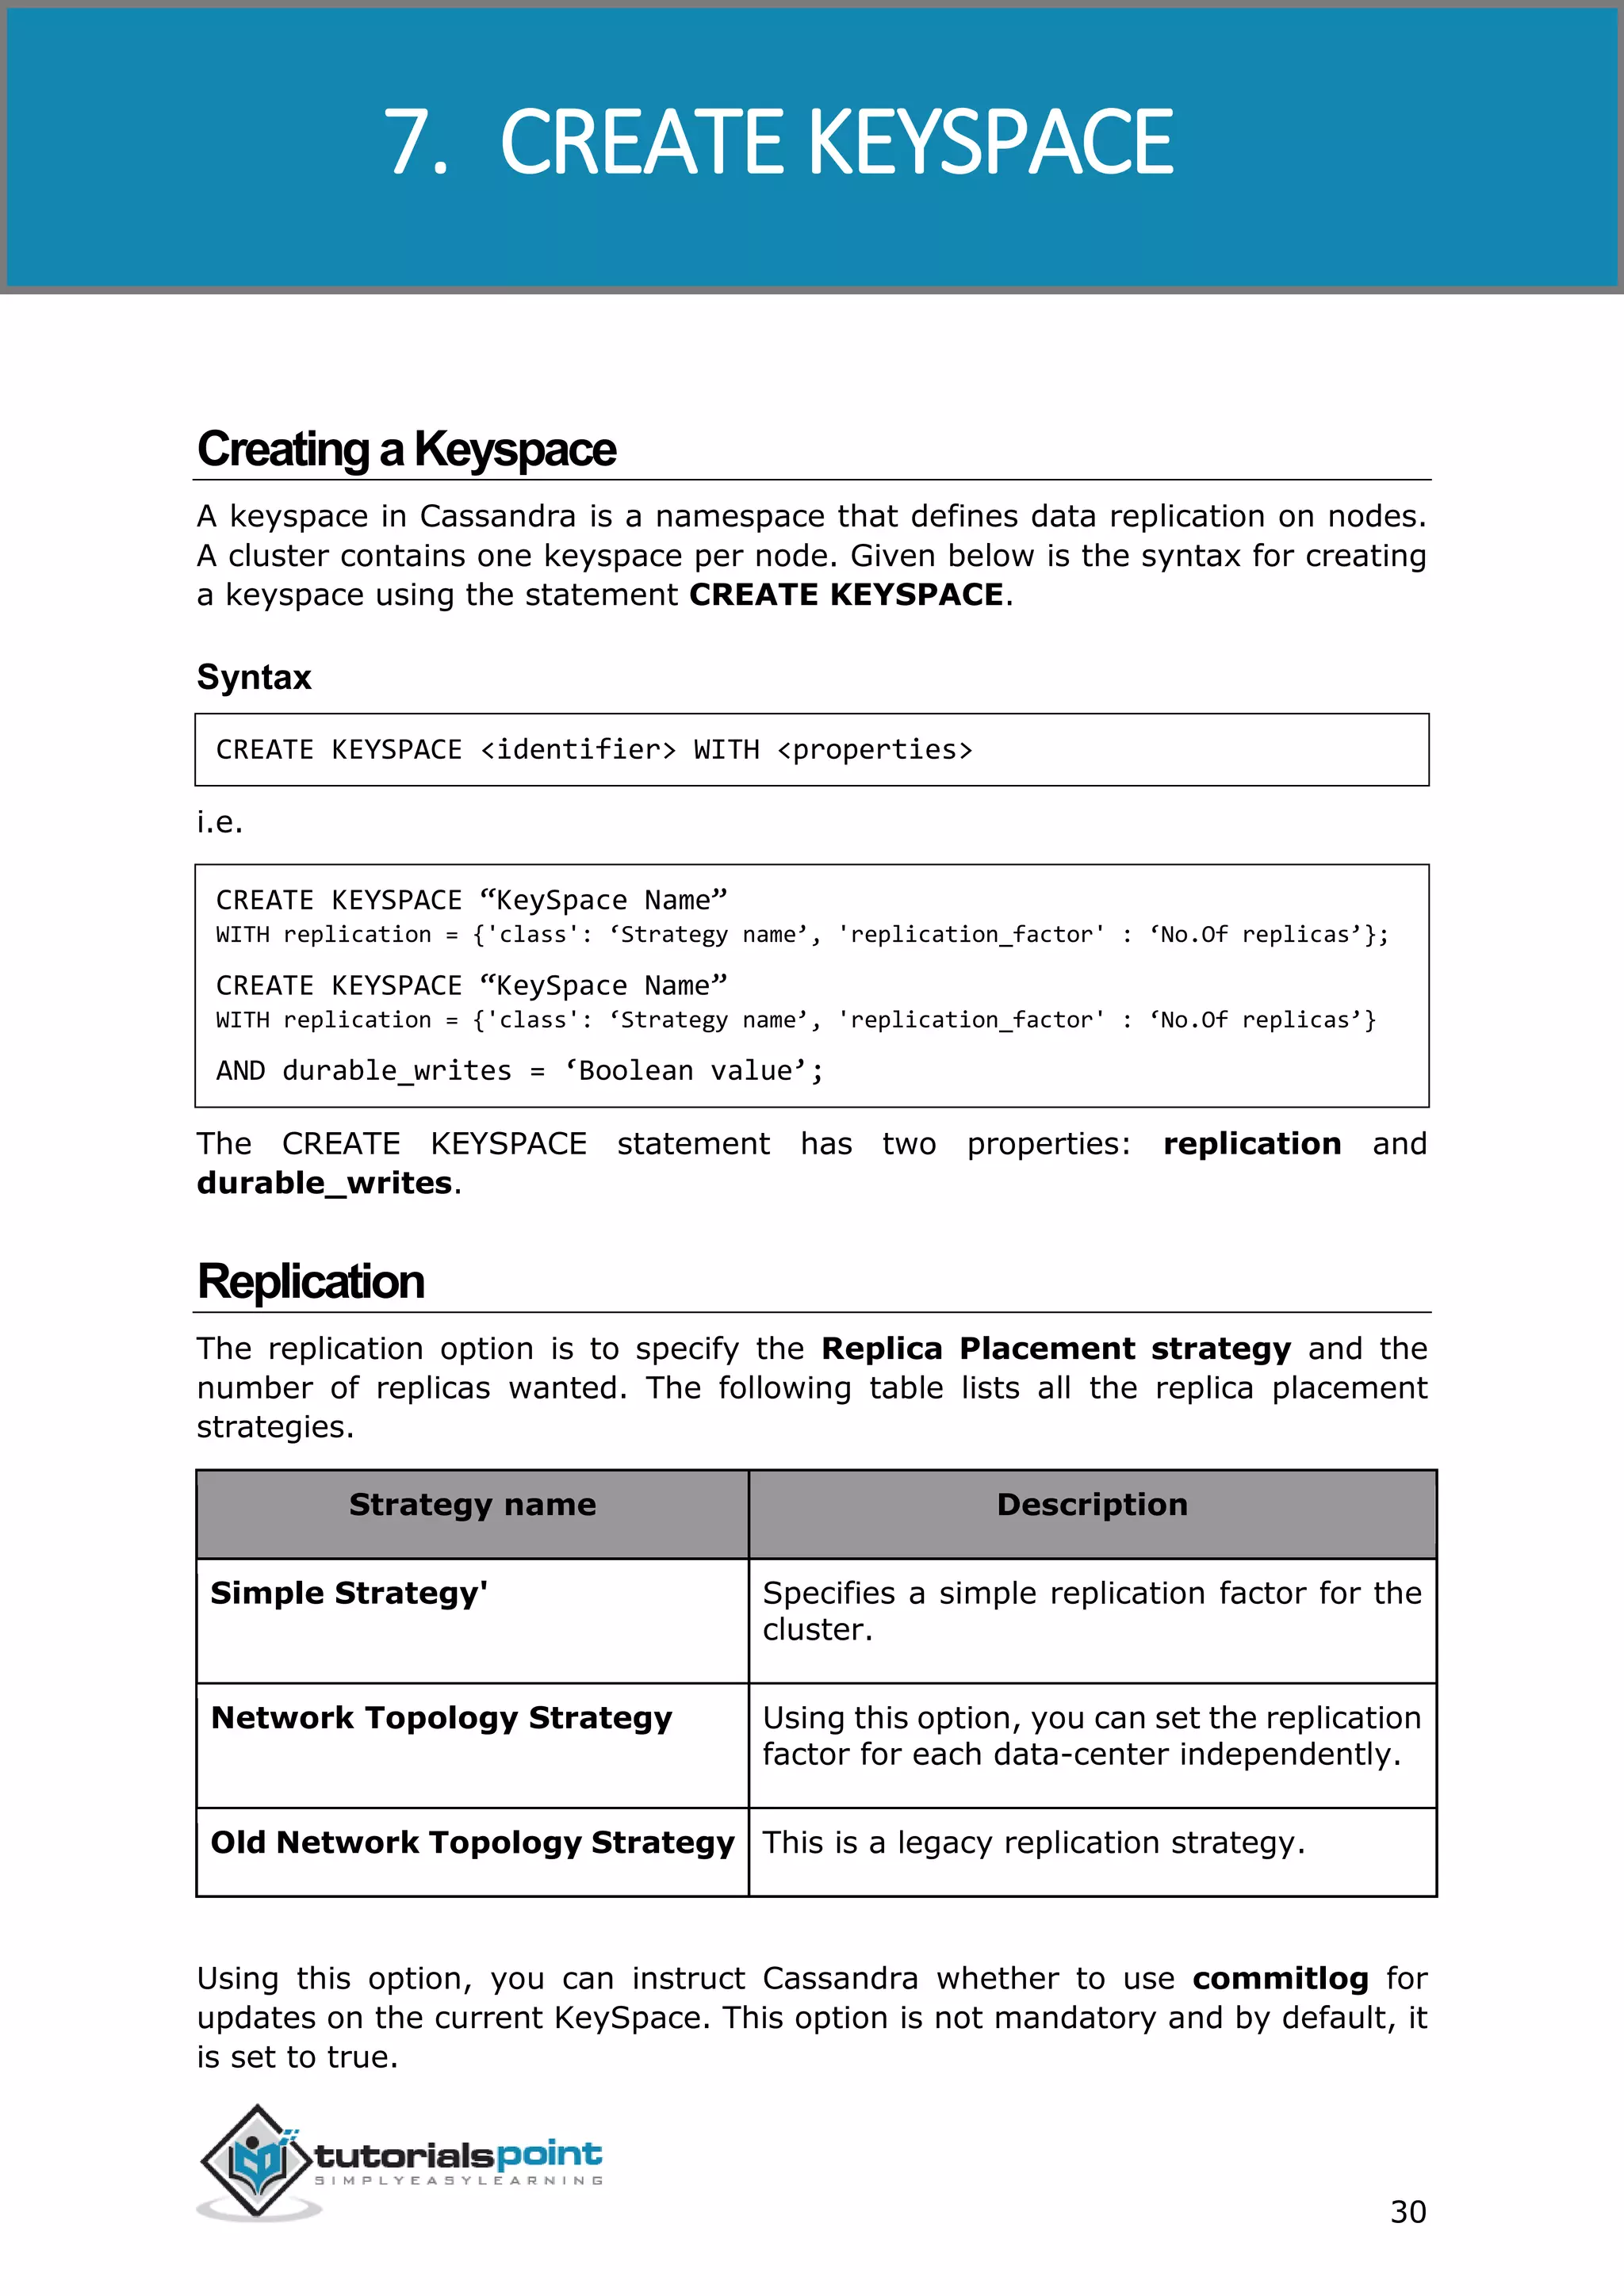
25
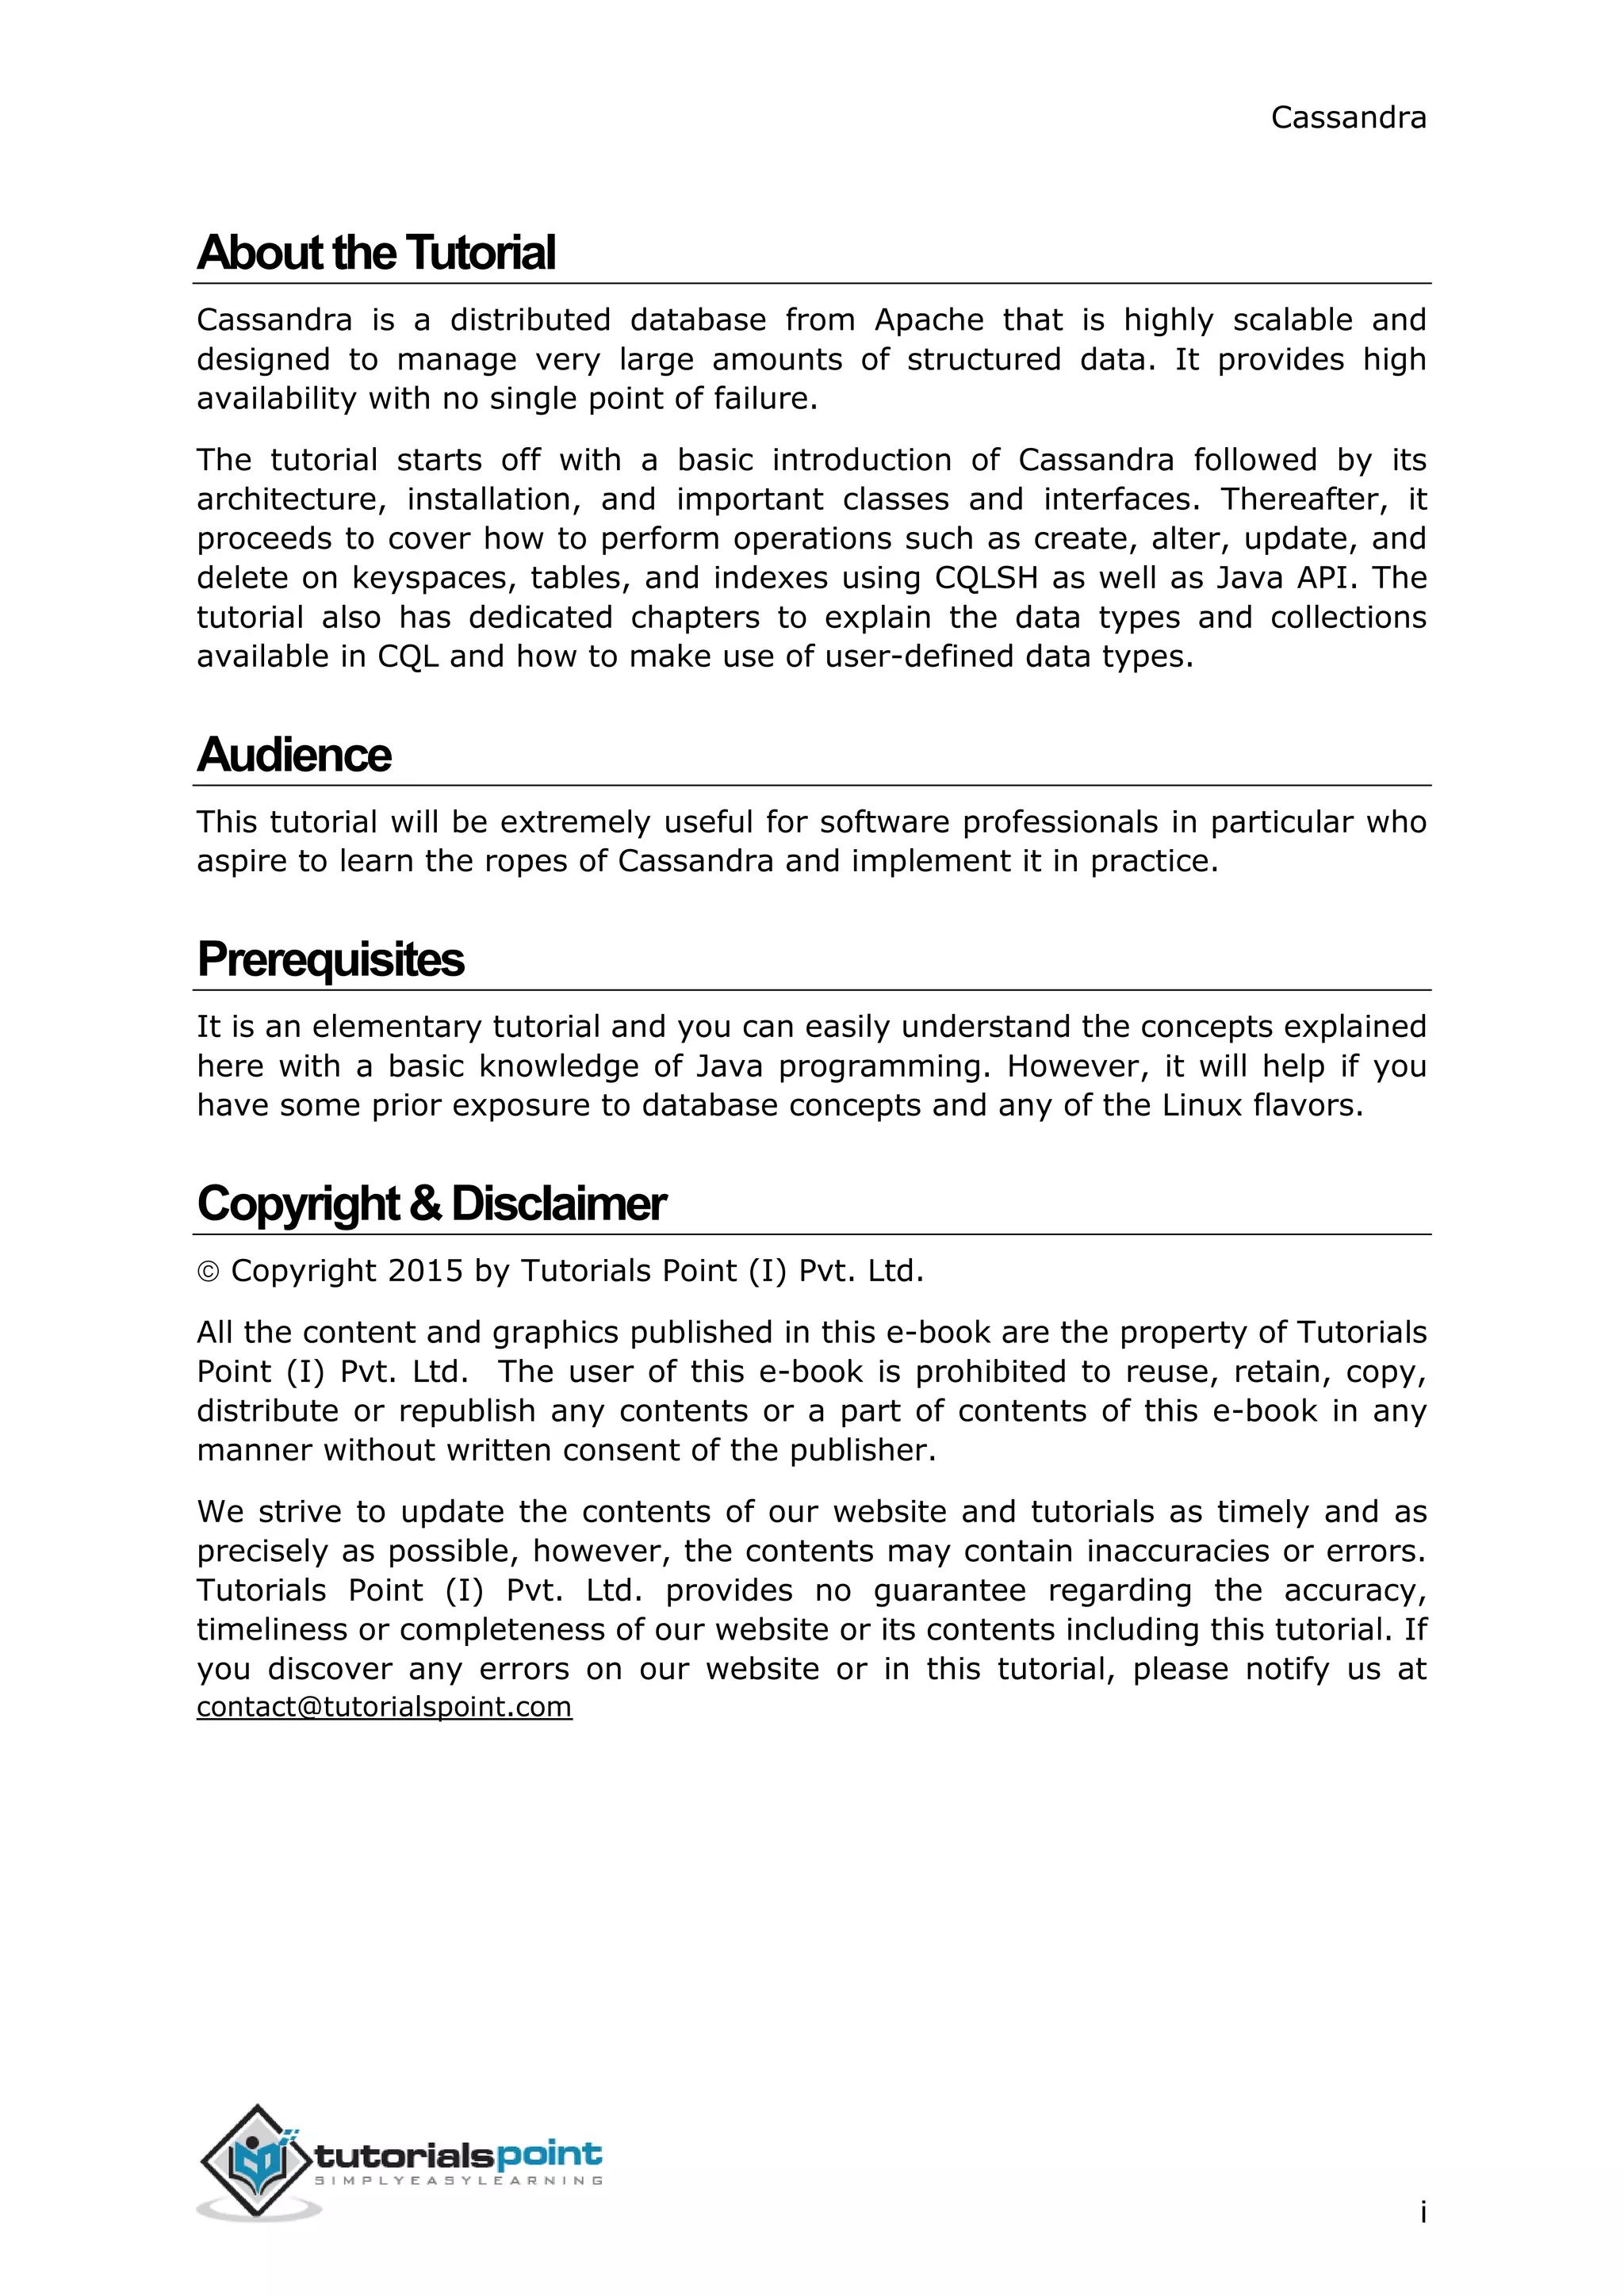
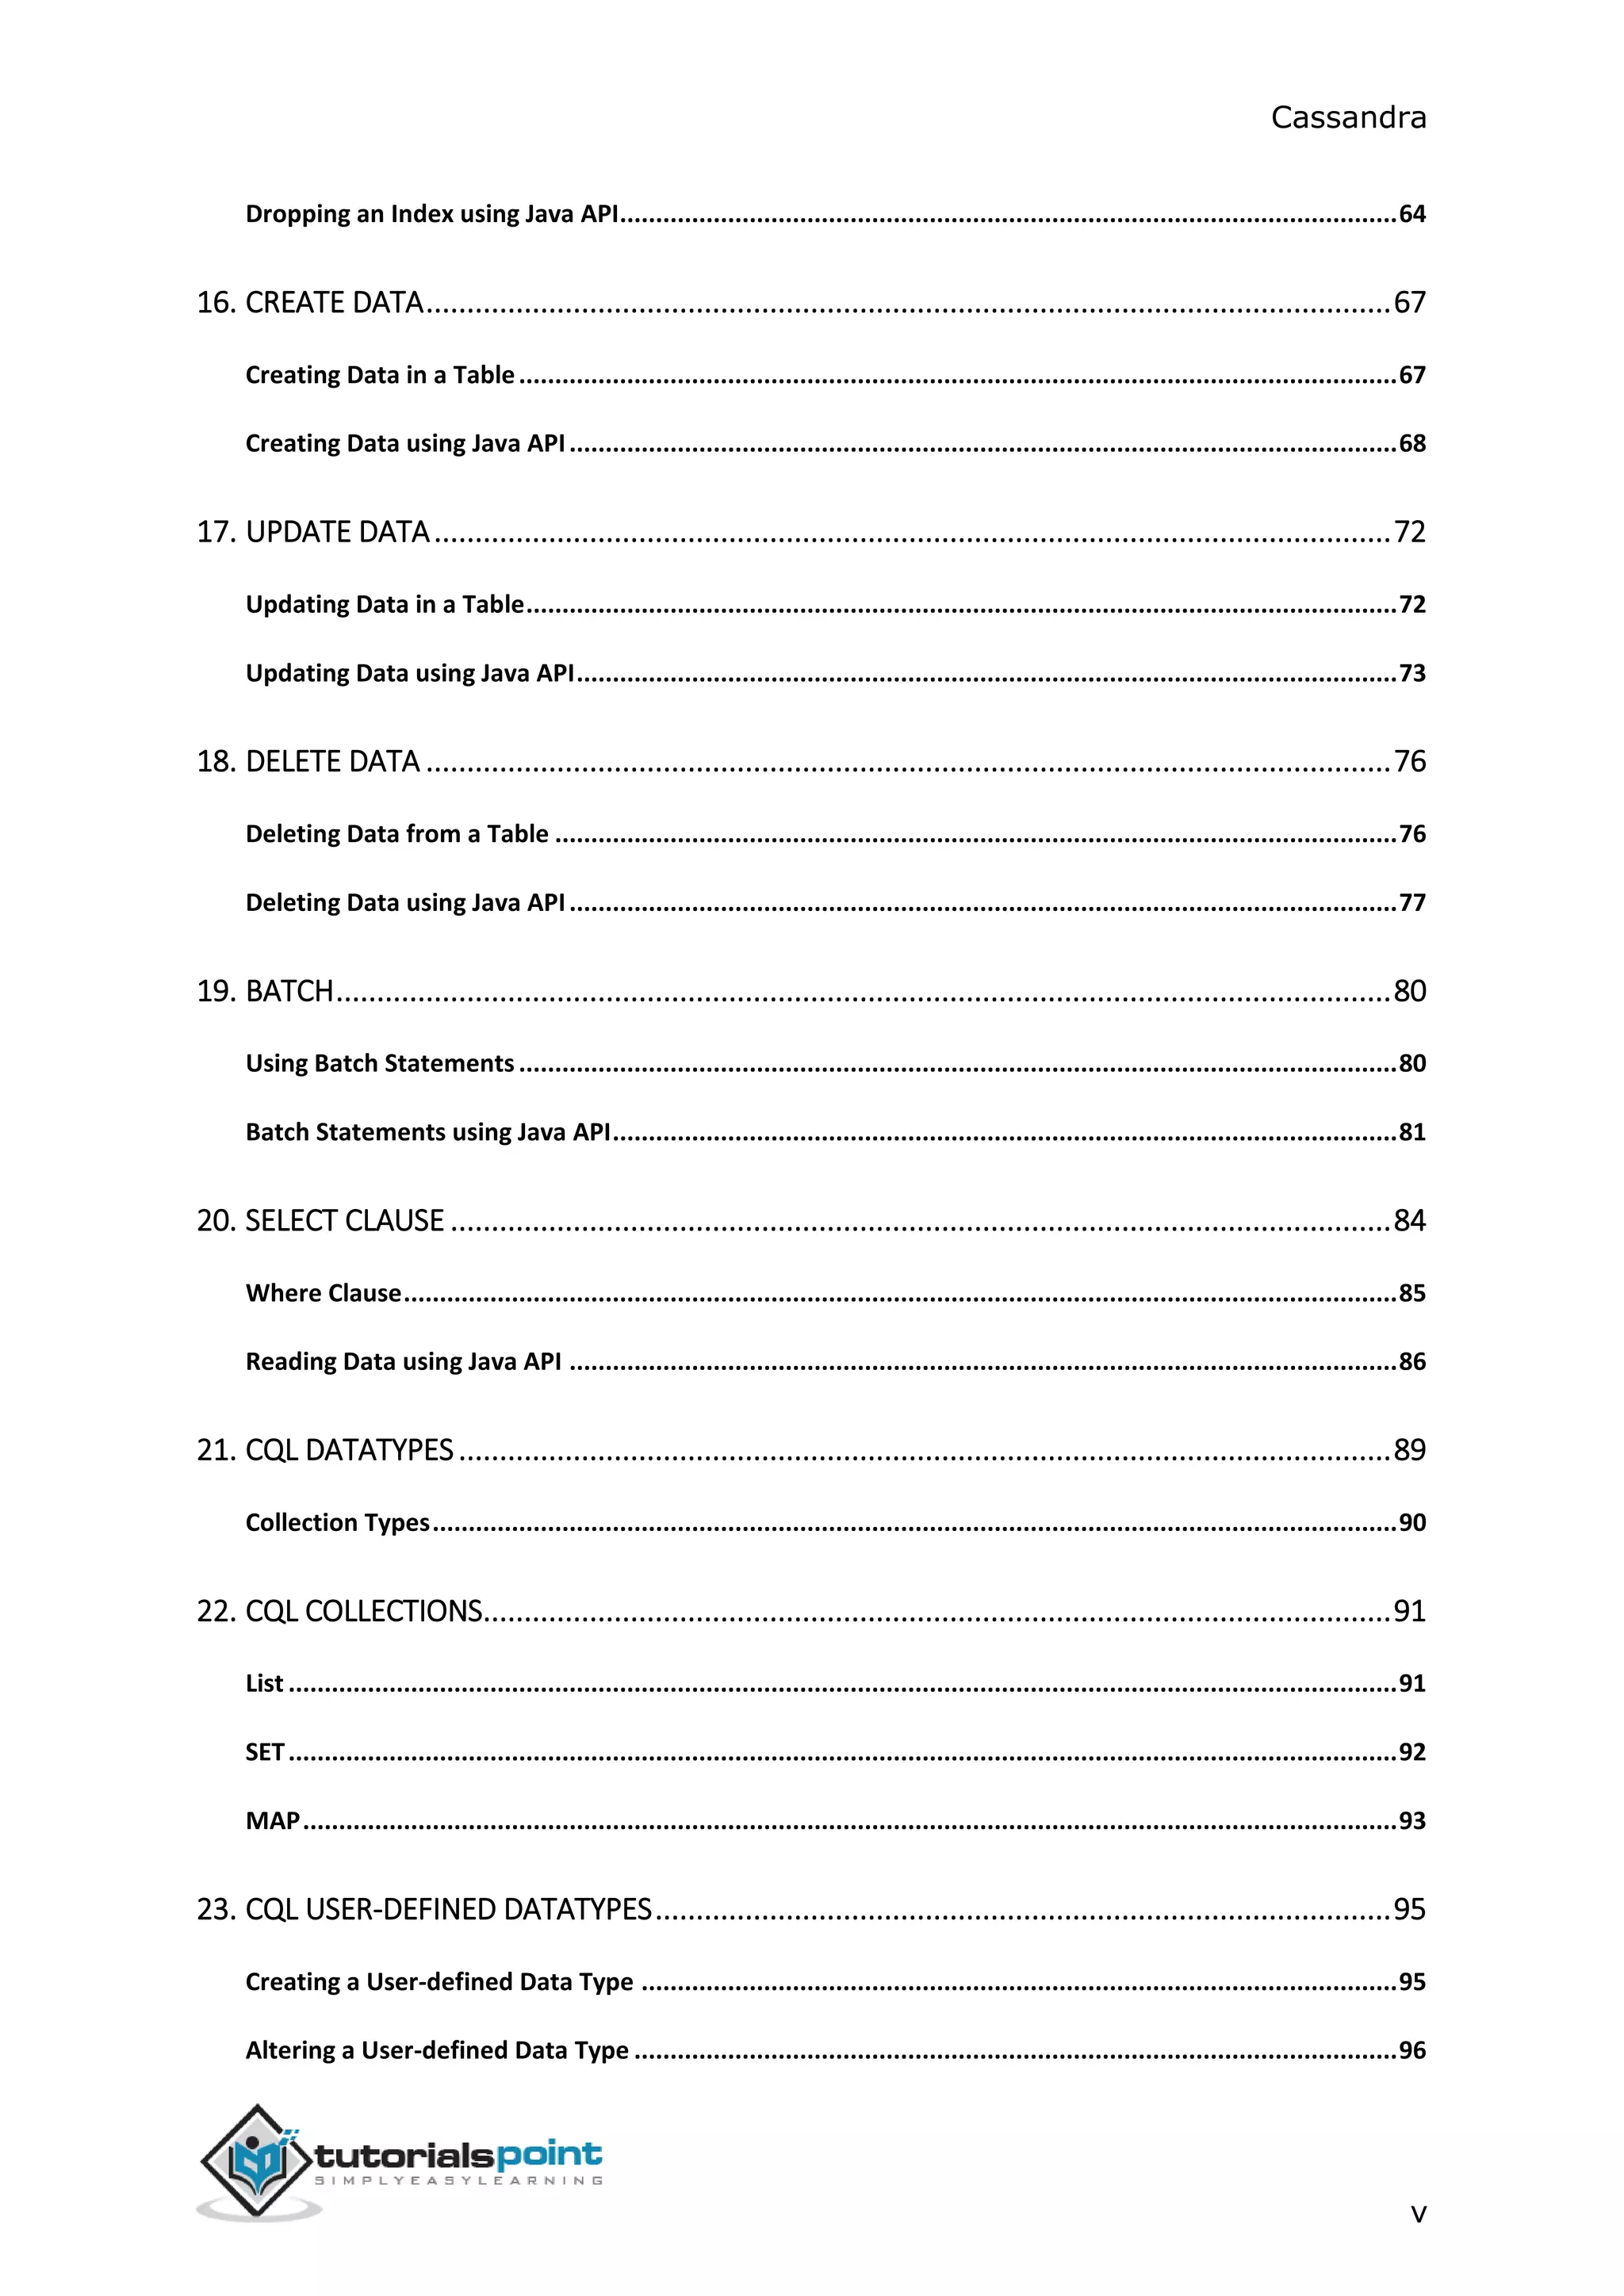
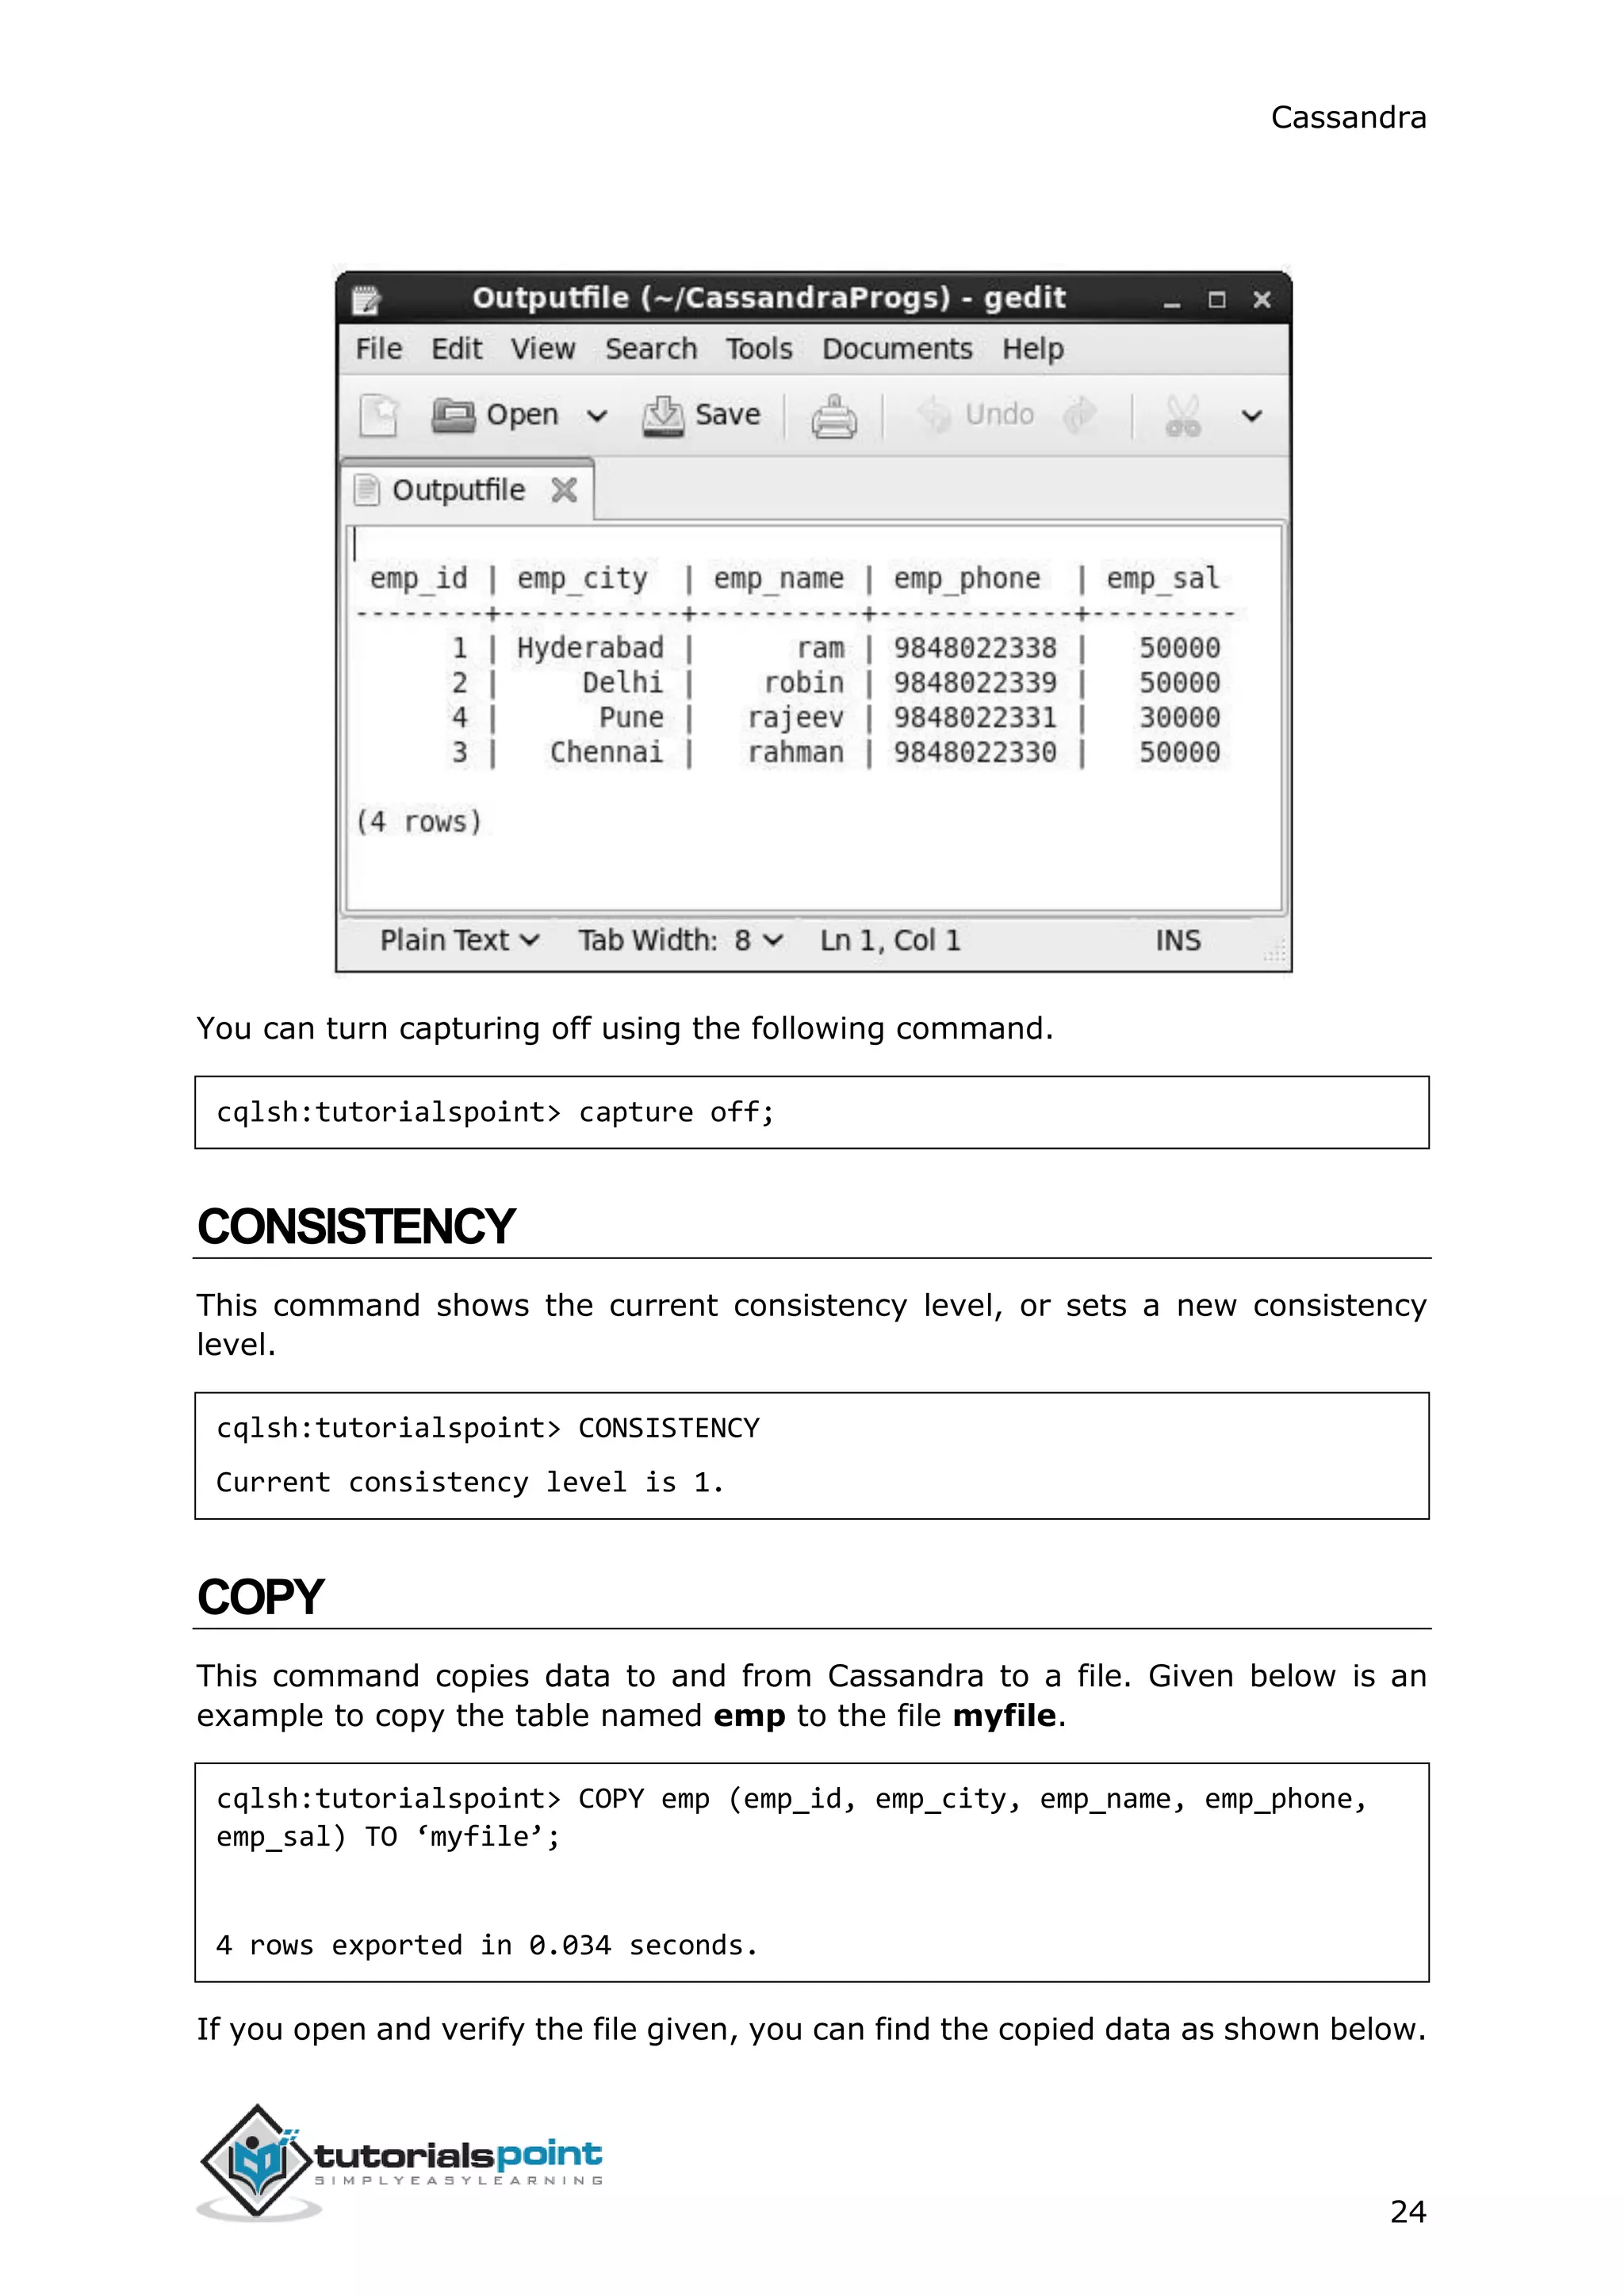
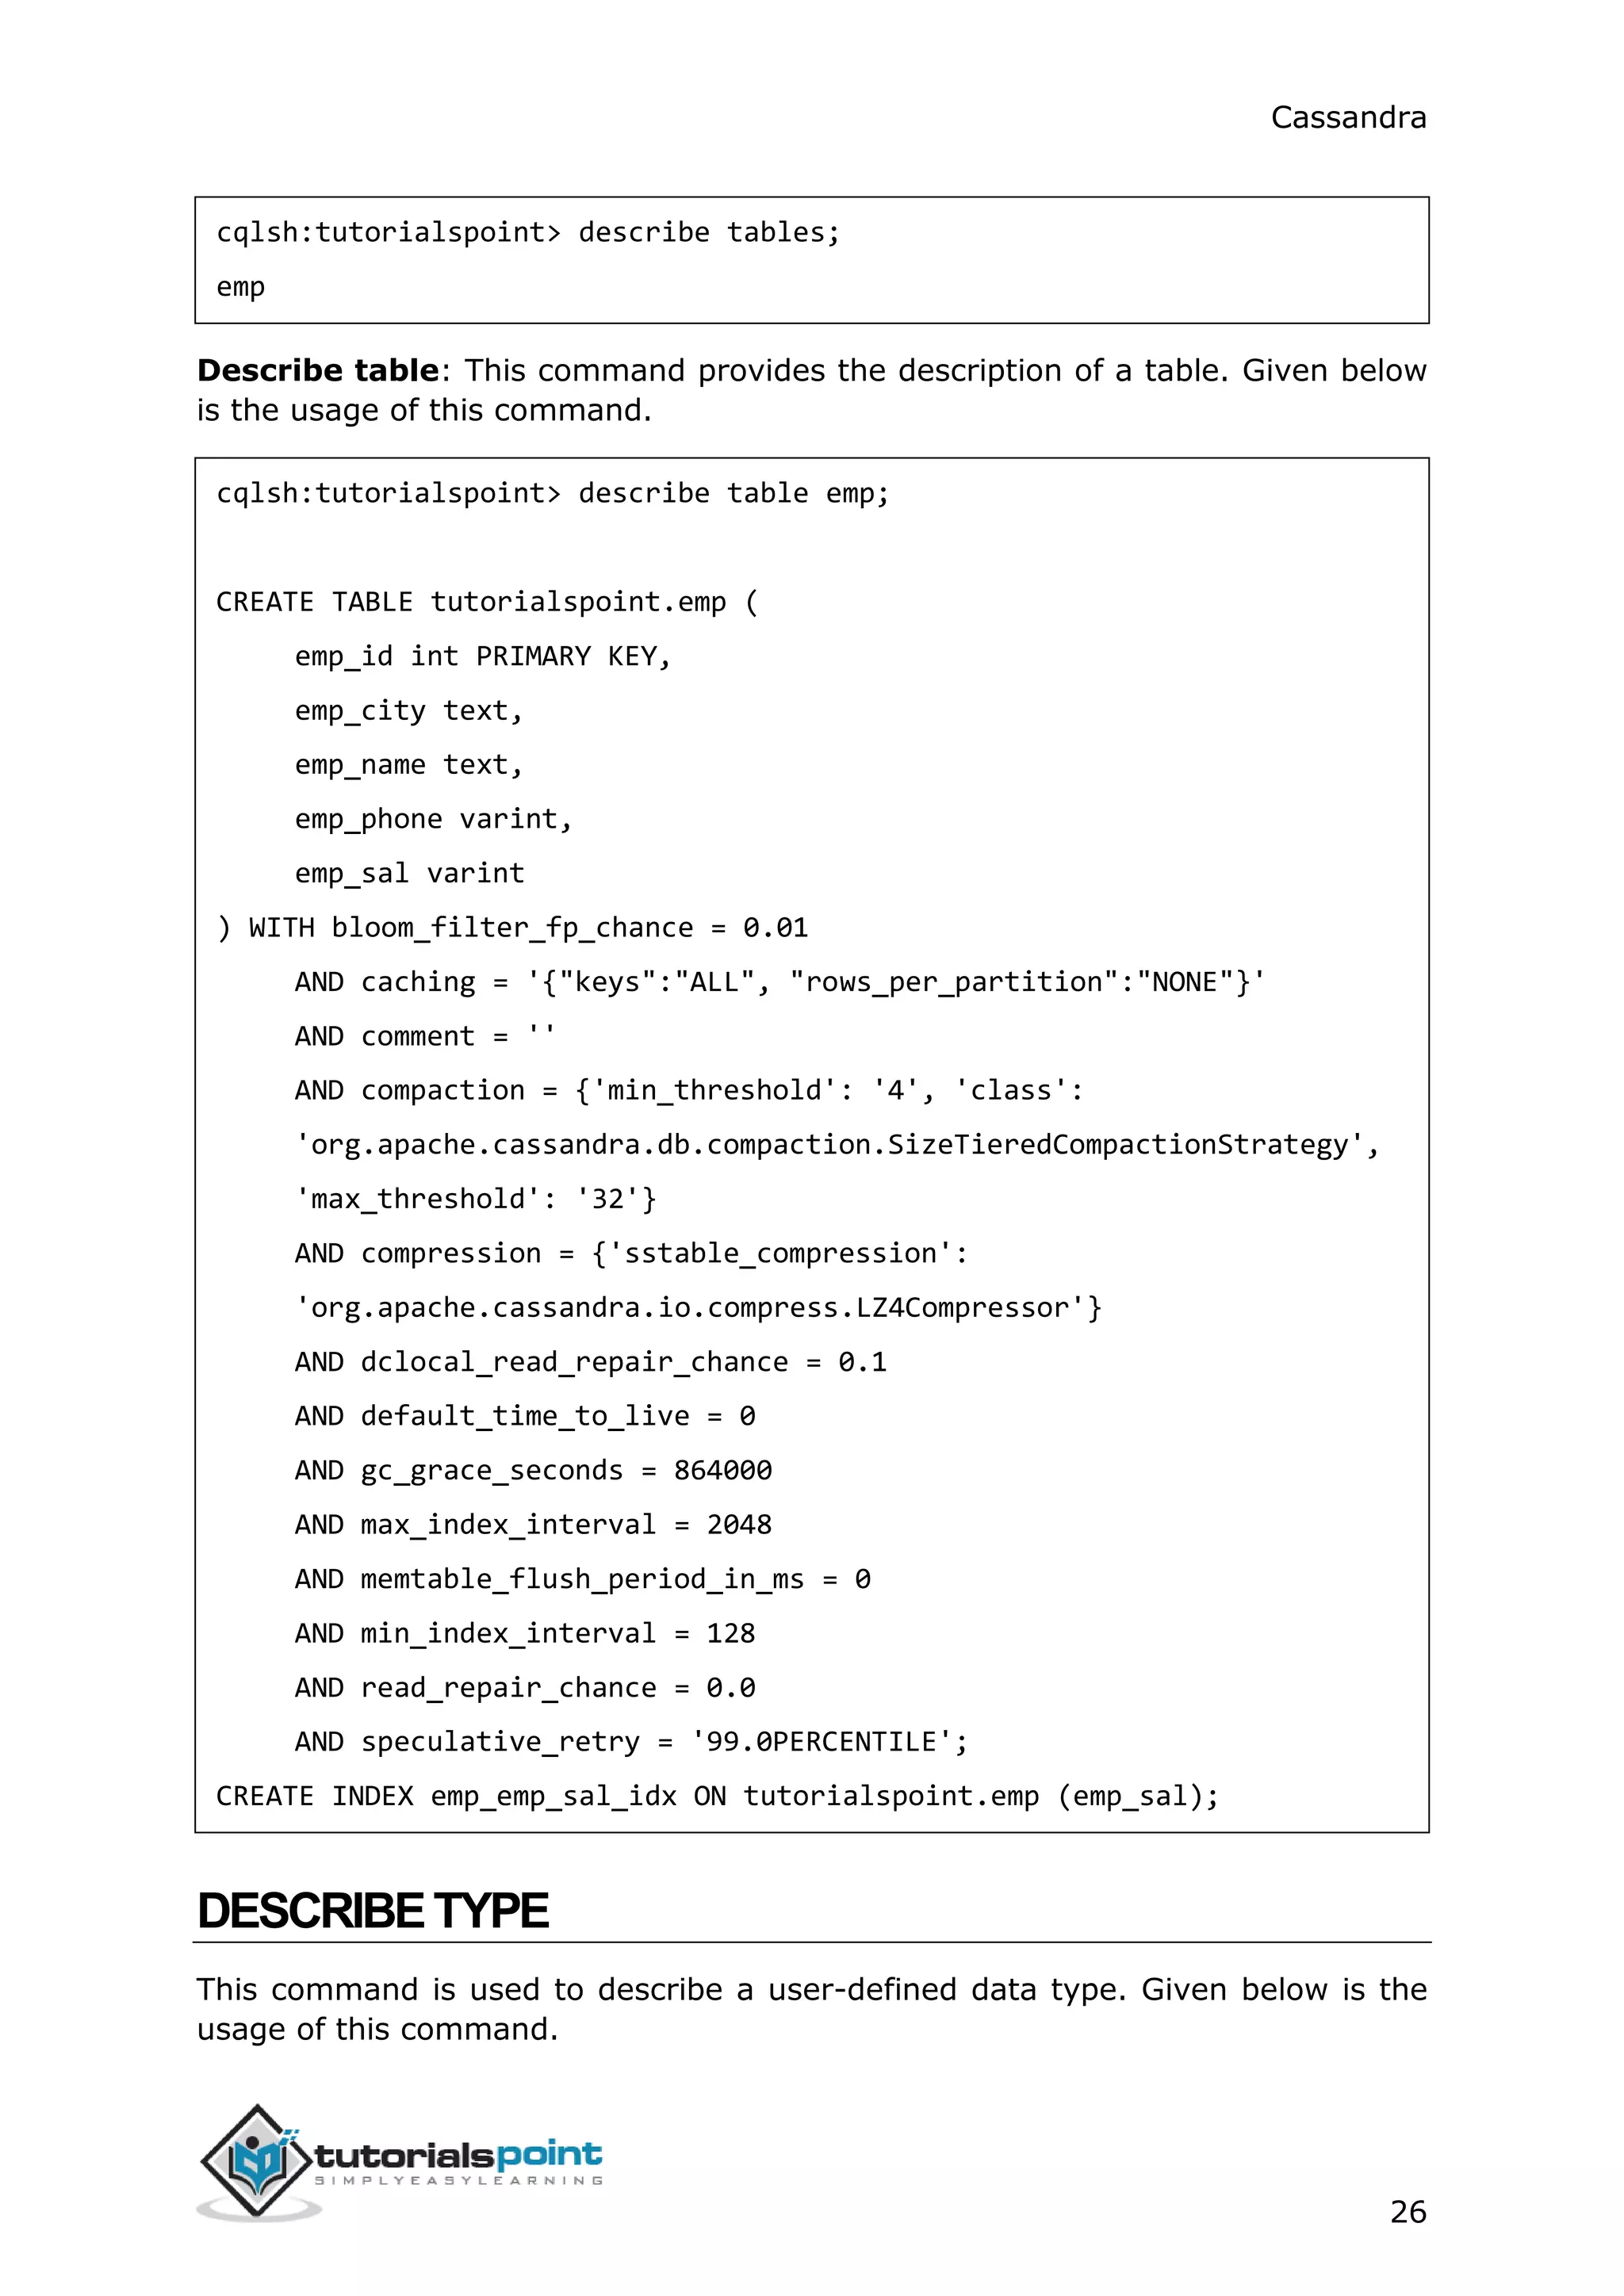
DESCRIBE
This command describes the current cluster of Cassandra and its objects. The
variants of this command are explained below.
Describe cluster: This command provides information about the cluster.
cqlsh:tutorialspoint> describe cluster;
Cluster: Test Cluster
Partitioner: Murmur3Partitioner
Range ownership:
-658380912249644557 [127.0.0.1]
-2833890865268921414 [127.0.0.1]
-6792159006375935836 [127.0.0.1]
Describe Keyspaces: This command lists all the keyspaces in a cluster. Given
below is the usage of this command.
cqlsh:tutorialspoint> describe keyspaces;
system_traces system tp tutorialspoint
Describe tables: This command lists all the tables in a keyspace. Given below is
the usage of this command.](https://image.slidesharecdn.com/cassandratutorial-180620080720/75/Cassandra-tutorial-32-2048.jpg)
![Cassandra
29
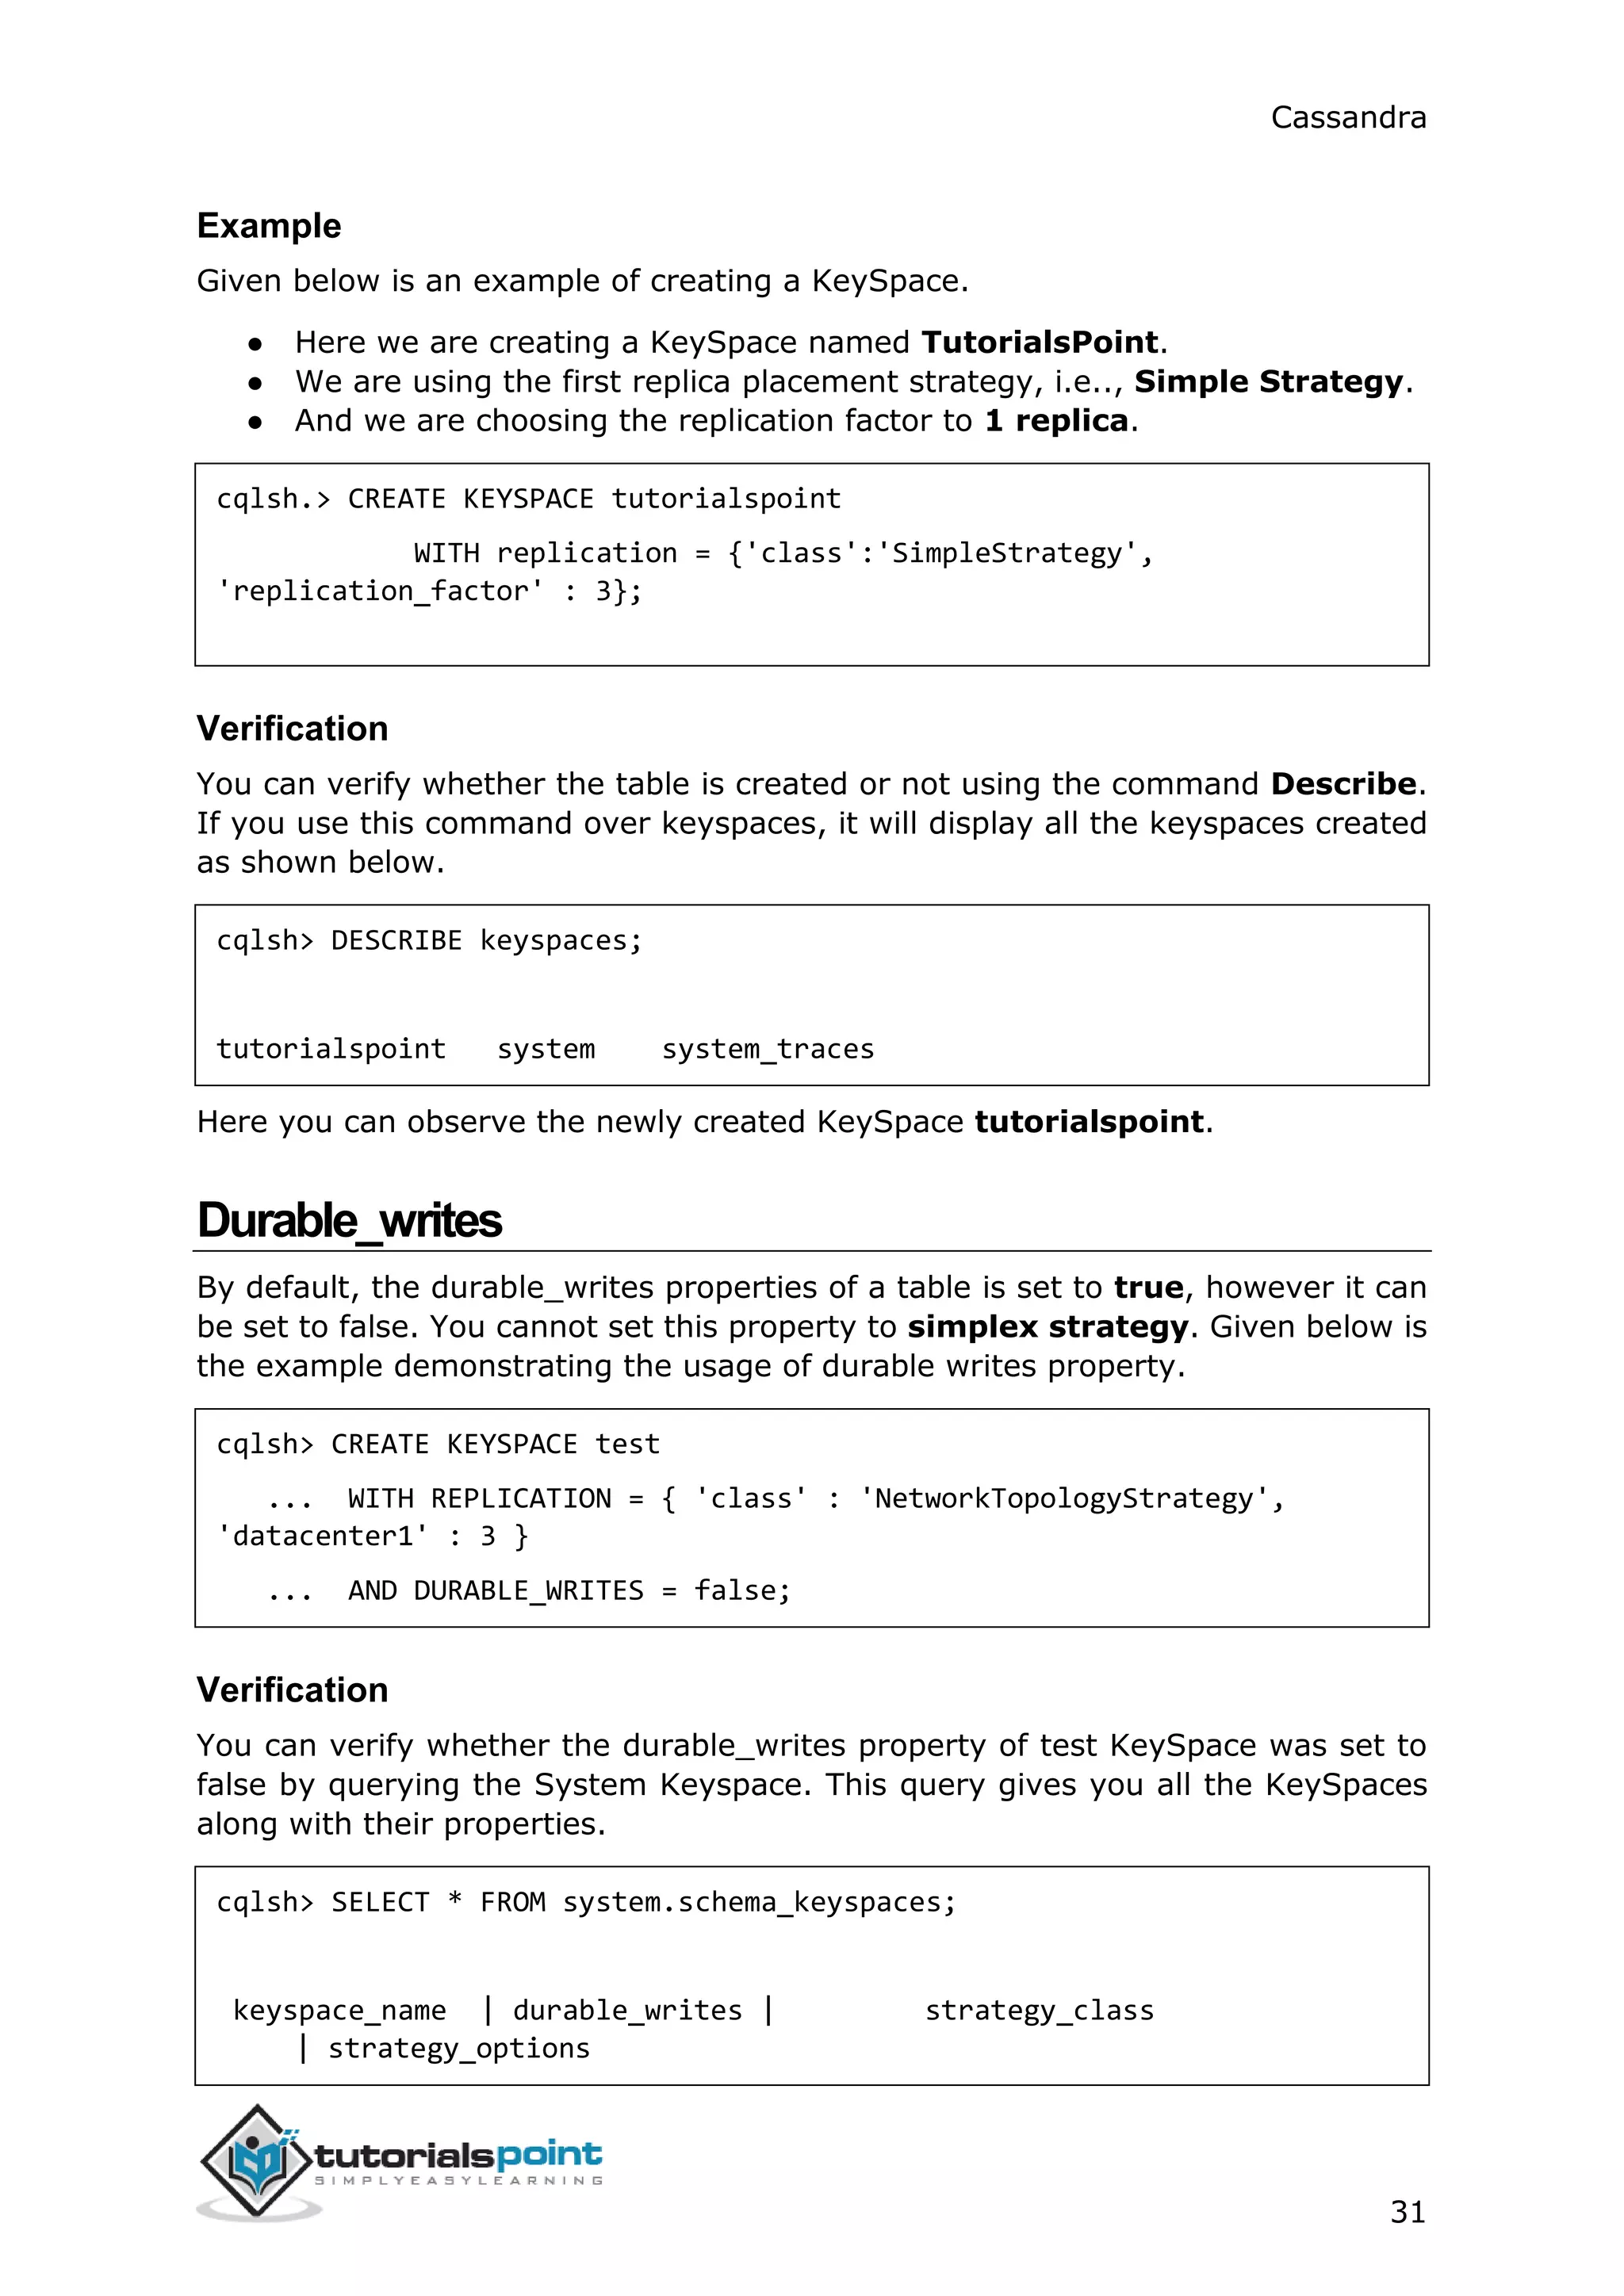
SHOW
This command displays the details of current cqlsh session such as Cassandra
version, host, or data type assumptions. Given below is the usage of this
command.
cqlsh:tutorialspoint> show host;
Connected to Test Cluster at 127.0.0.1:9042.
cqlsh:tutorialspoint> show version;
[cqlsh 5.0.1 | Cassandra 2.1.2 | CQL spec 3.2.0 | Native protocol v3]
SOURCE
Using this command, you can execute the commands in a file. Suppose our input
file is as follows:
Then you can execute the file containing the commands as shown below.
cqlsh:tutorialspoint> source '/home/hadoop/CassandraProgs/inputfile';
emp_id | emp_city | emp_name | emp_phone | emp_sal
--------+-----------+----------+------------+---------
1 | Hyderabad | ram | 9848022338 | 50000
2 | Delhi | robin | 9848022339 | 50000
3 | Pune | rajeev | 9848022331 | 30000
4 | Chennai | rahman | 9848022330 | 50000
(4 rows)](https://image.slidesharecdn.com/cassandratutorial-180620080720/75/Cassandra-tutorial-36-2048.jpg)
![Cassandra
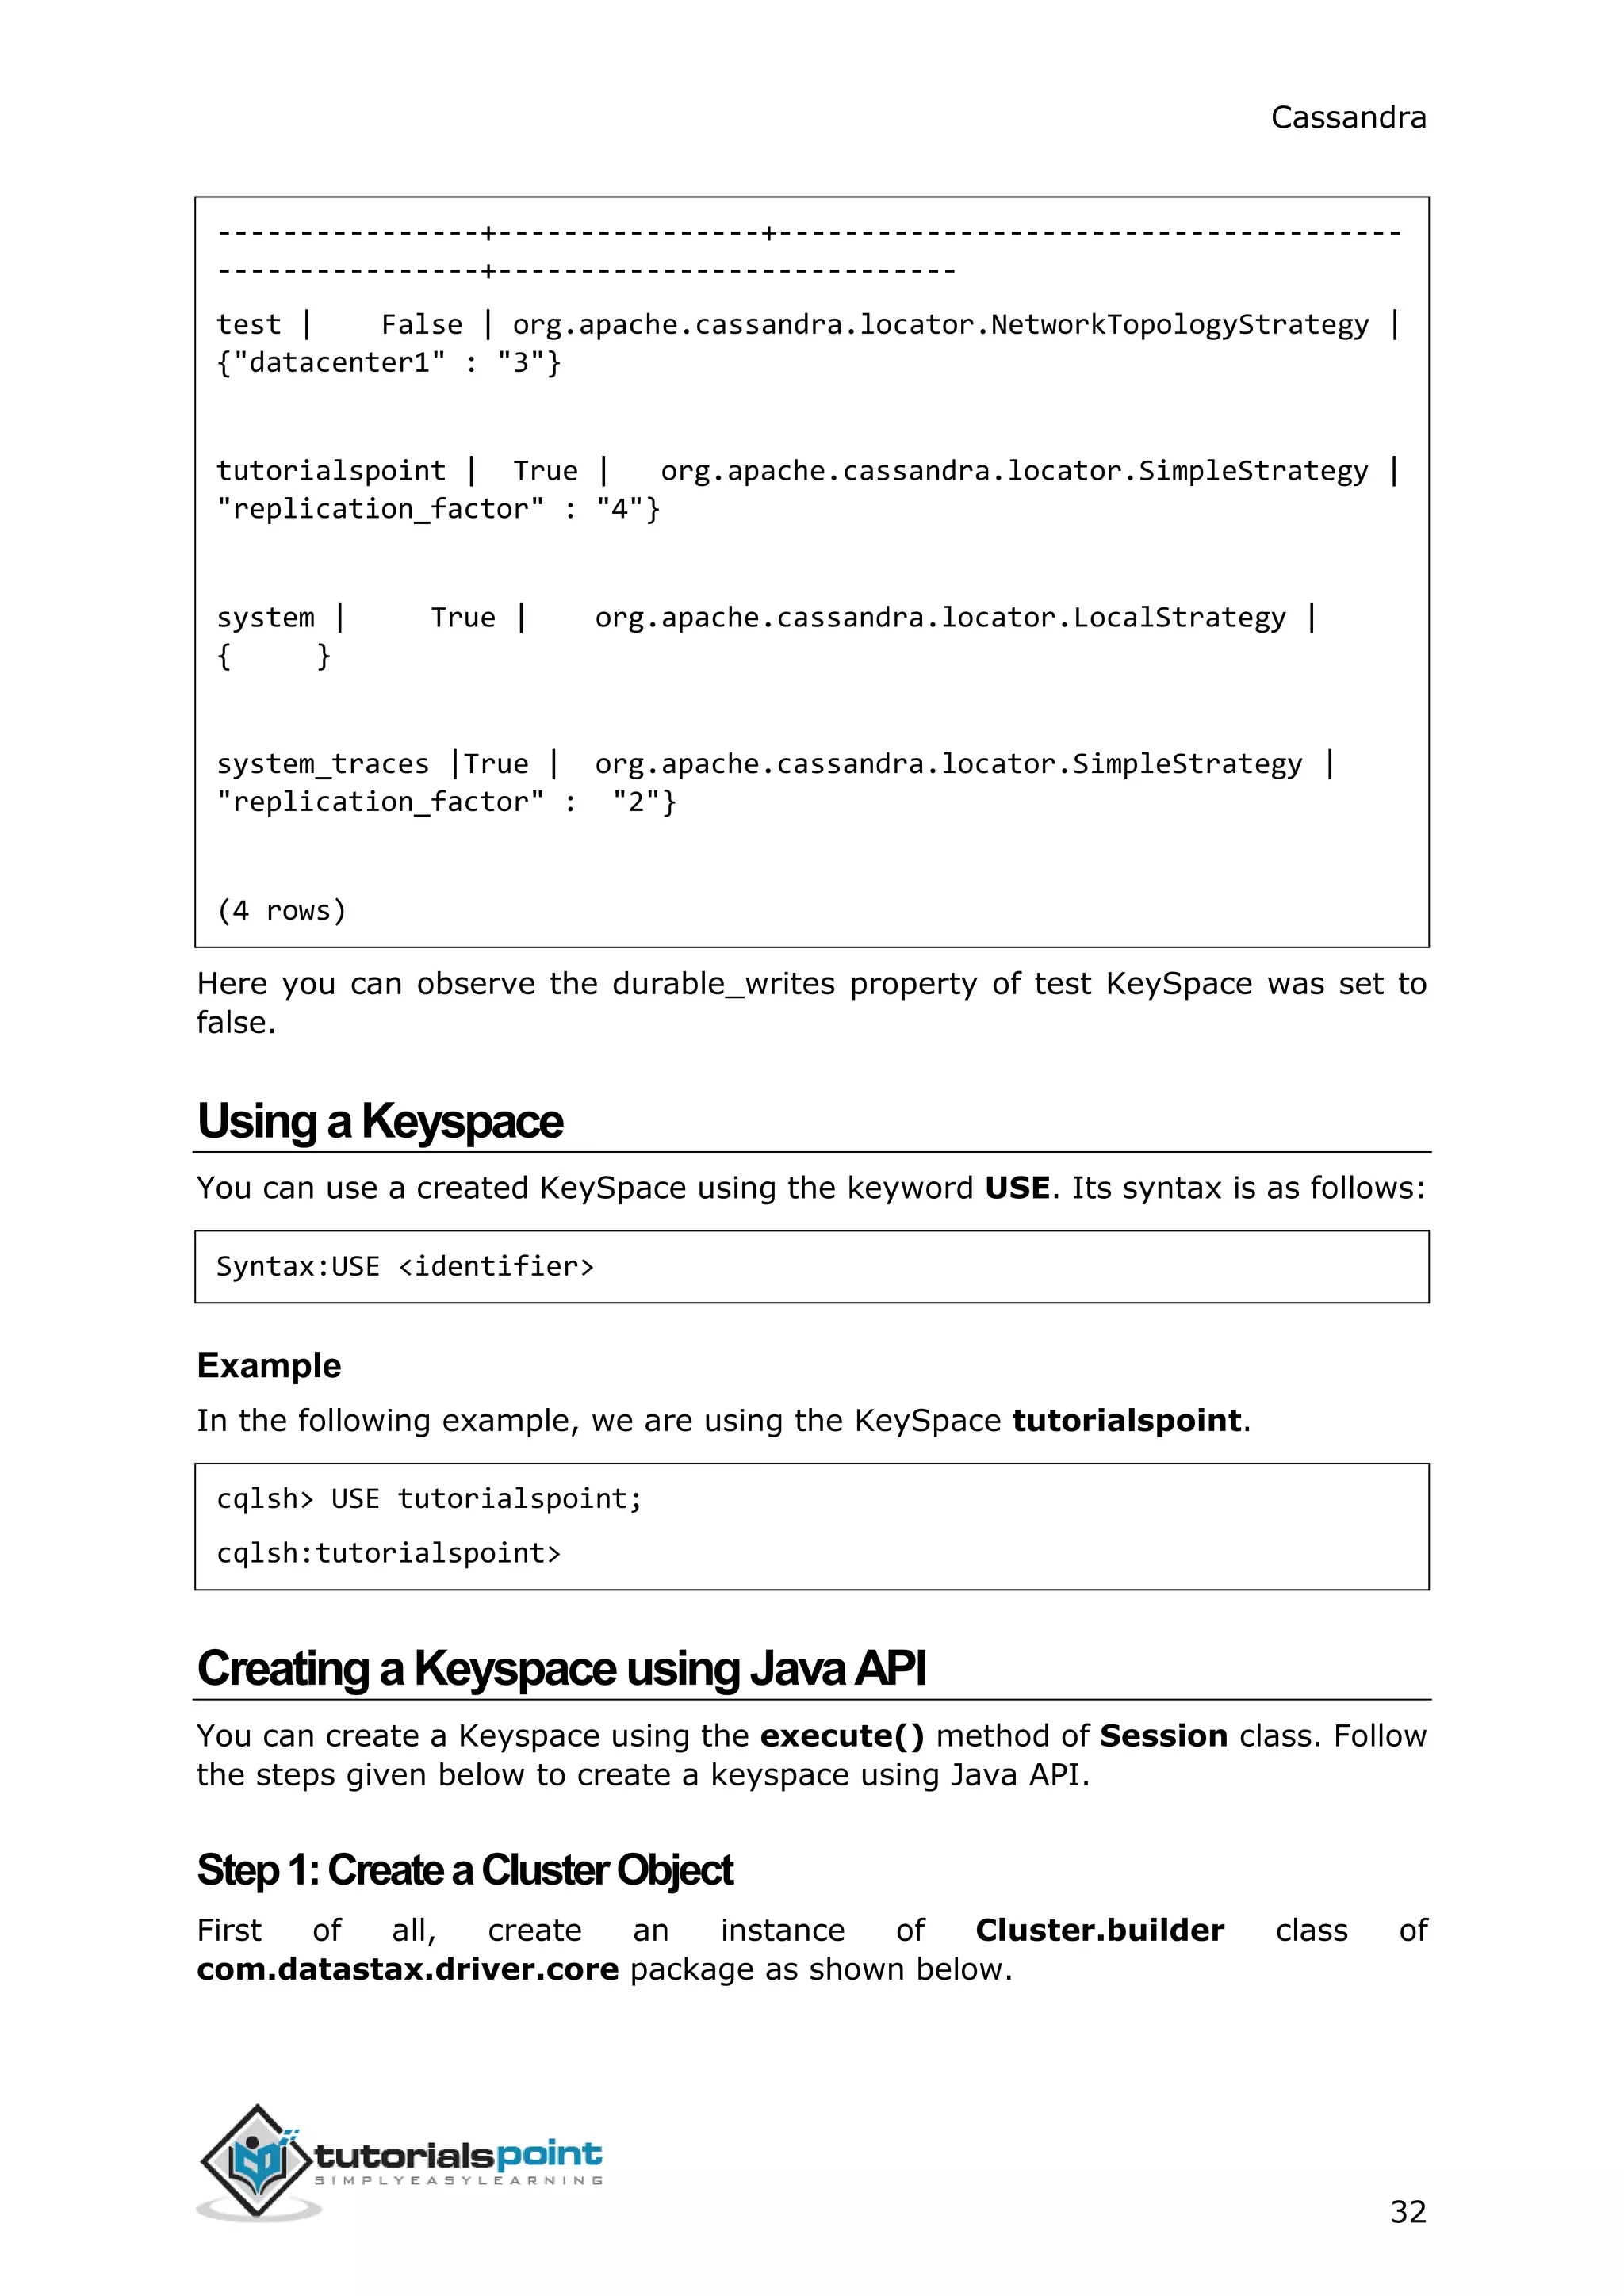
34
String query="CREATE KEYSPACE tp WITH replication "
+ "= {'class':'SimpleStrategy',
'replication_factor':1}; ";
session.execute(query);
Step4:UsetheKeySpace
You can use a created KeySpace using the execute() method as shown below.
execute(“ USE tp ” );
Given below is the complete program to create and use a keyspace in Cassandra
using Java API.
import com.datastax.driver.core.Cluster;
import com.datastax.driver.core.Session;
public class Create_KeySpace {
public static void main(String args[]){
//Query
String query="CREATE KEYSPACE tp WITH replication "
+ "= {'class':'SimpleStrategy',
'replication_factor':1};";
//creating Cluster object
Cluster cluster = Cluster.builder().addContactPoint("127.0.0.1").build();
//Creating Session object
Session session=cluster.connect();
//Executing the query
session.execute(query);
//using the KeySpace
session.execute("USE tp");
System.out.println("Keyspace created");](https://image.slidesharecdn.com/cassandratutorial-180620080720/75/Cassandra-tutorial-41-2048.jpg)


![Cassandra
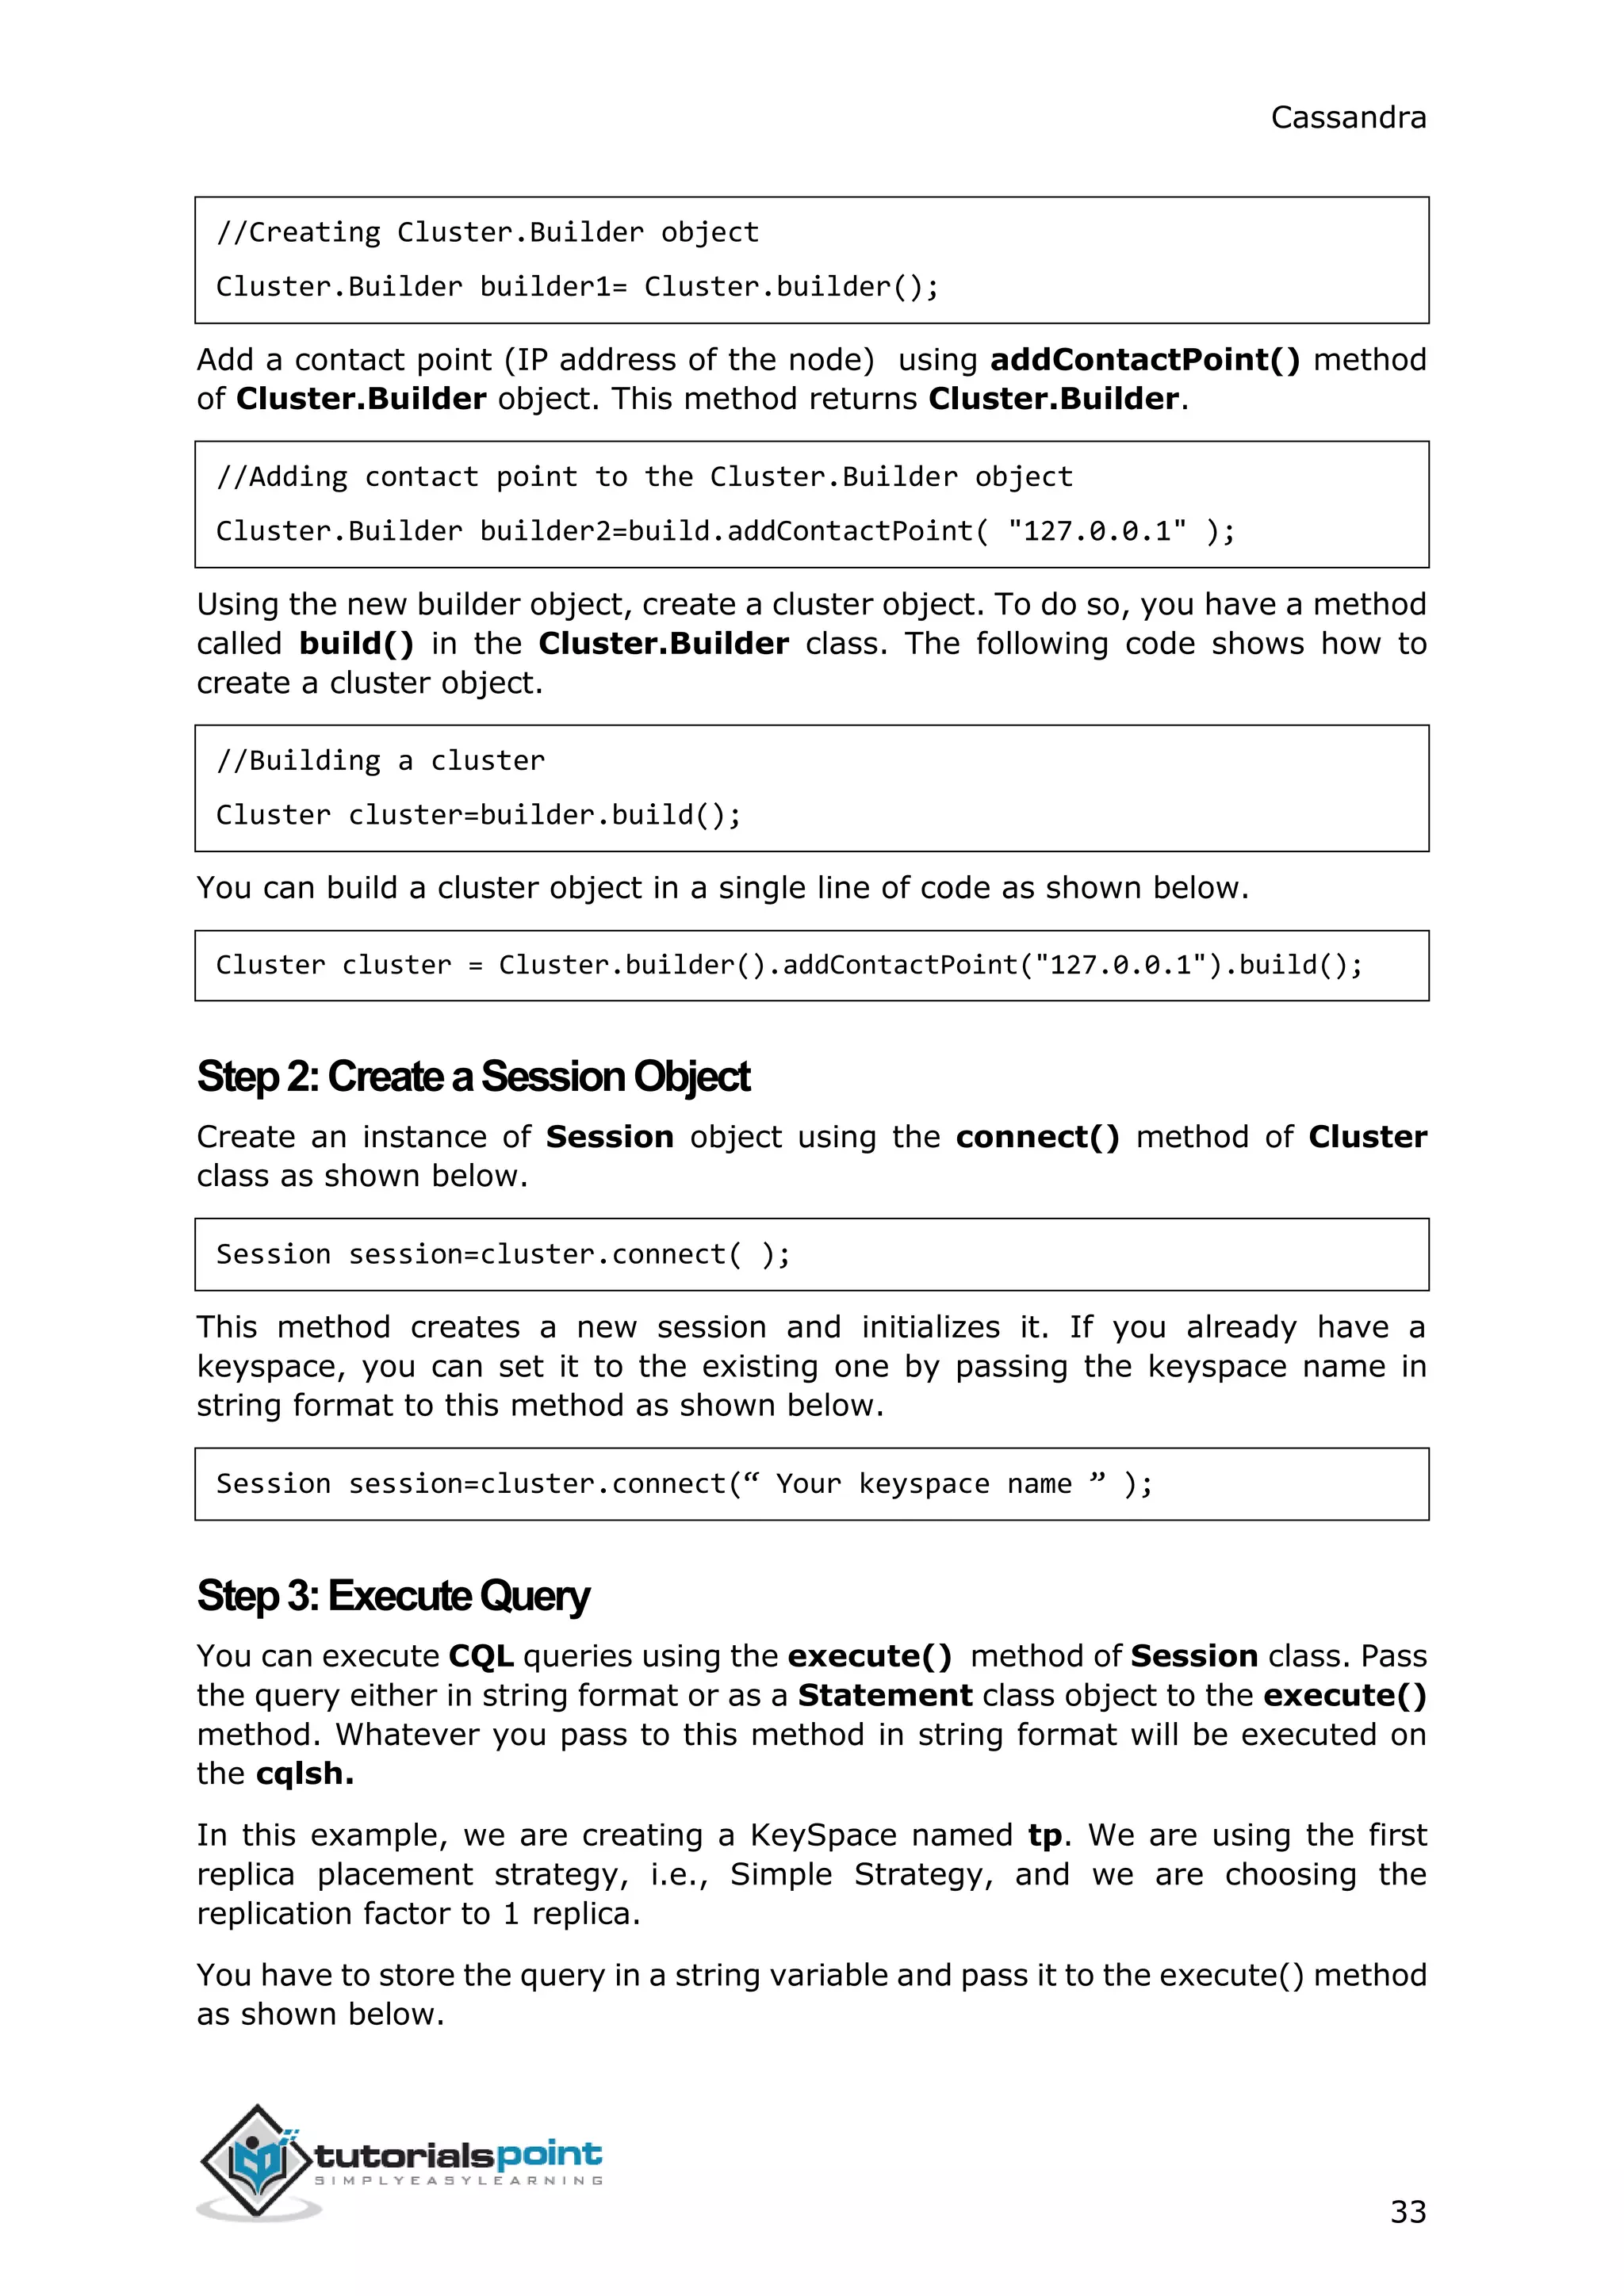
40
public static void main(String args[]){
//Query
String query="ALTER KEYSPACE tp WITH replication "
+ "= {'class':'NetworkTopologyStrategy', 'datacenter1':3}"
+ "AND DURABLE_WRITES = false;";
//Creating Cluster object
Cluster cluster = Cluster.builder().addContactPoint("127.0.0.1").build();
//Creating Session object
Session session=cluster.connect();
//Executing the query
session.execute(query);
System.out.println("Keyspace altered");
}
}
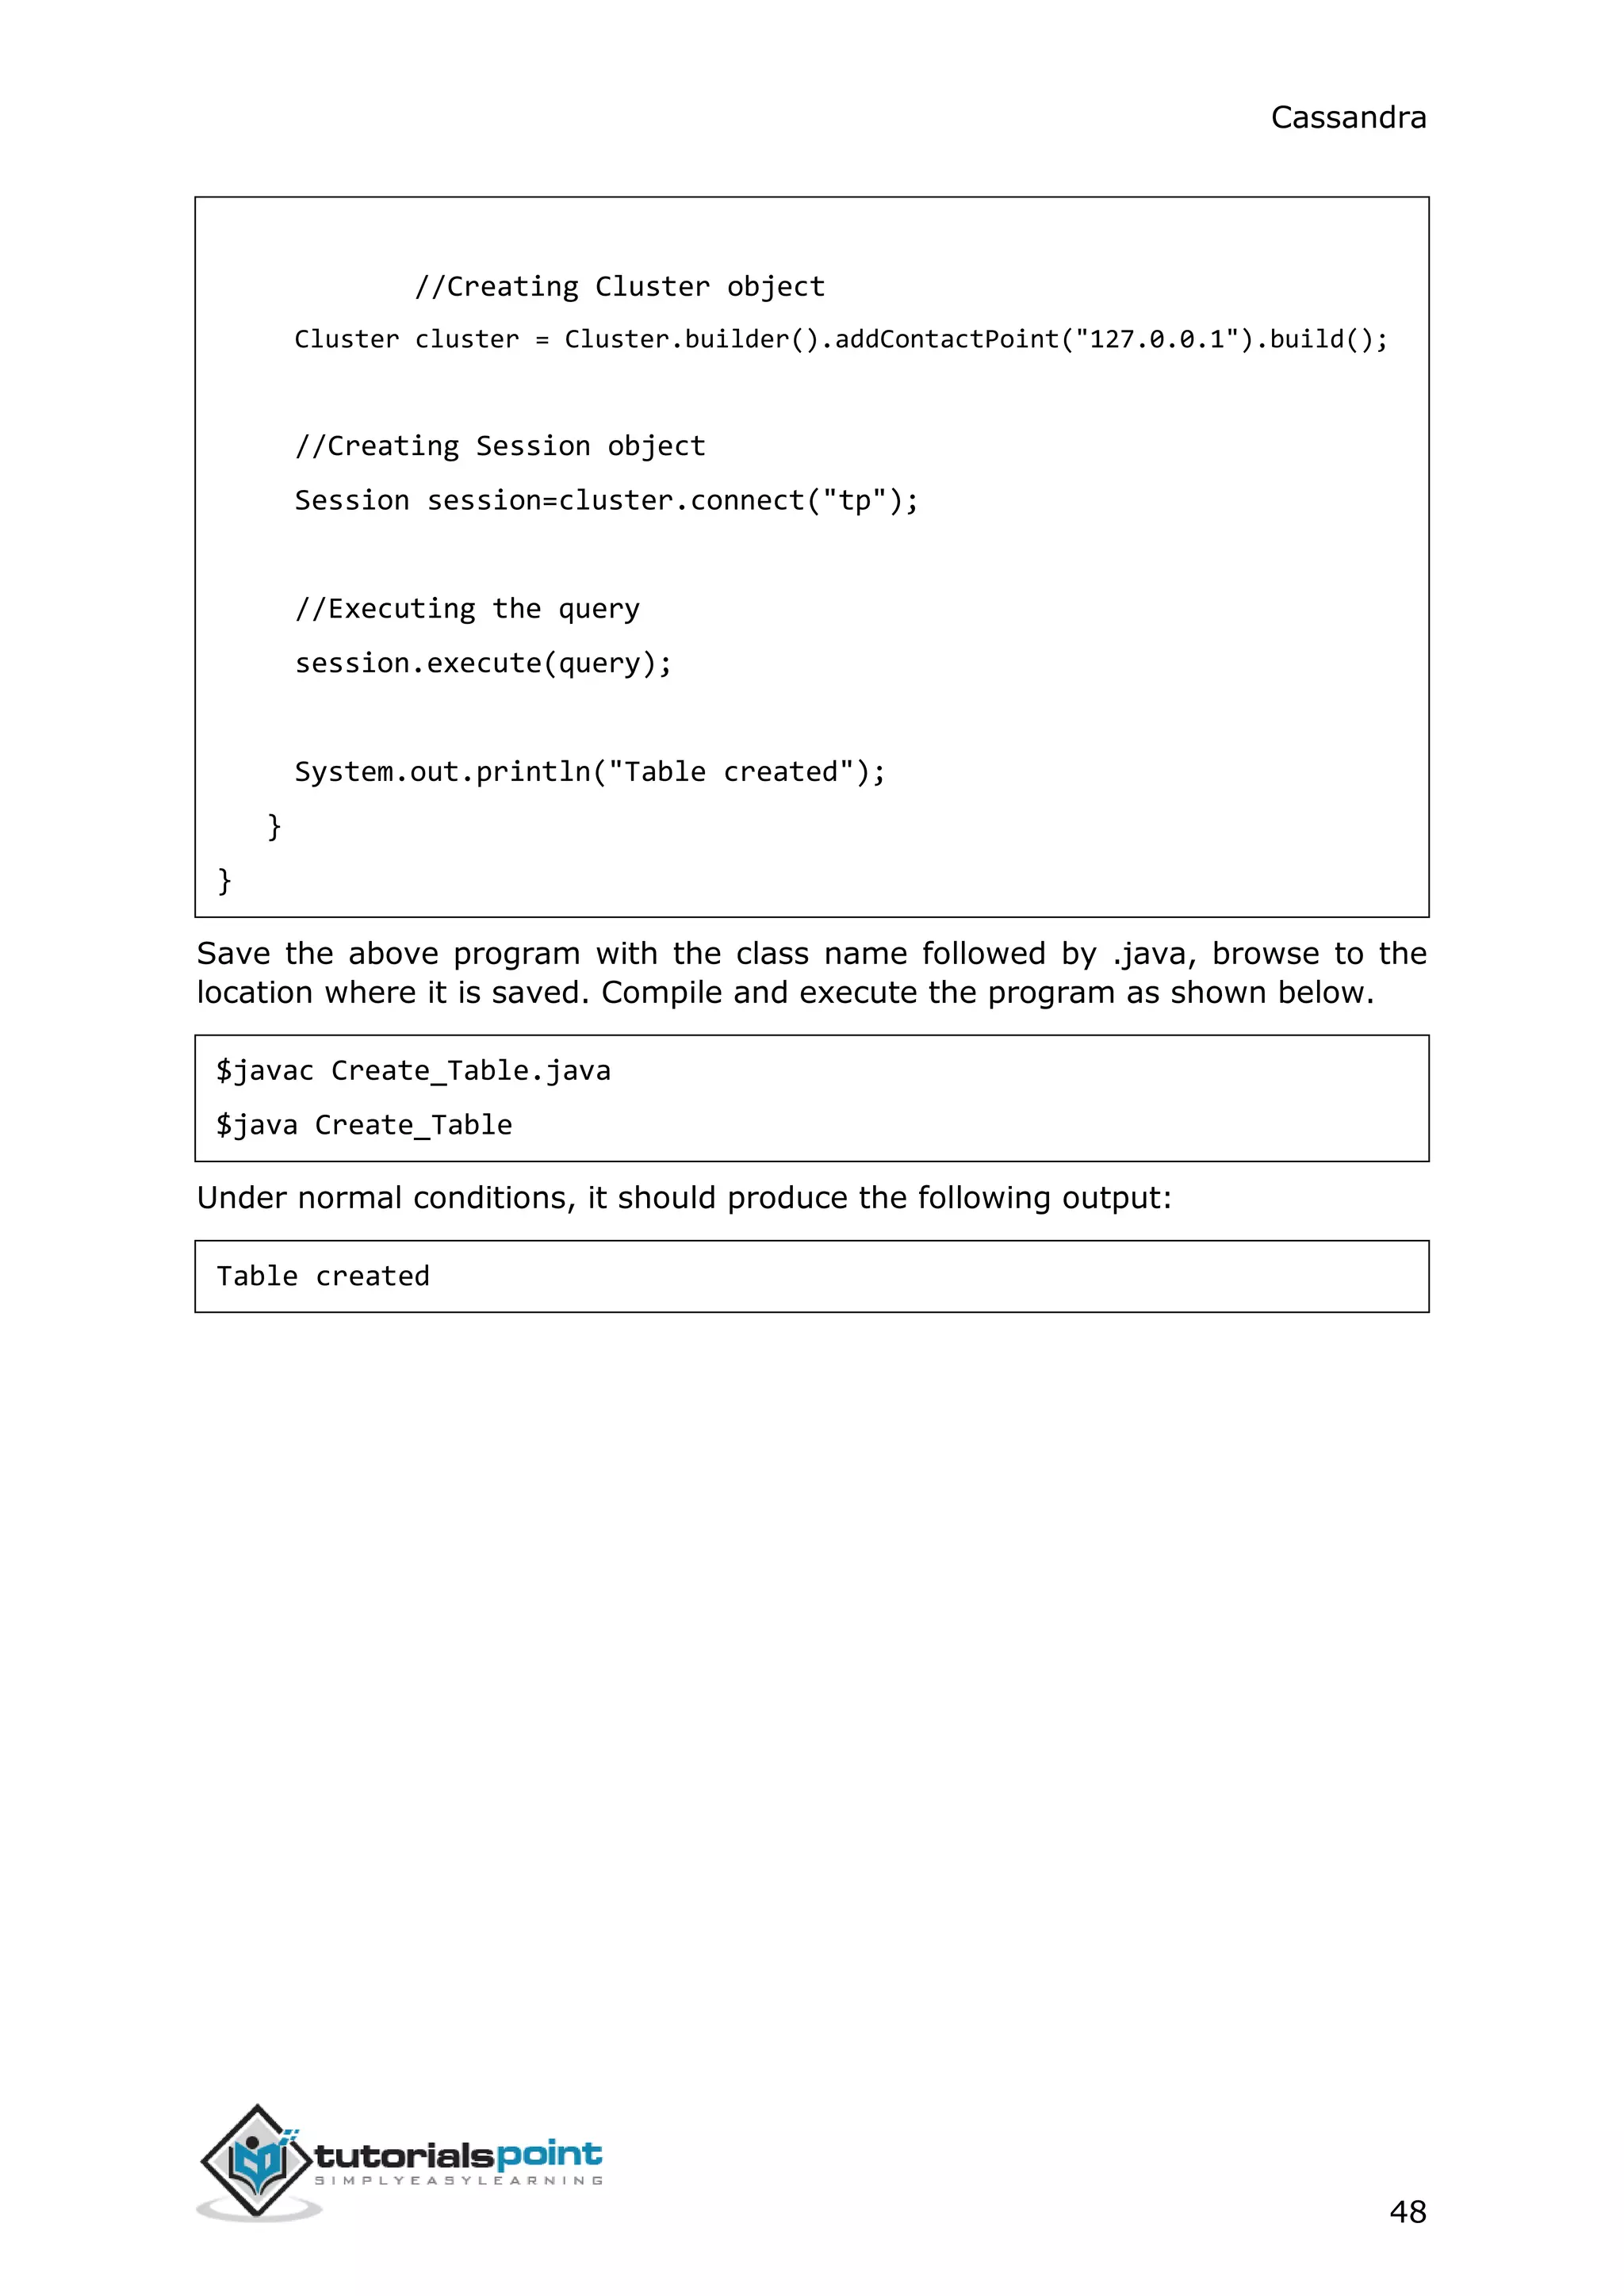
Save the above program with the class name followed by .java, browse to the
location where it is saved. Compile and execute the program as shown below.
$javac Alter_KeySpace.java
$java Alter_KeySpace
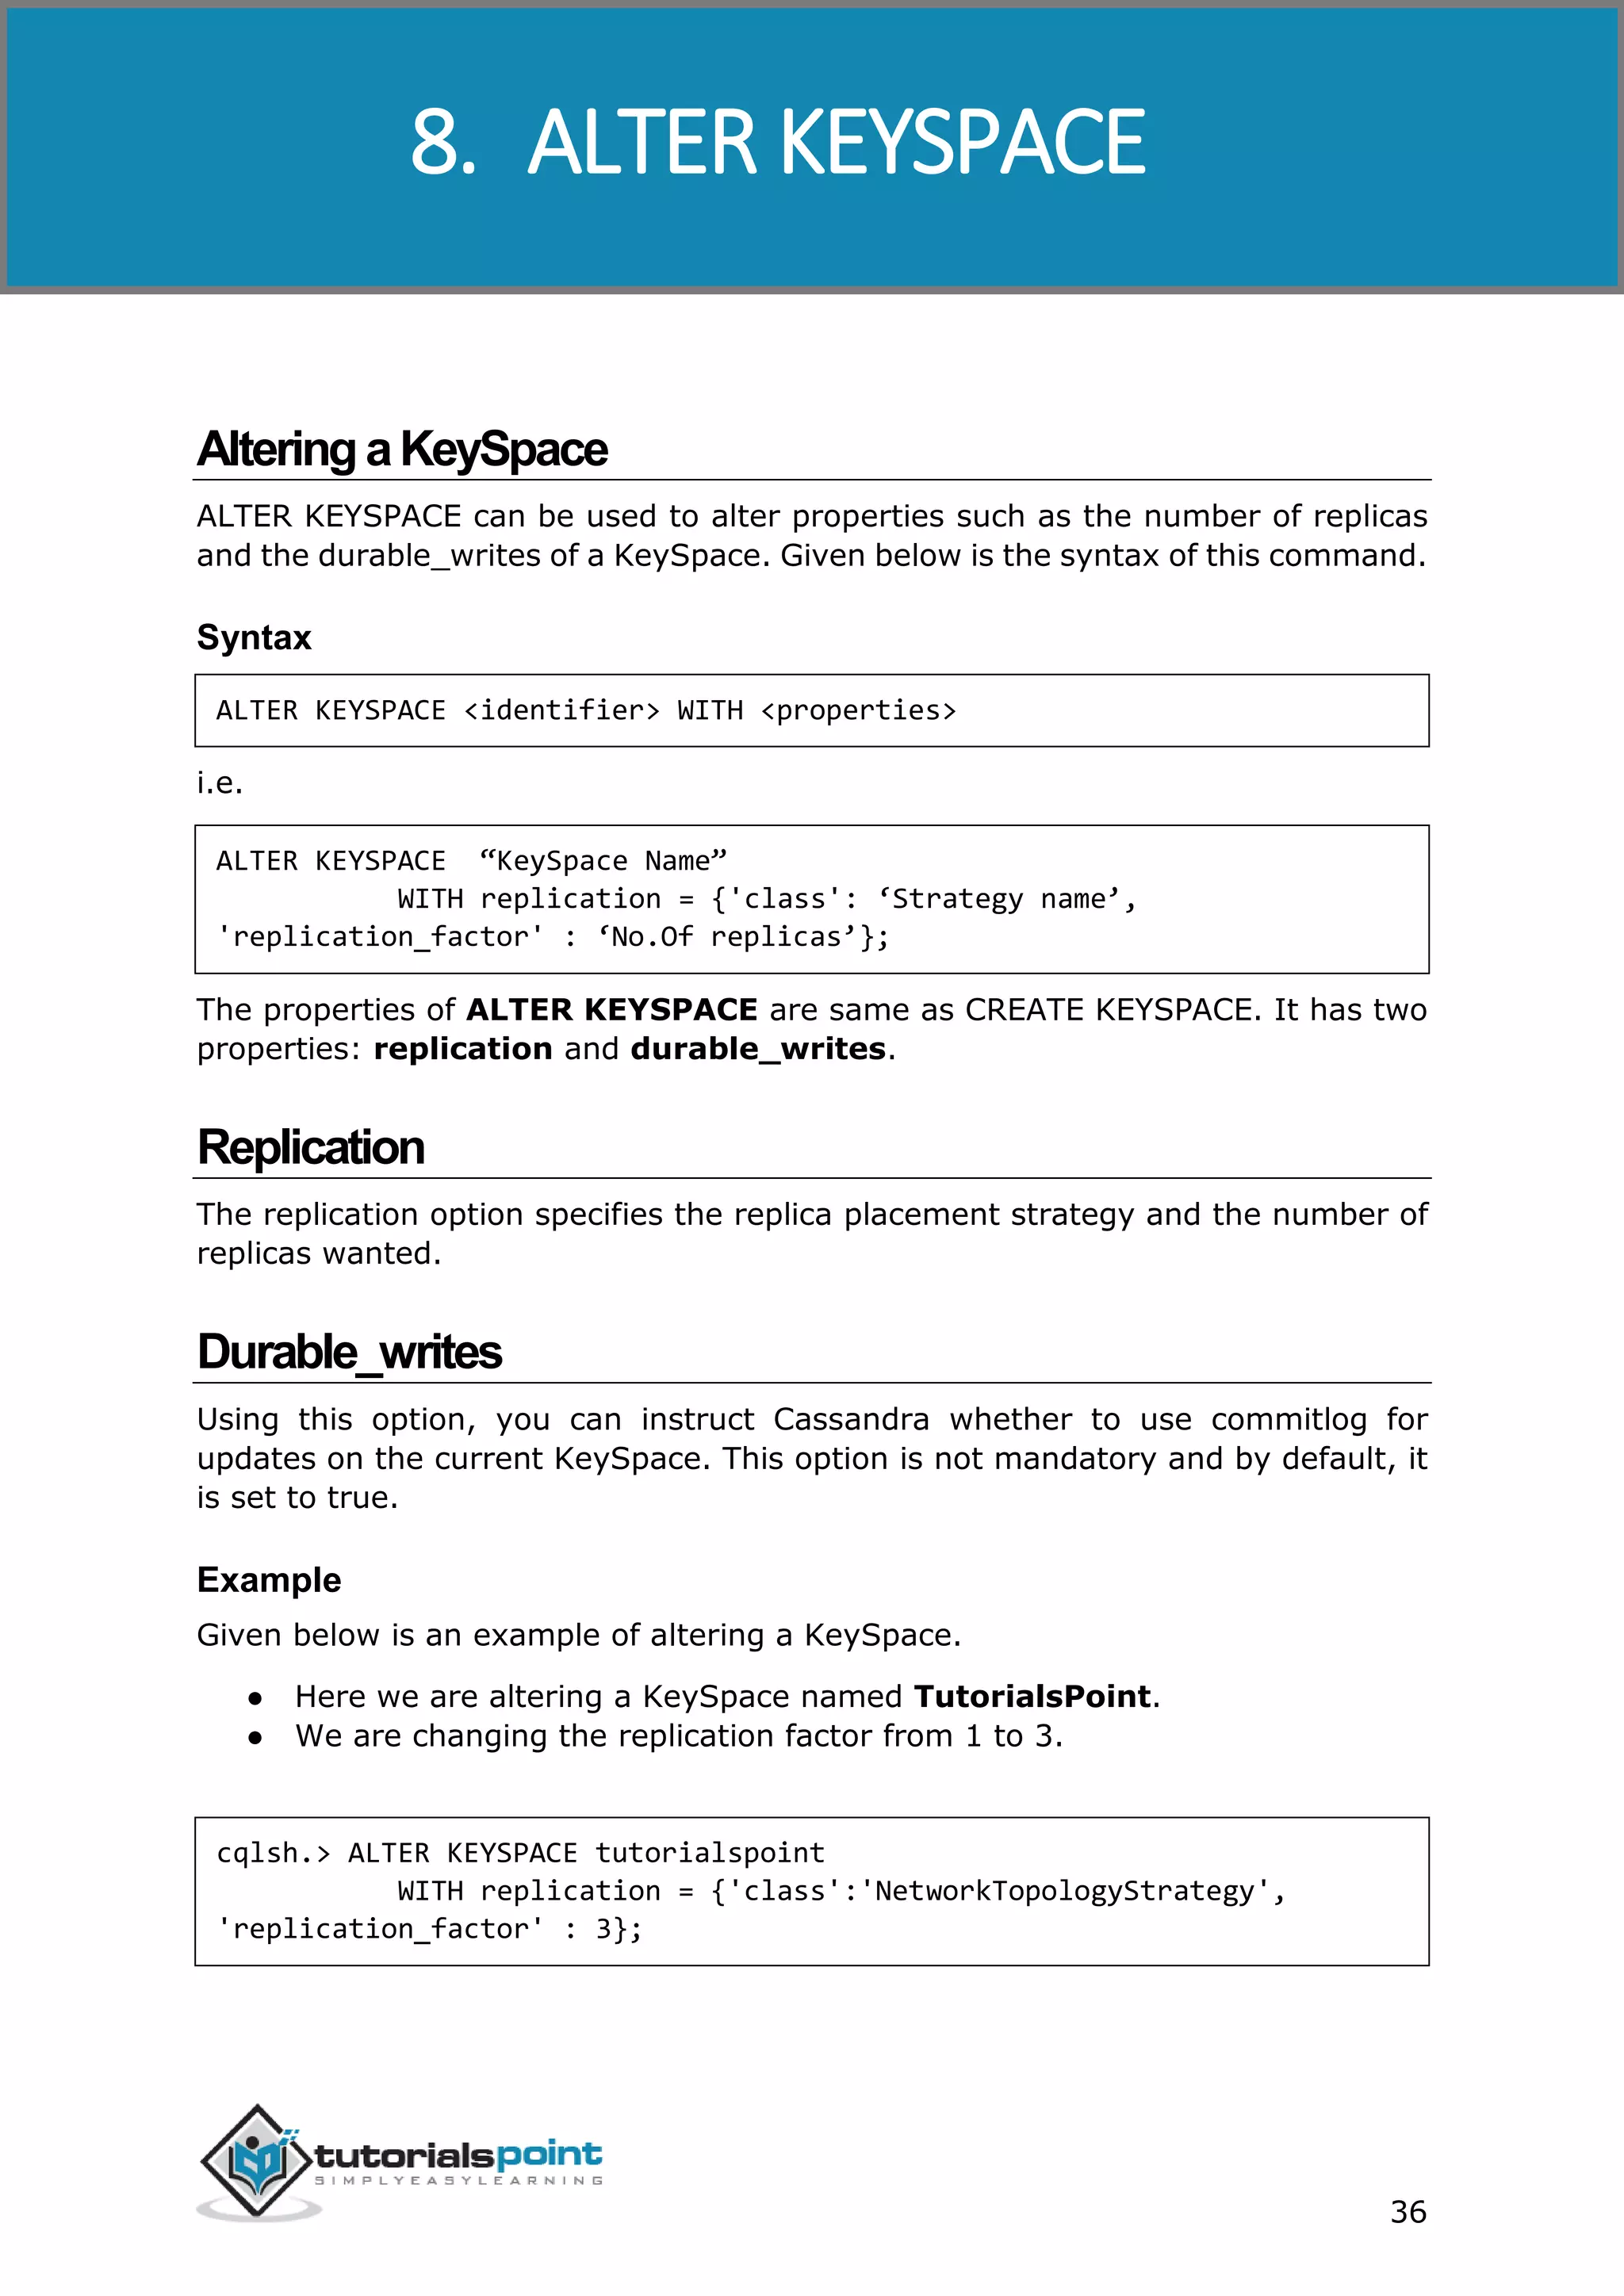
Under normal conditions, it produces the following output:
Keyspace Altered](https://image.slidesharecdn.com/cassandratutorial-180620080720/75/Cassandra-tutorial-47-2048.jpg)
![Cassandra
43
import com.datastax.driver.core.Cluster;
import com.datastax.driver.core.Session;
public class Drop_KeySpace {
public static void main(String args[]){
//Query
String query="Drop KEYSPACE tp";
//creating Cluster object
Cluster cluster = Cluster.builder().addContactPoint("127.0.0.1").build();
//Creating Session object
Session session=cluster.connect();
//Executing the query
session.execute(query);
System.out.println("Keyspace deleted");
}
}
Save the above program with the class name followed by .java, browse to the
location where it is saved. Compile and execute the program as shown below.
$javac Delete_KeySpace.java
$java Delete_KeySpace
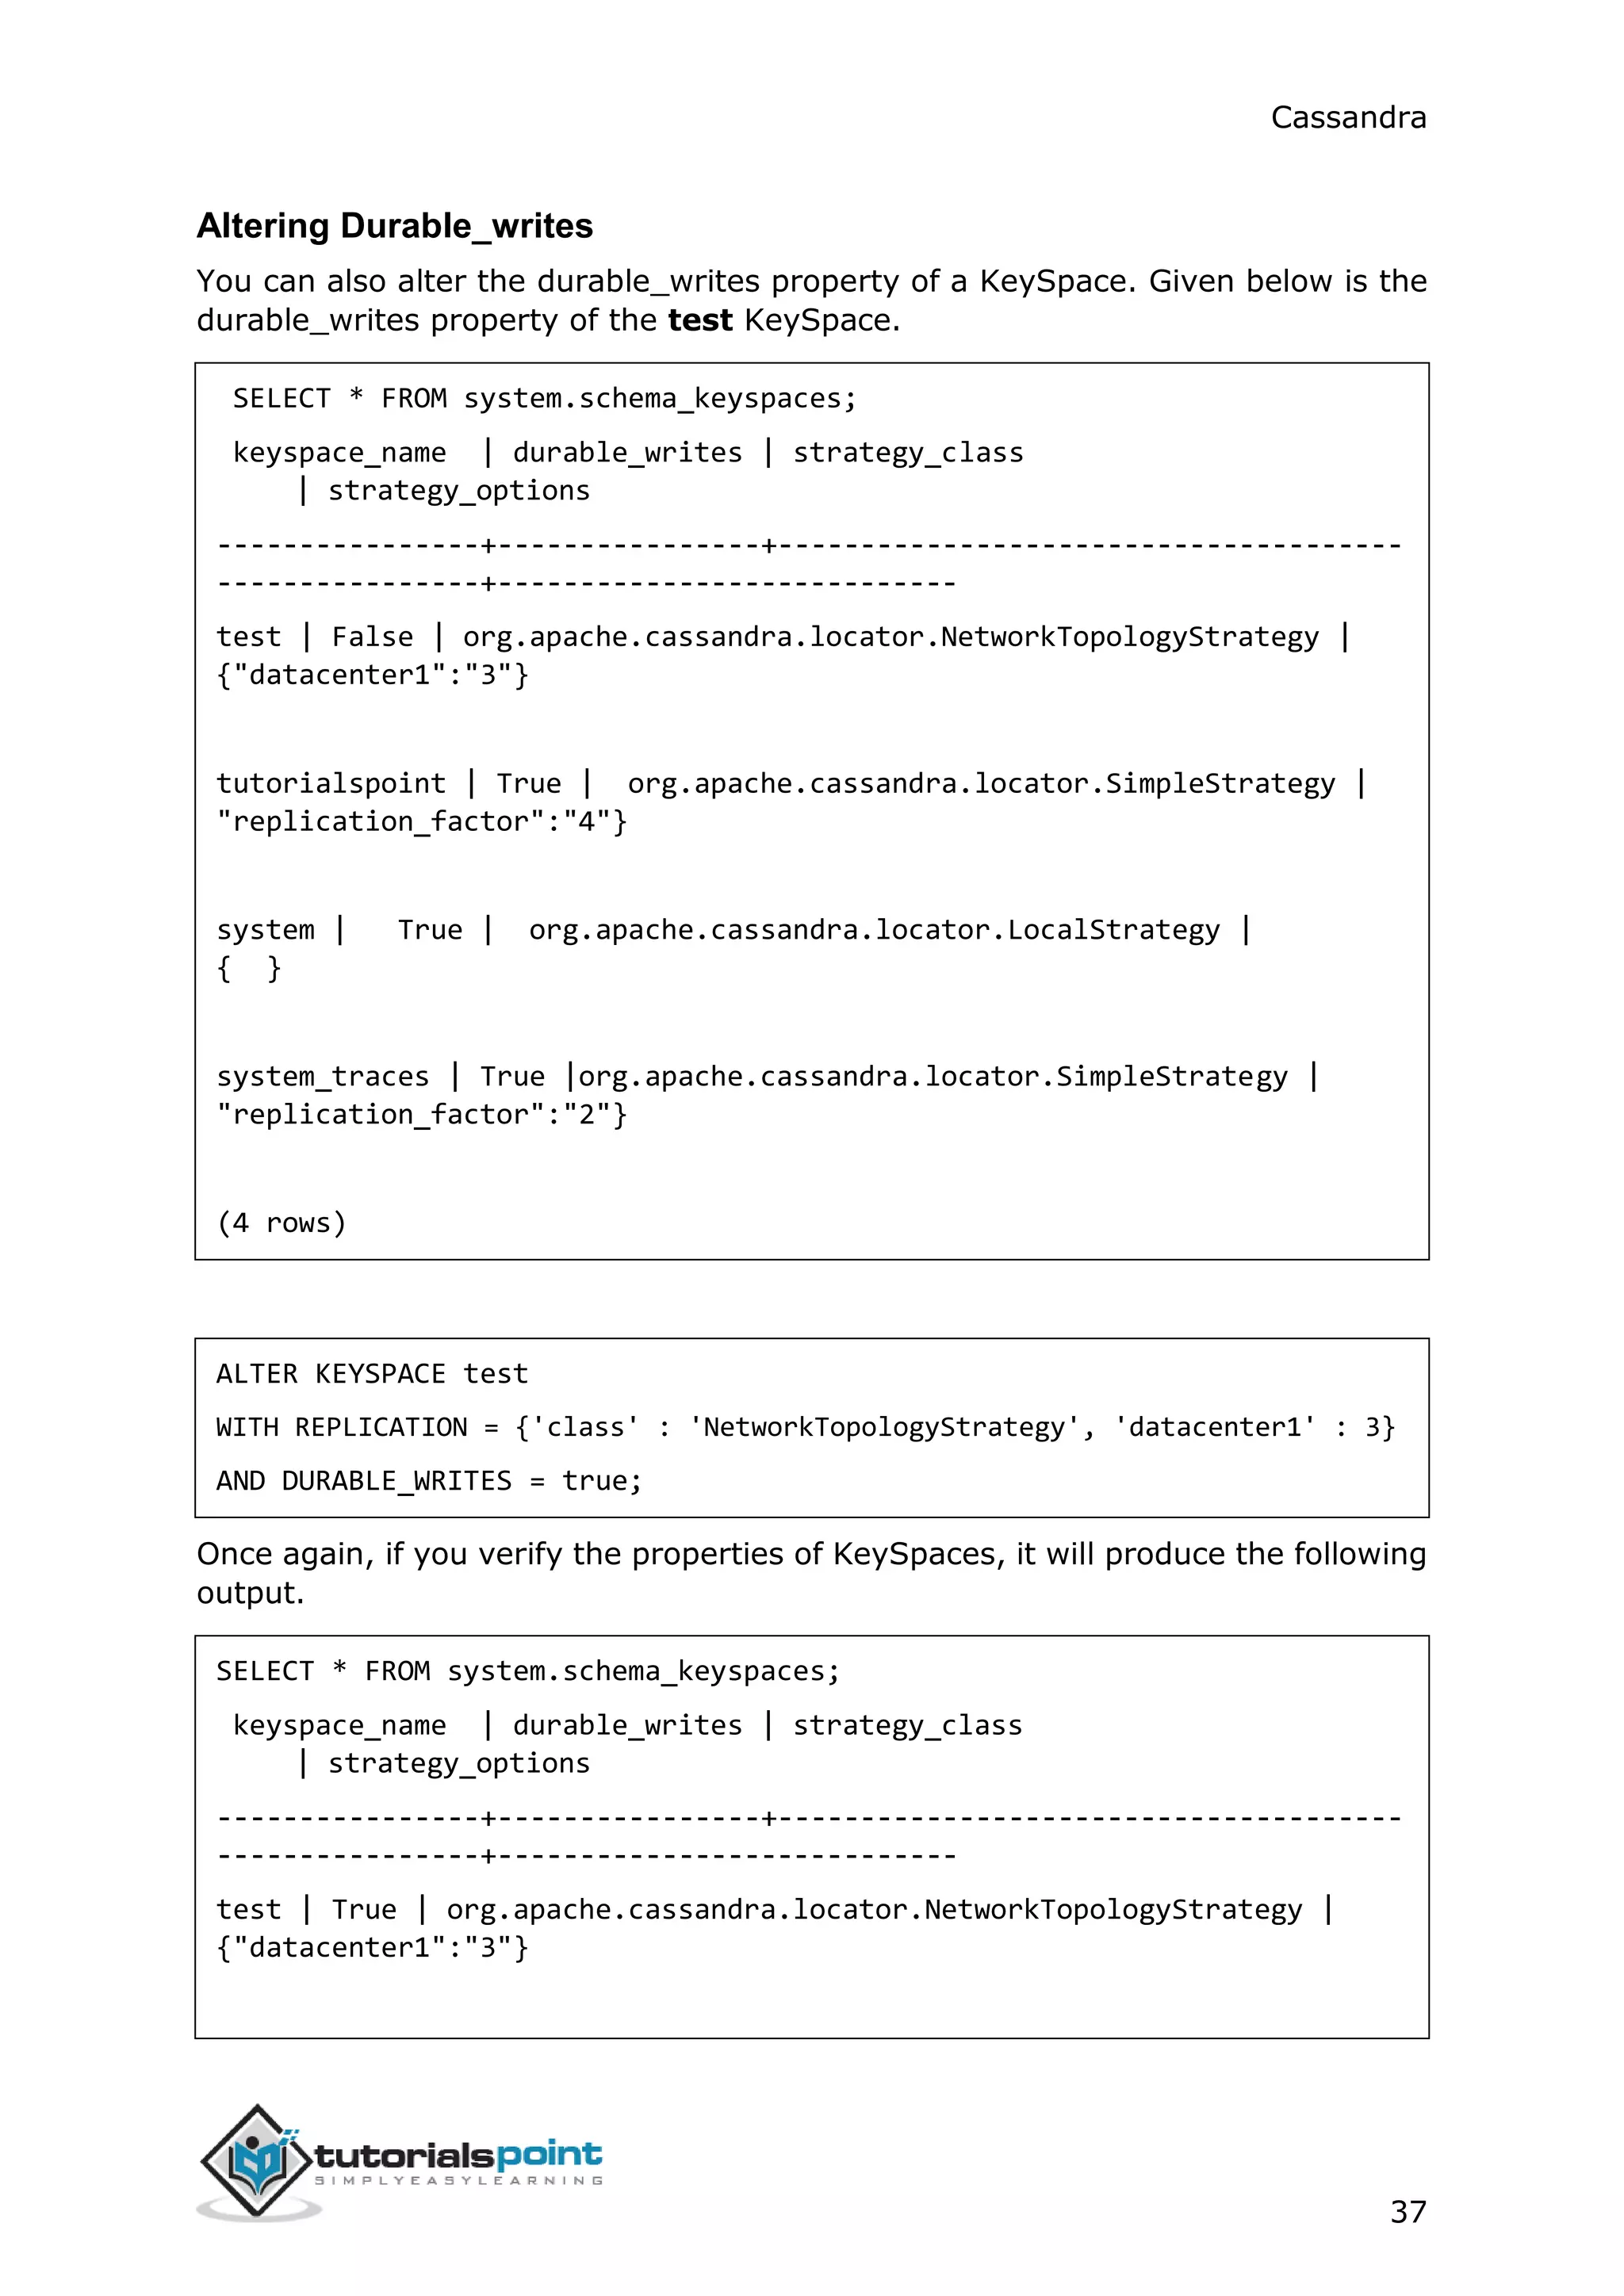
Under normal conditions, it should produce the following output:
Keyspace deleted](https://image.slidesharecdn.com/cassandratutorial-180620080720/75/Cassandra-tutorial-50-2048.jpg)
![Cassandra
47
Here we are using the keyspace named tp . Therefore, create the session object
as shown below.
Session session=cluster.connect(“ tp” );
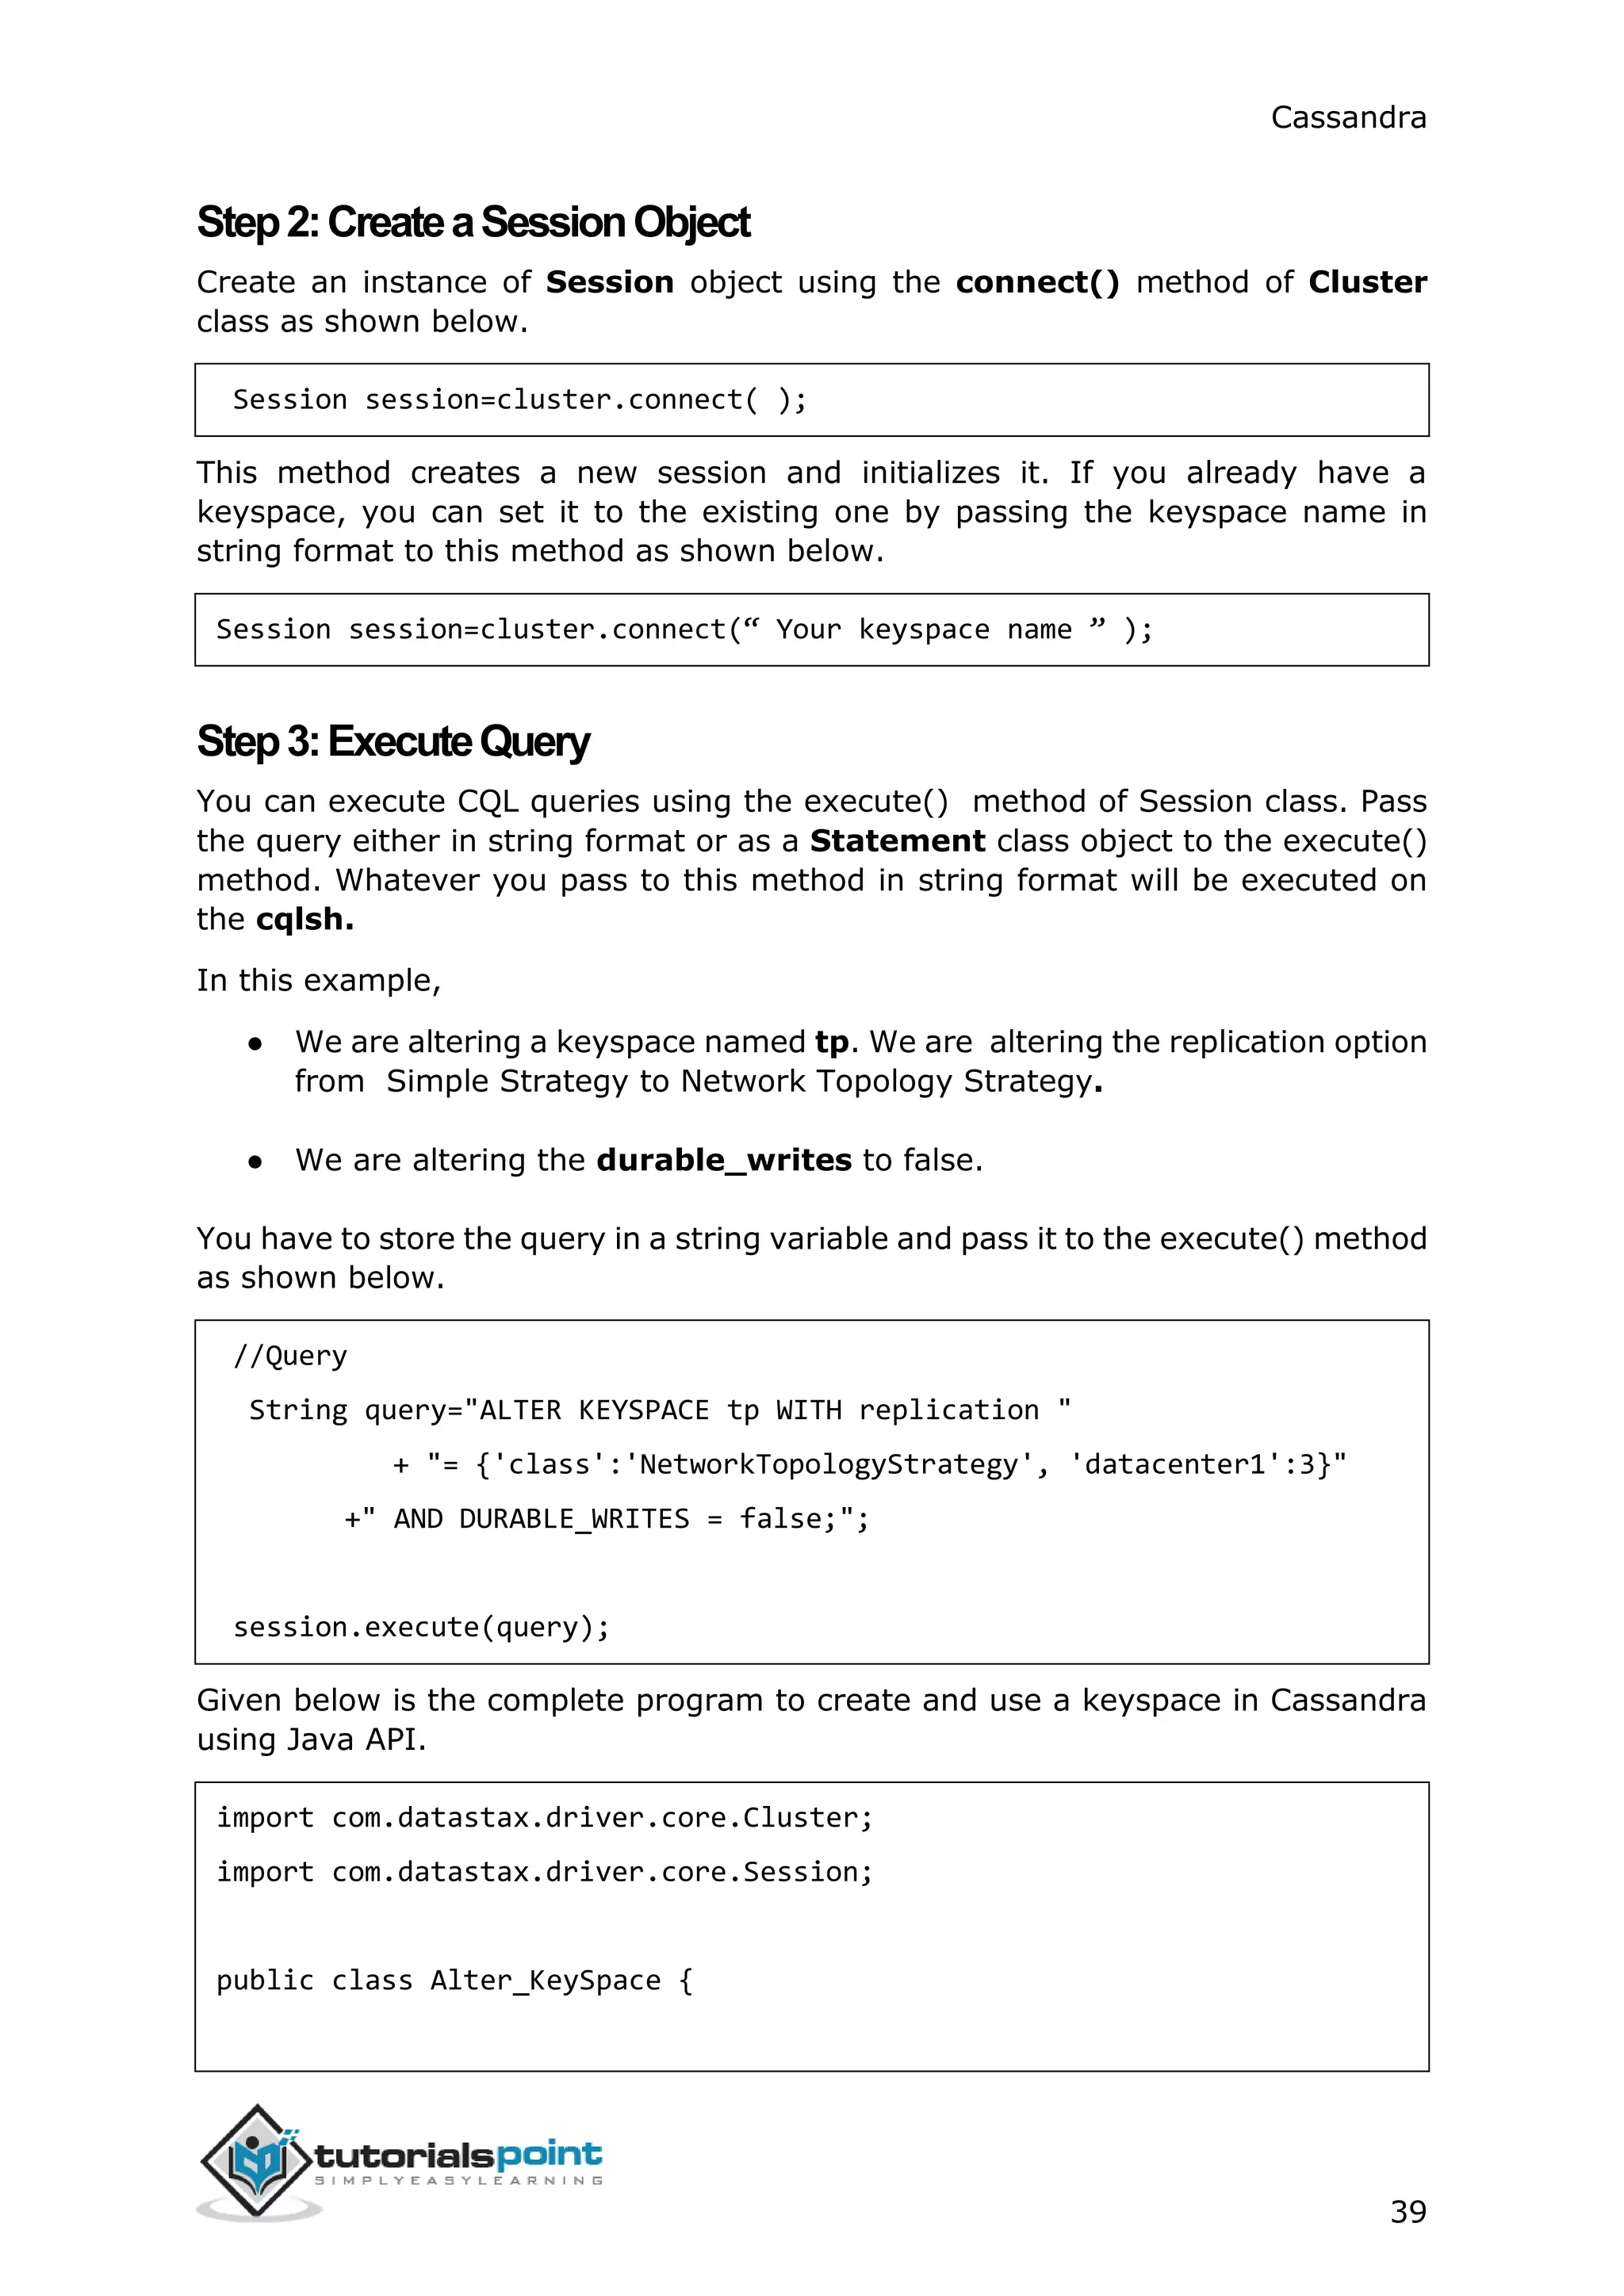
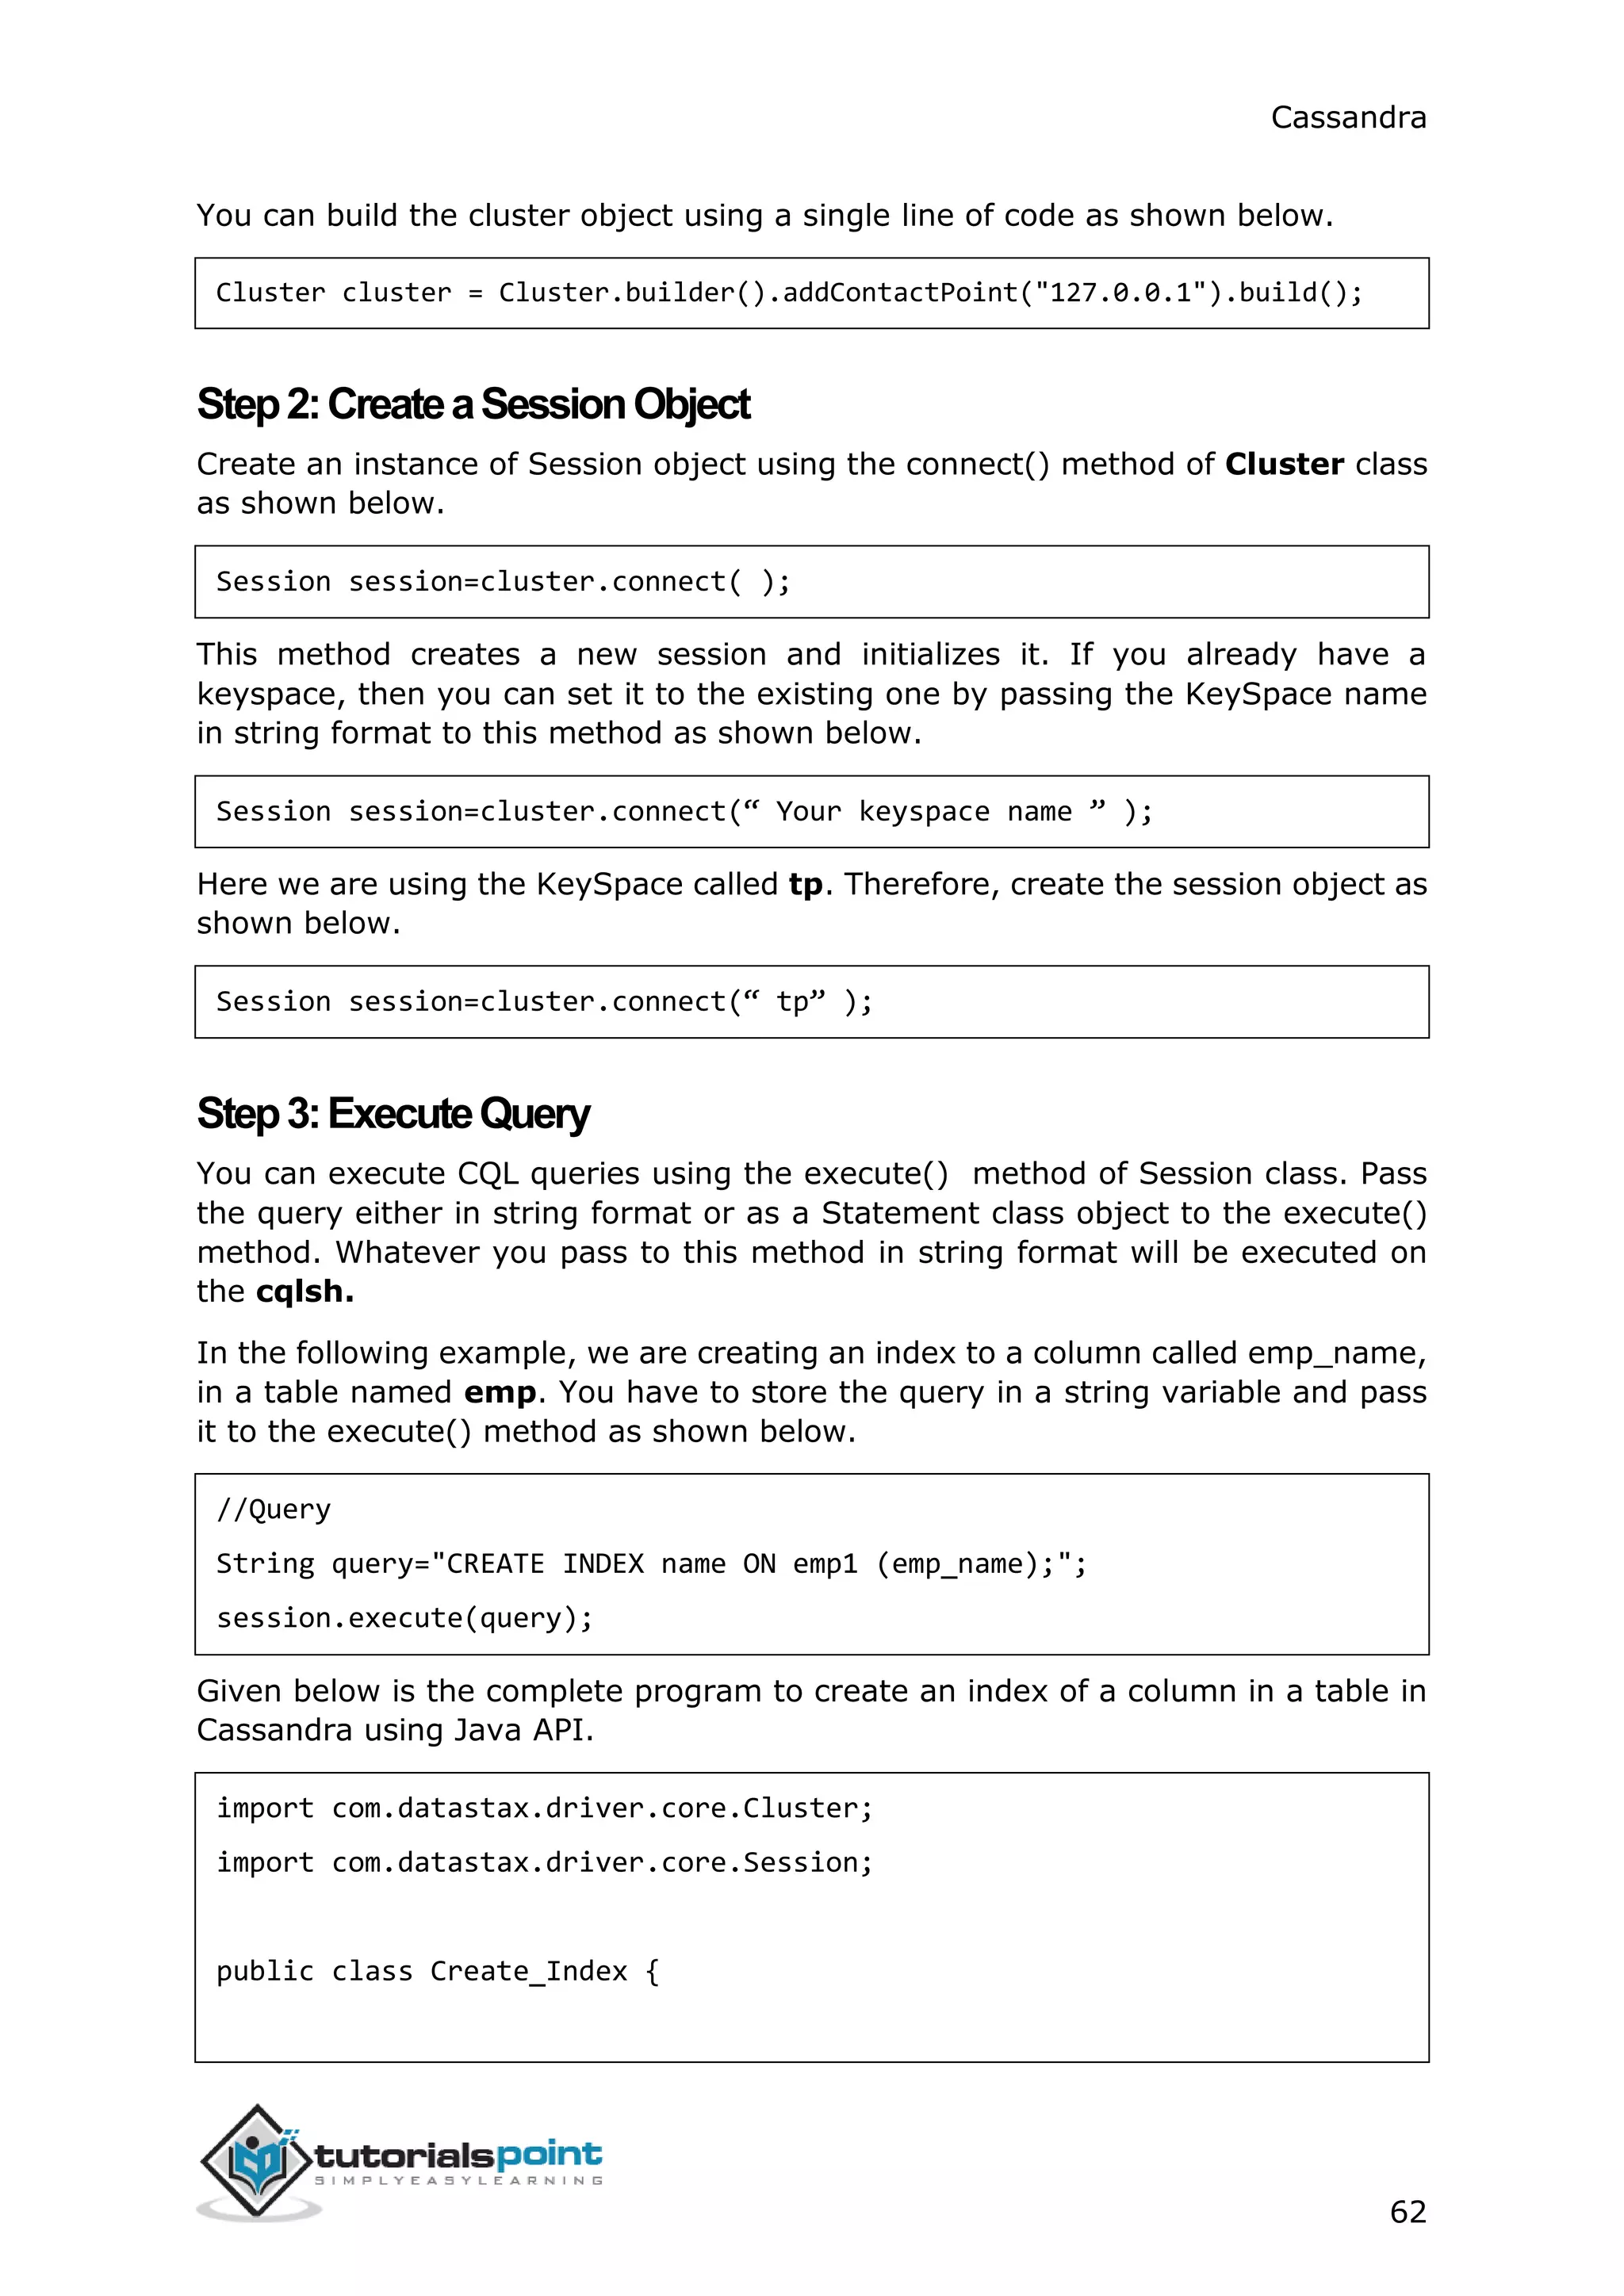
Step3:ExecuteQuery
You can execute CQL queries using the execute() method of Session class. Pass
the query either in string format or as a Statement class object to the execute()
method. Whatever you pass to this method in string format will be executed on
the cqlsh.
In the following example, we are creating a table named emp. You have to store
the query in a string variable and pass it to the execute() method as shown below.
//Query
String query="CREATE TABLE emp(emp_id int PRIMARY KEY, "
+ "emp_name text, "
+ "emp_city text, "
+ "emp_sal varint, "
+ "emp_phone varint );";
session.execute(query);
Given below is the complete program to create and use a keyspace in Cassandra
using Java API.
import com.datastax.driver.core.Cluster;
import com.datastax.driver.core.Session;
public class Create_Table {
public static void main(String args[]){
//Query
String query="CREATE TABLE emp(emp_id int PRIMARY KEY, "
+ "emp_name text, "
+ "emp_city text, "
+ "emp_sal varint, "
+ "emp_phone varint );";](https://image.slidesharecdn.com/cassandratutorial-180620080720/75/Cassandra-tutorial-54-2048.jpg)
![Cassandra
52
session.execute(query);
Given below is the complete program to add a column to an existing table.
import com.datastax.driver.core.Cluster;
import com.datastax.driver.core.Session;
public class Add_column {
public static void main(String args[]){
//Query
String query="ALTER TABLE emp ADD emp_email text";
//Creating Cluster object
Cluster cluster = Cluster.builder().addContactPoint("127.0.0.1").build();
//Creating Session object
Session session=cluster.connect("tp");
//Executing the query
session.execute(query);
System.out.println("Column added");
}
}
Save the above program with the class name followed by .java, browse to the
location where it is saved. Compile and execute the program as shown below.
$javac Add_Column.java
$java Add_Column
Under normal conditions, it should produce the following output:
Column added](https://image.slidesharecdn.com/cassandratutorial-180620080720/75/Cassandra-tutorial-59-2048.jpg)
![Cassandra
53
DeletingaColumn
Given below is the complete program to delete a column from an existing table.
import com.datastax.driver.core.Cluster;
import com.datastax.driver.core.Session;
public class Delete_Column {
public static void main(String args[]){
//Query
String query="ALTER TABLE emp DROP emp_email;";
//Creating Cluster object
Cluster cluster = Cluster.builder().addContactPoint("127.0.0.1").build();
//Creating Session object
Session session=cluster.connect("tp");
//executing the query
session.execute(query);
System.out.println("Column deleted");
}
}
Save the above program with the class name followed by .java, browse to the
location where it is saved. Compile and execute the program as shown below.
$javac Delete_Column.java
$java Delete_Column
Under normal conditions, it should produce the following output:
Column deleted](https://image.slidesharecdn.com/cassandratutorial-180620080720/75/Cassandra-tutorial-60-2048.jpg)
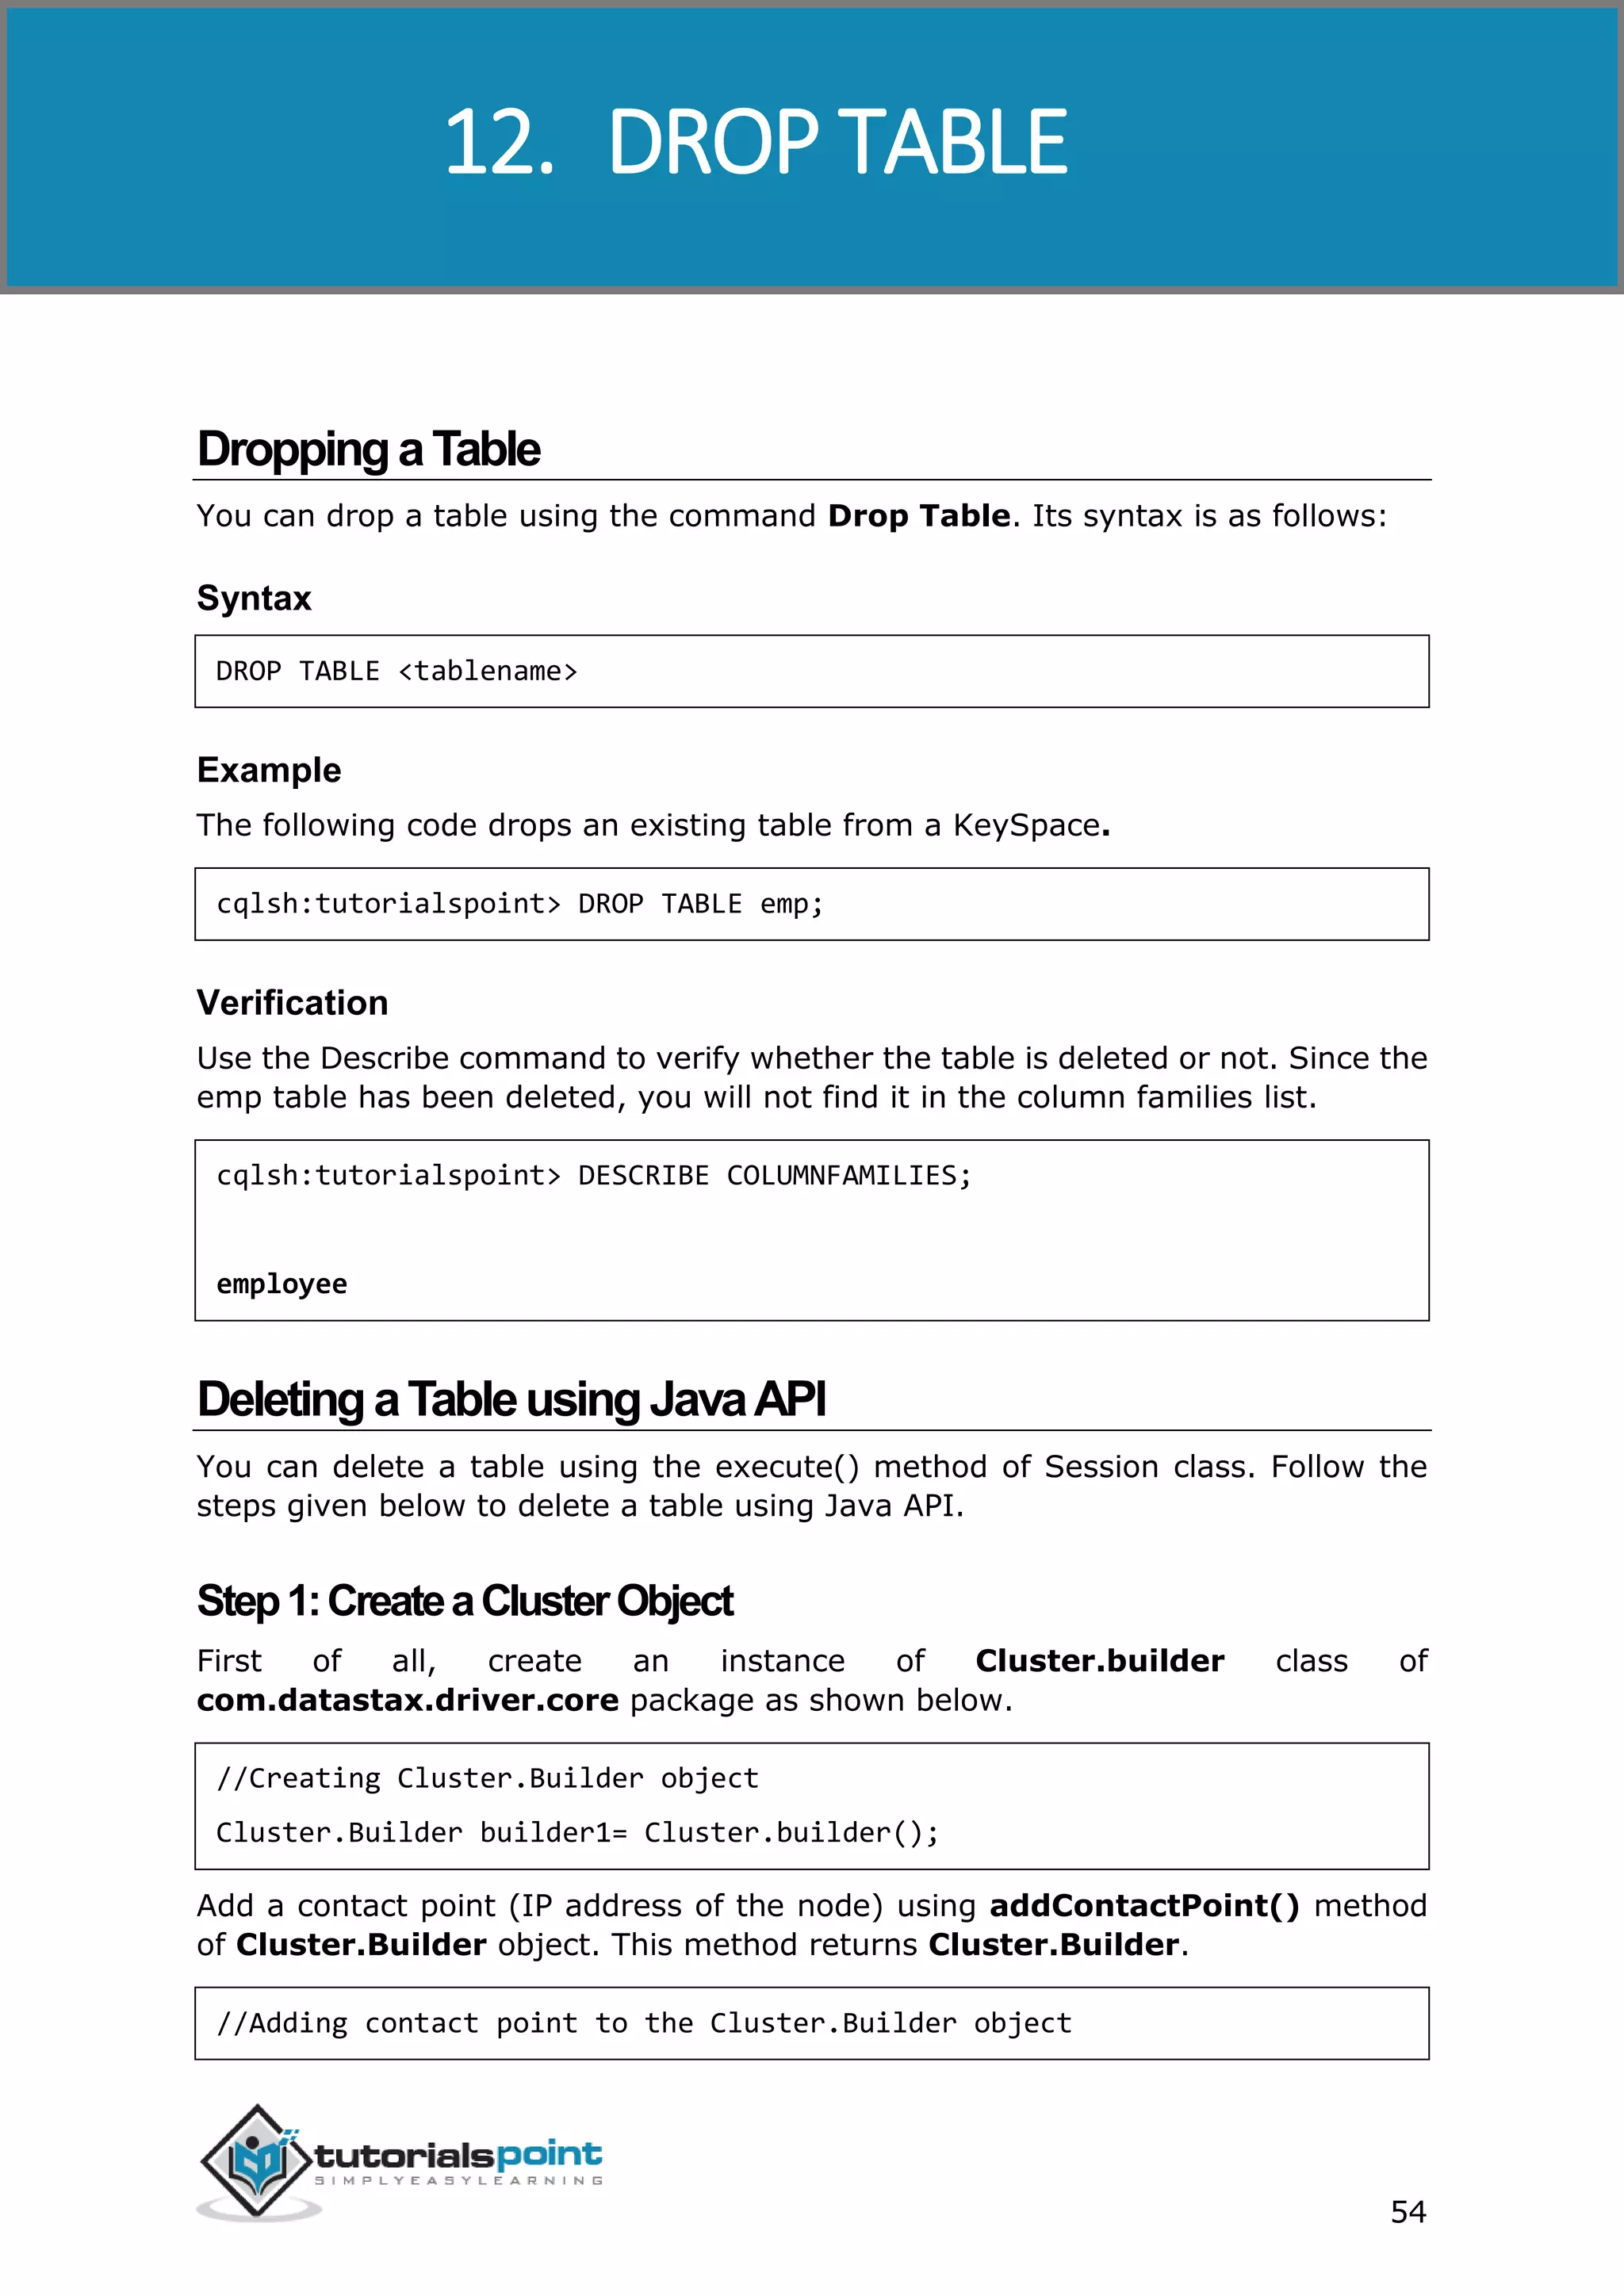
![Cassandra
56
import com.datastax.driver.core.Cluster;
import com.datastax.driver.core.Session;
public class Drop_Table {
public static void main(String args[]){
//Query
String query="DROP TABLE emp1;";
Cluster cluster = Cluster.builder().addContactPoint("127.0.0.1").build();
//Creating Session object
Session session=cluster.connect("tp");
//Executing the query
session.execute(query);
System.out.println("Table dropped");
}
}
Save the above program with the class name followed by .java, browse to the
location where it is saved. Compile and execute the program as shown below.
$javac Drop_Table.java
$java Drop_Table
Under normal conditions, it should produce the following output:
Table dropped](https://image.slidesharecdn.com/cassandratutorial-180620080720/75/Cassandra-tutorial-63-2048.jpg)
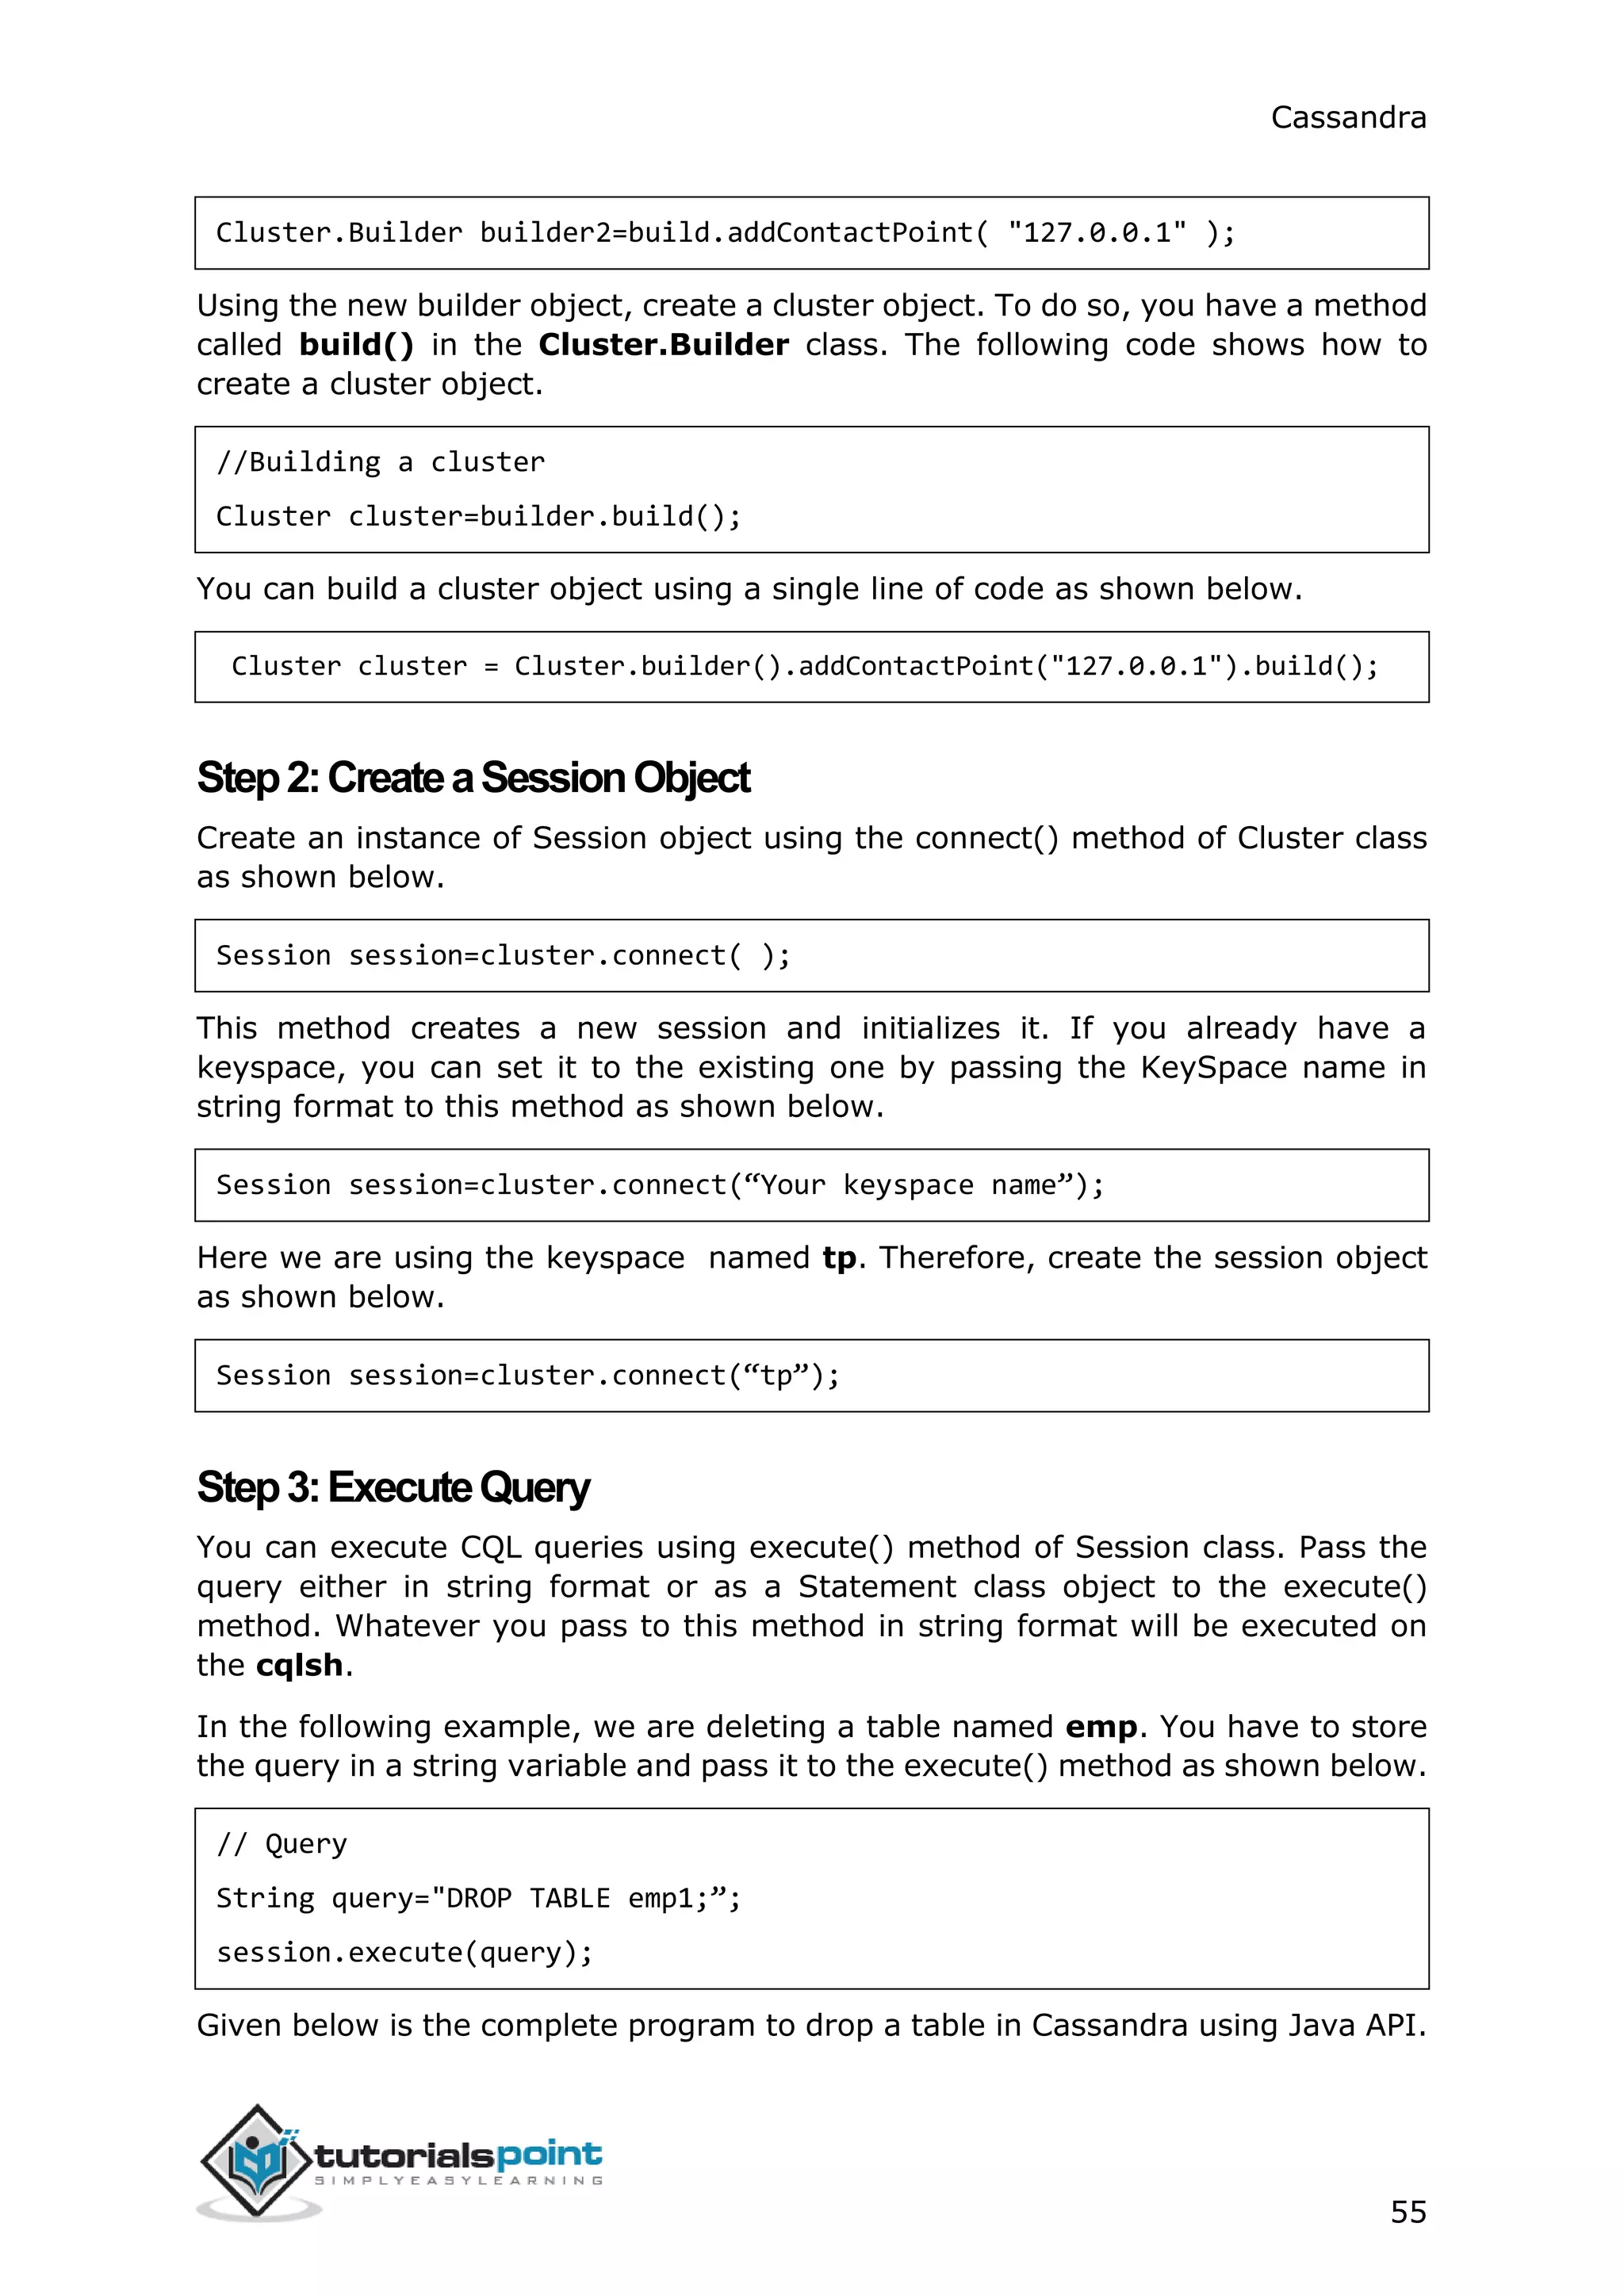
![Cassandra
59
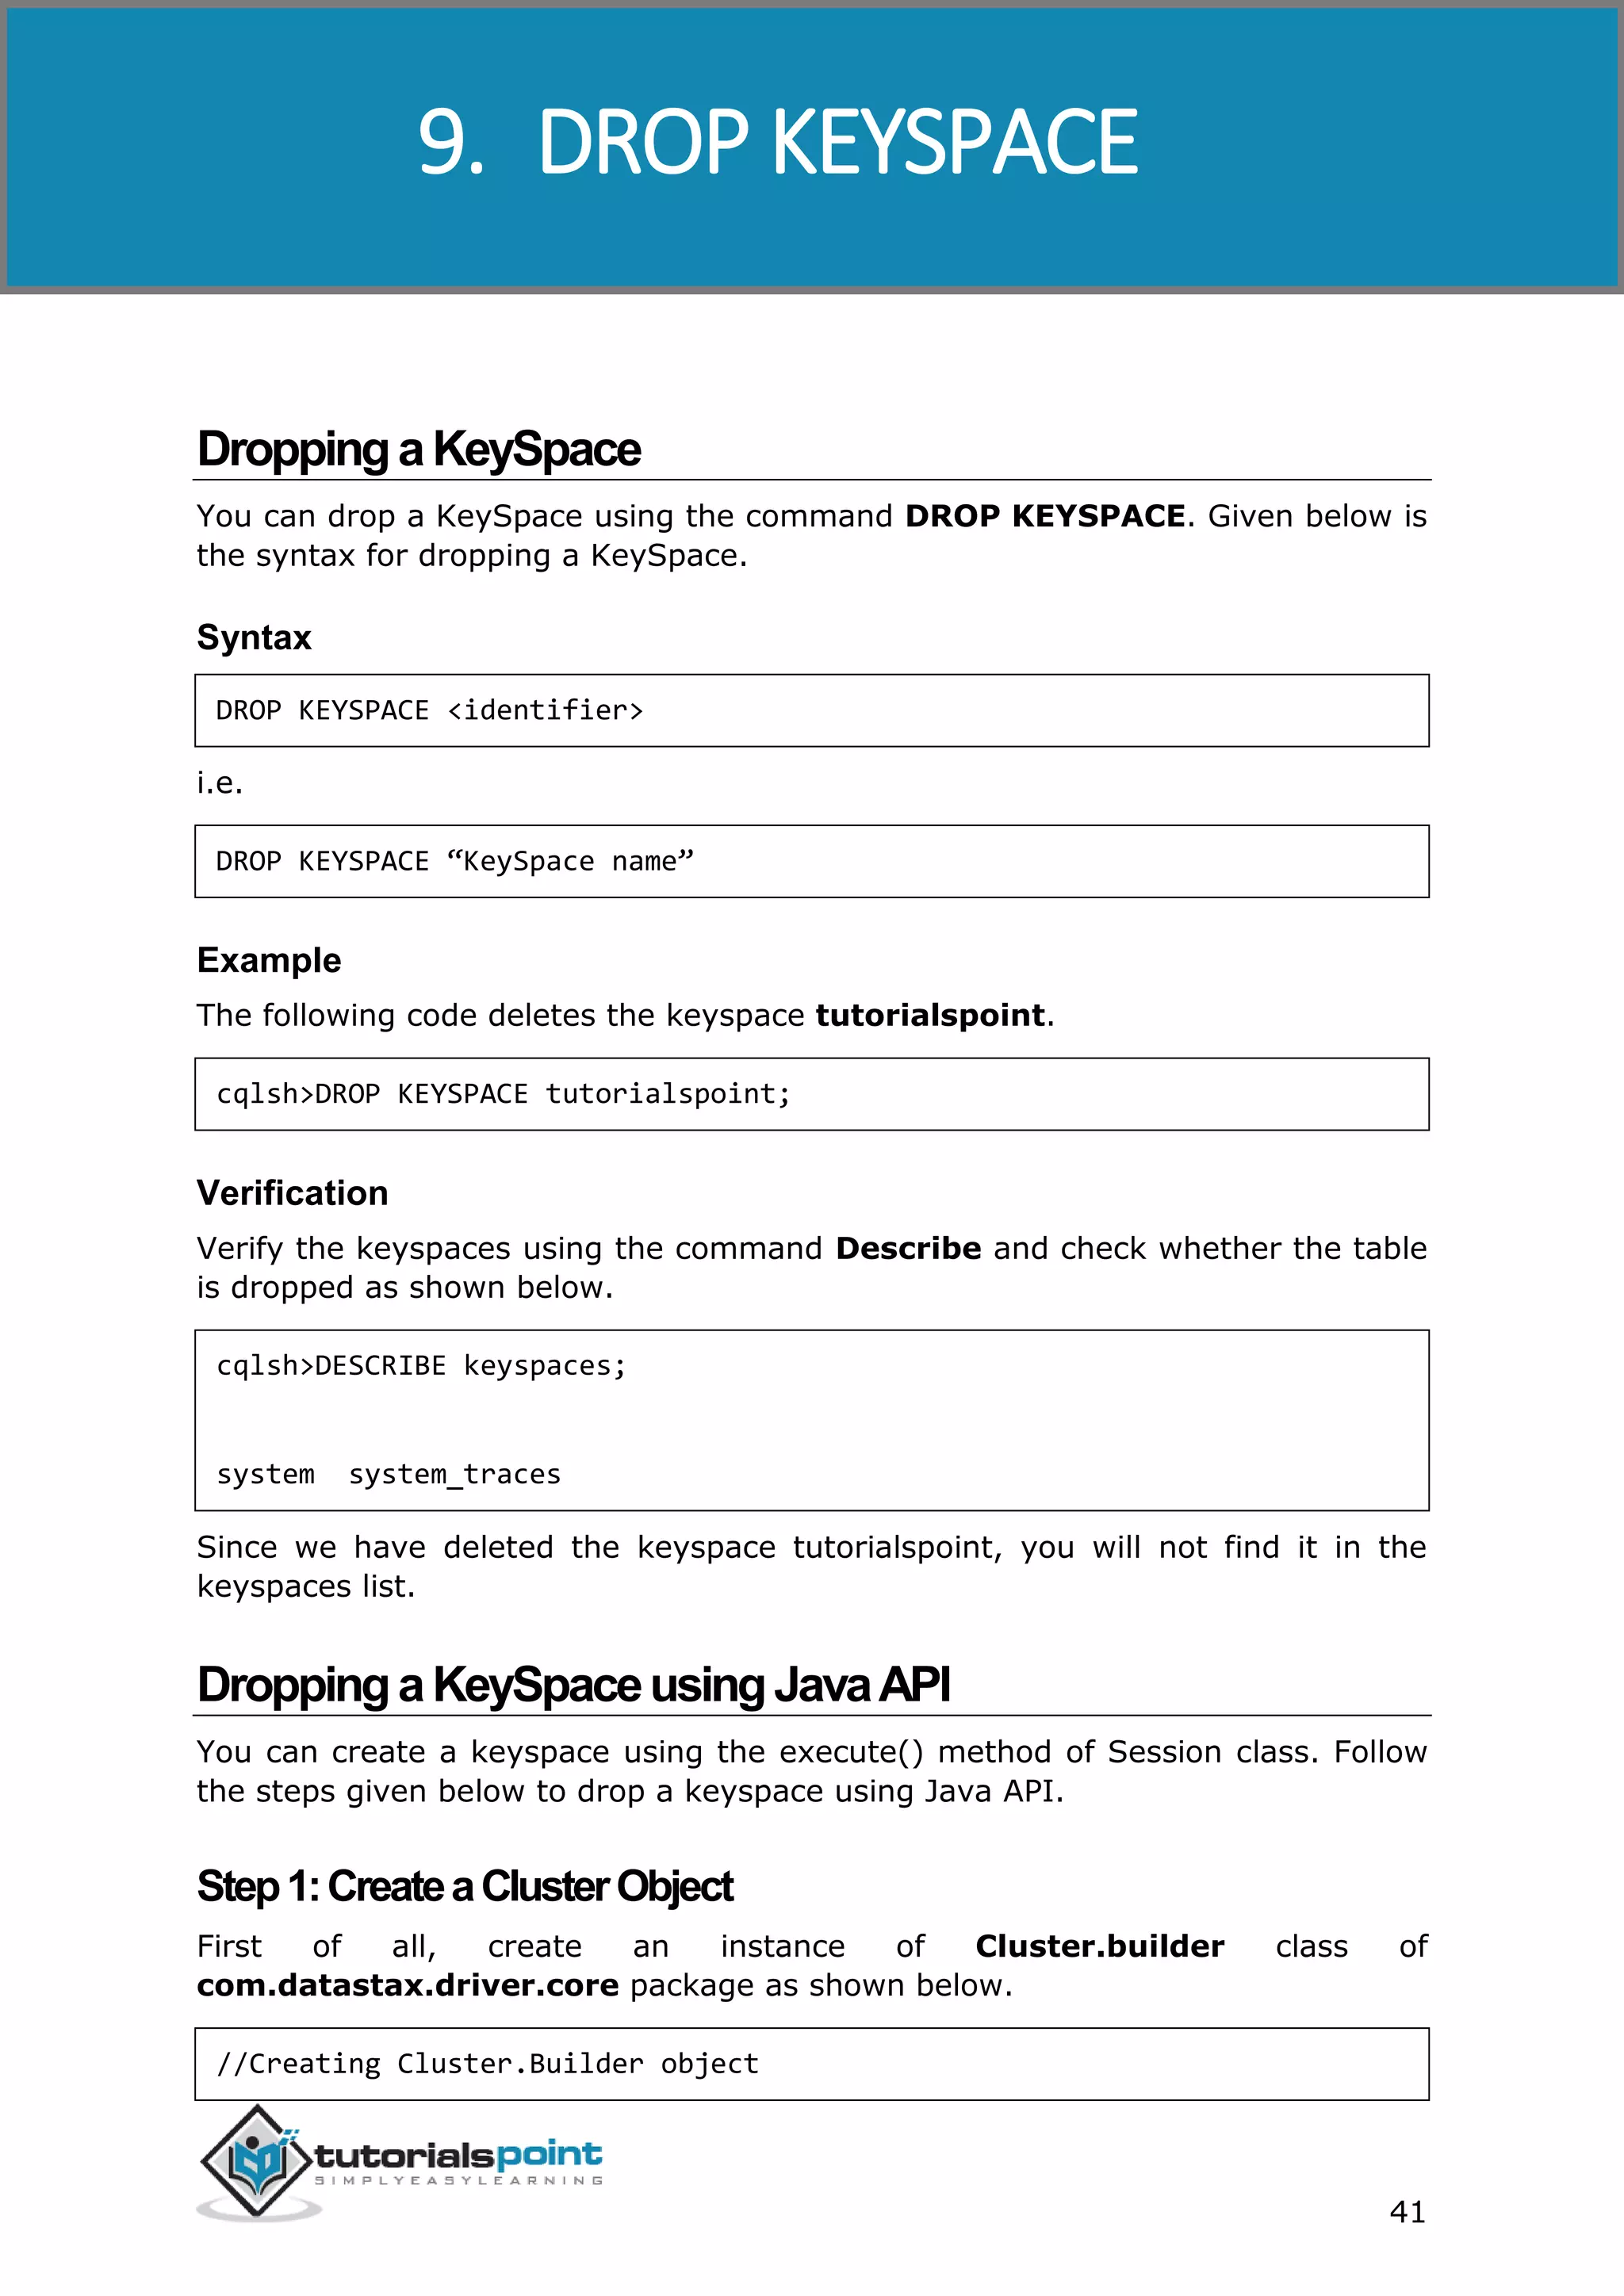
Step2:CreatingaSessionObject
Create an instance of Session object using the connect() method of Cluster class
as shown below.
Session session=cluster.connect( );
This method creates a new session and initializes it. If you already have a
keyspace, then you can set it to the existing one by passing the KeySpace name
in string format to this method as shown below.
Session session=cluster.connect(“ Your keyspace name ” );
Session session=cluster.connect(“ tp” );
Here we are using the keyspace named tp. Therefore, create the session object
as shown below.
Step3:ExecuteQuery
You can execute CQL queries using the execute() method of Session class. Pass
the query either in string format or as a Statement class object to the execute()
method. Whatever you pass to this method in string format will be executed on
the cqlsh.
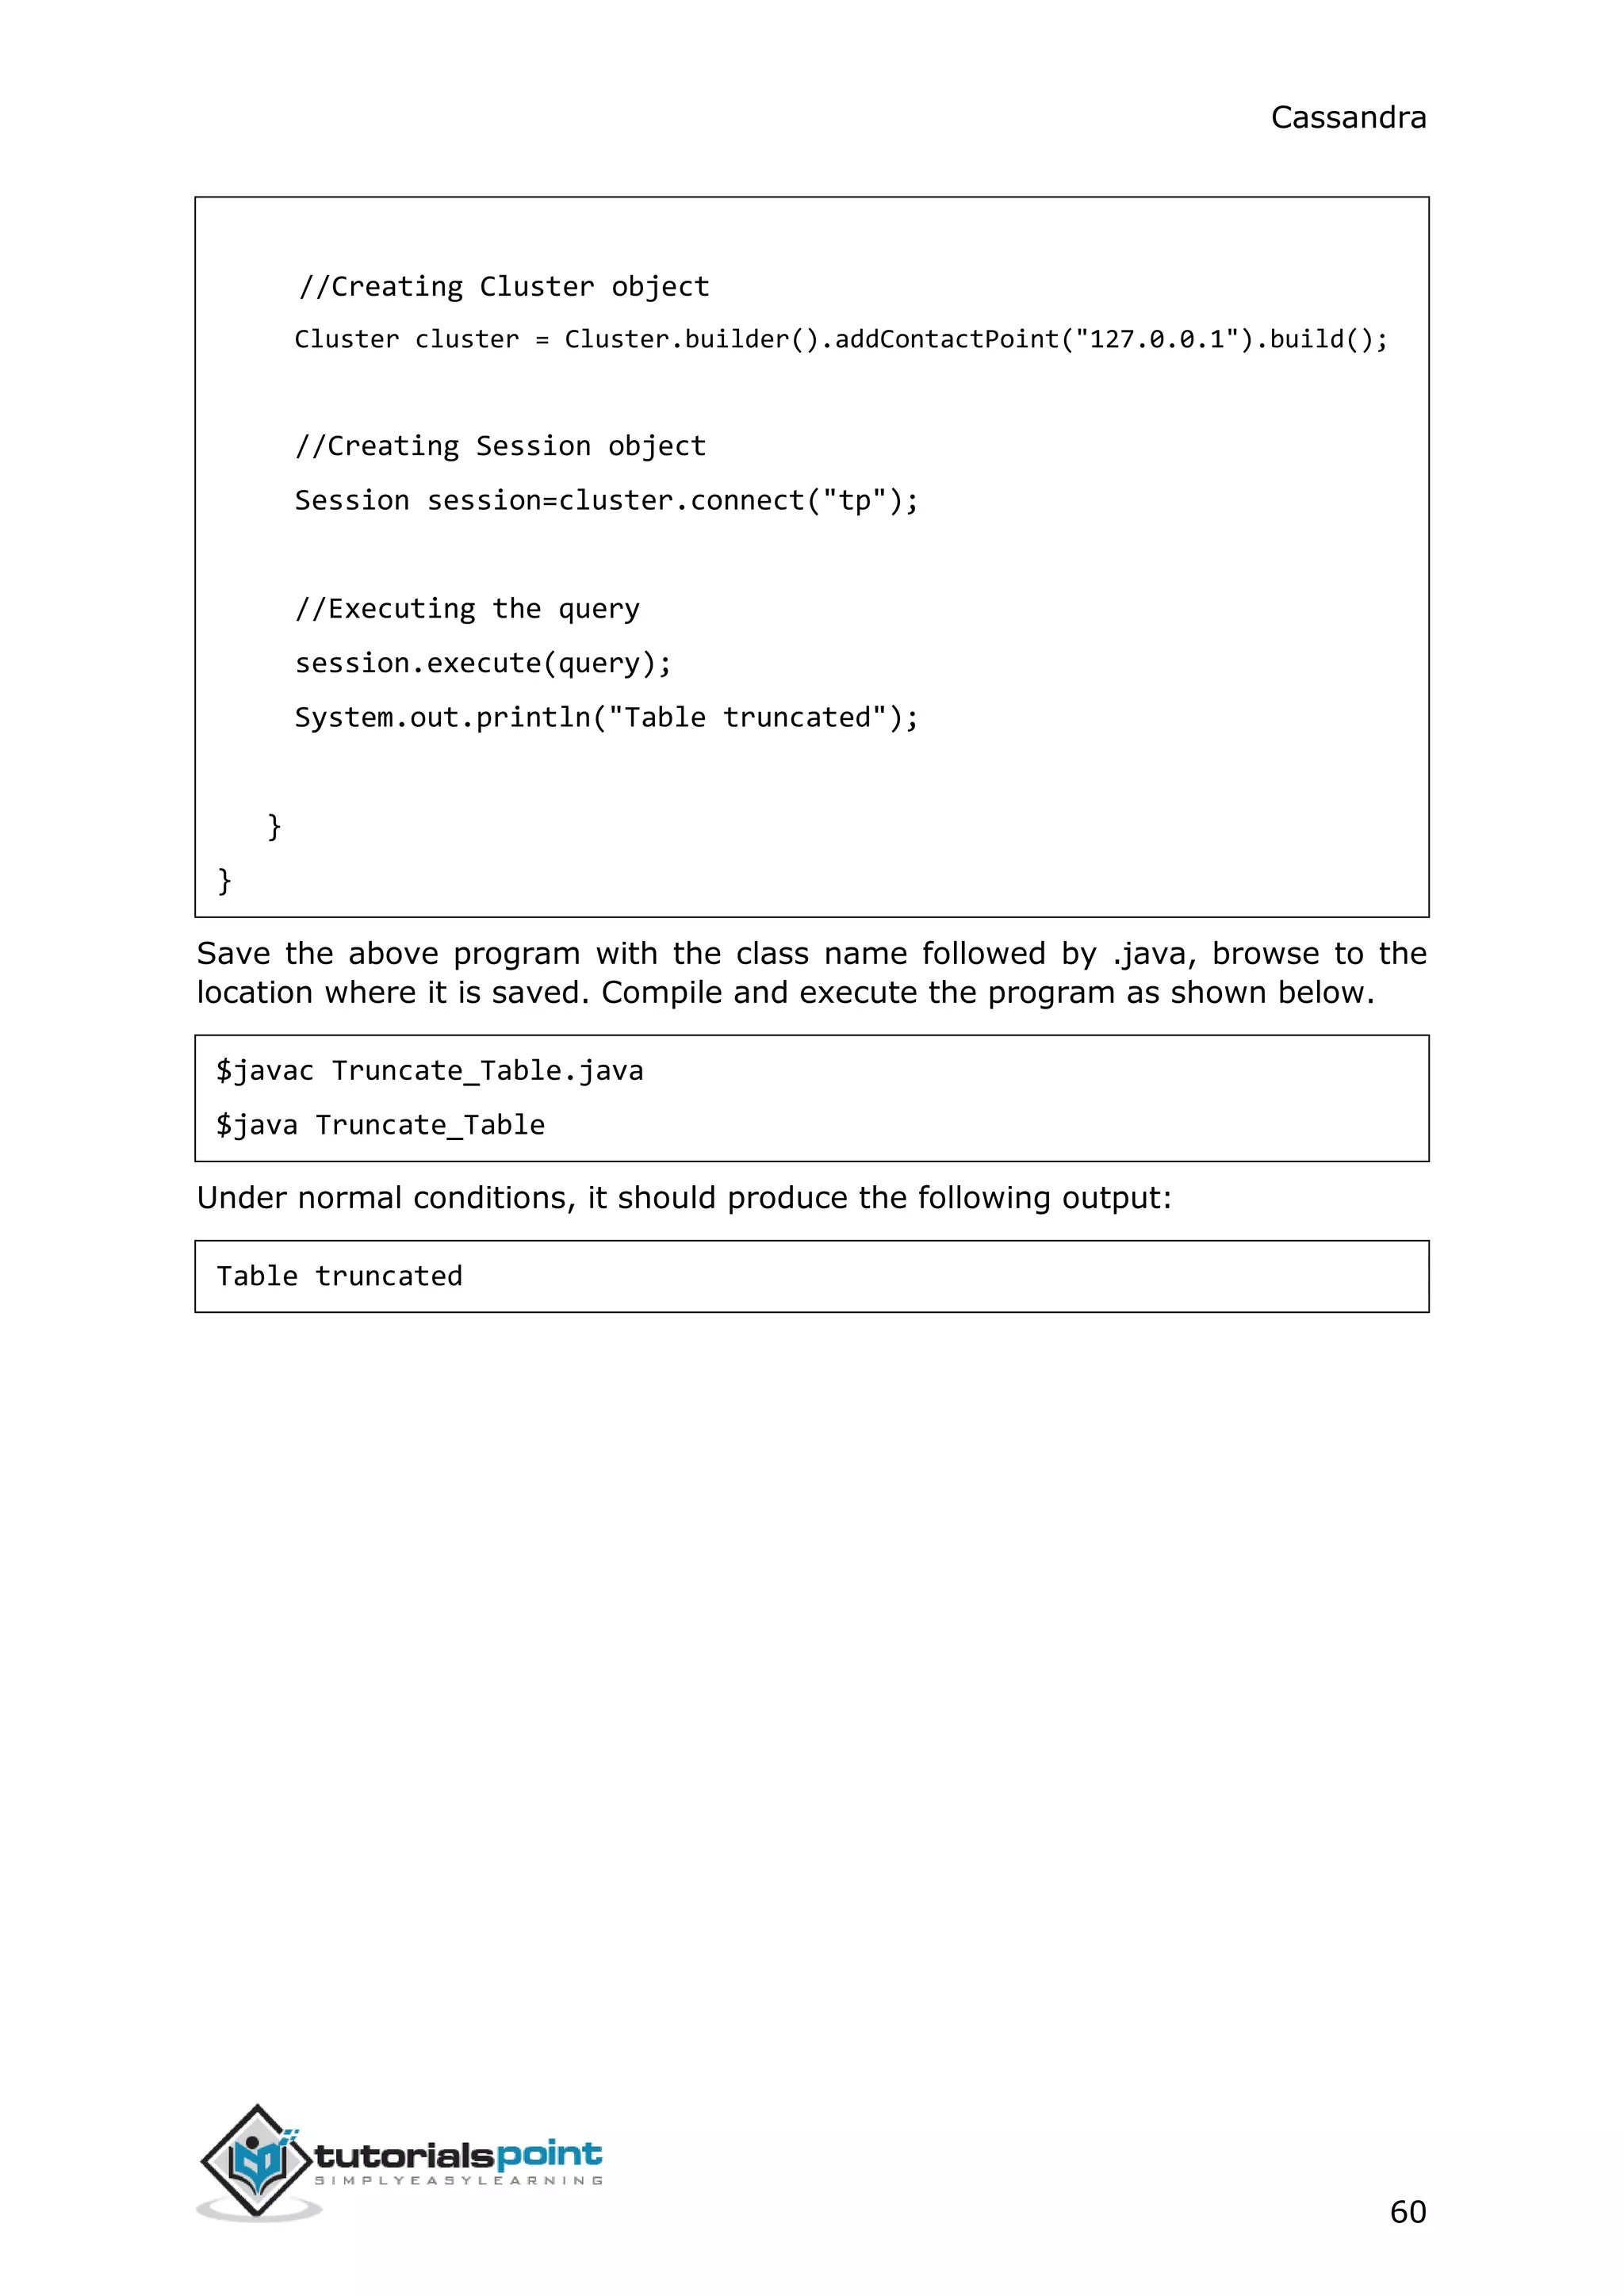
In the following example, we are truncating a table named emp. You have to store
the query in a string variable and pass it to the execute() method as shown
below.
//Query
String query="TRUNCATE emp;;”;
session.execute(query);
Given below is the complete program to truncate a table in Cassandra using Java
API.
import com.datastax.driver.core.Cluster;
import com.datastax.driver.core.Session;
public class Truncate_Table {
public static void main(String args[]){
//Query
String query="Truncate student;";](https://image.slidesharecdn.com/cassandratutorial-180620080720/75/Cassandra-tutorial-66-2048.jpg)

![Cassandra
63
public static void main(String args[]){
//Query
String query="CREATE INDEX name ON emp1 (emp_name);";
Cluster cluster = Cluster.builder().addContactPoint("127.0.0.1").build();
//Creating Session object
Session session=cluster.connect("tp");
//Executing the query
session.execute(query);
System.out.println("Index created");
}
}
Save the above program with the class name followed by .java, browse to the
location where it is saved. Compile and execute the program as shown below.
$javac Create_Index.java
$java Create_Index
Under normal conditions, it should produce the following output:
Index created](https://image.slidesharecdn.com/cassandratutorial-180620080720/75/Cassandra-tutorial-70-2048.jpg)
![Cassandra
65
Step2:CreateaSessionObject
Create an instance of Session object using the connect() method of Cluster class
as shown below.
Session session=cluster.connect( );
This method creates a new session and initializes it. If you already have a
keyspace, then you can set it to the existing one by passing the KeySpace name
in string format to this method as shown below.
Session session=cluster.connect(“ Your keyspace name ” );
Here we are using the KeySpace named tp. Therefore, create the session object
as shown below.
Session session=cluster.connect(“ tp” );
Step3:ExecuteQuery
You can execute CQL queries using the execute() method of Session class. Pass
the query either in string format or as a Statement class object to the execute()
method. Whatever you pass to this method in string format will be executed on
the cqlsh.
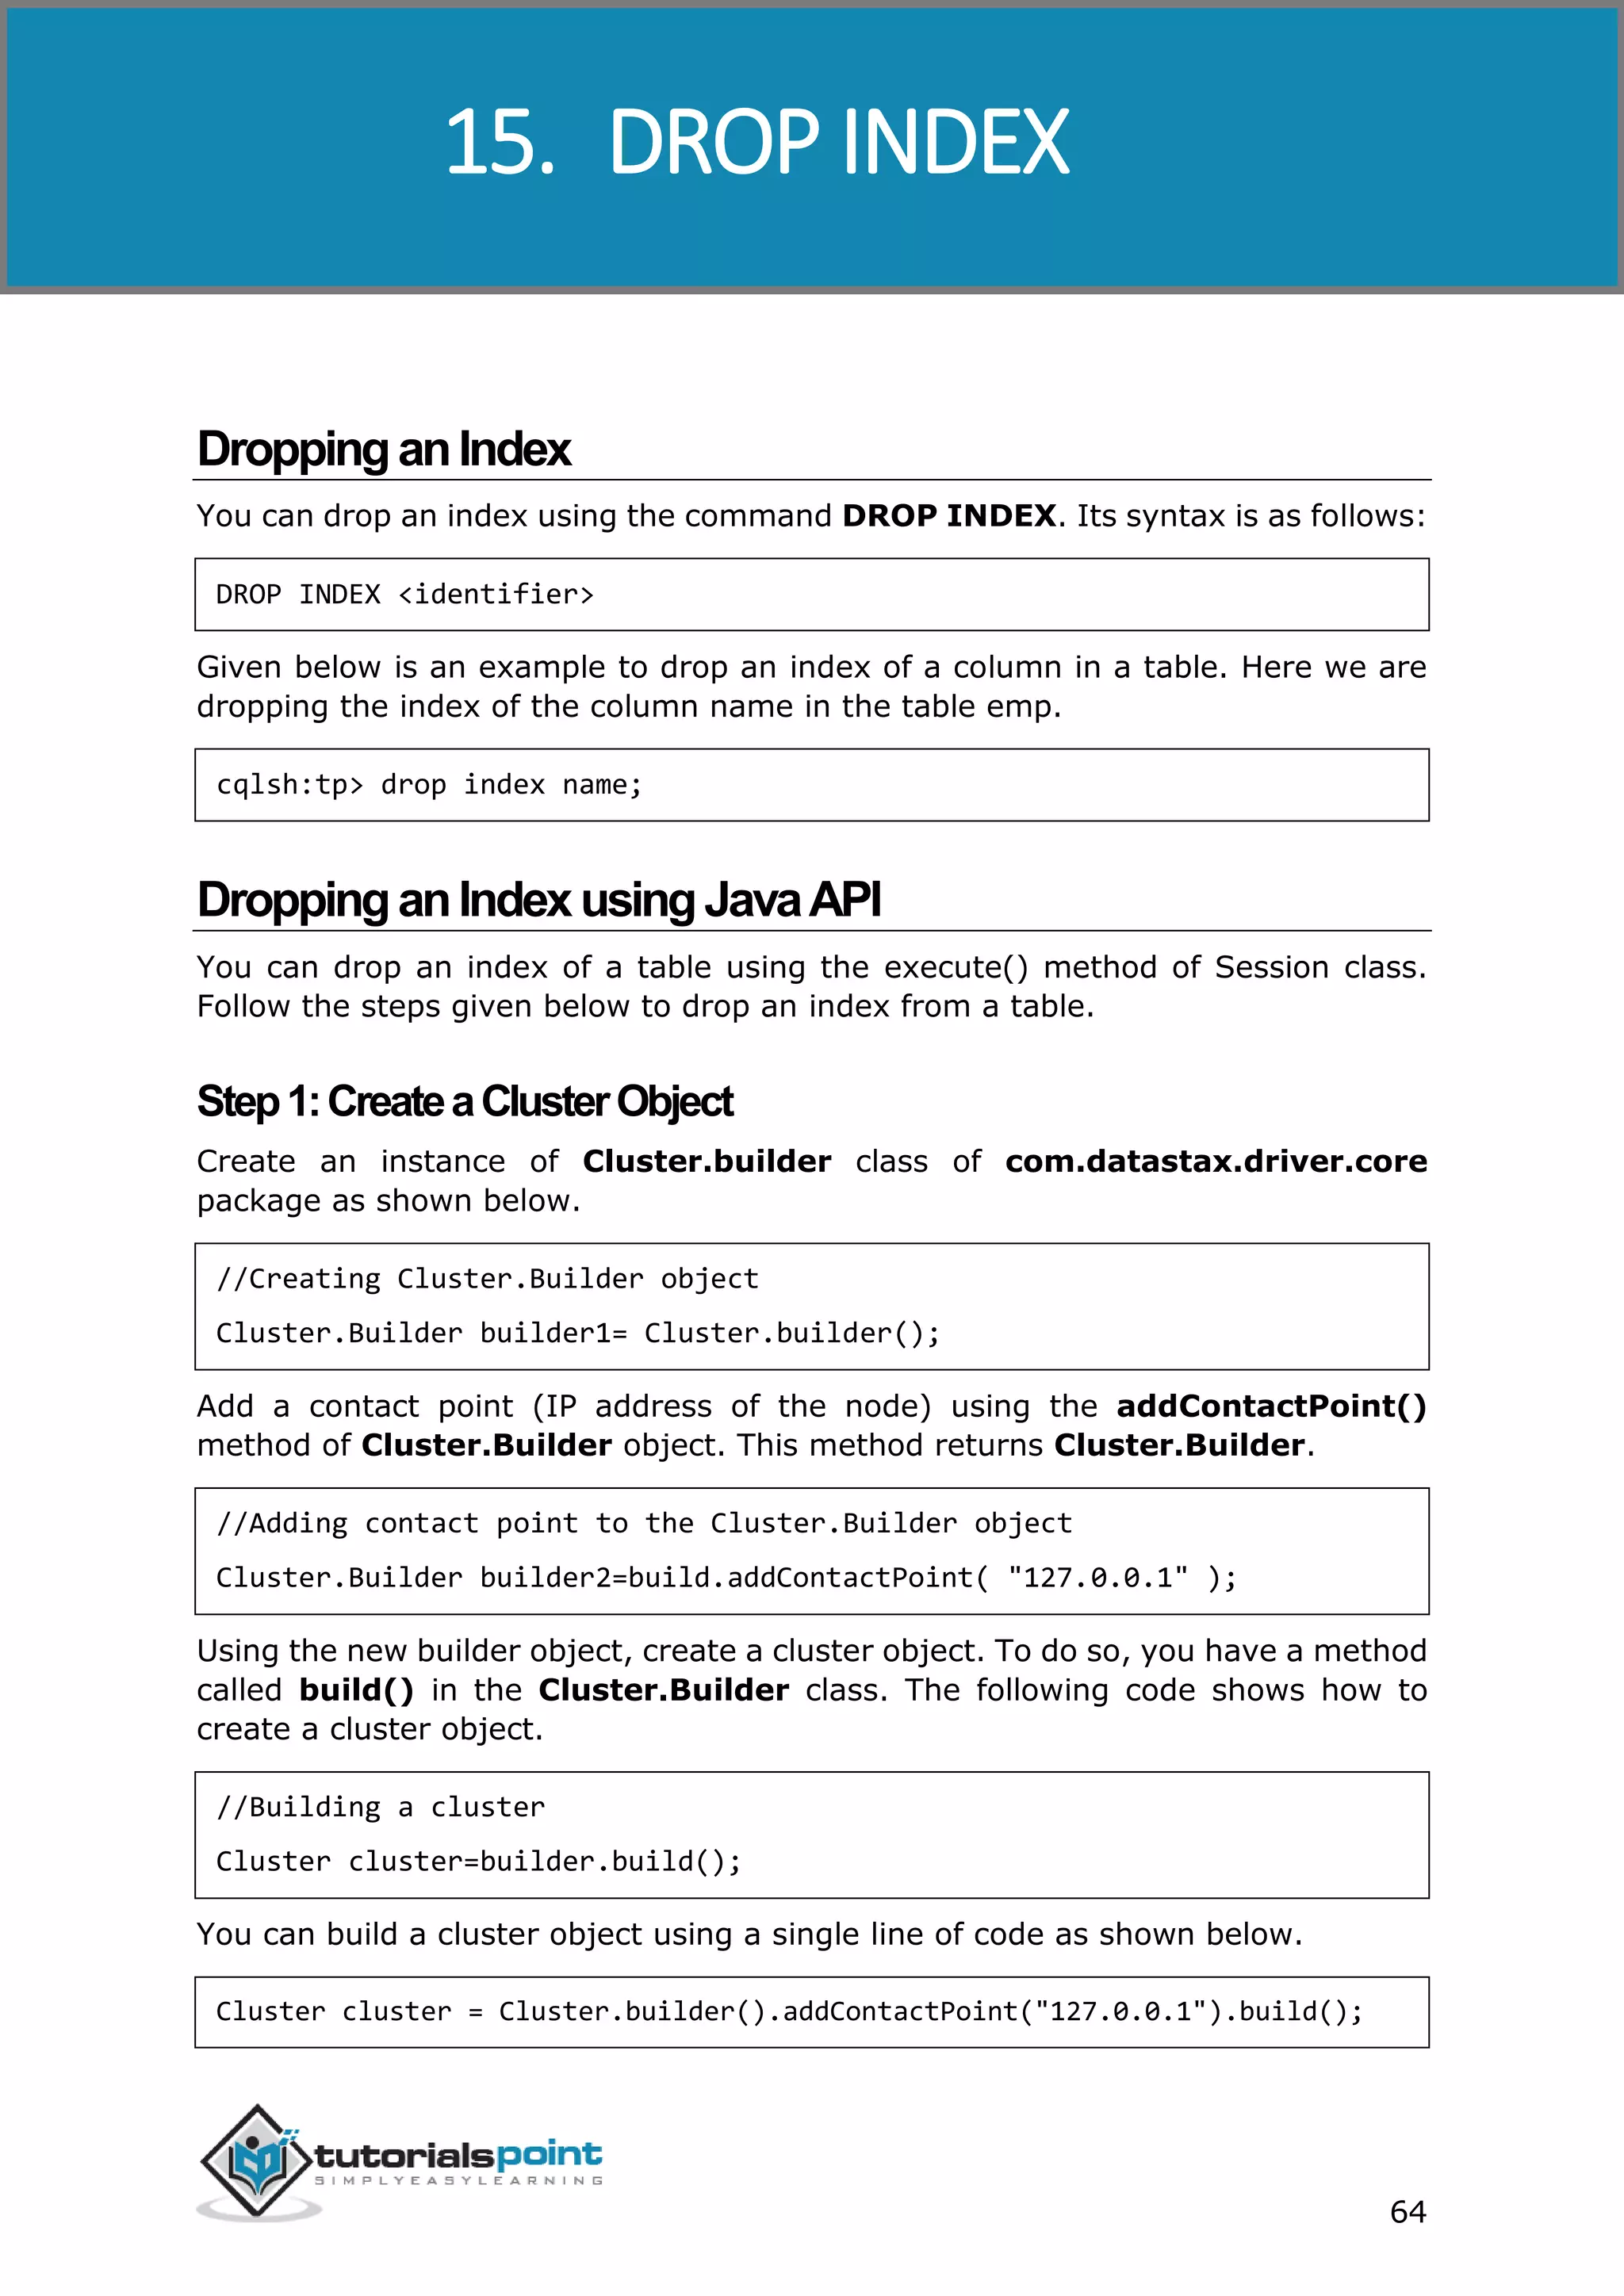
In the following example, we are dropping an index “name” of emp table. You
have to store the query in a string variable and pass it to the execute() method
as shown below.
//Query
String query="DROP INDEX user_name;";
session.execute(query);
Given below is the complete program to drop an index in Cassandra using Java
API.
import com.datastax.driver.core.Cluster;
import com.datastax.driver.core.Session;
public class Drop_Index {
public static void main(String args[]){
//Query
String query="DROP INDEX user_name;";](https://image.slidesharecdn.com/cassandratutorial-180620080720/75/Cassandra-tutorial-72-2048.jpg)
![Cassandra
70
session.execute(query1);
session.execute(query2);
session.execute(query3);
Given below is the complete program to insert data into a table in Cassandra using
Java API.
import com.datastax.driver.core.Cluster;
import com.datastax.driver.core.Session;
public class Create_Data {
public static void main(String args[]){
//queries
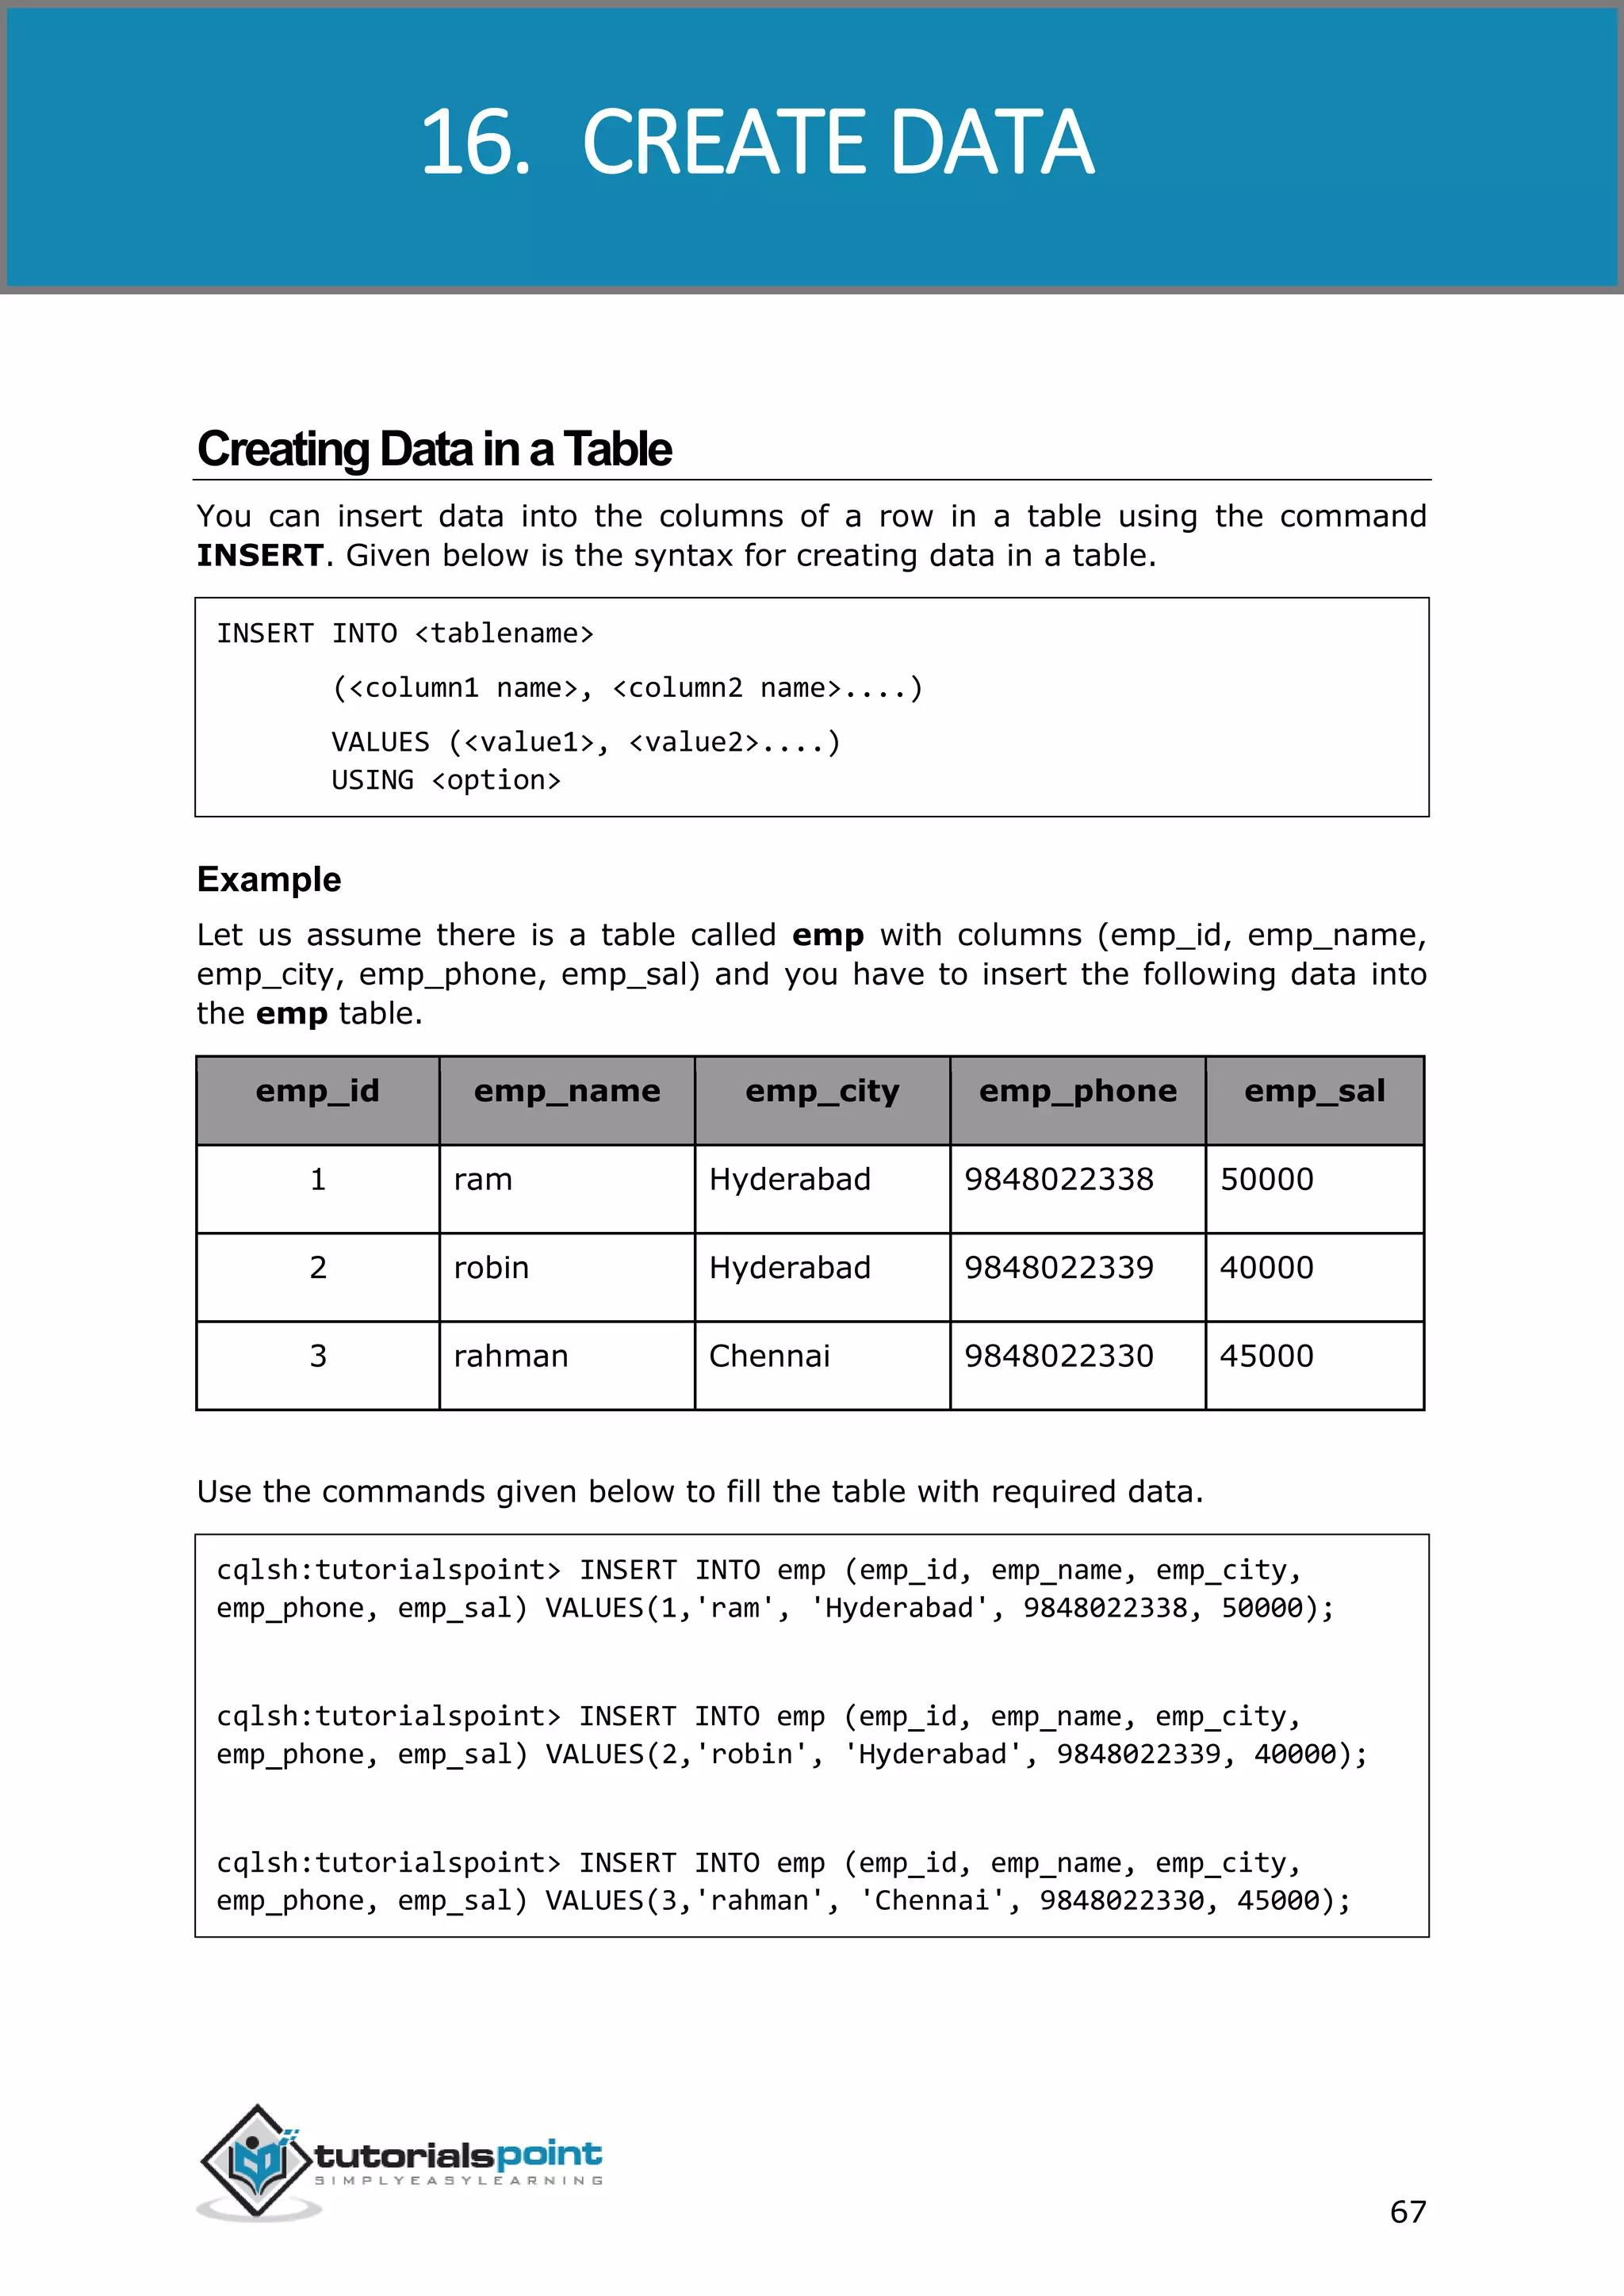
String query1="INSERT INTO emp (emp_id, emp_name, emp_city,
emp_phone, emp_sal)"
+ " VALUES(1,'ram', 'Hyderabad', 9848022338, 50000);" ;
String query2="INSERT INTO emp (emp_id, emp_name, emp_city,
emp_phone, emp_sal)"
+ " VALUES(2,'robin', 'Hyderabad', 9848022339, 40000);" ;
String query3="INSERT INTO emp (emp_id, emp_name, emp_city,
emp_phone, emp_sal)"
+ " VALUES(3,'rahman', 'Chennai', 9848022330, 45000);" ;
//Creating Cluster object
Cluster cluster = Cluster.builder().addContactPoint("127.0.0.1").build();
//Creating Session object
Session session=cluster.connect("tp");
//Executing the query
session.execute(query1);](https://image.slidesharecdn.com/cassandratutorial-180620080720/75/Cassandra-tutorial-77-2048.jpg)

![Cassandra
74
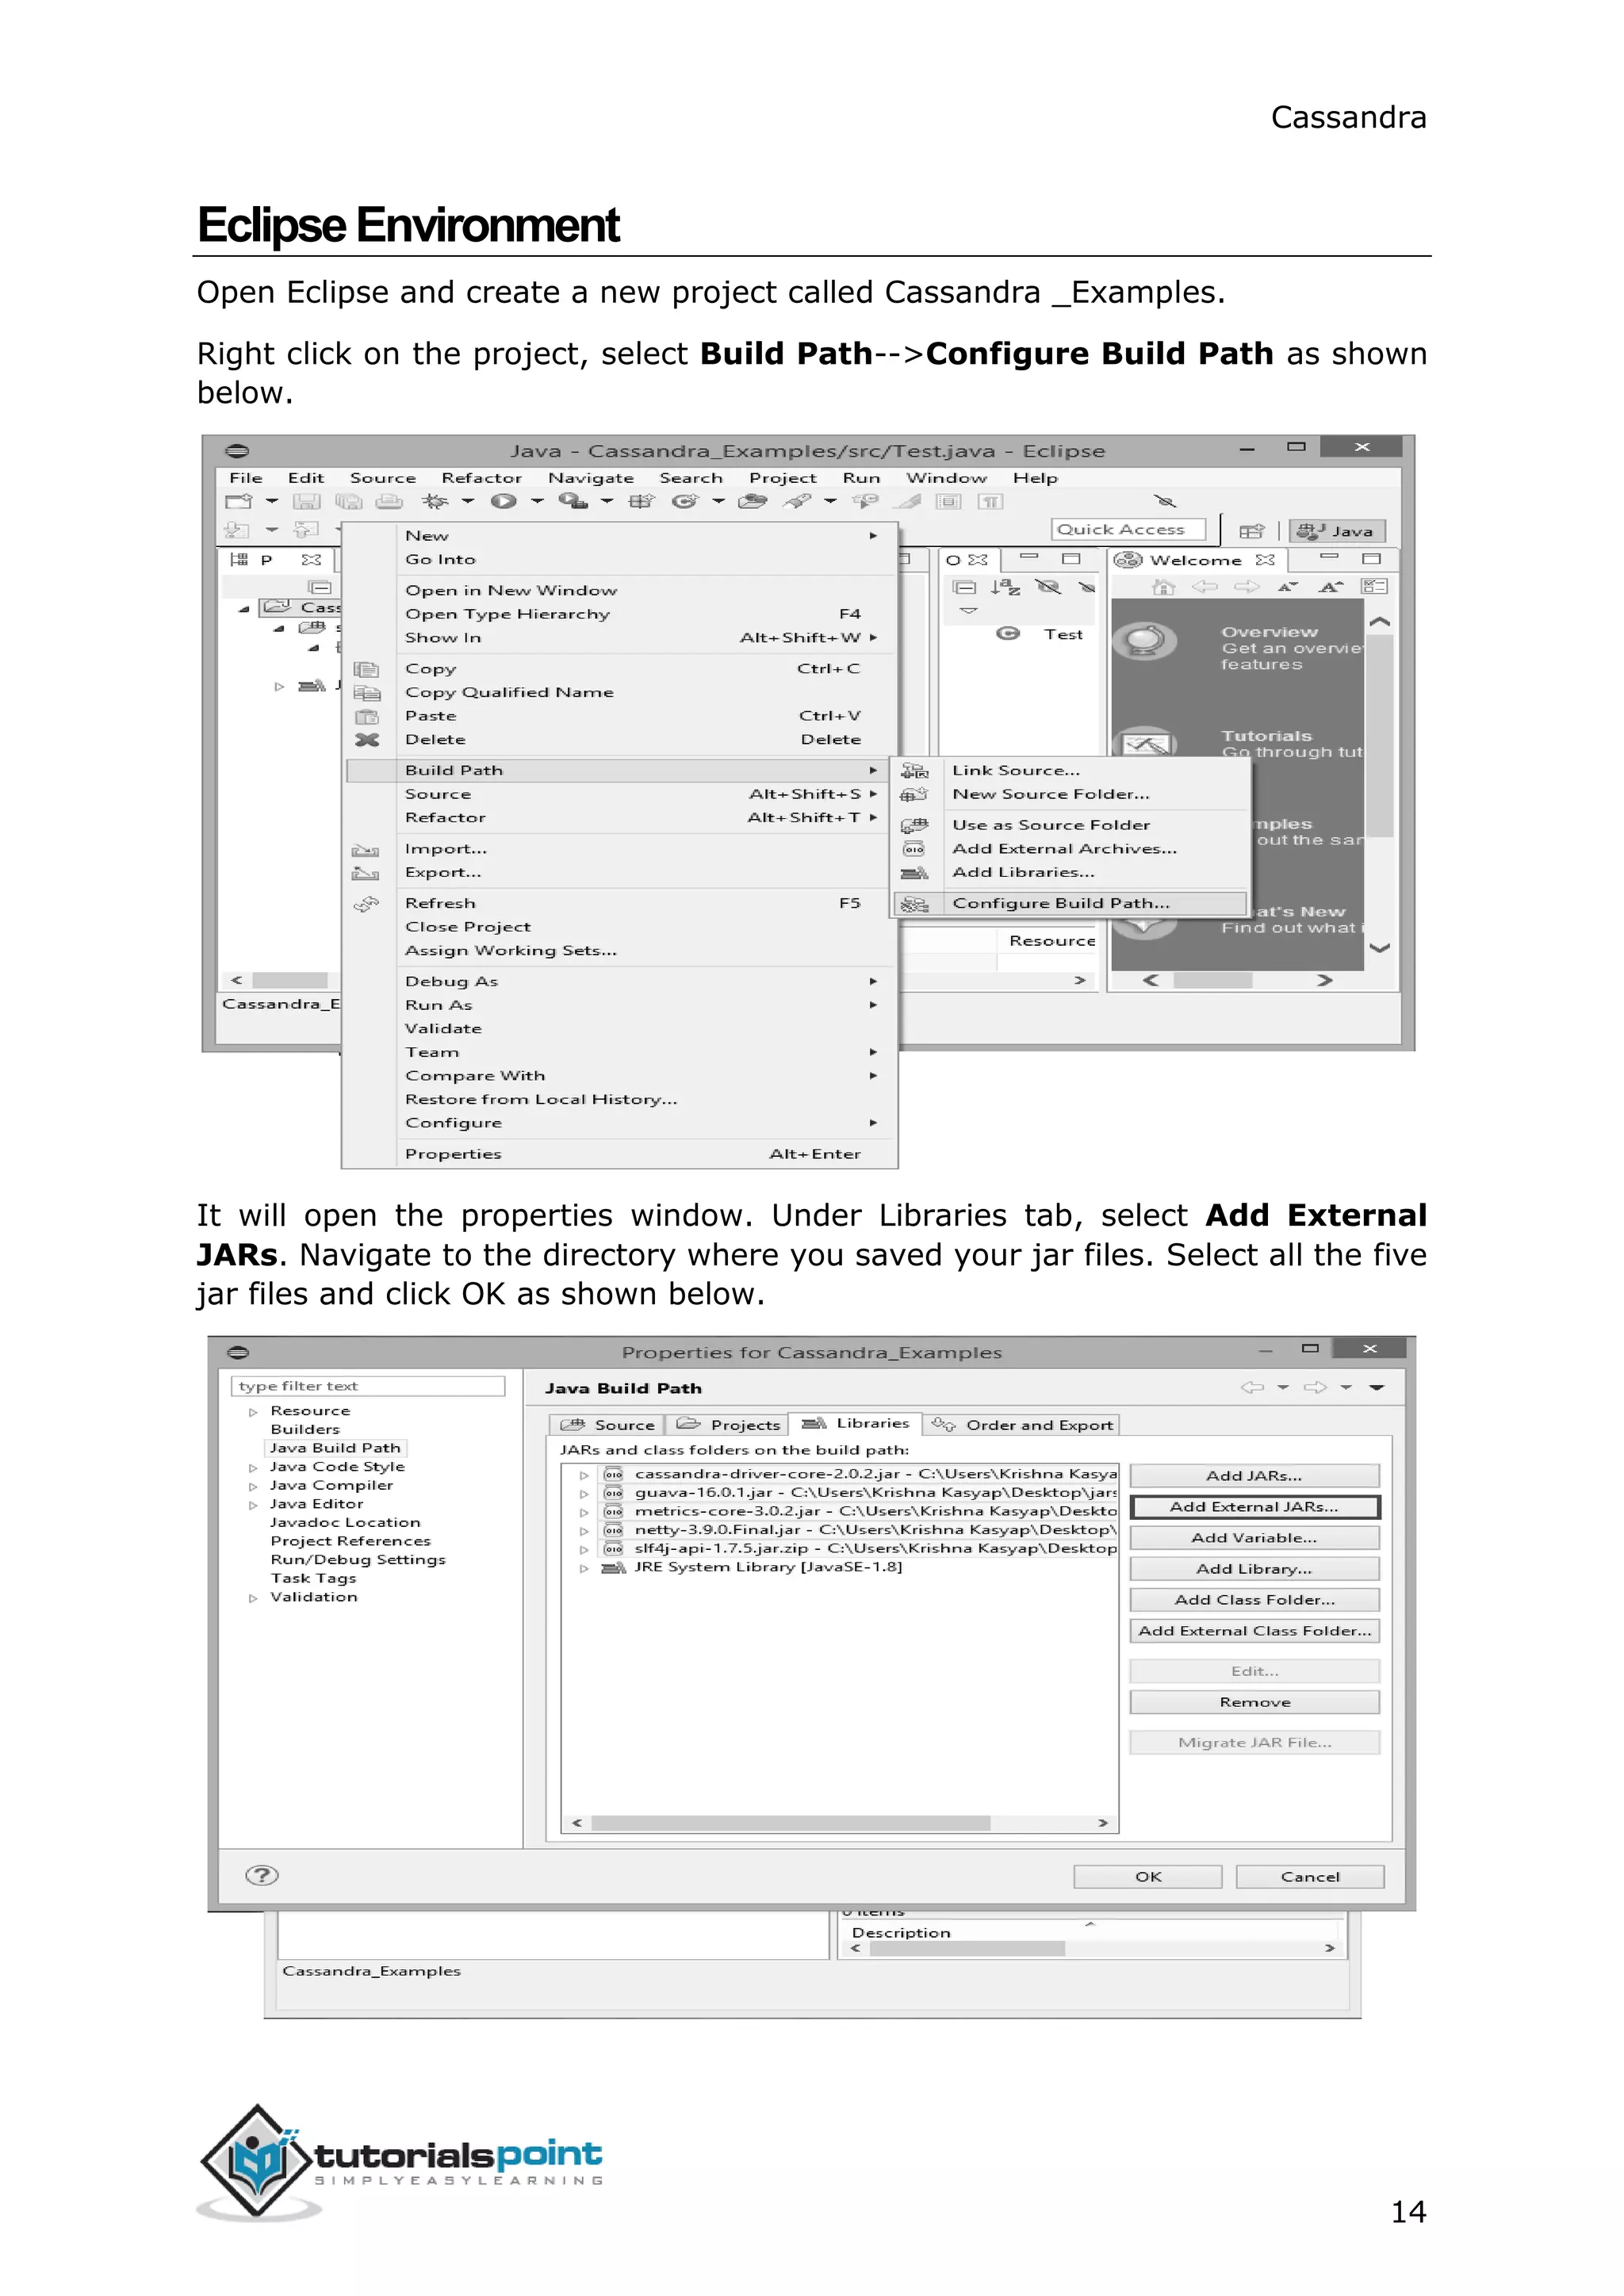
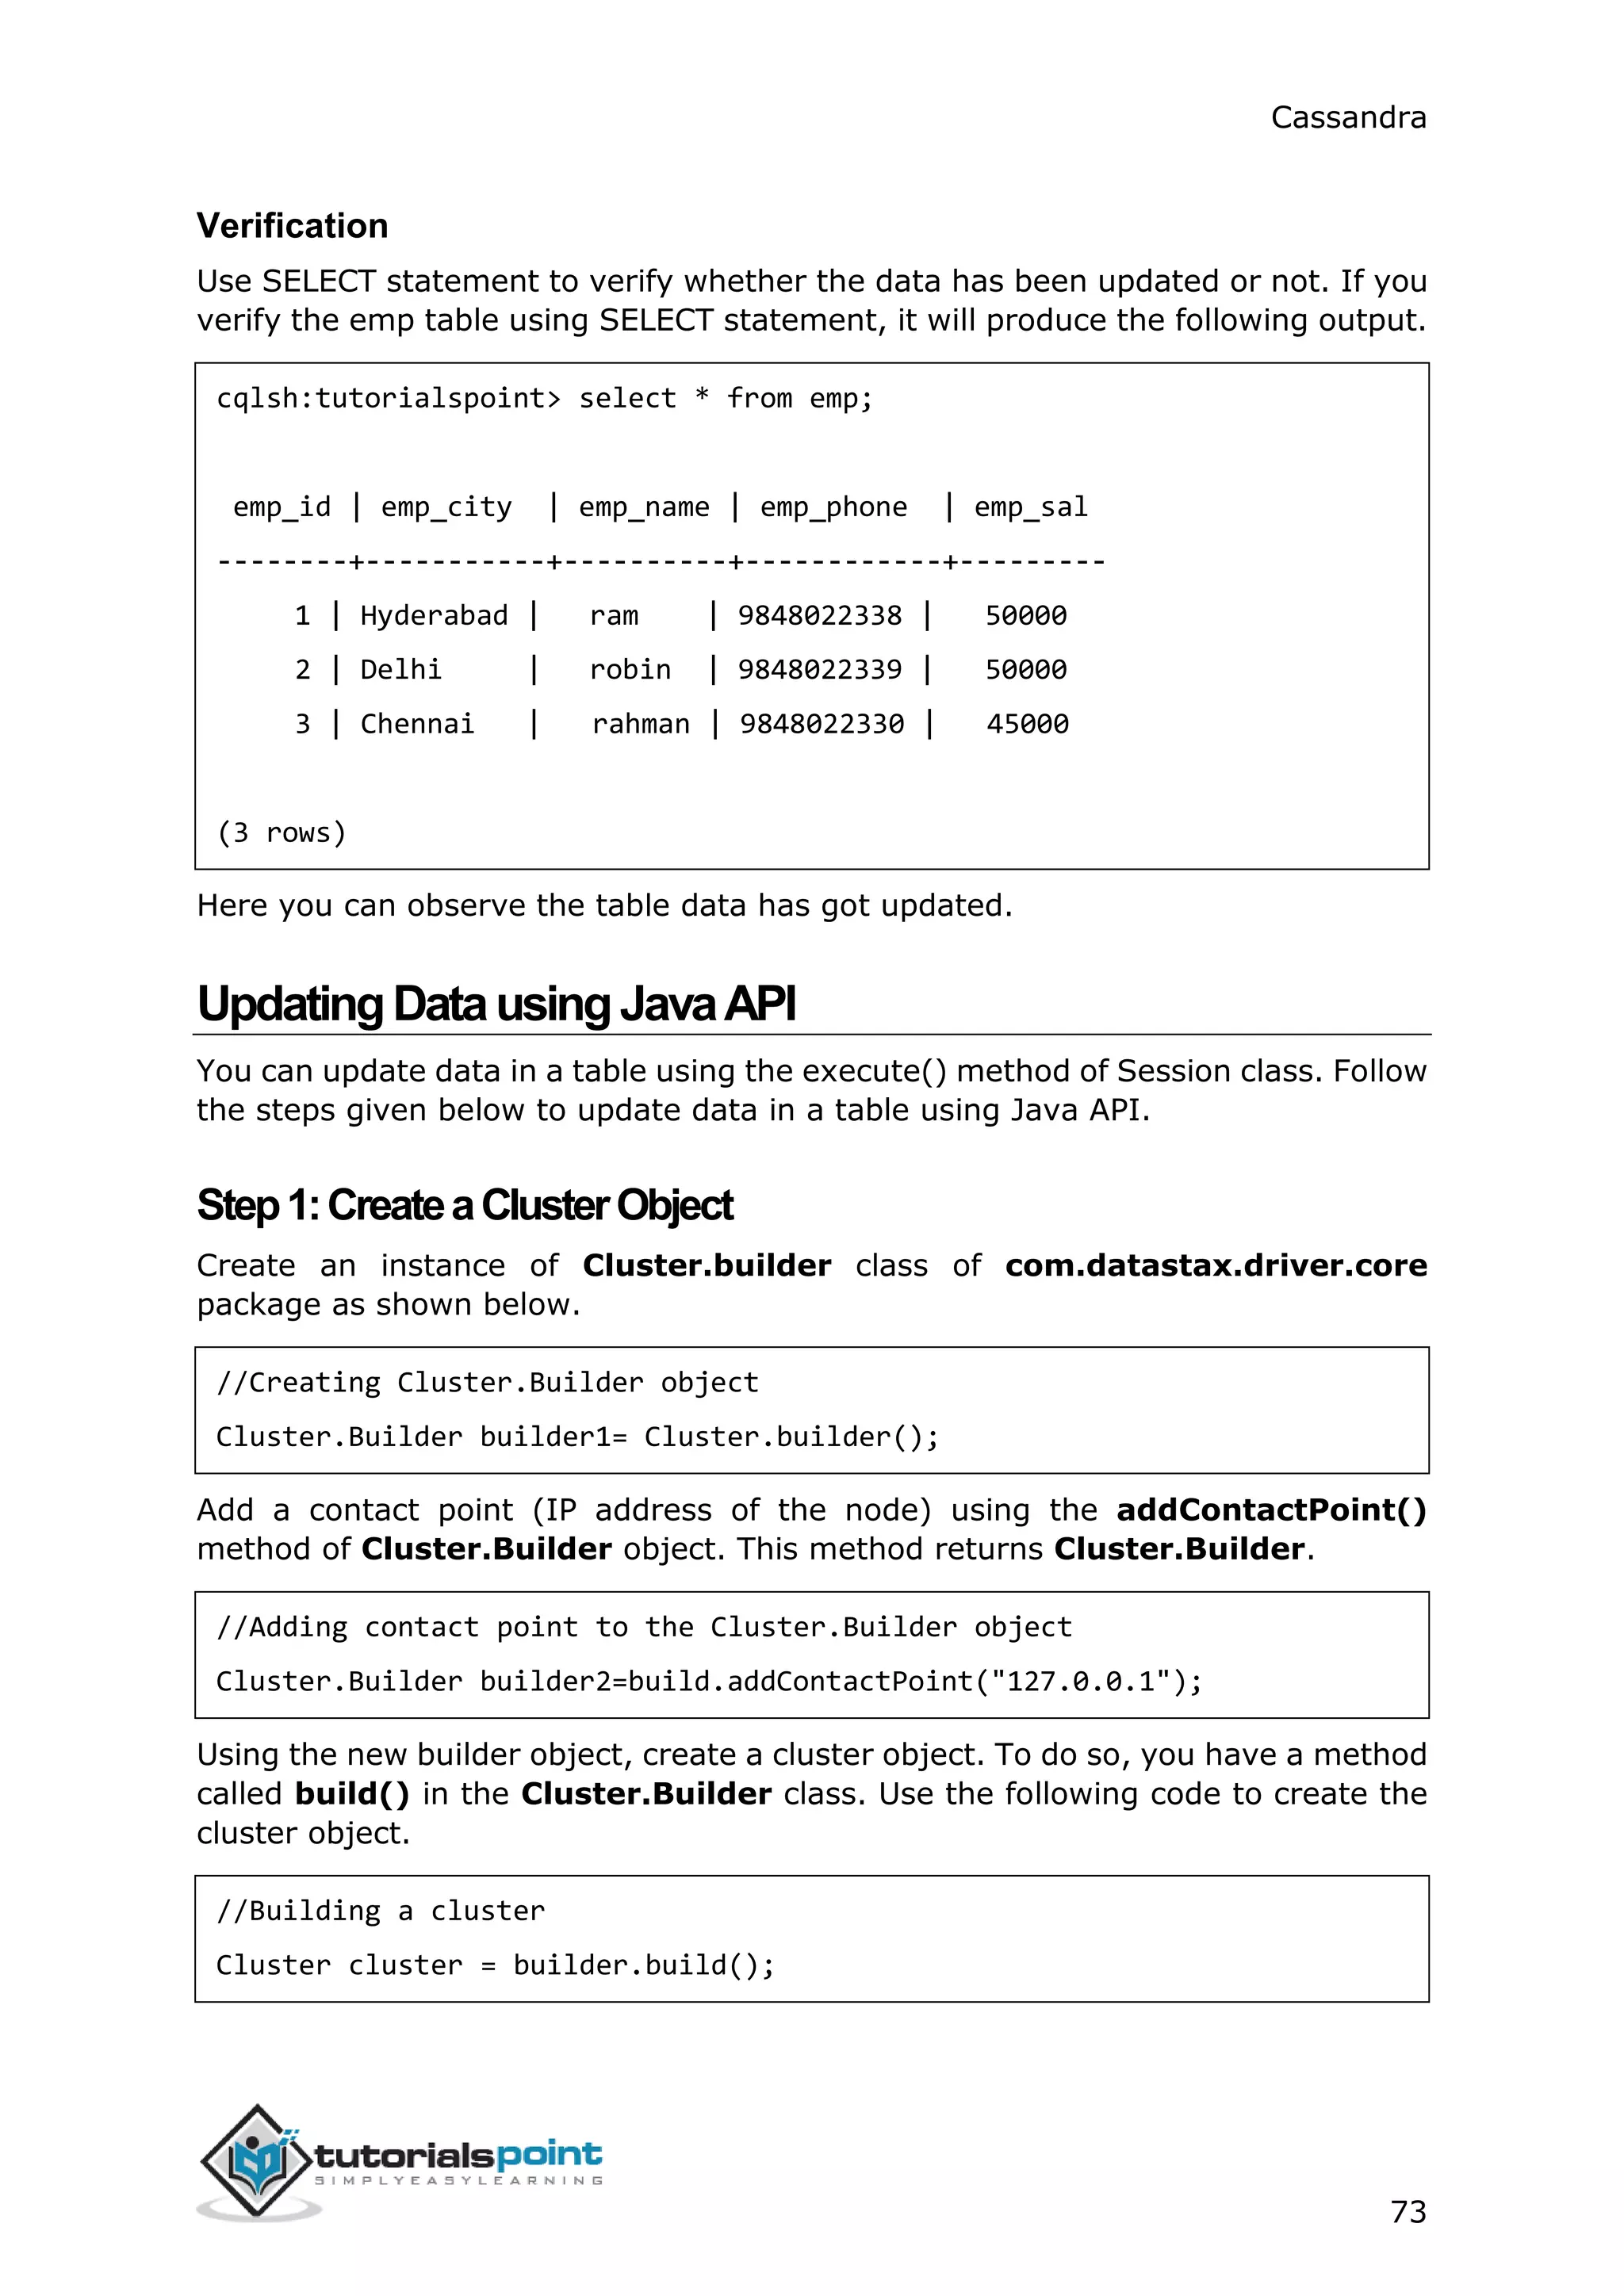
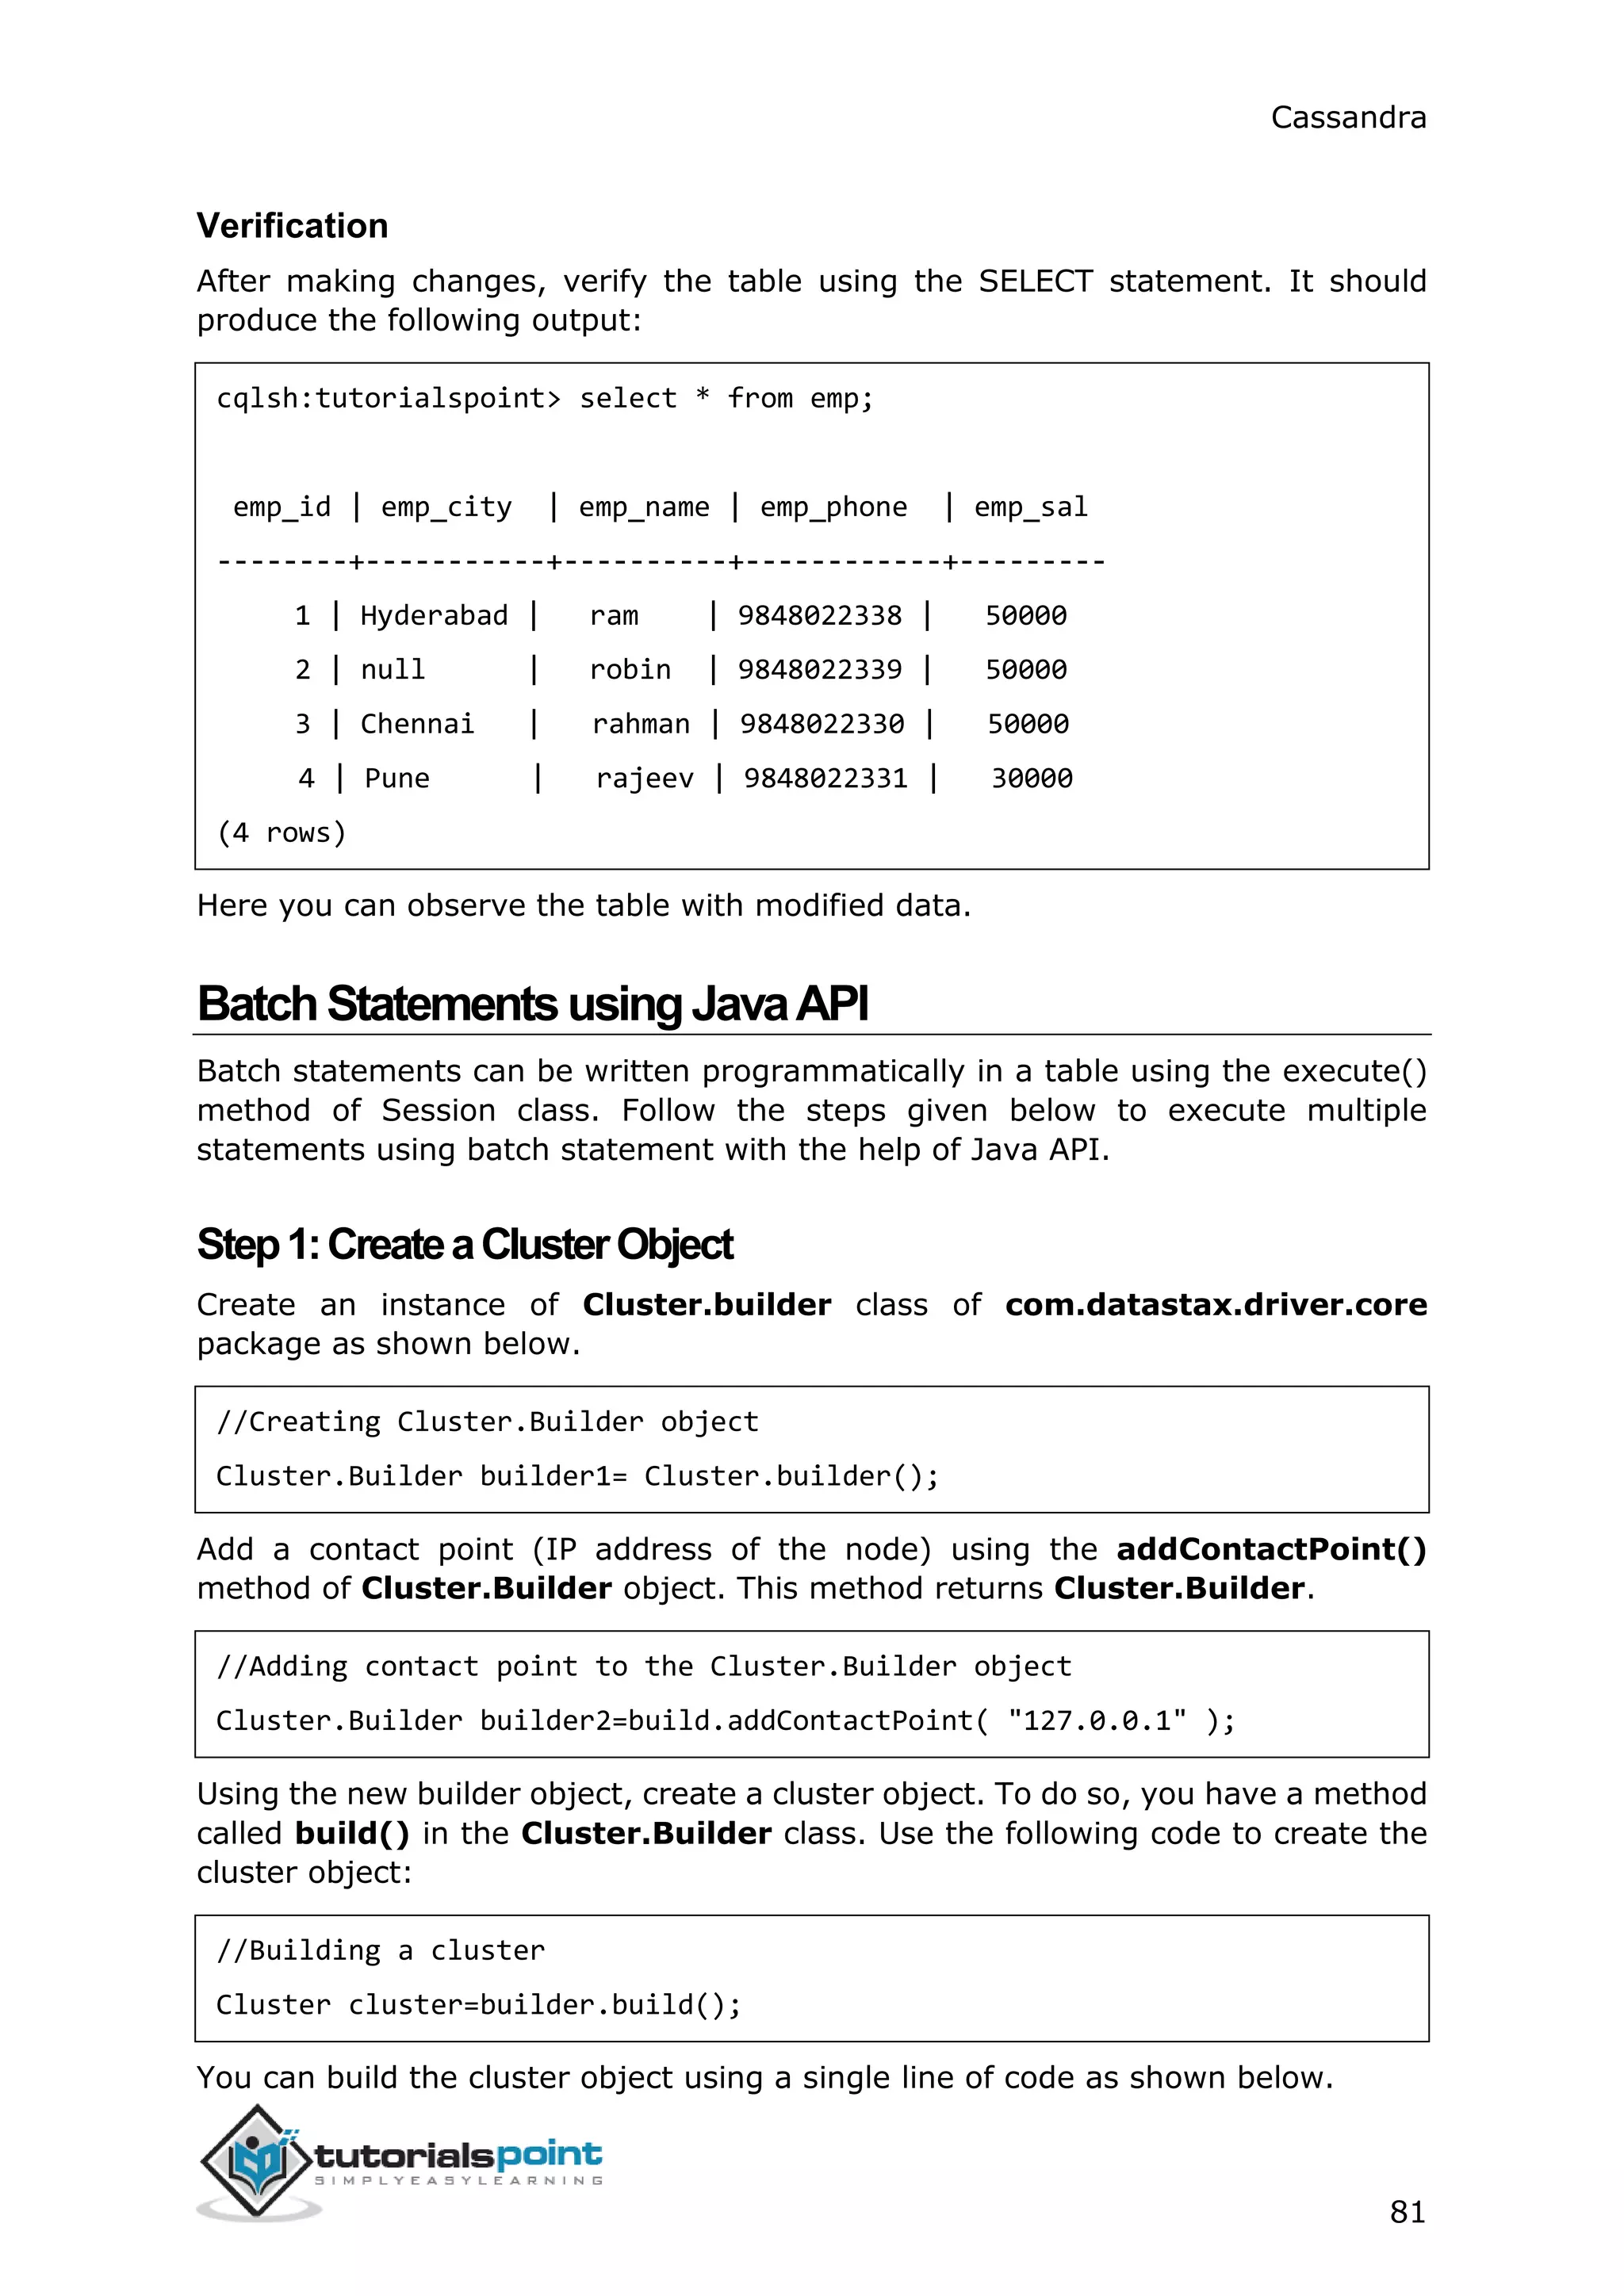
You can build the cluster object using a single line of code as shown below.
Cluster cluster = Cluster.builder().addContactPoint("127.0.0.1").build();
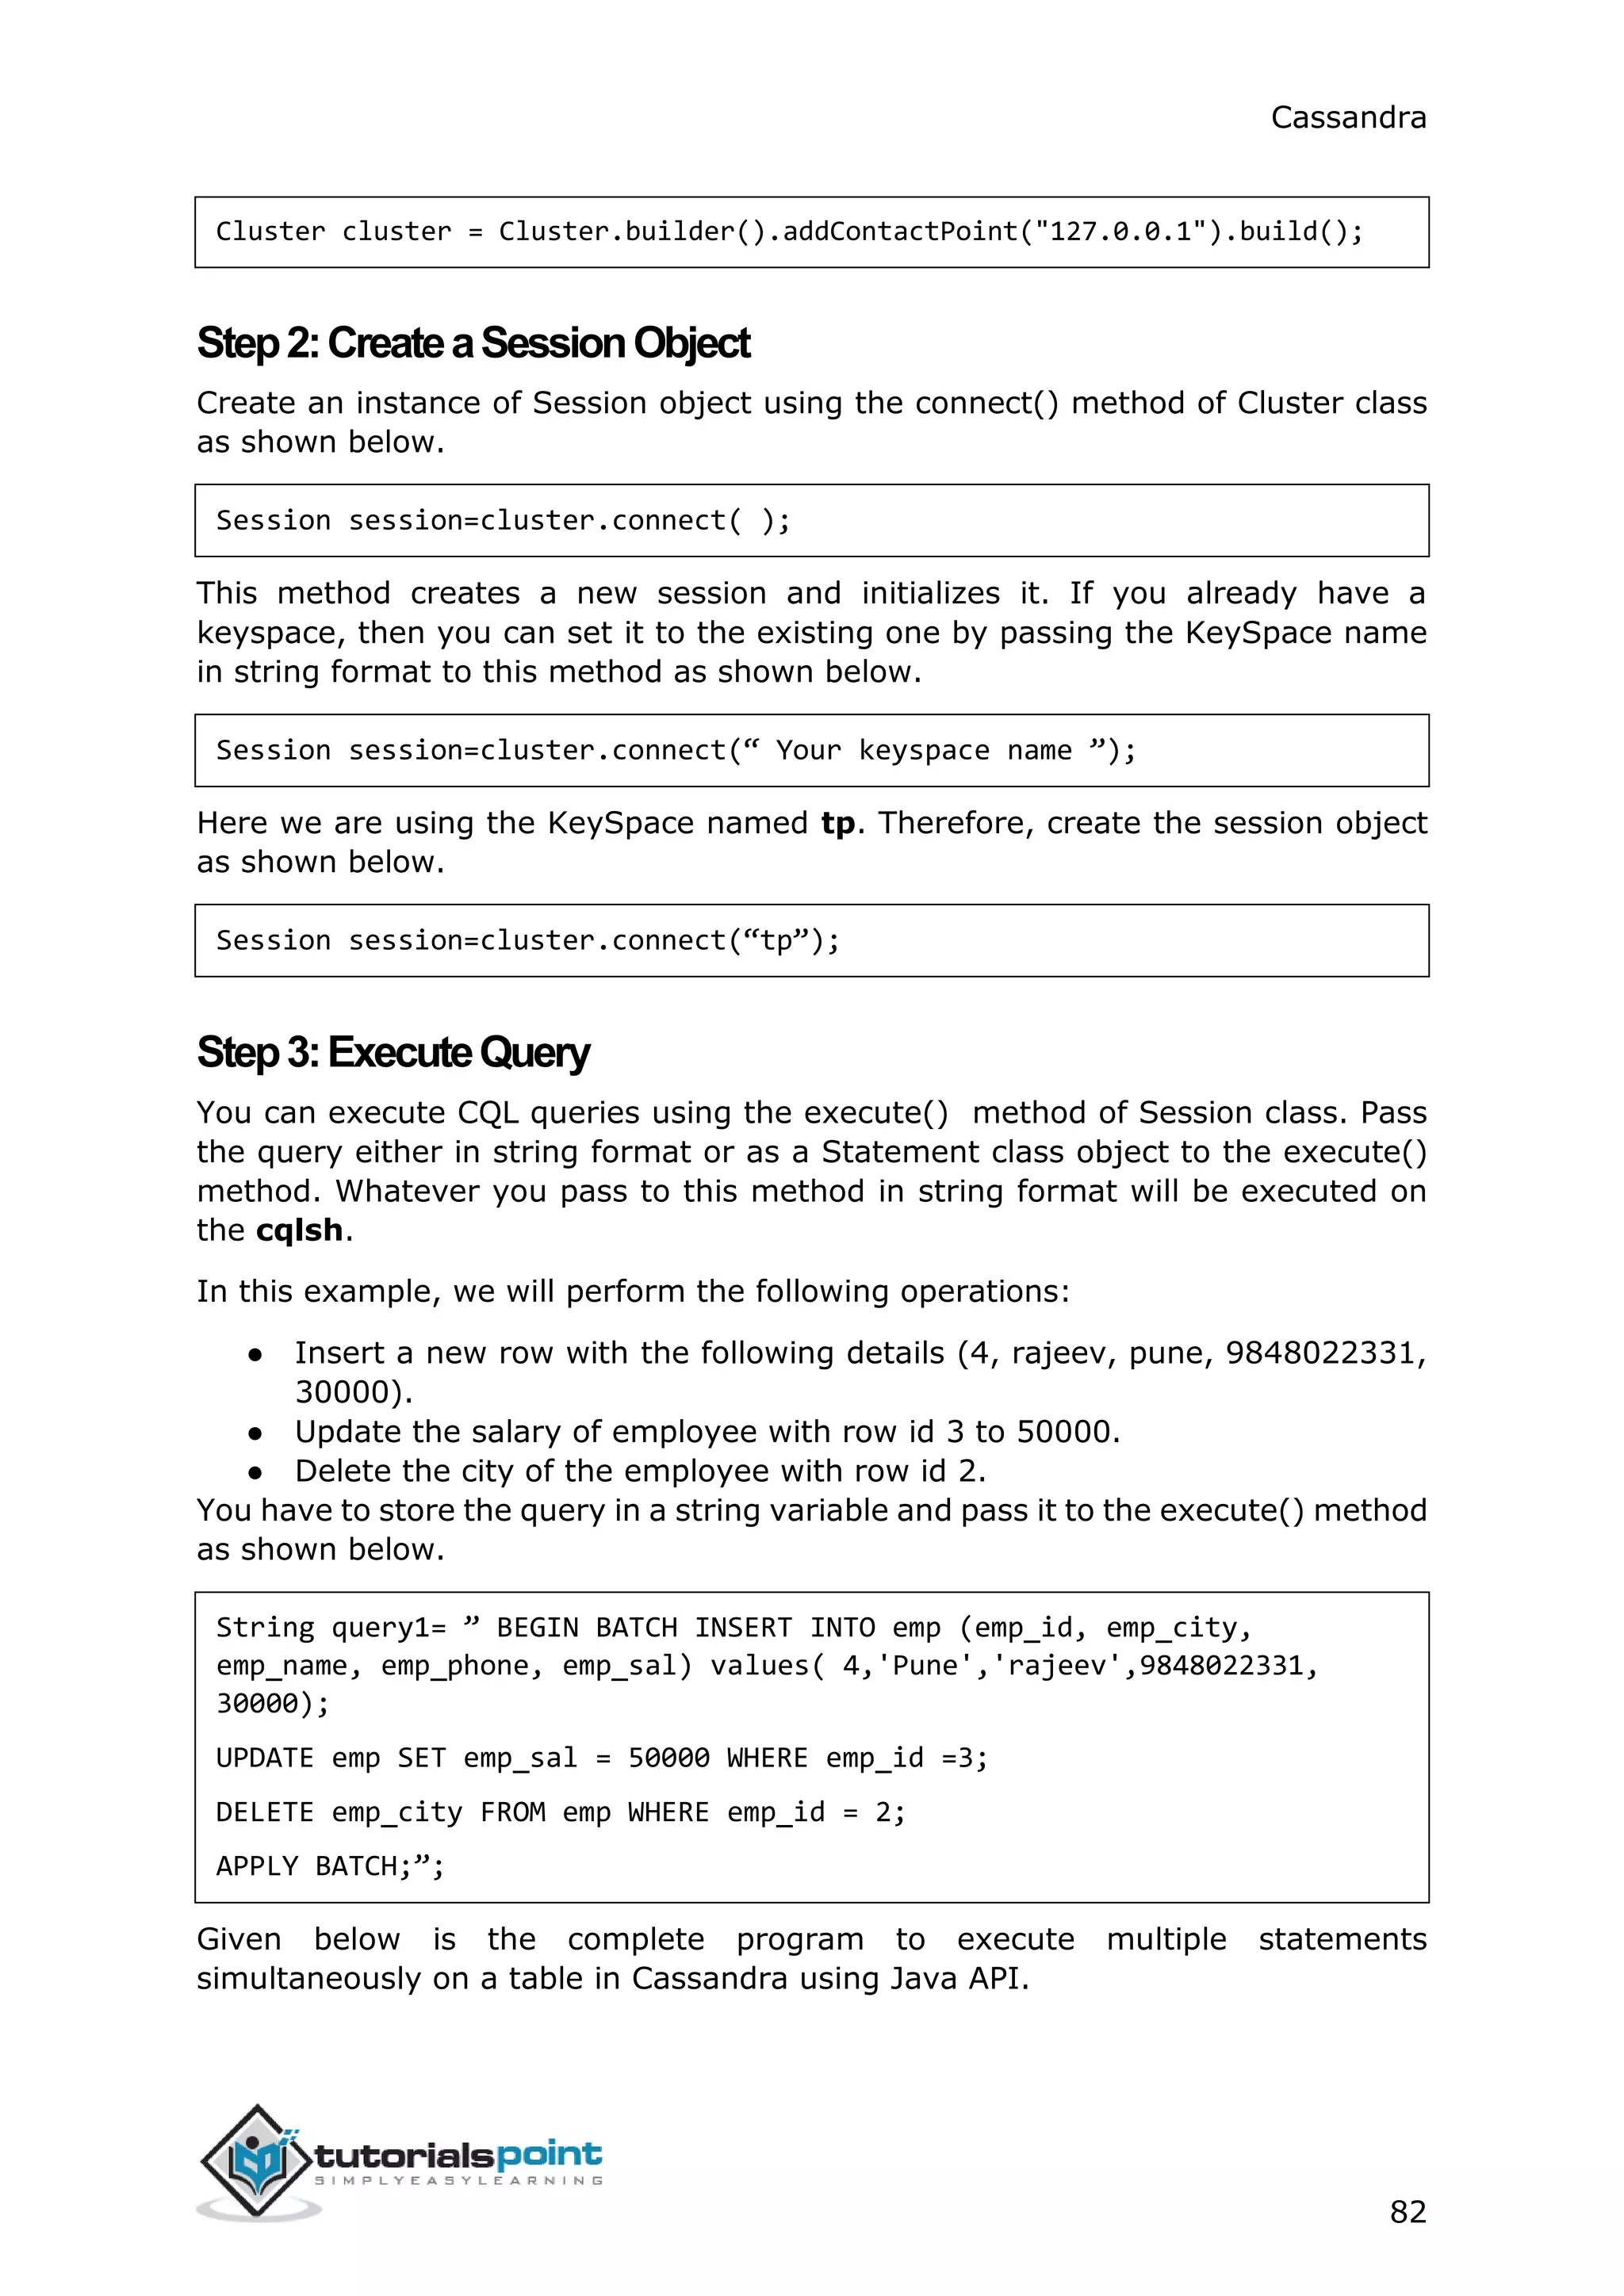
Step2:CreateaSessionObject
Create an instance of Session object using the connect() method of Cluster class
as shown below.
Session session = cluster.connect( );
This method creates a new session and initializes it. If you already have a
keyspace, then you can set it to the existing one by passing the KeySpace name
in string format to this method as shown below.
Session session=cluster.connect(“ Your keyspace name”);
Here we are using the KeySpace named tp. Therefore, create the session object
as shown below.
Session session=cluster.connect(“tp”);
Step3:ExecuteQuery
You can execute CQL queries using the execute() method of Session class. Pass
the query either in string format or as a Statement class object to the execute()
method. Whatever you pass to this method in string format will be executed on
the cqlsh.
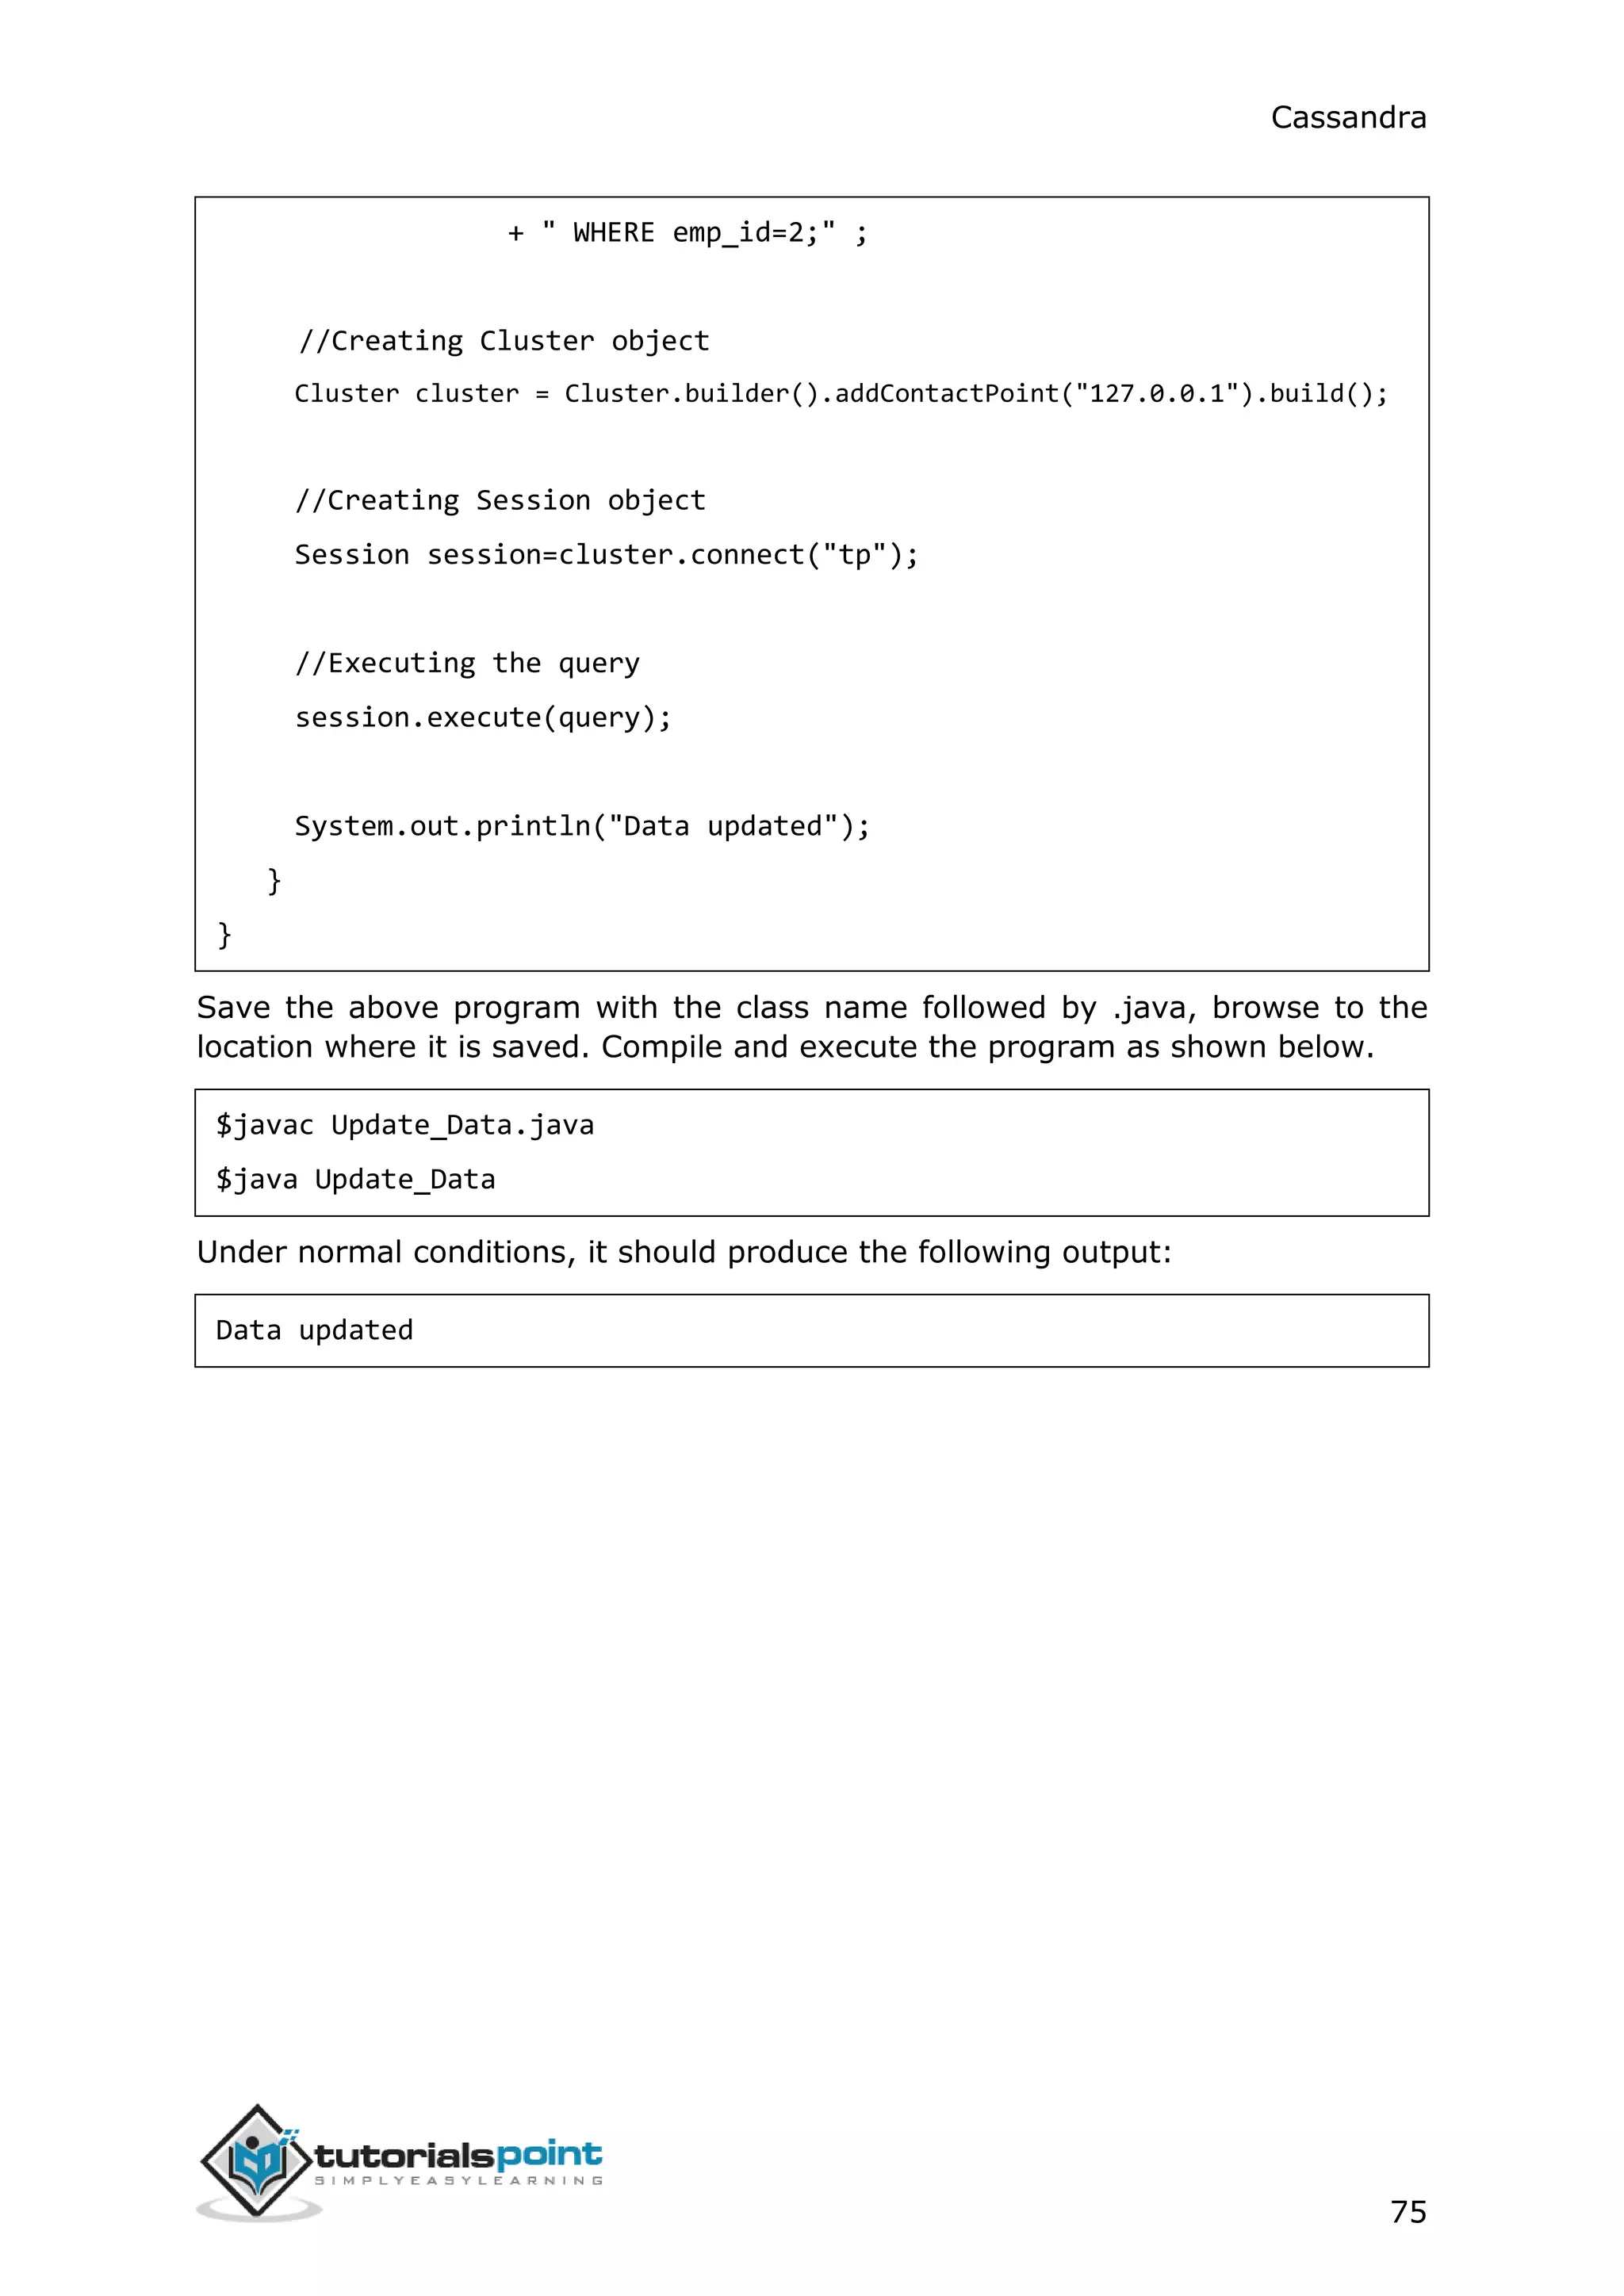
In the following example, we are updating the emp table. You have to store the
query in a string variable and pass it to the execute() method as shown below.
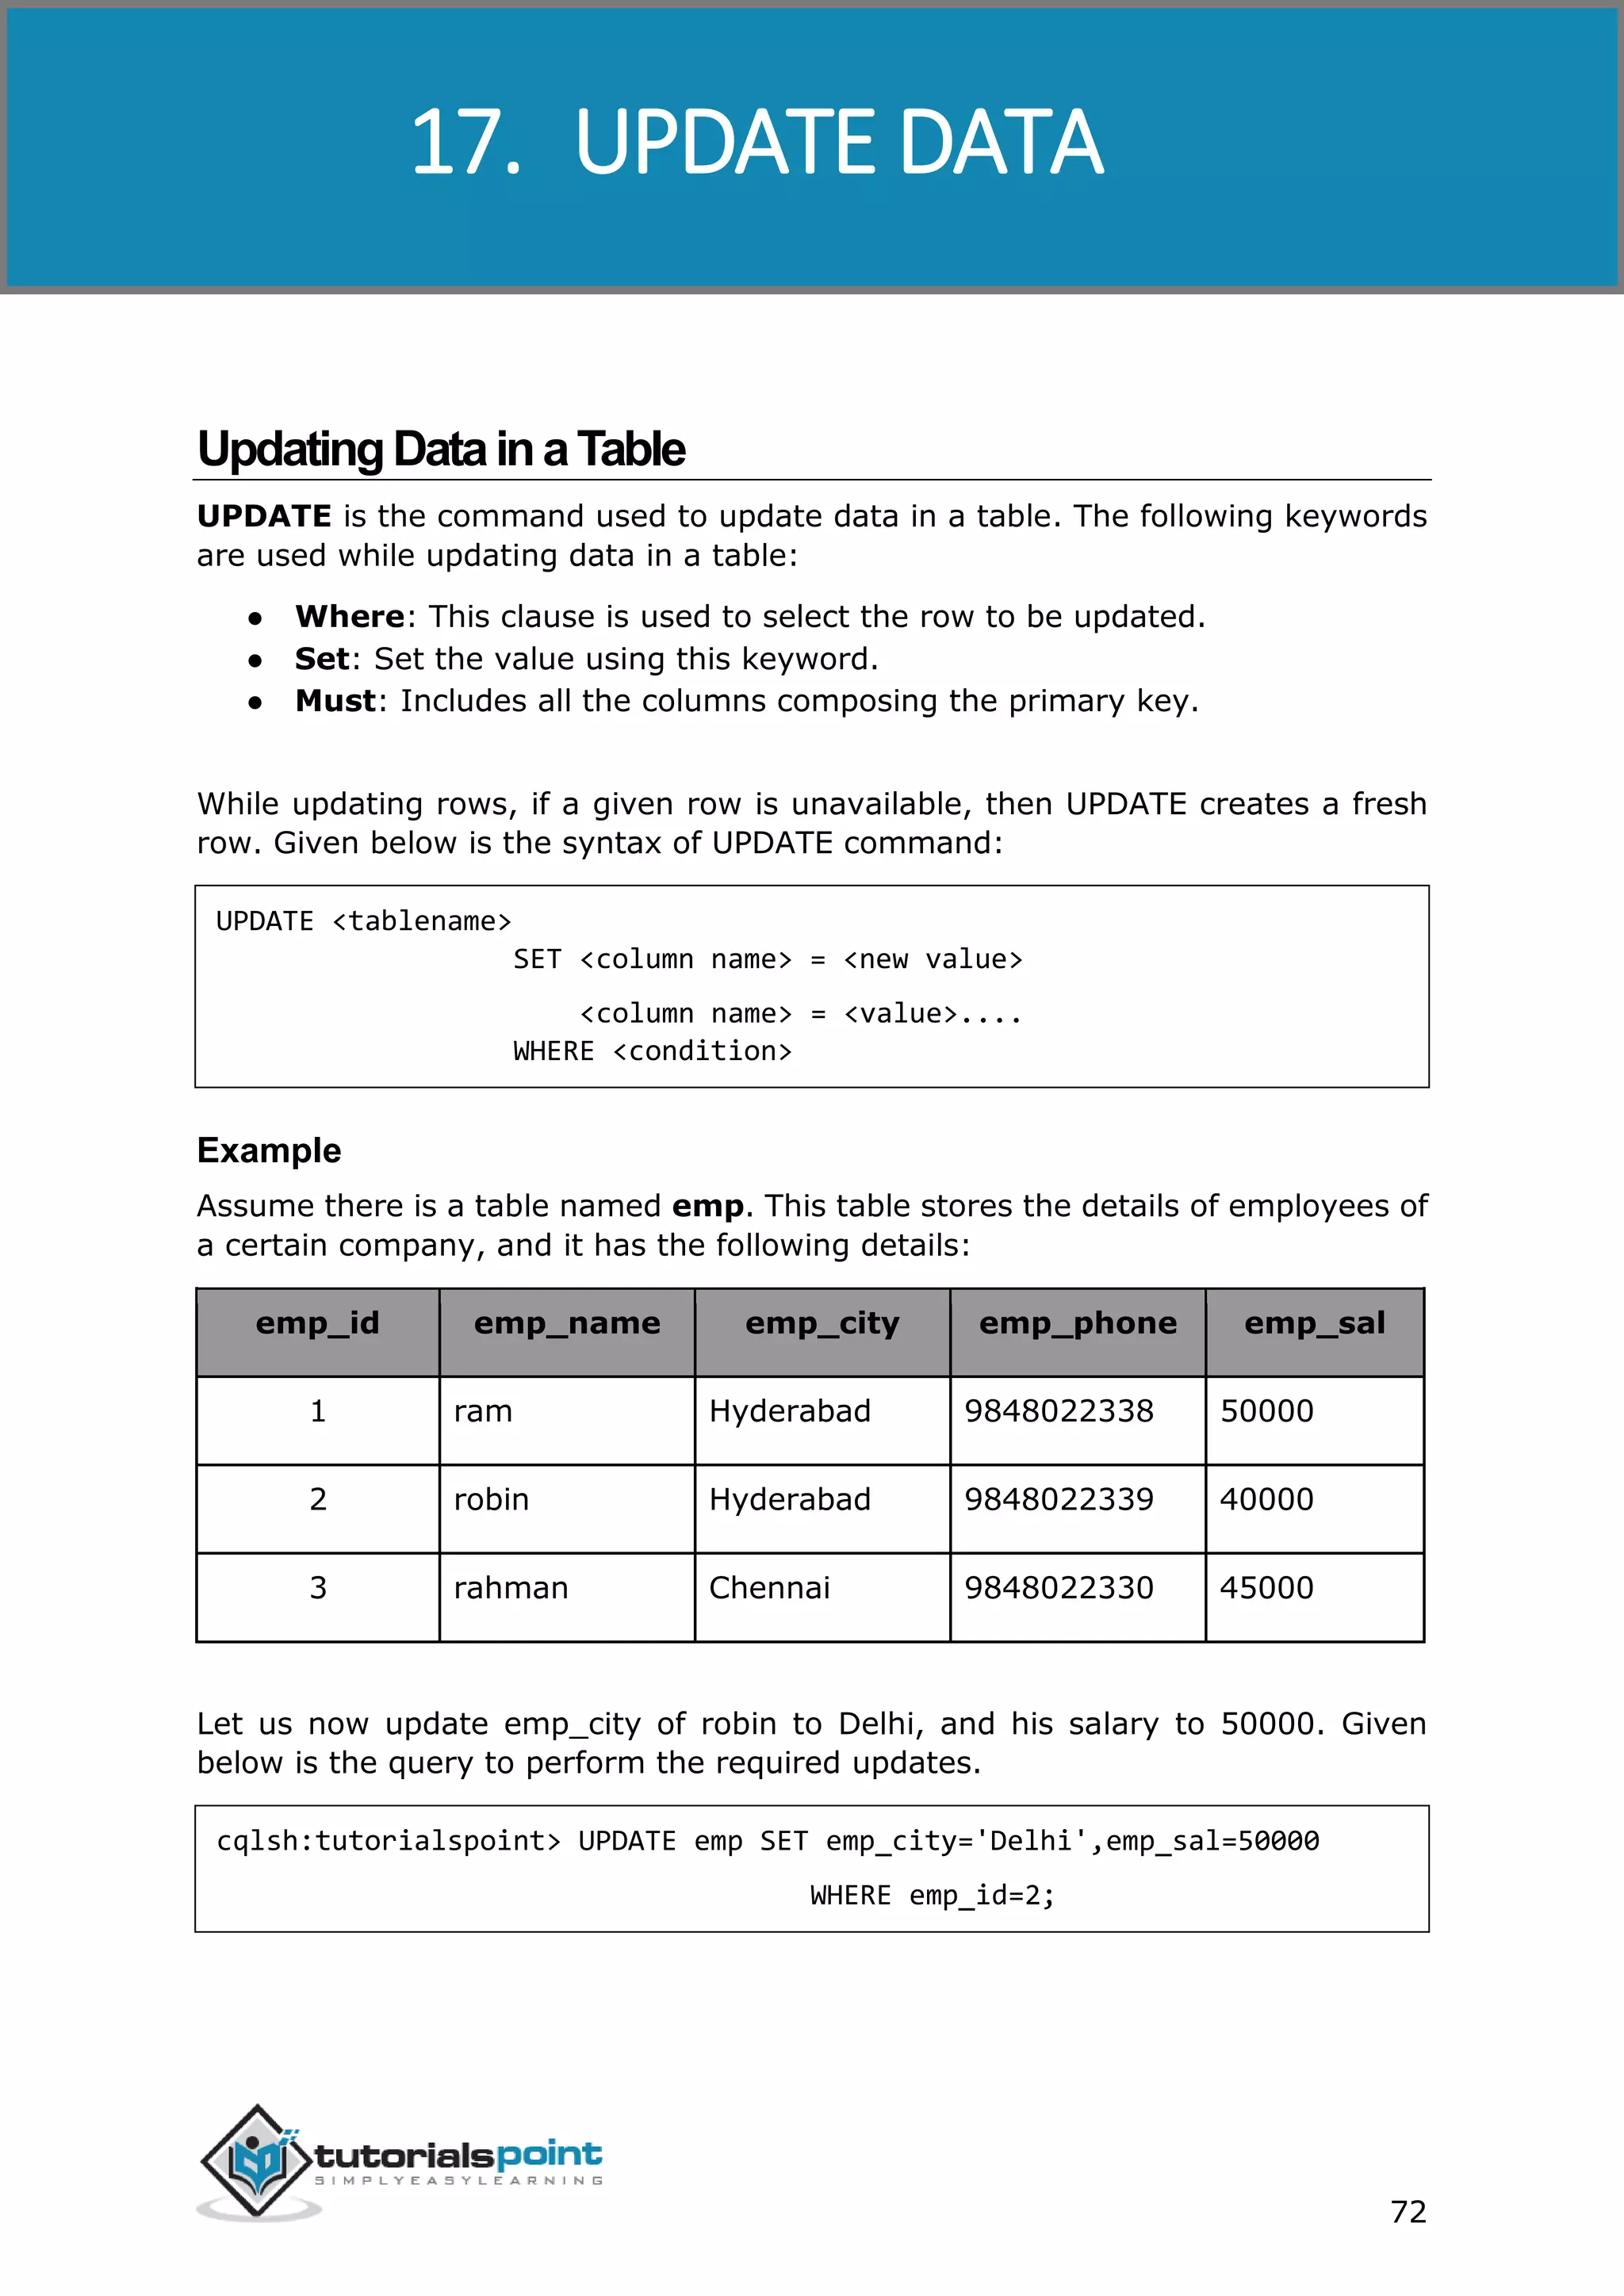
String query = “ UPDATE emp SET emp_city='Delhi',emp_sal=50000
WHERE emp_id=2;” ;
Given below is the complete program to update data in a table using Java API.
import com.datastax.driver.core.Cluster;
import com.datastax.driver.core.Session;
public class Update_Data {
public static void main(String args[]){
//query
String query = " UPDATE emp SET emp_city='Delhi',emp_sal=50000"](https://image.slidesharecdn.com/cassandratutorial-180620080720/75/Cassandra-tutorial-81-2048.jpg)

![Cassandra
79
import com.datastax.driver.core.Cluster;
import com.datastax.driver.core.Session;
public class Delete_Data {
public static void main(String args[]){
//query
String query = "DELETE FROM emp WHERE emp_id=3;";
//Creating Cluster object
Cluster cluster = Cluster.builder().addContactPoint("127.0.0.1").build();
//Creating Session object
Session session=cluster.connect("tp");
//Executing the query
session.execute(query);
System.out.println("Data deleted");
}
}
Save the above program with the class name followed by .java, browse to the
location where it is saved. Compile and execute the program as shown below.
$javac Delete_Data.java
$java Delete_Data
Under normal conditions, it should produce the following output:
Data deleted](https://image.slidesharecdn.com/cassandratutorial-180620080720/75/Cassandra-tutorial-86-2048.jpg)
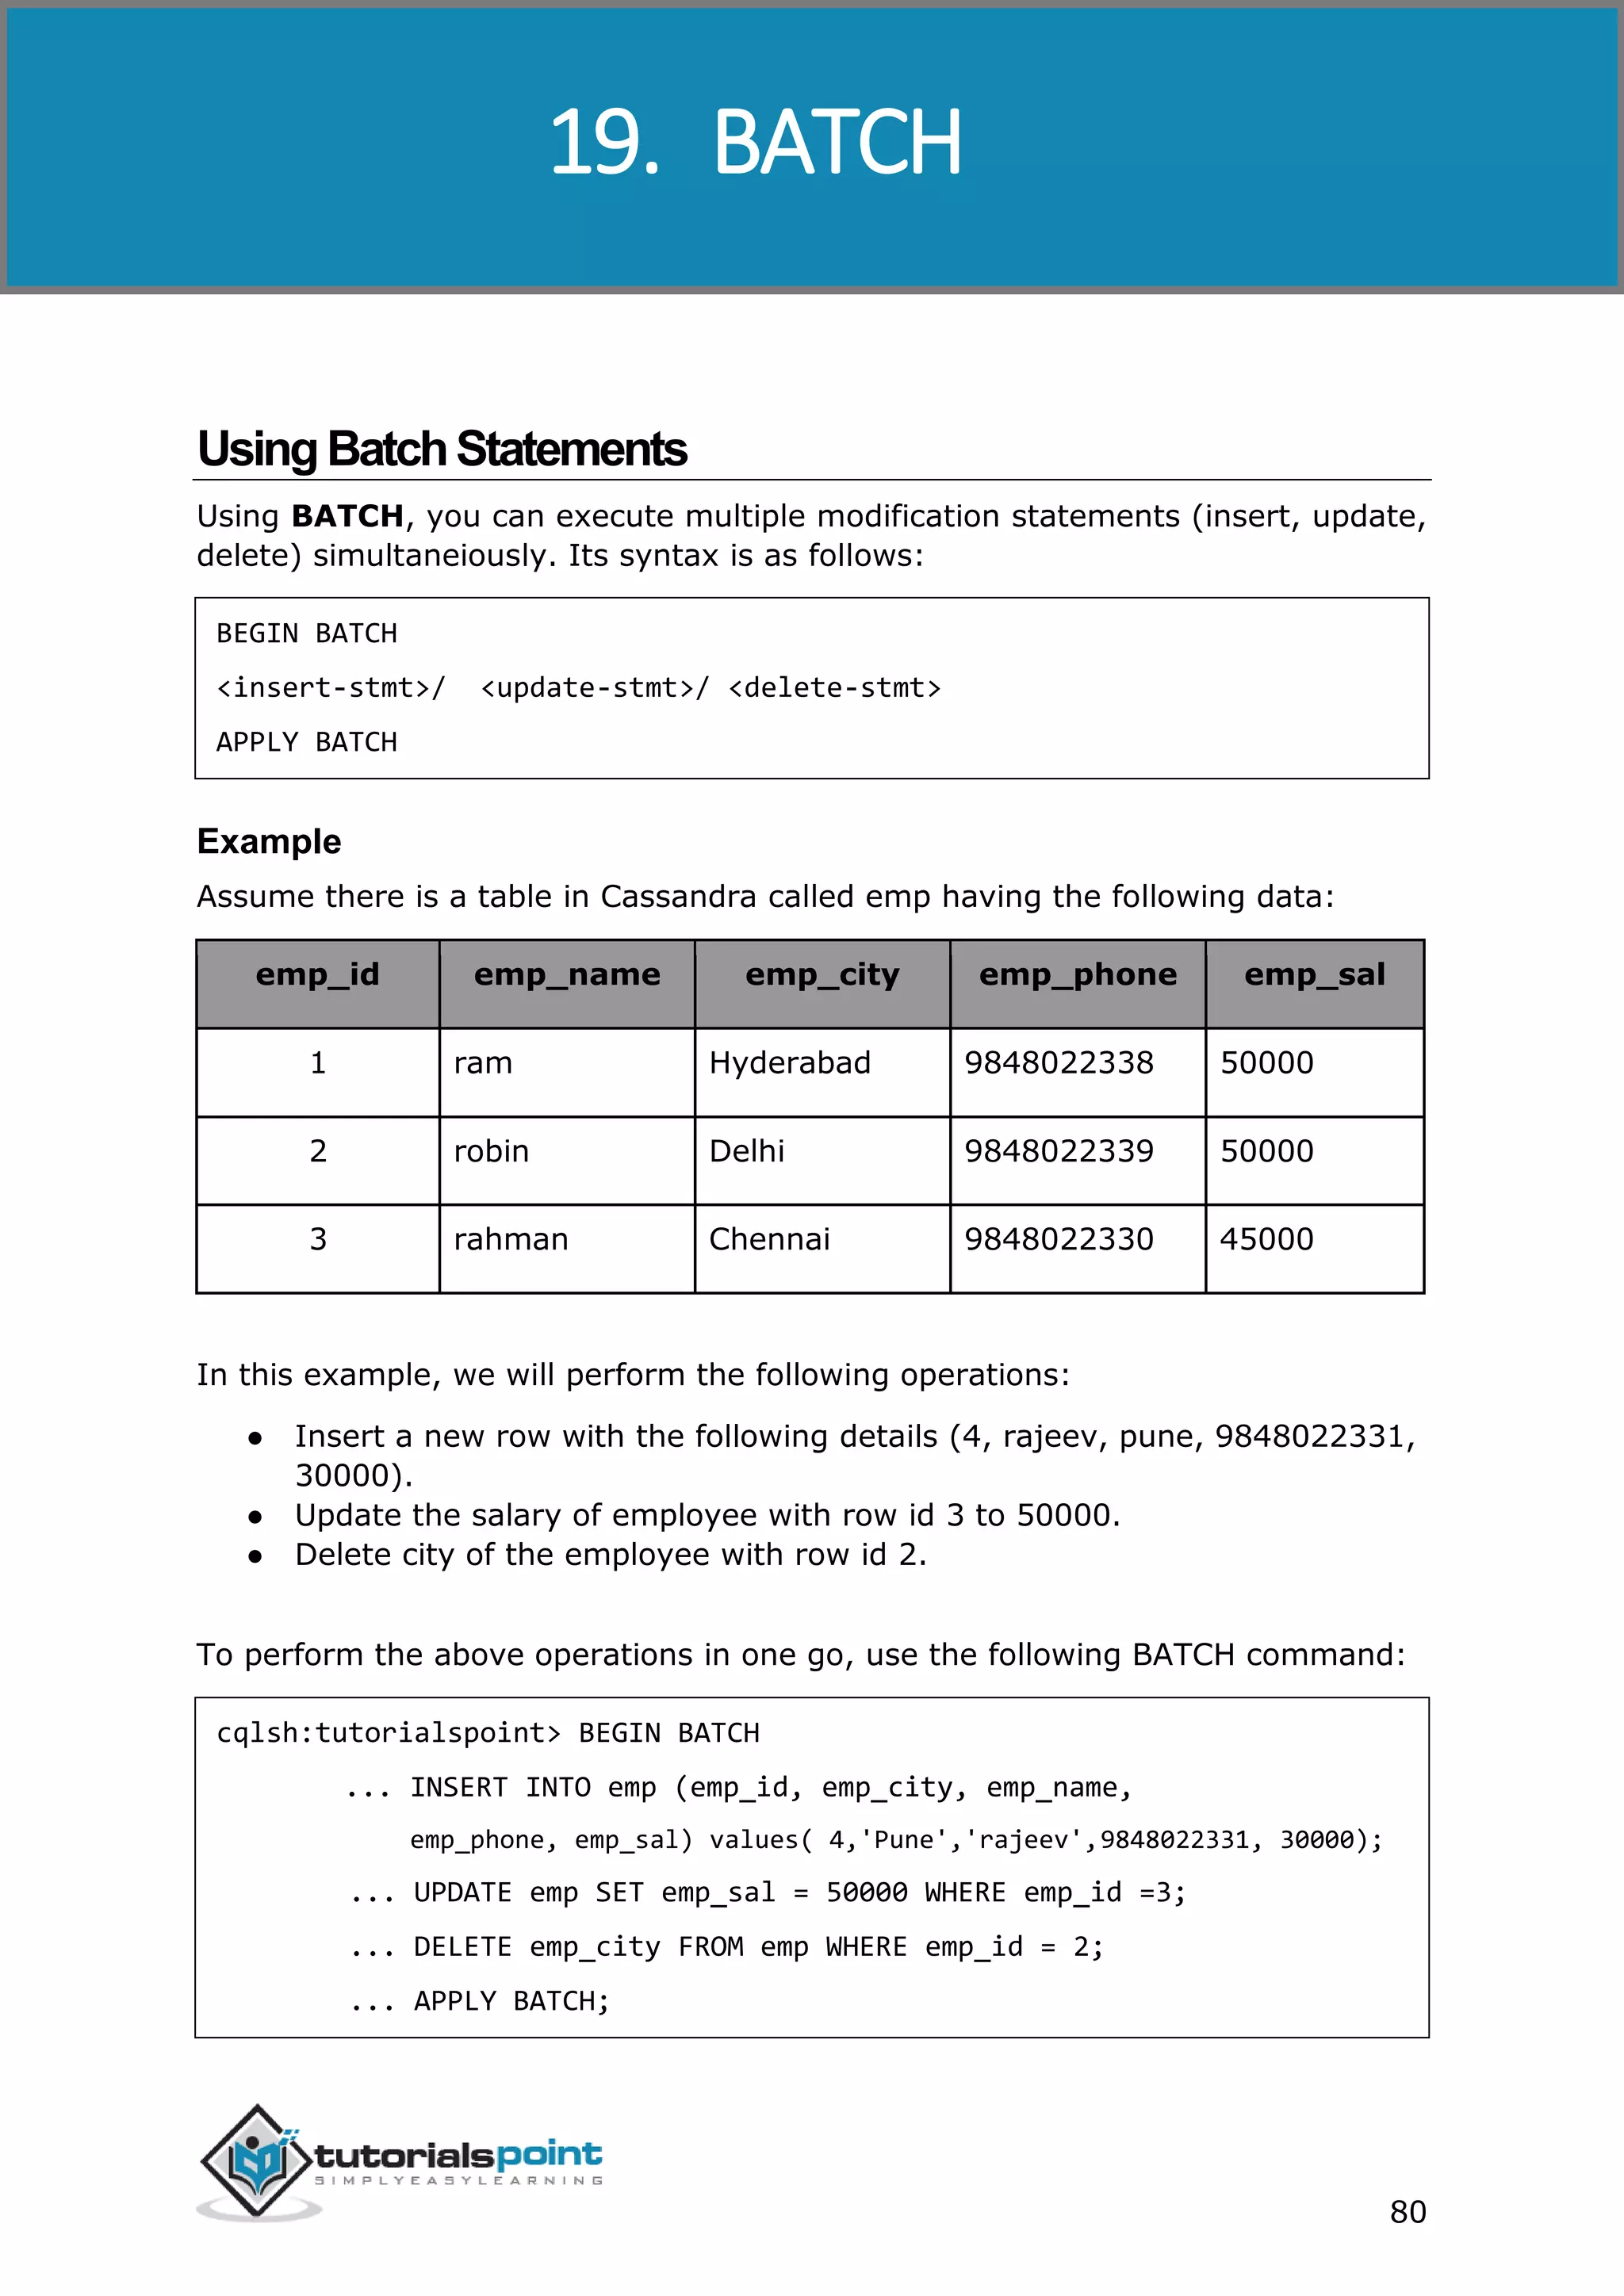
![Cassandra
83
import com.datastax.driver.core.Cluster;
import com.datastax.driver.core.Session;
public class Batch {
public static void main(String args[]){
//query
String query=" BEGIN BATCH INSERT INTO emp (emp_id, emp_city,
emp_name, emp_phone, emp_sal) values( 4,'Pune','rajeev',9848022331,
30000);"
+ "UPDATE emp SET emp_sal = 50000 WHERE emp_id =3;"
+ "DELETE emp_city FROM emp WHERE emp_id = 2;"
+ "APPLY BATCH;";
//Creating Cluster object
Cluster cluster = Cluster.builder().addContactPoint("127.0.0.1").build();
//Creating Session object
Session session=cluster.connect("tp");
//Executing the query
session.execute(query);
System.out.println("Changes done");
}
}
Save the above program with the class name followed by .java, browse to the
location where it is saved. Compile and execute the program as shown below.
$javac Batch.java
$java Batch
Under normal conditions, it should produce the following output:
Changes done](https://image.slidesharecdn.com/cassandratutorial-180620080720/75/Cassandra-tutorial-90-2048.jpg)

![Cassandra
87
Session session=cluster.connect(“tp”);
Step3:ExecuteQuery
You can execute CQL queries using execute() method of Session class. Pass the
query either in string format or as a Statement class object to the execute()
method. Whatever you pass to this method in string format will be executed on
the cqlsh.
In this example, we are retrieving the data from emp table. Store the query in a
string and pass it to the execute() method of session class as shown below.
String query=”SELECT 8 FROM emp”;
session.execute(query);
Execute the query using the execute() method of Session class.
Step4:GettheResultSetObject
The select queries will return the result in the form of a ResultSet object,
therefore store the result in the object of RESULTSET class as shown below.
ResultSet result=session.execute( );
Given below is the complete program to read data from a table.
import com.datastax.driver.core.Cluster;
import com.datastax.driver.core.ResultSet;
import com.datastax.driver.core.Session;
public class Read_Data {
public static void main(String args[])throws Exception{
//queries
String query="SELECT * FROM emp";
//Creating Cluster object
Cluster cluster = Cluster.builder().addContactPoint("127.0.0.1").build();
//Creating Session object
Session session=cluster.connect("tutorialspoint");](https://image.slidesharecdn.com/cassandratutorial-180620080720/75/Cassandra-tutorial-94-2048.jpg)
![Cassandra
88
//Getting the ResultSet
ResultSet result=session.execute(query);
System.out.println(result.all());
}
}
Save the above program with the class name followed by .java, browse to the
location where it is saved. Compile and execute the program as shown below.
$javac Read_Data.java
$java Read_Data
Under normal conditions, it should produce the following output:
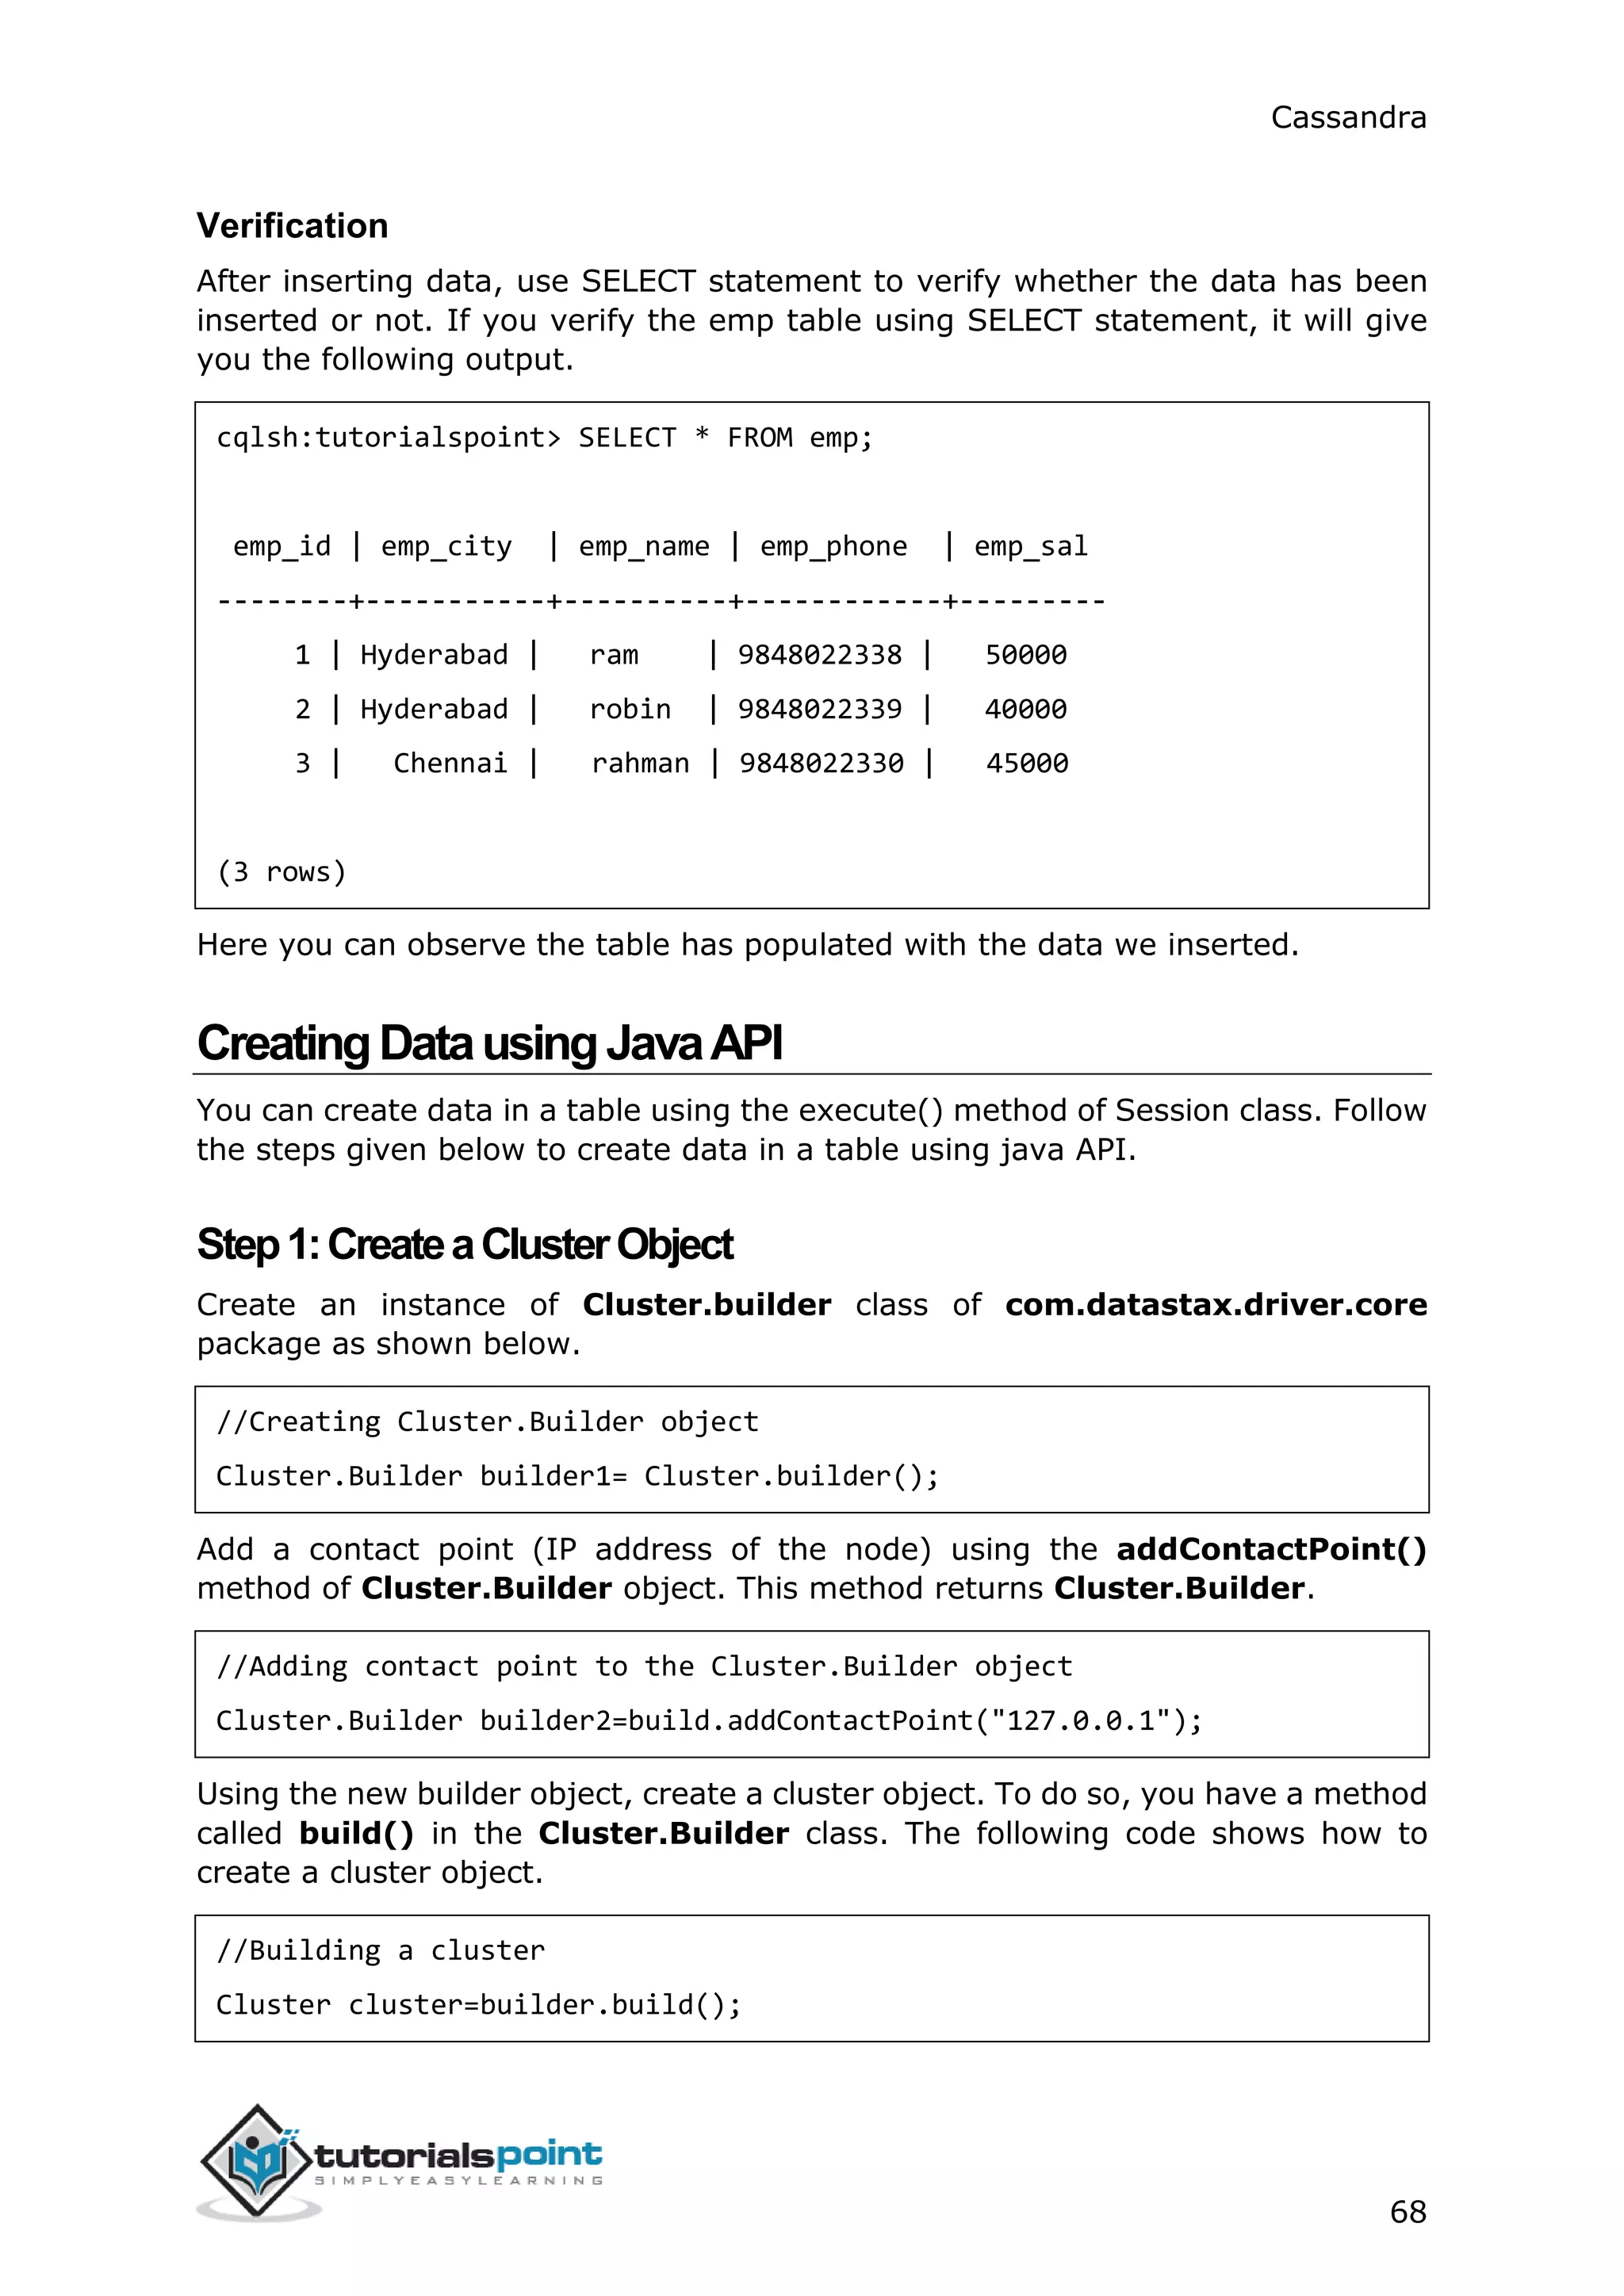
[Row[1, Hyderabad, ram, 9848022338, 50000], Row[2, Delhi, robin,
9848022339, 50000], Row[4, Pune, rajeev, 9848022331, 30000], Row[3,
Chennai, rahman, 9848022330, 50000]]](https://image.slidesharecdn.com/cassandratutorial-180620080720/75/Cassandra-tutorial-95-2048.jpg)
![Cassandra
91
CQL provides the facility of using Collection data types. Using these Collection
types, you can store multiple values in a single variable. This chapter explains how
to use Collections in Cassandra.
List
List is used in the cases where
● the order of the elements is to be maintained, and
● a value is to be stored multiple times.
You can get the values of a list data type using the index of the elements in the
list.
CreatingaTablewithList
Given below is an example to create a sample table with two columns, name and
email. To store multiple emails, we are using list.
cqlsh:tutorialspoint> CREATE TABLE data(name text PRIMARY KEY, email
list<text>);
InsertingDataintoaList
While inserting data into the elements in a list, enter all the values separated by
comma within square braces [ ] as shown below.
cqlsh:tutorialspoint> INSERT INTO data(name, email) VALUES ('ramu',
['abc@gmail.com','cba@yahoo.com']);
UpdatingaList
Given below is an example to update the list data type in a table called data. Here
we are adding another email to the list.
cqlsh:tutorialspoint> UPDATE data
... SET email = email +['xyz@tutorialspoint.com']
... where name = 'ramu';
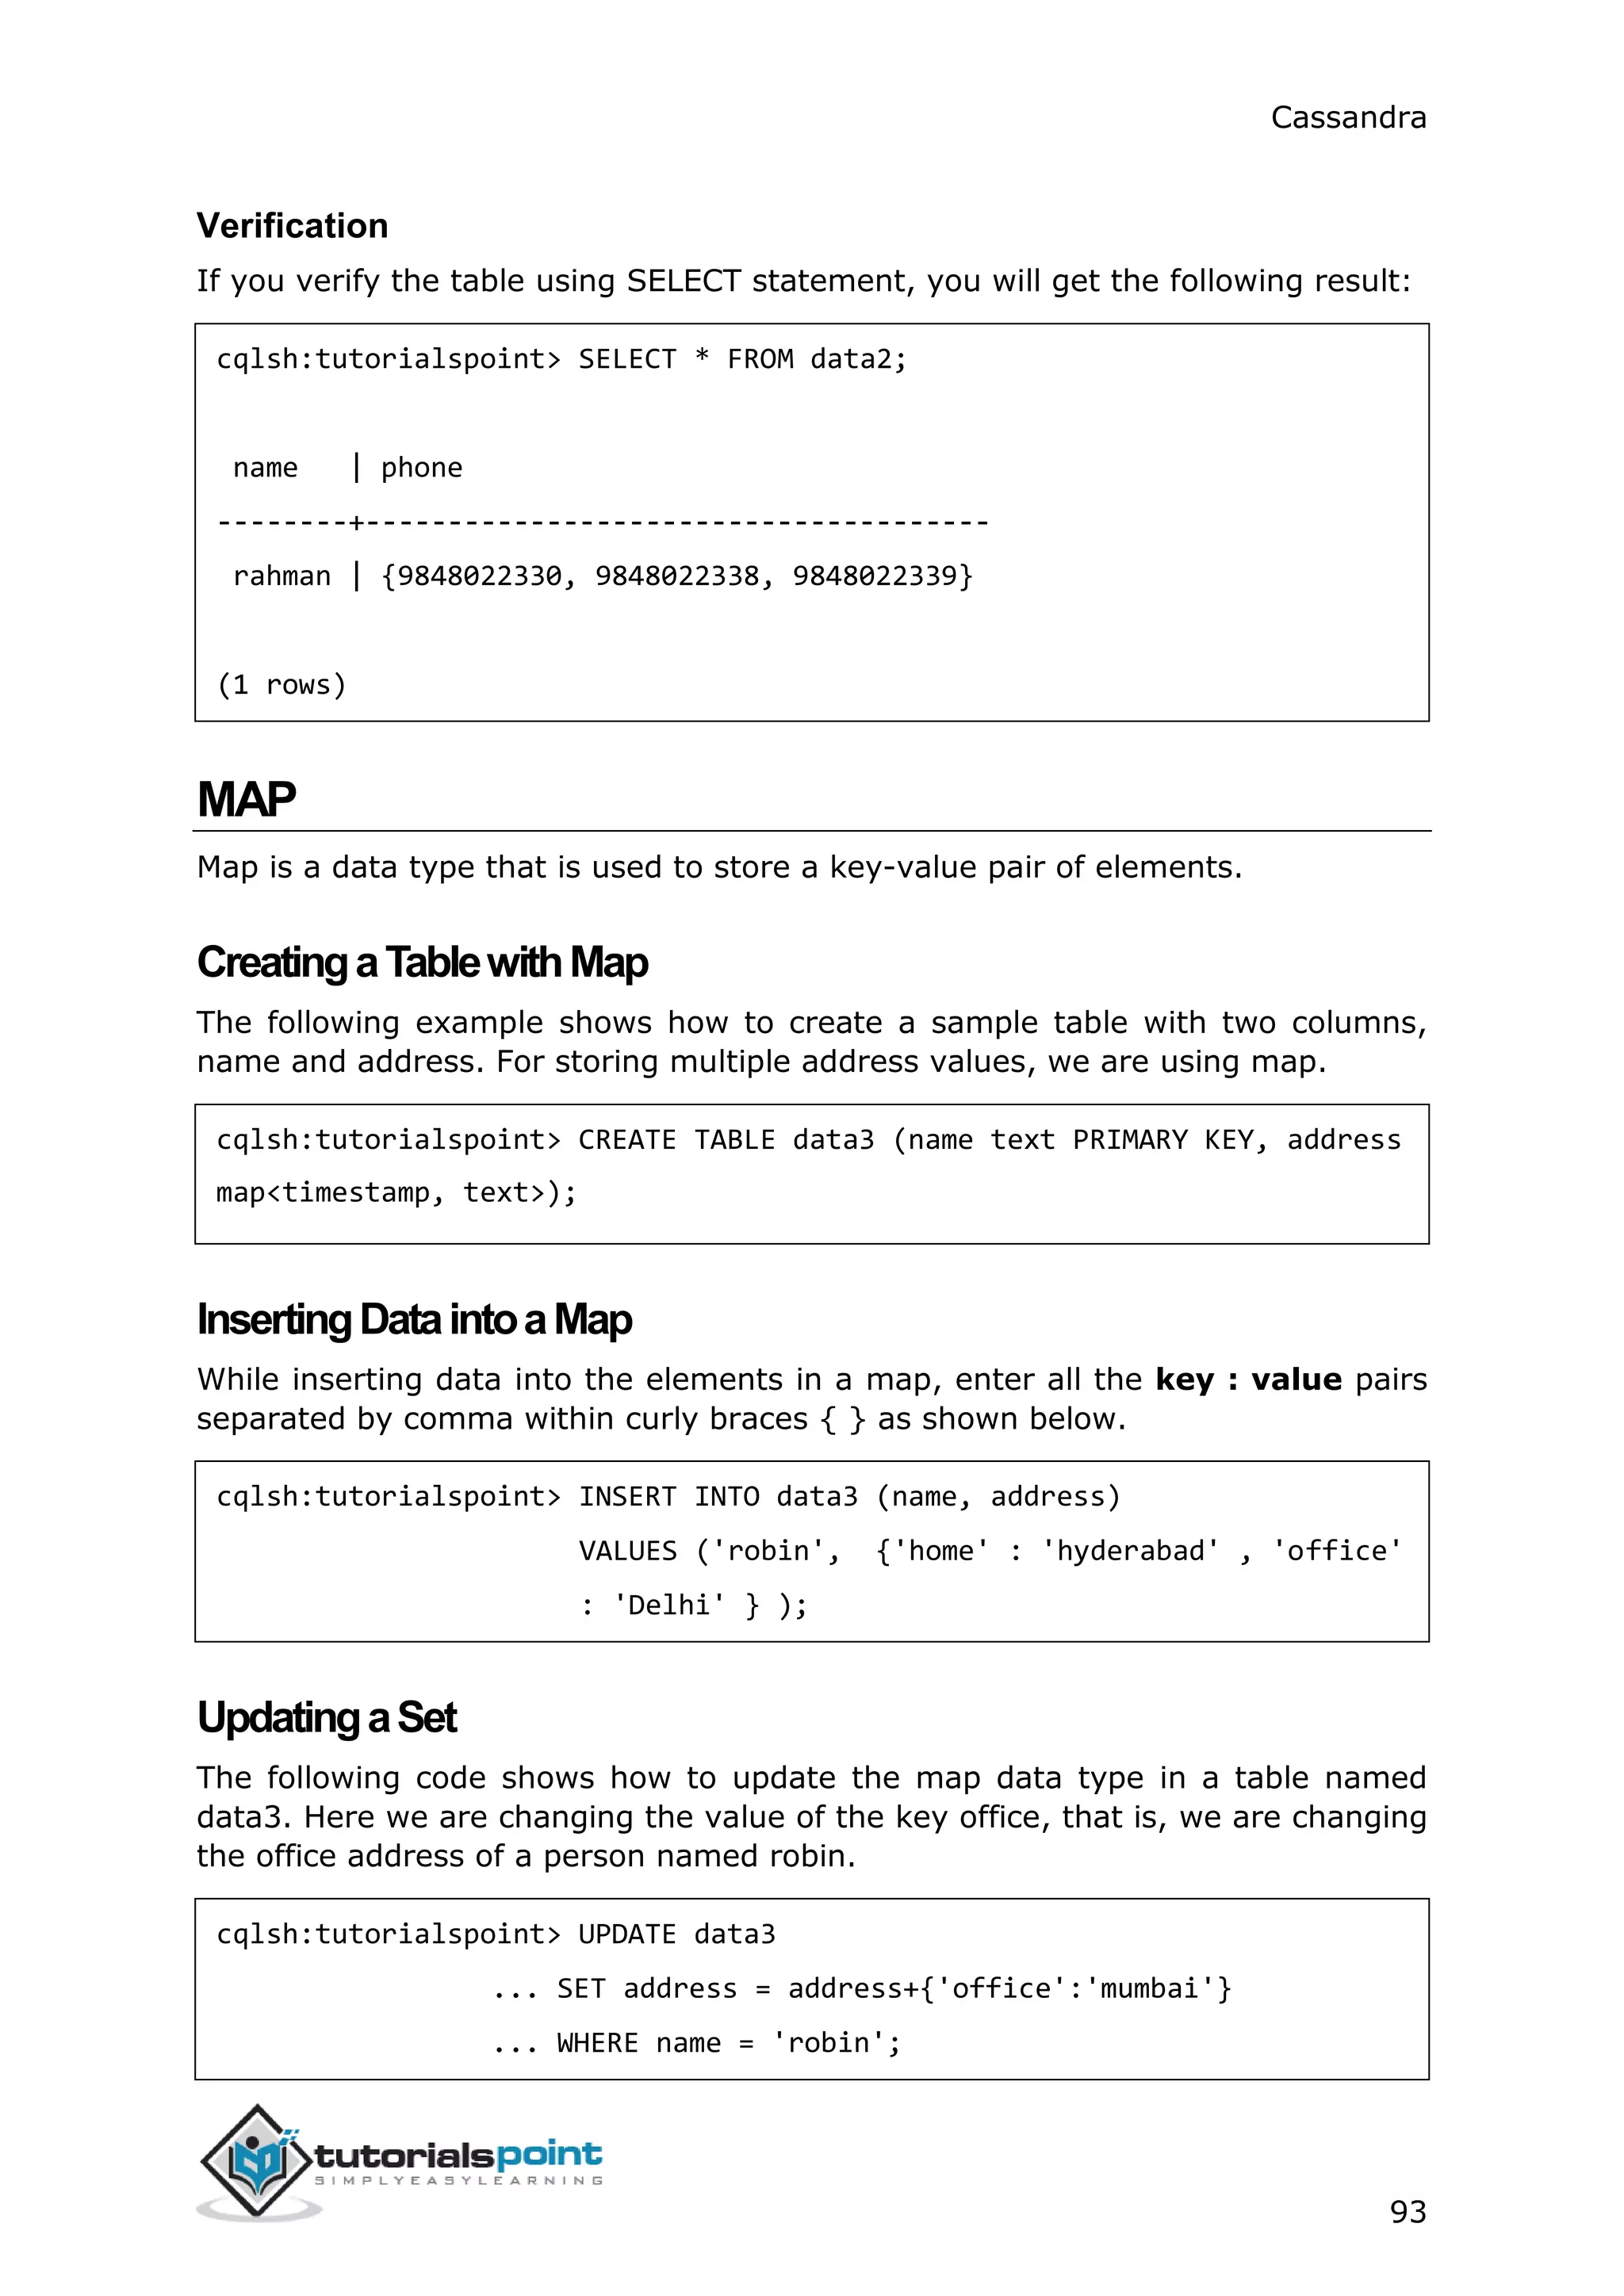
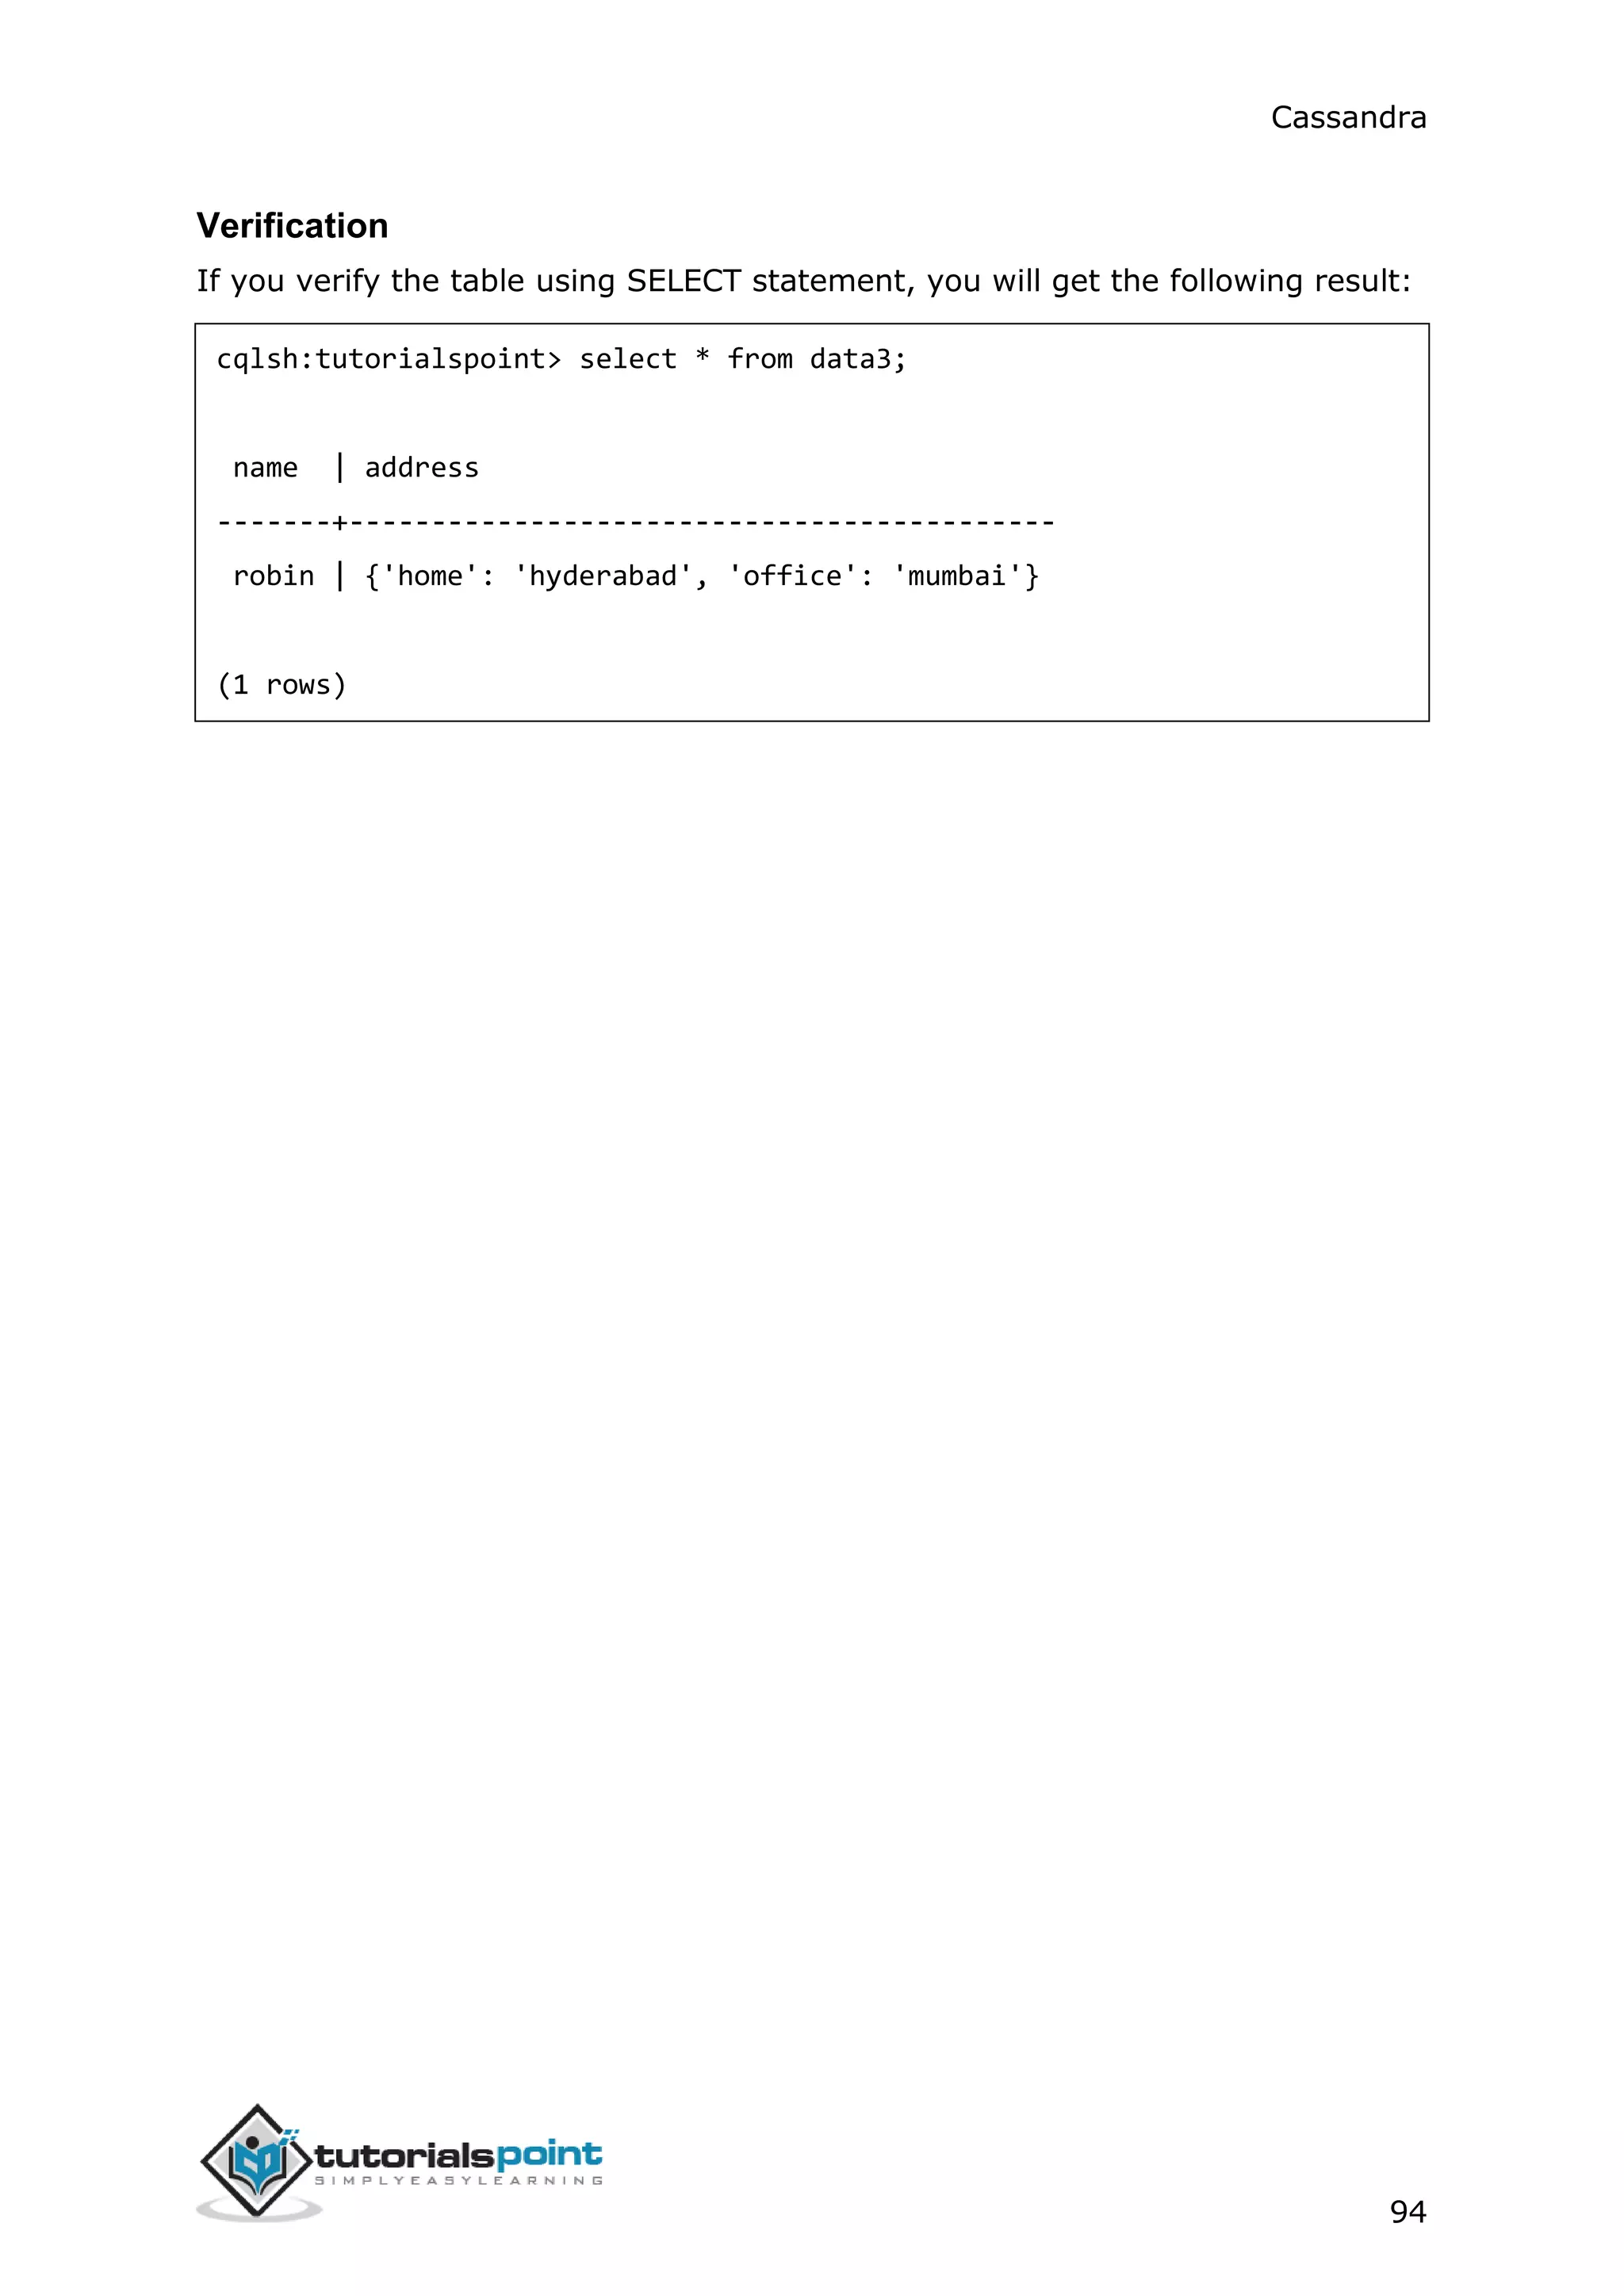
Verification
If you verify the table using SELECT statement, you will get the following result:
22. CQL COLLECTIONS](https://image.slidesharecdn.com/cassandratutorial-180620080720/75/Cassandra-tutorial-98-2048.jpg)
![Cassandra
92
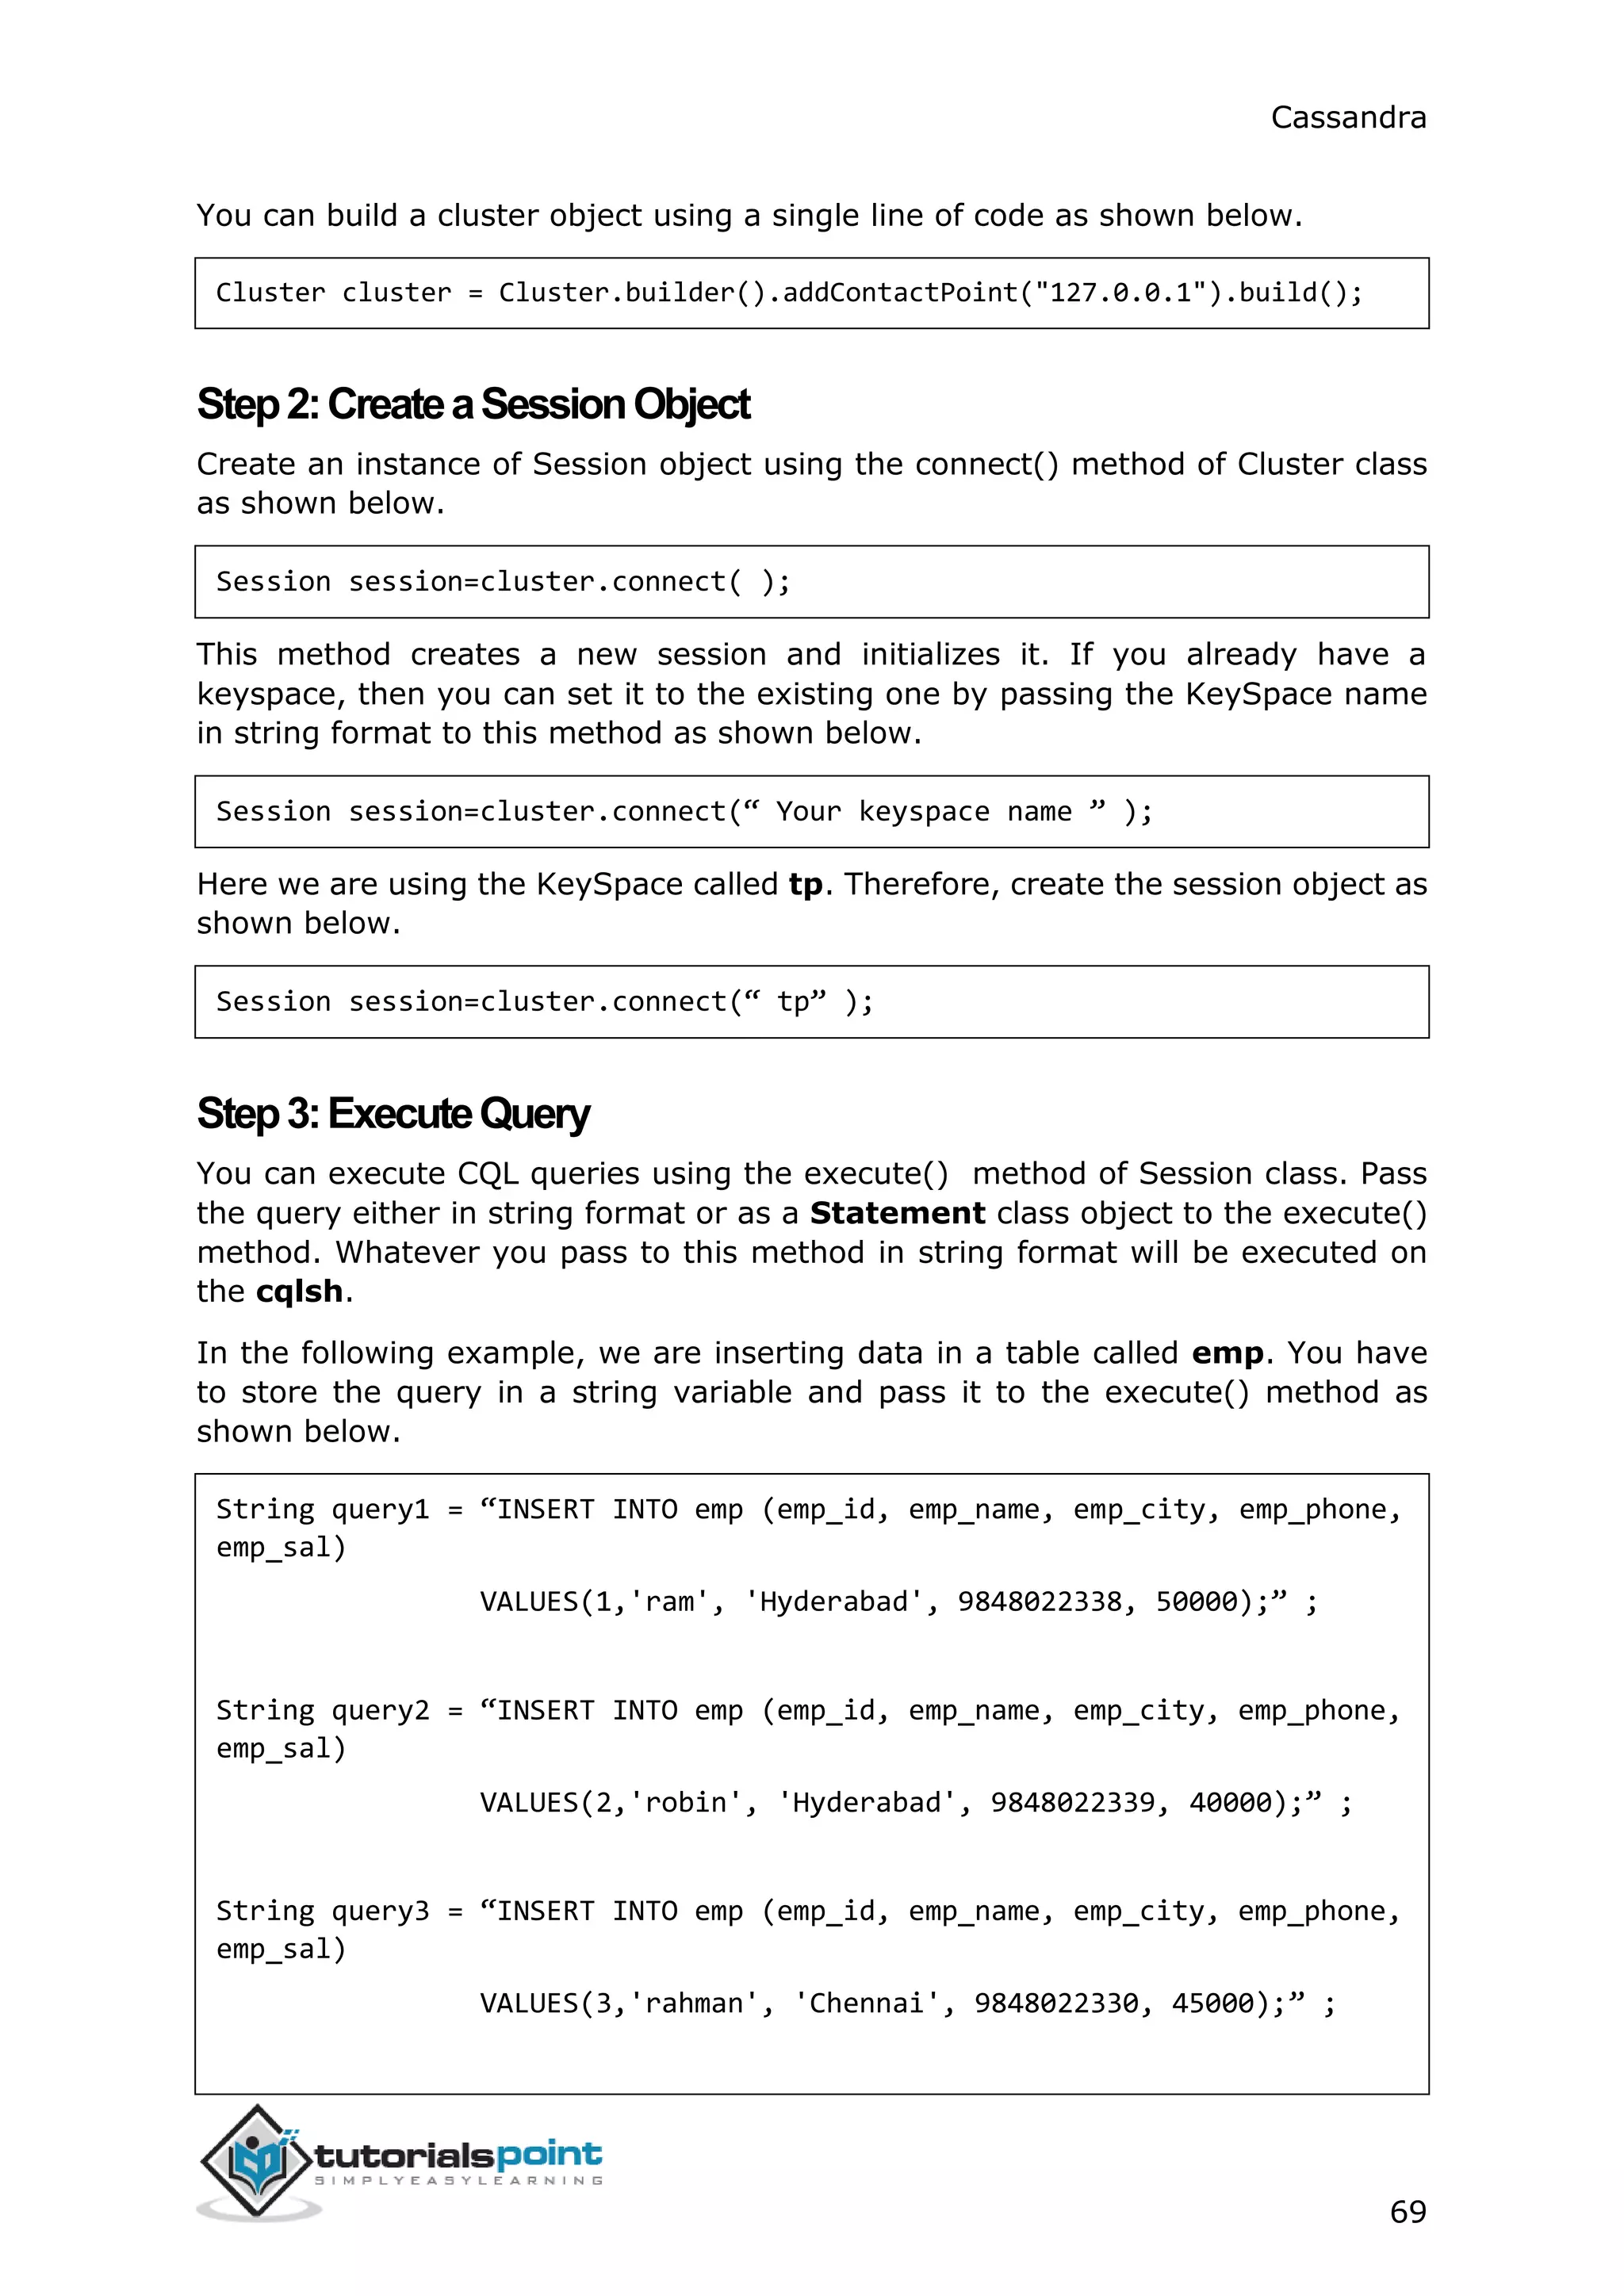
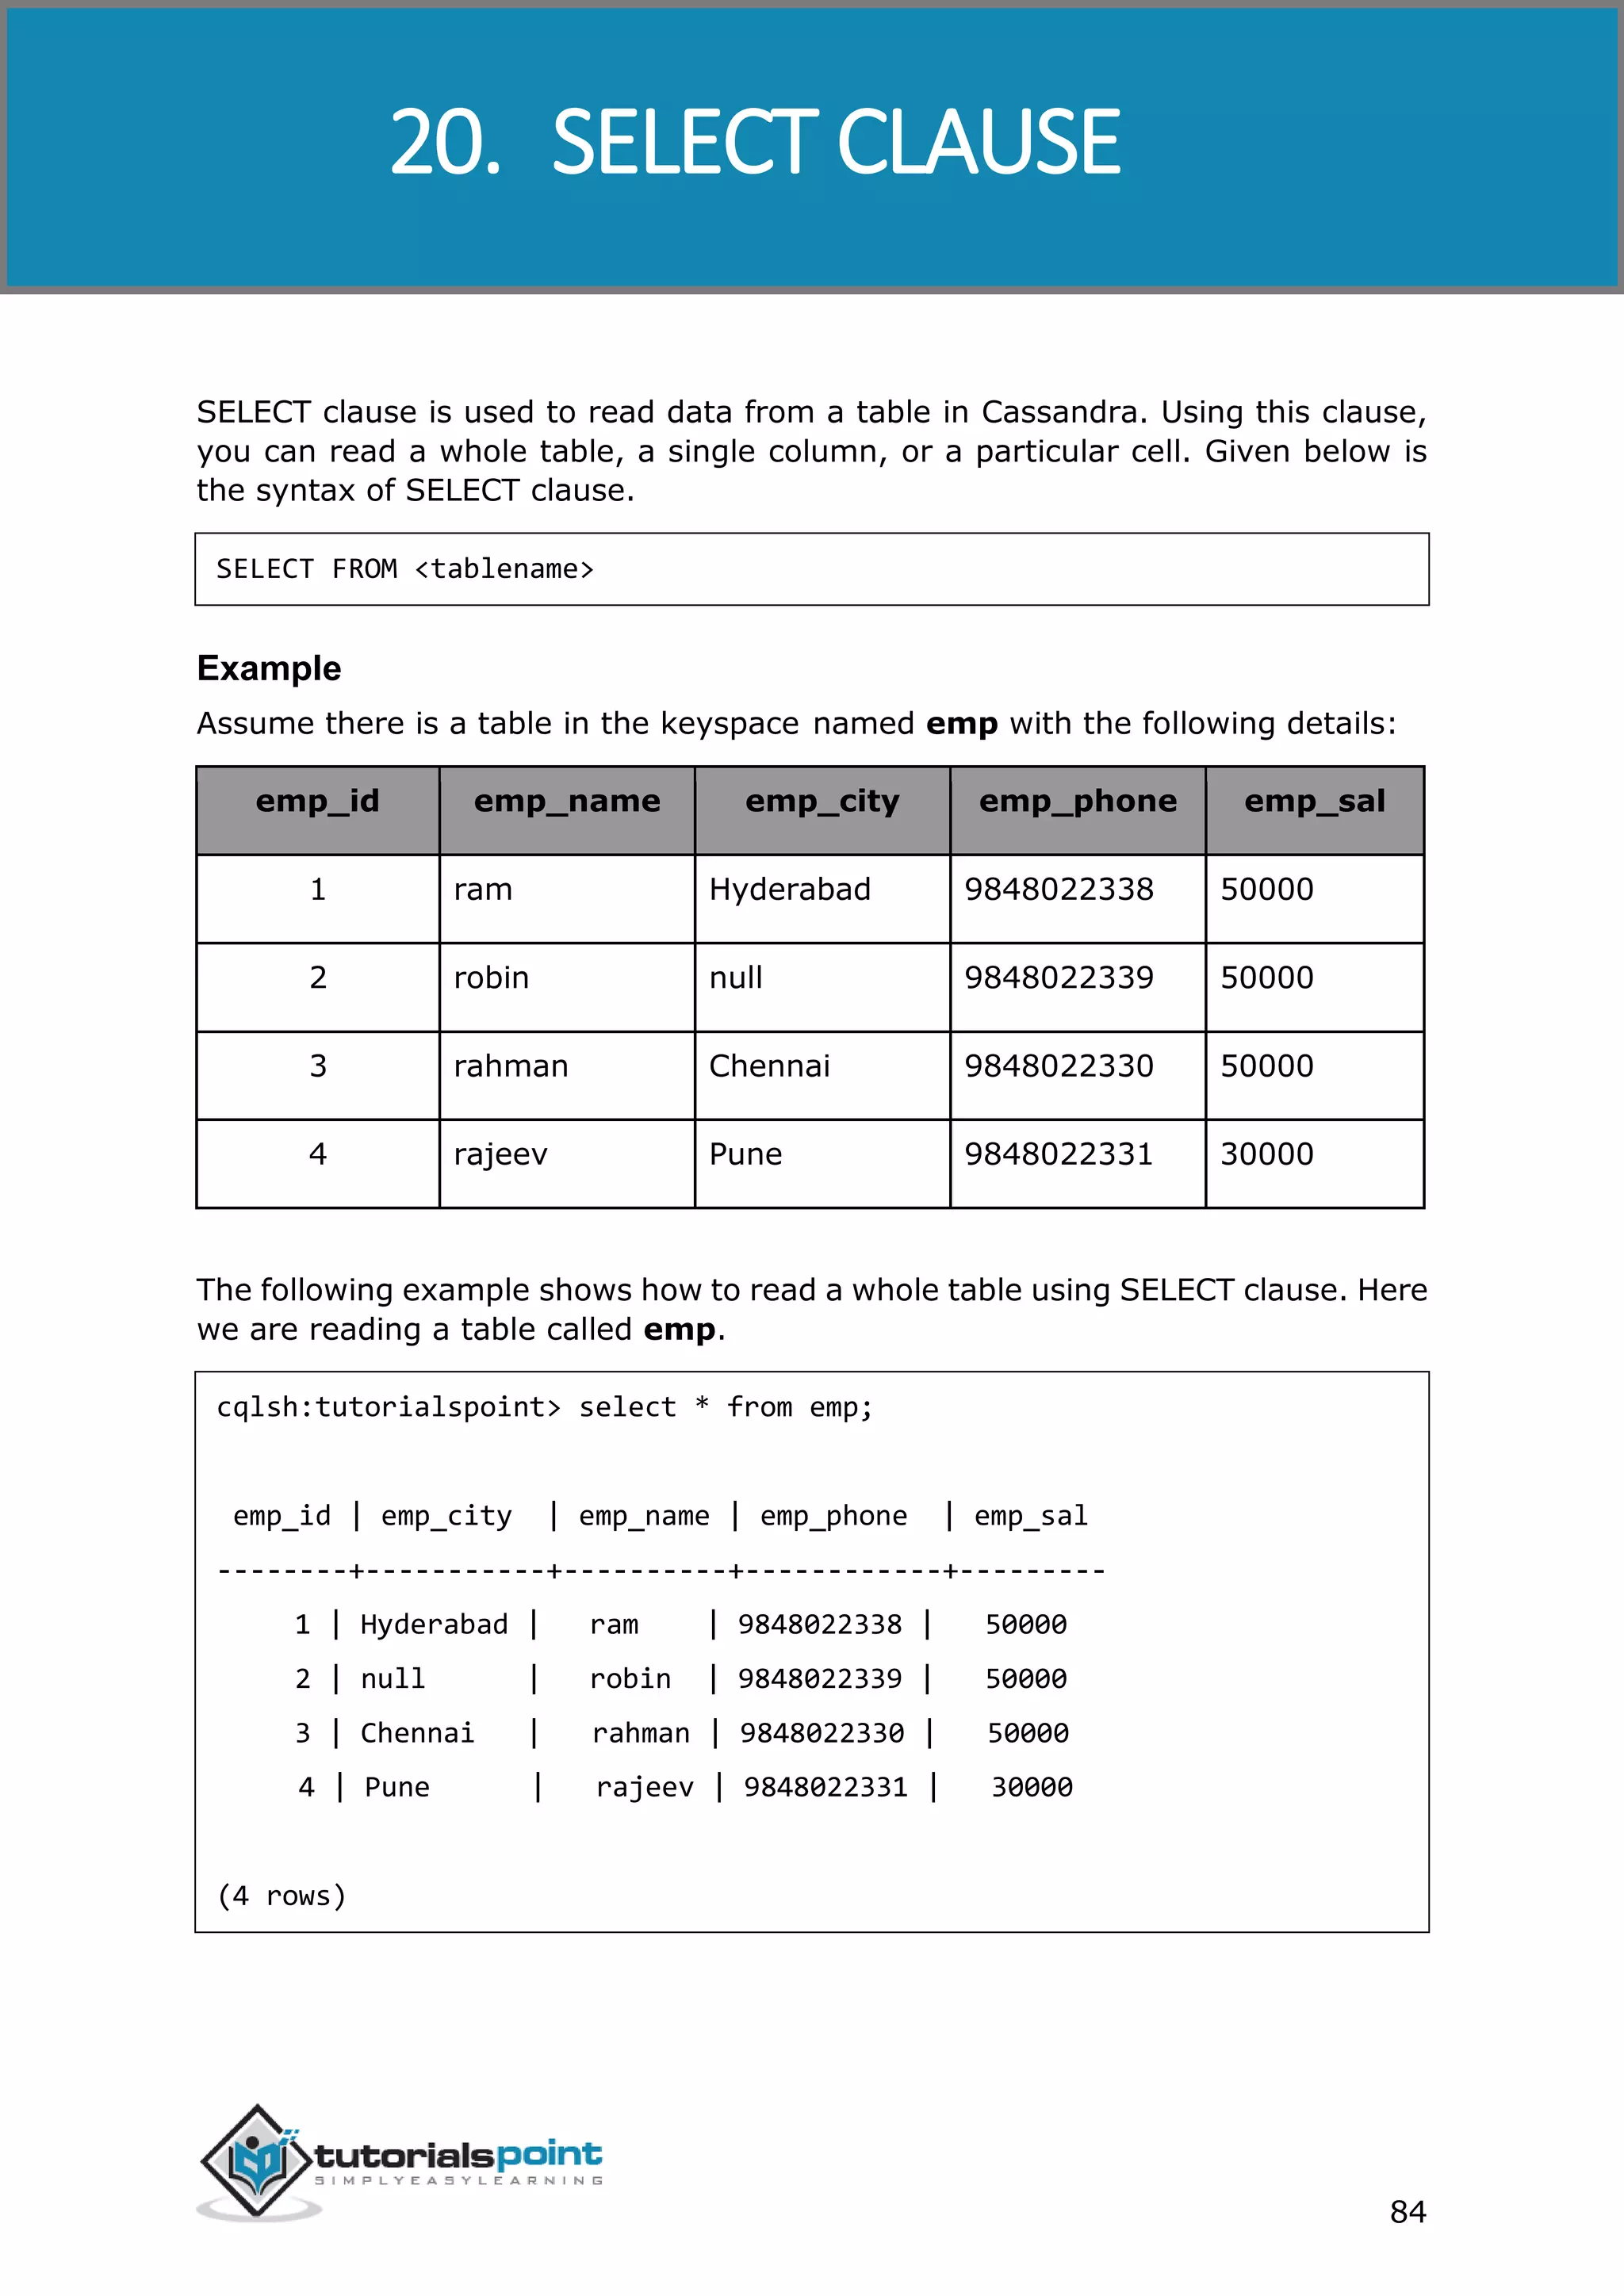
cqlsh:tutorialspoint> SELECT * FROM data;
name | email
------+--------------------------------------------------------------
ramu | ['abc@gmail.com', 'cba@yahoo.com', 'xyz@tutorialspoint.com']
(1 rows)
SET
Set is a data type that is used to store a group of elements. The elements of a set
will be returned in a sorted order.
CreatingaTablewithSet
The following example creates a sample table with two columns, name and phone.
For storing multiple phone numbers, we are using set.
cqlsh:tutorialspoint> CREATE TABLE data2 (name text PRIMARY KEY, phone
set<varint>);
InsertingDataintoaSet
While inserting data into the elements in a set, enter all the values separated by
comma within curly braces { } as shown below.
cqlsh:tutorialspoint> INSERT INTO data2(name, phone)VALUES ('rahman',
{9848022338,9848022339});
UpdatingaSet
The following code shows how to update a set in a table named data2. Here we
are adding another phone number to the set.
cqlsh:tutorialspoint> UPDATE data2
... SET phone = phone + {9848022330}
... where name='rahman';](https://image.slidesharecdn.com/cassandratutorial-180620080720/75/Cassandra-tutorial-99-2048.jpg)


The document provides an overview of Apache Cassandra, a distributed database designed to handle large amounts of structured data across commodity servers. It discusses Cassandra's architecture, data model, and key features like scalability, availability, and replication. The data model section explains Cassandra's core components - clusters, keyspaces, column families, columns, supercolumns, and how they differ from relational database tables and schemas. It also covers installing and configuring Cassandra.