Download to read offline


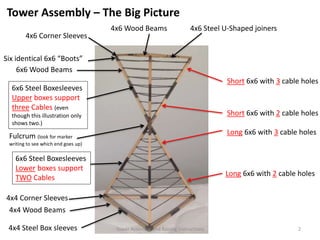
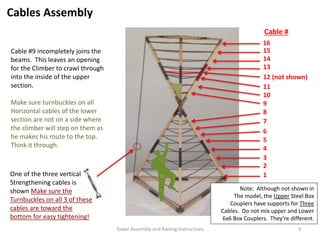
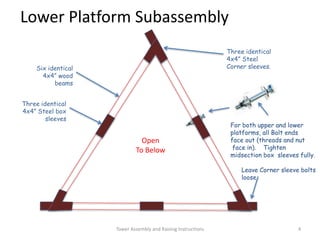
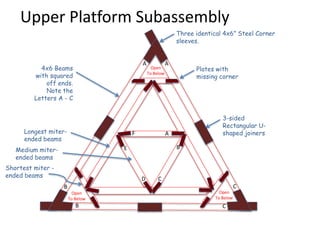
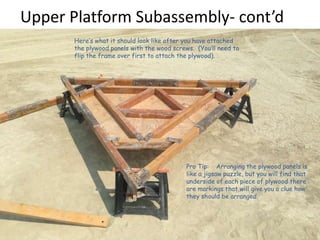
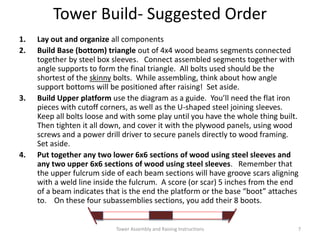
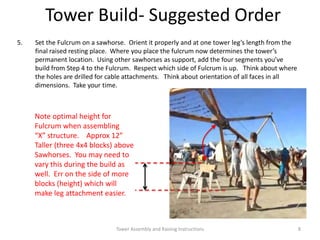
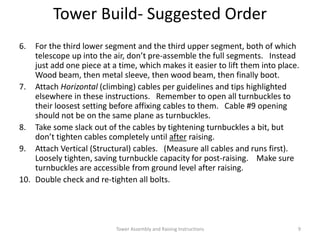
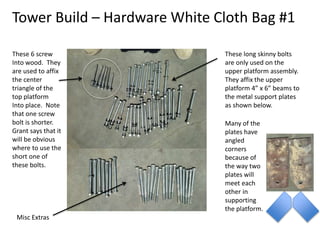

This document provides instructions for assembling and raising a tower structure. It includes details on the various wood and metal components needed for the lower and upper platforms. It recommends building the base triangle and platform subassemblies first before connecting them. Horizontal and vertical cables should be installed and loosely tightened before raising. The raising process involves establishing roles, clearing space, attaching guide ropes, and having teams slowly pull and lower the tower into place under the direction of a lift master. After raising, bolts and turnbuckles should be re-tightened.


