
Recommended
More Related Content
What's hot
What's hot (20)
Similar to Bitbucket
Similar to Bitbucket (20)
Recently uploaded
Recently uploaded (20)
Bitbucket
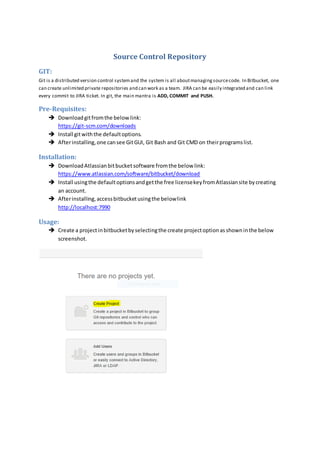
- 1. Source Control Repository GIT: Git is a distributed version control systemand the system is all aboutmanagingsourcecode. In Bitbucket, one can create unlimited private repositories and can work as a team. JIRA can be easily integrated and can link every commit to JIRA ticket. In git, the main mantra is ADD, COMMIT and PUSH. Pre-Requisites: Downloadgitfromthe belowlink: https://git-scm.com/downloads Install gitwiththe defaultoptions. Afterinstalling,one cansee GitGUI, Git Bash and Git CMD on theirprogramslist. Installation: DownloadAtlassianbitbucketsoftware fromthe below link: https://www.atlassian.com/software/bitbucket/download Install usingthe defaultoptionsandgetthe free licensekeyfromAtlassiansite bycreating an account. Afterinstalling,accessbitbucketusingthe belowlink http://localhost:7990 Usage: Create a projectinbitbucketbyselectingthe create projectoptionasshowninthe below screenshot.
- 2. Enter the projectname anda validdescriptionin the window andthenchoose Create Project. Aftercreatingthe project,create repository. Enter a validrepositoryname andthenselectcreate repository
- 3. Aftercreatingthe repository,one cansee ascreenlike the below window whichwill givea detailedlistof optionstoconfigure the emptyrepoforthe firsttime Git Bash: Opengitbash and configure gitforthe firsttime.The below commandsare justtotell git aboutyour identity. git config --global user.name "admin" git config --global user.email devops201@gmail.com //Above commands are just one time setup. Ignore these commands from the second repository Clone the Repository usingthe repositorycloneurl.The below commandcreatesanempty directoryonyour system. git clone http://admin@localhost:7990/scm/fir/unixrepo.git Change the directorytothe repositoryfolder.Inthiscase type the below commandingit bash. cd unixrepo(Thisfoldername will be the repositoryname)
- 4. Copya file tothisfolder Aftercopying,addthe file togitusingthe below command. git add –all Committhe addedfilesusing: git commit -m "Initial Commit" Note:Initial Commitisjustthe message.One canenteranythingascommitmessage Nowpushthe filestobitbucket. git push -u origin master Note: master in the above command is the branch name Aftergettingasuccessmessage,youcan see thatthe filesgotuploadedtobitbucketserver. From nexttime,beforeaddingfilestothe directorypull the objectsusingthe below commands. git pull origin master Afterpulling,addthe source code toyour repositoryandthenadd,commitandpushfiles. Git GUI: Now you can work from any computer and send changes back to the repository. Open Git GUI Select “Clone existing repository”. For the ‘Source location’,copy the clone url from bitbucket. Browse the target location on the system and provide a folder name and then click on Clone.
- 5. You now have C:/Users/map/Desktop/RepoName folder that is a clone of the bitbucket repository, and that also has the same data as the repository. Let’s make some changes in the cloned directory and save. Right click, select Git GUI here option. Unstaged changes window will contain all the modified files list. Clickon Stage changedto addthe filestoStagedchangeswindow or the file icon to add file by file.
- 6. Nowthe filesare added to Stage Changed window. Enter a valid commit message and click on Commit. After committing the changes, click Push.
- 7. Login to bitbucket to see your files in the repository. Note: From next time, before adding your changes to the repository fetch and merge the changesas showninthe belowscreenshots.
- 8. Tagging Like most VCSs, Git has the ability to tag specific points in history as being important. Typically people use this functionality to mark release points (v1.0, and so on). In this section, you’ll learn how to list the available tags, how to create new tags, and what the different types of tags are. ListingYourTags Listing the available tags in Git is straightforward. Just type git tag: $ git tag v0.1
- 9. v1.3 This command lists the tags in alphabetical order; the order in which they appear has no real importance. You can also search for tags with a particular pattern. The Git source repo, for instance, contains more than 500 tags. If you’re only interested in looking at the 1.8.5 series, you can run this: $ git tag -l "v1.8.5*" v1.8.5 v1.8.5-rc0 v1.8.5-rc1 v1.8.5-rc2 v1.8.5-rc3 v1.8.5.1 v1.8.5.2 v1.8.5.3 v1.8.5.4 v1.8.5.5 CreatingTags Git uses two main types of tags: lightweight and annotated. A lightweight tag is very much like a branch that doesn’t change – it’s just a pointer to a specific commit. Annotated tags, however, are stored as full objects in the Git database. They’re checksummed; contain the tagger name, email, and date; have a tagging message; and can be signed and verified with GNU Privacy Guard (GPG). It’s generally recommended that you create annotated tags so you can have all this information; but if you want a temporary tag or for some reason don’t want to keep the other information, lightweight tags are available too. AnnotatedTags Creating an annotated tag in Git is simple. The easiest way is to specify -a when you run the tagcommand: $ git tag -a v1.4 -m "my version 1.4"
- 10. $ git tag v0.1 v1.3 v1.4 The -m specifies a tagging message, which is stored with the tag. If you don’t specify a message for an annotated tag, Git launches your editor so you can type it in. You can see the tag data along with the commit that was tagged by using the git show command: $ git show v1.4 tag v1.4 Tagger: Ben Straub <ben@straub.cc> Date: Sat May 3 20:19:12 2014 -0700 my version 1.4 commit ca82a6dff817ec66f44342007202690a93763949 Author: Scott Chacon <schacon@gee-mail.com> Date: Mon Mar 17 21:52:11 2008 -0700 changed the version number That shows the tagger information, the date the commit was tagged, and the annotation message before showing the commit information. LightweightTags Another way to tag commits is with a lightweight tag. This is basically the commit checksum stored in a file – no other information is kept. To create a lightweight tag, don’t supply the -a, -s, or -m option: $ git tag v1.4-lw $ git tag v0.1 v1.3 v1.4
- 11. v1.4-lw v1.5 This time, if you run git show on the tag, you don’t see the extra tag information. The command just shows the commit: $ git show v1.4-lw commit ca82a6dff817ec66f44342007202690a93763949 Author: Scott Chacon <schacon@gee-mail.com> Date: Mon Mar 17 21:52:11 2008 -0700 changed the version number TaggingLater You can also tag commits after you’ve moved past them. Suppose your commit history looks like this: $ git log --pretty=oneline 15027957951b64cf874c3557a0f3547bd83b3ff6 Merge branch 'experiment' a6b4c97498bd301d84096da251c98a07c7723e65 beginning write support 0d52aaab4479697da7686c15f77a3d64d9165190 one more thing 6d52a271eda8725415634dd79daabbc4d9b6008e Merge branch 'experiment' 0b7434d86859cc7b8c3d5e1dddfed66ff742fcbc added a commit function 4682c3261057305bdd616e23b64b0857d832627b added a todo file 166ae0c4d3f420721acbb115cc33848dfcc2121a started write support 9fceb02d0ae598e95dc970b74767f19372d61af8 updated rakefile 964f16d36dfccde844893cac5b347e7b3d44abbc commit the todo 8a5cbc430f1a9c3d00faaeffd07798508422908a updated readme Now, suppose you forgot to tag the project at v1.2, which was at the “updated rakefile” commit. You can add it after the fact. To tag that commit, you specify the commit checksum (or part of it) at the end of the command: $ git tag -a v1.2 9fceb02 You can see that you’ve tagged the commit: $ git tag
- 12. v0.1 v1.2 v1.3 v1.4 v1.4-lw v1.5 $ git show v1.2 tag v1.2 Tagger: Scott Chacon <schacon@gee-mail.com> Date: Mon Feb 9 15:32:16 2009 -0800 version 1.2 commit 9fceb02d0ae598e95dc970b74767f19372d61af8 Author: Magnus Chacon <mchacon@gee-mail.com> Date: Sun Apr 27 20:43:35 2008 -0700 updated rakefile ... SharingTags By default, the git push command doesn’t transfer tags to remote servers. You will have to explicitly push tags to a shared server after you have created them. This process is just like sharing remote branches – you can run git push origin [tagname]. $ git push origin v1.5 Counting objects: 14, done. Delta compression using up to 8 threads. Compressing objects: 100% (12/12), done. Writing objects: 100% (14/14), 2.05 KiB | 0 bytes/s, done. Total 14 (delta 3), reused 0 (delta 0) To git@github.com:schacon/simplegit.git * [new tag] v1.5 -> v1.5
- 13. If you have a lot of tags that you want to push up at once, you can also use the -- tags option to the git push command. This will transfer all of your tags to the remote server that are not already there. $ git push origin --tags Counting objects: 1, done. Writing objects: 100% (1/1), 160 bytes | 0 bytes/s, done. Total 1 (delta 0), reused 0 (delta 0) To git@github.com:schacon/simplegit.git * [new tag] v1.4 -> v1.4 * [new tag] v1.4-lw -> v1.4-lw Now, when someone else clones or pulls from your repository, they will get all your tags as well.