This document provides a tutorial on basic techniques for using Vray, including:
1. Exterior lighting setup using GI, Irradiance maps, and environment adjustments.
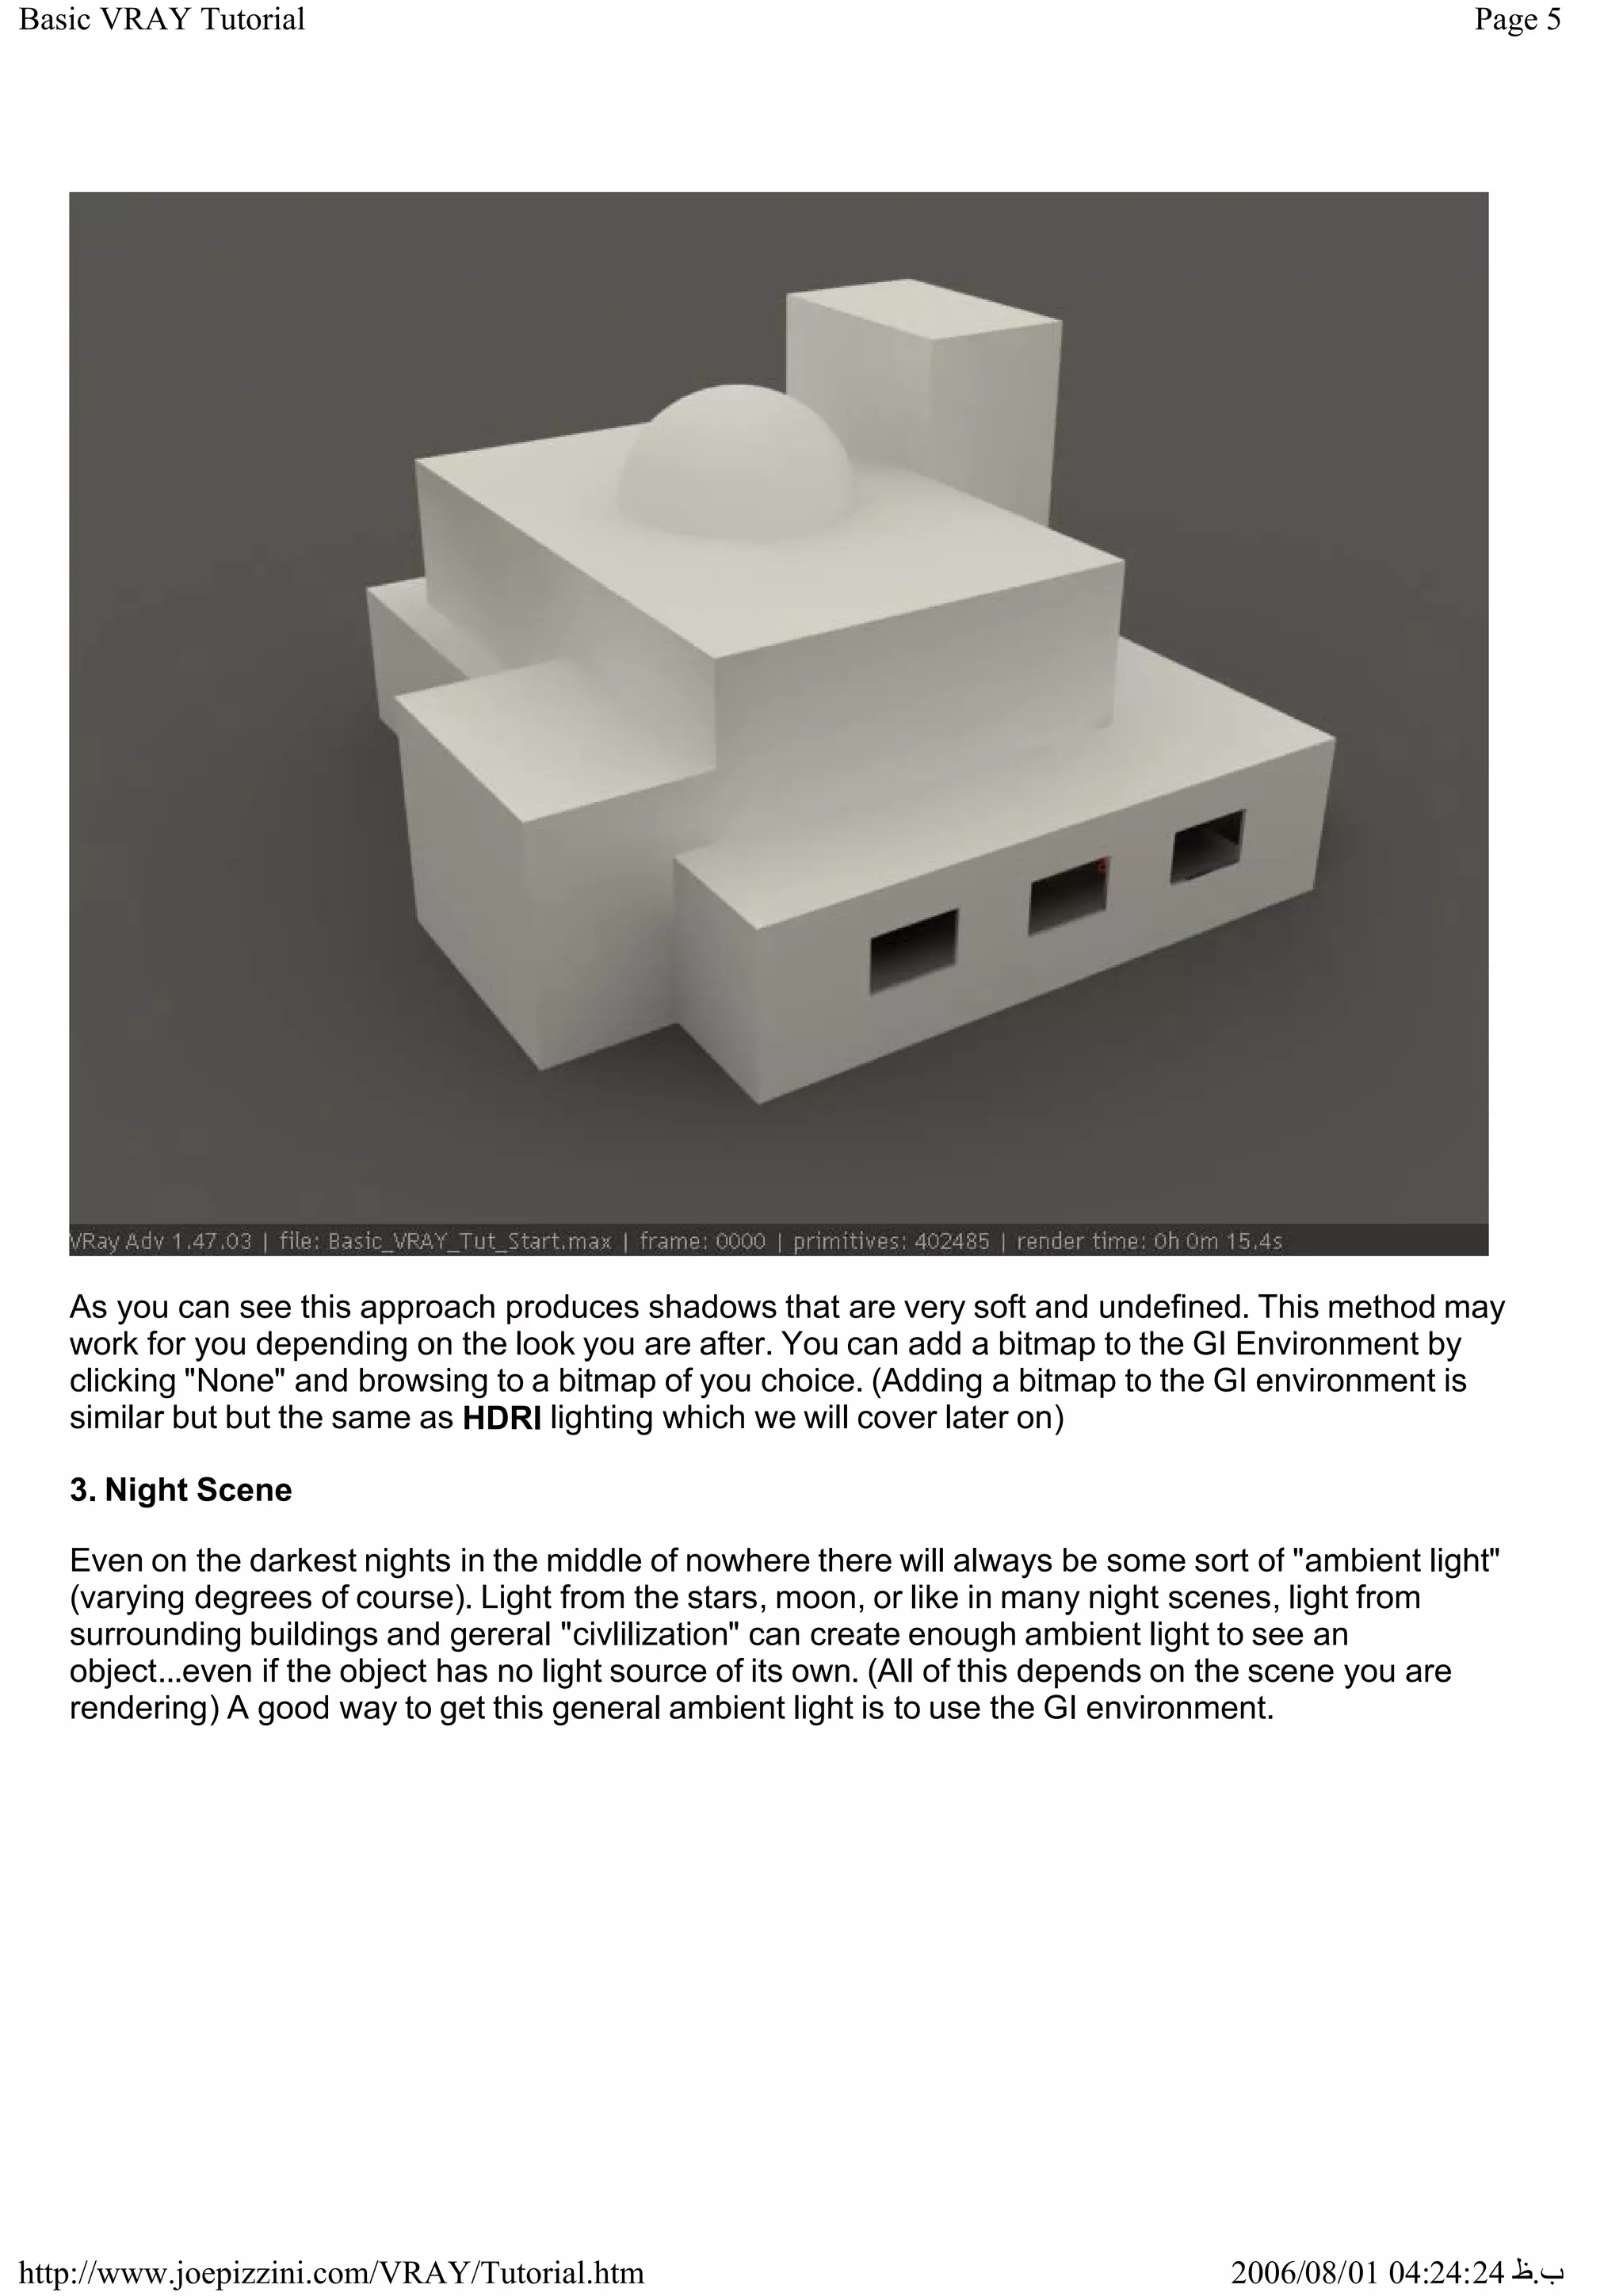
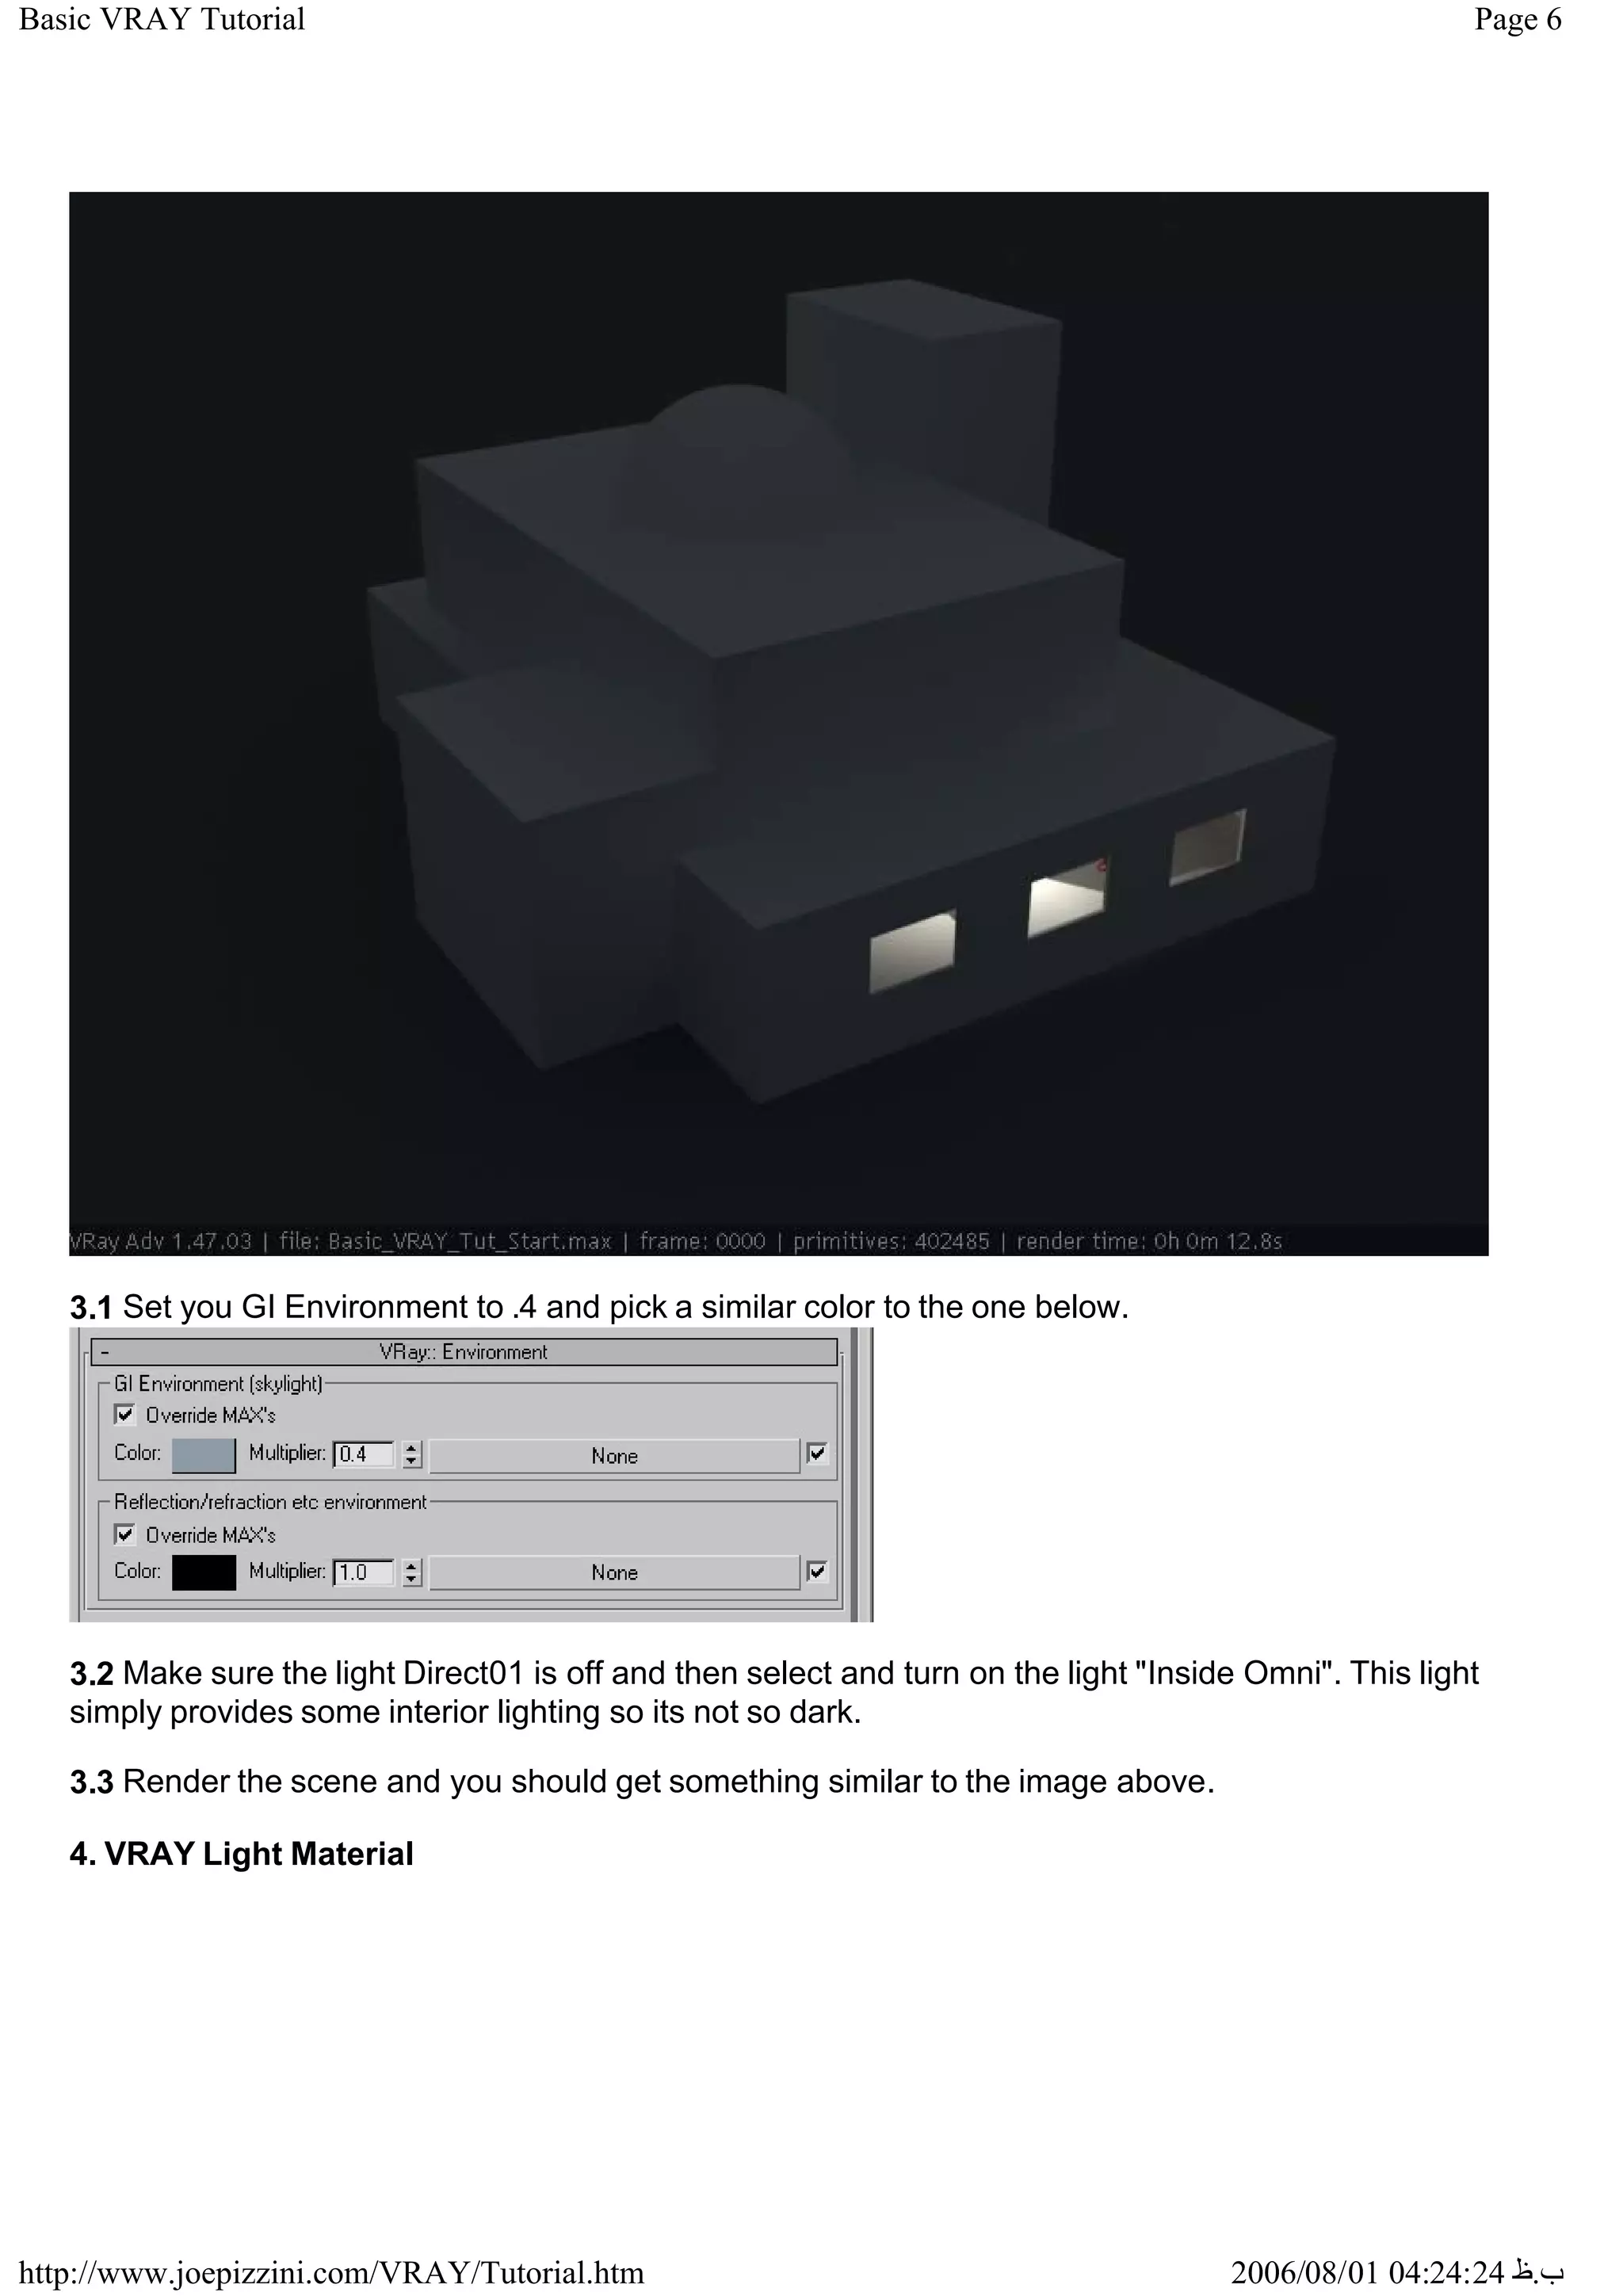
2. Creating night scenes using only GI environment lighting.
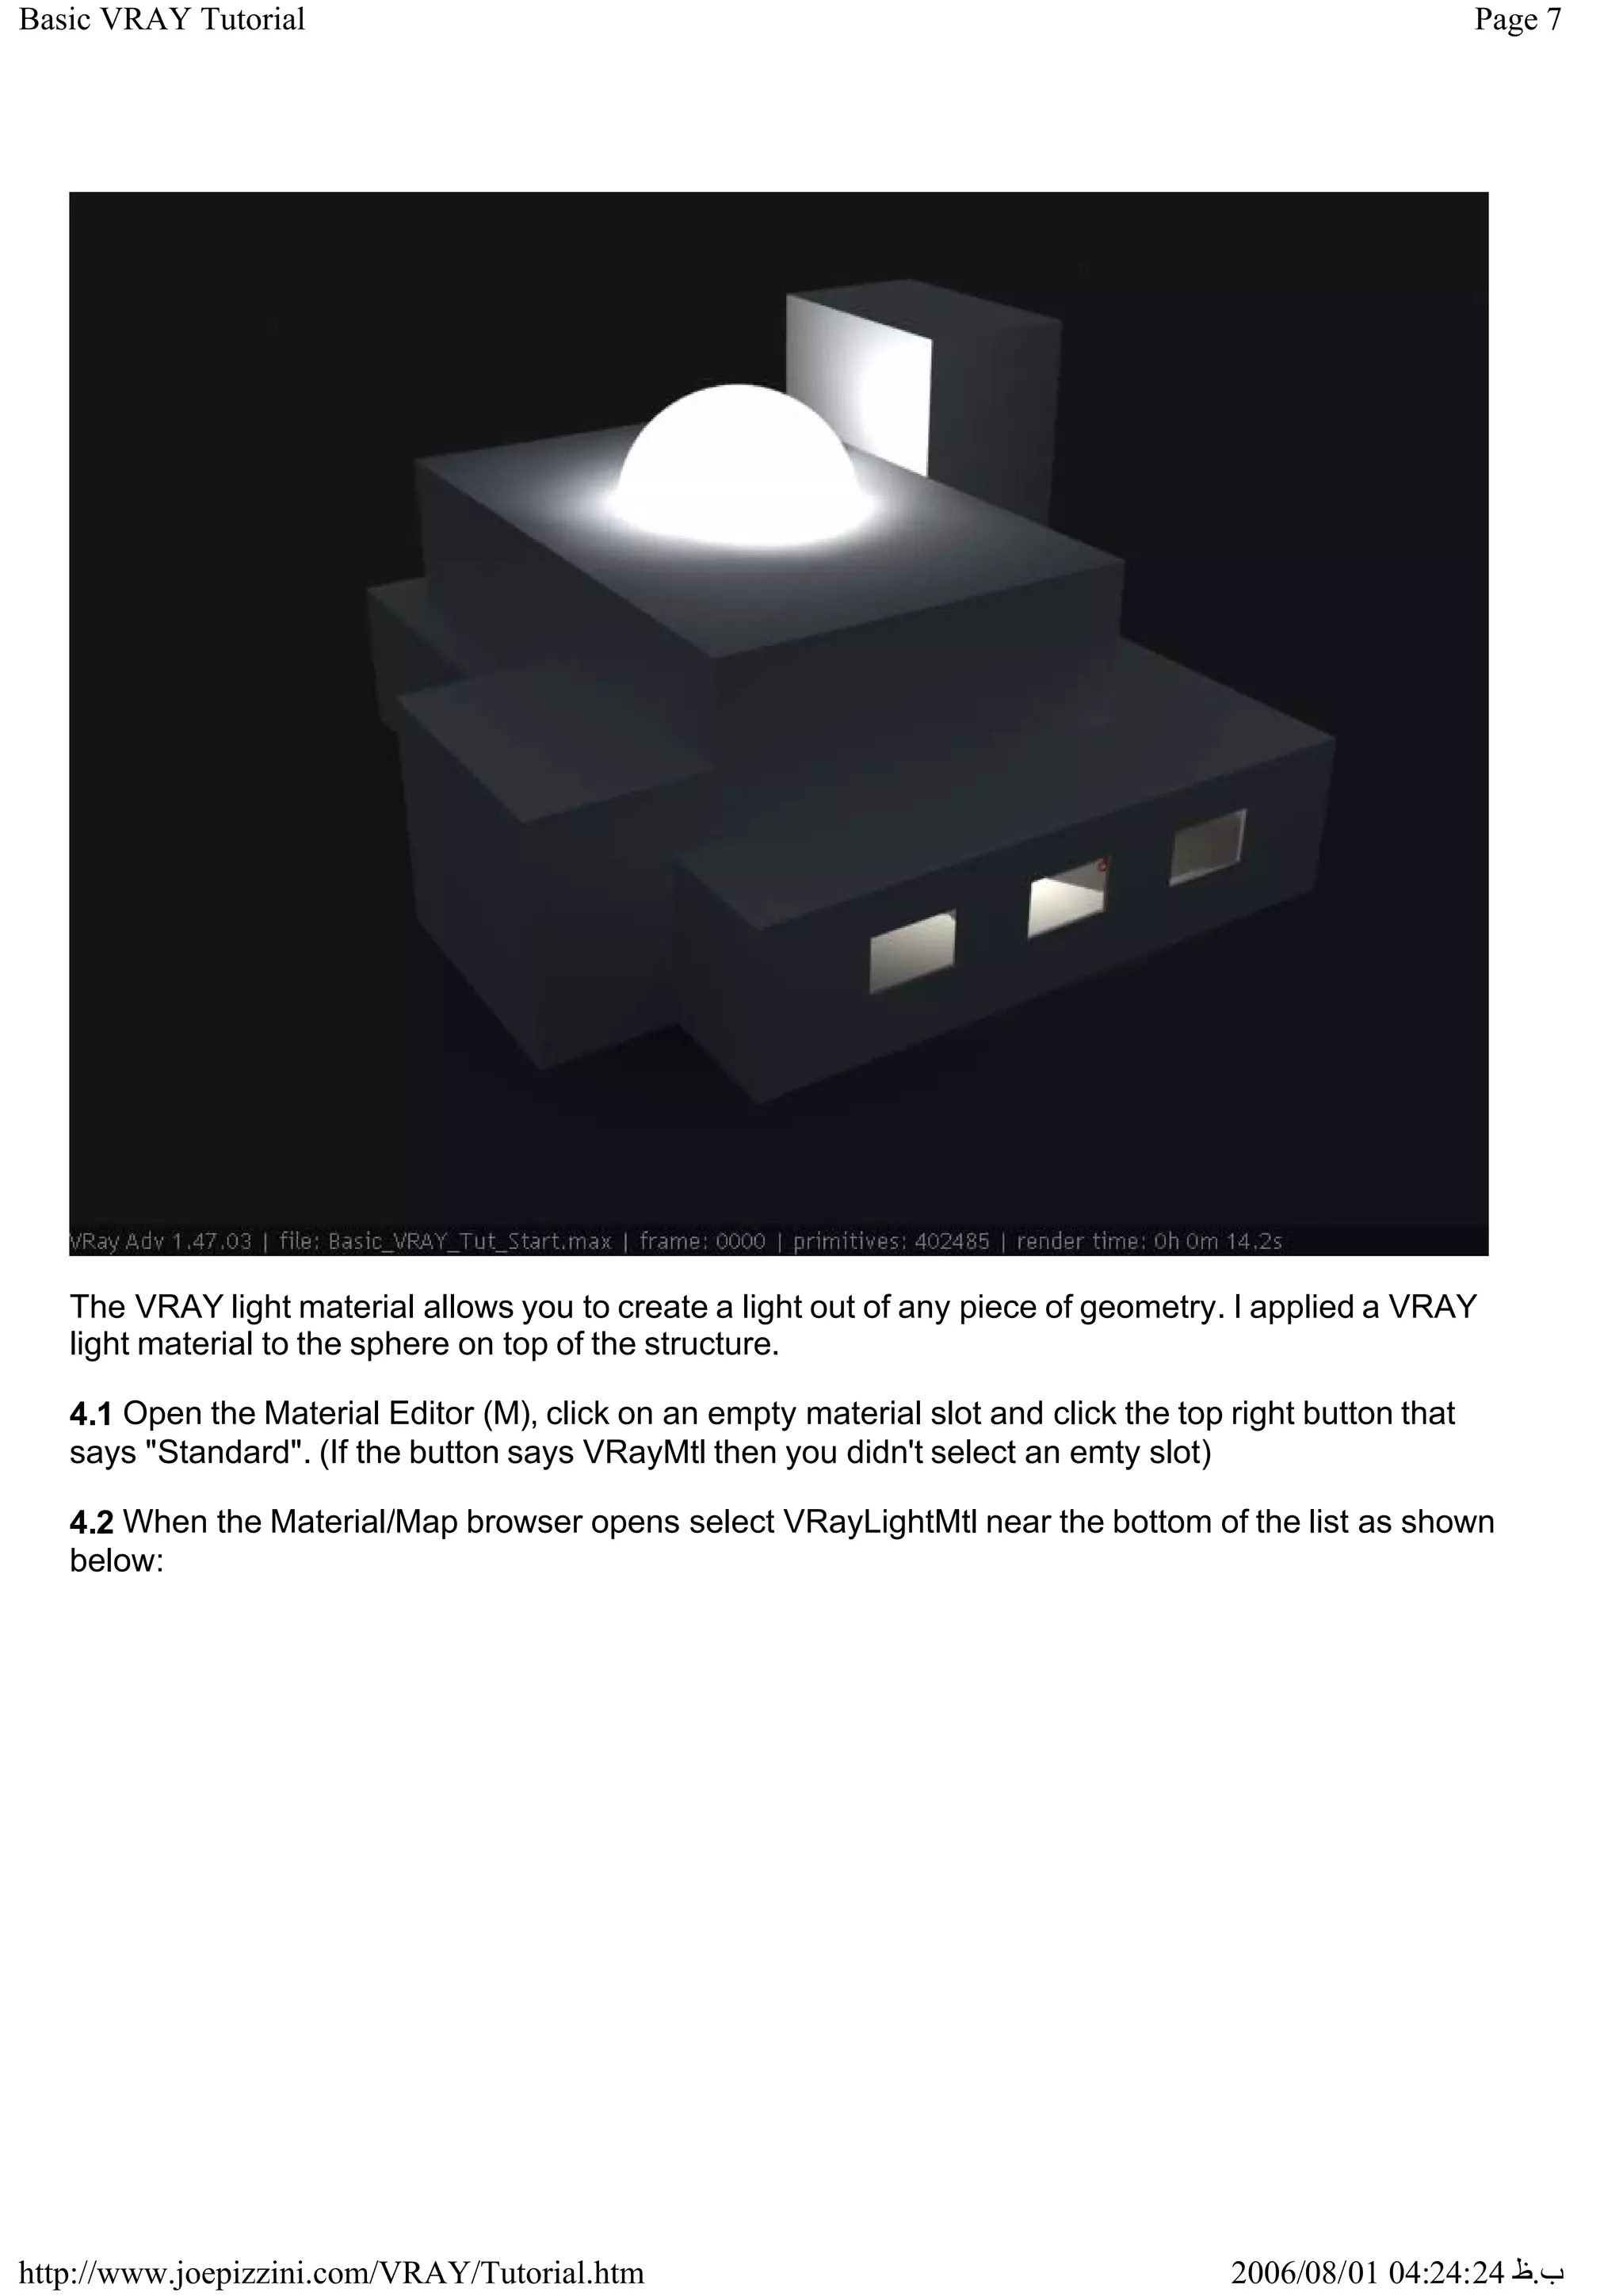
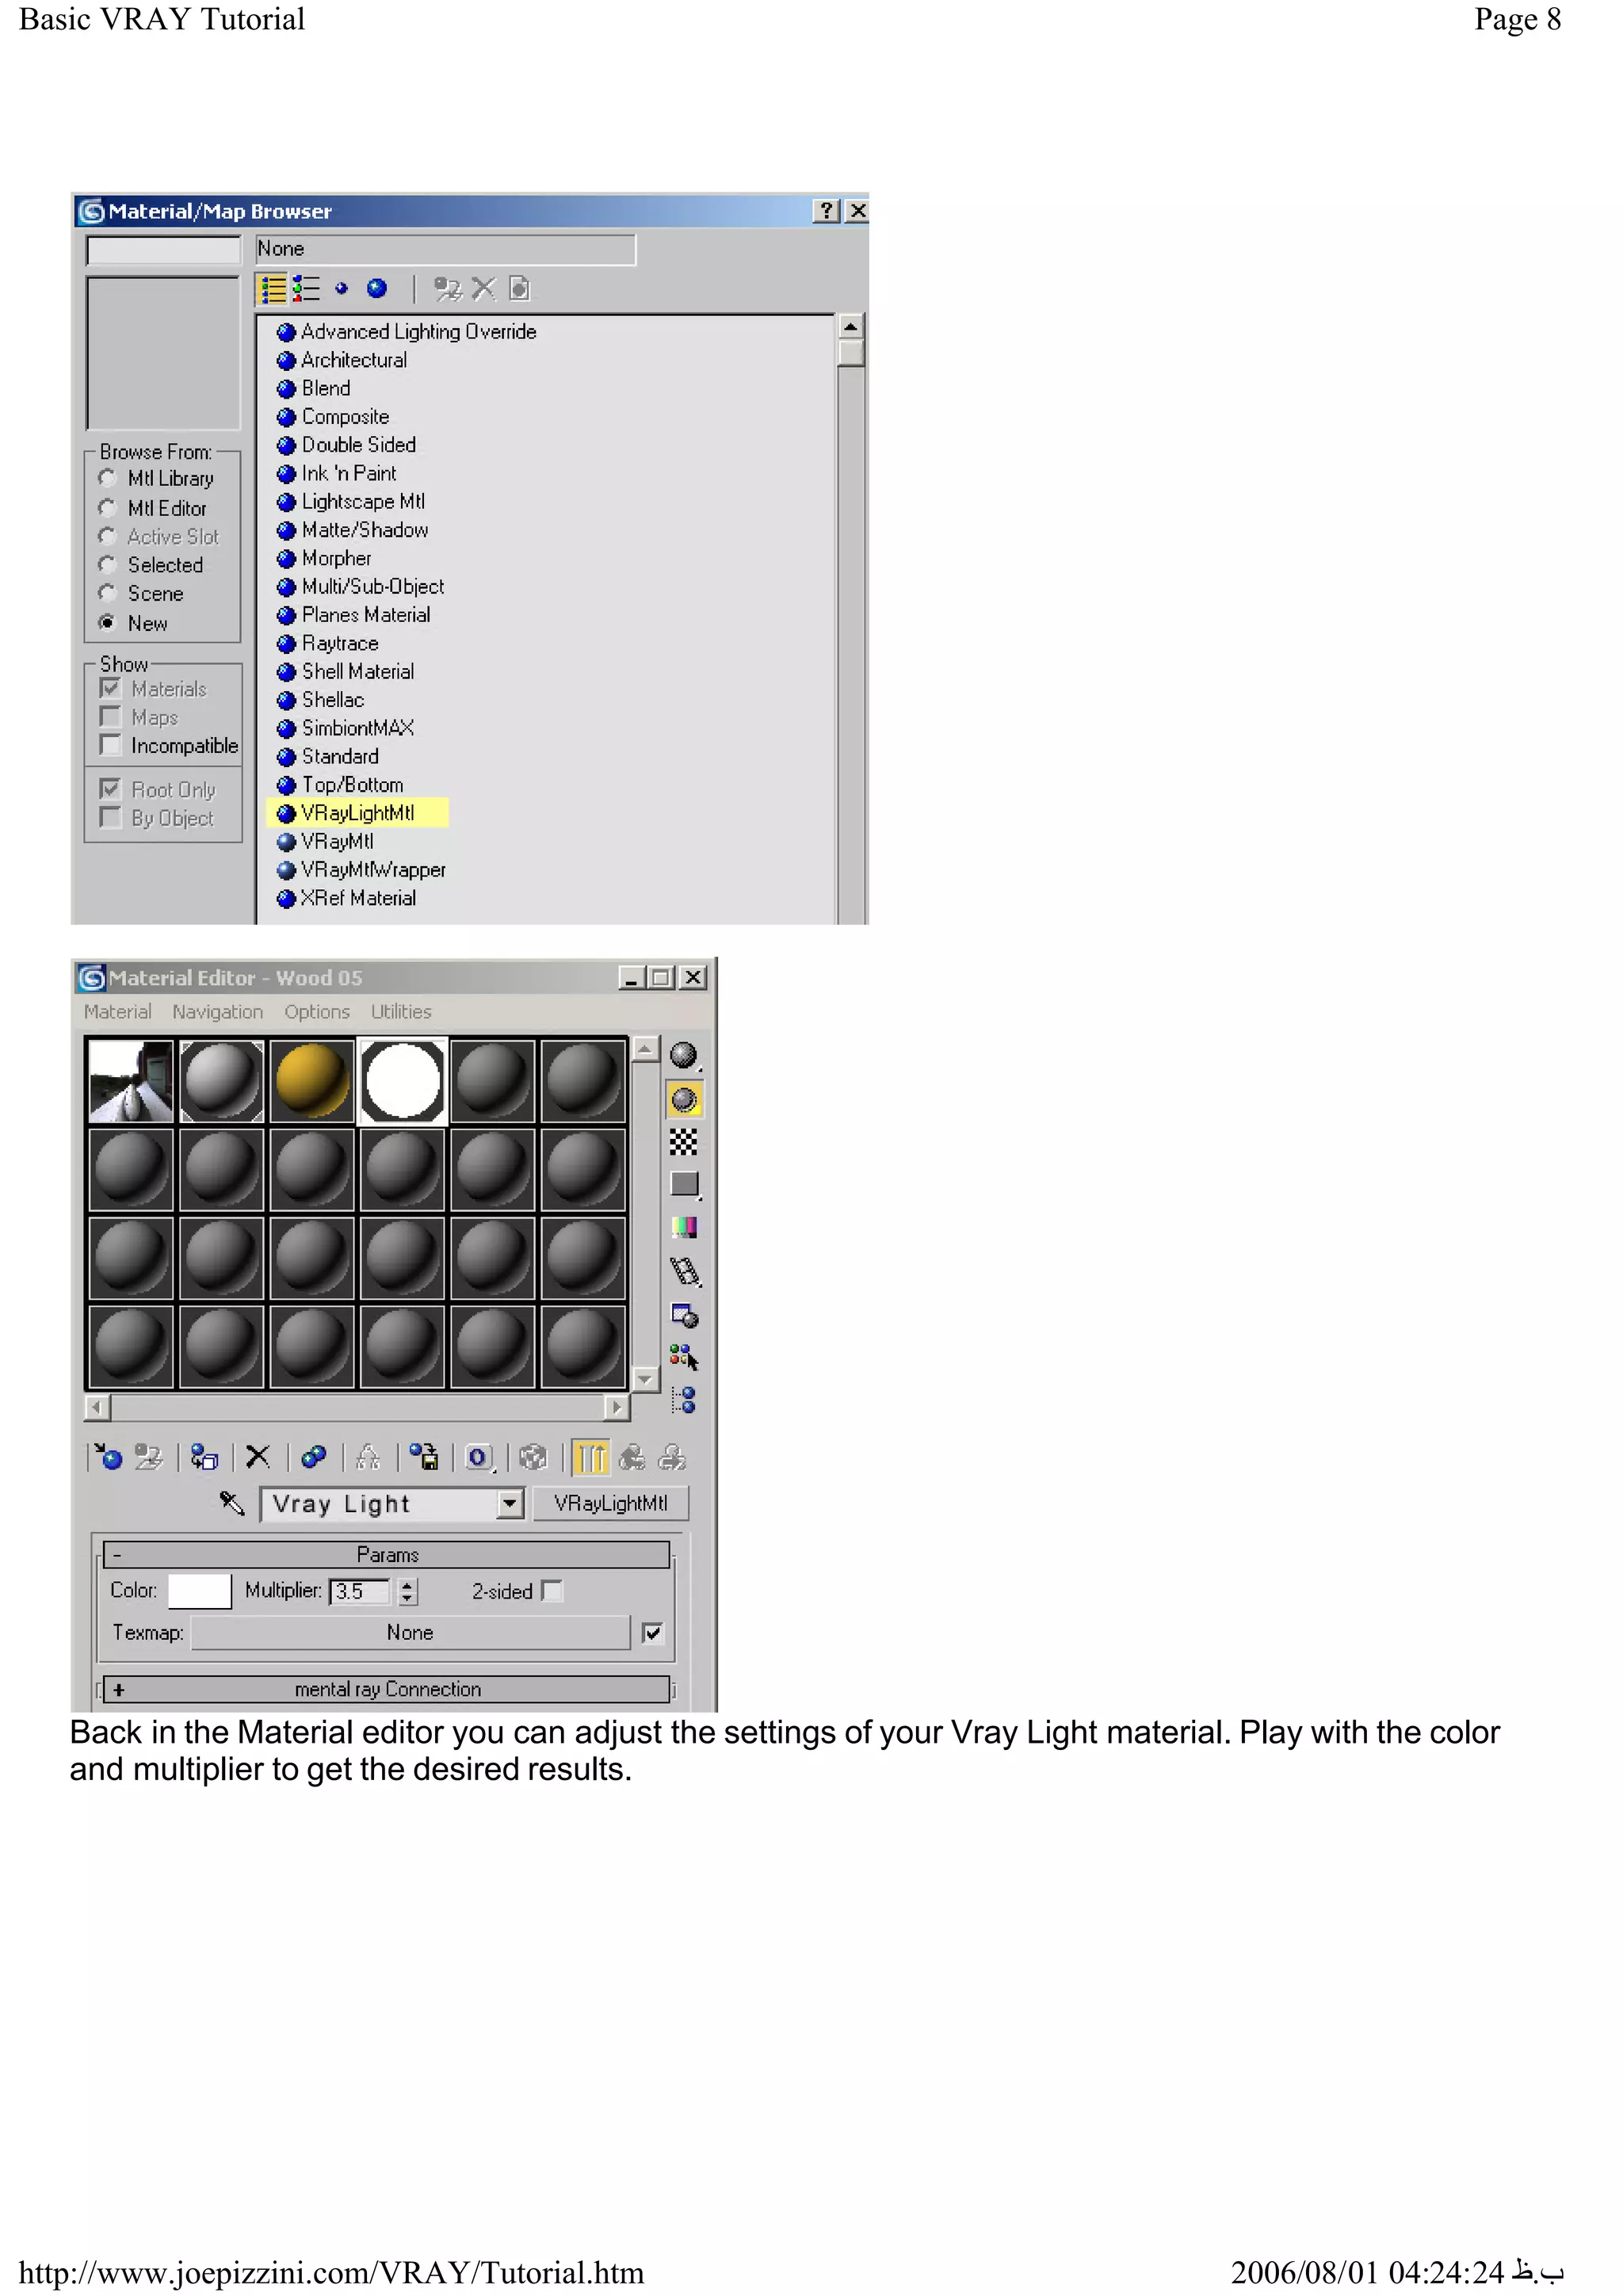
3. Using VRAY light materials to turn geometry into lights.
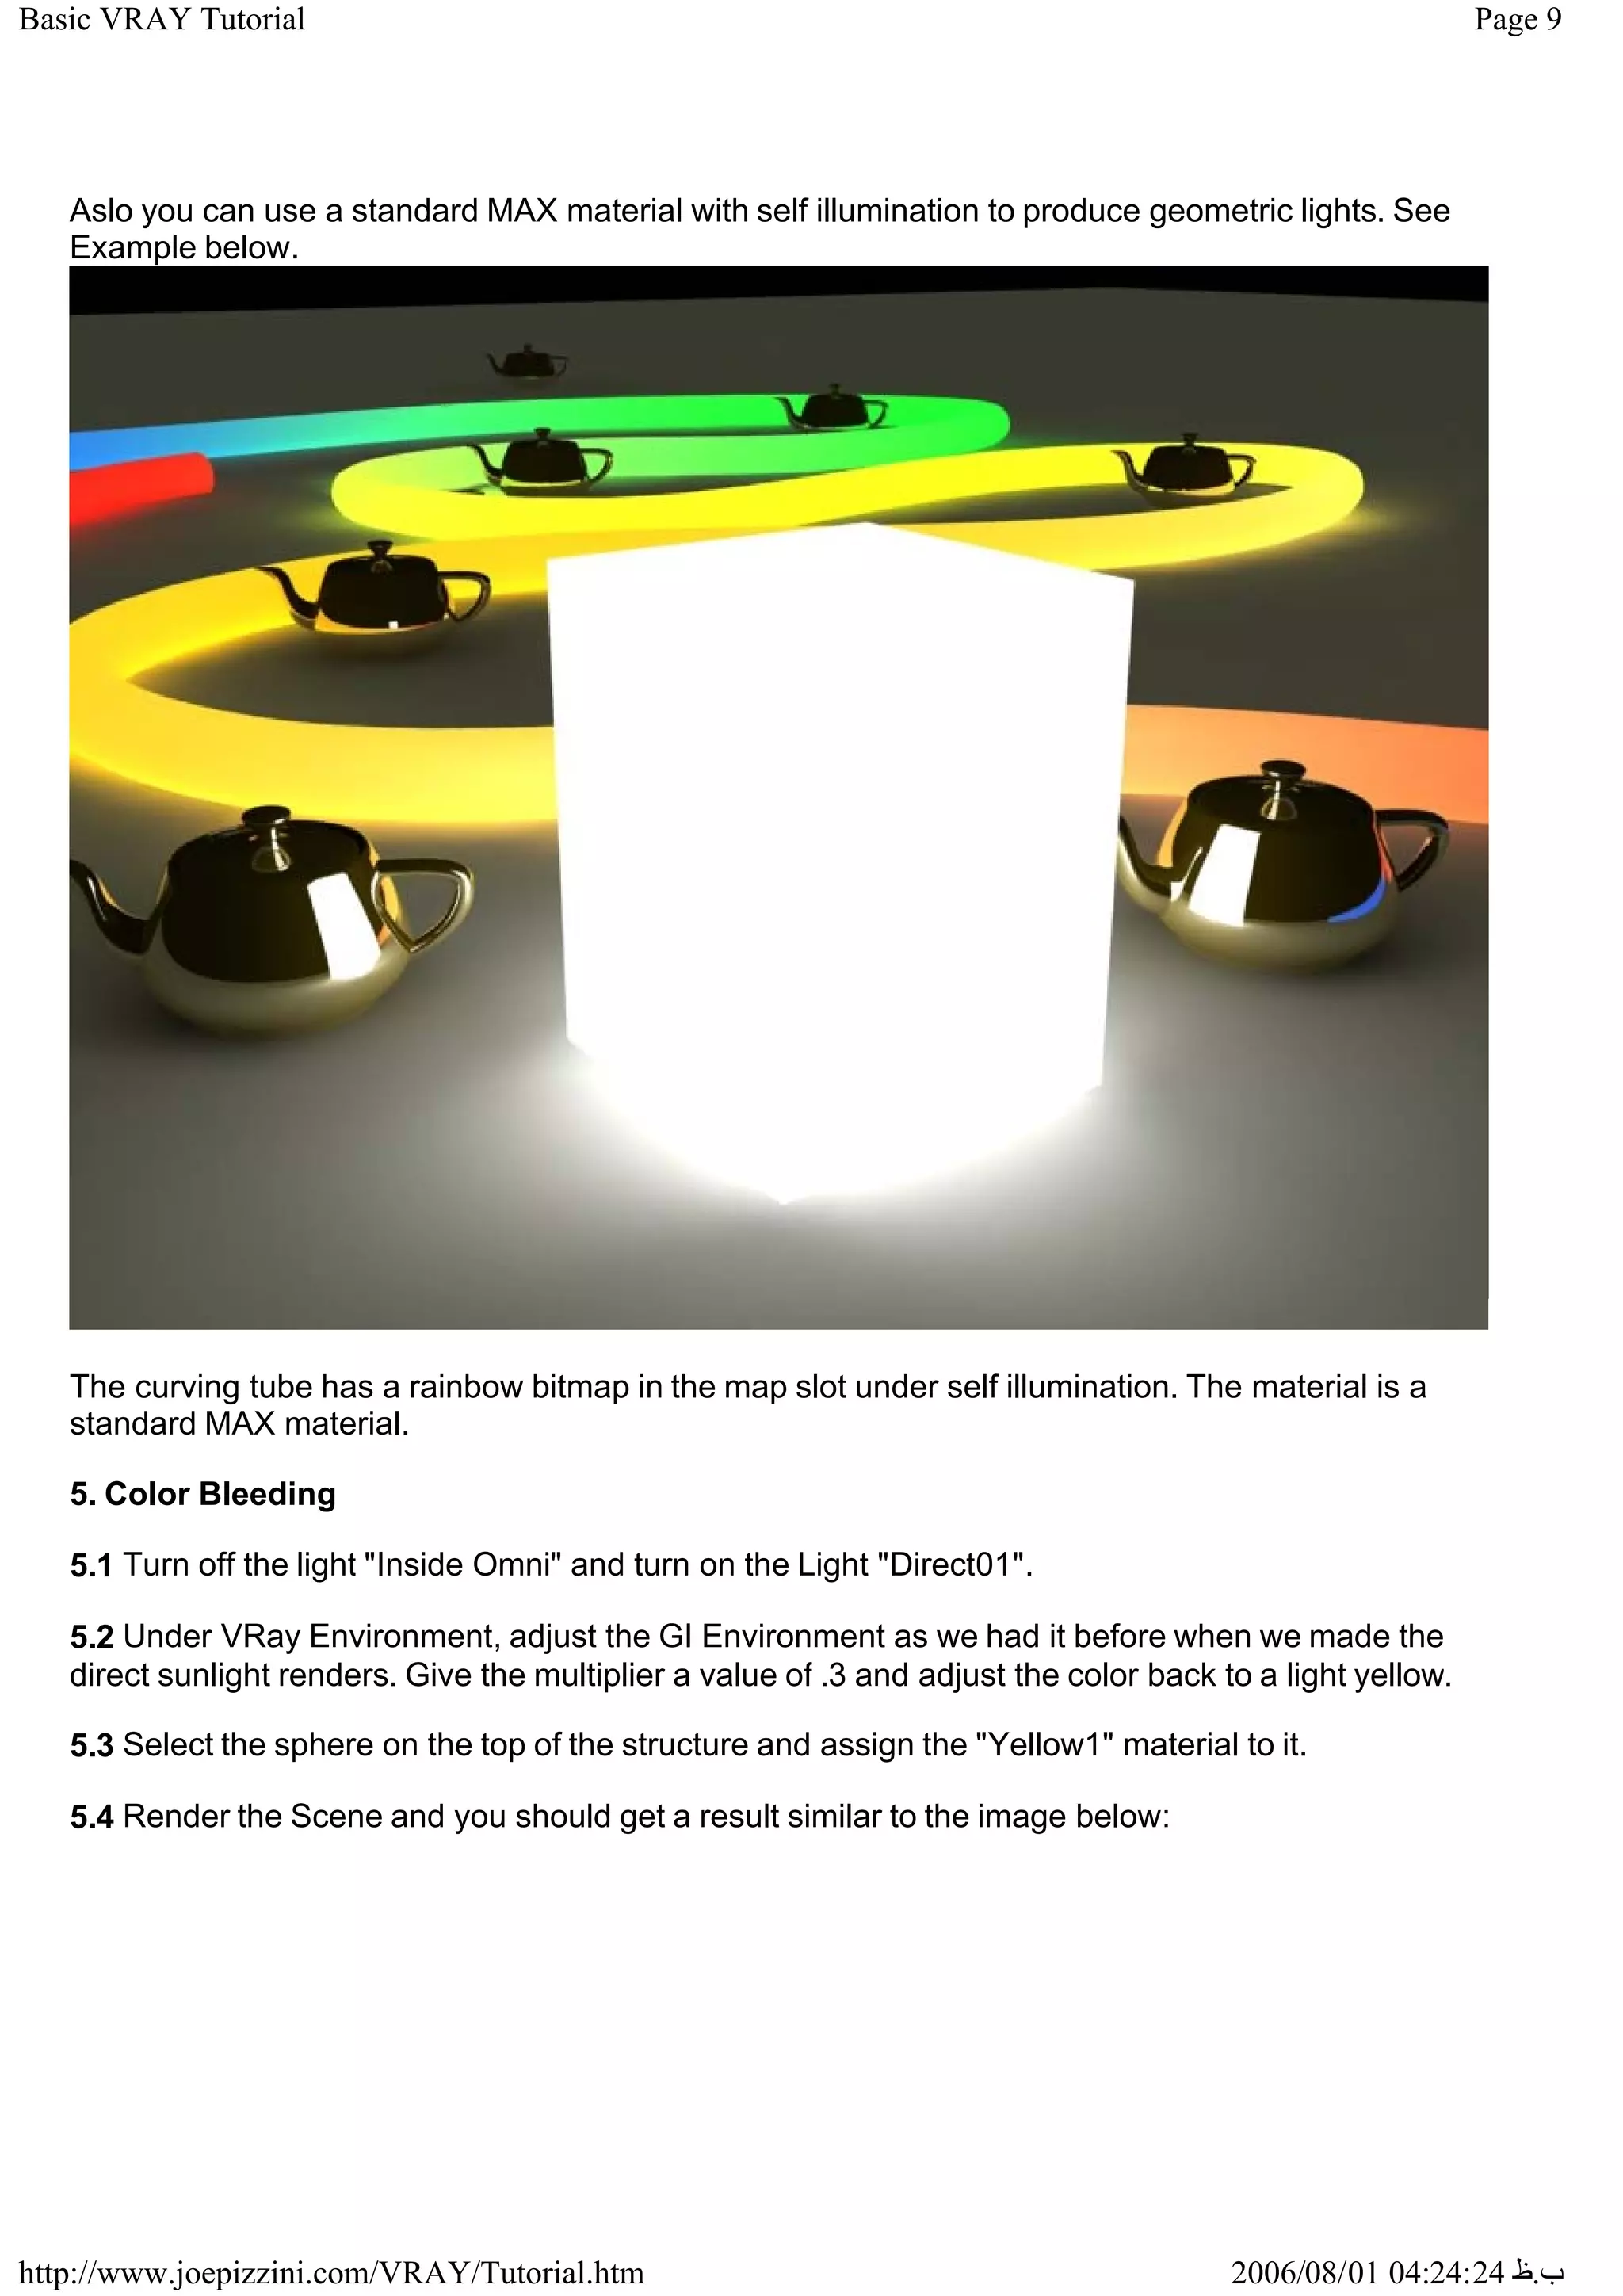
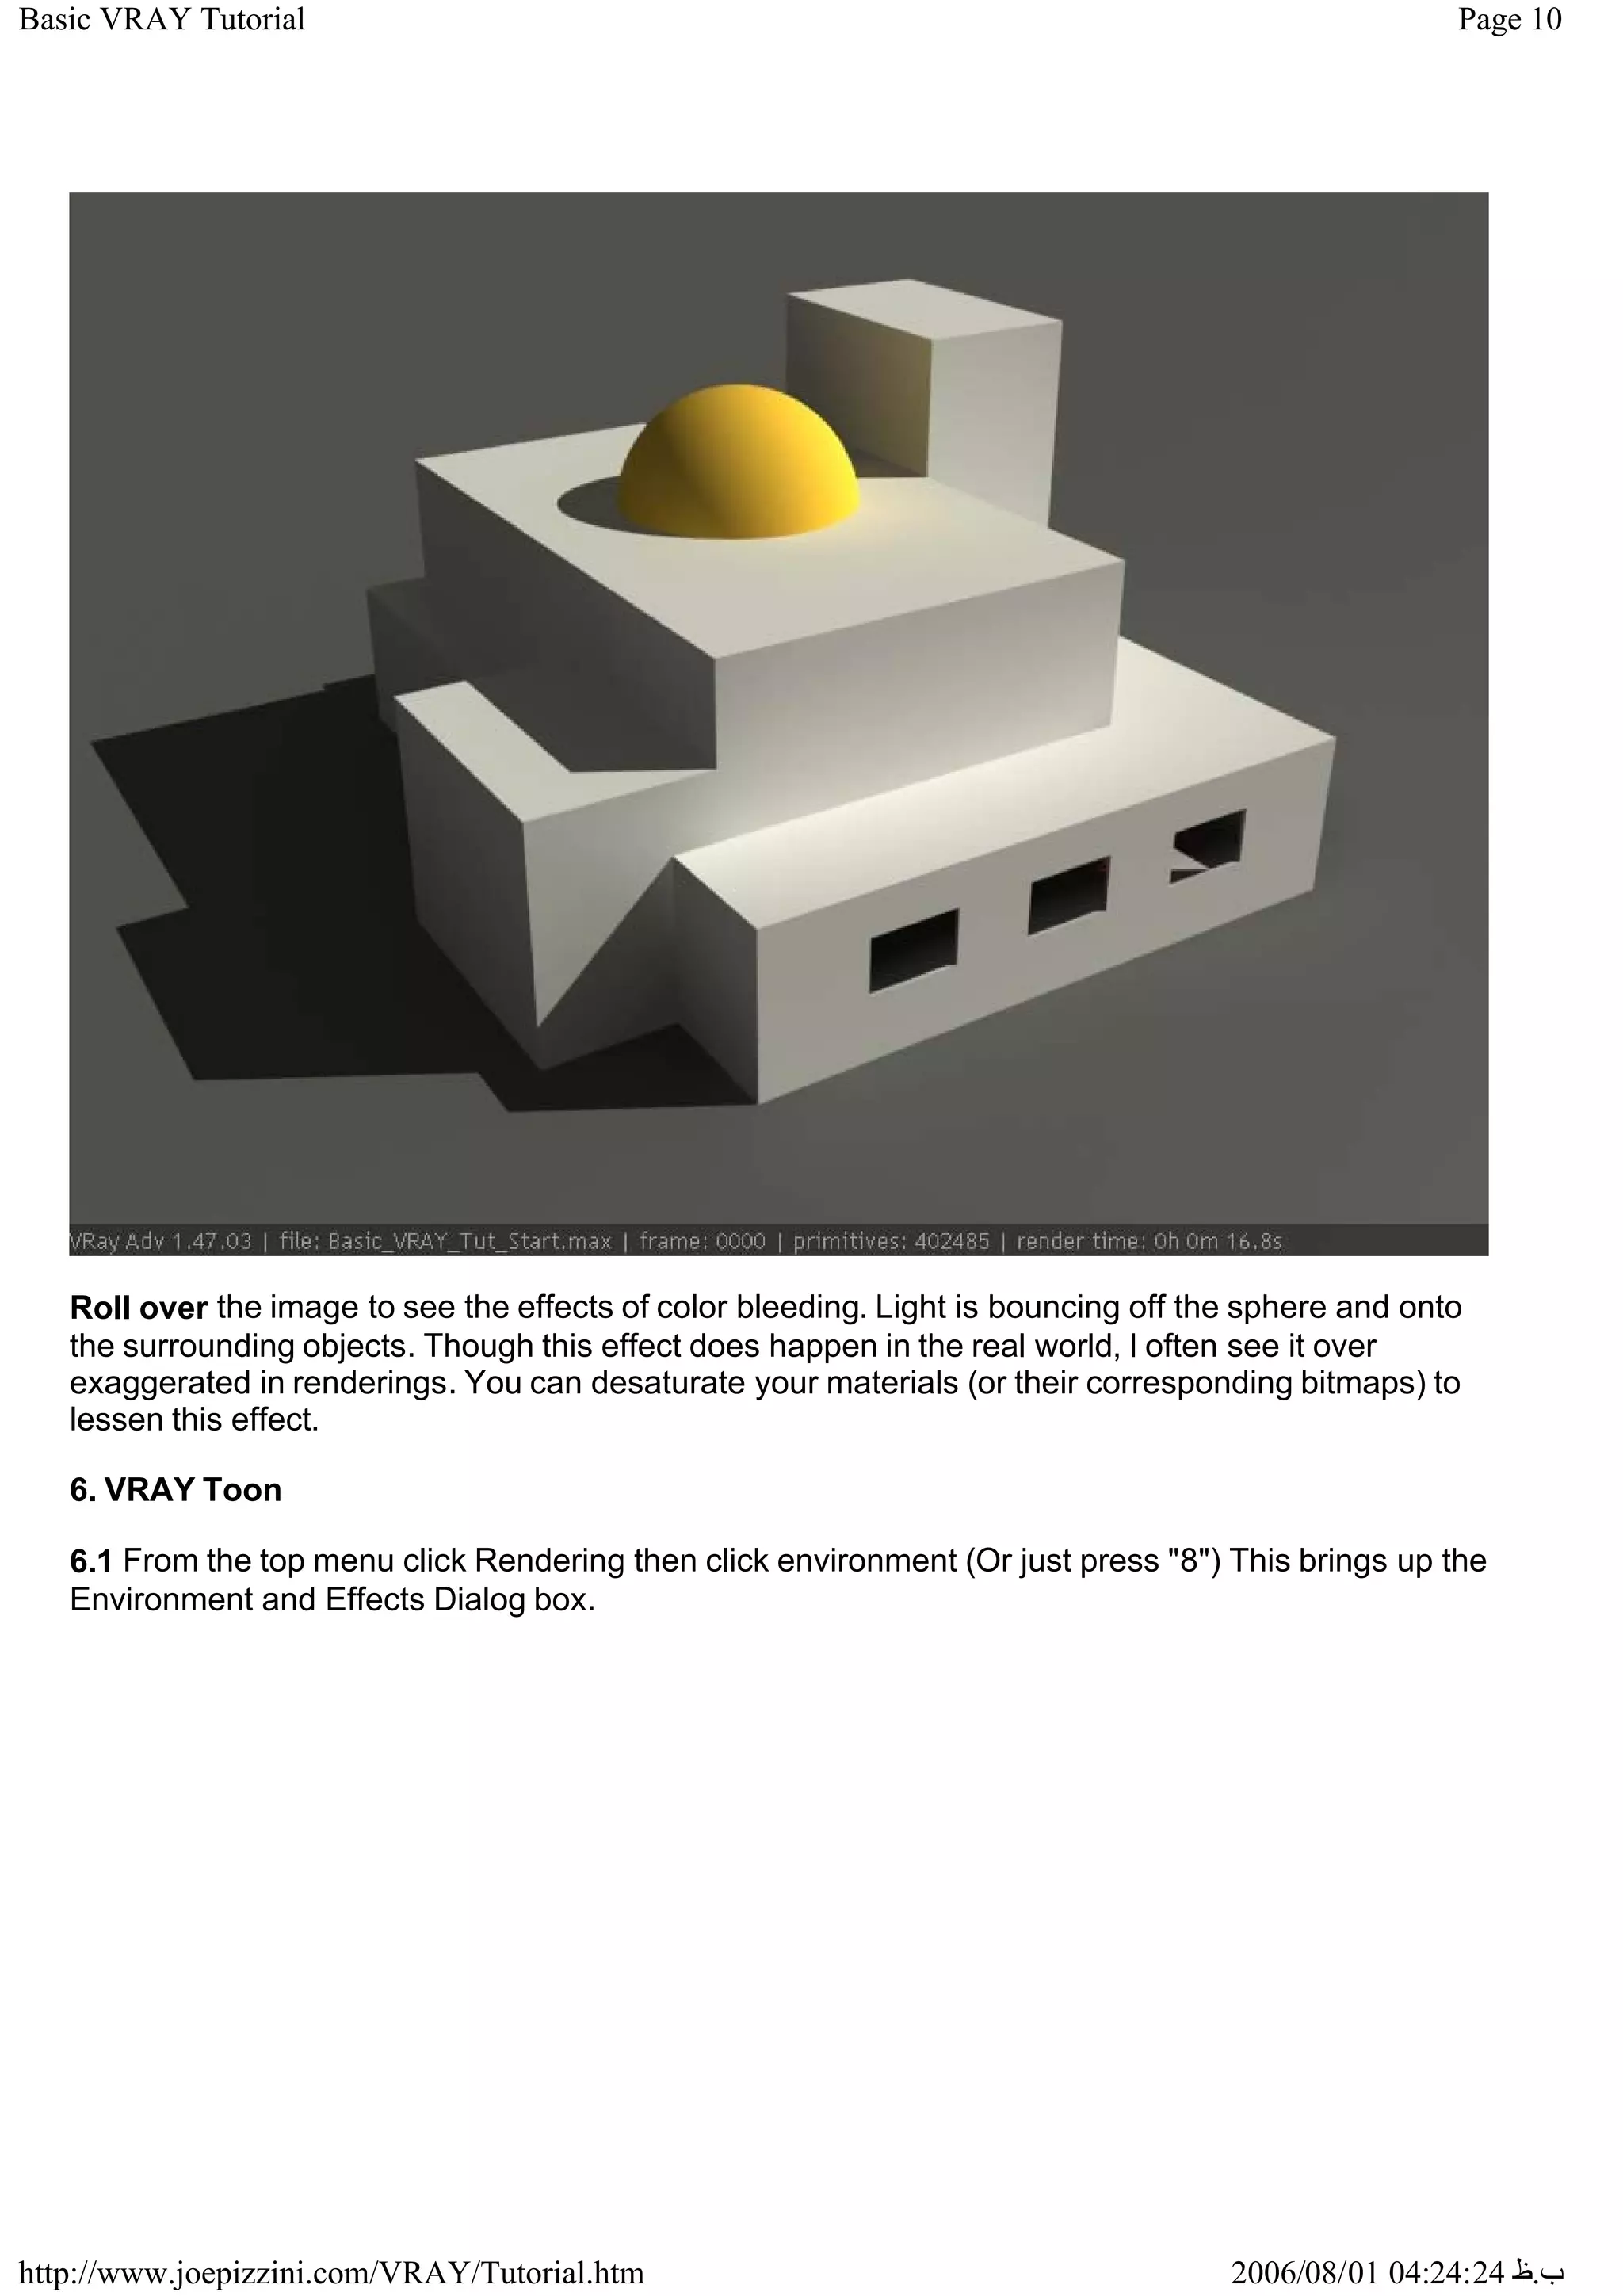
4. Demonstrates color bleeding effects and how to reduce them.
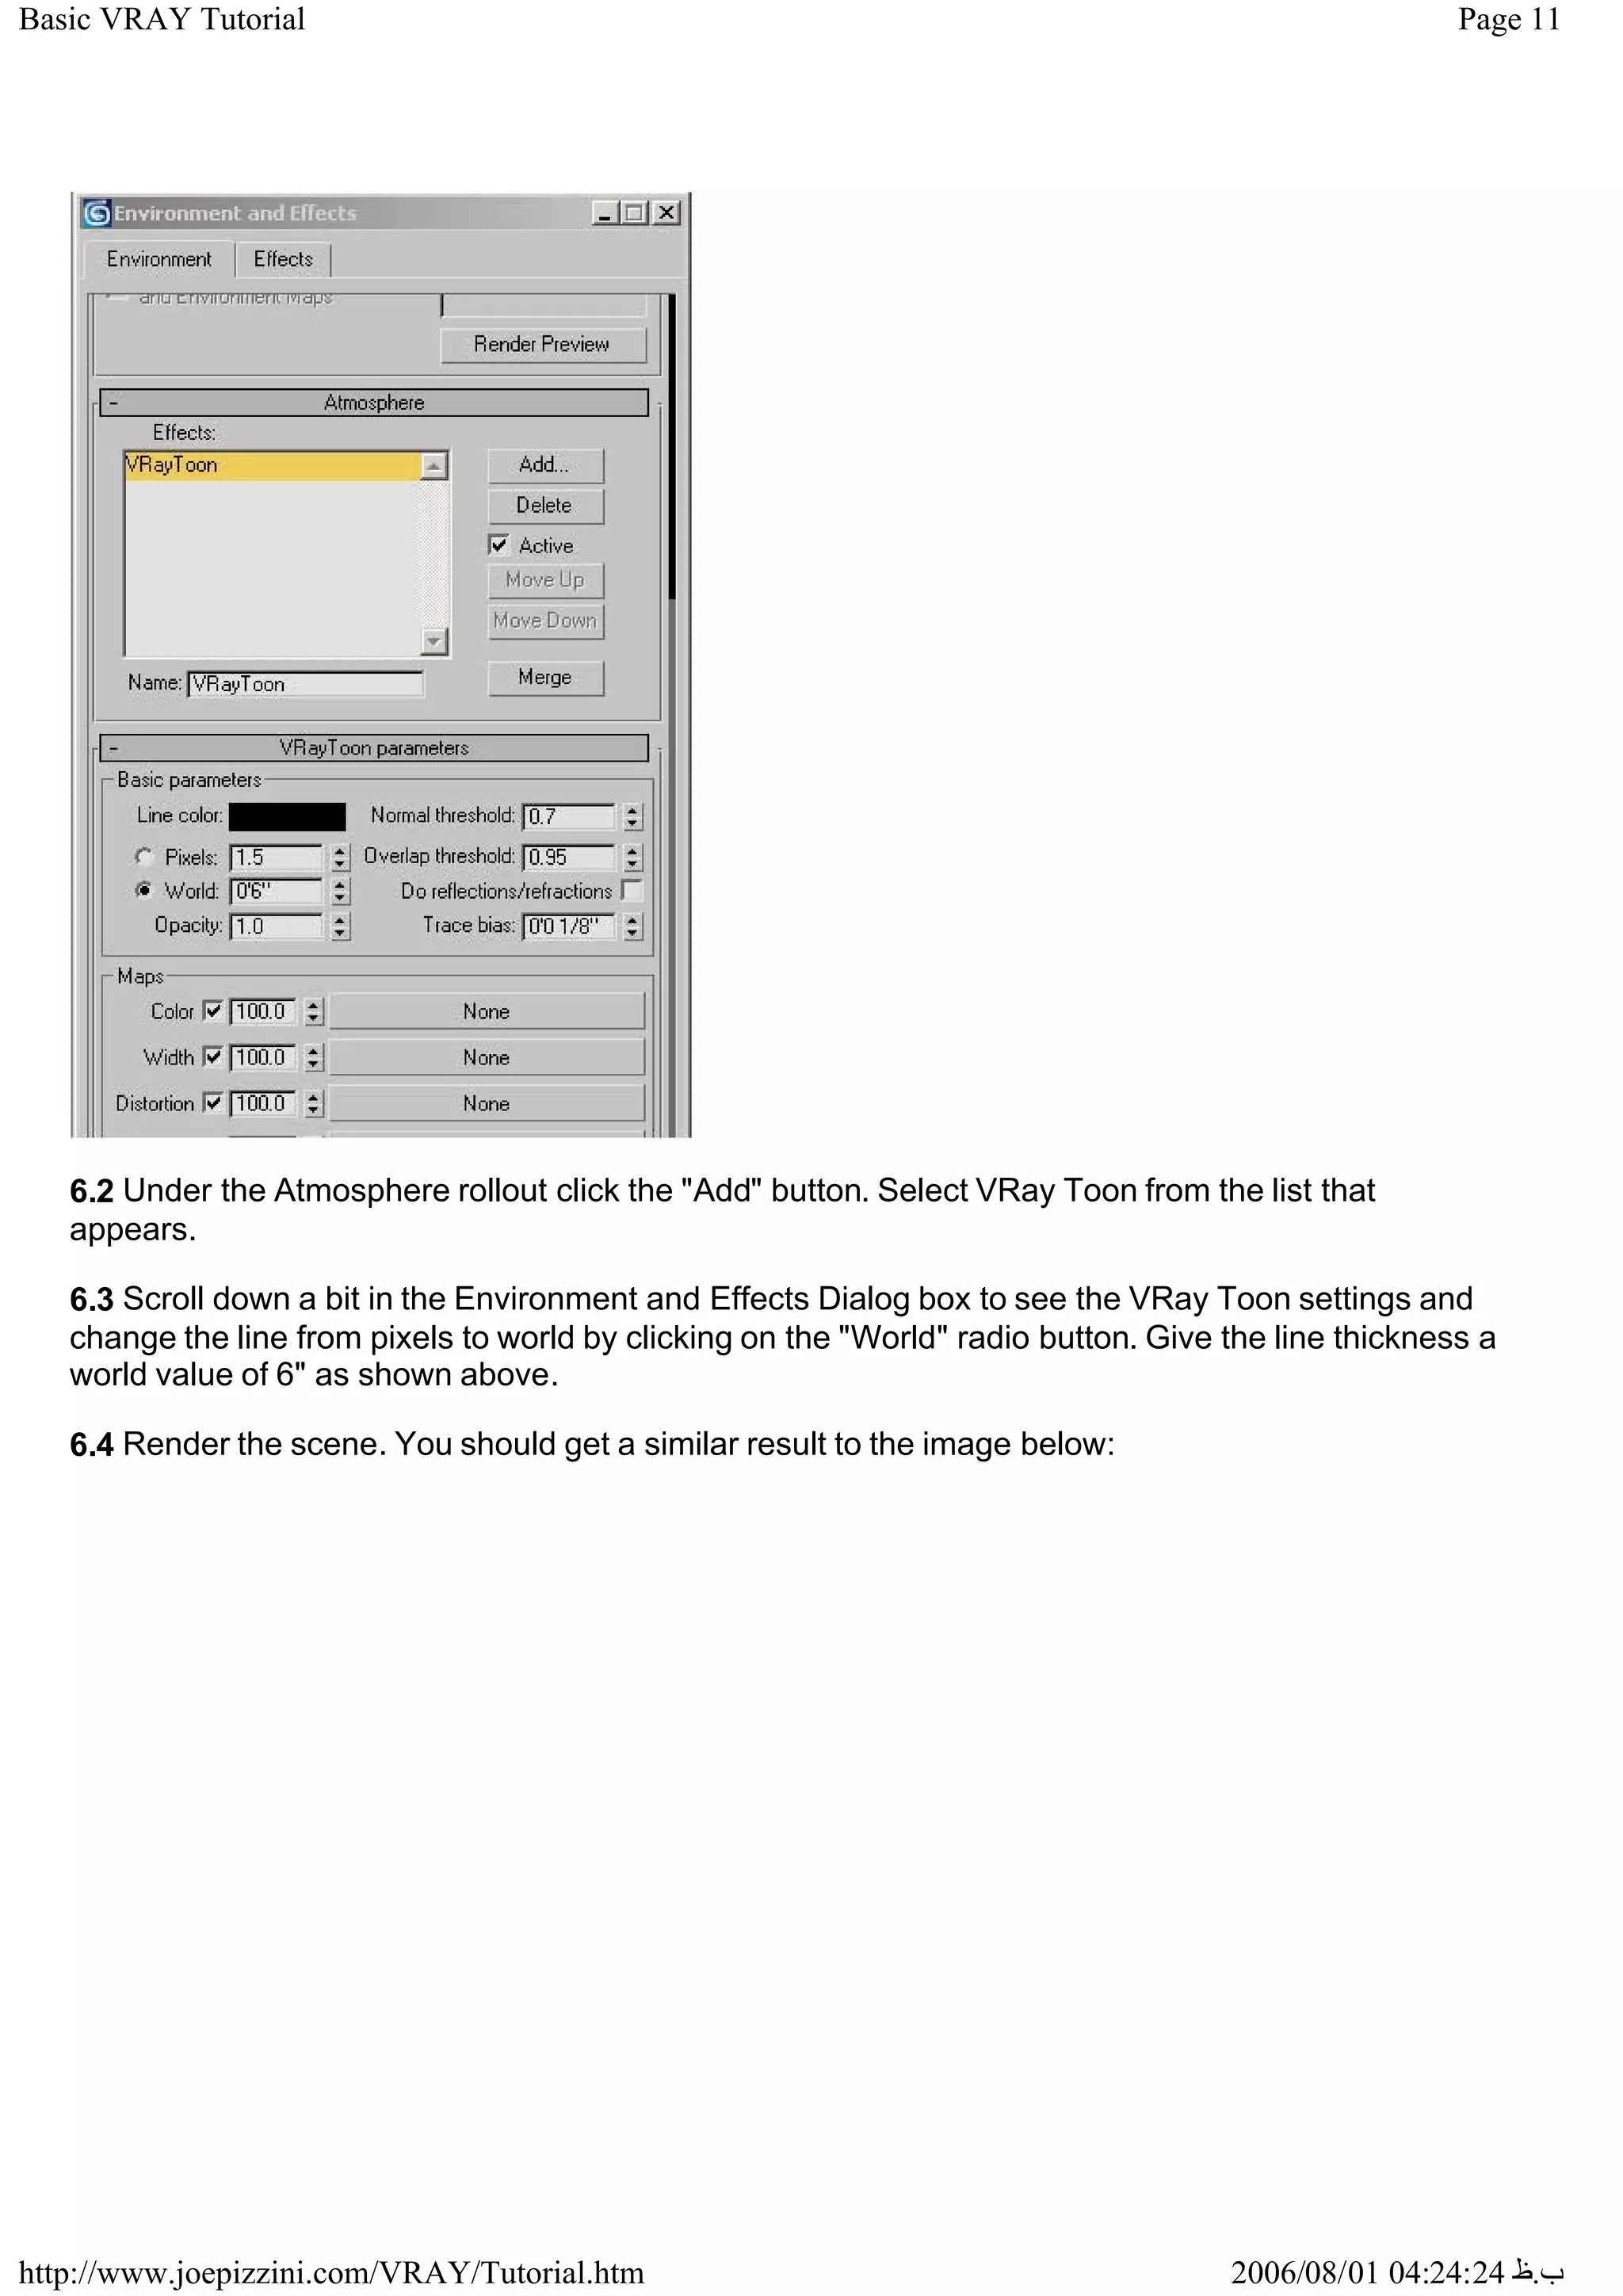
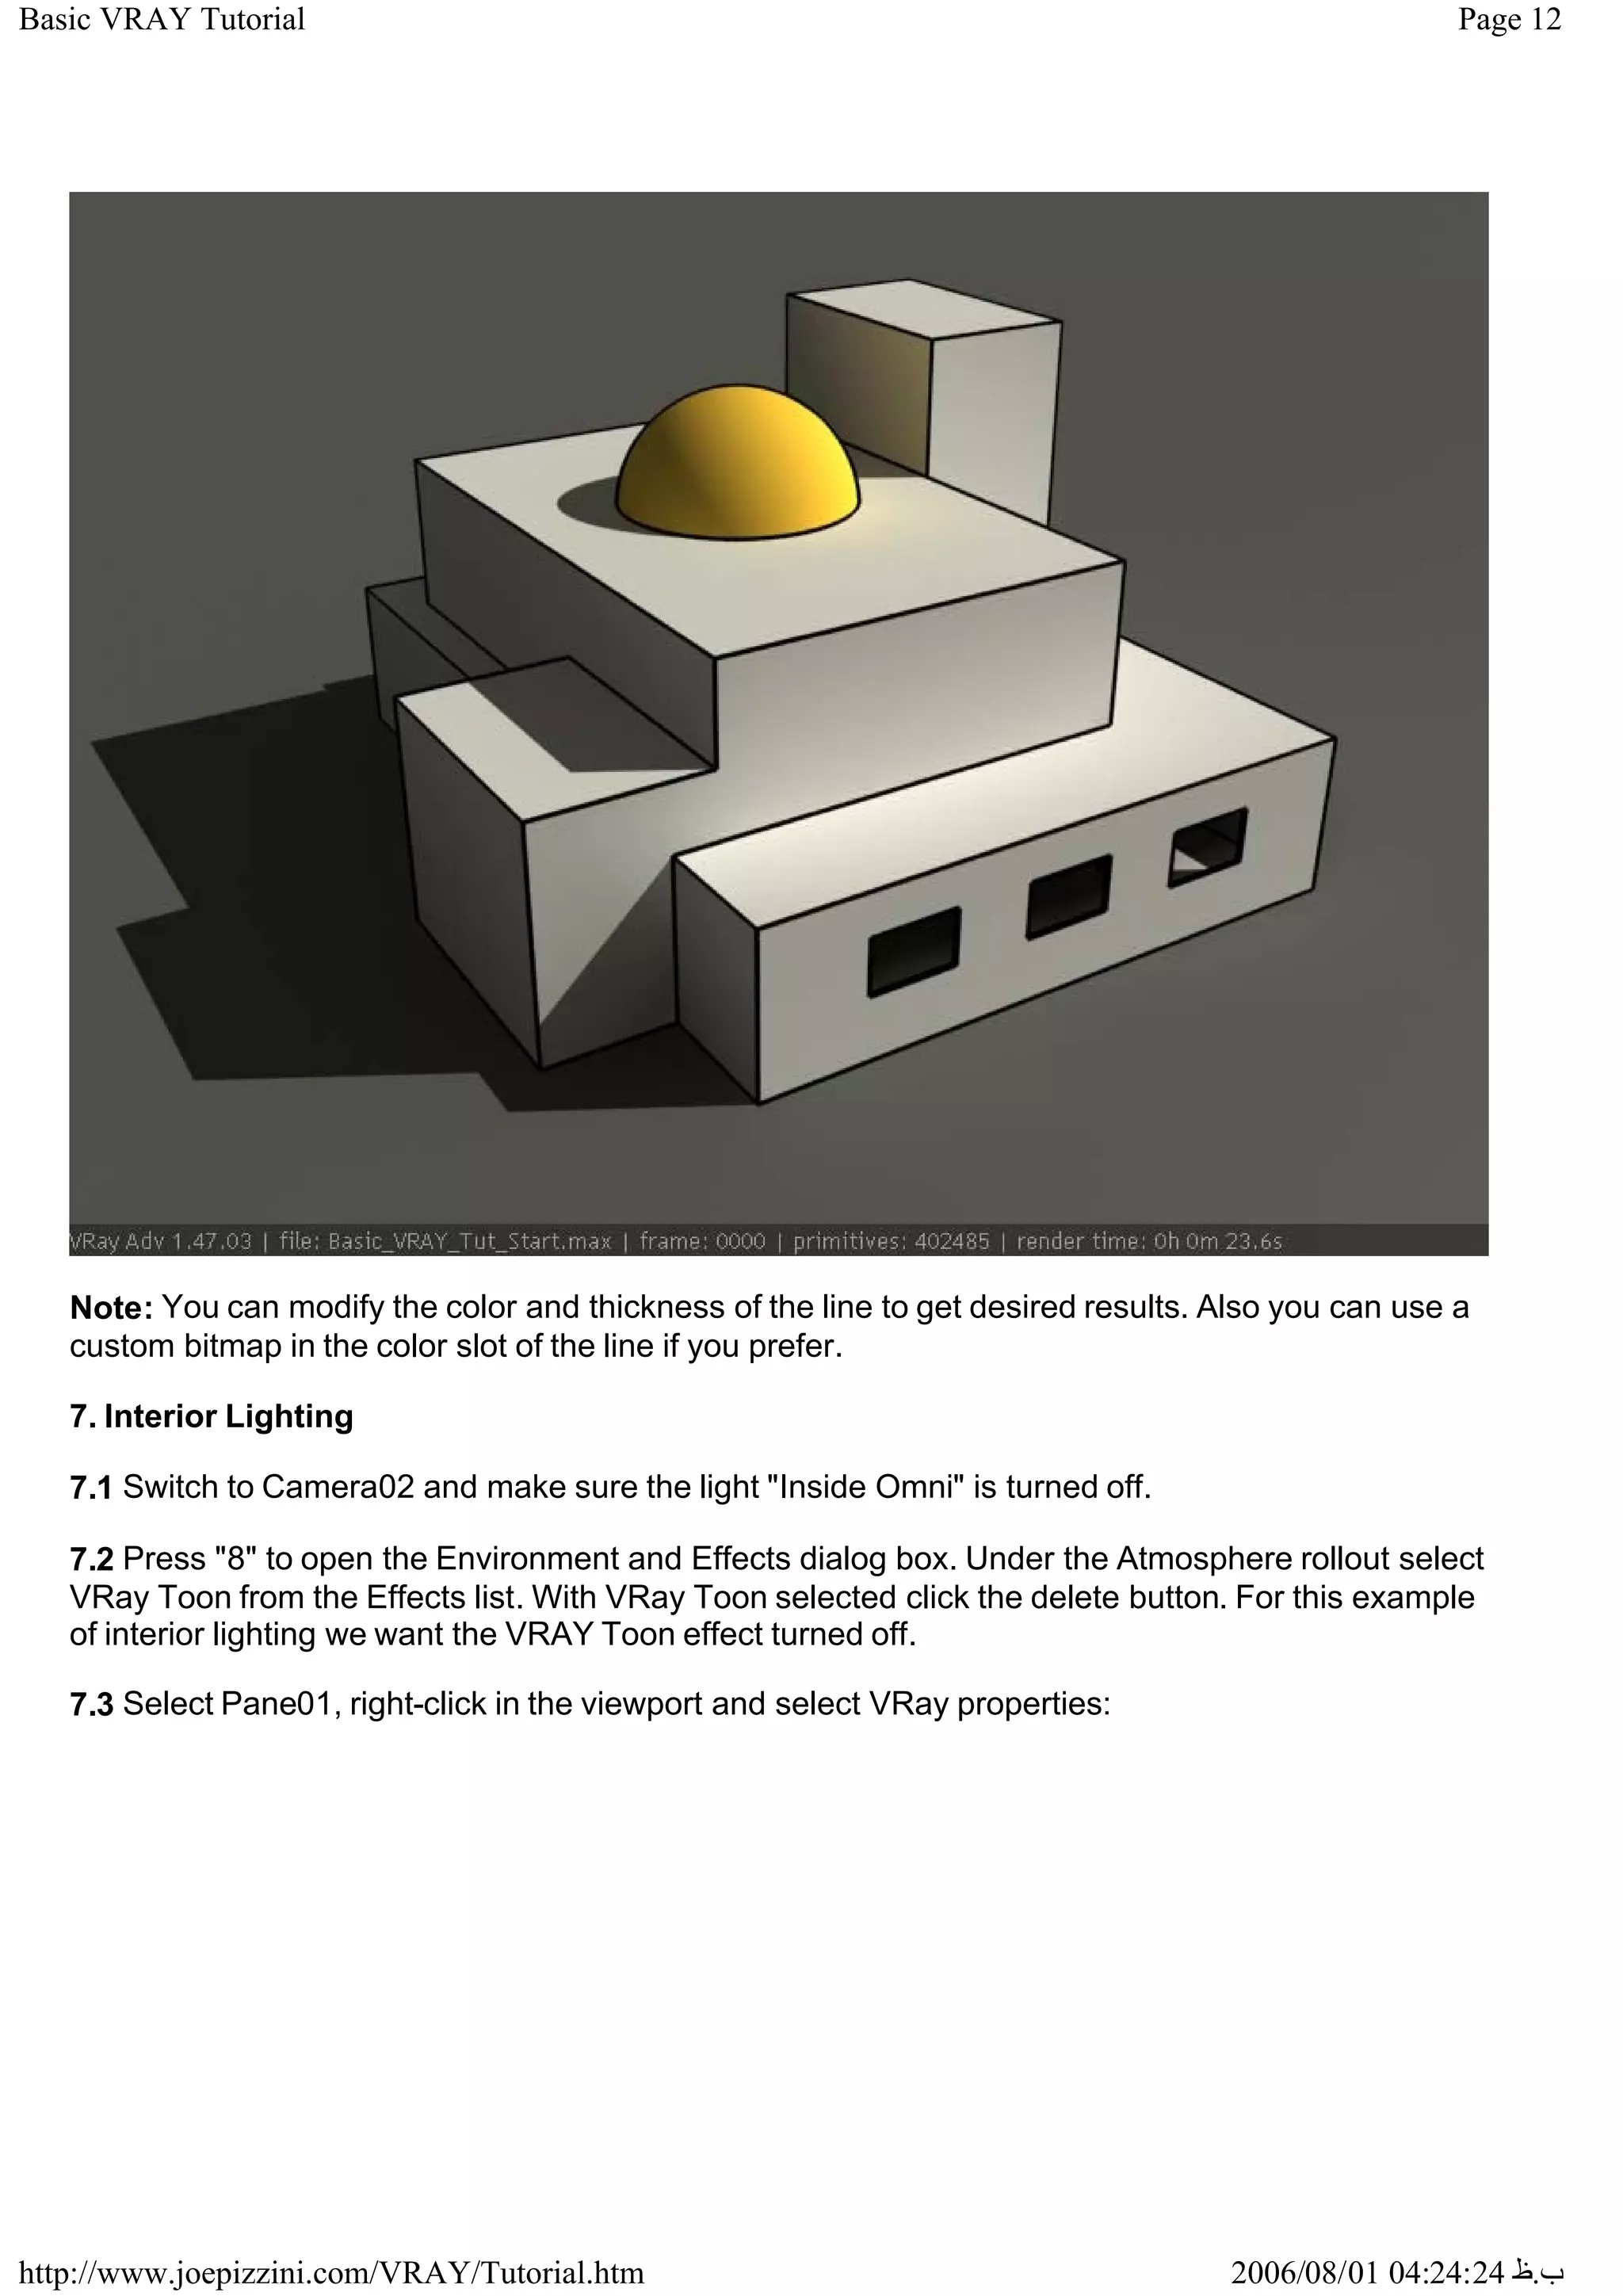
5. Applying a VRAY Toon effect to create cel-shaded rendering.
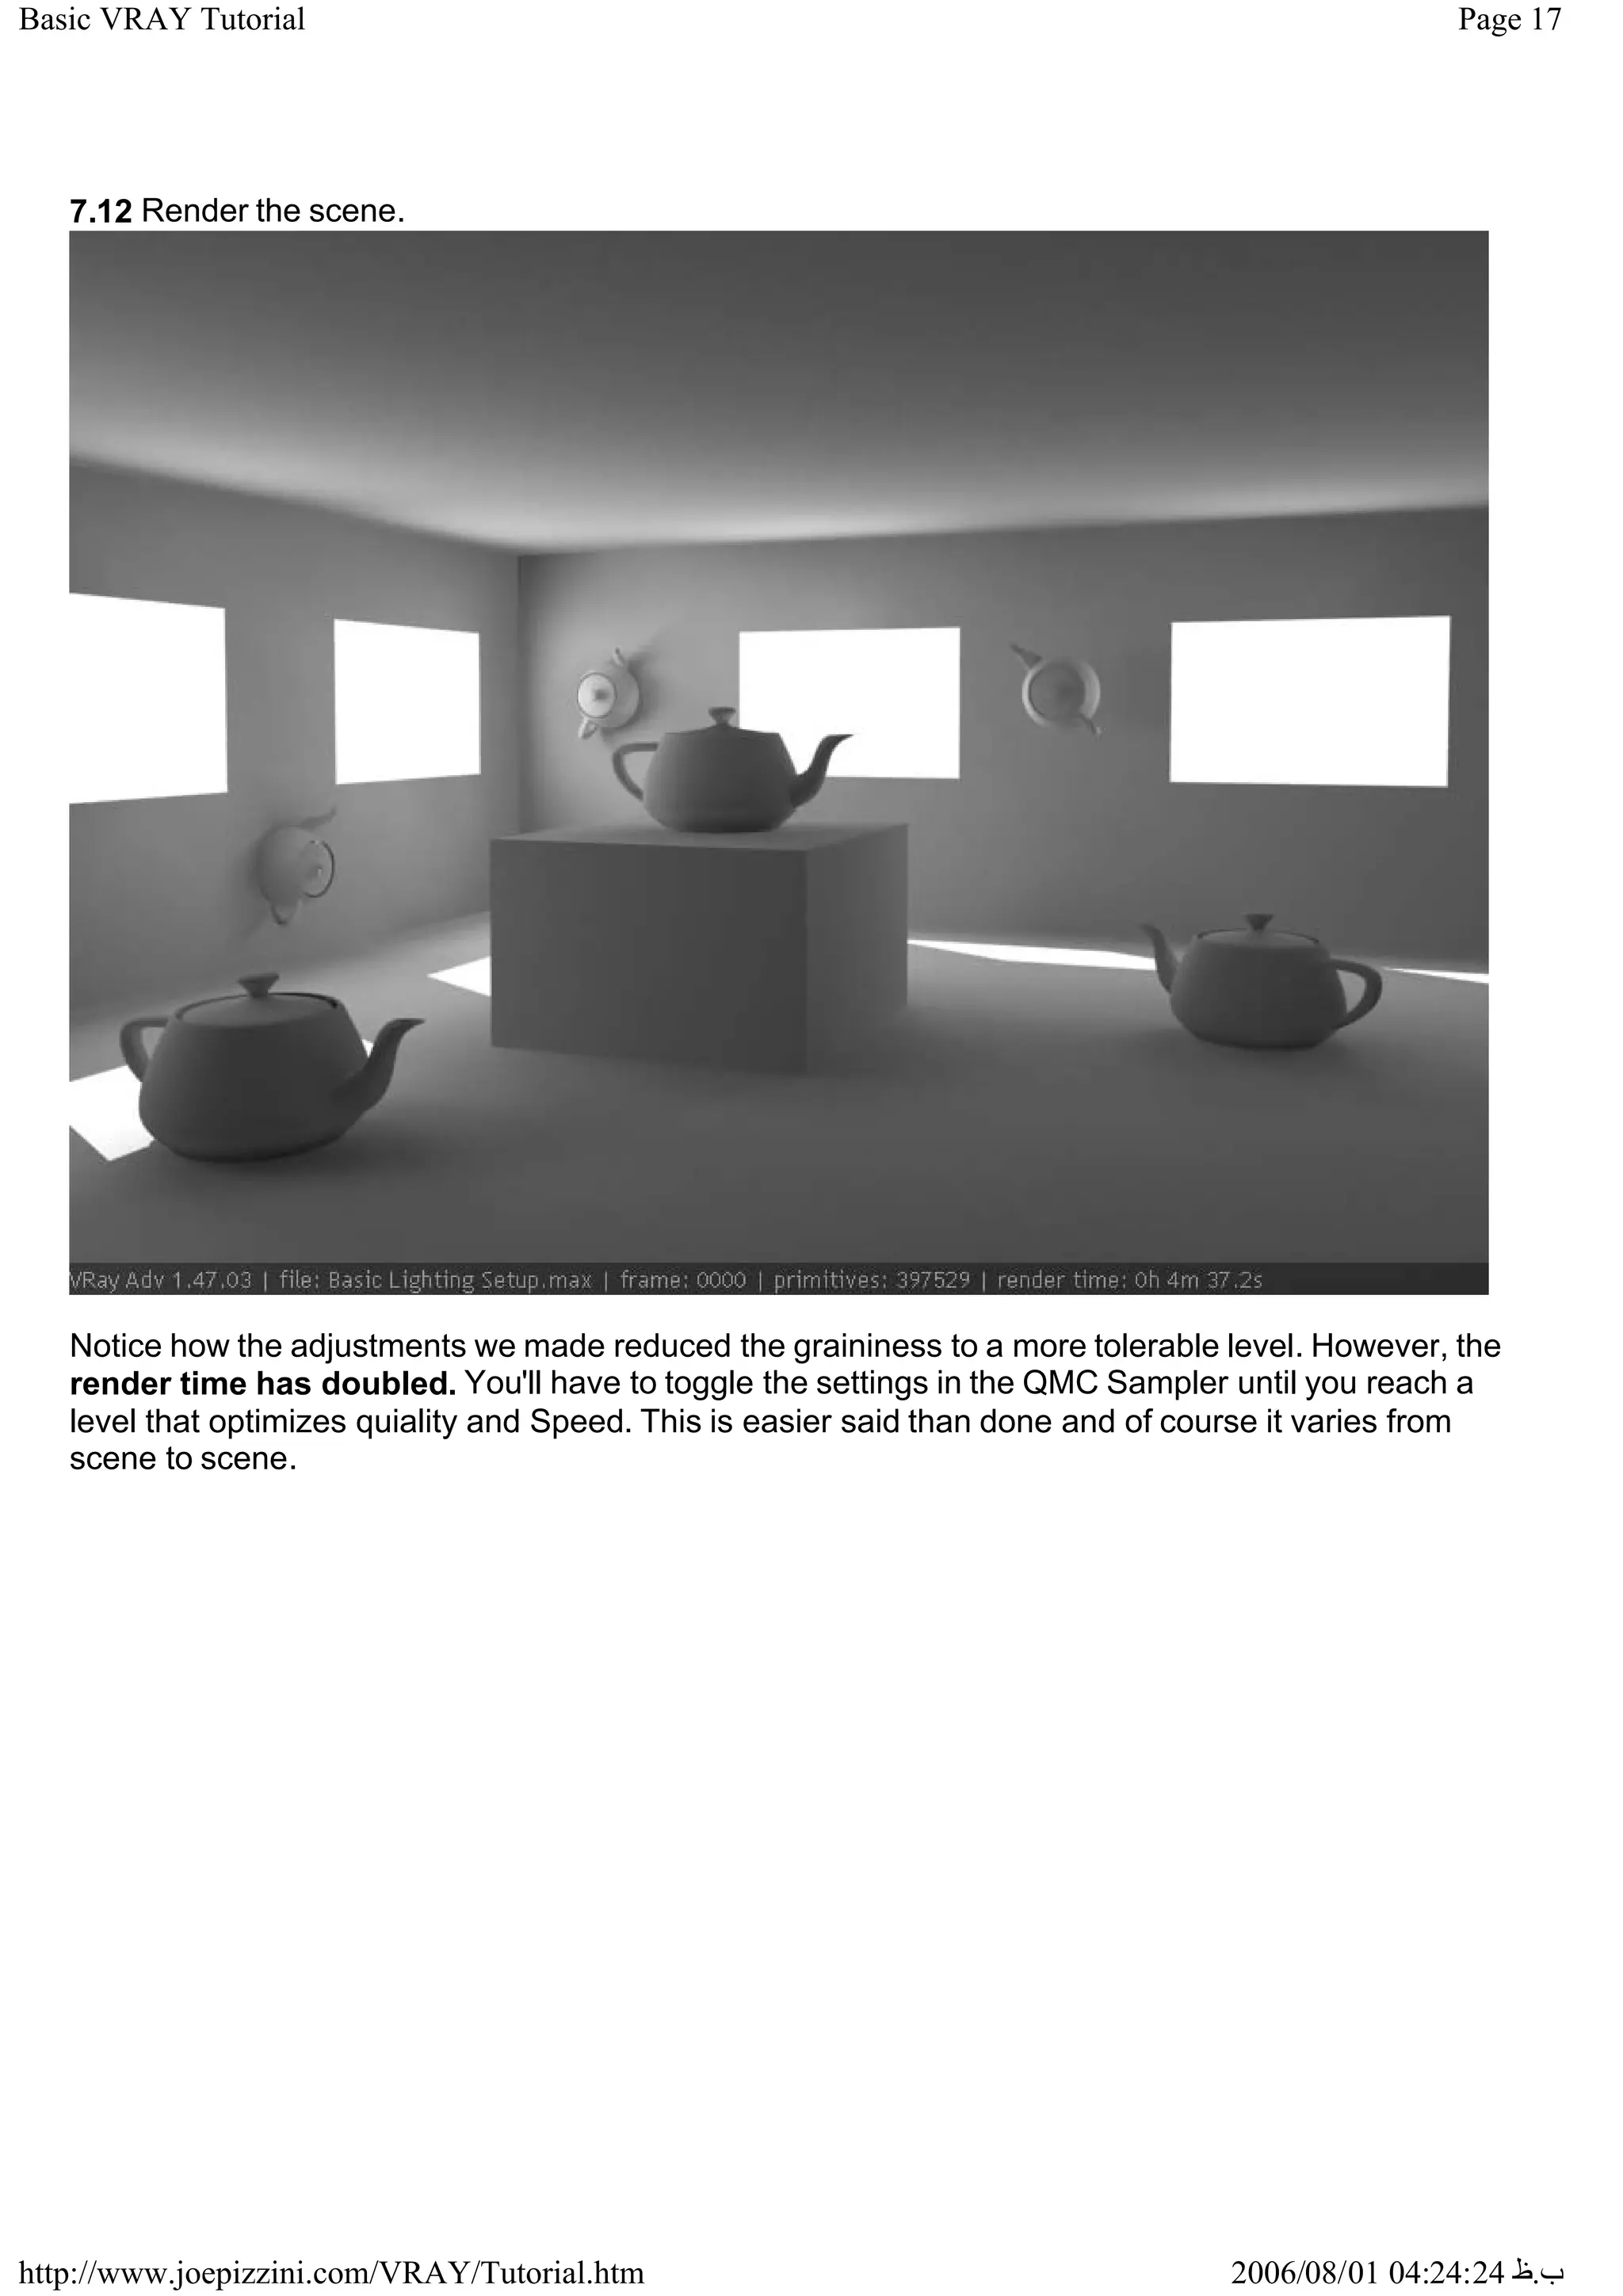
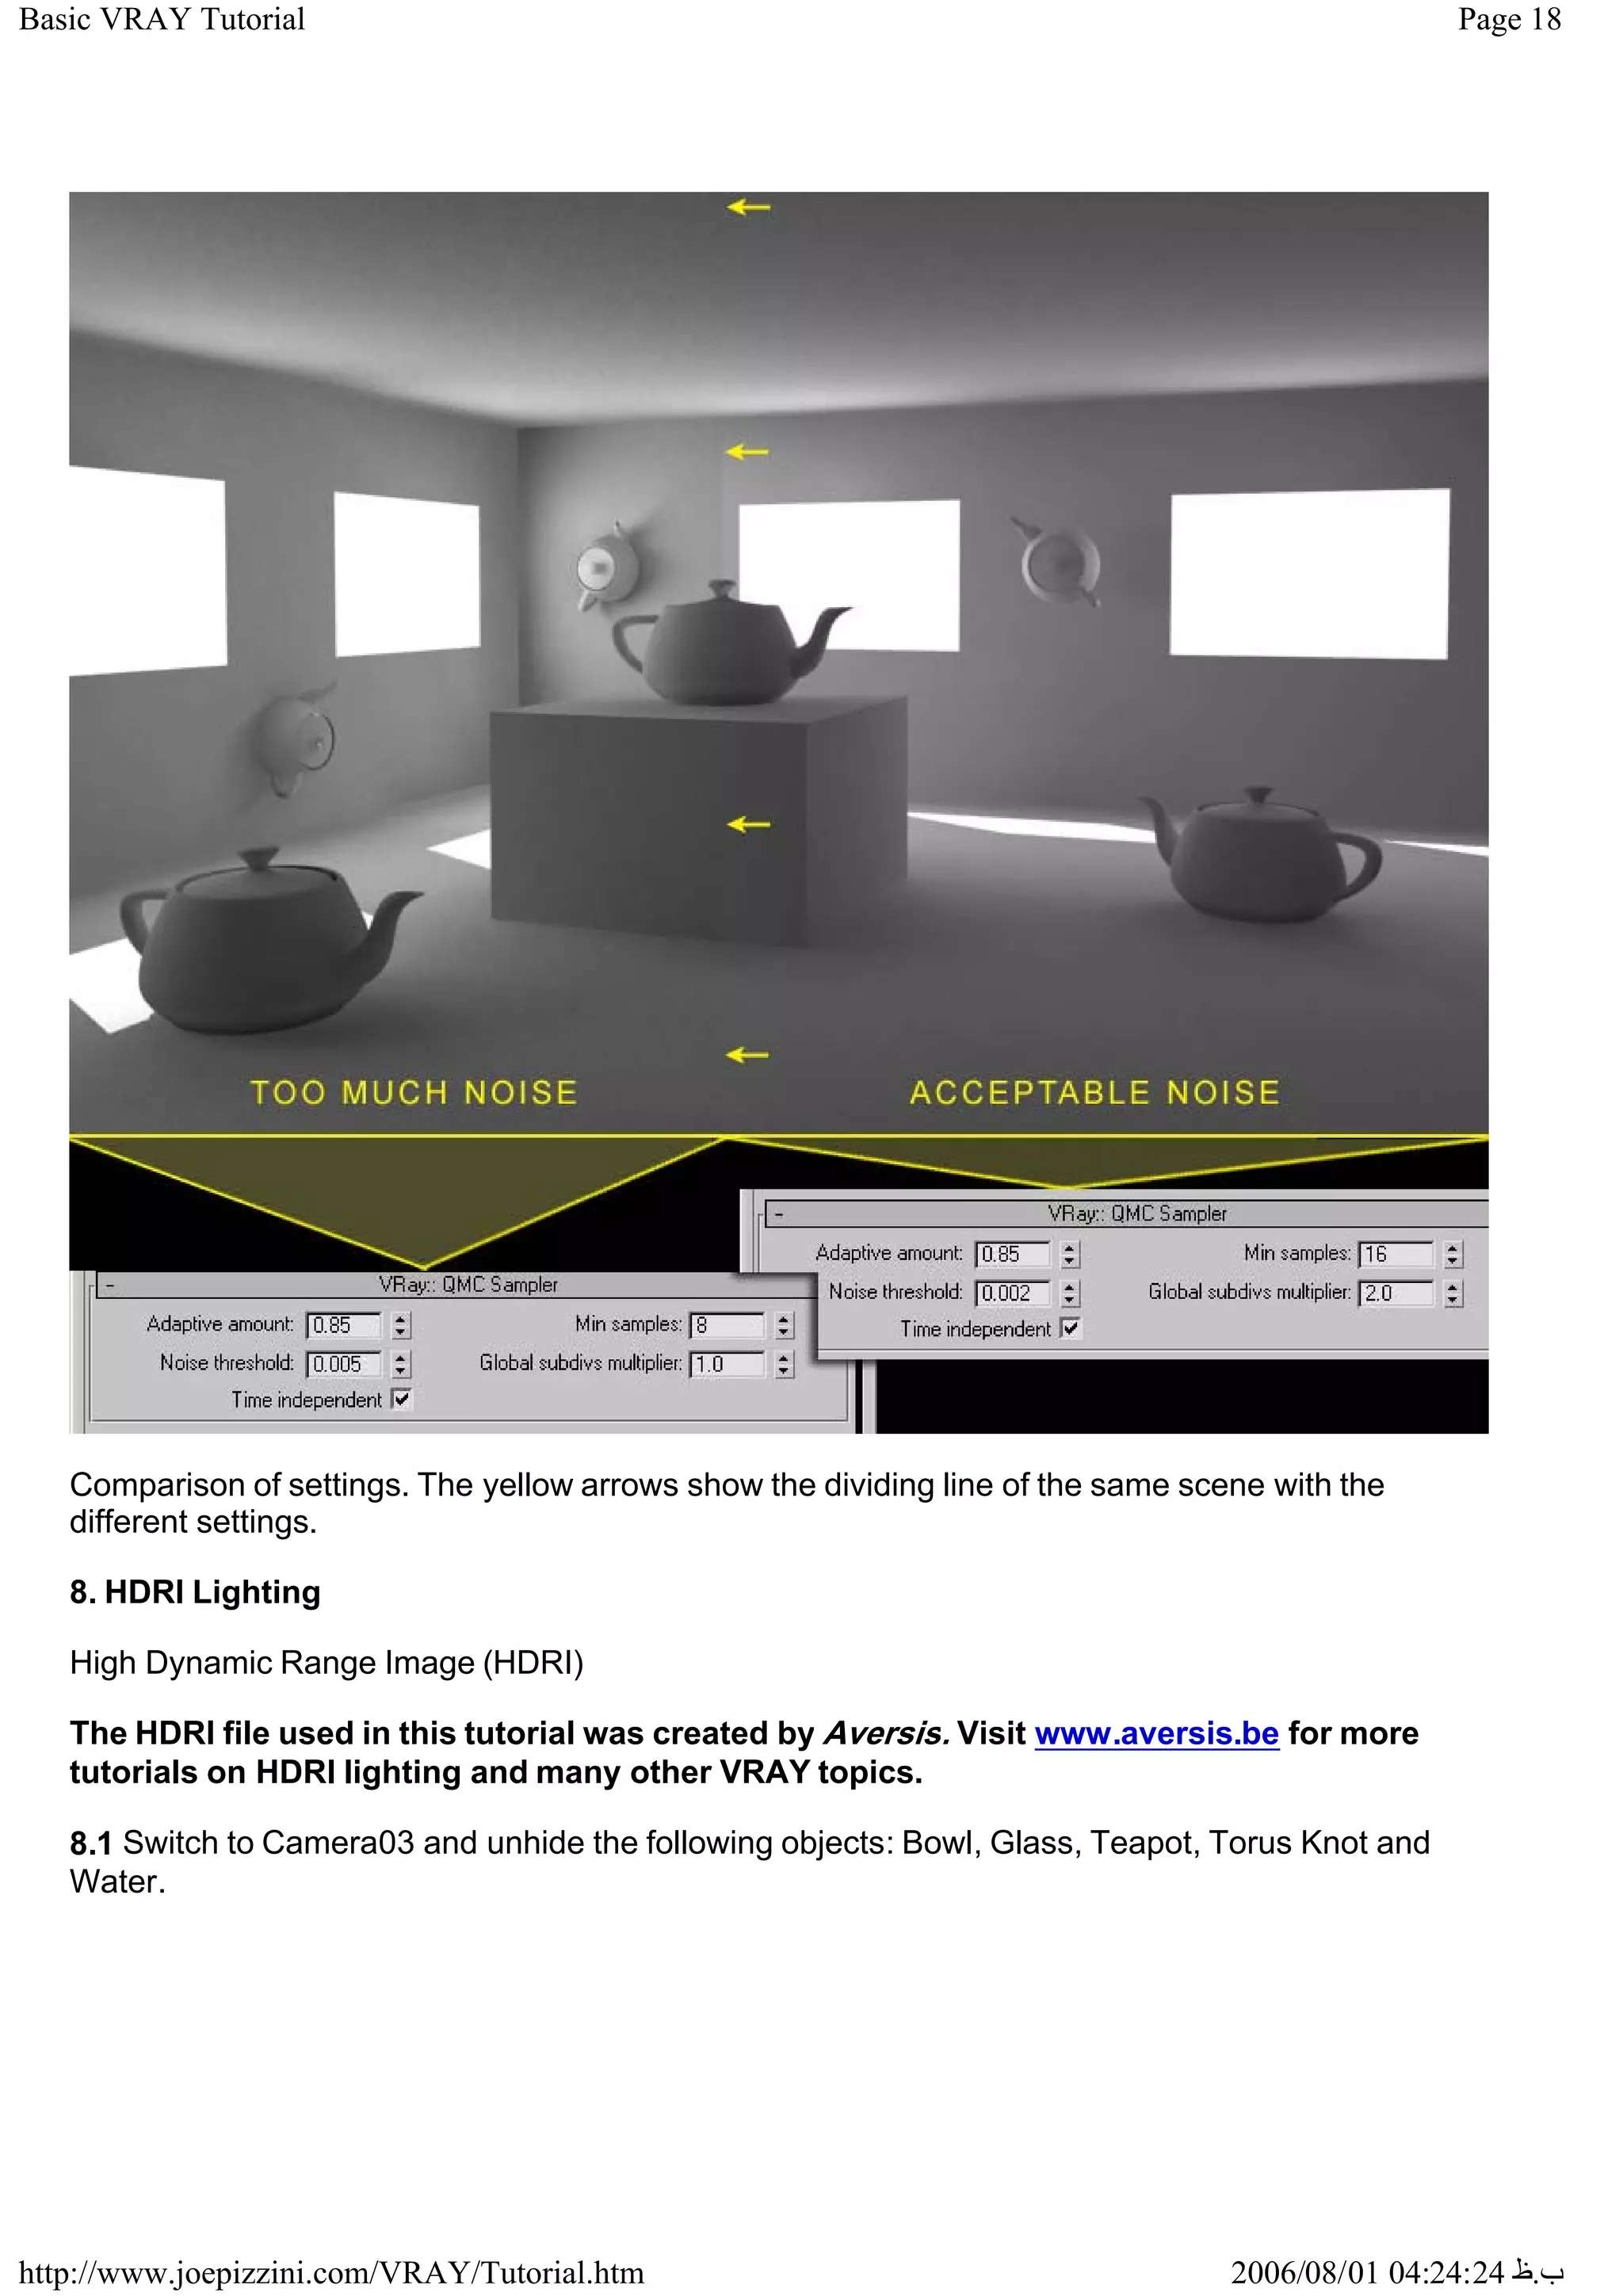
6. Lighting interior scenes using VRAY lights and windows, and adjusting QMC settings.