AxRobot Robot Programming Tutorial I -- Offline Programming

ASIX AX58200 AxRobot supports offline and online robot programming functionalities. This slide shows the offline robot programming functionality of AX58200 AxRobot EtherCAT 7-Axis Force-Assisted Control Robot solution. AxRobot EtherCAT 7-Axis Force-Assisted Control Robot solution uses AxRobot servo drive modular design with AX58200 EtherCAT slave controller SoC to effectively reduce the motor drive board PCB space and hardware design cost for each robotic arm joint. Using EtherCAT Daisy-Chain network topology technology to communicate between AxRobot controller and AxRobot servo drive modules, all robotic arm joints can be easily wired together in sequence. It provides the simplest network wiring in each robotic arm joint and reduces the difficulty of equipment maintenance. Normally, the collaborative robots are equipped with force sensors skin to obtain external contact forces information for realizing the Human-Robot Collaboration functionalities. AxRobot EtherCAT 7-Axis Force-Assisted Control Robot solution needs not be equipped with extra expensive force sensors skin, and supports the external forces assisted controller for realizing the collaborative robot functionalities. While detecting sudden external forces collision events, it can stop the operation of the robotic arm in an emergency and send out error alarm messages to ensure the personal safety of nearby operators. ASIX offers AxRobot EtherCAT 7-Axis Force-Assisted Control Robot development kit for designers to easily evaluate AxRobot software force-assisted control robot functionalities. In addition, ASIX also offers the engineering design services for AxRobot EtherCAT 7-Axis Force-Assisted Control Robot solution. For more information, please contact ASIX Electronics Corp. via e-mail: sales@asix.com.tw, or visit ASIX website: https://www.asix.com.tw/.

Recommended
More Related Content
Similar to AxRobot Robot Programming Tutorial I -- Offline Programming
Similar to AxRobot Robot Programming Tutorial I -- Offline Programming (20)
More from ASIX Electronics Corporation
More from ASIX Electronics Corporation (13)
Recently uploaded
Recently uploaded (20)
AxRobot Robot Programming Tutorial I -- Offline Programming
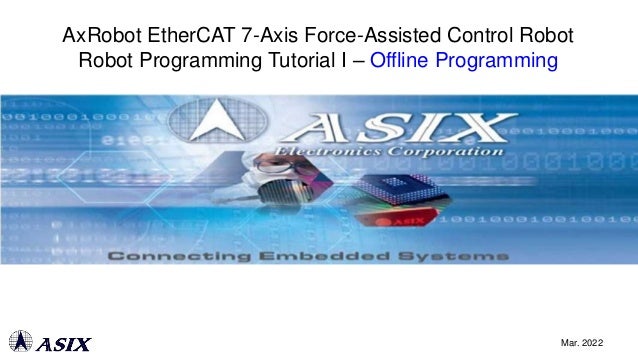
- 1. AxRobot EtherCAT 7-Axis Force-Assisted Control Robot Robot Programming Tutorial I – Offline Programming Mar. 2022
- 2. AX58200 AxRobot EtherCAT 7-Axis Force-Assisted Control Robot Solution AxRobot Robot Programming Tutorial I – Offline Programming Topics AxRobot Offline Robot Programming Demonstration AxRobot Robot Programming Tutorial II – Online Programming Topics AxRobot Online Robot Programming Demonstration AxRobot Online Robot Programming Demonstration (Teaching Mode)
- 3. AX58200 AxRobot EtherCAT 7-Axis Force-Assisted Control Robot Solution
- 4. AxRobot AX58200 EtherCAT Slave Controller AX58200 AxRobot EtherCAT 7-Axis Force-Assisted Control Robot Reference Design
- 5. AX58200 AxRobot EtherCAT 7-Axis Force-Assisted Control Robot Application Diagram AX58200 EtherCAT Slave AxRobot Servo Drive Module P0 P1 ABZ PWM Motion Control Driver Increment Encoder M P0 P1 ABZ PWM Motion Control Driver Increment Encoder M EtherCAT Slave 7 EtherCAT Slave 1 AxRobot Controller EtherCAT Master USB Windows AxRobot Utility Demo Video: AxRobot EtherCAT 7-Axis Force-Assisted Control Robot Solution Introduction
- 6. AxRobot Controller (EtherCAT Master) & AxRobot Utility The AxRobot Controller is worked as EtherCAT master. Designers can run AxRobot Utility to evaluate AxRobot EtherCAT 7-Axis Force-Assisted Control Robot functionalities. AxRobot Utility is an open source software and developed under python environment. AxRobotUtility GitHub URL: https://github.com/MyRobot- lab/AxRobotUtility.git AxRobot Controller (EtherCAT Master) USB Windows AxRobot Utility AxRobot Utility
- 7. AX58200 EtherCAT Slave AxRobot Servo Drive Module Using AX58200 EtherCAT Slave AxRobot Servo Drive Module to effectively reduce the motor drive board PCB space and hardware design cost for each robotic arm joint. The AxRobot system imports extForce software controller to realize the collaborative robot functionalities. Need NOT be equipped with expensive force sensors skin!!
- 8. AxRobot Script Commands for Text-based Robot Programming AxRobot supports text-based robot programming language with general script commands. AxRobot Script Commands: AxRobot Script Commands example: MOVJNT J1=0 J2=0 J3=0 J4=0 J5=0 J6=0 J7=0 LOOP 3 MOVPT P0 MOVPT P1 MOVPT P2 MOVPT P3 MOVPT P0 LOOPEND DELAY 1000 MOVJNT J1=0 J2=0 J3=0 J4=0 J5=0 J6=0 J7=0
- 9. AxRobot Offline Robot Programming Solution AxRobot Controller EtherCAT Master USB Windows AxRobot Utility AxRobot Utility AxRobot supports offline robot programming by running AxRobot Utility, to create 3D robot simulator and simulate AxRobot robot functionalities without connecting AxRobot EtherCAT slave servo drive modules.
- 10. AxRobot Offline Robot Programming Demonstration
- 11. Startup AxRobot Utility 3D Robot Simulator & Configure AxRobot Offline Robot Programming Mode 1. Select the assigned COM port for AxRobot Controller USB Serial driver. 2. Check “Simulation Enable” box and press “Connect” button to enable AxRobot simulation for AxRobot offline programming. 3. Check “Create 3D Model” box and press “Enbale” button in Servo Control console to startup AxRobot 3D simulator. 4. Enable “Assistant Force” in Operation Mode setting. 5. Disable “Teaching Mode” in Operation Mode setting.
- 12. Adjust AxRobot Joints Position by AxRobot Utility Jog Control 1. Select “Axis” or “TCP” mode and set proper Speed/Distance values. 2. Click “+” or “-” button to adjust the position of Joint 1 to Joint 7. 3. Check the Joint/TCP (Tool Center Point) position values in “Real Time Status” console.
- 13. Add Points by AxRobot Utility Point Editor 1. Adjust AxRobot Joint 1 to Joint 7 to proper position in “Jog Control” console; or manually drag AxRobot arms after enabling “Teaching Mode” in StartUp console. 2. Select proper coordinate mode (joint/world/work/base). 3. Press “Add Point” button to add a new point definition. 4. Click the “Name” field of the new defined point to modify a proper name.
- 14. Run Script Commands by AxRobot Utility Script Editor 1. Press ENTER key in Command console to add new script commands. (Please define the used point name in “Point Editor” console firstly) 2. Press “Compile” button to compile the script commands. 3. Press “Run” button to run the script commands. AxRobot Script Commands Please see below demonstration…
- 15. Contact ASIX for further supporting ASIX Electronics Corporation https://www.asix.com.tw sales@asix.com.tw Corporate Headquarters 4F, No. 8, Hsin Ann Rd. Hsinchu Science Park, Hsinchu 30078, Taiwan TEL : +886-3-5799500 FAX : +886-3-5799558