This document provides installation guidelines for Skyline Roofing panels and accessories. It includes sections on delivery and storage, safety considerations, required tools and equipment, panel profiles, roof preparation, flashing details, and installation instructions. Diagrams illustrate how to install various roof components like ridges, valleys, eaves and more. The guidelines aim to help installers achieve high quality results and weatherproof installations.
An easily identified place for everything, and everything in its place, clean, safe, and ready for use.
Workplace organization and standardization
It’s NOT JUST HOUSEKEEPING!
The foundational building block of Lean
An easily identified place for everything, and everything in its place, clean, safe, and ready for use.
Workplace organization and standardization
It’s NOT JUST HOUSEKEEPING!
The foundational building block of Lean
Distributor, Exporter and Supplier of different type of Access Towers, Ladders and Allied Accessories. We make great effort to create an enduring relationship with our clients. such as Aluminium Scaffolding, Cantilever Aluminium Scaffolding, Aluminium Scaffolding, Aluminium Ladder Industrial, Ecolite- T Lighting Towers, FRP Platform Ladder, FRP Step Ladder, FRP Ladder.
Emco Industrial Plastics: Design Principles For Engineering PolymersPurpose Advertising
Engineers that are accustomed to fabricating out of metals should be sure to read the overview of engineering with thermoplastics and polymers.
Acetal, Delrin, Peek and many more are covered in this extensive yet informative manual.
To purchase or learn more about these and other thermoplastics, please visit this distibutor website www.emcoplastics.com
3. 2 February 2014
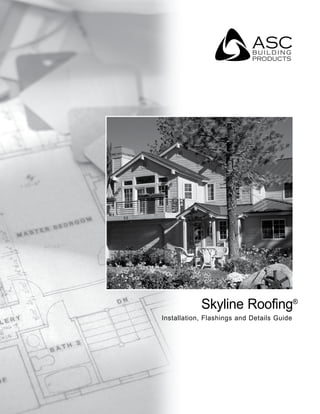
Skyline Roofing®
Installation, Flashings & Details Guide
Introduction
In addition to weather tightness, long life and good
looks, ASC BP’s Skyline Roofing is designed with ease
of installation as a primary consideration. This guide
is intended to help the installer achieve a high level of
quality in the finished product. Please do not hesitate
to contact an ASC BP representative for assistance.
Manufacturing Locations:
Anchorage, Alaska
2441 Cinnabar Loop
Anchorage, AK 99507
West Sacramento, California
2110 Enterprise Boulevard
West Sacramento, CA 95691
Salem, Oregon
4063 Salem Industrial Drive NE
Salem, OR 97303
800-272-7023 • 503-390-7174
Salt Lake City, Utah
4228 West 1730 South
Salt Lake City, UT 84104
Spokane, Washington
4111 East Ferry
Spokane, Washington 99202
800-776-8771 • 509-536-4097
Important Notice
Be sure to read this manual in its entirety before
beginning installation.
This manual is provided to the customers of ASC
Building Products as a guide to assist in the installation
of Skyline Roofing. Use for any other purpose is
prohibited. This manual remains the property of ASC
Building Products.
These instructions contain suggested application
procedures only and cannot replace the need for
good common sense and experience. Responsibility
for conformance to state and local building codes, as
well as any other applicable project requirements rests
with the installer, as does the responsibility to observe
reasonable safety procedures.
Certain panel and flashing conditions such as panel
overhangs, gutters, rake trim, etc., are easily damaged
if a ladder is leaned against them. Care should be
taken to avoid this.
ASC Building Products assumes no responsibility
for any problems which might arise as a result of
improper installation or any personal injury or property
damage that may occur with the product’s use.
Notes:
• It is recommended that Skyline Roofing be applied on
roofs with a minimum slope of 3 inches per foot (3:12).
• Panels exceeding 40’ in length must be fastened
using the Skyline Roofing clip (See page 10). Thru-
fastening these longer length Skyline Roofing panels
is not recommended. For applications that require
the Skyline Roofing clip and exceed 20 psf of snow
load, please contact an ASC Building Products
Representative for installation details.
• Each flashing part in this guide has been assigned a
part number. Each part number contains one or two
letters followed by one or two numbers, for example
(EW17). These part numbers have been provided for
you to make ordering these flashing parts quick and
easy.
• To prevent mis-alignment of fasteners and “walking”
drill bits, it may be advisable to pre-drill certain
flashings before they are installed.
MENU
4. ASC Building Products
A Division of ASC Profiles LLC
Skyline Roofing Installation Guide • February 2014 3
Delivery, Handling and Storage
• Always check the shipment upon delivery. Check
for damage and check material quantities against
the shipping list. Note any damaged material or
shortages at the time of delivery.
• Handle panel bundles and individual panels with
care to avoid damage. Longer bundles and panels
may require two or more “pick points,” spaced no
farther than 10’ apart, to avoid damage that can
result from buckling and/or bending of the panels.
Request a copy of the Long Length Handling
Instructions and diagrams from ASC BP Customer
Service as required.
• Store the panels and other materials in a dry, well
ventilated area and away from traffic. Elevate one
end of the bundle so that any moisture that may
have accumulated during shipping can run off. Be
sure that air will be able to circulate freely around
the bundles to avoid the build-up of moisture. Never
store materials in direct contact with the ground.
• Painted panels are shipped with a protective plastic
sheeting or a strippable film coating between all
panels. Remove any strippable film coating prior
to installation and in any case, do not allow the
strippable film coating to remain on the panels in
extreme heat, cold, or in direct sunlight or other UV
source.
• Wear clean cotton gloves when handling unpainted
bare panels or flashing to avoid discoloration.
Rollforming die marks (which appear black),
particularly at bends, will be visible.
• Wear clean, non-marking, soft soled shoes when
walking on the panels to avoid shoe marks or
damage to the finish. Do not step on the panel
seams or ribs. Step only in the flat area of the
panel.
Safety Considerations
• Never use unsecured or partially installed
panels as a working platform.
Do not walk on panels until they are in place on the
roof and all of the fasteners attaching the panels to
the roof have been installed.
• Metal roofing panels are slippery when
wet, dusty, frosty or oily.
Do not walk on a metal roof when any of these
conditions are present. Wearing soft soled shoes will
help minimize slipping and help prevent damage to
the painted surfaces.
• Do not walk on the panel seams.
When walking on the fully installed roof panels, be
sure to step only in the flat areas of the panels.
• Always be aware of your position on the
roof relative to your surroundings.
Take note of the locations of roof openings, roof
edges, equipment, co-workers, etc.
• Always wear proper clothing and safety
attire.
Wear proper clothing when working with sheet
metal in order to minimize the potential for cuts,
abrasions, and other injuries. ASC Building Products
recommends safety glasses and gloves.
• Use care when operating electrical and
other power equipment.
Observe all manufacturer’s safety recommendations.
• Roof installation on windy days can be
dangerous.
Avoid working with sheet metal products on windy
days.
MENU
5. Skyline Roofing
Installation, Flashings & Details Guide
4 February 2014
Screws/Screw bits: Clutch type screw gun
with depth locating nose piece allowing variable
torque settings is recommended to insure proper
installation of the screws. The following bits will be
required: 1/4” hex and No. 2 Phillips screwdriver bit.
Snips: For miscellaneous panel and flashing cutting
requirements. Three pairs will be required for left
edge, right edge, and
centerline cuts.
Electrical Metal Shears: Used for general
metal cutting, such as at the hips and valleys.
Note: Some erectors prefer to use circular power saws
with metal cutting abrasive blades While the use of power
saws may be faster, there are some disadvantages that
must be considered: (1) The edges of metal that have
been saw cut are jagged and unsightly, and are more
likely to rust than sheared edges. (2) Saw cutting will
leave small particles of metal on the panel surface that
will rust and damage the panel finish if not completely
removed.
Chalk Line: Used to assist in the alignment of panels,
flashings, etc.
Caulking Gun: For miscellaneous caulking and sealing
to inhibit water infiltration.
Rivet Tool: Used for miscellaneous flashing and trim
applications.
Turn-Up Tool: Available from ASC BP, the tool is used
to hand brake the ends of the panels as indicated in the
details of this manual.
Marking Tools: Indelible marker or scratching tools.
Scratch Awl: Used to mark the steel.
Utility Knife: Used for miscellaneous cutting.
Electric Drill: Used to drill holes such as those
required for rivet installation.
String Line: Used for general alignment and measuring.
Tape Measure: 25 ft. minimum (another 50 ft. handy)
Locking Pliers: Standard in “Duckbill” style for
miscellaneous clamping and bending of parts.
Hammer: Used with roofing nails to fasten flashings.
Skyline Roofing Panel Profile
Use only those accessories specifically designed
for use with this product. Use only galvanized or
Zincalume-coated flashings. Isolate roofing and
flashings from contact with dissimilar metals.
Available Products:
Coverage Gauge Wt. PSF
16” 26 0.90
16” 24 1.19
12” 26 0.97
MINIMUM RECOMMENDED TOOLS & EQUIPMENT
Note: All flat metal surfaces can display waviness
commonly referred to as “oil canning”. This is caused
by steel mill tolerances, variations in the steel substrate
and roofing underlayments. Oil canning is an inherent
characteristic of flat steel products, not a defect, and
therefore is not a cause for panel rejection.
Important Note:
At completion of each day’s work and at completion of
roof installation, sweep panels, flashings, and gutters
clean. Take special care not to sweep metal shavings
down into the gutters. Do not allow fasteners, cuttings,
filings, or scraps to accumulate.
MENU
6. ASC Building Products
A Division of ASC Profiles LLC
Skyline Roofing Installation Guide • February 2014 5
Roof Preparation
ASC BP’s Skyline Roofing can be used in both new
construction and retrofit roofing applications. Skyline
Roofing must be installed over a continuous rigid
substrate such as plywood, wood decking, or OSB.
All substrates must be complete, accurately sized and
located, in true plane, secure and otherwise properly
prepared. Contact ASC BP for additional information.
The following steps need to be taken to prepare the
roof for installation of Skyline Roofing panels:
NEW ROOFS:
1. Make sure there are no nails or other objects
protruding from the substrate that might puncture
the underlayment or the roof panels. Clean all
debris from the roof.
2. Check all details for possible roof penetrations
which must be added to the deck prior to roof
panel installation.
3. Cover the entire roof deck with minimum 30 lb.
asphalt saturated felt paper. Some synthetic
underlayments may be used in place of felt with
our Skyline roofing. Installer must ensure they
meet the minimum standards of 30 lb felt and
that the manufacturer has approved them for
use with metal roofing. (Check with a ASC BP
representative if project is in snow country). Begin
at the eave and roll the felt horizontally (parallel
to the eave). Allow each consecutive course to
overlap the previous one 3”. Overlap the end a
minimum of 6” when starting a new roll of felt.
(See illustration #1). Areas of felt paper that have
been torn or cut should be replaced or repaired
prior to installation of the metal roof.
4. Place an alignment line along the gable end where
the first roof panel will be installed. THIS LINE
MUST BE LOCATED 1/4” IN FROM THE GABLE
EDGE OF THE ROOF DECK AND SQUARE
WITH THE EAVE LINE. Various methods exist
for insuring that the line is square. Call your ASC
BP representative if you need assistance. (See
illustration #2).
Illustration No. 1
Illustration No. 2
6"
"
"
Note: Check with the felt supplier for specific
installation and handling instructions. Over exposure to
the elements may cause buckling of the felt resulting in
an objectionable appearance of the installed roof.
MENU
7. Skyline Roofing
Installation, Flashings & Details Guide
6 February 2014
Existing Roofing:
Some jurisdictions will allow reroofing over existing
roofing without the need for tearoff. Check with your
local codes or building department for your specific
requirements.
For best results, Skyline Roofing requires a
relatively smooth and flat substrate. Application over
rough and/or uneven surfaces is not recommended.
If the roof is to be stripped down to the existing
decking, follow the procedures for new roofs on page
5. Be sure to check the existing roof and repair any
damaged areas prior to installation of the new roof
system.
The following steps should be taken when
installing ASC BP’s Skyline Roofing over
existing roofing:
1. Inspect the roof for damage and make the
necessary repairs to achieve a flat plane for the
metal roof panels.
2. Secure any warped or loose roofing.
3. Make sure that there are no nails or other objects
protruding from the roof that might puncture the new
underlayment or the new roof panels.
4. Remove all moss and other debris from the roof.
5. Cut off any overhanging roofing flush with the
roof deck and remove all hips, ridge caps, and
penetration flashings.
6. Follow the directions on page 5, #2 through #4 on
roof preparation.
Note: Do not apply Skyline Roofing over roofs with
structural damage or trapped moisture.
MENU
8. ASC Building Products
A Division of ASC Profiles LLC
Skyline Roofing Installation Guide • February 2014 7
Map of Typical Roof Conditions
For suggestions on how to trim flashing in the different
areas, please refer to the following pages:
Flashing Page(s)
Adjustable Gable 37
Chalet Gable 36
Chimney 45-47
Eave 16-17
Endwall 28-29
Flashing Page(s)
Gable 19-23
Gutter 18
Peak 24
Slope Transition 30-31
Ridge & Hip 11-13
Flashing Page(s)
Sidewall 25-27
Skylight 40-44
Valley 14-15, 49-50
Vent 39
MENU
9. Skyline Roofing
Installation, Flashings & Details Guide
8 February 2014
Fastener Selection
FASTENER# DESCRIPTION USE
1.
2.
3.
4.
5.
No. 8 x 1” Modified Truss
Head Wood Screw
Panel to wood deck or trim
to wood attachments
(unexposed)
Panel to panel or trim to
panel attachments. May be
used as an alternative to
blind rivets
Panel to wood deck at
valleys, eave start panel
at gable attachments, and
endlaps (exposed)
Trim to trim attachments
(lapped joints)
Use when fastening panel to
wood deck for increased wind
uplift resistance (unexposed)
No. 12 x 3/4” Stitch Screw
No. 14 x 1” Metal-Wood
STST-42 Stainless Steel Rivet
1/8” x 1/8”
No. 10-12x1” Pancake Head Wood Screw
Correctly Driven
Proper Installation of Gasketed Fasteners
Under Driven Over Driven
Notes:
• The table above shows the fasteners required for
Skyline Roofing. Refer to the panel installation and
flashing details of this manual for specific screw usage
and spacing.
• Panel attachment screws must be long enough to fully
penetrate through the wood roof decking, or penetrate
solid lumber at least one inch.
• All screws must be coated to provide protection against
corrosion.
• Exposed fasteners must have sealing washers and
should be the same color as the parts they attach.
• Roofing nails are also required, but are not furnished by
ASC BP.
• Screws must be properly driven to ensure proper seal
and holding strength. Do not underdrive or overdrive
the screws.
• Stainless steel rivets are not watertight.
MENU
10. ASC Building Products
A Division of ASC Profiles LLC
Skyline Roofing Installation Guide • February 2014 9
GENERAL
Study the details section of this manual prior to the
installation of the panels. Pay close attention to the
following:
• Flashings that need to be installed prior to the panels
include Valley, Eave, Vented Eave, Standard Gutter,
Vented Gutter, Chalet Gable and Adjustable Gable,
and penetration flashings for skylights, chimneys, etc.
• Some panels may require “turn-up” at the uphill end
prior to their installation.
• Apply caulking to the pre-installed flashings per the
instructions in the detail section of this manual.
Panel Installation
1. Align the female edge of the first panel with the
alignment line constructed along the start gable
(See page 5, item 4). Allow the panel to overhang
the eave 1”. (Illustration #3)
2. Check the uphill end of the panel (See the
corresponding detail for proper panel position). Make
sure the female edge of the panel remains 1/4” from
the gable and the overhang is 1” from the eave.
3. After the first panel is properly aligned, tack the
gable end to the roof as in illustration #3. Then,
fasten the panel along the male edge fastening
flange. Refer to table #1 for the fastener spacing.
4. Align the second panel female edge with the first
panel male edge (see illustration #4 page 10). Make
sure the panels are flush with each other at eave
edge. Note: the panels overhang the eave by 1”.
5. Snap the panels together at the seam with light
foot pressure. Work the seam together from the
eave end toward the ridge. DO NOT work the
seam from both ends toward the middle.
6. After locking the panel seam, fasten the panel to
the roof utilizing the fastening flange along the
male edge (See illustration #4).
Table 1: Panel Attachment & Outward (Wind Uplift) Load Capacities
Panel
Width
Panel
Gage
Plywood / OSB
Thickness Min.1 Fastener Size
Fastener
Spacing 2
Basic Wind Speed Met
(mph) 3
(IRC only)
Outward Wind Load
Capacity (psf) 4
(IRC and IBC)
16” 26 15/32” #8 or #10 22” 90 29
26 15/32” #8 or #10 11” 90 31
16” 24 15/32” #8 22” 90 29
24 15/32” #10 22” 95 34
24 15/32” #8 or #10 11” 110 45
12” 26 15/32” #8 or #10 22” 95 34
26 15/32” #8 or #10 11” 105 39
Notes:
1 - Alternate substrate thicknesses have not been included as they do not provide greater outward wind load capacities. Inward gravity loads (snow, etc.) are also
resisted by the substrate therefore substrate thickness must be evaluated to appropriately account for these inward loads.
2 - Skyline Roofing panels utilize fastener mounting slots at 11” intervals.
3 - Basic Wind Speed Met is based on 2009/2012 International Residential Code (IRC) code provisions (IRC Section R301.2.1) using the following assumptions:
Slope >2:12, Wind exposure =B, Mean roof height ≤ 30’, No topographic effects. These values only apply to projects that fall under the 2009/2012 IRC. For
applications beyond the assumptions above, please refer to IRC Section R301.2.1 for necessary adjustments, or consult a design professional for assistance.
4 - Outward Wind Load Capacities are based on testing per ASTM E1592 and analysis per 2010 AISI S100. Associated fastener capacities are per the 2005
NDS. For projects governed by the International Building Code (IBC), consult the Engineer of Record to determine if stated capacities meet or exceed the
project’s outward wind load requirements. These capacities can also be used for IRC governed projects.
PROCEDURE FOR INSTALLING PANELS LESS THAN 40 FT. IN LENGTH
Illustration No. 3
1/4"
#14x1"
1"
Spacing
(see table 1)
MENU
11. Skyline Roofing
Installation, Flashings & Details Guide
10 February 2014
Panel Installation (continued)
1. Install eave flashing and fasten to the roof substrate.
(See Eave Flashing details)
2. Align the female edge of the first panel with the
alignment line constructed along the start gable (See
page 5 Item 4). Check the uphill panel position and
allow the panel to overhang the eave 1”.
3. After the panel is aligned, fasten the panel along the
eave with #14 x 1” Metal-Wood fasteners in a straight
line parallel to the eave and 3” up from the end of the
panel (Illustration #5).
4. Install the long length Skyline Roofing clip
so that the formed edge rests against the
male leg (See Illustration No. 6). Make sure the clip is
spaced every 24” o.c. along the panel.
5. Align the second panel female edge
with the first panel male edge and
make sure the panels are flush with
each other at the eave edge.
6. Snap the panels together at the seam
with light foot pressure. Work the
seam together from the eave end
toward the ridge. DO NOT work the
seam from both ends toward the middle.
7. Apply consecutive panels following steps 3-6.
8. Install the gable flashings on both sides of the roof
(Make sure the G16 flashing is used in both cases
so that the panel is free to expand and contract.
(See “Start and End Gable” Flashings Details for
installation).
Illustration No. 5
"
"4 /2"1
12” Panel Shown
7. Apply consecutive panels as in items #4 through
#6 above.
8. Fasten the panels along the eave with #14 x 1”
Metal-Wood (metal-to-wood) fasteners located
along a straight line parallel to the eave and 3” up
from the end of the panel. The fasteners should
be evenly spaced (See illustration #5).
Illustration No. 4
4 /2"1 #14x1"Panels Greater Than 40 ft. in Length
" "
16” Panel Shown
Illustration No. 6
Note: For 12” wide panels (Illustration No. 5) use two
fasteners as shown. For 16” wide panels (Illustration No. 6)
use three fasteners as shown.
MENU
12. ASC Building Products
A Division of ASC Profiles LLC
Skyline Roofing Installation Guide • February 2014 11
Procedures
• Locate the panels down from the ridge as required.
Provide space between the zee closure “Z17” and
the end of the panel to allow for expansion of the
panel. Check the overhang at the eave. (See pg. 9).
• Caulk the bottom and sides of the polyethylene
closure. Set the closure as shown above and caulk
the top. The closure is optional if the panel is turned
up and caulked at the sides near the rib.
• Attach the zee closure “Z17”(solid) at the top edge
of the roof parallel to the ridge.
• Fasten the hip/ridge flashing “R16” to the zee using
#12 x 3/4” stitch screws. (Adjacent to the panel ribs
when possible).
• Caulk, lap and rivet sequential flashings.
(See pg. 48).
Hip/Ridge Flashing
Z17 R18 R16
/16"
3
2 /16"
13
4 /16"
7
4 /16"
7
/2"
1
/8"
7
/8"
7
/8"
3
/8"
3
1"
1
5 /2"
1
5
TURN-UP PANEL
(SEE PROCEDURES)
#12 X 3/4” STITCH SCREW
ADJACENT TO EACH RIB
(DO NOT FASTEN THROUGH THE RIB,
THIS WILL REDUCE THE ROOFS
ABILITY TO EXPAND AND CONTRACT)
SKYLINE ROOFING
ZEE CLOSURE
SOLID (Z17)
HIP/RIDGE (R16)
#8 X 1” MODIFIED TRUSS
HEAD WOOD SCREW
@ 12 O.C.
PROVIDE 3/8” GAP
FOR THERMAL
EXPANSION POLYETHYLENE CLOSURE SET
IN SEALANT ALL AROUND.
(SEE PROCEDURES)
1”
Solid
Note: “R16” is a standard ridge. A narrow ridge, “R18”,
is also available. If using narrow ridge, field notch with
tin snips to fit over ribs. Attach “R18” to the zee closure
with color-matched #12 x 3/4” stitch screws @ 12” o.c.
adjacent to each rib when possible.
MENU
13. Skyline Roofing
Installation, Flashings & Details Guide
12 February 2014
Procedures
• Plywood should be held back 2” from each
side of the ridge.
• Locate the panels down from the edge of the
plywood as required. Provide space between
perforated zee closure “Z16” and end of panel
to allow for expansion of the panel. Check the
overhang at the eave. (See pg. 9).
• Turn-up panel and caulk at the sides near the ribs.
For increased weather tightness add neoprene
closure below panel turn-up.
• Attach the perforated zee closure “Z16” at
the top edge of the plywood and parallel to
the ridge.
• Fasten the vented ridge “R17” to the zee closure using
#12 x 3/4” stitch screws. (Adjacent to the panel ribs
when possible).
• Caulk, lap and rivet sequential flashings.
(See pg. 48).
• Close the ends of the ridge cap by slitting and folding
material at each end, caulking joints, and fastening
with rivets. (See pg. 13).
"
1"
1" 2" 2"
/8" HEM
3
/16"31
/4"36
/8"11
/8"11
/4"36
/8" HEM
3
DIMENSION VARIES
SEE TABLE BELOW
VENTED RIDGE (R17)
ZEE CLOSURE
PERFORATED (Z16)
TURN-UP PANEL
(SEE PROCEDURES)
SKYLINE ROOFING
#8 X 1” MODIFIED TRUSS
HEAD WOOD SCREW
@ 12” O.C.
#12 X 3/4” STITCH SCREW ADJACENT TO EACH RIB
(DO NOT FASTEN THROUGH THE RIB, THIS WILL REDUCE THE ROOFS
ABILITY TO EXPAND AND CONTRACT)
PROVIDE 3/8” GAP
FOR THERMAL EXPANSION
R17
Vented Ridge Flashing
Note: The gable flashing must be installed prior to installation of the ridge. (See page 23)
Z16
Perforated
Roof Pitch
3:12-6:12 41
⁄2”
7:12-9:12 33
⁄4”
10:12-12:12 3”
a
a
MENU
14. ASC Building Products
A Division of ASC Profiles LLC
Skyline Roofing Installation Guide • February 2014 13
Vented Ridge Termination
1"
1"
1"
REMOVE THIS
MATERIAL
REMOVE THIS
MATERIAL
REMOVE THIS
MATERIALREMOVE THIS
MATERIAL
CUT HERE
CUT HERE
CUT
HERE
FOLD LINE
SEE GABLE PREPARATION
@ RIDGE (PAGE 23)
GABLE
CAULK AND RIVET
CAULK
VENTED RIDGE (R17)
CUT AND TRIM SIMILAR
TO GABLE (SEE PAGE 23).
FOLD DOWN OVER END TABS.
CUT AT BENDS 1”
AND FOLD IN 90º
MENU
15. Skyline Roofing
Installation, Flashings & Details Guide
14 February 2014
Valley Flashing
Note: This flashing must be installed prior to the panels.
Procedures
• Place a second layer of 36” roof felt in the valley center
line with 18” of felt on each side.
• Starting at the low end, trim and place the valley
flashing “V16” so it overhangs the eaves 1”.
(See pg. 15).
• Caulk and over lap the subsequent valley flashings a
minimum of 8”.
• Parallel to the valley, place two rows of butyl mastic
tape spaced as shown.
• Field cut the panels holding a minimum of 4” back from
the valley as shown. Larger valleys, without the center
V, may be required in snow country installations.
• Thru-fasten the panels to the roof using (4) #14 x 1”
Metal-Woods with washer, evenly spaced, 8” up from
the valley so they align with the second row of tape
sealant.
V16
1"1"
12" 12"
VALLEY (V16)
2 ROWS OF
1/2” BUTYL MASTIC TAPE
SKYLINE ROOFING
#14 X 1” METAL WOOD
(4) EACH PANEL
EVENLY SPACED
4” MIN.
2”
2”
Note: Valley dimensions must be the proper width to
account for slope, snow, ice and rain conditions. An
underlayment such as a rubberized cold-applied membrane
is recommended. The membrane is installed first, extending
3’-0” up from the center of the valley on each side, with felt
overlapping the membrane.
MENU
16. ASC Building Products
A Division of ASC Profiles LLC
Skyline Roofing Installation Guide • February 2014 15
Valley Termination
1"
4"
1"
VALLEY
FOLD TABS DOWN 90º
REMOVE THIS MATERIAL
SEE VALLEY (PAGE 14) FOR
FASTENING & SEALING REQUIREMENTS
FILL OPEN
END WITH SEALANT
EAVE
MIN.
MENU
17. Skyline Roofing
Installation, Flashings & Details Guide
16 February 2014
Eave and Vented Eave Flashings
Note: This flashing must be installed prior to the panels.
E16
E17
E18
Procedures
• Attach the eave flashing “E17” using #10-12 x 1”
pancake head wood screw or roofing nails evenly
spaced at 24” o.c.
• Use a screwdriver to open the hem of the next
flashing for approximately 4”. (See pg. 48).
• Caulk and lap the flashing a minimum of 3” joining
the hem.
(See pg. 48).
• Panels should overhang the eave 1” minimum.
"
3/8” HEM
5/8"
1/8"
1/2"
1/8"
2"
1
4"
5
3/4"1
1/4"
1/2"
1
SKYLINE ROOFING
#14 X 1” METAL WOOD
(2) PER 12” PANEL
(3) PER 16” PANEL
1/2” BUTYL
MASTIC TAPE
#10-12 X 1” PANCAKE HEAD
WOOD SCREW OR ROOFING
NAILS @ 24” O.C.
WIDE EAVE (E17)
PERFORATE
FASCIA AS
REQUIRED
2x SPACED BLOCKING
Note: “E17” is a wide eave. A narrow eave, “E16” is also
available. “E18” is a snow eave designed for snow country.
Note that E16 & E18 flashings do not line up with standard
gable trims (G16 & G17). Heavy weather conditions may
require a rubberized cold-applied membrane underlayment.
See notes on page 14 for installation techniques.
Roof Pitch a b
3:12 3 1/8 104°
4:12 3 1/8 108°
5:12 3 1/8 113°
6:12 3 3/8 117°
7:12 3 3/8 120°
8:12 3 5/8 124°
9:12 3 5/8 127°
10:12 4 130°
11:12 4 133°
12:12 4 135°
b ab
MENU
18. ASC Building Products
A Division of ASC Profiles LLC
Skyline Roofing Installation Guide • February 2014 17
Eave Flashing Preparation
Step One
Step Two
1"
1"
REMOVE THIS MATERIAL
EAVE
REMOVE THIS MATERIAL
EAVE
BEND TABS
HERE @ 90º
MENU
19. Skyline Roofing
Installation, Flashings & Details Guide
18 February 2014
Gutter and Gutter With Vented Eave
Note: This flashing must be installed prior to the panels.
Procedures
• Carpentry must be complete as indicated prior to
installation of the flashing.
• Attach eave flashing “E16” using #10-12 x 1”
pancake head wood screw or roofing nails evenly
spaced at 24” o.c.
• Use a screwdriver to open the hem of the next
flashing for approximately 4”. (See pg. 48).
• Caulk and lap the flashing a minimum of 3” joining
the hem.
(See pg. 48).
• Panels should overhang the eave 1” minimum.
• ASC BP recommends that a licensed gutter
contractor install the gutter.
"
/2"1
/8"11
2"
#10-12x1” PANCAKE HEAD
WOOD SCREW OR ROOFING
NAILS @ 24” O.C.
#14x1” METAL WOOD
(2) PER 12” PANEL
(3) PER 16” PANEL PREFORATE
FASCIA AS
REQUIRED
SKYLINE
ROOFING
2x SPACED BLOCKING
1/2” BUTYL
MASTIC TAPE
NARROW EAVE (E16)
METAL SCREEN
AS REQUIRED
ATTACH PER
MANUFACTURERS RECOMMENDATIONS
GUTTER
E16
MENU
20. ASC Building Products
A Division of ASC Profiles LLC
Skyline Roofing Installation Guide • February 2014 19
Procedures
• Place the first roof panel according to the
instructions on pages 5-6 & 9.
• Place butyl mastic tape along the gable flashing’s
flange as shown.
• Install the gable flashing “G17” by placing it firmly
over the rib and predrilling holes 24” o.c. then fasten
using color matched Metal-Wood screws. If using
the narrow gable “G16” do not fasten. (See Note).
• Caulk and lap the flashing a minimum of 3”
hooking the hem. (See pg. 48).
• Mitre cut the flashing at the peak to join each side
at the ridge. (See pg. 23).
• Snip and fold the gable at the eave to close the end.
Use rivets to fasten. (See pgs. 13, 17, & 22).
Start Gable Flashing
G16
(For panels longer than 40 ft.)
G17
(For panels shorter than 40 ft.)
Note: If using the narrow gable “G16” do not fasten to
panel, only to the structure. Narrow gable flashing fits
snug against panel rib. Use “G16” for long length Skyline
Roofing®
applications
MENU
21. Skyline Roofing
Installation, Flashings & Details Guide
20 February 2014
End Gable Flashing
G16
(For panels longer than 40 ft.)
G17
(For panels shorter than 40 ft.)
Procedures
• Trim the panel 1/2” in and parallel with the edge of
the roof.
• Place butyl mastic tape along the gable flashing’s
flange as shown.
• Install the gable flashing “G17” by placing it firmly
over the rib and predrilling holes 24” o.c. then fasten
using color matched Metal-Wood screws. If using
the narrow gable “G16” do not fasten. (See Note).
• Caulk and lap the flashing a minimum of 3” hooking
the hem. (See pg. 48).
• Mitre cut the flashing at the peak to join each side at
the ridge. (See pg. 23).
• Snip and fold the gable at the eave to close the end.
Use rivets to fasten. (See pgs. 13, 17, & 22).
/2"1
/2"1
/8"1
/4"3
/2"1
1" 1"
1
/4"12
4"
3"
3/8" HEM
3/8" HEM
#8x1”MODIFIED TRUSS
HEAD WOOD SCREW
@ 24” O.C.
#14x1” METAL WOOD
@ 24” O.C. INTO
PREDRILLED HOLES
1/2” WIDE BUTYL MASTIC TAPE
SKYLINE ROOFING
CAULK
STANDARD GABLE (G17)
TURN-UP PANEL
#14x1” METAL WOOD SCREWS
@ 24” O.C.
Notes:
• If using the narrow gable “G16” do not fasten to panel,
only to the structure. Narrow gable flashing fits snug
against panel rib, or panel edge turned-up in the field.
• Gable flashing should be dimensioned to match peak,
ridge, and eave flashings.
• Use “G16” for Skyline Roofing® longer than 40 ft.
MENU
22. ASC Building Products
A Division of ASC Profiles LLC
Skyline Roofing Installation Guide • February 2014 21
"
REMOVE THIS PORTION
OF GABLE OR SIDEWALL
FLASHING TO ALLOW
CONTINUOUS ZEE CLOSURE.
(SEE PAGE 23, STEP 2)
GABLE OR SIDEWALL
FLASHING
CAULK AND RIVET
ZEE CLOSURE
RIDGE OR ENDWALL
FLASHING
SKYLINE ROOFING
GABLE FLASHING
BEND HERE 90º
RIVET
INSERT EAVE TAB
BEHIND GABLE
EAVE FLASHING
Gable/Ridge Transition
Similar to Gable/Endwall Transition
Gable Corner at Eave
See page 22 for instructions
MENU
23. Skyline Roofing
Installation, Flashings & Details Guide
22 February 2014
Gable Flashing Preparation
Step One
Step Two
Note: Length of
gable must extend
2 1/2” past eave
fascia.
Step Three
Roof Pitch Dimension
3:12 17
⁄8”
31
⁄2:12 13
⁄4”
4:12 15
⁄8”
5:12 17
⁄16”
6:12 11
⁄4”
12:12 0”
MENU
24. ASC Building Products
A Division of ASC Profiles LLC
Skyline Roofing Installation Guide • February 2014 23
Gable Flashing Preparation at Ridge
Step One
Remove a pie-shaped piece
from the gable flashing as
shown below.
Step Three
Note: See page 13 for final steps
Step Four
Center the flashing on the ridge at
the gable and bend to roof pitch
Step Two
Notch out the downturn leg on
the gable as shown below.
Note: Zee Closure “Z16” (perforated) or “Z17” (solid)
must be in place prior to installation of the ridge piece.
Roof Pitch Dimension*
3:12 11
⁄16”
3½:12 11
⁄4”
4:12 17
⁄16”
5:12 13
⁄4”
6:12 23
⁄16”
12:12 47
⁄16”
* Dimensions only apply to
G16 and G17 Gable Flashing
MENU
25. Skyline Roofing
Installation, Flashings & Details Guide
24 February 2014
"
1 /16"3
2 /16"13
3/8" HEM
TURN-UP PANEL
(SEE PROCEDURES)
PROVIDE 3/8 GAP FOR
THERMAL EXPANSION
SKYLINE ROOFING
POLYETHYLENE CLOSURE SET
IN SEALANT ALL AROUND.
(SEE PROCEDURES)
ZEE CLOSURE
SOLID (Z17)
PEAK (PF16)
#8 X 1” MODIFIED TRUSS
HEAD WOOD SCREW
@ 12” O.C.
#14 X 1” METAL WOOD
@ 24” O.C.
#12 X 3/4” STITCH SCREW
ADJACENT TO EACH RIB
1”
3/8" HEM
1/2”
Peak Flashing
Procedures
• Locate the panels down from the peak as required.
• Caulk the bottom & sides of the polyethylene
closure, set the closure as shown above and caulk
the top. Closure is optional if the panel is turned-up
as shown and caulked at the sides near the ribs.
• Attach the zee closure “Z17” (solid) at the top edge
of the panel parallel to the peak.
• Provide space between zee closure “Z17” and panel
to allow for expansion of the panel.
• Fasten the peak “PF16” to the zee using #12 x
3/4” stitch screws. (Adjacent to the panel ribs when
possible.
• Fasten the peak “PF16” with Metal-Wood screws at
24” o.c.
• Caulk, lap and rivet sequential flashings. (See pg.
48).
PF16
Z17
Solid
Roof Pitch a b c
3:12 4 3/8 5 3/4 76°
4:12 4 3/8 5 3/4 72°
5:12 4 3/8 5 3/4 67°
6:12 4 3/4 5 7/8 63°
7:12 4 3/4 5 7/8 60°
8:12 5 1/8 6 1/8 56°
9:12 5 1/8 6 1/8 53°
10:12 5 5/8 6 3/8 50°
11:12 5 5/8 6 3/8 47°
12:12 5 5/8 6 3/8 45°
ac
b
MENU
26. ASC Building Products
A Division of ASC Profiles LLC
Skyline Roofing Installation Guide • February 2014 25
Sidewall Flashing
For panels shorter than 40 feet.
SW16 SW17
Procedures
• The roof should be installed prior to the siding.
• Trim the panel 1/2” in and parallel with the wall.
• Place butyl mastic tape along the sidewall flashing’s
flange as shown.
• Install the sidewall flashing “SW16” (when used
with a standard endwall) by placing it firmly on
the roofing panel and fastening with the fasteners
indicated.
• Caulk and lap the flashing a minimum of 3” joining
the hem. (See pg. 48).
• See page 27 on closing the end of the flashing.
• When using a sidewall flashing in conjunction with a
vented endwall condition, increase the 1-1/8” leg on
sidewall flashing, “SW16”, to
2-1/8” (“SW17”).
Note: Do not use this detail if panels are greater than 40 ft.
MENU
27. Skyline Roofing
Installation, Flashings & Details Guide
26 February 2014
SS2
Procedures
• The roof and flashings should be installed prior to
siding.
• Trim the panel 1” in and parallel with the wall.
• Turn up the panel 1” from the edge of the panel as
shown.
• Apply mastic tape to the hook (SS2) before
fastening.
• Fasten hook (SS2) to the turn-up. Make sure panel is
able to expand and contract.
• See page 27 on closing the end of the flashing.
• Install the sidewall flashing (SW18) by hooking it into the
hook (SS2) and then fastening it to the wall.
Sidewall Flashing
For panels greater than 40 feet.
SW18
MENU
28. ASC Building Products
A Division of ASC Profiles LLC
Skyline Roofing Installation Guide • February 2014 27
Closing Sidewall Flashing
For panels shorter than 40 feet.
Step One
Step Two
Step One
Step Two
For panels longer than 40 feet.
1"
1"
4"
1 /4"1
1 /4"1
FLASHING MUST BE
CUT 2 1/2" BEYOND
EAVE FASCIA
REMOVE THIS
MATERIAL
BEND TAB
DOWN 180º
REMOVE THIS MATERIAL
BEND
HERE 90º
REMOVE
THIS MATERIAL
SKYLINE
ROOFING
SIDEWALL
FLASHING
BEND HERE
90º
SKYLINE
ROOFING
SIDEWALL
FLASHING
SNIP HERE
END OF
ROOF PANEL
REMOVE
THIS MATERIAL
REMOVE
THIS MATERIAL
BEND TAB
DOWN 90º
FLASHING MUST
BE CUT 5 1/4"
BEYOND EAVE
FASCIA
SIDEWALL
FLASHING
SIDEWALL
FLASHING
MENU
29. Skyline Roofing
Installation, Flashings & Details Guide
28 February 2014
1"
/16"3
/16"13
5 1/2"
4"
1"
2
1
3/8" HEM
#10-12x1” PANCAKE HEAD
WOOD SCREW OR ROOFING
NAILS @ 12” O.C.
ENDWALL (EW16)
PROVIDE 3/8” GAP FOR THERMAL EXPANSION
#12x3/4” STITCH SCREW
@ EACH RIB
SKYLINE ROOFING
POLYETHYLENE CLOSURE SET
IN SEALANT ALL AROUND.
(SEE PROCEDURES)
ZEE CLOSURE
SOLID (Z17)
TURN-UP PANEL
(SEE PROCEDURES)
#8x1” MODIFIED TRUSS
HEAD WOOD SCREW
@ 12” O.C.
Procedures
• Locate the panels down from the endwall as
required.
• Caulk the bottom and sides of the polyethylene
closure, set the closure as shown above and caulk
the top. The closure is an option if the panels are
turned-up and caulked at the sides near the ribs.
• Attach the zee closure “Z17” (solid) at the top edge
of the roof and parallel to the endwall.
• Provide space between the zee closure “Z17” and
the end of the panel to allow for expansion of the
panel.
• Fasten the endwall “EW16” with pancake head
wood screws or roofing nails at 24” o.c.
• Fasten the endwall “EW16” to the zee using #12 x
3/4” stitch screws at each rib (Adjacent to the panel
ribs when possible).
• Caulk, lap and rivet sequential flashings. (See pg.
48).
Endwall Flashing
Z17
Solid
EW16
MENU
30. ASC Building Products
A Division of ASC Profiles LLC
Skyline Roofing Installation Guide • February 2014 29
2"
1"
1
1"
/16"3
1
4"
/8"1
1 /8"7
/8" HEM3
6 /4"3
ZEE CLOSURE
PERFORATED (Z16)
#10-12x1” PANCAKE HEAD
WOOD SCREW OR ROOFING
NAILS @ 12” O.C.
VENTED ENDWALL (EW17)
TURN-UP PANEL
(SEE PROCEDURES)
SKYLINE ROOFING
#8x1” MODIFIED TRUSS
HEAD WOOD SCREW
@ 12” O.C.
PROVIDE 3/8” GAP FOR
THERMAL EXPANSION
#12x3/4” STITCH SCREW
@ ADJACENT TO EACH RIB
Vented Endwall Flashing
Z16
Perforated
EW17
Procedures
• Plywood should be held back 2” from the wall.
• Locate the panels down from the edge of the
plywood as required. Provide space between
the zee closure “Z16” and the panel to allow for
expansion of the panel.
• Turn-up pan of panel and caulk at the sides near
the ribs. For increased weather tightness add a
neoprene closure below panel turn-up.
• Attach the vented zee closure “Z16” (perforated)
at the top edge of the plywood and parallel to the
endwall.
• Fasten the vented endwall “EW17” with #10-12 x 1”
pancake head wood screws or roofing nails at 24”
o.c.
• Fasten the vented endwall “EW17” to the zee closure
“Z16” (perforated) using #12 x 3/4” stitch screws.
(Adjacent to the panel ribs when possible).
• Caulk, lap and rivet sequential flashings.
(See pg. 48).
Roof Pitch
3:12-6:12 41
⁄2”
7:12-9:12 33
⁄4”
10:12-12:12 3”
a
a
MENU
31. Skyline Roofing
Installation, Flashings & Details Guide
30 February 2014
Procedures
• Locate the panels down and parallel to the valley as
required. Check the overhang at the eave
(See pg. 9).
• Turn up panel. Caulk the bottom and sides of the
polyethylene closure, set the closure as shown above
and caulk the top.
• Attach the zee closure “Z17” (solid) at the top edge of
the plywood and parallel to the valley.
• Provide space between the zee closure “Z17” and the
panels to allow for expansion of the panel.
• Install wood blocking as needed for support.
• Fasten the transition flashing “TR16” with #10-12
x 1” pancake head wood screws or roofing nails at
24” o.c.
• Fasten the transition flashing “TR16” to the zee
closure using #12 x 3/4” stitch screws. (Adjacent to
the panel ribs when possible).
• Caulk, lap and rivet sequential flashings (See pg. 48).
• Parallel to the transition, place two rows of butyl
mastic tape as shown above.
• Attach the uphill panels as shown.
Slope Transition - High Slope to Low Slope
1"
1
1"
/16"3
VARIES
(SEE TABLE)
VARIES
(SEE TABLE)
3/8” HEM
5”
2 /16”13
#10-12x1” PANCAKE HEAD
WOOD SCREW OR ROOFING
NAILS @ 24” O.C.
#14x1” METAL WOOD
(2) PER PANEL
2 ROWS OF
BUTYL MASTIC TAPE
TRANSITION HIGH-LOW(TR16)
TURN-UP PANEL
(SEE PROCEDURES)
#12x3/4” STITCH SCREW
ADJACENT TO EACH RIB
SKYLINE ROOFING
WOOD BLOCKING
ZEE CLOSURE
SOLID (Z17)
#8x1” MODIFIED TRUSS
HEAD WOOD SCREW
@ 12” O.C.
POLYTHYLENE CLOSURE SET
IN SEALANT ALL AROUND.
(SEE PROCEDURES)
PROVIDE 3/8” GAP FOR
THERMAL EXPANSION
Z17
Solid
TR16
Upper Slope
LowerSlope
3:12 4:12 5:12 6:12 7:12 8:12 9:12 10:12 9:12 10:12
1:12
13 1/2″ 11″ 9″ 7 1/2″ 7 1/2″ 6 1/2″ 6 1/2″ 6 1/2″ 6 1/2″ 6 1/2″
171° 166° 162° 158° 155° 151° 148° 145° 142° 140°
2:12
13 1/2″ 11″ 9″ 7 1/2″ 7 1/2″ 7 1/2″ 6 1/2″ 6 1/2″ 6 1/2″
171° 167° 163° 159° 156° 153° 150° 147° 144°
3:12
13 1/2″ 11″ 9″ 9″ 7 1/2″ 7 1/2″ 6 1/2″ 6 1/2″
171° 167° 164° 160° 157° 154° 152° 149°
4:12
13 1/2″ 11″ 9″ 9″ 7 1/2″ 7 1/2″ 7 1/2″
172° 168° 165° 162° 159° 156° 153°
5:12
13 1/2″ 11″ 9″ 9″ 9″ 7 1/2″
172° 169° 166° 163° 160° 158°
6:12
16 1/2″ 11″ 11″ 9″ 9″
173° 170° 167° 164° 162°
7:12
16 1/2″ 13 1/2″ 11″ 9″
173° 170° 168° 165°
8:12
16 1/2″ 13 1/2″ 11″
174° 171° 169°
9:12
16 1/2″ 13 1/2″
174° 172°
10:12
18″
178°
11:12
12:12
- Inquire with ASC BP representative regarding slope combinations not listed here.
- For fractional slopes (ie: 4 1/2 : 12), chose nearest chart slope that provides a longer length ‘L’.
MENU
32. ASC Building Products
A Division of ASC Profiles LLC
Skyline Roofing Installation Guide • February 2014 31
1"
/8" HEM3
/16"13
4"
2
/16"31
1"
VARIES
SEE TABLE
#10-12x1” PANCAKE HEAD
WOOD SCREW OR ROOFING
NAILS @ 24” O.C.
2 ROWS OF
BUTYL MASTIC TAPE
#14x1” METAL WOOD
(2) PER PANEL
TURN-UP PANEL
(SEE PROCEDURES)
TRANSITION LOW-HIGH (TR17)
#12x3/4” STITCH SCREW
ADJACENT TO EACH RIB
SKYLINE ROOFING
WOOD BLOCKING
ZEE CLOSURE
SOLID (Z17)
#8x1” MODIFIED TRUSS
HEAD WOOD SCREW
@ 12” O.C.
POLYETHYLENE CLOSURE SET
IN SEALANT ALL AROUND.
(SEE PROCEDURES)
VARIES
SEE TABLE
PROVIDE 3/8” GAP FOR
THERMAL EXPANSION
Procedures
• Locate the panels down and parallel to the valley as
required. Check the overhang at the eave
(See pg. 9).
• Turn up panel. Caulk the bottom and sides of the
polyethylene closure, set the closure as shown
above and caulk the top.
• Attach the zee closure “Z17” (solid) near the top of
the plywood and parallel to the valley.
• Provide space between the zee closure “Z17” and
the panels to allow for expansion of the panel.
• Install wood blocking as needed for support.
• Fasten the transition flashing “TR17” with #10-12 x
1” pancake head wood screws or roofing nails at 24”
o.c.
• Fasten the transition flashing “TR17” to the zee
closure using #12 x 3/4” stitch screws. (Adjacent to
the panel ribs when possible).
• Caulk, lap and rivet sequential flashings.
(See pg. 48).
• Parallel to the transition, place two rows of butyl
mastic tape as shown above.
• Attach the uphill panels as shown.
Slope Transition - Low Slope to High Slope
Z17
Solid
TR17
Upper Slope
LowerSlope
1:12 2:12 3:12 4:12 5:12 6:12 7:12 8:12 9:12 10:12
1:12
2:12
3:12
13″
17°
4:12
9″ 13″
166° 171°
5:12
9 ″ 11″ 13″
162° 167° 171°
6:12
7 1/2″ 9″ 11″ 13″
158° 163° 167° 172°
7:12
7 1/2″ 7 1/2″ 9″ 11″ 13″
155° 159° 164° 168° 172°
8:12
6 1/2″ 7 1/2″ 7 1/2″ 9″ 11″ 16 1/2″
151° 156° 160° 165° 169° 173°
9:12
6 1/2″ 7 1/2″ 7 1/2″ 9″ 9″ 11″ 16 1/2″
148° 153° 157° 162° 166° 170° 173°
10:12
6 1/2″ 6 1/2″ 7 1/2″ 7 1/2″ 9″ 11″ 13″ 16 1/2″
145° 150° 154° 159° 163° 167° 170° 174
11:12
6 1/2″ 6 1/2″ 6 1/2″ 7 1/2″ 7 1/2″ 9″ 11″ 13″ 16 1/2″
142° 147° 152° 156° 160° 164° 168° 171° 174°
12:12
6 1/2″ 6 1/2″ 6 1/2″ 7 1/2″ 7 1/2″ 9″ 9″ 11″ 12 1/2″ 17 1/4″
140° 144° 149° 153° 158° 162° 165° 169° 172° 175°
- Inquire with ASC BP representative regarding slope combinations not listed here.
- For fractional slopes (ie: 4 1/2 : 12), chose nearest chart slope that provides a longer length ‘L’.
MENU
33. Skyline Roofing
Installation, Flashings & Details Guide
32 February 2014
Outside Corner Flashing
OC16
Procedures
• Begin with the bottom most flashing.
• Attach the outside corner “OC16” with #14 x 1” Metal-
Wood screws at 24” o.c.
• Caulk and lap the next flashing a minimum of 3”
joining the hem. (See pg. 48).
/2"11
1"
4"
3/8” HEM
SYM
M
ETRICAL
1/2” WIDE BUTYL
MASTIC TAPE
OUTSIDE CORNER (OC16)
#8 X 1” MODIFIED TRUSS
HEAD WOOD SCREW
@ 12” O.C.
#14 X 1” METAL WOOD SCREWS
@ 24” O.C.
1/2” WIDE BUTYL
MASTIC TAPE
MENU
34. ASC Building Products
A Division of ASC Profiles LLC
Skyline Roofing Installation Guide • February 2014 33
Inside Corner Flashing
Procedures
• Begin with the bottom most flashing.
• Attach the outside corner “IC16” with #14 x 1” Metal-
Wood screws at 24” o.c.
• Caulk and lap the next flashing a minimum of 3”
joining the hem. (See pg. 48).
3"
1"
1 /2"1
SYM
M
ETRICAL
1/2” WIDE BUTYL
MASTIC TAPE
#8 X 1” MODIFIED TRUSS
HEAD WOOD SCREW
@ 12” O.C.
INSIDE CORNER (IC16)
#14 X 1” METAL WOOD SCREWS
@ 24” O.C.
1/2” WIDE BUTYL
MASTIC TAPE
3/8” HEM
IC16
MENU
35. Skyline Roofing
Installation, Flashings & Details Guide
34 February 2014
Base Trim at Drip/Head Flashing
B16
Procedures
• Attach the base trim “B16” prior to the installation of the
panels.
• Fasten with #10-12 x 1” pancake head wood screws or
roofing nails at 24” o.c.
/2"1
3"
/8"11
SKYLINE ROOFING
#10-12x1” PANCAKE HEAD
WOOD SCREW OR ROOFING
NAILS @ 24” O.C.
#14x1” METAL WOOD
(2) PER PANEL
BASE TRIM (B16)
MENU
36. ASC Building Products
A Division of ASC Profiles LLC
Skyline Roofing Installation Guide • February 2014 35
“C” Trim Flashing/Soffit
C16
Procedures
• Attach the “C” Trim “C16” prior to the installation of
the soffit panels.
• Fasten with #8 x 1” modified truss head wood
screws at 24” o.c.
MENU
37. Skyline Roofing
Installation, Flashings & Details Guide
36 February 2014
5"
6"
3
1" 1 /2"1
/8"5
/4"3
/8"7
1 /8"5
3/8" HEM
#14X1” METAL WOOD
@ 4” O.C.
SKYLINE ROOFING
2 ROWS OF 1/2”
BUTYL MASTIC TAPE
* THIS FLASHING IS ALSO KNOWN AS
A PROW OR DUTCH GABLE ROOF.
CHALET GABLE (G18)
#14X 1” METAL WOOD
@ 24” O.C.
Chalet Gable Flashing
Note: This flashing must be installed prior to the panels.
G18
Procedures
• Attach the chalet flashing “G18” using #14 x 1” Metal-
Woods spaced at 24” o.c.
• Caulk and lap the flashing a minimum of 3” o.c. joining
the hem. (See pg. 48).
• Parallel to the face of the flashing, place two rows of
butyl mastic tape as shown.
• Field cut the panels holding 5” back from the face of the
flashing as shown.
• Attach the panels to the roof and ‘thru-fasten’ along
the bottom edge using #14 x 1” Metal-Woods spaced
at 4” o.c. and at approximately 7 1/2” in from the face
of the flashing so they align with the second row of tape
sealant.
• Chalet gable to be used with standard eave “E17”.
(See pg. 16).
MENU
38. ASC Building Products
A Division of ASC Profiles LLC
Skyline Roofing Installation Guide • February 2014 37
Adjustable Gable Flashing
Note: This flashing must be installed prior to the panels.
G5
SS1
/2"1
/2"1
/2"1
2
4"
6"
1” HOOK
3/8” HOOK
ADJUSTMENT AREA
STARTER STRIP (SS1)
BUTYL MASTIC TAPE
SKYLINE ROOFING
#14 X 1” METAL WOOD
@ 24” O.C.
#10-12 X 1” PANCAKE HEAD
WOOD SCREW OR ROOFING
NAILS @ 12” O.C.
#14 X 1” METAL WOOD
@24” O.C.
ADJUSTABLE GABLE (G5)
Procedures
• Attach the adjustable gable “G5” using #14 x 1” Metal-
Wood screws spaced at 24” o.c.
• Place one row of butyl mastic tape between adjustable
gable “G5” and starter strip “SS1”.
• Fasten starter strip “SS1” with #10-12 x 1” pancake
head wood screw or roofing nails 12” o.c.
• Caulk and lap the flashing a minimum of 3” o.c.
hooking the hem. (See pg. 48).
• Field cut, caulk, and attach the panels and fasten using
#14 x 1” Metal-Woods at 24” o.c.
• Adjustable gable “G5” is to be used with standard eave
“E17”. (See pg. 16).
• See Chalet Gable Flashing, page 36, for additional
notes.
MENU
39. Skyline Roofing
Installation, Flashings & Details Guide
38 February 2014
Knee Cap Flashing
K16
Procedures
• Cut only the major ribs where the panel is to bend.
• Attach the roofing/fascia panels.
• Caulk and cover the gap with the knee cap flashing
“K16” and fasten with four (3) rivets.
KNEE CAP (K16)
FEMALE RIB
NOTE: KNEE CAP (K16) IS
NOT SYMMETRICAL,
PLACE THE LEG WITH
THE HOOK INTO THE
PANEL’S “S” BEND
AS SHOWN
SKYLINE ROOFING
STST-42 STAINLESS
STEEL RIVET.
(3) @ EACH KNEE CAP
KNEE CAP (K16)
MENU
40. ASC Building Products
A Division of ASC Profiles LLC
Skyline Roofing Installation Guide • February 2014 39
Vent Flashing
Procedures
• Trim the opening in the flashing to 20% smaller than
the pipe diameter.
• Slide the flashing down over the pipe.
• Seal between the flashing and the roofing with
gunnable caulk and set the flashing.
• Form the flashing to fit the profile of the roof.
• Fasten the flashing with #14 x 1” Metal-Wood
screws at 1” o.c.
For penetration
through the sidelap:
When a penetration occurs
through the panel sidelap,
install gunnable caulk from
the penetration to the ridge,
peak or endwall to prevent
water from running downhill
into the opening.
See detail left.
Note: In many cases it may be easier to locate vent/
pipe flashing in the flat area of the roof panel (as shown)
rather than have the penetration occur at a panel rib.
Determining panel layout prior to installation often
simplifies penetration flashing installation.
MENU
41. Skyline Roofing
Installation, Flashings & Details Guide
40 February 2014
1 – Skylight Flashing (Side)
Whenever possible, position the skylight curb so
the ribs of the roof panels do not interfere with the
flashing.
Cut the Skyline Roofing panels as close to the
left, right and downhill sides of the curb as possible.
Cut the uphill side 6” up from the curb as indicated on
page 41.
SK18
SIDE SKYLIGHT (SK18)
#14x1” METAL WOOD
@ 4” O.C.
1/2” WIDE BUTYL MASTIC TAPE
SKYLINE ROOFING
#8x1” MODIFIED TRUSS
HEAD WOOD SCREW
@ 12” O.C.
3-1/2”
2”
3/8” HEM
Note: Do not fasten down the panels within 24” uphill
from the skylight.
DOWNHILL
SEE PAGE 34
UPHILL
SEE PAGE 33
SIDE
SEE BELOW
1.
2.
3.
SLOPE
LENGTH
WIDTH
Skylight Flashing
Downhill
See page 42
Side
See below
Uphill
See page 41
MENU
42. ASC Building Products
A Division of ASC Profiles LLC
Skyline Roofing Installation Guide • February 2014 41
2 – Skylight Flashing (Uphill)
SK16
Uphill
6"
12"
3 /2"1
2 ROWS OF 1/2” WIDE
BUTYL MASTIC TAPE
SKYLINE ROOFING
#14x1” METAL WOOD
@ 4” O.C.
UPHILL SKYLIGHT (SK16)
6"
MENU
43. Skyline Roofing
Installation, Flashings & Details Guide
42 February 2014
SK17
Downhill
/2"12
5"
3/8" HEM
POLYETHYLENE CLOSURE SET
IN SEALANT ALL AROUND
DOWNHILL SKYLIGHT (SK17)
SKYLINE ROOFING
PANEL TURN UP
(OPTIONAL)
#14 X 1” METAL WOOD
SCREW @ 4” O.C.
#12x3/4” STITCH SCREW
@ EVERY RIB
PROVIDE 3/8” GAP
FOR THERMAL EXPANSION
Note: Provide space between end of panel and skylight
framing to allow for expansion of panels.
3 – Skylight Flashing (Downhill)
MENU
44. ASC Building Products
A Division of ASC Profiles LLC
Skyline Roofing Installation Guide • February 2014 43
Procedure for the Installation of
Skylight Flashings
The skylight flashing will be 4” wider
than the width of the curb (2” on
each side). Cut a 1/8” slot
in the two uphill corners of the
Skyline Roofing panel slightly wider
than 2 1/16”, so the uphill flashing
can slide through the two slots. (See
illustration #8).
Illustration No. 8
Trim and bend the right side
skylight flashing as indicated. Trim
the left side in a similar fashion.
Note: the left and right side
flashings are mirror images of each
other.
Skylight Flashing Preparation
Right Side
Downhill
Uphill
2"
2"
6"
2"
2 /2"1
2 /16"1
/8"1
CUT HERE FOLD HERE 90º
CUT HERE
CUT HER
REMOVE
LENGTH
SLOPE
SKYLIGHT CURB
SKYLINE ROOFING
2"
2"
2"
6"
2"
2 /2"1
2 /16"1
/8"1
CUT HERE FOLD HERE 90º
CUT HERE
CUT HERE
REMOVE THIS MATERIAL
LENGTH
SLOPE
SKYLIGHT CURB
SKYLINE ROOFING
MENU
45. Skyline Roofing
Installation, Flashings & Details Guide
44 February 2014
Skylight Flashing Preparation
Uphill
Downhill
Procedures
• Trim both ends of the uphill and downhill sides of the
skylight flashing as indicated.
• Slide the uphill flashing into the slots of the Skyline
Roofing and apply liberal amount of gunnable caulking.
• Assemble the skylight as indicated on pages 40-44.
• Trim and assemble chimney flashing similarly.
1"
1"
2"
FOLD HERE 90º
CUT HERE
REMOVE THIS MATERIAL
CUT HERE
REMOVE THIS MATERIAL
CUT HERE
REMOVE HEM
TO FOLD LINE
FOLD HERE 90º
MENU
46. ASC Building Products
A Division of ASC Profiles LLC
Skyline Roofing Installation Guide • February 2014 45
3. 1.
2.
SLOPE
UPHILL
SEE PAGE 39
DOWNHILL
SEE PAGE 40
SIDE
SEE PAGE 38
1.
2.
3.
LENGTH
WIDTH
SLOPE
Chimney Flashing
Downhill
See page 47
Side
See page 46
Uphill
See page 47
Note: Procedures for the installation of chimney flashings
are similar to the skylights. (see pgs. 40-44). The reglet
“RG16”** shown may be deleted if the chimney is clad with
siding. (Lap the siding over the flashing and caulk). Be
sure to specify the slope and the orientation of the chimney
dimensions when ordering this assembly.
** A reglet is a flashing found on the side of a wall, chimney
or other similar roof penetration.
(See pgs. 46-47).
MENU
47. Skyline Roofing
Installation, Flashings & Details Guide
46 February 2014
CH18
Side
RG16
Reglet
2"
6" /2"1
/4"3
3"
GUNNABLE CAULK
ANCHOR BY OTHERS
REGLET (RG16)
GUNNABLE CAULK
SIDE CHIMNEY (CH18)
#14X1” METAL WOOD
@ 4” O.C. INTO PREDRILLED HOLE
1/2” WIDE BUTYL MASTIC TAPE
SKYLINE ROOFING
#8X1” MODIFIED TRUSS
HEAD WOOD SCREW
@ 12” O.C.
3/8” HEM
3/8” HEM
3/8” HEM
1 – Chimney Flashing (Side)
MENU
48. ASC Building Products
A Division of ASC Profiles LLC
Skyline Roofing Installation Guide • February 2014 47
6"
3"
5"
5"
6"
12"
6"
/2"1
/4"3
GUNNABLE CAULK
ANCHORS BY OTHERS
REGLET (RG16)
GUNNABLE CAULK
UPHILL CHIMNEY
(CH16)
2 ROWS OF 1/2” WIDE
BUTYL MASTIC TAPE
SKYLINE ROOFING
#14X1” METAL WOOD
@ 4” O.C.
GUNNABLE CAULK
ANCHORS BY OTHERS
REGLET (RG16)
GUNNABLE CAULK
#12x3/4” STITCH SCREW
@ EVERY RIB
POLYETHYLENE CLOSURE SET
IN SEALANT ALL AROUND
DOWNHILL CHIMNEY (CH17)
SKYLINE ROOFING
#14x1” METAL WOOD
SCREW @ 4” O.C.
3/8” HEM
3/8” HEM
3/8” HEM
RG16
CH16
Uphill
CH17
Downhill
2 – Chimney Flashing (Uphill)
3 – Chimney Flashing (Downhill)
Note: Provide space between end of panel and structure
to accommodate for expansion of panels.
MENU
49. Skyline Roofing
Installation, Flashings & Details Guide
48 February 2014
Procedure for Joining Hems
Typical Flashing Lap
Step One
Step Two
3"
3"
2"
/8"1
OPEN THE HEM OF BOTH
FLASHINGS TO BE JOINED
USING A SCREWDRIVER OR
SCRATCH AWL.
SNIP HERE
REMOVE THIS MATERIAL FROM
THE ‘INSIDE’ FLASHING ONLY
CAULK AND RIVET
AS REQUIRED
RE-CLOSE HEMS WITH
‘DUCKBILL’ PLIERS
MENU
50. ASC Building Products
A Division of ASC Profiles LLC
Skyline Roofing Installation Guide • February 2014 49
Valley Top End
HIP/RIDGE (R16)
FIELD MITER AND ASSEMBLE
SKYLINE ROOFING
ROOFING NAIL
2 ROWS OF
BUTYL MASTIC TAPE
VALLEY (V16)
Note: Foam or metal closures and caulking are required
between the intersecting ridge cap and the valley flashing
to provide adequate weathertightness.
MENU
51. Skyline Roofing
Installation, Flashings & Details Guide
50 February 2014
Valley Dormer
FIELD MITER AND ASSEMBLE
ONTO FLAT STOCK
SKYLINE ROOFING
VALLEY (V16)
ENDWALL
FLASHING
ATTACHED TO
ZEE CLOSURE
TRIM
VALLEY
FIELD MADE
SLOPE TRANSITION
FLASHING ATTACHED
TO ZEE CLOSURE
Procedures
• Place a second layer of 36” roof felt in the valley
center line with 18” of paper on each side.
• Caulk and lap the subsequent valley flashings a
minimum of 8”.
• Parallel to the valley, place two rows of butyl
mastic tape spaced as shown on page 14.
• Field cut the panels holding a minimum of 4”
back from the valley as shown. Larger valleys,
without the center V, may be required in snow
country installations.
• Attach the panels to the roof and ‘thru-fasten’ along
the bottom end using at the valley (4) #14 x 1” metal
wood with washer evenly spaced and at 8” up from
the valley so they align with the second row of tape
sealant as shown on page 14.
Notes:
• Valley dimensions must be the proper width to
account for slope, snow, ice and rain conditions.
An underlayment such as rubberized cold-applied
membrane is recommended. The membrane is
installed first, extending 3’-0” up from the center of
the valley on each side, with felt overlapping the
membrane.
• Foam or metal closures and caulking are required
between the intersecting ridge cap and the valley
flashing to provide adequate weathertightness.
MENU
52. ASC Building Products
A Division of ASC Profiles LLC
Skyline Roofing Installation Guide • February 2014 51
MENU