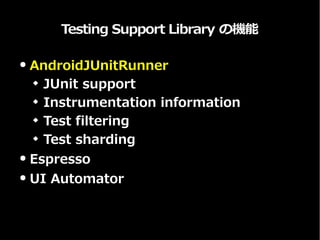
Testing Support Libraryの機能
● AndroidJUnitRunner
JUnit support
Instrumentation information
Test filtering
Test sharding
● Espresso
● UI Automator
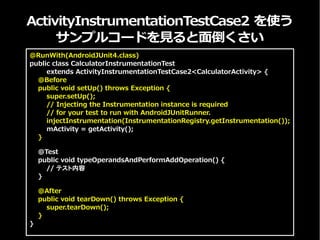
ActivityInstrumentationTestCase2 を使う
サンプルコードを見ると面倒くさい
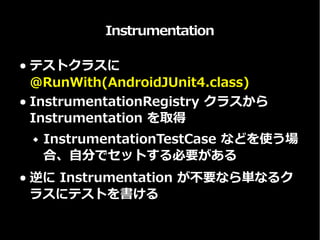
@RunWith(AndroidJUnit4.class)
public classCalculatorInstrumentationTest
extends ActivityInstrumentationTestCase2<CalculatorActivity> {
@Before
public void setUp() throws Exception {
super.setUp();
// Injecting the Instrumentation instance is required
// for your test to run with AndroidJUnitRunner.
injectInstrumentation(InstrumentationRegistry.getInstrumentation());
mActivity = getActivity();
}
@Test
public void typeOperandsAndPerformAddOperation() {
// テスト内容
}
@After
public void tearDown() throws Exception {
super.tearDown();
}
}
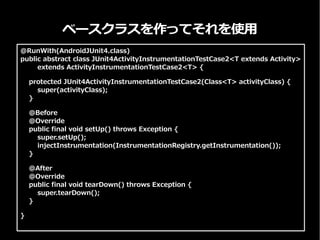
11.
ベースクラスを作ってそれを使用
@RunWith(AndroidJUnit4.class)
public abstract classJUnit4ActivityInstrumentationTestCase2<T extends Activity>
extends ActivityInstrumentationTestCase2<T> {
protected JUnit4ActivityInstrumentationTestCase2(Class<T> activityClass) {
super(activityClass);
}
@Before
@Override
public final void setUp() throws Exception {
super.setUp();
injectInstrumentation(InstrumentationRegistry.getInstrumentation());
}
@After
@Override
public final void tearDown() throws Exception {
super.tearDown();
}
}