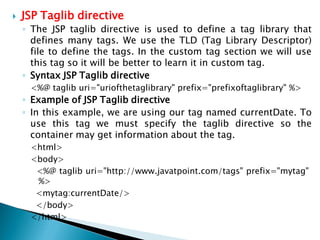
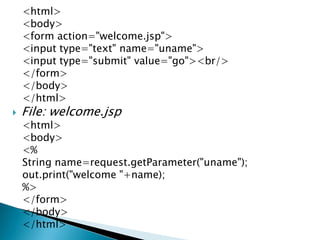
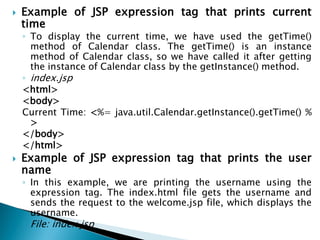
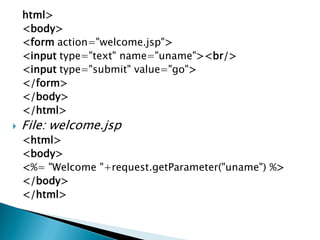
This document discusses servlet technology and JavaServer Pages (JSP) technology. It provides definitions and explanations of servlets, JSPs, cookies, and related classes and interfaces. Some key points include:
- Servlets are Java programs that generate dynamic web content and reside on the server-side. JSPs are similar to servlets but make it easier to separate programming logic from presentation logic.
- The servlet lifecycle involves loading, instantiating, initializing, servicing requests, and destroying the servlet. The servlet interface defines common methods like init(), service(), destroy(), etc.
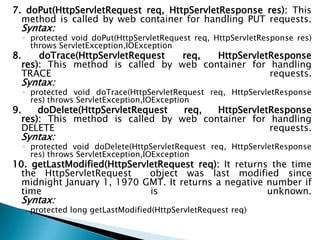
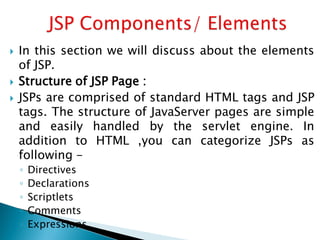
- Cookies are small pieces of information stored by the web server on the client-side browser


![ How to create cookie?
◦ HttpServletResponse interface’s addCookie(Cookie ck) method is
used to add a cookie in response object.
◦ Syntax: public void addCookie(Cookie ck)
◦ Example:
//create cookie object
Cookie cookie=new Cookie(“cookieName”,”cookieValue”);
//add cookie object in the response
response.addCookie(cookie);
How to get cookie?
◦ HttpServletRequest interface’s getCookies() method is used to
get the cookies from request object.
◦ Syntax: public Cookie[] getCookies()
◦ Example:
//get all cookie objects.
Cookie[] cookies = request.getCookies();
//iterate cookies array to get individual cookie objects.
for(Cookie cookie : cookies){
out.println(“Cookie Name: ” + cookie.getName());
out.println(“Cookie Value: ” + cookie.getValue());
}](https://image.slidesharecdn.com/advjavaunit4m-220521090229-fce45bfe/85/Adv-java-unit-4-M-Sc-CS-pdf-14-320.jpg)


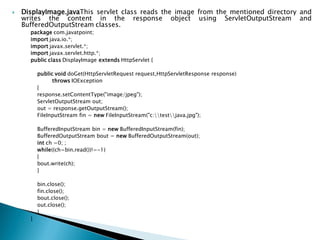
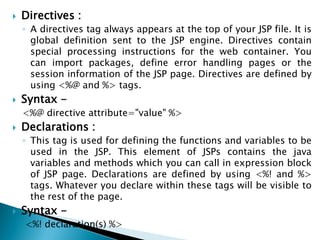
![ ServletInputStream class
◦ ServletInputStream class provides stream to read binary data
such as image etc. from the request object. It is an abstract
class.
◦ The getInputStream() method of ServletRequest interface
returns the instance of ServletInputStream class. So can be
get as:
◦ ServletInputStream sin=request.getInputStream();
Method of ServletInputStream class
◦ There are only one method defined in the ServletInputStream
class.
◦ int readLine(byte[] b, int off, int len) it reads the input stream.
ServletOutputStream class
◦ ServletOutputStream class provides a stream to write binary
data into the response. It is an abstract class.
◦ The getOutputStream() method of ServletResponse interface
returns the instance of ServletOutputStream class. It may be
get as:
◦ ServletOutputStream out=response.getOutputStream();](https://image.slidesharecdn.com/advjavaunit4m-220521090229-fce45bfe/85/Adv-java-unit-4-M-Sc-CS-pdf-19-320.jpg)


![[Android] Widget Event Handling](https://cdn.slidesharecdn.com/ss_thumbnails/trainingandroidlesson5-130304083131-phpapp02-thumbnail.jpg?width=640&height=640&fit=bounds)