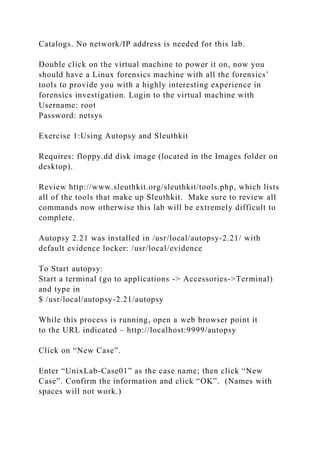
841- Advanced Computer Forensics
Unix Forensics Lab
Due Date: Please submit your answers to the Linux Lab dropbox
by midnight of July 2nd 2013.
*****************************************************
*************************
To challenge yourself, you may work on the advanced Unix
forensics lab analyzing the Lewis USB image and writing a
report about this case. See the file UNIXForensicslab-usb for
details.
*****************************************************
*************************
Objective
This lab will use Autopsy, PTK, Sleuthkit and foremost to
analyze a given image. Read the entire document before starting
to be sure you have all the necessary tools and files required to
complete the lab. You should further explore the tools used in
this lab to ensure your familiarity with alternative investigation
options.
Deliverable
Answer all the exercise questions and include screenshots as
supporting data if necessary.
OPTIONS:
You can work on this lab by
1. using a bootable live CD, for example, backtrack 5
2. using the RLES vCloud.
3. using SANS Investigate Forensic Toolkit (SIFT) Workstation,
http://computer-forensics.sans.org/community/downloads.
4. installing the software on your own system (check the
appendix for more installation details).
If you choose to use the RLES vCloud, please continue.
Lab Setup for using RLES vCloud
This lab is designed to function on the RLES vCloud via
https://rlesvcloud.rit.edu/cloud/org/NAT. Please FIRST read
the RLES VCLOUD user guide in myCourses > Content >
Hands-on Labs.
Special Browser Setting Requirement (See RLES VCLOUD user
guide)
In order to view the console of virtual machines, the VMRC
plugin must be installed within the browser. The first time the
console is accessed, the plugin can be downloaded. In Internet
Explorer, https://rlesvlcoud.rit.edu must be added to the Local
intranet zone.
(Go to Tools -> Internet Options -> Security tab -> Local
intranet, click the Sites button, click Advanced and add the
URL.)
The interface is available by navigating to
https://rlesvcloud.rit.edu/cloud/org/NAT. (Yes, we know the
certificate wasn’t issued by a commonly trusted certificate
authority. Also check the user guide for your browser
compatibility).
Use your RIT Computer Account credentials to gain access to
the rlesvcloud interface.
To start, you will first create your vApp by following the
instructions of Add a vApp Template to My Cloud in the RLES
VCLOUND user guide. Make sure to follow the vApp name
convention defined in the RLES VCLOUND user guide and
select the vApp template, 841_Linux_Forensics, from the Public
Catalogs. No network/IP address is needed for this lab.
Double click on the virtual machine to power it on, now you
should have a Linux forensics machine with all the forensics’
tools to provide you with a highly interesting experience in
forensics investigation. Login to the virtual machine with
Username: root
Password: netsys
Exercise 1:Using Autopsy and Sleuthkit
Requires: floppy.dd disk image (located in the Images folder on
desktop).
Review http://www.sleuthkit.org/sleuthkit/tools.php, which lists
all of the tools that make up Sleuthkit. Make sure to review all
commands now otherwise this lab will be extremely difficult to
complete.
Autopsy 2.21 was installed in /usr/local/autopsy‐2.21/ with
default evidence locker: /usr/local/evidence
To Start autopsy:
Start a terminal (go to applications -> Accessories->Terminal)
and type in
$ /usr/local/autopsy-2.21/autopsy
While this process is running, open a web browser point it
to the URL indicated – http://localhost:9999/autopsy
Click on “New Case”.
Enter “UnixLab-Case01” as the case name; then click “New
Case”. Confirm the information and click “OK”. (Names with
spaces will not work.)
Click “Add Host”.
Enter “Host1” under “Host Name” and “EST” under “Timezone”
and click “Add Host”.
Question 1: What other information can be set?
Time skew adjustment : describe how many seconds this
computer’s clock was out of sync.
Confirm the information and click “ADD HOST”.
Click “Add Image”.
Click “ADD IMAGE FILE”.
Select “Partition” instead of “Disk”.
In “Location” type the path to the image file “floppy.dd”. (The
file floppy.dd is located in the fold called Images on desktop.)
In “Import Method” select “Copy to Evidence Locker”.
Question 2: What other options are available to you? When
might you want to use the alternatives?
To analyze the image file, it must be located in the evidence
locker. It can be imported from its current location using a
symbolic link, by copying it, or by moving it. Note that if a
system failure occurs during the move, then the image could
become corrupt
The md5 hash value for floppy.dd is:
ee54a82de158cb154252439c88d6859e
Review the options for checking / creating md5’s and select the
appropriate entry based on the information you currently have.
Question 3: Which selection did you make and why?
I choose the option to calculate the hash value and I got the
same value to the one which Is above
Then I added the hash value and enable the verification of hash
after importing
Autopsy and Sleuthkit identifies the file system type to be
fat12.
Question 4: How would you determine the file system type of an
image file? Include a screenshot to support your statement.
We can use “fsstat” command which can give us the file system
type of the image
In “Mount Point” type “a:”
Question 5: Why might the ”original mount point” setting be
useful?
Because it is a floppy image so usually it is in “a” partition
Click “Add”.
Confirm the information and click “OK”.
Click “Analysis” and choose “FILE ANALYSIS”
Click some of the files shown. In the information window at the
bottom click on the “display” and “report” links.
Question 6: What information can you get from “File
Analysis”?
From report we can get a lot of information like file location ,
MD5 of file , SHA-1 of file , file system type and data
generation date this regarding the general information , for the
meta data information we can get information like directory
entry , file size and sectors used
From here you can recover any of the files shown, including
deleted ones. Next you will recover a deleted file.
Choose one of the deleted files. In the information window click
“Export”.
Depending on your browser, it will either ask you to save the
file or it will automatically create the file in you downloads
folder.
Question 7: How can you determine that a file has been deleted?
Because it shows in red color with a mark on the DEL Column
Try opening the file. Run the “file” command on the file on
your terminal.
Question 8: What other information available from the “file”
command? Include a screenshot to support your statement.
File command will give us information about the content of the
file
Click “File Type”. Then click “Sort Files by Type”. Then click
“OK”.
Question 9: What other options are available? How might they
be useful in an investigation?
We can Sort files into categories by type and ignore the
unknown file types also we can Save a copy of files in category
directory and we can choose to save only graphic images and
this maybe help us in investigation to save the time and reduce
the amount of data which we need to look inside in order to
achieve what we are looking for
Copy the URL of “Output can be found by viewing”. Then open
a new browser window, paste the URL into the new window and
load the page.
Question 10: What similarities and differences can you observe
between the current page and the new page you opened? Is there
any additional information available on either page? How might
you use any such information (if it exists)?
The two pages are exactly similar to each other same number of
files (41) , same number of file skipped (8) , same number of
extension mismatch (4) and same number of categories (33)
with the same number of files in each category
The Sorter Output window shows you how many of each file
type were found (categories can be added). Click one of the file
type links.
Question 11: What information are you shown and why is this
information useful?
It gives us information regarding the file type we choose , as
example , I clicked on the documents file which contain one file
only and I got information like creation time , last saved time ,
number of pages ,number of words and file location on the disk
, this information is useful because it help us to focus on the
type of files we are looking for and get all the above
information from it
Click on “Meta Data” and provide a valid inode number.
Question 12: Knowing an inode number, how can one determine
the data blocks referenced by that inode (provide both a GUI
answer and a CMD-LINE answer).
Click on “Image Details” and read the information given.
Question 13: What information can you get from this window?
It gives us a lot of information like file system information
which contain , file system type and details of file system
layout . meta data information , content information which
contain sector size ,cluster size and total cluster range , and
finally a details of file contents .
Question 14: What is a superblock and what is its purpose?
The superblock is essentially file system metadata and defines
the file system type, size, status, and information about other
metadata structures (metadata of metadata). The superblock is
very critical to the file system and therefore is stored in
multiple redundant copies for each file system. The superblock
is a very "high level" metadata structure for the file system. For
example, if the superblock of a partition, /var, becomes corrupt
then the file system in question (/var) cannot be mounted by the
operating system , The backup copies themselves are stored in
block groups spread through the file system with the first stored
at a 1 block offset from the start of the partition. This is
important in the event that a manual recovery is necessary.
Click “Close”.
Back in the “Host Manager” click “File Activity Timelines”.
Click “Create Data File”.
Select the disk image and click “OK”
Confirm the information.
Question 15: What command line tools were run? What other
options can be passed to these tools?
Running fls -r -m on vol1
Click “OK”.
In the “Create Timeline” window you can select the starting and
ending dates of file activity that you want to see. For this lab
you will choose none so you will see all activity.
Under “Enter the file name to save as” enter “fa_lab2”
Click “OK”.
Note where the timeline is saved to and click “OK”.
Note the information. Click the links at the top to look at other
dates.
Question 16: What is the significance of the information? How
might this be useful?
We can see the dates of the files and when they used , which
files deleted from the hard disk , size of each file and the
location of the file on disk
Click “Close”.
Back to “Host Manager” click “Image Integrity”.
Question 17: What comparisons are being made? How does it
know?
Check the MD5 of the image , body and the time line to ensure
that all them are correct by compare the original MD5 with the
current MD5 of each file
Click “OK”.
Question 18. Explore any other features of Autopsy & Sleuthkit,
and include any interesting results.
We can add event to the event sequencer and chose the desired
date which we want that event to be used and also we can add
notes with each analysis and this will be helpful for any one
who look at our work later
After you are done, close the case by clicking “Close Host” then
“Close Case”. You can reopen the case to work on it later if you
choose to.
Exercise 2: Using Foremost
“Foremost is a console program to recover files based on their
headers and footers. Foremost can work on image files, such as
those generated by dd, Safeback, Encase, etc, or directly on a
drive. The headers and footers are specified by a configuration
file, so you can pick and choose which headers you want to look
for.” (From the Foremost website)
Read the document from
http://foremost.sourceforge.net/foremost.html to understand
more about foremost and how to setup the foremost.conf.
Run foremost against the floppy.dd disk image in your terminal.
Question 19: What files did it identify? Did it match the
extension of the file?
I got a lot of folders for different file extensions and one file
called audit.txt
Question 20: Why is foremost capable of being independent of
filesystem, volume, and media?
Because Foremost is a console program to recover files based
on their headers , footers and internal data structures .
APPENDIX
(If you choose to run this lab on your own system!)
You may use a Helix 1.9 or later version of live Linux CD
(http://www.e-fense.com/helix/) instead of install all the
software to your system. The Helix live CD includes all the
software (Except PTK) you need for this lab. If you do not have
a Linux/Unix system, a live Linux CD is definitely your choice.
If you use Helix live CD, you can skip “Installing software”
A. Installing Autopsy and SleuthkitDownload the latest version
of Autopsy and Sleuthkit from
http://www.sleuthkit.org/sleuthkit/download.php and
http://www.sleuthkit.org/autopsy/download.php
BE SURE to verify the source code using gpg
Install Sleuthkit:
Select the latest version of Sleuthkit and unpack the distribution
to /usr/local
Compile the source code (run “make”).
Copy the manfiles for sleuthkit to the appropriate locations in
/usr/share/man to make the man pages available to your relative
path.
The readme files that accompany the software contain a great
deal of important information. Right now, read the
/usr/local/autopsy/README file. It will give you an overview
of Sleuthkit.
Install the Autopsy Forensic Browser
Choose the latest version of Autopsy and unpack the
distribution to /usr/local
Compile the source code (run “make”).
Copy the manfiles for Autopsy to the appropriate locations in
/usr/share/man to make the man pages available to your relative
path.
The readme files that accompany the software contain a great
deal of important information. Right now, read the
/usr/local/autopsy/README file. It will give you an overview
of Autopsy.
When prompted for the Sleuthkit directory, enter the directory
where you installed Sleuthkit.
When prompted for the NIST National Software Reference
Library (NSRL) hit n because we will not be using that for this
lab.
When prompted for the location of the Evidence locker, enter
/usr/local/evidence. (This directory needs to be created
otherwise the autopsy program generates an error when is starts
up.)
*** NOTE: This directory has been specified for ease of use in
this lab exercise. In the field it would be suggested to create a
partition on the hard drive or another hard drive and mount that
into the filesystem in its own location (away from system files –
e.g. usr, home, etc.). In this way the partition or hard drive
could be cleaned of any old evidence (zero’d) before new
evidence is written to it, thereby preventing contamination of
any evidence. ***
B. Installing Foremost
Download the latest version of foremost from
http://foremost.sourceforge.net/
Make and install the software.
Copy the man page to the proper directory.
Pan, 4055-841 Page 8 of 8 UNIX ForensicsLab.doc

841- Advanced Computer ForensicsUnix Forensics LabDue Date.docx

  • 1.
    841- Advanced ComputerForensics Unix Forensics Lab Due Date: Please submit your answers to the Linux Lab dropbox by midnight of July 2nd 2013. ***************************************************** ************************* To challenge yourself, you may work on the advanced Unix forensics lab analyzing the Lewis USB image and writing a report about this case. See the file UNIXForensicslab-usb for details. ***************************************************** ************************* Objective This lab will use Autopsy, PTK, Sleuthkit and foremost to analyze a given image. Read the entire document before starting to be sure you have all the necessary tools and files required to complete the lab. You should further explore the tools used in this lab to ensure your familiarity with alternative investigation options. Deliverable Answer all the exercise questions and include screenshots as supporting data if necessary. OPTIONS: You can work on this lab by 1. using a bootable live CD, for example, backtrack 5 2. using the RLES vCloud. 3. using SANS Investigate Forensic Toolkit (SIFT) Workstation, http://computer-forensics.sans.org/community/downloads. 4. installing the software on your own system (check the
  • 2.
    appendix for moreinstallation details). If you choose to use the RLES vCloud, please continue. Lab Setup for using RLES vCloud This lab is designed to function on the RLES vCloud via https://rlesvcloud.rit.edu/cloud/org/NAT. Please FIRST read the RLES VCLOUD user guide in myCourses > Content > Hands-on Labs. Special Browser Setting Requirement (See RLES VCLOUD user guide) In order to view the console of virtual machines, the VMRC plugin must be installed within the browser. The first time the console is accessed, the plugin can be downloaded. In Internet Explorer, https://rlesvlcoud.rit.edu must be added to the Local intranet zone. (Go to Tools -> Internet Options -> Security tab -> Local intranet, click the Sites button, click Advanced and add the URL.) The interface is available by navigating to https://rlesvcloud.rit.edu/cloud/org/NAT. (Yes, we know the certificate wasn’t issued by a commonly trusted certificate authority. Also check the user guide for your browser compatibility). Use your RIT Computer Account credentials to gain access to the rlesvcloud interface. To start, you will first create your vApp by following the instructions of Add a vApp Template to My Cloud in the RLES VCLOUND user guide. Make sure to follow the vApp name convention defined in the RLES VCLOUND user guide and select the vApp template, 841_Linux_Forensics, from the Public
  • 3.
    Catalogs. No network/IPaddress is needed for this lab. Double click on the virtual machine to power it on, now you should have a Linux forensics machine with all the forensics’ tools to provide you with a highly interesting experience in forensics investigation. Login to the virtual machine with Username: root Password: netsys Exercise 1:Using Autopsy and Sleuthkit Requires: floppy.dd disk image (located in the Images folder on desktop). Review http://www.sleuthkit.org/sleuthkit/tools.php, which lists all of the tools that make up Sleuthkit. Make sure to review all commands now otherwise this lab will be extremely difficult to complete. Autopsy 2.21 was installed in /usr/local/autopsy‐2.21/ with default evidence locker: /usr/local/evidence To Start autopsy: Start a terminal (go to applications -> Accessories->Terminal) and type in $ /usr/local/autopsy-2.21/autopsy While this process is running, open a web browser point it to the URL indicated – http://localhost:9999/autopsy Click on “New Case”. Enter “UnixLab-Case01” as the case name; then click “New Case”. Confirm the information and click “OK”. (Names with spaces will not work.)
  • 4.
    Click “Add Host”. Enter“Host1” under “Host Name” and “EST” under “Timezone” and click “Add Host”. Question 1: What other information can be set? Time skew adjustment : describe how many seconds this computer’s clock was out of sync. Confirm the information and click “ADD HOST”. Click “Add Image”. Click “ADD IMAGE FILE”. Select “Partition” instead of “Disk”. In “Location” type the path to the image file “floppy.dd”. (The file floppy.dd is located in the fold called Images on desktop.) In “Import Method” select “Copy to Evidence Locker”. Question 2: What other options are available to you? When might you want to use the alternatives? To analyze the image file, it must be located in the evidence locker. It can be imported from its current location using a symbolic link, by copying it, or by moving it. Note that if a system failure occurs during the move, then the image could become corrupt The md5 hash value for floppy.dd is: ee54a82de158cb154252439c88d6859e Review the options for checking / creating md5’s and select the appropriate entry based on the information you currently have. Question 3: Which selection did you make and why? I choose the option to calculate the hash value and I got the
  • 5.
    same value tothe one which Is above Then I added the hash value and enable the verification of hash after importing Autopsy and Sleuthkit identifies the file system type to be fat12. Question 4: How would you determine the file system type of an image file? Include a screenshot to support your statement. We can use “fsstat” command which can give us the file system type of the image In “Mount Point” type “a:” Question 5: Why might the ”original mount point” setting be useful? Because it is a floppy image so usually it is in “a” partition Click “Add”. Confirm the information and click “OK”. Click “Analysis” and choose “FILE ANALYSIS” Click some of the files shown. In the information window at the bottom click on the “display” and “report” links. Question 6: What information can you get from “File Analysis”? From report we can get a lot of information like file location , MD5 of file , SHA-1 of file , file system type and data generation date this regarding the general information , for the meta data information we can get information like directory entry , file size and sectors used
  • 6.
    From here youcan recover any of the files shown, including deleted ones. Next you will recover a deleted file. Choose one of the deleted files. In the information window click “Export”. Depending on your browser, it will either ask you to save the file or it will automatically create the file in you downloads folder. Question 7: How can you determine that a file has been deleted? Because it shows in red color with a mark on the DEL Column Try opening the file. Run the “file” command on the file on your terminal. Question 8: What other information available from the “file” command? Include a screenshot to support your statement. File command will give us information about the content of the file Click “File Type”. Then click “Sort Files by Type”. Then click “OK”. Question 9: What other options are available? How might they be useful in an investigation? We can Sort files into categories by type and ignore the unknown file types also we can Save a copy of files in category directory and we can choose to save only graphic images and this maybe help us in investigation to save the time and reduce the amount of data which we need to look inside in order to achieve what we are looking for Copy the URL of “Output can be found by viewing”. Then open
  • 7.
    a new browserwindow, paste the URL into the new window and load the page. Question 10: What similarities and differences can you observe between the current page and the new page you opened? Is there any additional information available on either page? How might you use any such information (if it exists)? The two pages are exactly similar to each other same number of files (41) , same number of file skipped (8) , same number of extension mismatch (4) and same number of categories (33) with the same number of files in each category The Sorter Output window shows you how many of each file type were found (categories can be added). Click one of the file type links. Question 11: What information are you shown and why is this information useful? It gives us information regarding the file type we choose , as example , I clicked on the documents file which contain one file only and I got information like creation time , last saved time , number of pages ,number of words and file location on the disk , this information is useful because it help us to focus on the type of files we are looking for and get all the above information from it Click on “Meta Data” and provide a valid inode number. Question 12: Knowing an inode number, how can one determine the data blocks referenced by that inode (provide both a GUI answer and a CMD-LINE answer). Click on “Image Details” and read the information given.
  • 8.
    Question 13: Whatinformation can you get from this window? It gives us a lot of information like file system information which contain , file system type and details of file system layout . meta data information , content information which contain sector size ,cluster size and total cluster range , and finally a details of file contents . Question 14: What is a superblock and what is its purpose? The superblock is essentially file system metadata and defines the file system type, size, status, and information about other metadata structures (metadata of metadata). The superblock is very critical to the file system and therefore is stored in multiple redundant copies for each file system. The superblock is a very "high level" metadata structure for the file system. For example, if the superblock of a partition, /var, becomes corrupt then the file system in question (/var) cannot be mounted by the operating system , The backup copies themselves are stored in block groups spread through the file system with the first stored at a 1 block offset from the start of the partition. This is important in the event that a manual recovery is necessary. Click “Close”. Back in the “Host Manager” click “File Activity Timelines”. Click “Create Data File”. Select the disk image and click “OK” Confirm the information. Question 15: What command line tools were run? What other options can be passed to these tools? Running fls -r -m on vol1
  • 9.
    Click “OK”. In the“Create Timeline” window you can select the starting and ending dates of file activity that you want to see. For this lab you will choose none so you will see all activity. Under “Enter the file name to save as” enter “fa_lab2” Click “OK”. Note where the timeline is saved to and click “OK”. Note the information. Click the links at the top to look at other dates. Question 16: What is the significance of the information? How might this be useful? We can see the dates of the files and when they used , which files deleted from the hard disk , size of each file and the location of the file on disk Click “Close”. Back to “Host Manager” click “Image Integrity”. Question 17: What comparisons are being made? How does it know? Check the MD5 of the image , body and the time line to ensure that all them are correct by compare the original MD5 with the current MD5 of each file Click “OK”. Question 18. Explore any other features of Autopsy & Sleuthkit, and include any interesting results.
  • 10.
    We can addevent to the event sequencer and chose the desired date which we want that event to be used and also we can add notes with each analysis and this will be helpful for any one who look at our work later After you are done, close the case by clicking “Close Host” then “Close Case”. You can reopen the case to work on it later if you choose to. Exercise 2: Using Foremost “Foremost is a console program to recover files based on their headers and footers. Foremost can work on image files, such as those generated by dd, Safeback, Encase, etc, or directly on a drive. The headers and footers are specified by a configuration file, so you can pick and choose which headers you want to look for.” (From the Foremost website) Read the document from http://foremost.sourceforge.net/foremost.html to understand more about foremost and how to setup the foremost.conf. Run foremost against the floppy.dd disk image in your terminal. Question 19: What files did it identify? Did it match the extension of the file? I got a lot of folders for different file extensions and one file called audit.txt Question 20: Why is foremost capable of being independent of filesystem, volume, and media? Because Foremost is a console program to recover files based on their headers , footers and internal data structures .
  • 11.
    APPENDIX (If you chooseto run this lab on your own system!) You may use a Helix 1.9 or later version of live Linux CD (http://www.e-fense.com/helix/) instead of install all the software to your system. The Helix live CD includes all the software (Except PTK) you need for this lab. If you do not have a Linux/Unix system, a live Linux CD is definitely your choice. If you use Helix live CD, you can skip “Installing software” A. Installing Autopsy and SleuthkitDownload the latest version of Autopsy and Sleuthkit from http://www.sleuthkit.org/sleuthkit/download.php and http://www.sleuthkit.org/autopsy/download.php BE SURE to verify the source code using gpg Install Sleuthkit: Select the latest version of Sleuthkit and unpack the distribution to /usr/local Compile the source code (run “make”). Copy the manfiles for sleuthkit to the appropriate locations in /usr/share/man to make the man pages available to your relative path. The readme files that accompany the software contain a great deal of important information. Right now, read the /usr/local/autopsy/README file. It will give you an overview of Sleuthkit. Install the Autopsy Forensic Browser Choose the latest version of Autopsy and unpack the distribution to /usr/local
  • 12.
    Compile the sourcecode (run “make”). Copy the manfiles for Autopsy to the appropriate locations in /usr/share/man to make the man pages available to your relative path. The readme files that accompany the software contain a great deal of important information. Right now, read the /usr/local/autopsy/README file. It will give you an overview of Autopsy. When prompted for the Sleuthkit directory, enter the directory where you installed Sleuthkit. When prompted for the NIST National Software Reference Library (NSRL) hit n because we will not be using that for this lab. When prompted for the location of the Evidence locker, enter /usr/local/evidence. (This directory needs to be created otherwise the autopsy program generates an error when is starts up.) *** NOTE: This directory has been specified for ease of use in this lab exercise. In the field it would be suggested to create a partition on the hard drive or another hard drive and mount that into the filesystem in its own location (away from system files – e.g. usr, home, etc.). In this way the partition or hard drive could be cleaned of any old evidence (zero’d) before new evidence is written to it, thereby preventing contamination of any evidence. *** B. Installing Foremost Download the latest version of foremost from http://foremost.sourceforge.net/
  • 13.
    Make and installthe software. Copy the man page to the proper directory. Pan, 4055-841 Page 8 of 8 UNIX ForensicsLab.doc