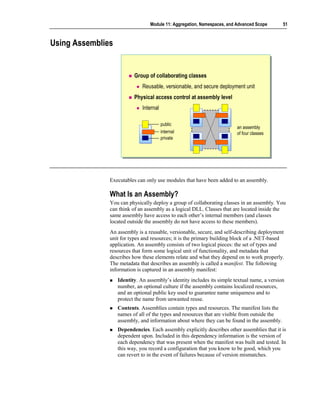
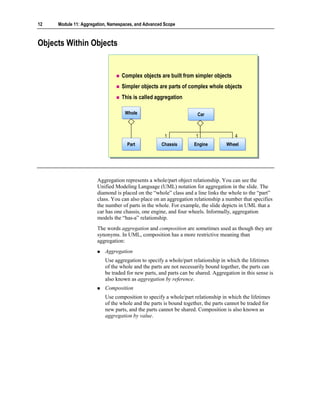
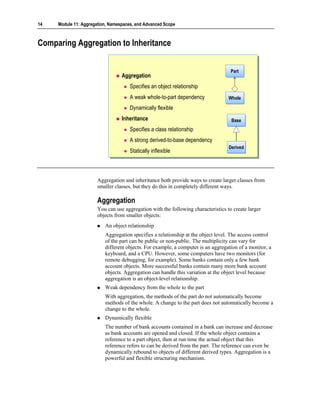
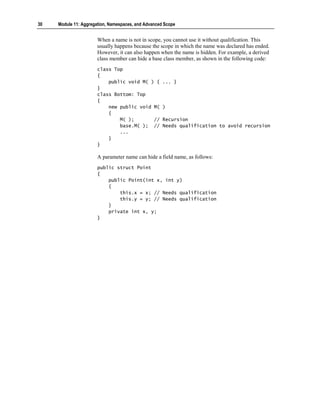
This document discusses aggregation, namespaces, and advanced scope in .NET. It covers using internal access to allow classes privileged access within an assembly. Aggregation is introduced as a way to implement powerful patterns like factories by grouping objects together into larger objects. Namespaces are described as a way to logically organize classes, and modules and assemblies are presented as ways to physically group source files. The document provides examples and code snippets demonstrating these concepts.


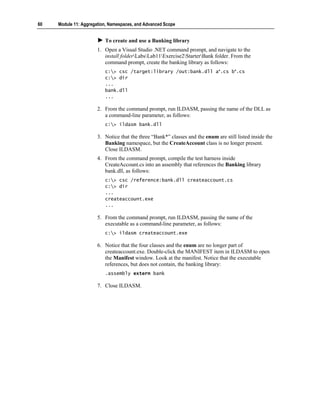
![18 Module 11: Aggregation, Namespaces, and Advanced Scope
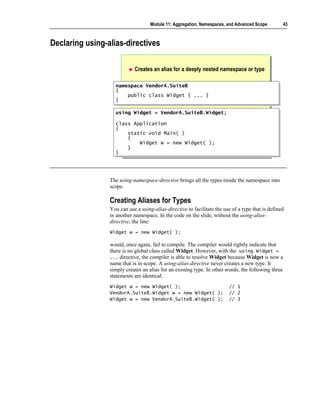
Factory Example
public class Bank
public class Bank
{{
public BankAccount OpenAccount( )
public BankAccount OpenAccount( )
{
{
BankAccount opened = new BankAccount( );
BankAccount opened = new BankAccount( );
accounts[opened.Number( )] = opened;
accounts[opened.Number( )] = opened;
return opened;
return opened;
}
}
private Hashtable accounts = new Hashtable( );
private Hashtable accounts = new Hashtable( );
}}
public class BankAccount
public class BankAccount
{{
internal BankAccount( ) { ... }
internal BankAccount( ) { ... }
public long Number( ) { ... }
public long Number( ) { ... }
public void Deposit(decimal amount) { ... }
public void Deposit(decimal amount) { ... }
}}
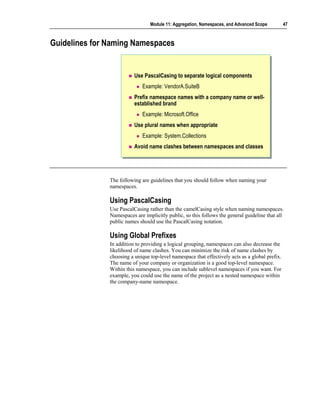
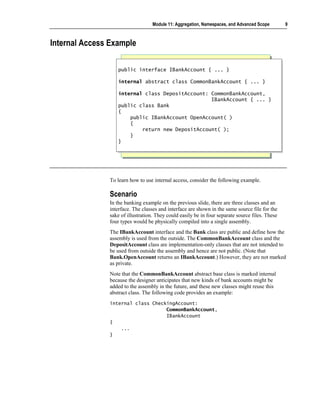
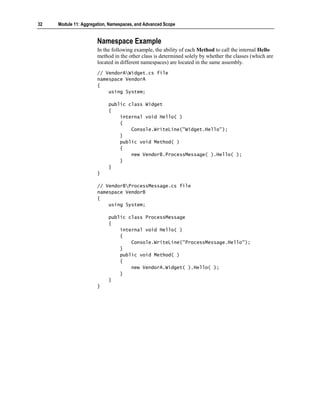
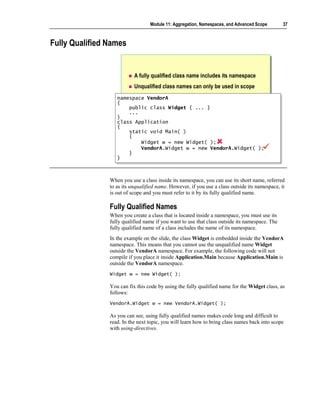
To learn how to use the Factory pattern, consider an example of publicly
useable, non-creatable objects being made and aggregated in a factory.
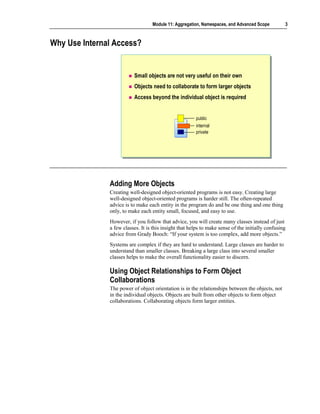
Scenario
In this example, the BankAccount class is public and has public methods. If
you could create a BankAccount object, you could use its public methods.
However, you cannot create a BankAccount object because its constructor is
not public. This is a perfectly reasonable model. After all, you cannot just create
a real bank account object. If you want a bank account, you need to go to a bank
and ask a teller to open one. The bank creates the account for you.
This is exactly the model that the above code depicts. The Bank class has a
public method called OpenAccount, the body of which creates the
BankAccount object for you. In this case, the Bank and the BankAccount are
in the same source file, and so will inevitably become part of the same
assembly. Assemblies will be covered later in this module. However, even if
the Bank class and the BankAccount classes were in separate source files, they
could (and would) still be deployed in the same assembly, in which case the
Bank would still have access to the internal BankAccount constructor. Notice
also that the Bank aggregates the BankAccount objects that it creates. This is
very common.](https://image.slidesharecdn.com/7494611-100803095722-phpapp01/85/7494611-20-320.jpg)
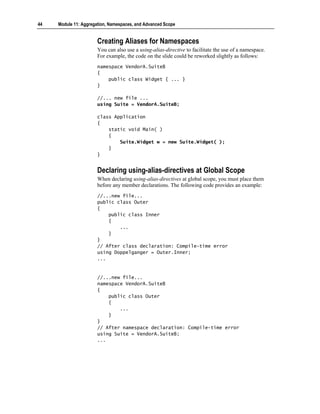
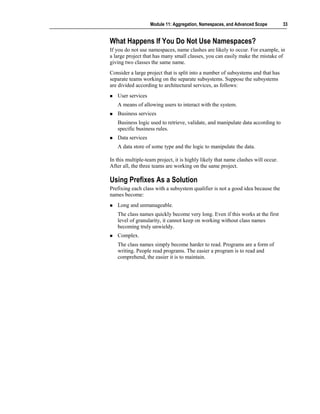
![Module 11: Aggregation, Namespaces, and Advanced Scope 19
Design Alternatives
To restrict creation of BankAccount objects further, you can make
BankAccount a private nested class of Bank with a public interface. The
following code provides an example:
using System.Collections;
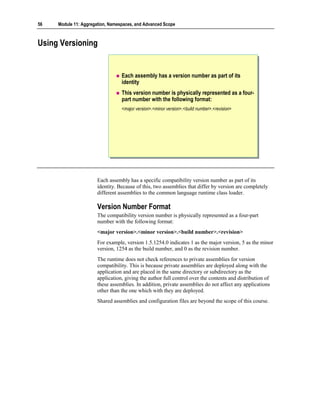
public interface IAccount
{
long Number( );
void Deposit(decimal amount);
//...
}
public class Bank
{
public IAccount OpenAccount( )
{
IAccount opened = new DepositAccount( );
accounts[opened.Number( )] = opened;
return opened;
}
private readonly Hashtable accounts = new Hashtable( );
private sealed class DepositAccount: IAccount
{
public long Number( )
{
return number;
}
public void Deposit(decimal amount)
{
balance += amount;
}
//...
// Class state
private static long NextNumber( )
{
return nextNumber++;
}
private static long nextNumber = 123;
// Object state
private decimal balance = 0.0M;
private readonly long number = NextNumber( );
}
}](https://image.slidesharecdn.com/7494611-100803095722-phpapp01/85/7494611-21-320.jpg)
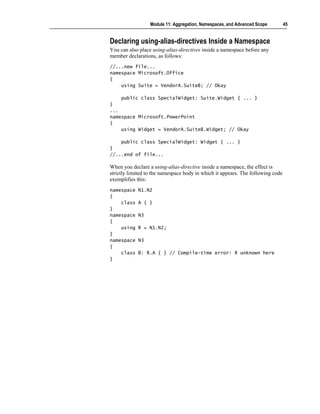
![20 Module 11: Aggregation, Namespaces, and Advanced Scope
Alternatively, you can make the entire BankAccount concept private, and
reveal only the bank account number, as shown in the following code:
using System.Collections;
public sealed class Bank
{
public long OpenAccount( )
{
IAccount opened = new DepositAccount( );
long number = opened.Number( );
accounts[number] = opened;
return number;
}
public void Deposit(long accountNumber, decimal amount)
{
IAccount account = (IAccount)accounts[accountNumber];
if (account != null) {
account.Deposit(amount);
}
}
//...
public void CloseAccount(long accountNumber)
{
IAccount closing = (IAccount)accounts[accountNumber];
if (closing != null) {
accounts.Remove(accountNumber);
closing.Dispose( );
}
}
private readonly Hashtable accounts = new Hashtable( );
private interface IAccount
{
long Number( );
void Deposit(decimal amount);
void Dispose( );
//...
}
private sealed class DepositAccount: IAccount
{
public long Number( )
{
return number;
}
public void Deposit(decimal amount)
{
balance += amount;
}
Code continued on following page.](https://image.slidesharecdn.com/7494611-100803095722-phpapp01/85/7494611-22-320.jpg)
![24 Module 11: Aggregation, Namespaces, and Advanced Scope
To make the Bank responsible for closing accounts
Real bank accounts never leave their bank. Instead, bank accounts remain
internal to their bank, and customers gain access to their accounts by using their
unique bank account numbers. In the next few steps, you will modify the
Bank.CreateAccount method in Bank.cs to reflect this.
1. Add a private static field called accounts of type Hashtable to the Bank
class. Initialize it with a new Hashtable object. The Hashtable class is
located inside the System.Collections namespace, so you will need an
appropriate using-directive.
2. Modify the Bank.CreateAccount method so that it returns the
BankAccount number (a long) and not the BankAccount itself. Change the
body of the method so that it stores the newly created BankAccount object
in the accounts Hashtable, using the bank account number as the key.
3. Add a public non-static CloseAccount method to the Bank class.
This method will expect a single parameter of type long (the number of the
account being closed) and will return a bool. The body of this method will
access the BankAccount object from the accounts Hashtable, using the
account number parameter as an indexer. It will then remove the
BankAccount from the accounts Hashtable by calling the Remove method
of the Hashtable class, and then dispose of the closing account by calling
its Dispose method. The CloseAccount method will return true if the
account number parameter successfully accesses a BankAccount inside the
accounts Hashtable; otherwise it will return false.
At this point, the Bank class should look as follows:
using System.Collections;
public class Bank
{
public long CreateAccount( )
{
BankAccount newAcc = new BankAccount( );
long accNo = newAcc.Number( );
accounts[accNo] = newAcc;
return accNo;
}
public bool CloseAccount(long accNo)
{
BankAccount closing = (BankAccount)accounts[accNo];
if (closing != null) {
accounts.Remove(accNo);
closing.Dispose( );
return true;
}
else {
return false;
}
}
private static Hashtable accounts = new Hashtable( );
}](https://image.slidesharecdn.com/7494611-100803095722-phpapp01/85/7494611-26-320.jpg)
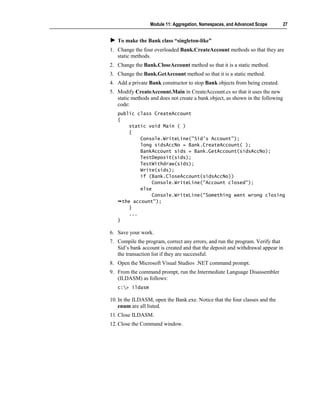
![Module 11: Aggregation, Namespaces, and Advanced Scope 25
4. Save your work.
5. Compile the program.
It will not compile. The test harness in CreateAccount.Main now fails
because Bank.CreateAccount returns a long rather than a BankAccount.
6. Add a public non-static method called GetAccount to the Bank class.
It will expect a single parameter of type long that specifies a bank account
number. It will return the BankAccount object stored in the accounts
Hashtable that has this account number (or null if there is no account with
this number). The BankAccount object can be retrieved by using the
account number as an indexer parameter on accounts as shown below:
public class Bank
{
...
public BankAccount GetAccount(long accNo)
{
return (BankAccount)accounts[accNo];
}
}
7. Change Main in the CreateAccount.cs test harness so that it uses the new
Bank methods, as follows:
public class CreateAccount
{
static void Main ( )
{
Console.WriteLine("Sid's Account");
Bank bank = new Bank( );
long sidsAccNo = bank.CreateAccount( );
BankAccount sids = bank.GetAccount(sidsAccNo);
TestDeposit(sids);
TestWithdraw(sids);
Write(sids);
if (bank.CloseAccount(sidsAccNo)) {
Console.WriteLine("Account closed");
} else {
Console.WriteLine("Something went wrong closing
the account");
}
}
...
}
8. Save your work.
9. Compile the program, correct any errors, and run the program. Verify that
Sid’s bank account is created and that the deposit and withdrawal appear in
the transaction list if they are successful.](https://image.slidesharecdn.com/7494611-100803095722-phpapp01/85/7494611-27-320.jpg)

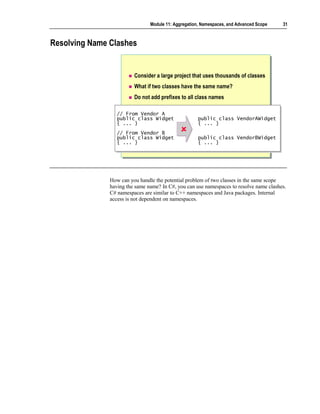

![42 Module 11: Aggregation, Namespaces, and Advanced Scope
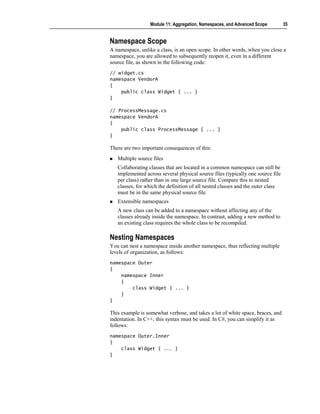
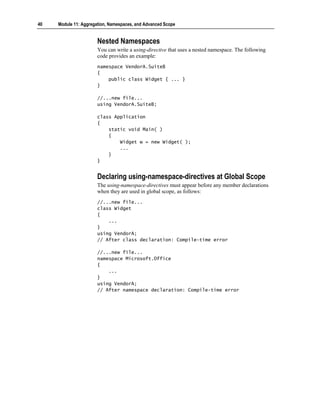
Ambiguous Names
Consider the following example:
namespace VendorA
{
public class Widget { ... }
}
namespace VendorB
{
public class Widget { ... }
}
namespace Test
{
using VendorA;
using VendorB;
class Application
{
static void Main( )
{
Widget w = new Widget( ); // Compile-time error
...
}
}
}
In this case, the compiler will return a compile-time error because it cannot
resolve Widget. The problem is that there is a Widget class inside both
namespaces, and both namespaces have using-directives. The compiler will not
select Widget from VendorA rather than VendorB because A comes before B
in the alphabet.
Note however, that the two Widget classes only clash when there is an attempt
to actually use the unqualified name Widget. You can resolve the problem by
using a fully qualified name for Widget, thus associating it with either
VendorA or VendorB. You can also rewrite the code without using the name
Widget at all, as follows, and there would be no error:
namespace Test
{
using VendorA;
using VendorB;
// Okay. No error here.
class Application
{
static void Main(string[ ] args)
{
VendorA.Widget w = new VendorA.Widget( );
}
}
}](https://image.slidesharecdn.com/7494611-100803095722-phpapp01/85/7494611-44-320.jpg)