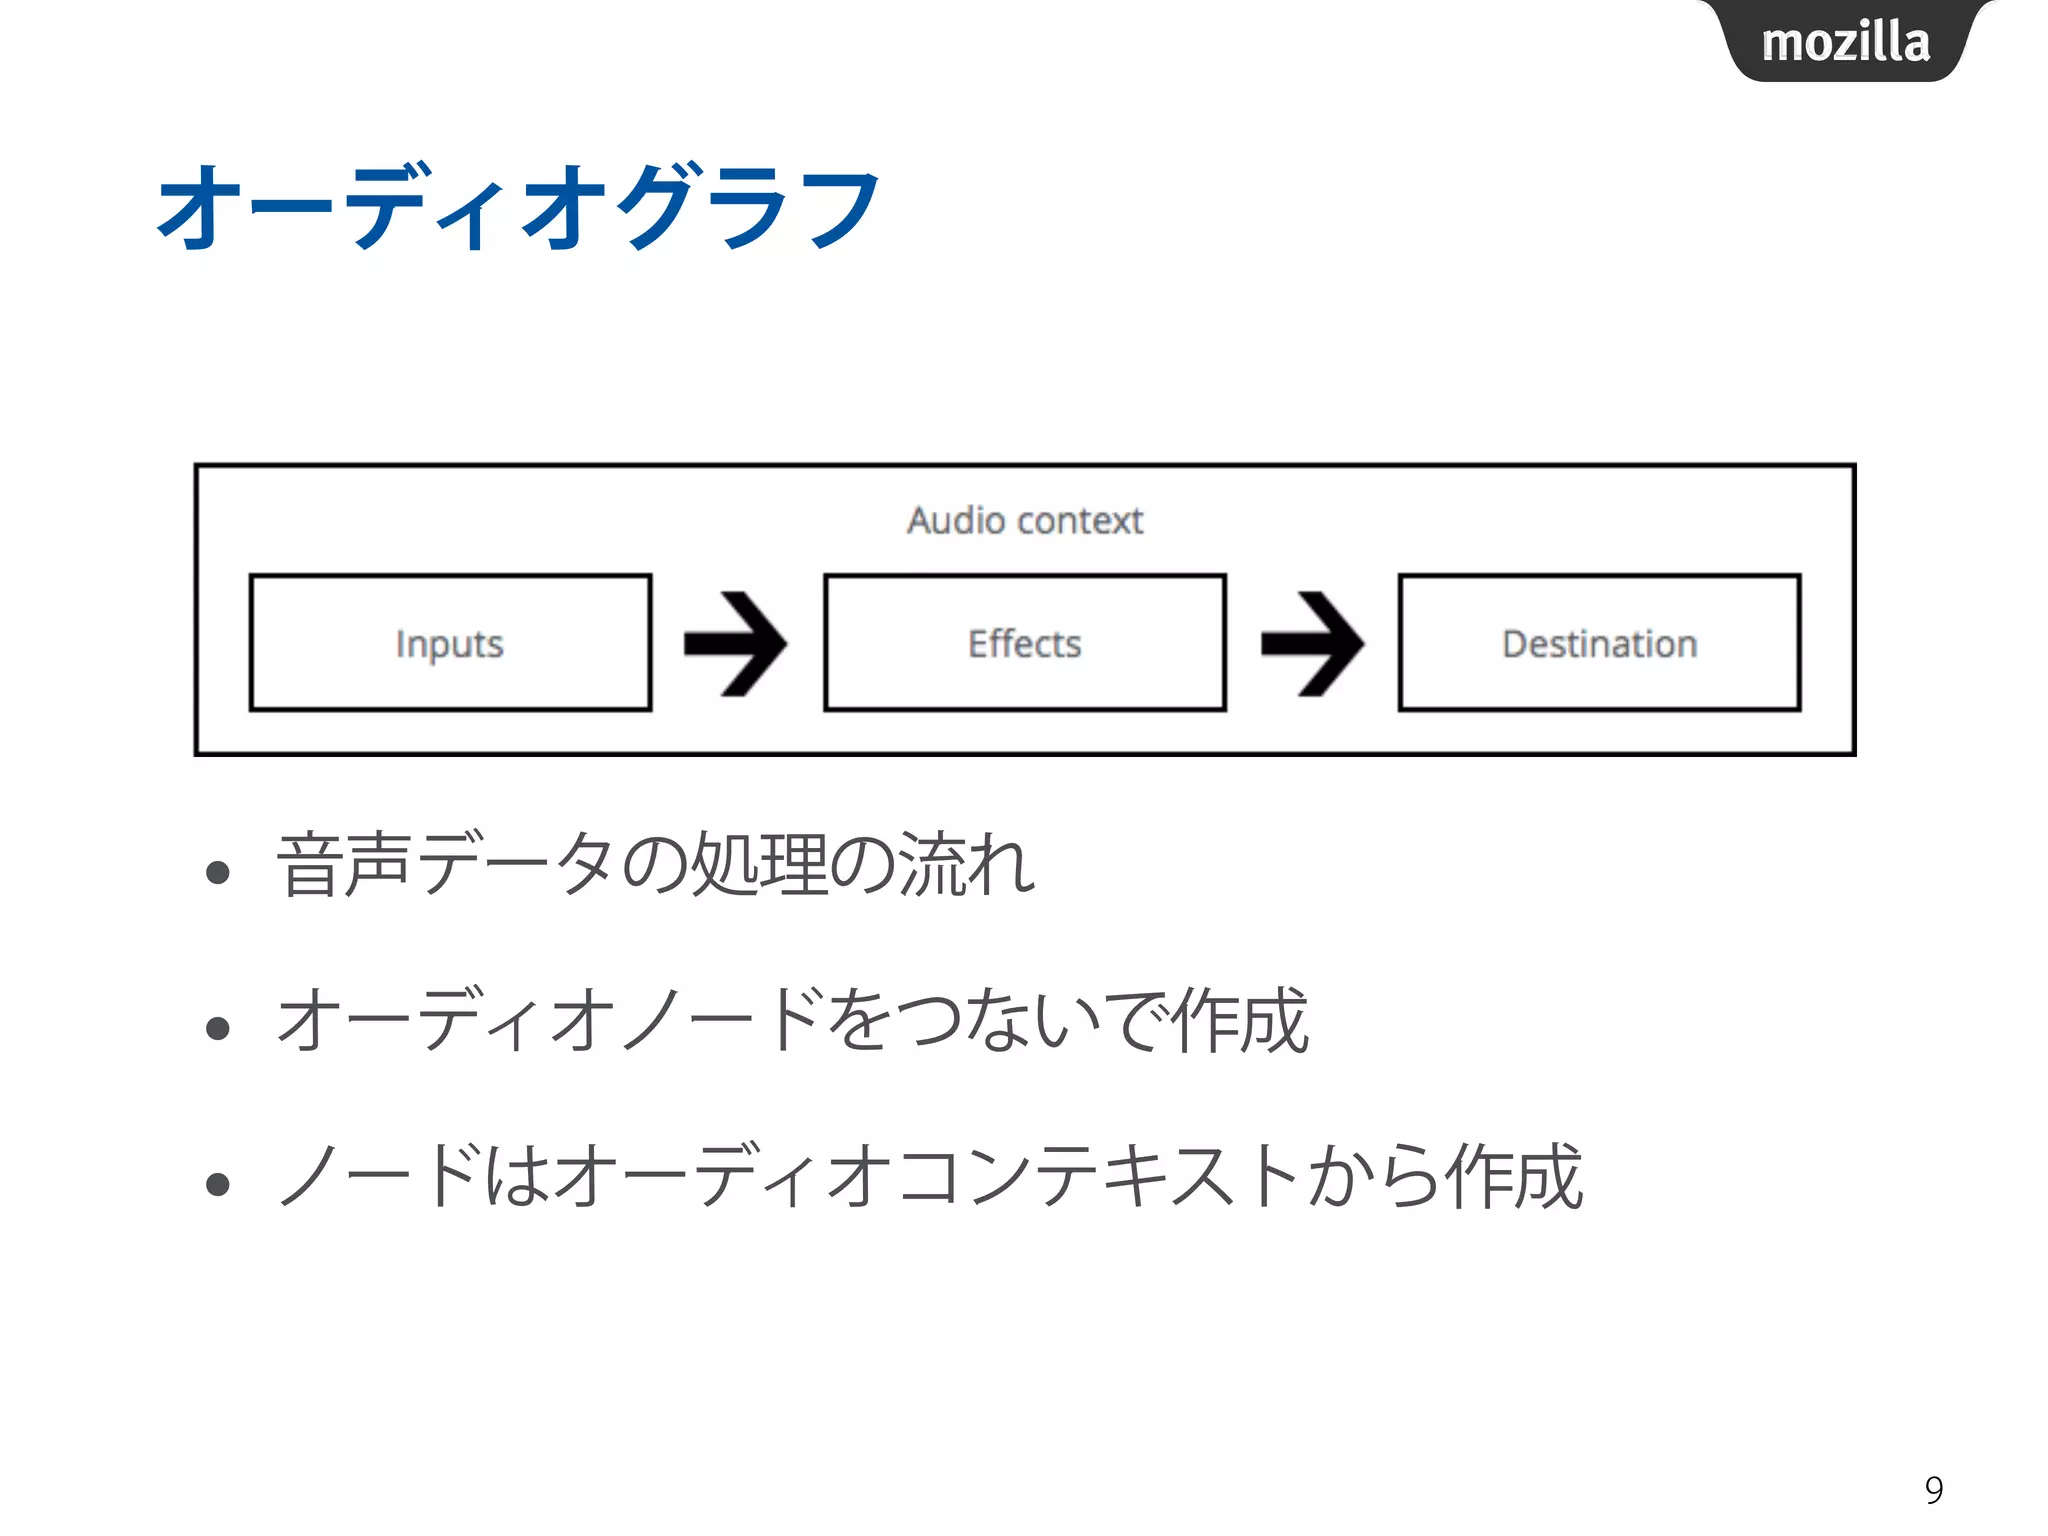
An introduction of Web Audio API and their friends by explaining Web based sampler app for Firefox OS. This slide is for Firefox OS meeting at 2014/08/30 in Hiroshima, Japan.
単純なオーディオグラフの作成例
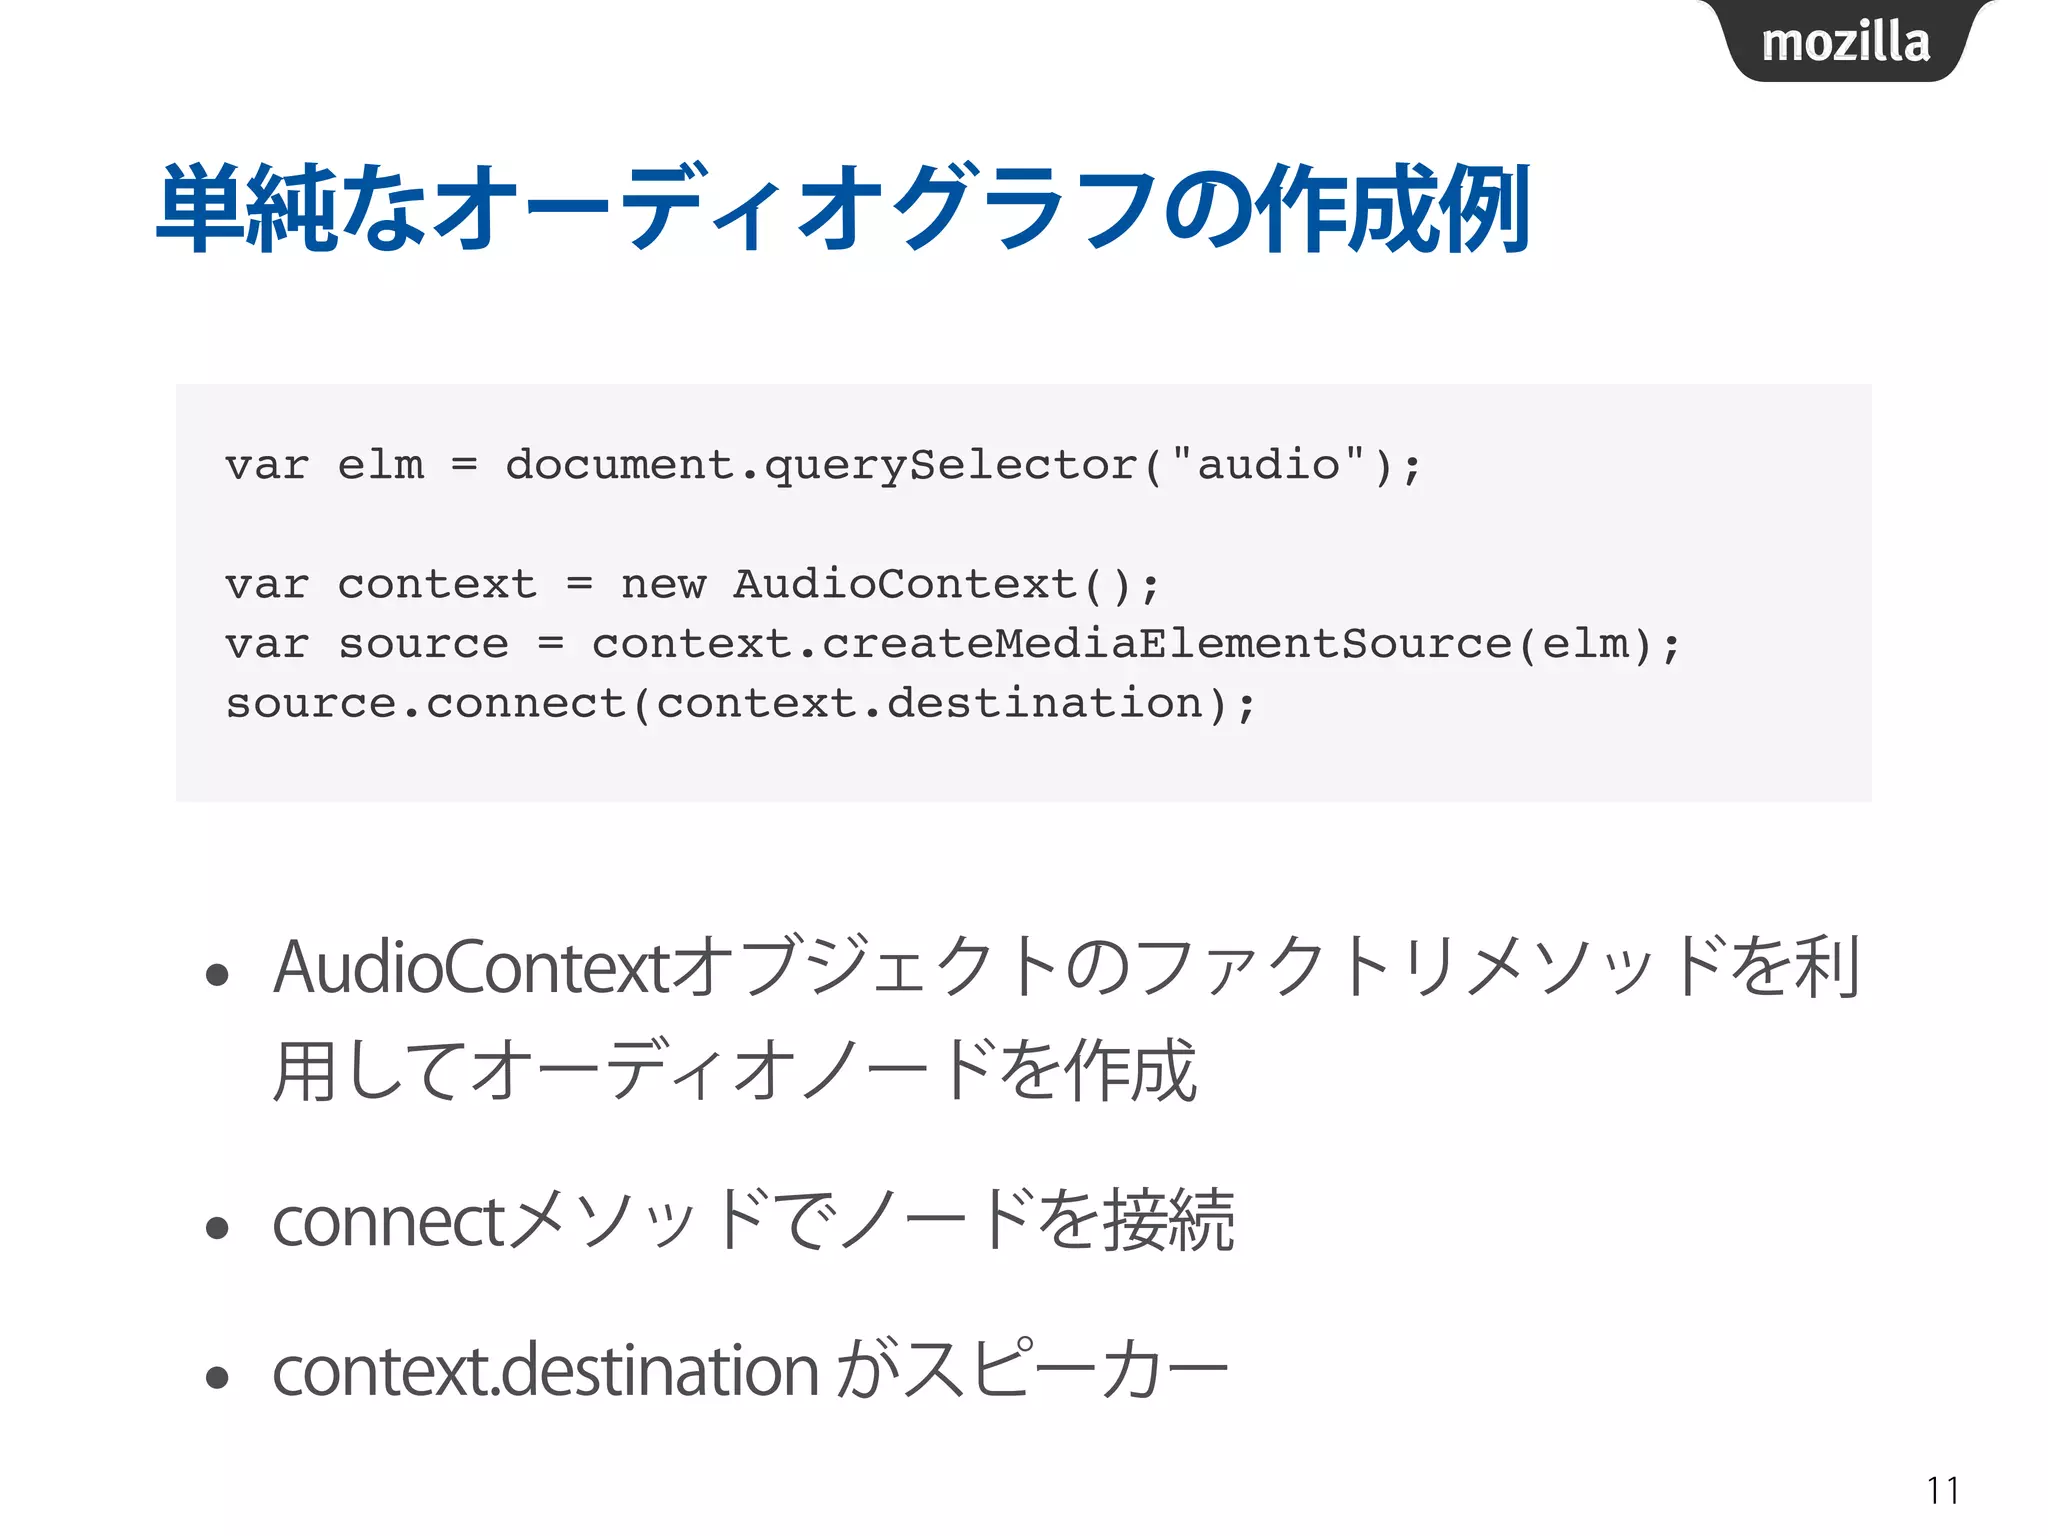
• AudioContextオブジェクトのファクトリメソッドを利
用してオーディオノードを作成
• connectメソッドでノードを接続
• context.destination がスピーカー
11
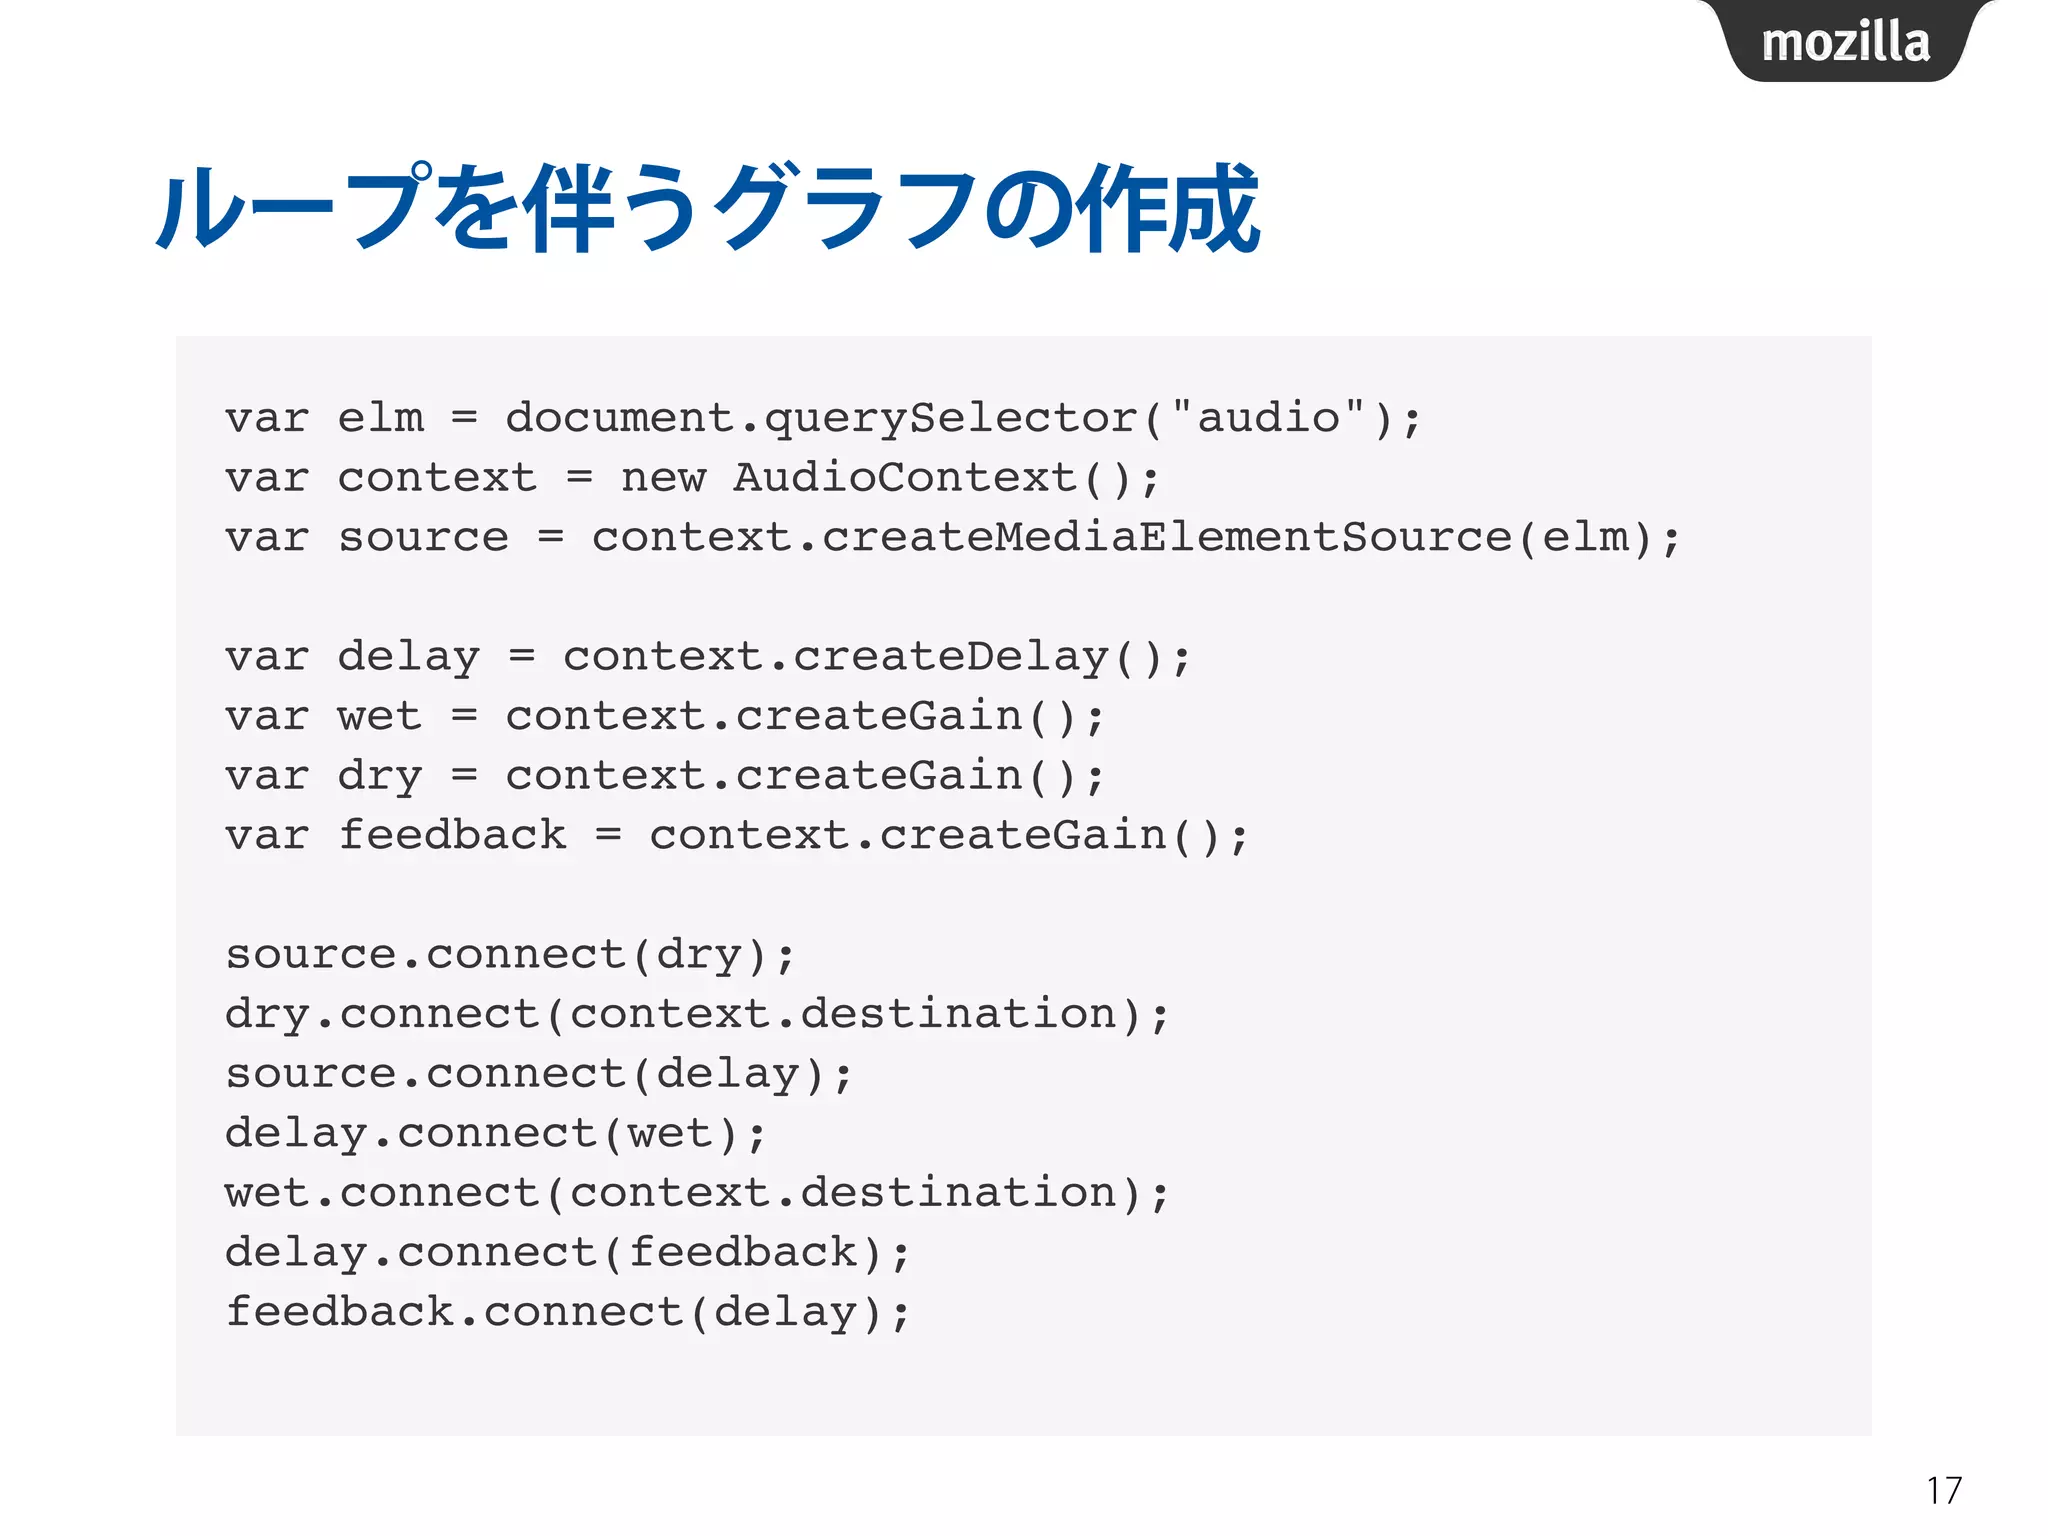
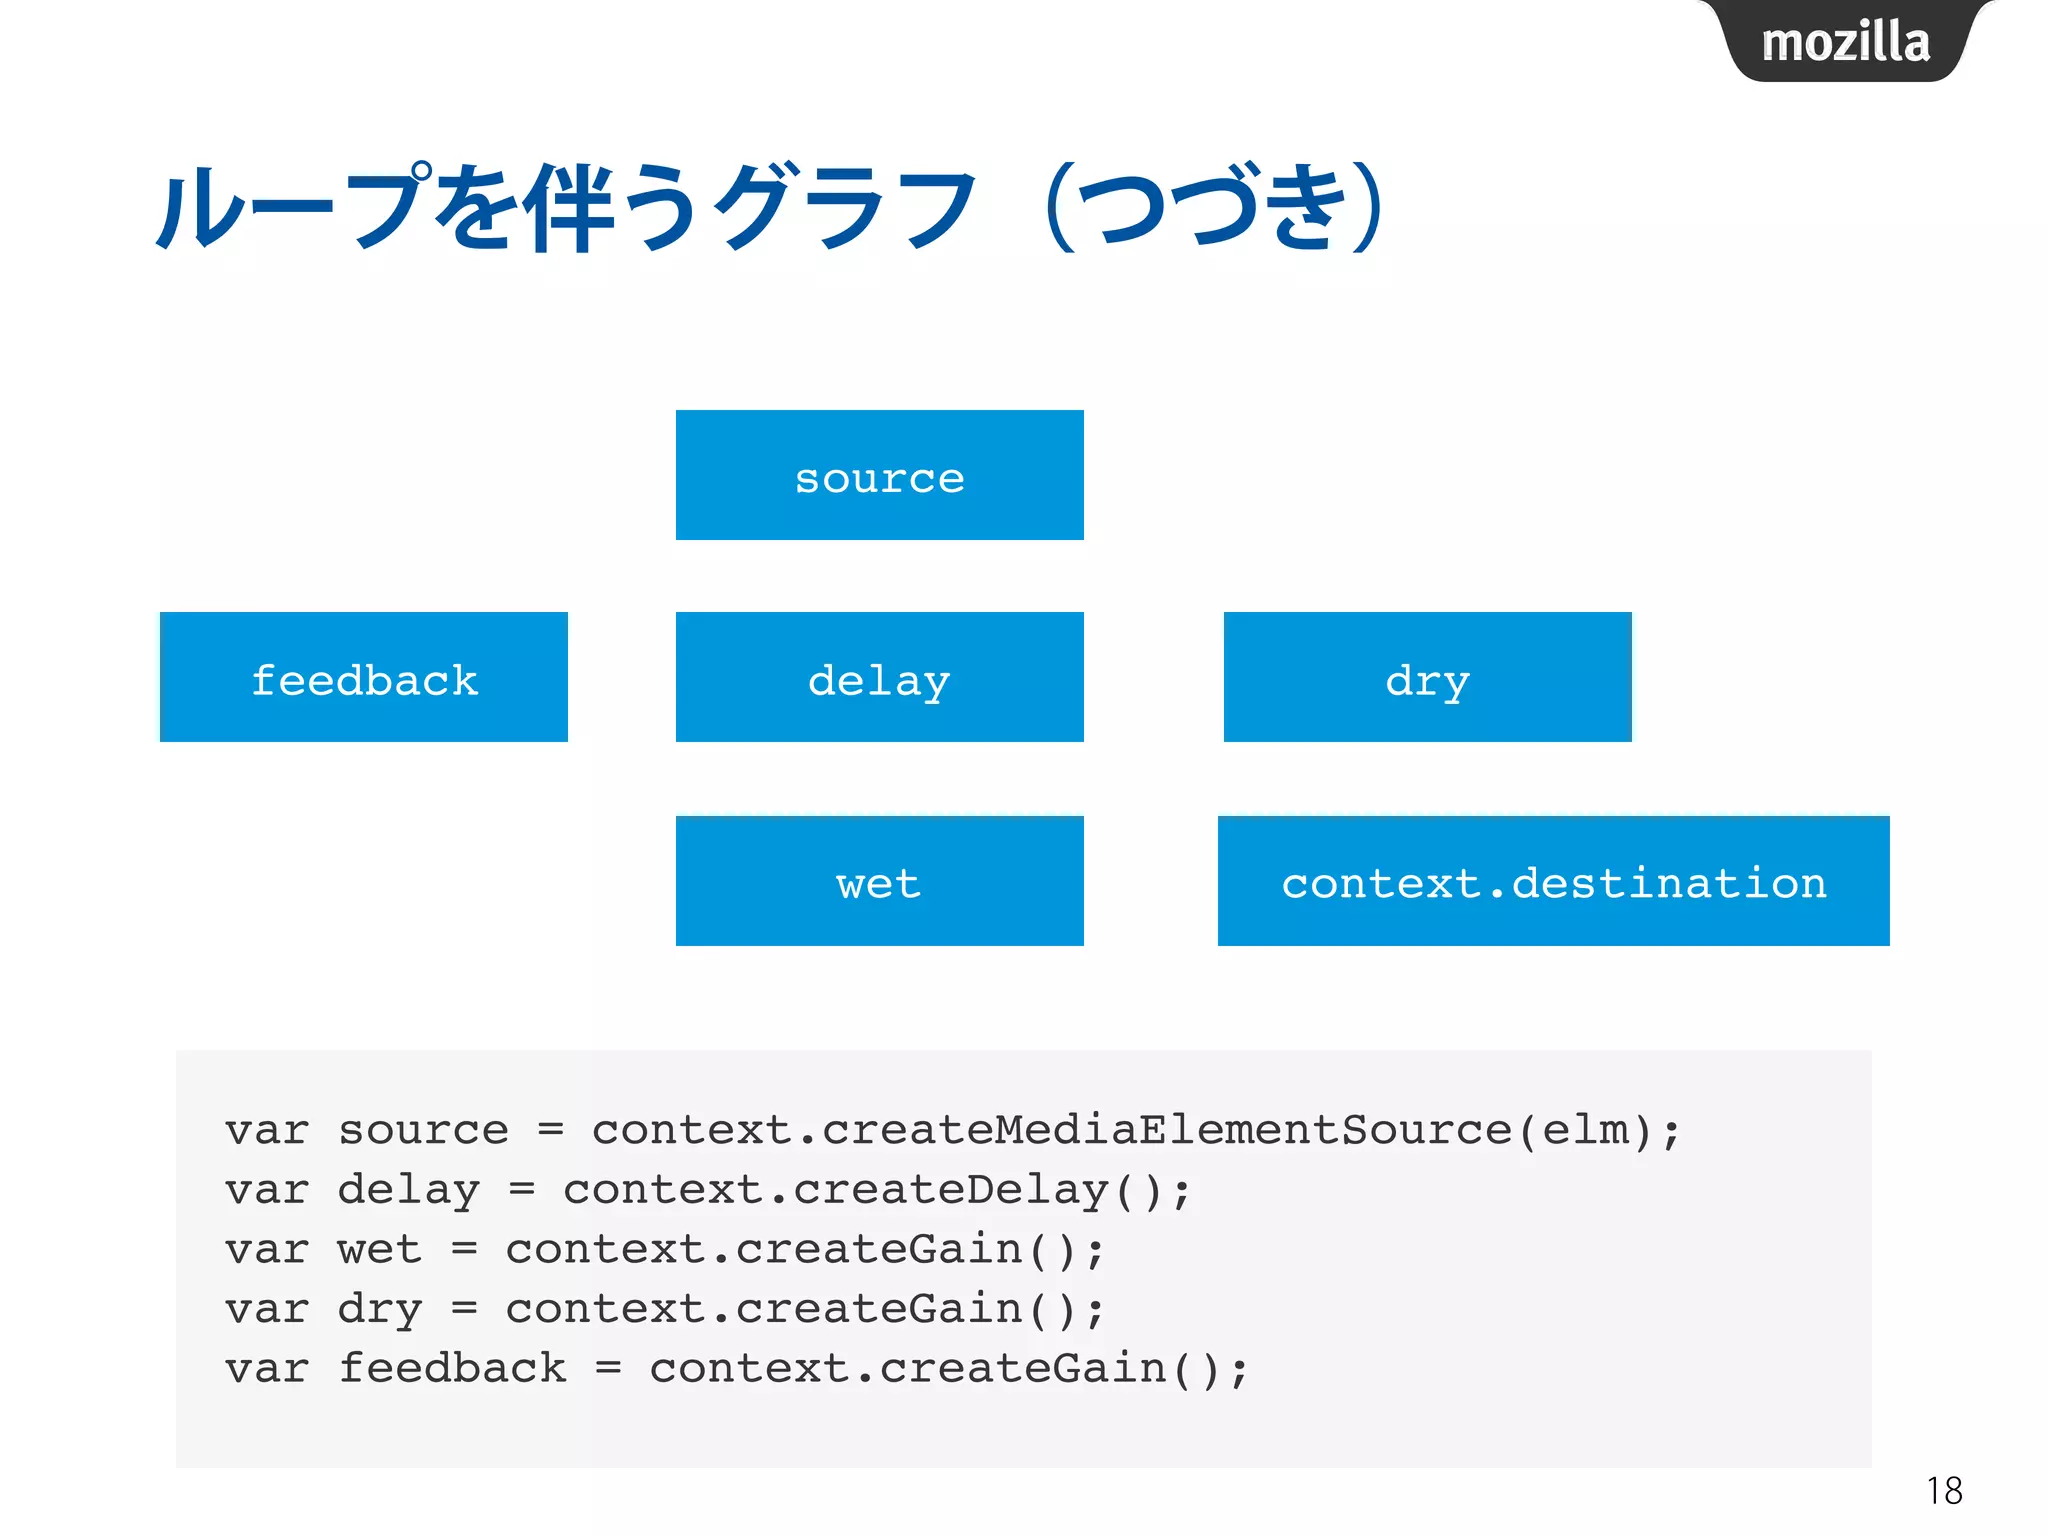
var elm = document.querySelector("audio");!
!
var context = new AudioContext();!
var source = context.createMediaElementSource(elm);!
source.connect(context.destination);
12.
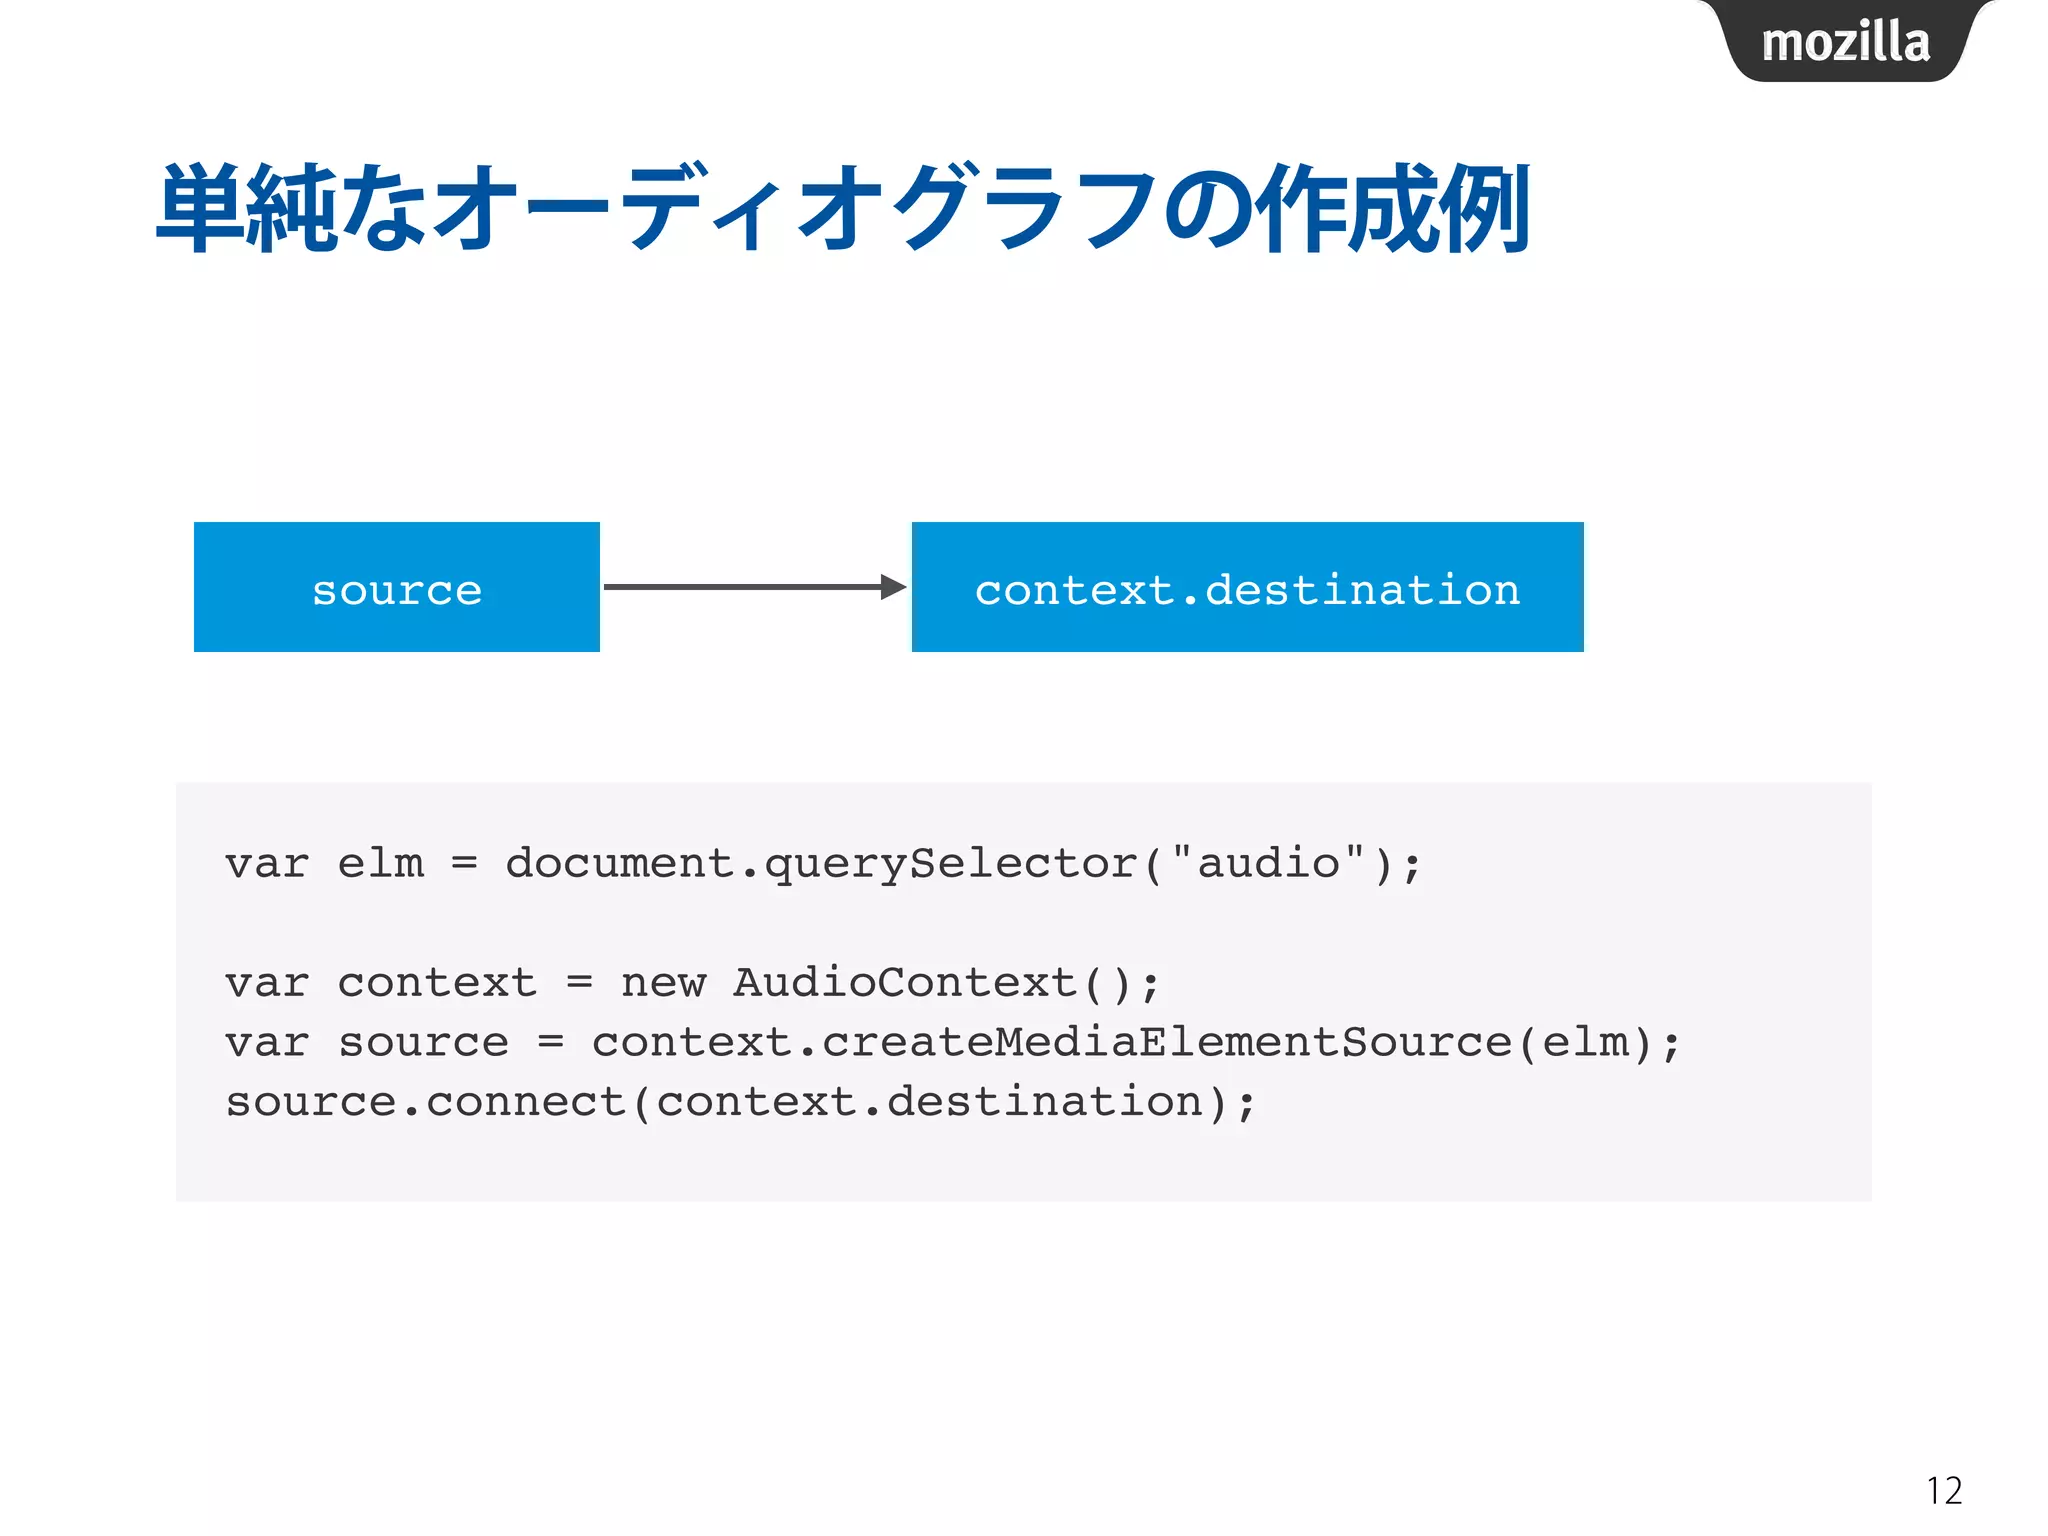
単純なオーディオグラフの作成例
12
sourcecontext.destination
var elm = document.querySelector("audio");!
!
var context = new AudioContext();!
var source = context.createMediaElementSource(elm);!
source.connect(context.destination);
13.
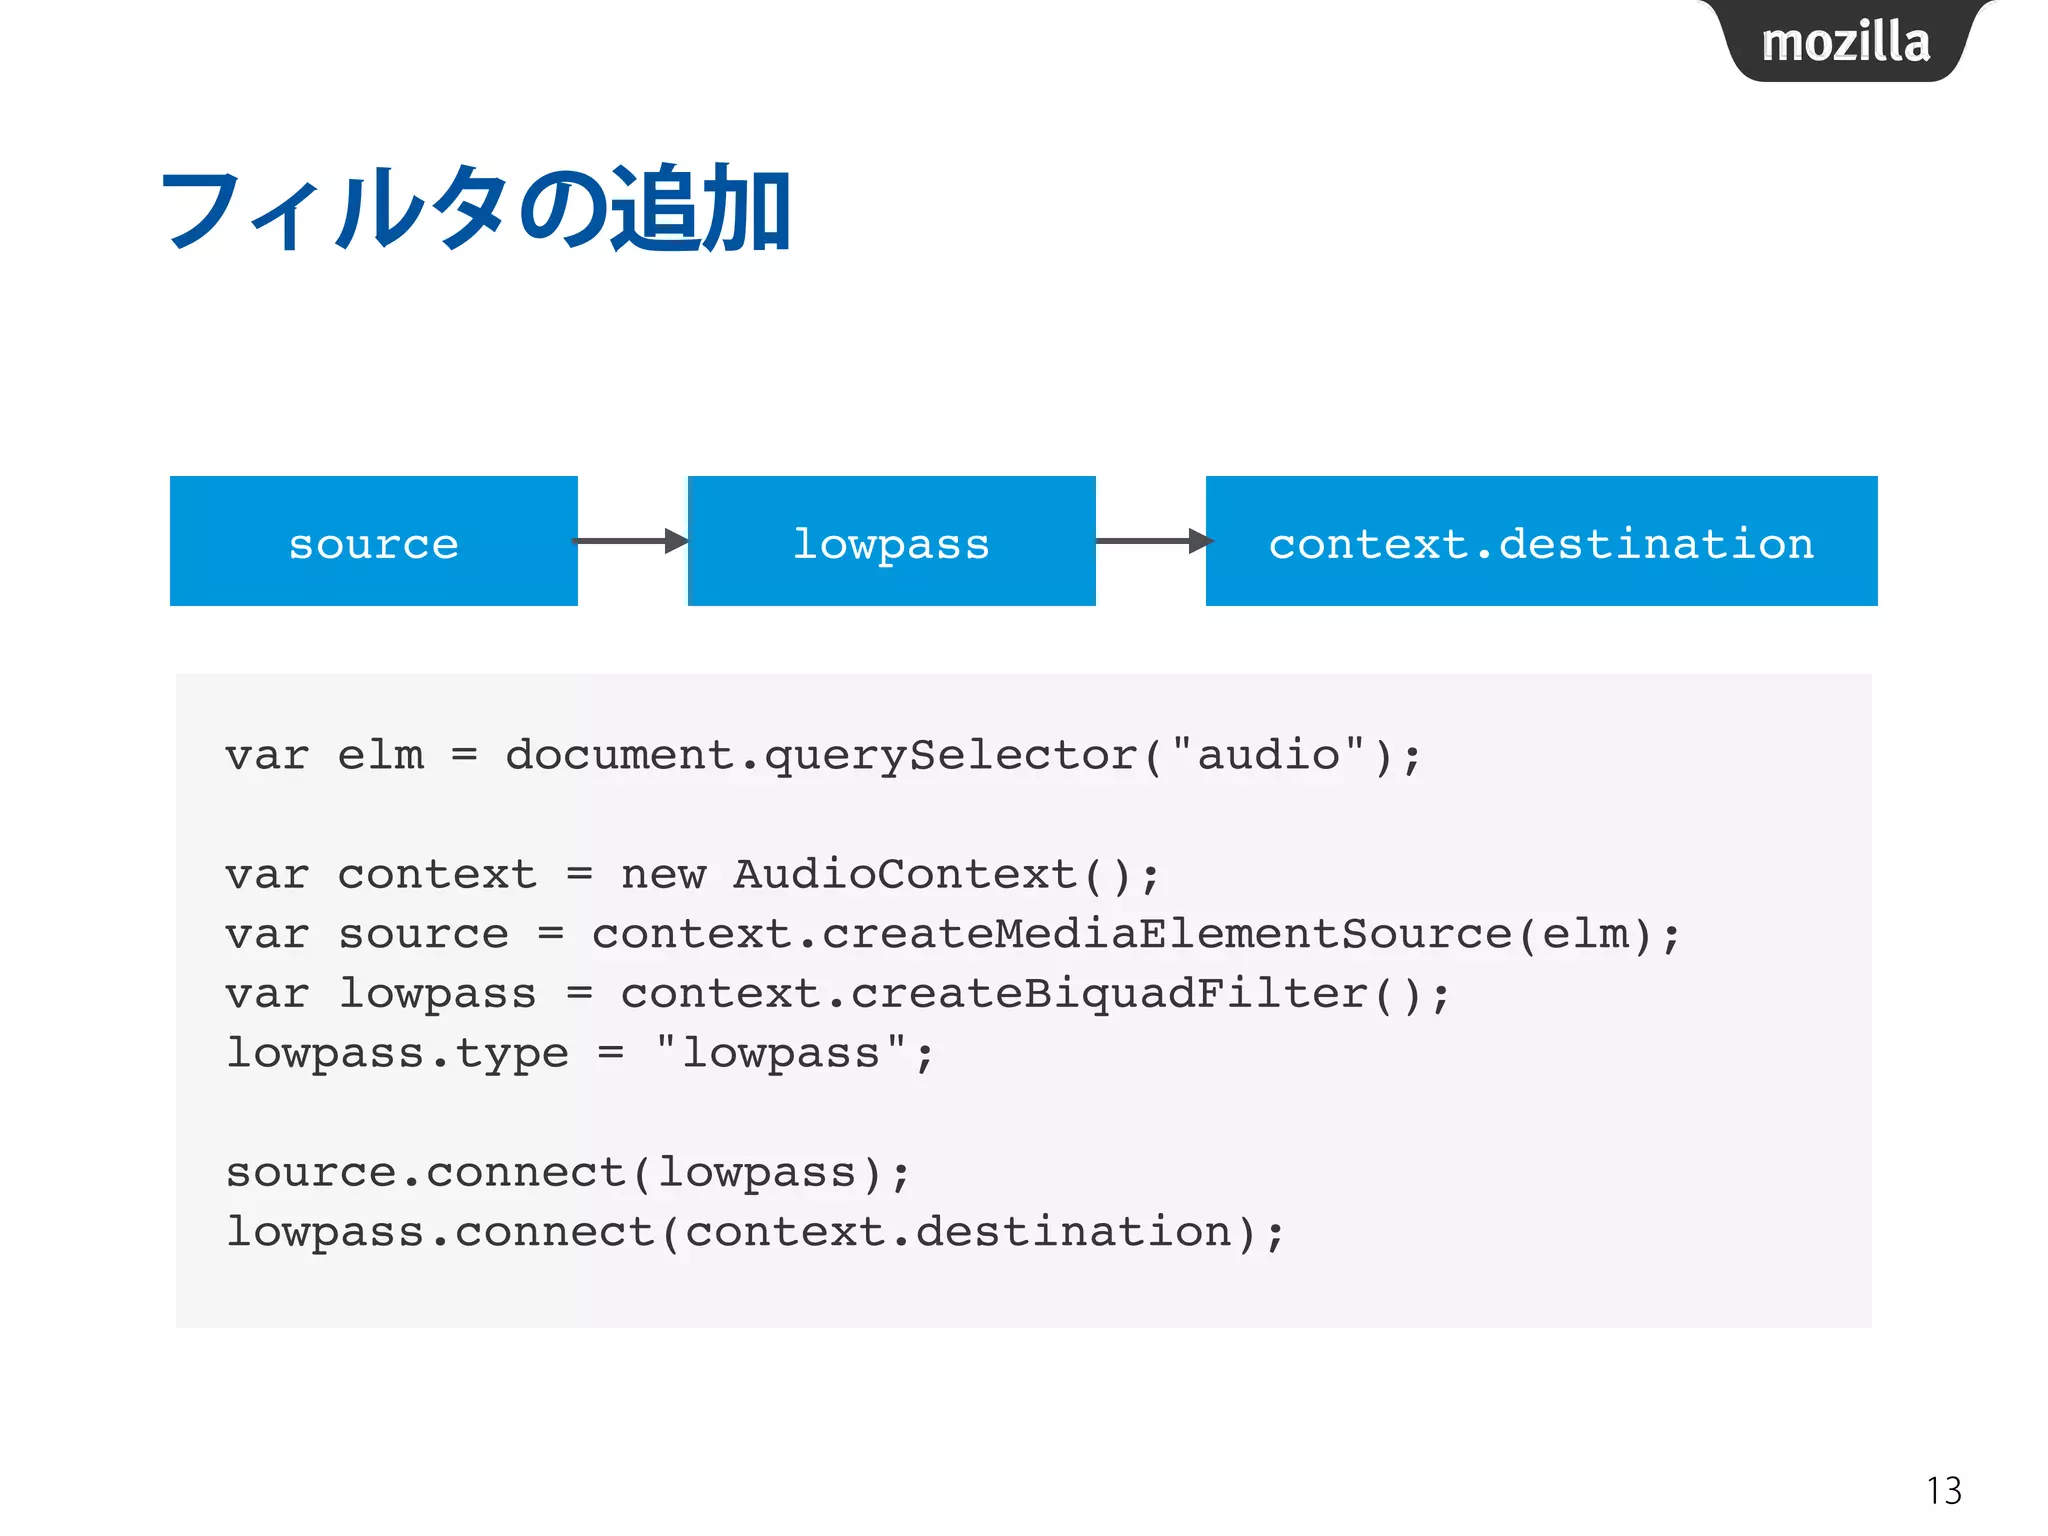
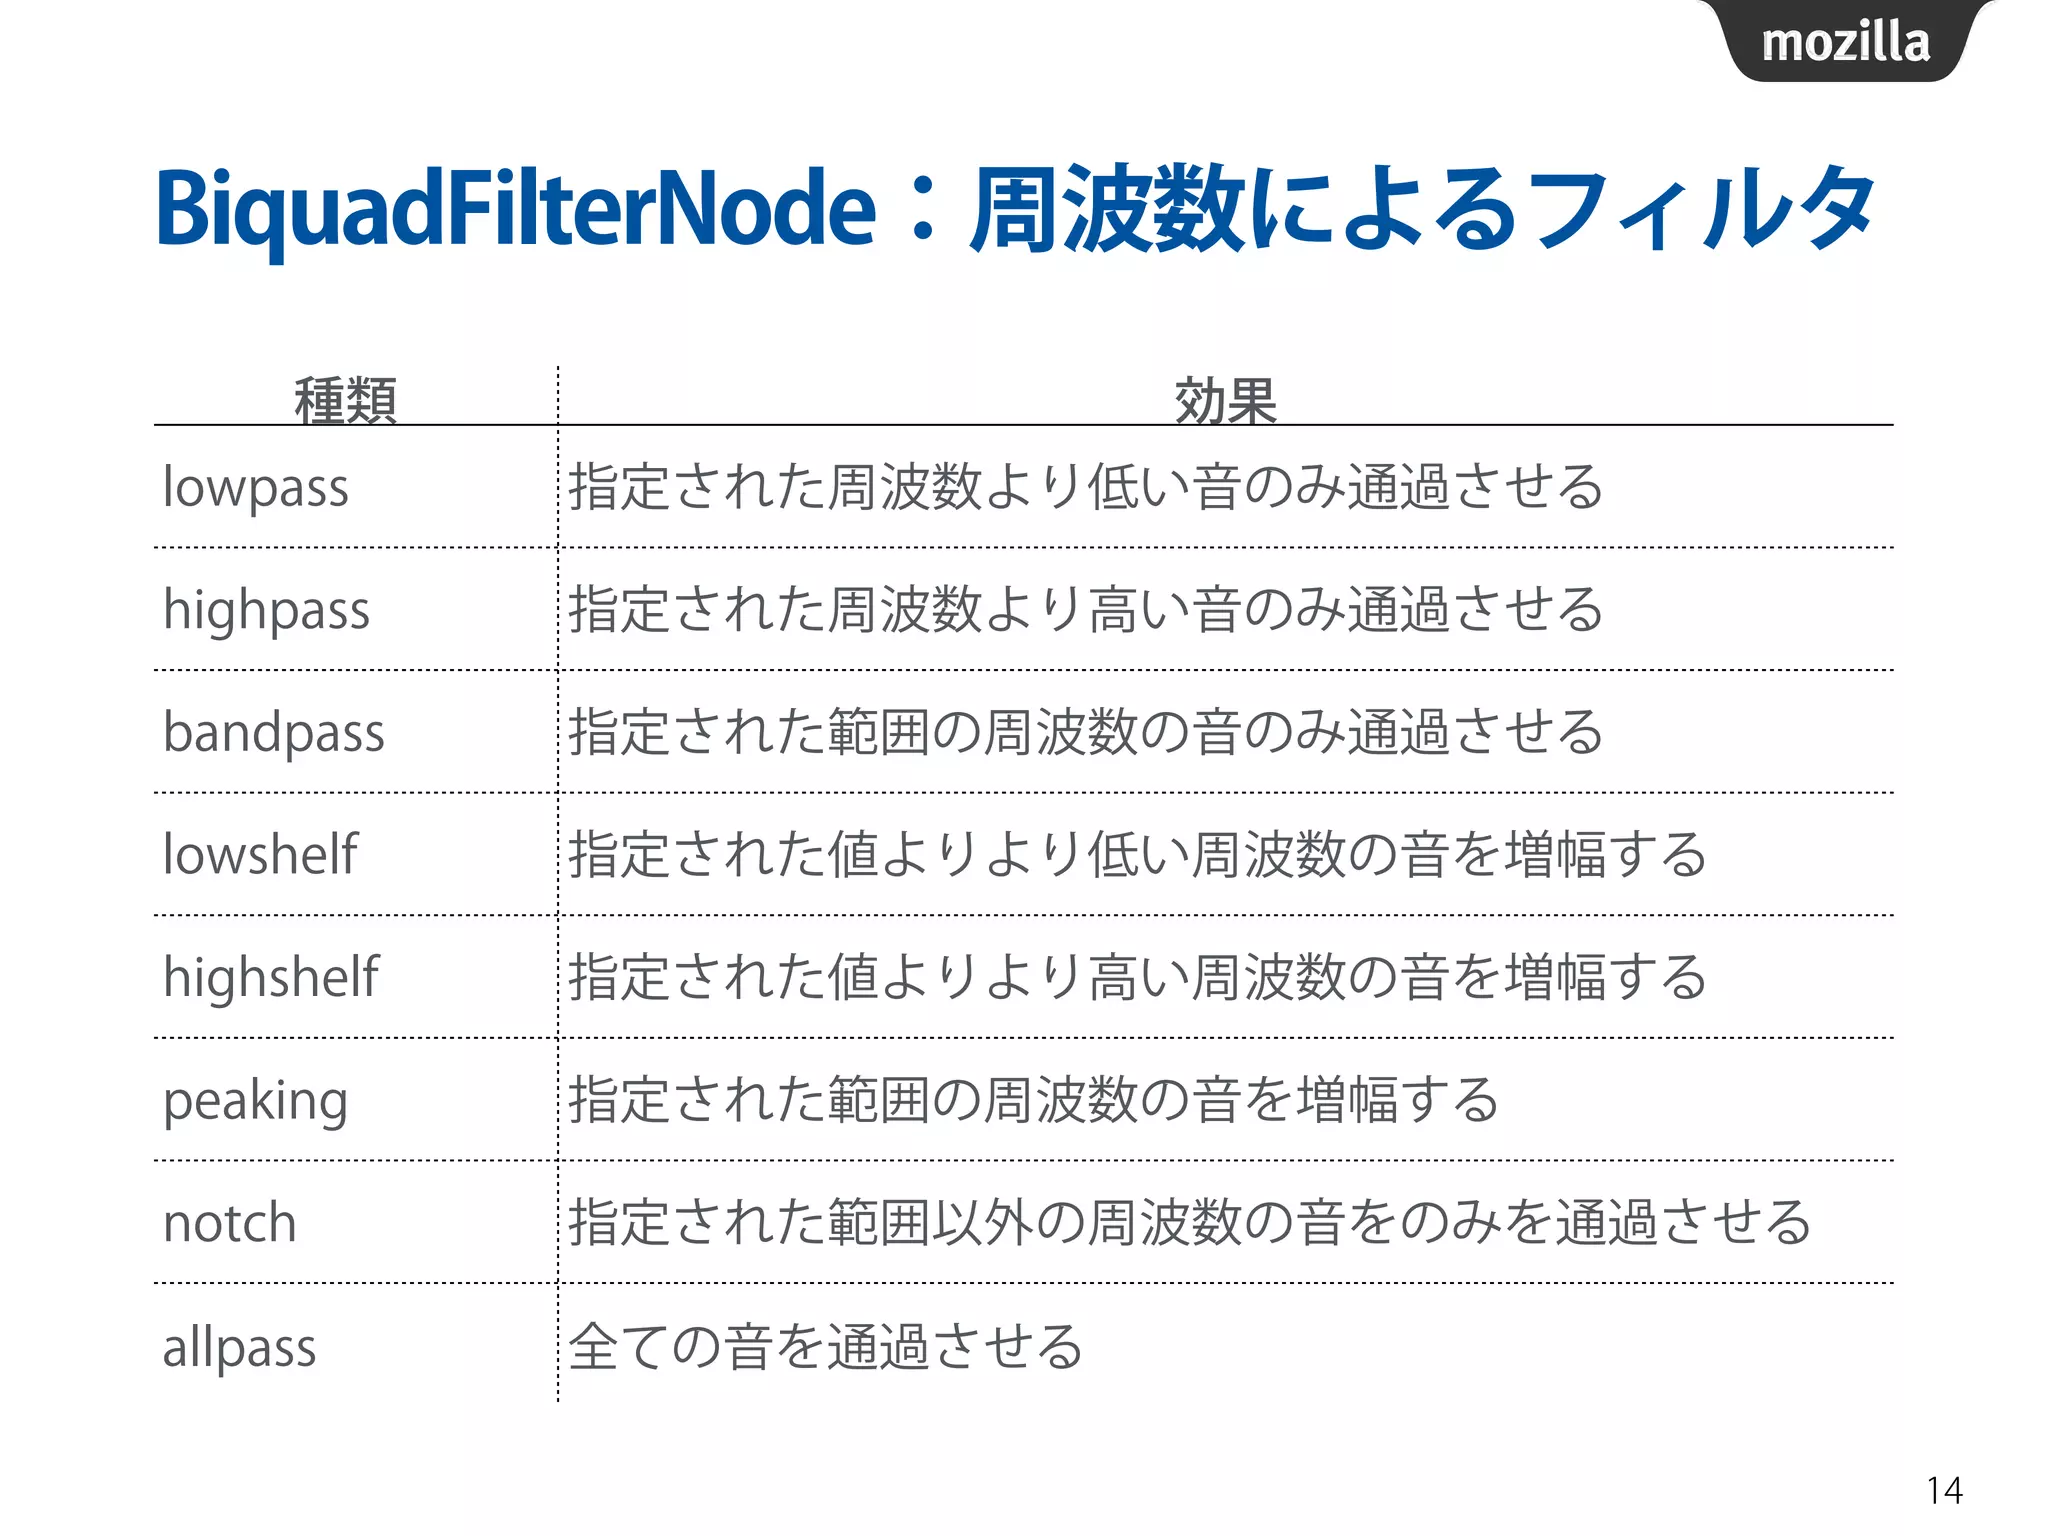
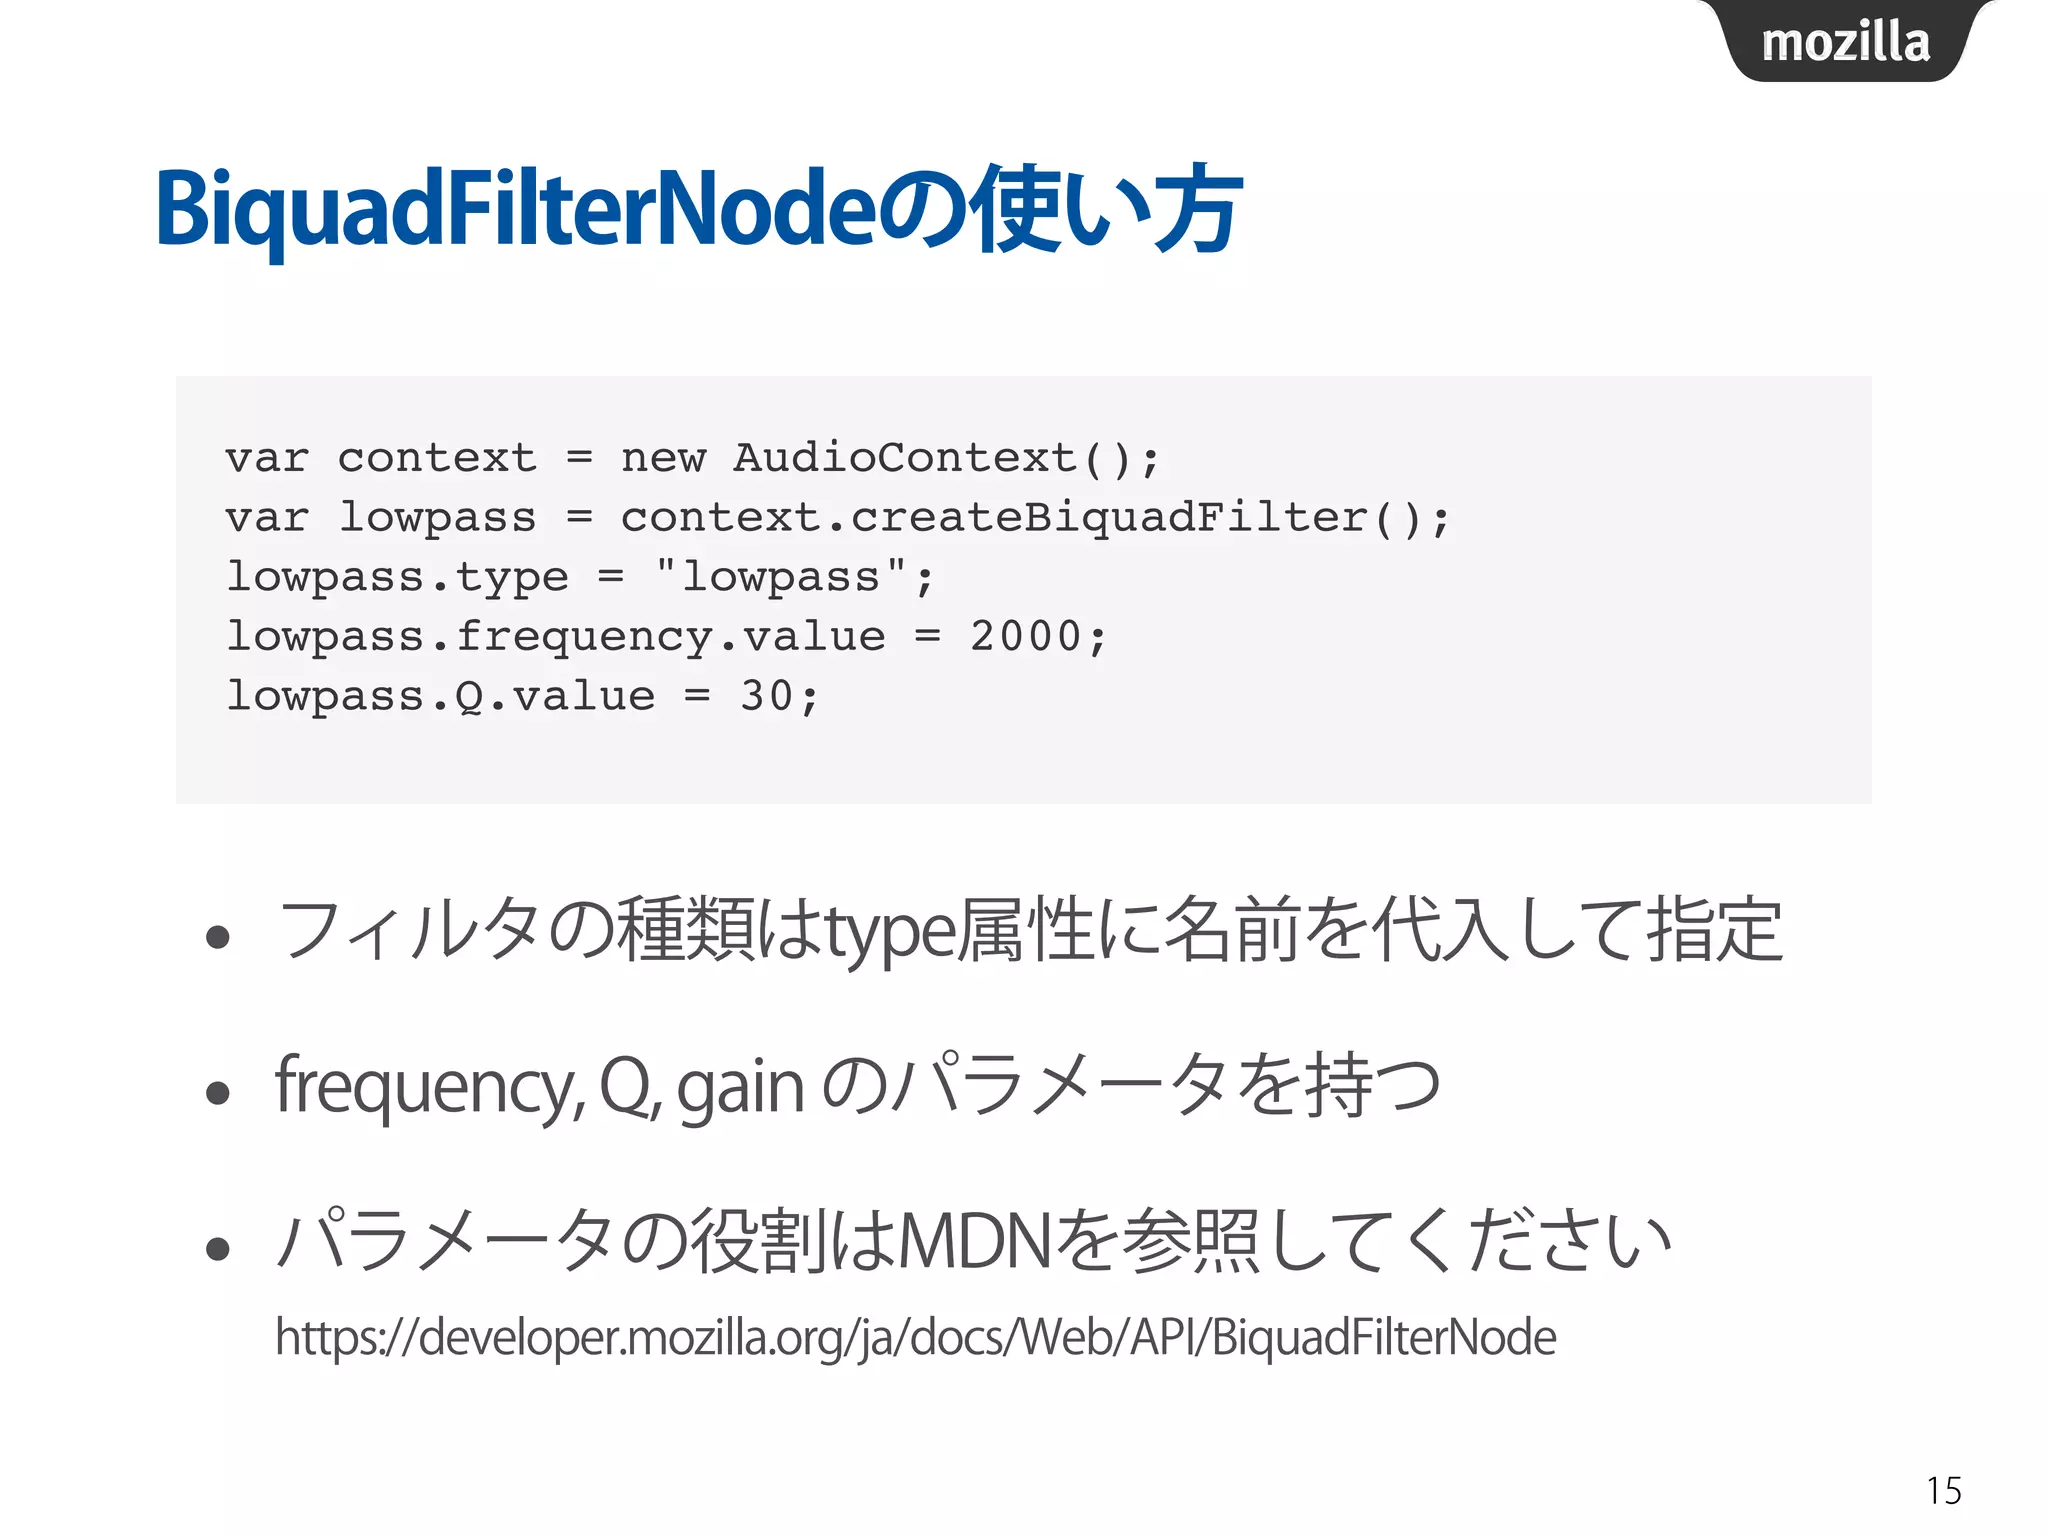
フィルタの追加
13
sourcelowpass context.destination
var elm = document.querySelector("audio");!
!
var context = new AudioContext();!
var source = context.createMediaElementSource(elm);!
var lowpass = context.createBiquadFilter();!
lowpass.type = "lowpass";!
!
source.connect(lowpass);!
lowpass.connect(context.destination);
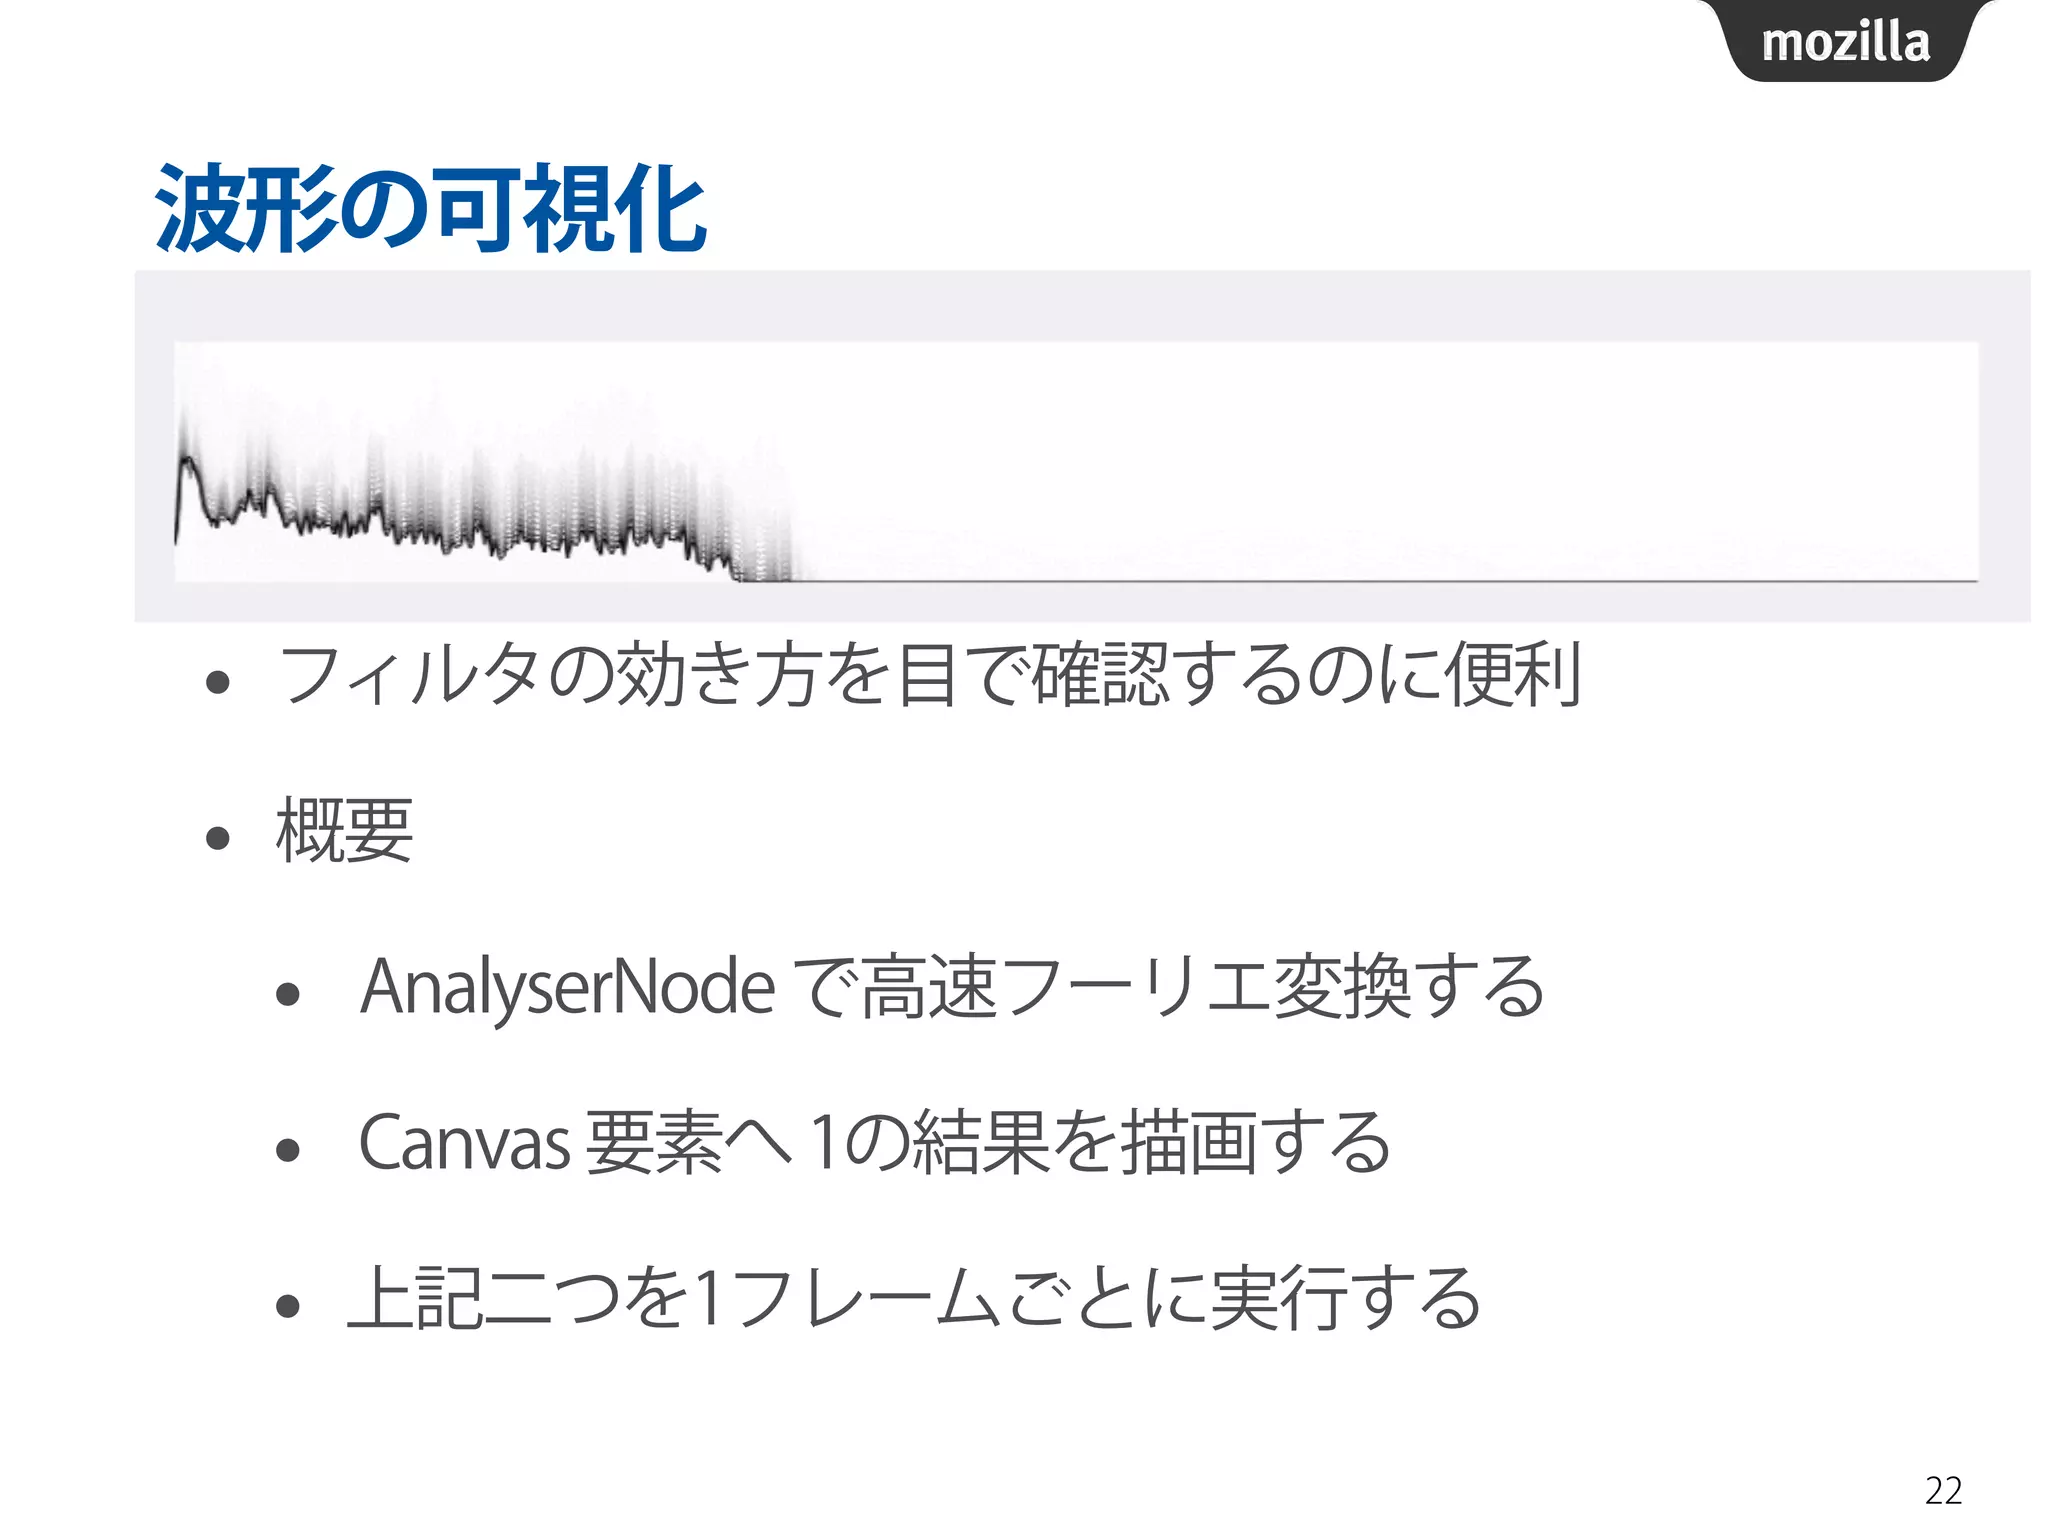
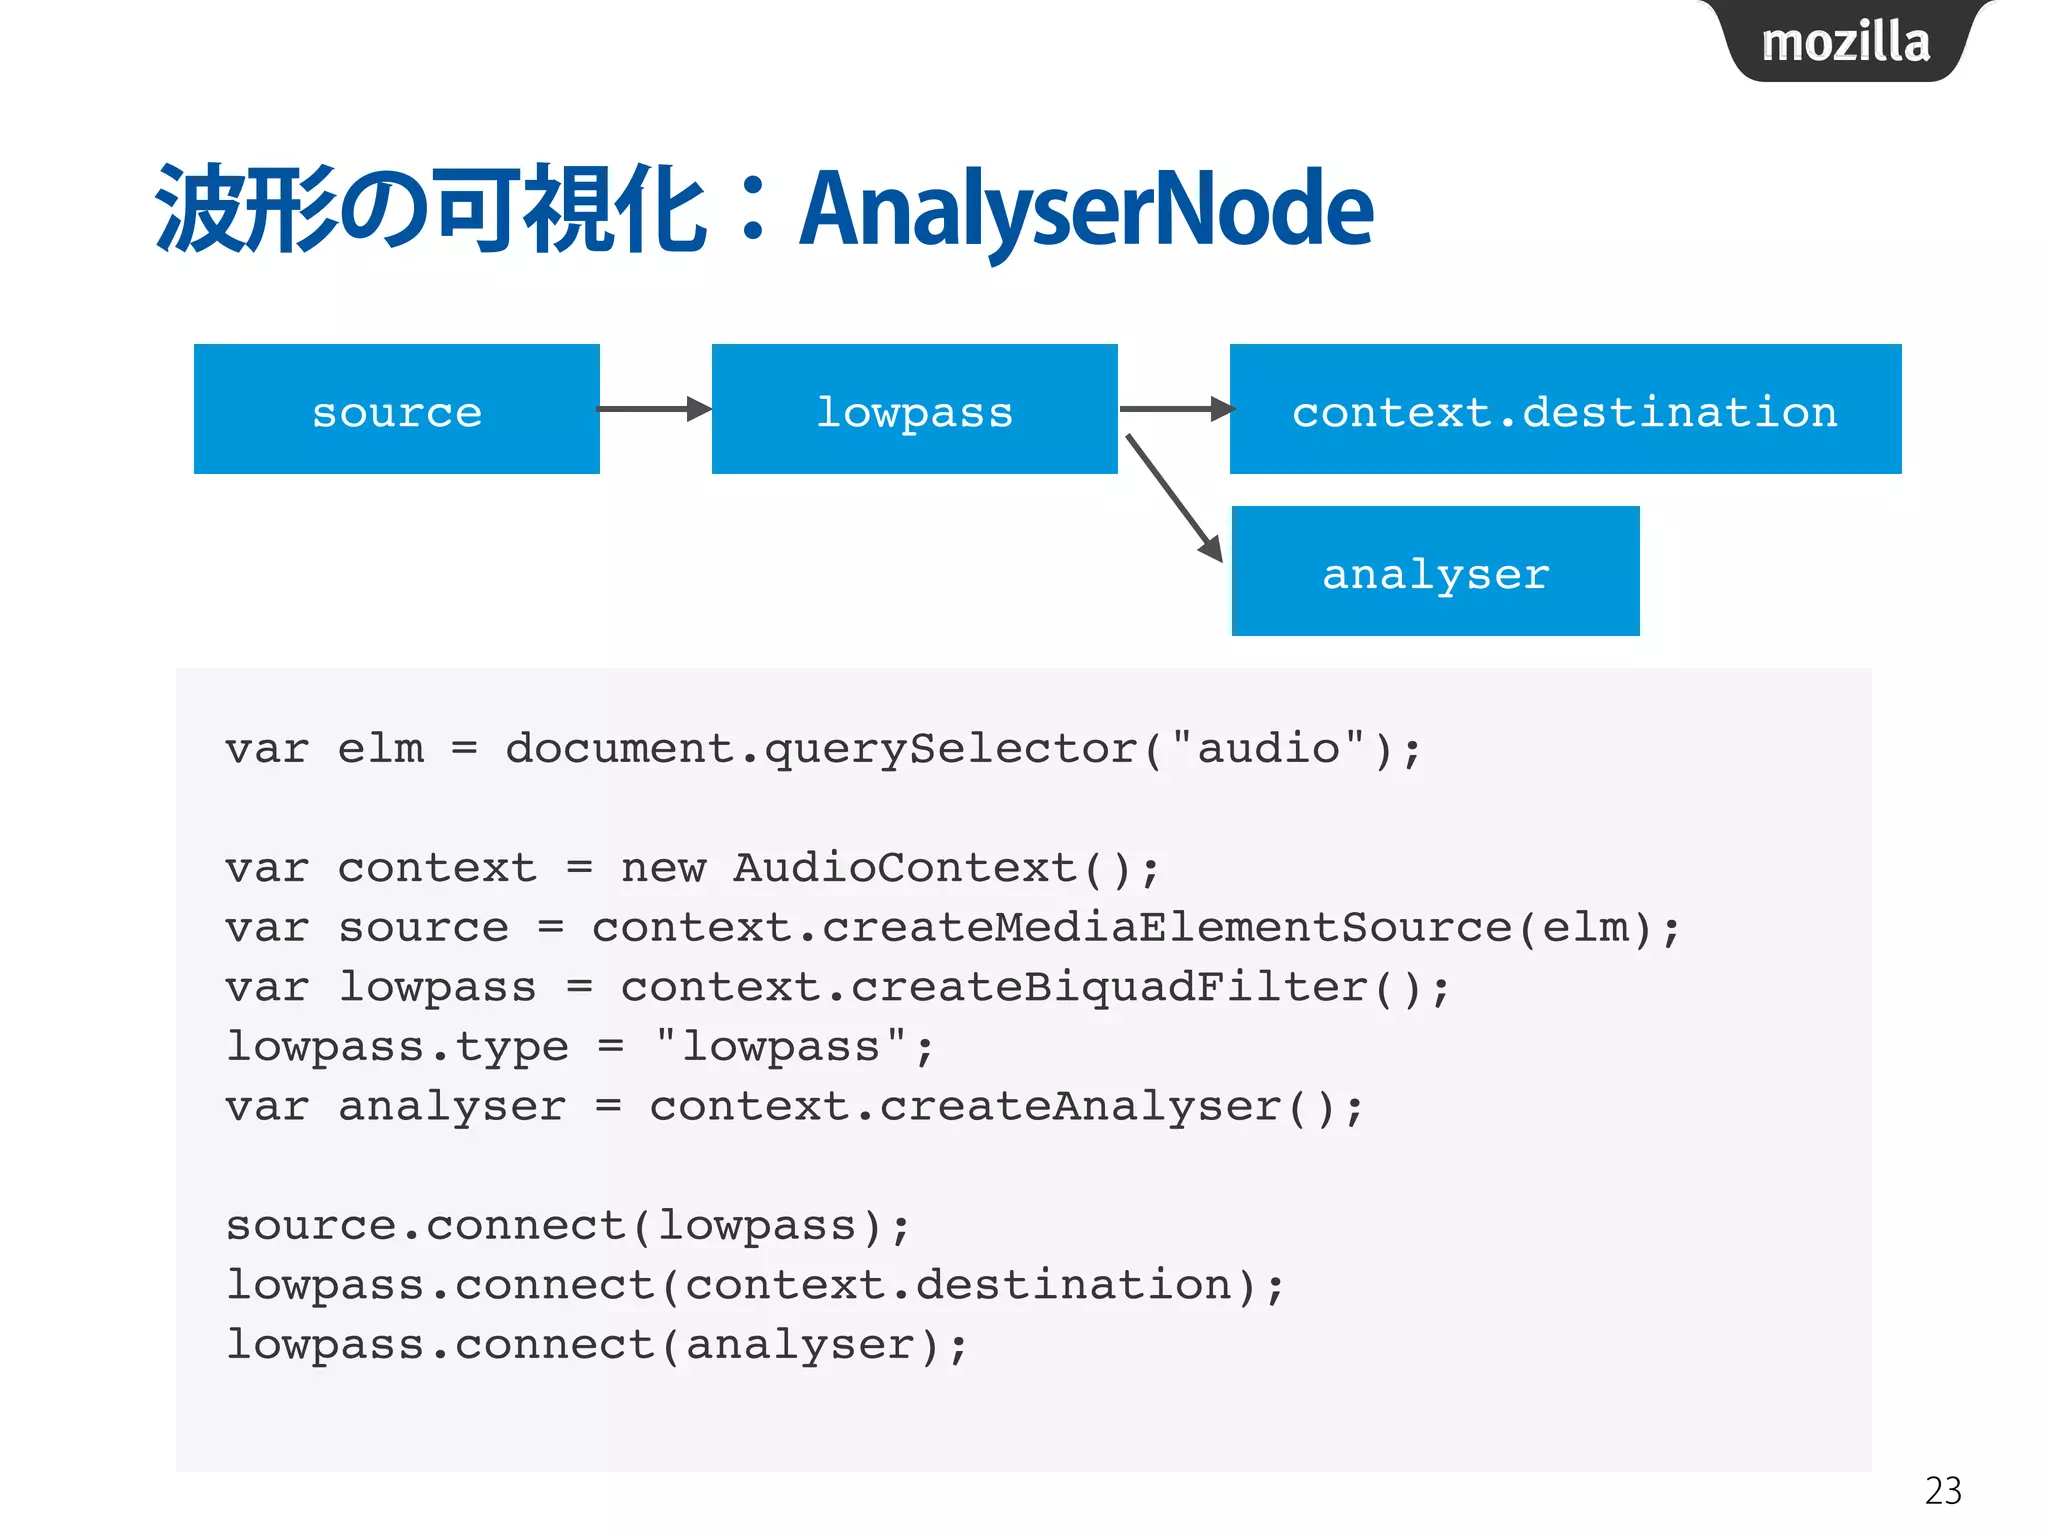
波形の可視化:AnalyserNode
23
sourcelowpass context.destination
analyser
var elm = document.querySelector("audio");!
!
var context = new AudioContext();!
var source = context.createMediaElementSource(elm);!
var lowpass = context.createBiquadFilter();!
lowpass.type = "lowpass";!
var analyser = context.createAnalyser();!
!
source.connect(lowpass);!
lowpass.connect(context.destination);!
lowpass.connect(analyser);
24.
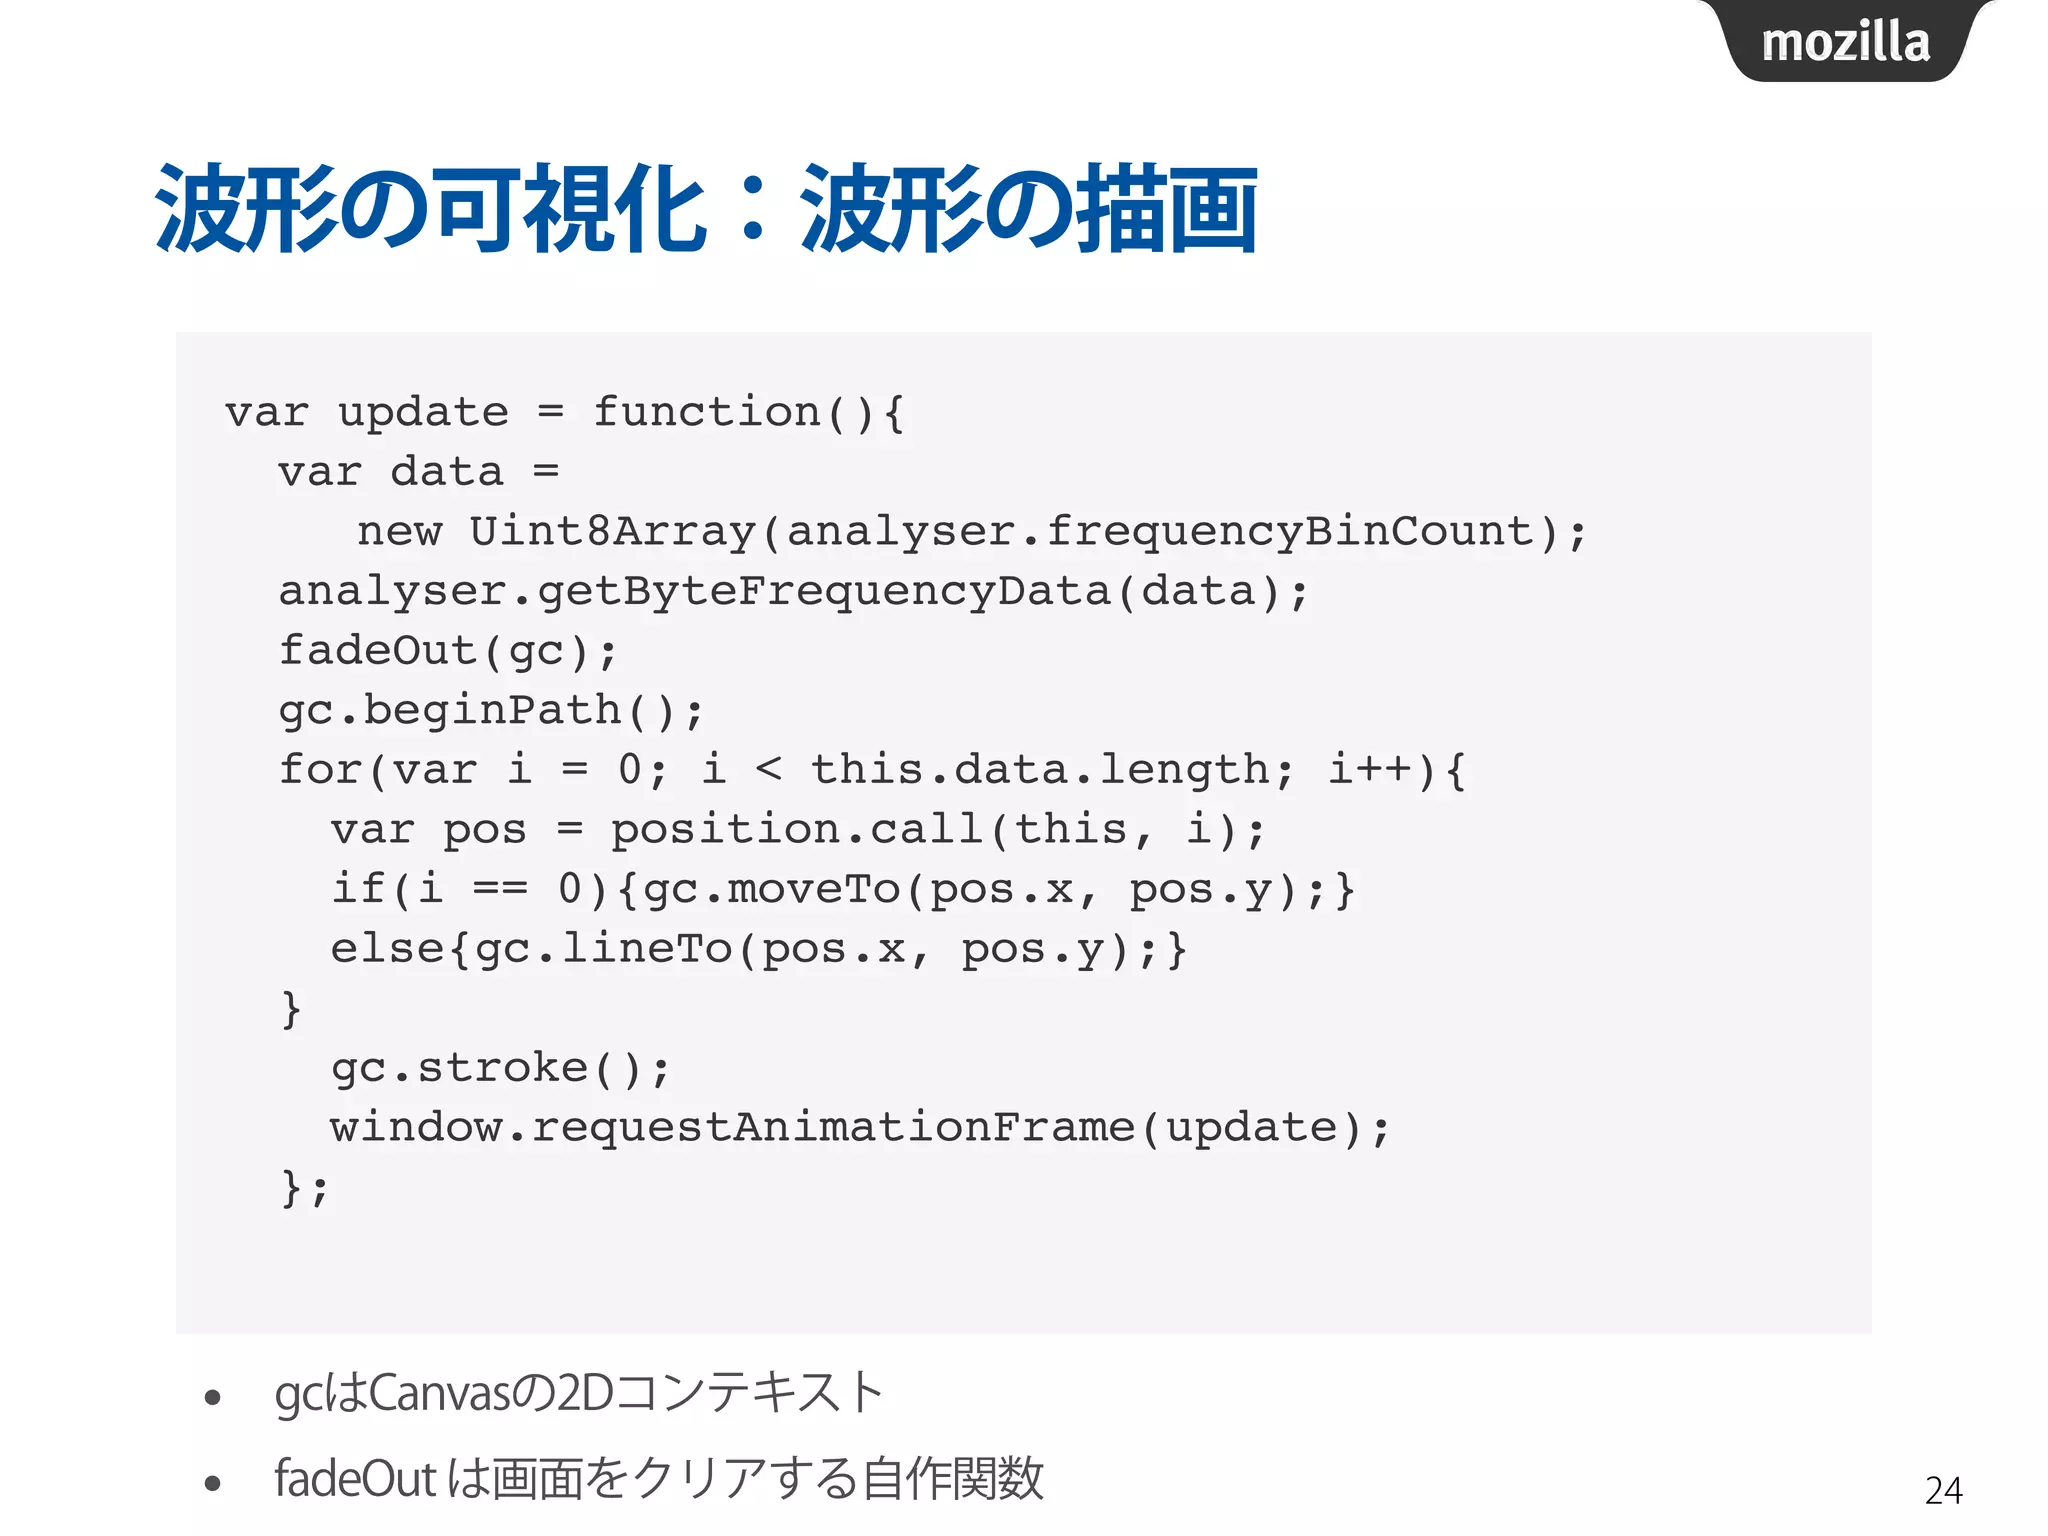
波形の可視化:波形の描画
24
varupdate = function(){!
var data = !
new Uint8Array(analyser.frequencyBinCount);!
analyser.getByteFrequencyData(data);!
fadeOut(gc);!
gc.beginPath();!
for(var i = 0; i < this.data.length; i++){!
var pos = position.call(this, i);!
if(i == 0){gc.moveTo(pos.x, pos.y);}!
else{gc.lineTo(pos.x, pos.y);}!
}!
gc.stroke();!
window.requestAnimationFrame(update);!
};
• gcはCanvasの2Dコンテキスト
• fadeOut は画面をクリアする自作関数
25.
波形の可視化:周波数成分の分析
• frequencyBinCount属性で分析結果になる、
周波数帯の数が取得できる
• getByteFrequencyDataメソッドを呼ぶことで、
各周波数帯の強さが0~255の256段階で取得できる
25
var data = !
new Uint8Array(analyser.frequencyBinCount);!
analyser.getByteFrequencyData(data);
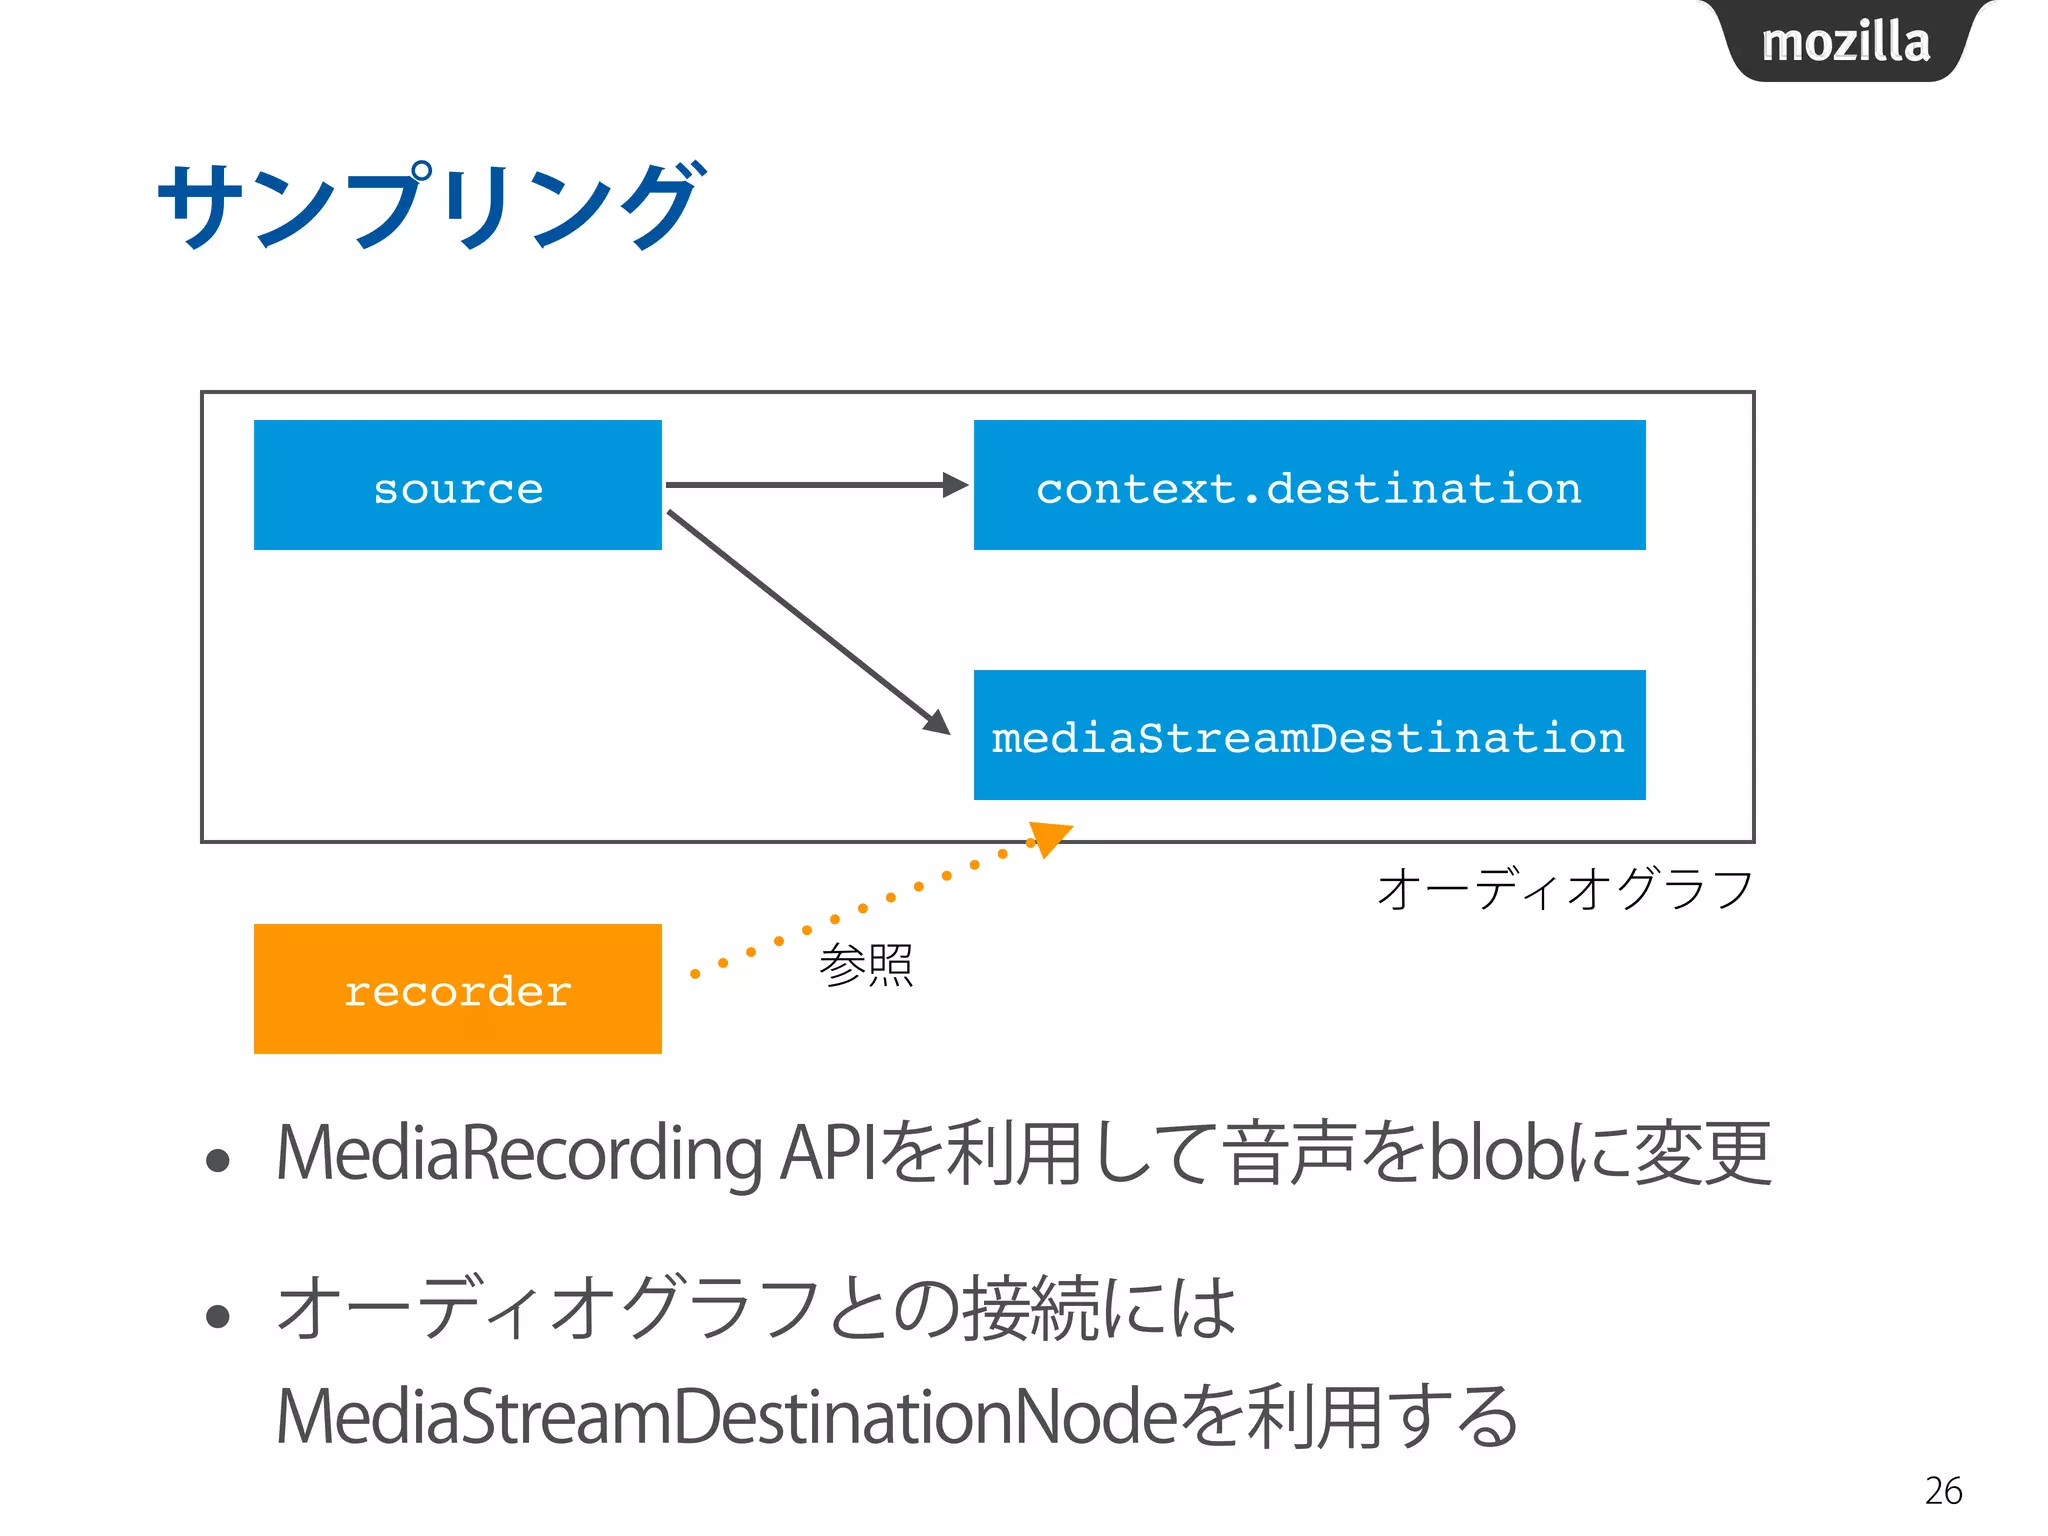
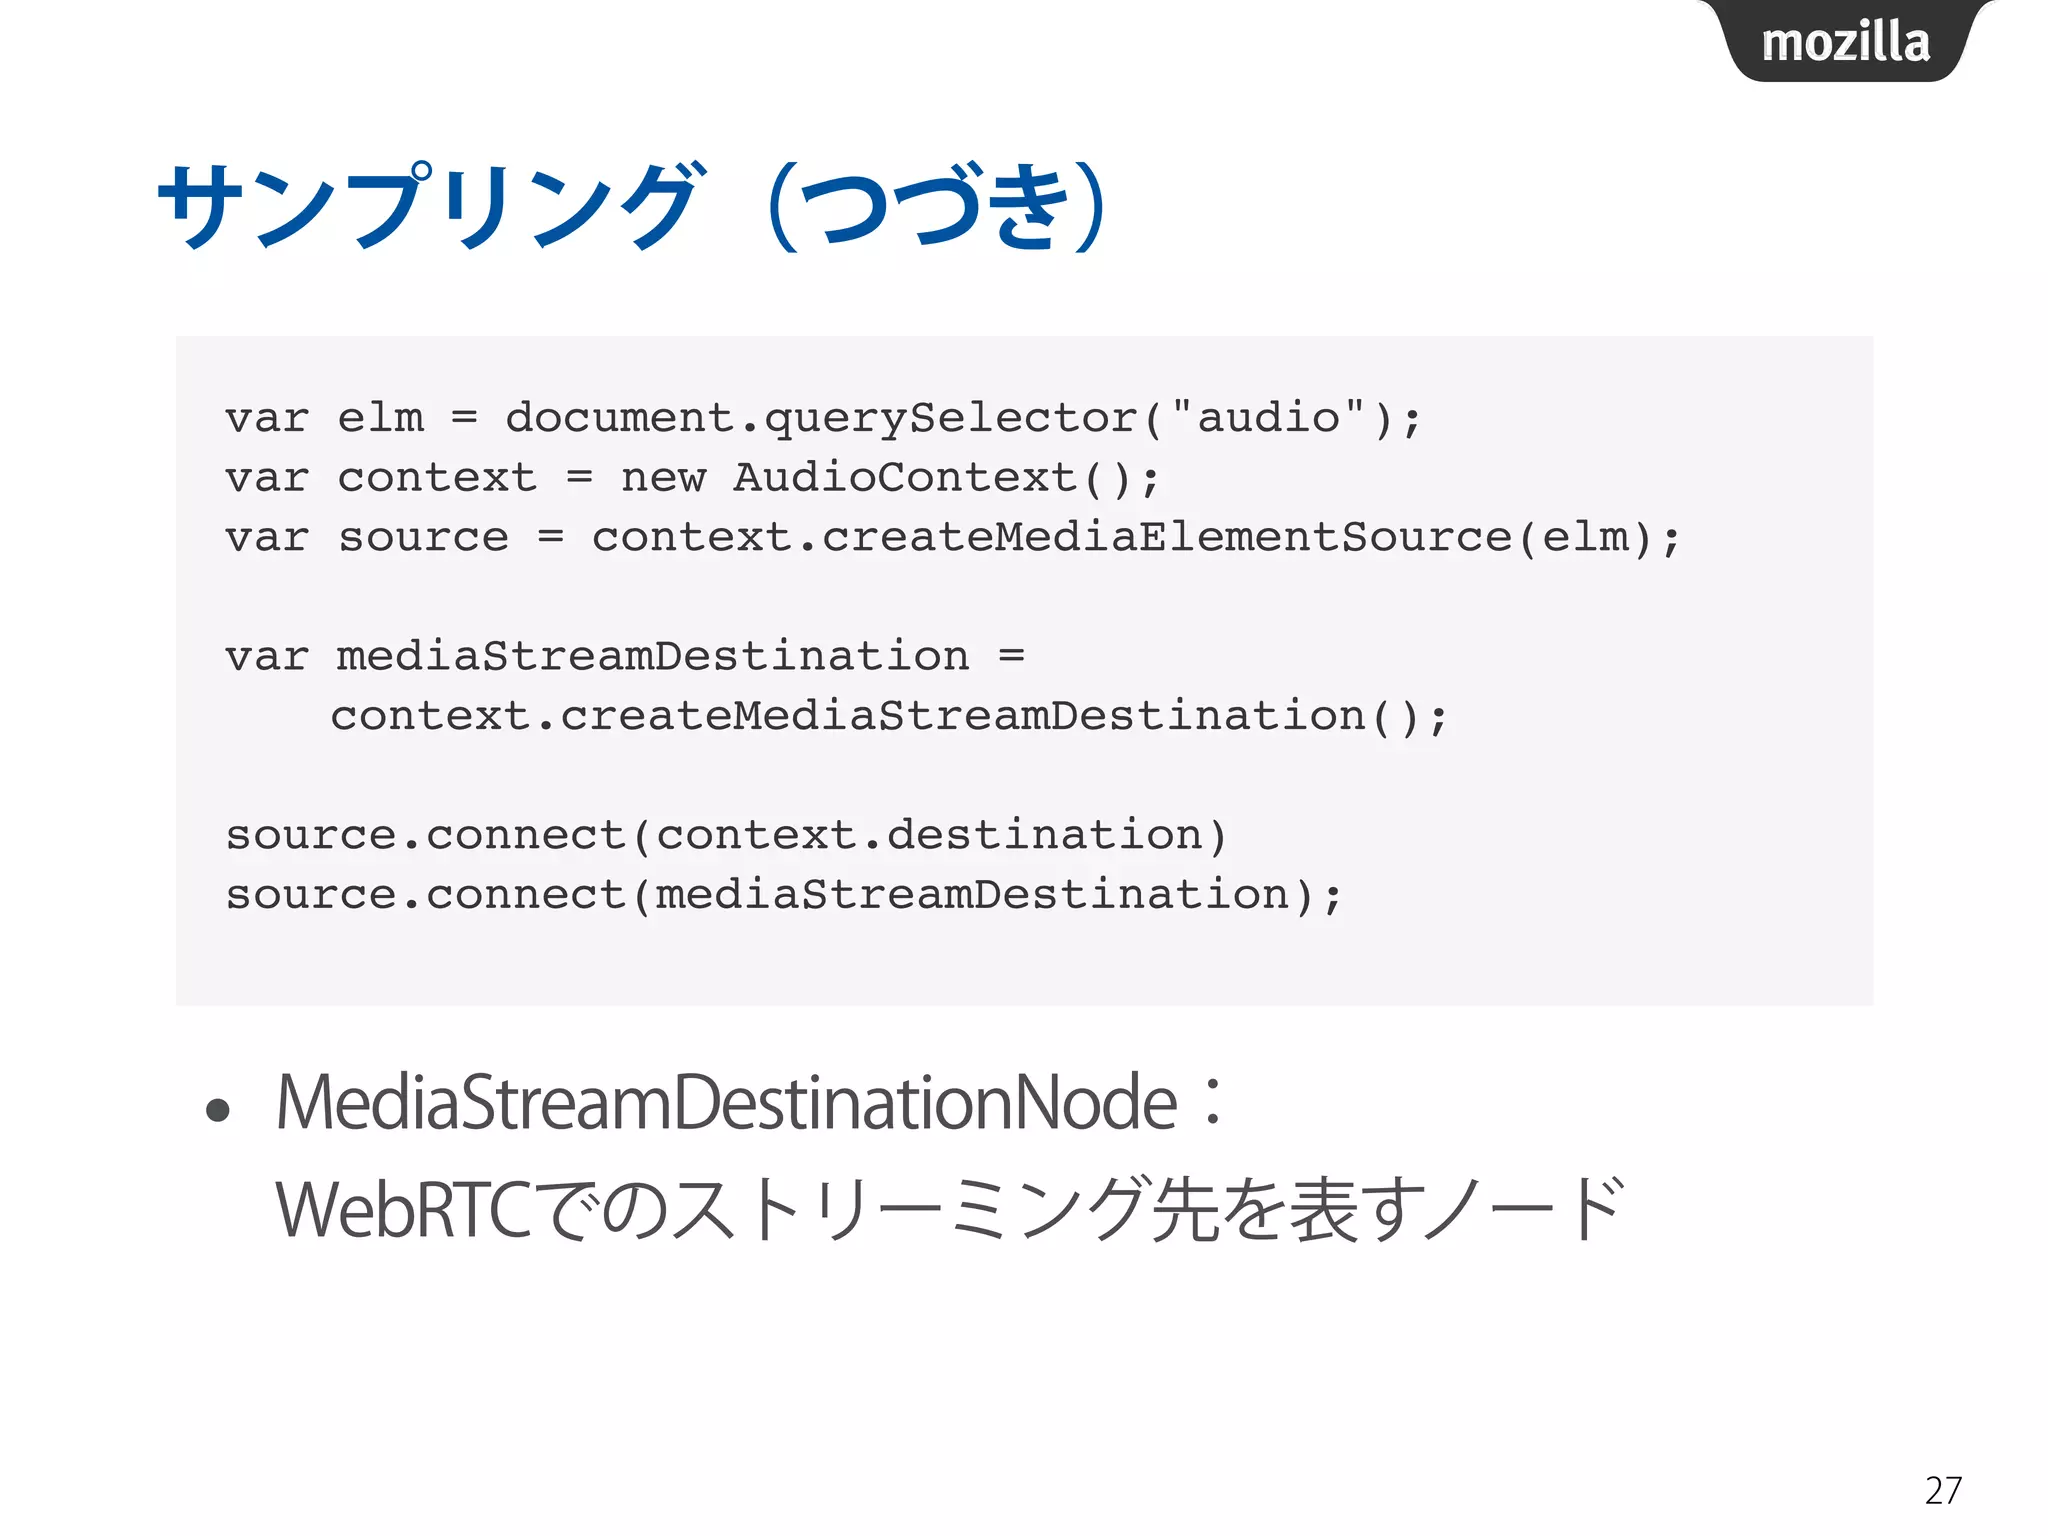
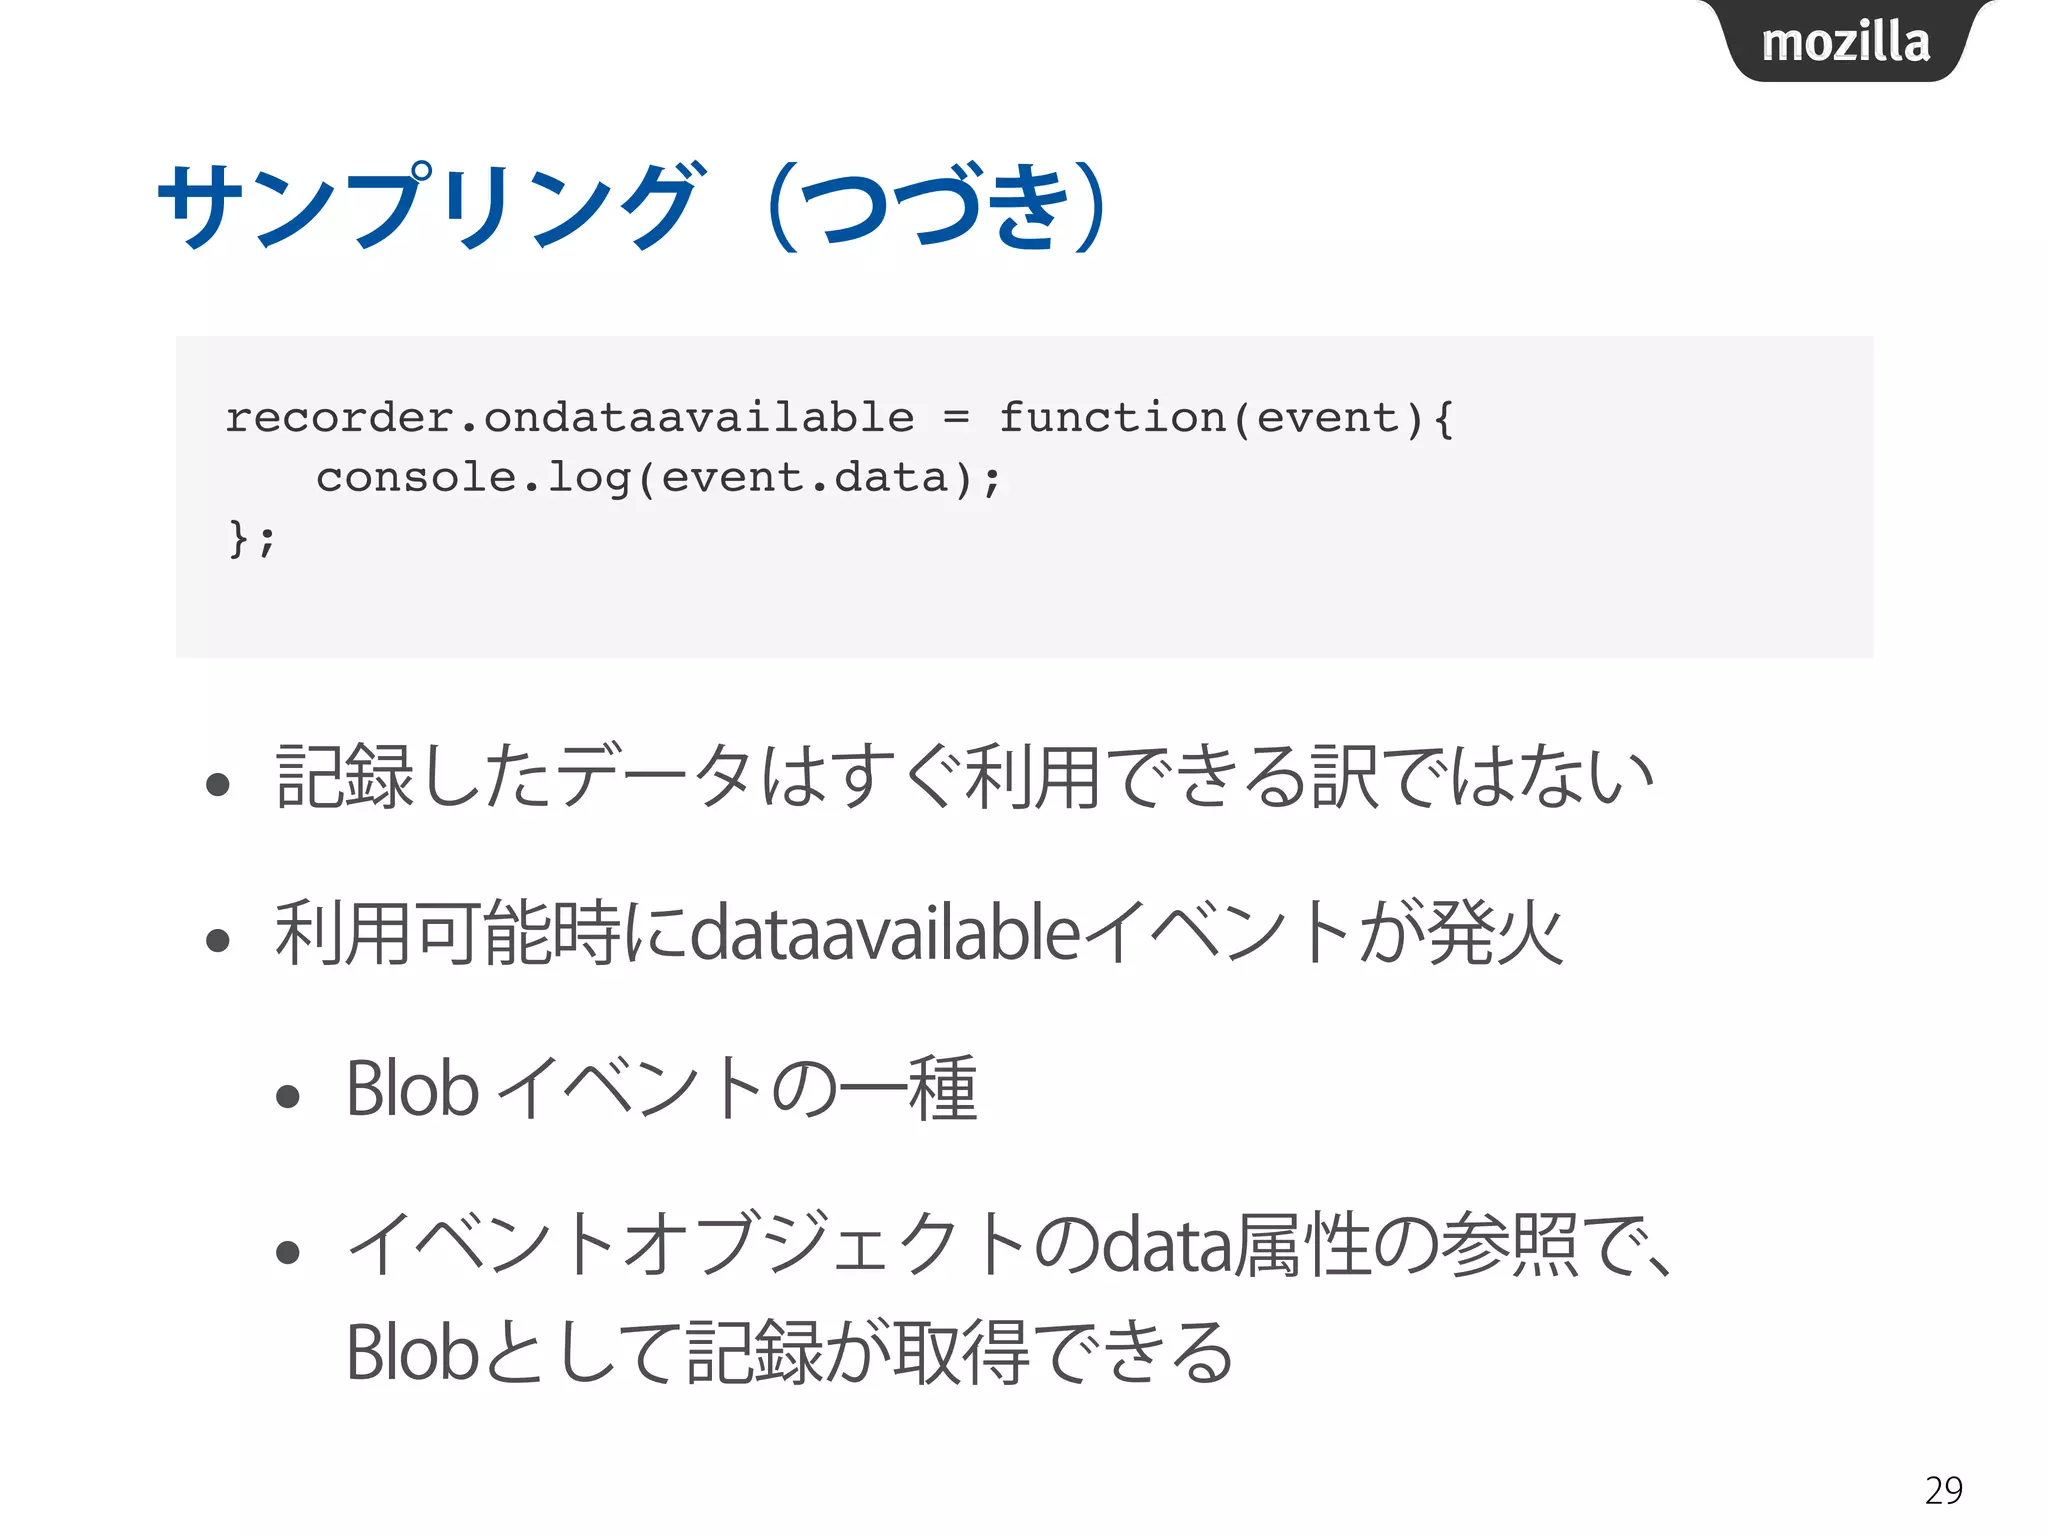
サンプリング(つづき)
• MediaStreamDestinationNode:
WebRTCでのストリーミング先を表すノード
27
var elm = document.querySelector("audio");!
var context = new AudioContext();!
var source = context.createMediaElementSource(elm);!
!
var mediaStreamDestination = !
context.createMediaStreamDestination();!
!
source.connect(context.destination)!
source.connect(mediaStreamDestination);
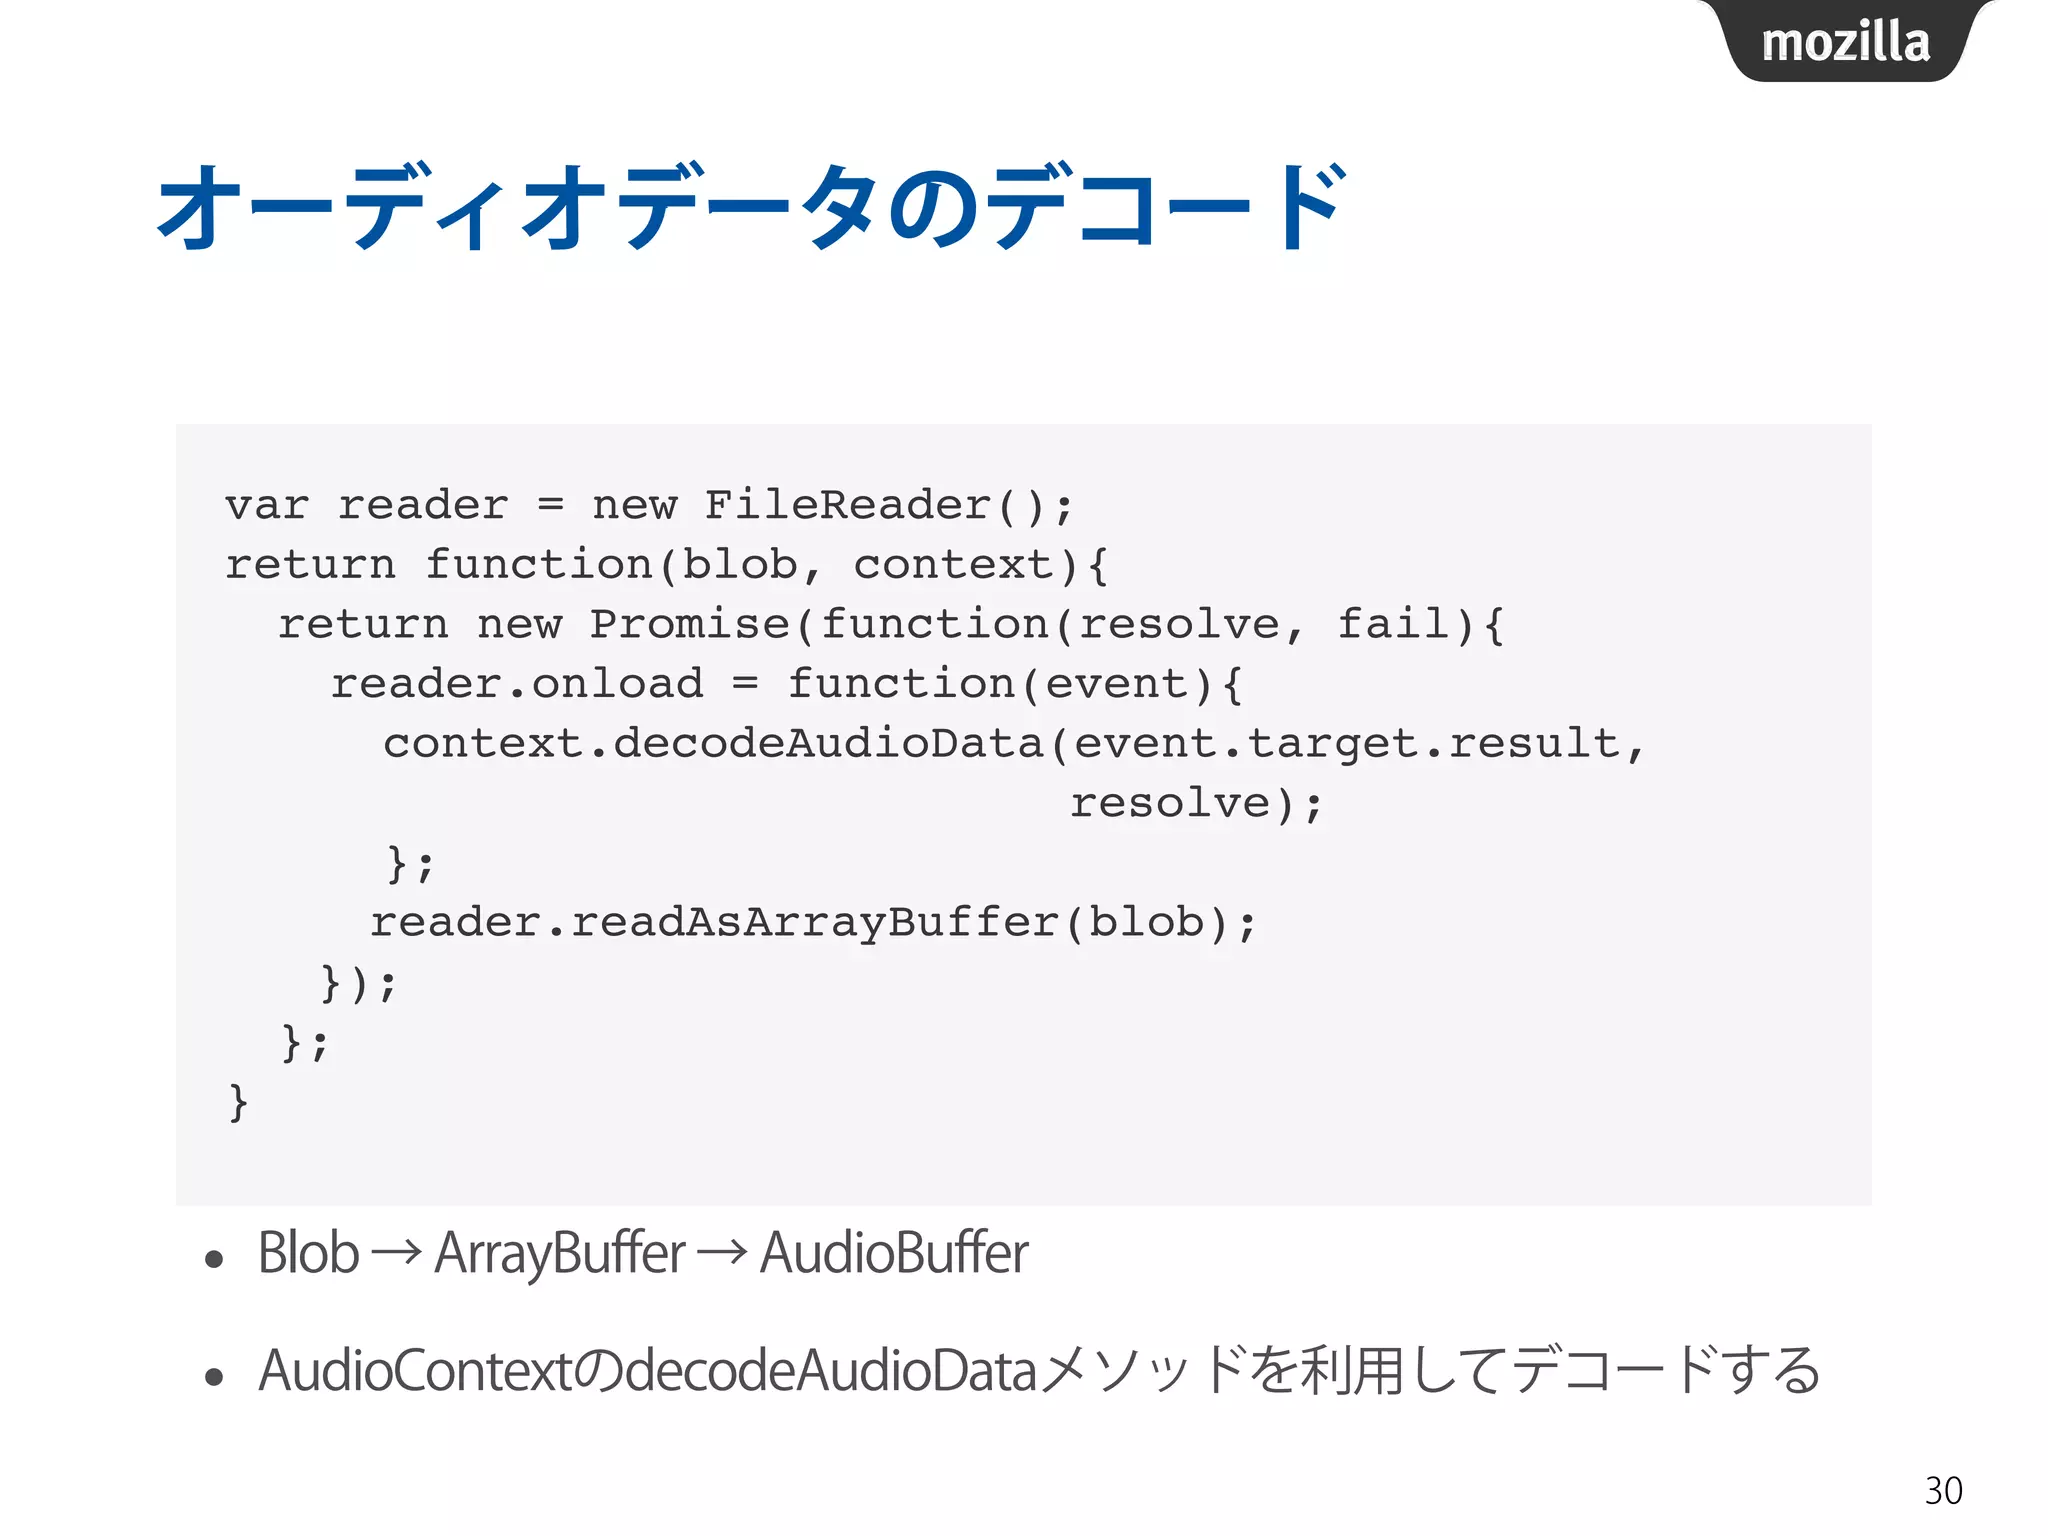
28.
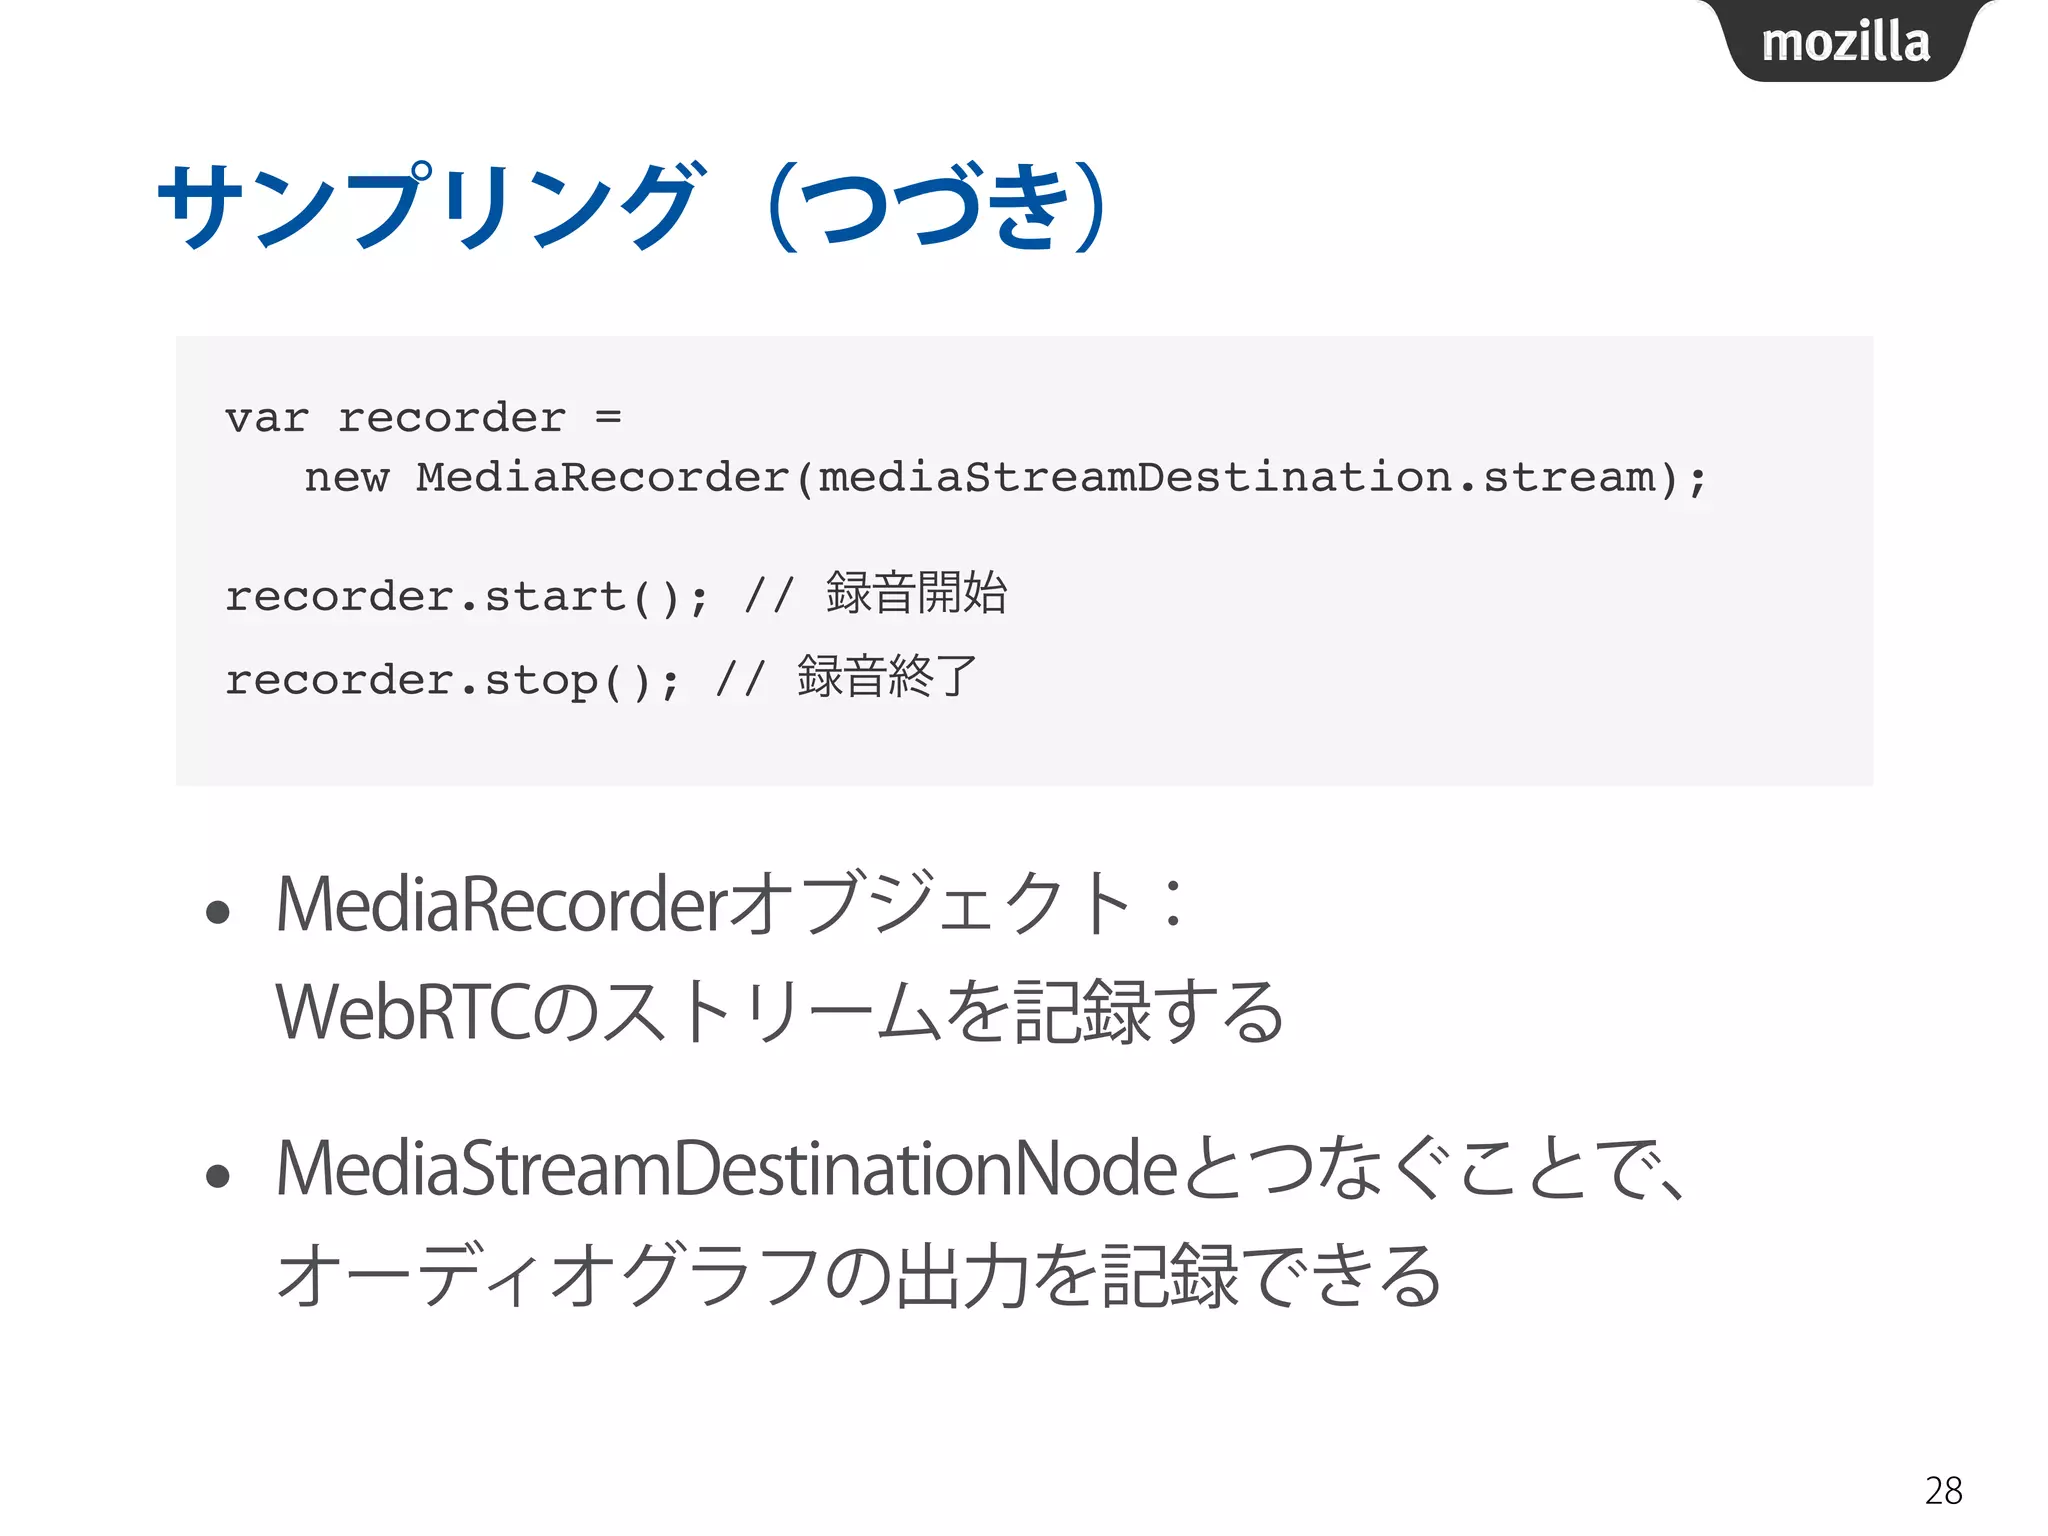
サンプリング(つづき)
• MediaRecorderオブジェクト:
WebRTCのストリームを記録する
• MediaStreamDestinationNodeとつなぐことで、
オーディオグラフの出力を記録できる
28
var recorder =!
new MediaRecorder(mediaStreamDestination.stream);!
!
recorder.start(); // 録音開始!
recorder.stop(); // 録音終了
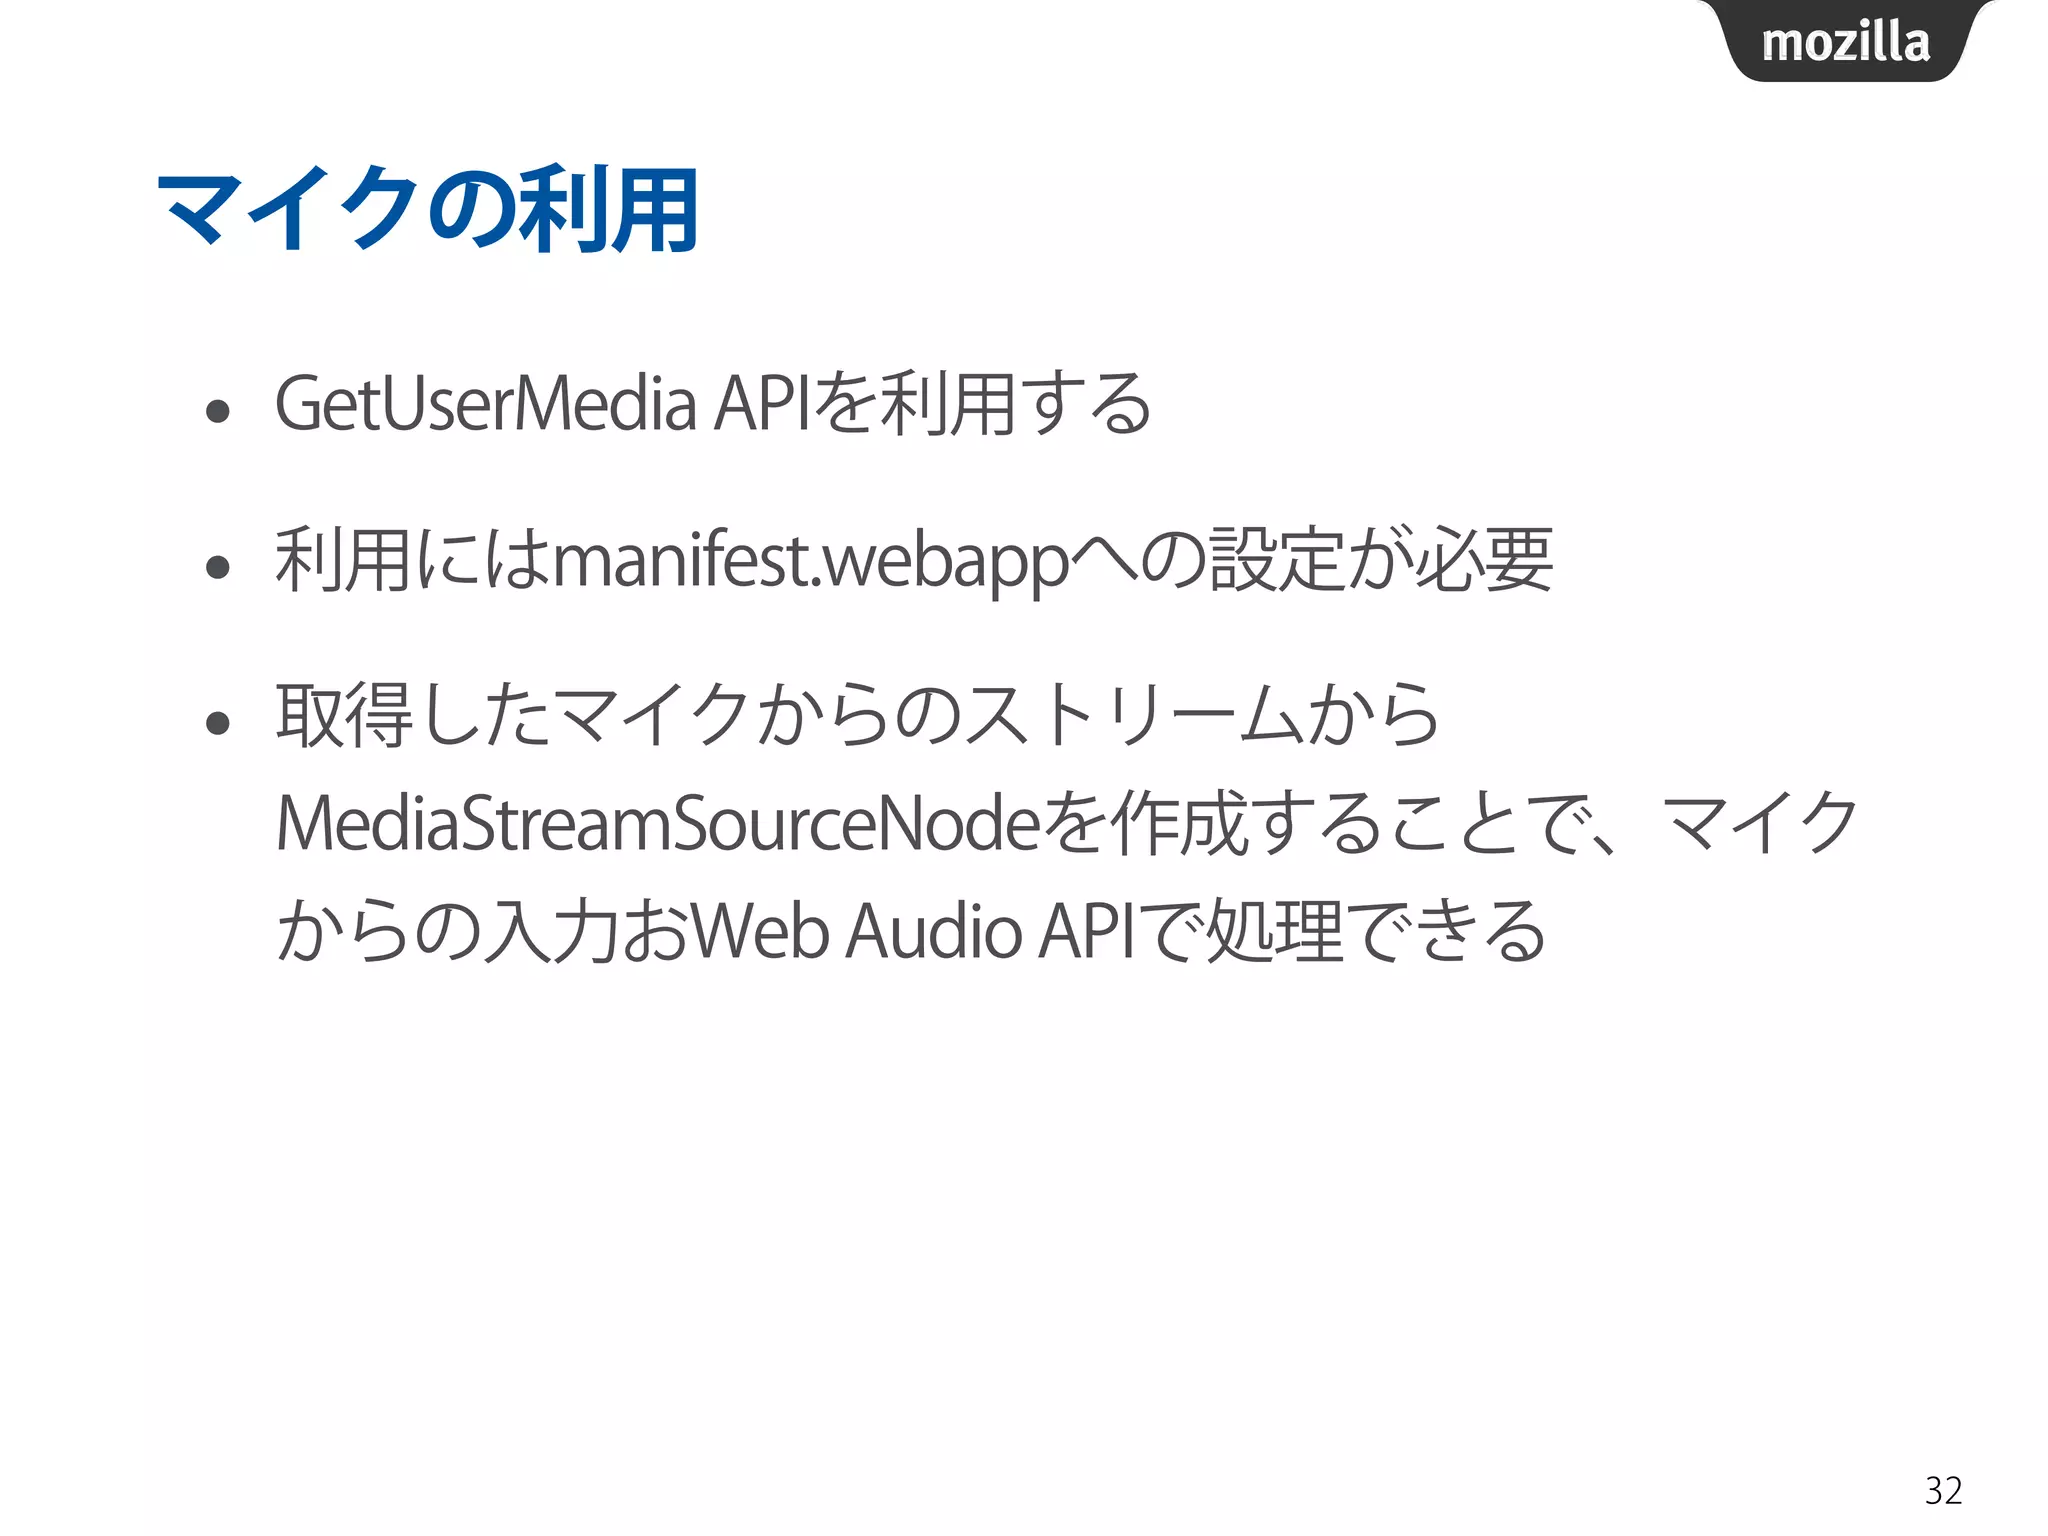
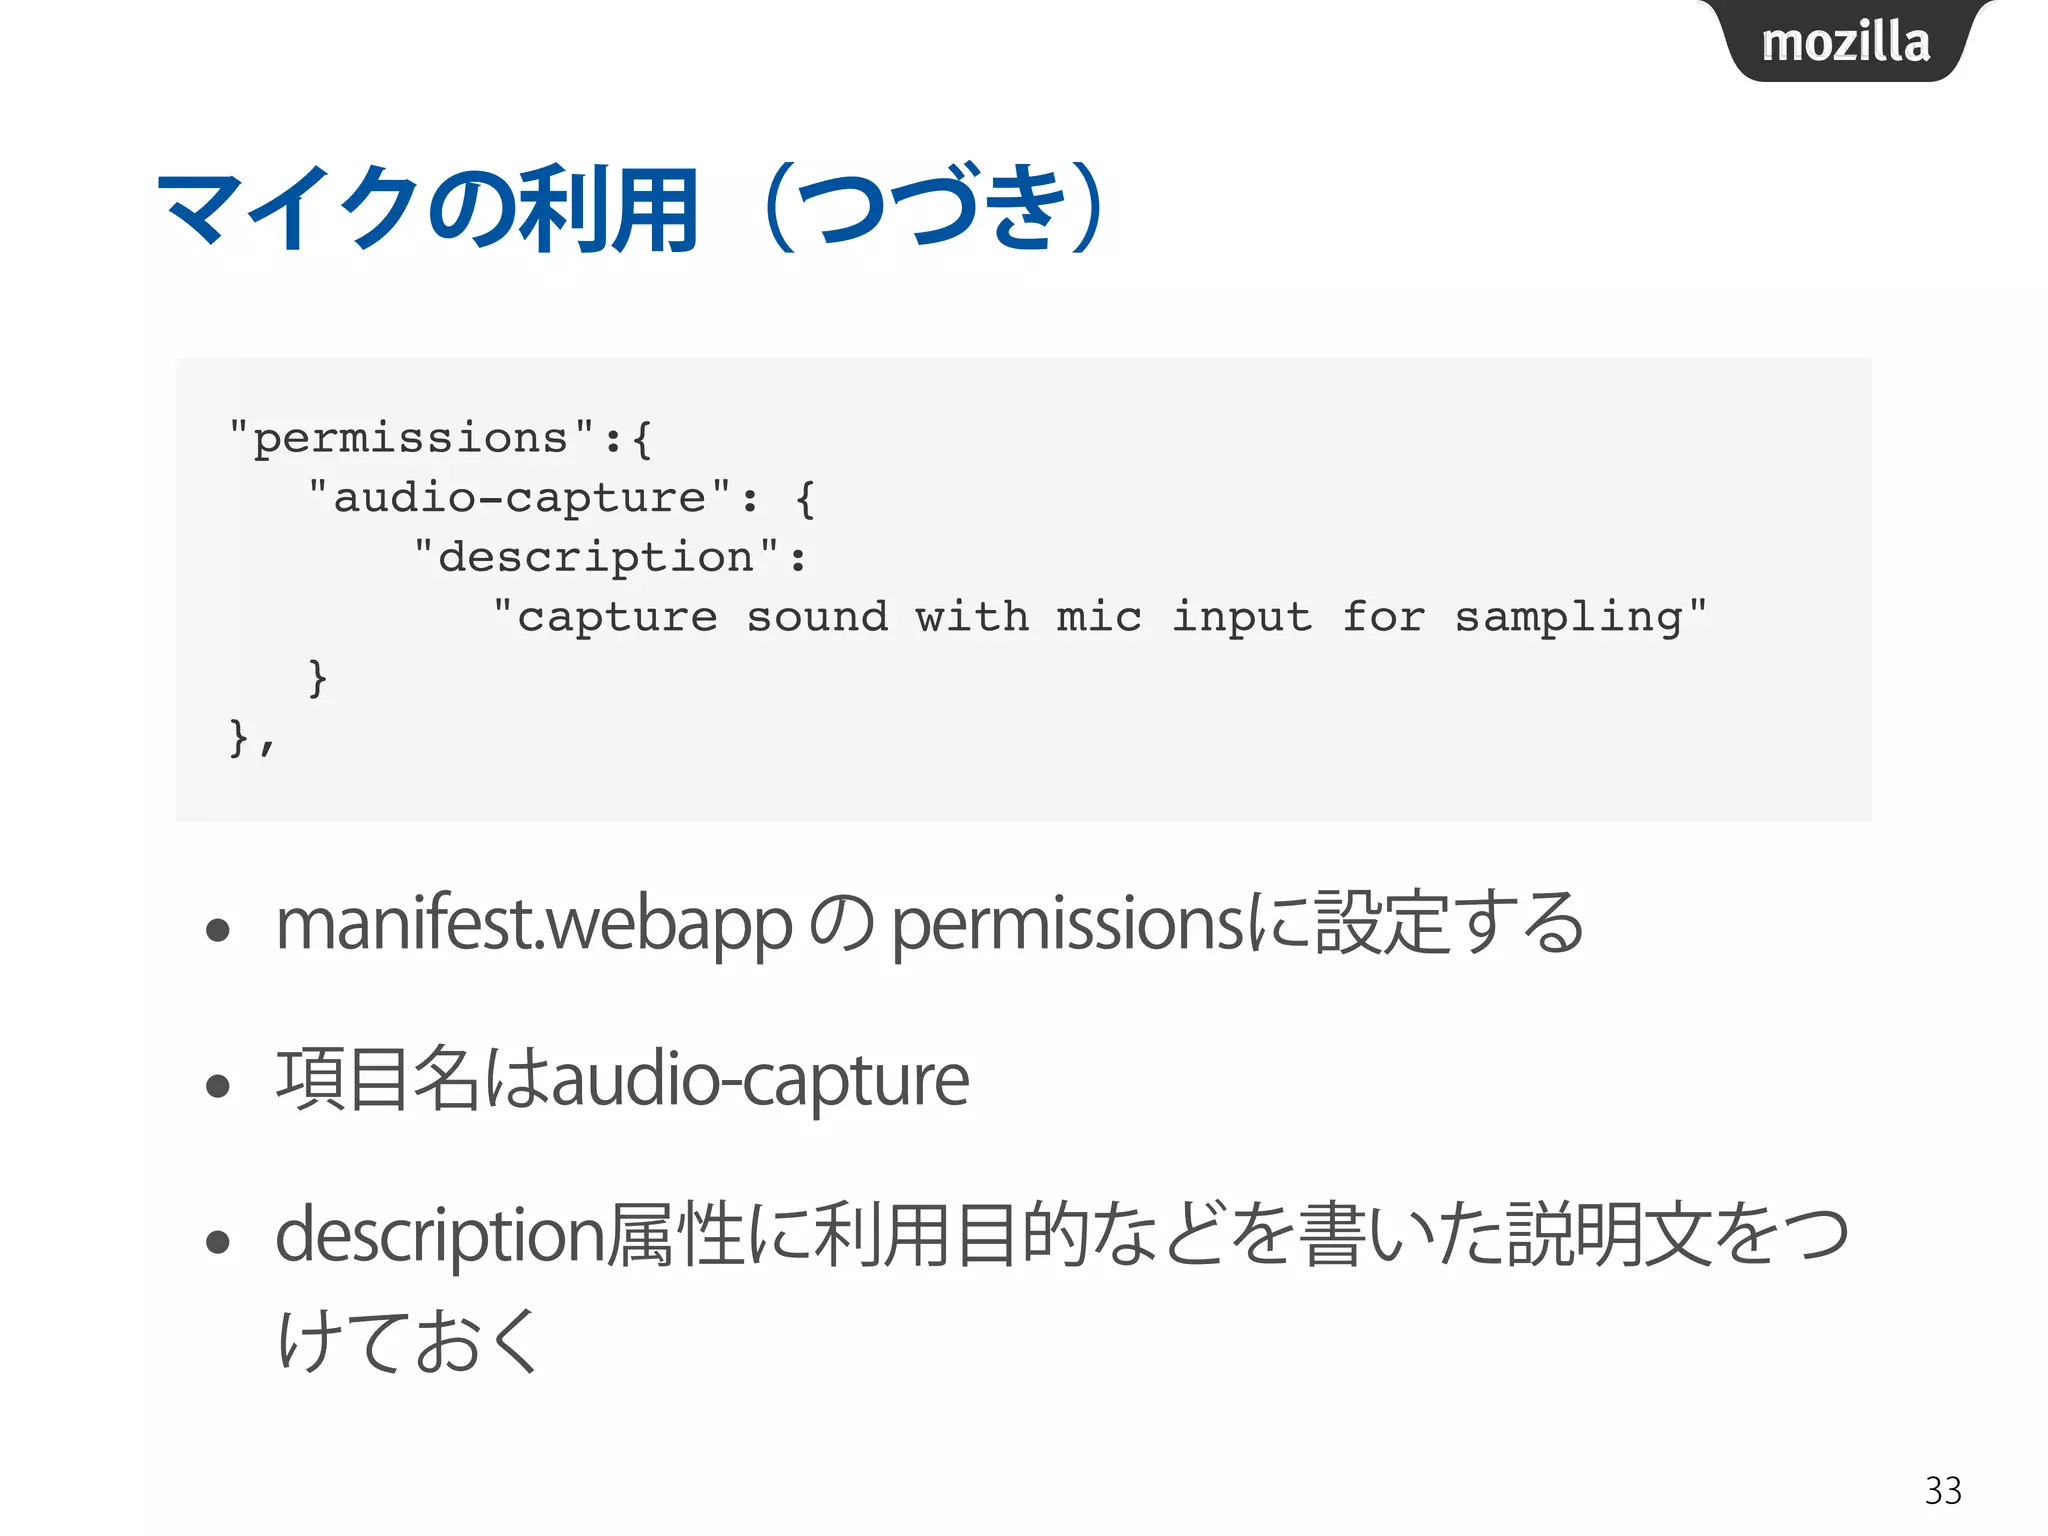
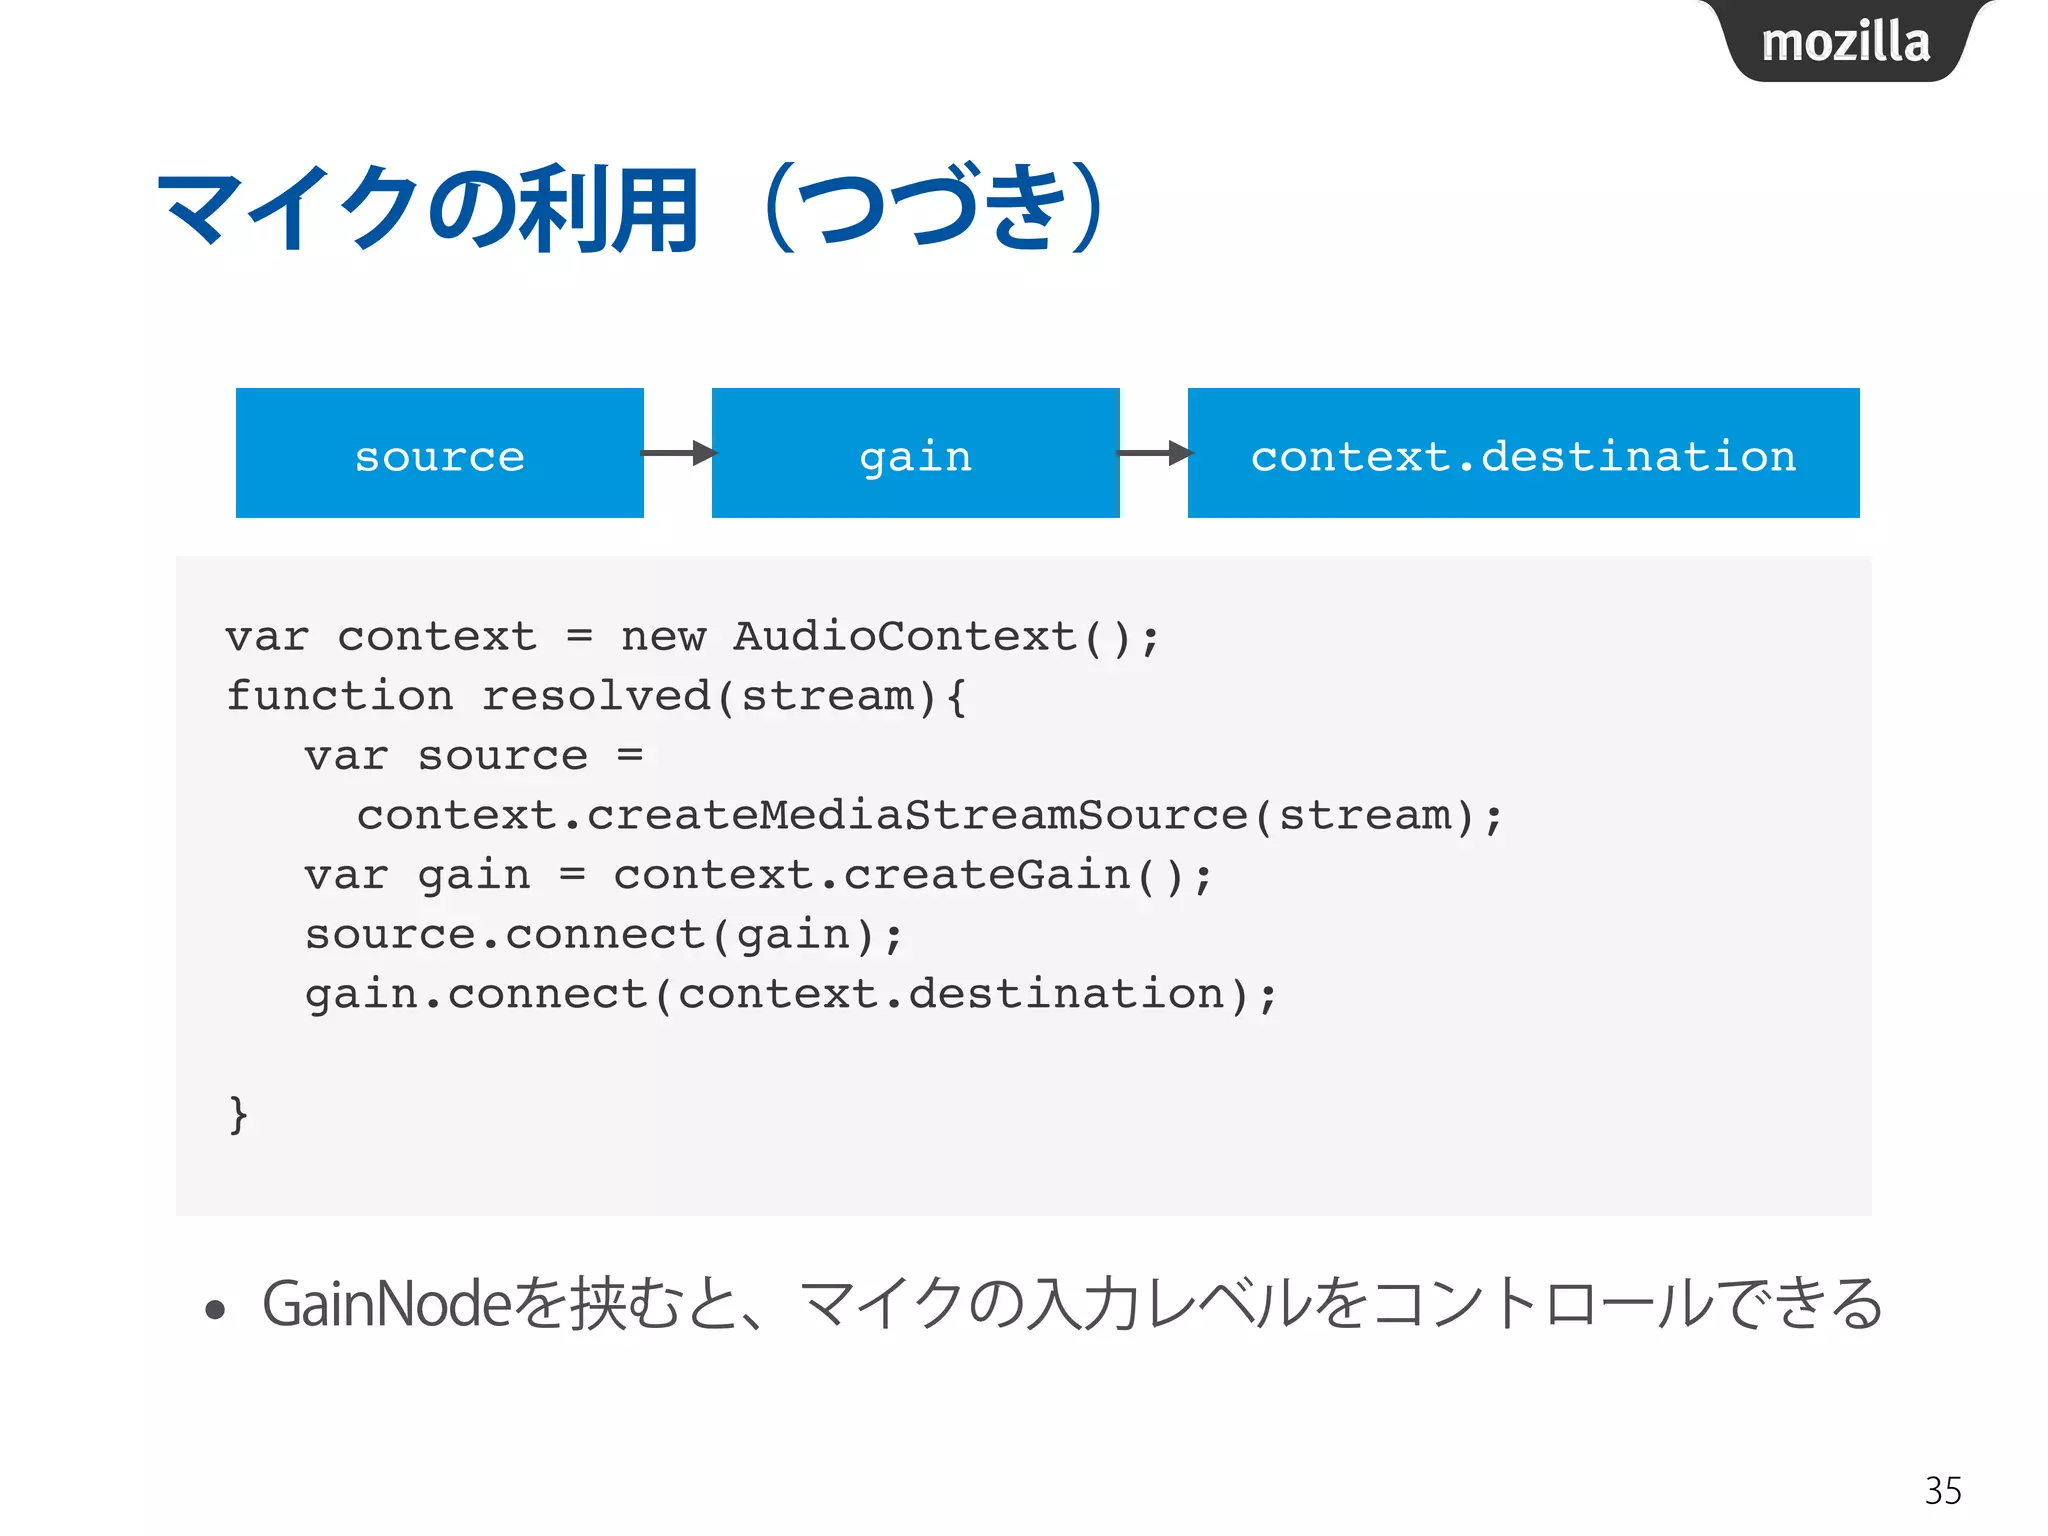
マイクの利用(つづき)
• GainNodeを挟むと、マイクの入力レベルをコントロールできる
35
var context = new AudioContext();!
function resolved(stream){!
var source = !
context.createMediaStreamSource(stream);!
var gain = context.createGain();!
source.connect(gain);!
gain.connect(context.destination);!
!
}
source gain context.destination
レファレンス
• WebAudio API の利用
https://developer.mozilla.org/ja/docs/Web/API/
Web_Audio_API/Using_Web_Audio_API
• Web Audio API
https://developer.mozilla.org/ja/docs/Web/API/
Web_Audio_API
• Web Audio Toy
http://uglyhack.appspot.com/webaudiotoy/
• Vocoder
http://webaudiodemos.appspot.com/Vocoder/
41


![[Htmlday]present](https://cdn.slidesharecdn.com/ss_thumbnails/htmldaypresent-130607095228-phpapp02-thumbnail.jpg?width=640&height=640&fit=bounds)


