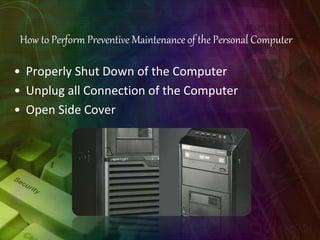
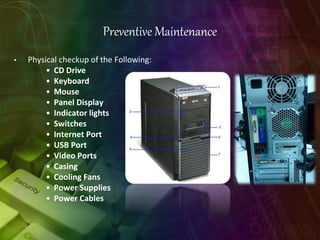
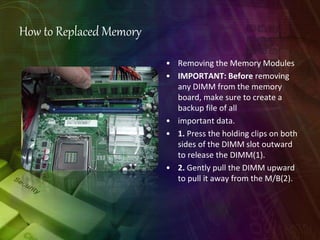
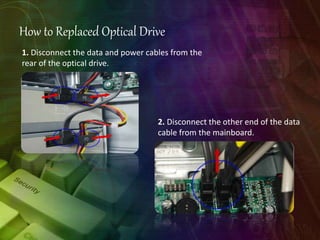
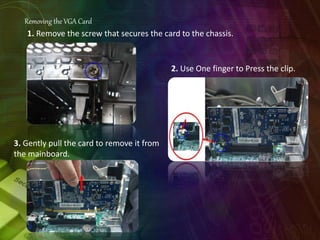
How to Perform Preventive Maintenance of the Personal Computer
• Properly Shut Down of the Computer
• Unplug all Connection of the Computer
• Open Side Cover
Preventive Maintenance
• Physical checkup of the Following:
• CD Drive
• Keyboard
• Mouse
• Panel Display
• Indicator lights
• Switches
• Internet Port
• USB Port
• Video Ports
• Casing
• Cooling Fans
• Power Supplies
• Power Cables
Power System Check
If the system will power on, skip this section. Refer to System External
Inspection.
If the system will not power on, do the following:
• Check if the power cable is properly connected to the system and
AC source.
System External Inspection
1. Inspect the LED indicators on the front panel, which can indicate the
malfunction.
2. Make sure that air flow is not blocked.
3. Make sure nothing in the system is making contact that could short out
power.
4. If the problem is not evident, continue with System Internal Inspection.
Removing the Side Panel
1. Remove the two screws located on the rear edge of the
side panel.
2. The firstly use two fingers to Press the lock handle toward the
arrowhead of the direction until the lock handle no moving, then use
other hand to Lift the side panel away from the chassis and put it aside.
How to Replaced Memory
• Removing the Memory Modules
• IMPORTANT: Before removing
any DIMM from the memory
board, make sure to create a
backup file of all
• important data.
• 1. Press the holding clips on both
sides of the DIMM slot outward
to release the DIMM(1).
• 2. Gently pull the DIMM upward
to pull it away from the M/B(2).
How to Replaced Hard Disk
Removing the Hard Disk Drive
1. Disconnect the data and power cables
from the rear of the optical drive.
2. Disconnect the
other end of the data
cable from the
mainboard
3. Remove the HDD bracket.
a. Use two fingers to press the HDD
bracket then lift the bracket up.
4. Take out the HDD module
a. Use a hand to open out the HDD bracket until the hook of HDD bracket
away from the HDD screw
bore. then use other hand to take out the HDD module
How to Replaced Optical Drive
1. Disconnect the data and power cables from the
rear of the optical drive.
2. Disconnect the other end of the data
cable from the mainboard.
3. Slide two lock handle toward the left(1) until the lock
hnadle no removing(2).
4. Push the rear of the optical drive. take out the slave ODD.
Removing the VGA Card
1. Remove the screw that secures the card to the chassis.
2. Use One finger to Press the clip.
3. Gently pull the card to remove it from
the mainboard.

12 Preventive Maintenance.pptx

  • 2.
    How to PerformPreventive Maintenance of the Personal Computer • Properly Shut Down of the Computer • Unplug all Connection of the Computer • Open Side Cover
  • 3.
    Preventive Maintenance • Physicalcheckup of the Following: • CD Drive • Keyboard • Mouse • Panel Display • Indicator lights • Switches • Internet Port • USB Port • Video Ports • Casing • Cooling Fans • Power Supplies • Power Cables
  • 4.
    Power System Check Ifthe system will power on, skip this section. Refer to System External Inspection. If the system will not power on, do the following: • Check if the power cable is properly connected to the system and AC source. System External Inspection 1. Inspect the LED indicators on the front panel, which can indicate the malfunction. 2. Make sure that air flow is not blocked. 3. Make sure nothing in the system is making contact that could short out power. 4. If the problem is not evident, continue with System Internal Inspection.
  • 5.
    Removing the SidePanel 1. Remove the two screws located on the rear edge of the side panel.
  • 6.
    2. The firstlyuse two fingers to Press the lock handle toward the arrowhead of the direction until the lock handle no moving, then use other hand to Lift the side panel away from the chassis and put it aside.
  • 7.
    How to ReplacedMemory • Removing the Memory Modules • IMPORTANT: Before removing any DIMM from the memory board, make sure to create a backup file of all • important data. • 1. Press the holding clips on both sides of the DIMM slot outward to release the DIMM(1). • 2. Gently pull the DIMM upward to pull it away from the M/B(2).
  • 8.
    How to ReplacedHard Disk Removing the Hard Disk Drive 1. Disconnect the data and power cables from the rear of the optical drive. 2. Disconnect the other end of the data cable from the mainboard 3. Remove the HDD bracket. a. Use two fingers to press the HDD bracket then lift the bracket up.
  • 9.
    4. Take outthe HDD module a. Use a hand to open out the HDD bracket until the hook of HDD bracket away from the HDD screw bore. then use other hand to take out the HDD module
  • 10.
    How to ReplacedOptical Drive 1. Disconnect the data and power cables from the rear of the optical drive. 2. Disconnect the other end of the data cable from the mainboard.
  • 11.
    3. Slide twolock handle toward the left(1) until the lock hnadle no removing(2). 4. Push the rear of the optical drive. take out the slave ODD.
  • 12.
    Removing the VGACard 1. Remove the screw that secures the card to the chassis. 2. Use One finger to Press the clip. 3. Gently pull the card to remove it from the mainboard.