Historic Survey Photo Guidelines and Tutorial by Stephen Schafer for SurveyLA
•
1 like•693 views

This document provides a tutorial on how to take effective documentary photographs for architectural surveys. It discusses the importance of lighting, perspective, framing the subject, and including key features like foundations, roofs, windows, siding and entries. Survey photos should be clear, contain all edges of the building, and show its scale and context. Compromises may be needed to capture all important details in one photo when constraints exist. The goal is to concisely document buildings to create an archival record.

Recommended
More Related Content
What's hot
What's hot (20)
Viewers also liked
Viewers also liked (20)
Recently uploaded
Recently uploaded (20)
Historic Survey Photo Guidelines and Tutorial by Stephen Schafer for SurveyLA
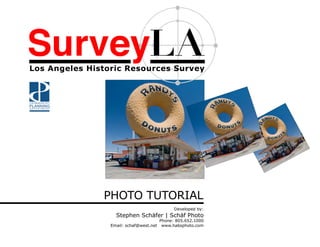
- 1. PHOTO TUTORIAL Developed by: Stephen Schäfer | Schäf Photo Phone: 805.652.1000 Email: schaf@west.net www.habsphoto.com
- 2. 2 Photo Information: Point Fermin Lighthouse, San Pedro, California Los Angeles Historic Cultural Monument (HCM) #2385 This self-paced tutorial was developed by architectural photographer Stephen Schafer to illustrate the basics of capturing historic resource survey photos for SurveyLA.
- 3. 3 Photo Information: Each resource surveyed will be digitally photographed, and those photographs will become an integral part of the SurveyLA database. Survey photos may serve as the only documentation of a resource lost to fire, alteration, or demolition. Avalon Swap Meet Building, part of the Los Angeles Railway Company (Yellow Cars) South Park Shops Complex at Avalon Boulevard and 54th Street
- 4. 4 Photo Information: In addition to buildings, SurveyLA will include structures, landscapes, objects, trees, and districts. Hollywood Walk of Fame, Hollywood, California Los Angeles HCM #194,
- 5. 5 Photo Information: Demolition mitigation photographs of Vanoni Ranch, Saticoy, Ventura County, California. This is a typical example of structure documentation using the Historic American Building Survey (HABS) format. All facades are recorded with large-format cameras. HABS photos include every facade and context photographs as well. Let’s begin with the basics of documentary photography. Formal photo surveys – like HABS/HAER surveys of sites – require special camera equipment. They are recorded on large format black & white film, and include multiple views of the resource.
- 6. 6 Photo Information: SurveyLA photos need not be as formal, but their basic documentary DNA is similar. The most important function of a documentary photo is to convey data about the resource. The Koffee Pot, Long Beach, California in 2008
- 7. 7 Photo Information: Architectural photographers use many techniques to take beautiful photographs. However, while the photographs in magazines tell a story, they do not always contain great documentary data. The Wagon Wheel Motel, Oxnard, California, at the 101 Freeway. Shown when still in operation, with rooms (left), office (center), and restaurant (right). A survey photograph of this resource maybe called “boring” by a magazine editor, but to a photo-historian, this photograph is loaded with data about the building.
- 8. 8 Photo Information: Sometimes, everything will go your way and your survey photos will look great, have great details, and be easy to capture in just one shot. SurveyLA photographers should always try to document the resource in as few shots as possible (generally one). Dinny and Mr. Rex, Cabazon, California
- 9. 9 Photo Information: Survey photos should be as easy to take as a snapshot. Follow some basic guidelines and you’ll automatically capture the maximum documentary data. The Golden Pavilion, Kyoto, Japan
- 10. 10 Photo Information: Sometimes, good documentary photos may not be beautiful, but that’s okay. This is a good example of an ugly photo that includes loads of great data about the resource. Stone House, Cameron Street, Ventura, California
- 11. 11 Photo Information: Now that you know you aren’t making art, you need to focus on the most important element in any photo: the light! Step one: Keep the sun out of the shot. Seventh Day Adventist Church, West Chestnut Street, Lompoc, California
- 12. 12 Photo Information: Having all parts of the resource front-lit is the best policy. This might not always be possible, but a bit of pre-planning can go a long way. The sun predictably rises in the east and sets in the west. Warehouse, Los Angeles Railway Company South Park Shops
- 13. 13 Photo Information: Noon is not the ideal time to shoot buildings. Occasionally, you can get a good photograph at noon, but if any of the resources you are surveying have eaves, data will be lost in shadows. Eichler Tract, Thousand Oaks, California
- 14. 14 Photo Information: When planning a survey outing, remember that structures on the west side of the street are usually lit in the morning and structures on the east side in the afternoon. If you don’t have time to pre-plan, then assess the situation at the site. If the building in front of you is backlit… Cabin 21 and 29, Topanga Ranch Motel, Malibu, California …then the building right behind you might be in the sun. Start on that side of the street.
- 15. 15 Photo Information: Keep the sunlight behind you if you can, preferably over your shoulder. Apartment building, North Crimea Street, Ventura, California Ironically, the worst light for beauty shots is the best light for survey photos. Light fog or overcast skies create a shadowless light that can reveal more detail (look at the shadow area under the tree in the last image).
- 16. 16 Photo Information: Los Angeles resource aficionados may find this lighthouse familiar because its twin still survives as LAHCM #2385, Point Fermin Lighthouse in San Pedro, California. Remember, you are creating a document that photo-researchers will be scrutinizing in 100 years. The lesson we’ve learned from photographers at the turn of the century is that they liked shadowless light too. Look at all the information in this postcard photo, shot on an overcast day. (The clouds were painted in later.)
- 17. 17 Photo Information: Now that you know what light to be aware of, you can focus on getting the maximum amount of data in your photos. Most of the time, a 3/4 view or corner that shows the two most important facades is best. Barnsdall-Rio Grande Gasoline Station, built 1929 on 101 highway now Hollister Avenue. Ellwood Mesa, Goleta, California.
- 18. 18 Be sure to make the resource as big as possible in the frame. Avoid too much sky or street (or car mirrors). Bigger photos hold more data. This photo was taken from the same spot in the car with a zoom lens. Here, the resource fills the frame. However, you will usually get a better angle from outside the car.
- 19. 19 Photo Information: And NO DWPs! (Driving While Photographing) Oldest operating McDonald’s, Downey,California
- 20. 20 Photo Information: Obviously, you need to be aware of the edges of the resource and the edges of the frame. This photo is an extreme example, but you should try to include even small features at the edge of the resource. Randy’s Donuts, on Manchester Avenue at the 405 Freeway, Los Angeles, California
- 21. 21 Formal HABS photographs need to be straight, so they are taken with special perspective control lenses. SurveyLA photos can recede in perspective in order to get a tall resource in the frame. It is okay to tilt the camera up in order to capture the entire resource. Camera Tilted Up Perspective corrected HABS type photo
- 22. 22 Photo Information: Tilting the camera up may be especially helpful when photographing historic trees. Here, the addition of the mission next to the trees provides needed scale and context. Mission San Buenaventura and Mission Norfolk Pines, 211 E. Main Street, Ventura, California, City of Ventura Landmark #8
- 23. 23 Like trees, unusual buildings with unusual scale need context included.
- 24. 24 Photo Information: This image better describes the scale of the structure and the streetscape, while the cars offer a benchmark for size comparison. “Binoculars” by Claes Oldenburg and Coosje van Bruggen. Chiat-Day advertising agency building designed by Frank Gehry and Associates, 340 Main St., Venice, California.
- 25. 25 Photo Information: When a resource is taller than it is wide, it’s time to turn the camera 90 degrees and capture a vertical frame. Verticals (a.k.a. portrait perspective) are acceptable for SurveyLA. Capitol Tower and Rooftop Sign, Hollywood, California. Los Angeles HCM #857.
- 26. 26 Photo Information: Vertical perspectives are also useful when recording resources such as landscapes and horizontal features like these railroad tracks. The data in the left photo can be improved by adding some context and perspective. The right image better illustrates the resource because of the inclusion of the buildings at the top of the frame. Some of the last remaining Yellow Car tracks at the Los Angeles Railway Company South Park Shops Complex Avalon Boulevard, South Los Angeles, California.
- 27. 27 Photo Information: You’ll have to use your judgment and decide which perspective – vertical or horizontal – will allow the resource to fill the frame. Sometimes, a horizontal space like a park or memorial will be best recorded from a higher vantage point, if available. Grant Park Cross, above downtown Ventura, California. City of Ventura Landmark #5
- 28. 28 Photo Information: The SurveyLA Field Interface will link a photograph with survey data being gathered in the field. This data will be recorded electronically in the SurveyLA database and documented on the State Historic Resources Inventory forms. Ideally, ONE REPRESENTATIVE PHOTO is all that needs to be captured for most of the resources you will be surveying. First United Methodist Church of Hollywood, 6817 Franklin Avenue, Hollywood, California Los Angeles Historic Cultural Monument (HCM) #248
- 29. 29 Let’s walk up to a resource and find the best view. Here is view #1. The 3/4 perspective is good, but the edges are obscured. Since SurveyLA photos will be taken from the public right-of-way, this view won’t work.
- 30. 30 In view #2, the full front is well-lit and shows a lot of data. However this view does not capture the depth of the building by showing a second side.
- 31. 31 View #3 shows the front and driveway, but still lacks side/depth data.
- 32. 32 View #4 is well-lit, shows the primary and a secondary elevation, which reveals data about the depth and size of the resource, and is also able to capture side penetrations. The car does not obscure critical character defining features, and the wall to the right does not obscure the rear corner of the structure.
- 33. 33 View #5 is also a good mix of front and side elevations, and very similar to view #4. However, the wall at the right obscures the rear of the building slightly, so the previous view (#4) contains the most data.
- 34. 34 Sometimes the resource can fill the frame from across the street, or across a parking lot with the lens zoomed in.
- 35. 35 Sometimes it makes more sense to get up close – like in this public parking lot – and use a wide angle lens to keep obstructions like cars and street trees to a minimum.
- 36. 36 In residential neighborhoods, you must always stay on the sidewalk or street. In this case, this was the best photo angle available from the right-of-way and, although it only shows the front of the house, it still shows plenty of data about the resource.
- 37. 37 Photo Information: When framing the photo, be careful to place obstructions like trees and telephone poles where they will not obscure important data about the resource. Veterans Memorial Building, Lompoc, California. If a lamp post or flagpole is in the frame, try to place it away from the edges of the resource, or out of the way of important details. Did you notice the window covered up in the previous photo?
- 38. 38 Photo Information: Finding the best angle on a resource should become second-nature. Distilling the choices down to one view will inevitably leave out some information, but under most conditions, one photo is sufficient. Warehouse, Main Street, Santa Paula, California. Because it includes two sides, this is a better documentary photo of this building. With only one shot, the depth is communicated, and as a bonus, the character defining north-light skylights are shown as well.
- 39. 39 Typical problems on noisy streets are high walls and hedges. Digital cameras with (live-view) monitors on the back have solved that problem. Just hold the camera over head, and point it over the wall.
- 40. 40 You’ll see an image of the view over the wall in the monitor on the back of the camera. When the resource is in the frame, take the shot. Even if it’s a little crooked, it still shows more data than a fence or wall-obscured photo.
- 41. 41 Some resources will be behind gates and fences. You can sometimes use the small lenses on digital cameras to shoot right through a fence, or use the gap in the gate.
- 42. 42 Photo Information: This was shot through the space where the chain-link gates come together right at the sidewalk. A California fixer-upper.
- 43. 43 Photo Information: Sometimes, it’s better to ignore chain-link fences completely. They are often transparent and allow the details of the resource to show through. Adobe, near Santa Paula, California.
- 44. 44 Photo Information: Fences can obscure the best view of buildings as in this photo. In this instance, take the best image you can with the most data about the resource and ignore the fence. Old Monterey County Jail, 142 West Alisal Street, Salinas, California. National Register #03000337
- 45. 45 Some obstructions, like traffic, can take time or a few tries to avoid. You should always delete the images that are ruined by passing cars and other obstructions so the camera is recording only the best images.
- 46. 46 Photo Information: Let’s look at improving the individual resource photographs. Here is an excellent survey photo. Well-lit, + 3/4 perspective, + all edges in the frame + no obstructions + not too close and not too far… and it has FRoWSE. Built 1905 as the Bank of Arroyo Grande, 100 E. Branch St., Downtown Arroyo Grande, California.
- 47. 47 Photo Information: FRoWSE stands for Foundation + Roof + Windows + Siding + Entry – all of the elements that should be included in a good documentary photograph. The “F” stands for Foundation. This photo shows how the building meets the earth. Open Door Church, Ocean Street, Oceano, California. F.Ro.W.S.E.
- 48. 48 Photo Information: The “Ro” stands for Roof. Your photos should show the roof edge and, if possible, the roofing material. Geodesic Dome House, Lompoc, California. F.Ro.W.S.E.
- 49. 49 Photo Information: The “W” stands for Windows. Your photos should show the types of windows, as well as their styles, sizes, and frames. Victorian Rowhouse, Fillmore St. San Francisco, California. F.Ro.W.S.E.
- 50. 50 Photo Information: The “S” stands for Siding. Your photos should show the building material and siding patterns, and try to communicate the surfaces and vertical architectural features. Vogue Theater, Oxnard, California by architect S. Charles Lee. F.Ro.W.S.E.
- 51. 51 Photo Information: The “E” stands for Entry. Your first survey image should show the primary façade (which usually includes the entry) and, if possible, entry details, size, and porches. Taylor’s Steakhouse, 3361 West 8th St., Mid-Wilshire District, Los Angeles, California. F.Ro.W.S.E.
- 52. 52 Photo Information: This photo features even light, a 3/4 view, unobstructed edges, and is taken at the perfect distance. The FRoWSE features are captured too. A solid survey shot! Residence, Henry T. Oxnard Historic District, Oxnard, California. F.Ro.W.S.E.
- 53. 53 Photo Information: All the FRoWSE features are here as well. Control Tower, Los Angeles International Airport, Los Angeles, California. F.Ro.W.S.E.
- 54. 54 Photo Information: Now that you understand the important features to include in your photos, you’ll sometimes need to compromise to get them all in one frame. Here, in order to show the gable end, the entry was half obscured. This is a good compromise that allows the resource to be documented with only one photo instead of two. Lompoc, California
- 55. 55 Photo Information: Underwriters Fire Patrol Headquarters Building, Built 1908. 147 Natoma Street, San Francisco, California. Sometimes you may find yourself in small alleys and tight spaces. If you find yourself unable to back up and allow for space around the resource. Capture the most you can. Sometimes shooting at an angle from up the street can help.
- 56. 56 Photo Information: Here’s a challenge: This building will require two photos to effectively show its features. This front façade (showing the entry/primary façade) should be combined with the opposite view to convey the most data. Lompoc Restaurant, Lompoc, California. This second view from the rear parking lot shows the A-frame and the distinctive character defining features. Together with the primary façade view, these two images convey the most data.
- 57. 57 Photo Information: Another example of a structure that is difficult to document with only one view. Primary Facade, modern residence, Lompoc, California.
- 58. 58 Photo Information: This second view shows critical character defining features that were missing in the front view. Side view, modern residence, Lompoc, California.
- 59. 59 Photo Information: When surveying a large resource or historic district, more than one photo will be necessary. The most representative photo of the series should be tagged as the primary photo. Here is an example of the most photographed feature of the Olivas Adobe, a picturesque arch. This 20th century feature, however, is not as significant as the 19th century adobe. Bell and Arch, Olivas Adobe, Ventura, California. Built circa 1930.
- 60. 60 Photo Information: Here is a photo of the Olivas Adobe that would be a more appropriate primary image for the district. Other photos of the building and context would go after this one to show additional details and context views. City of Ventura Landmark #1, Rancho Olivas Adobe, Ventura, CA. Built circa 1849, this building is also listed on the National Register.
- 61. 61 Photo Information: Remember to show the non-architectural features of a district too. Sidewalks, streetlights, street trees, and setbacks are important to document on at least one image. Try to combine them if you can. Santa Paula Street, Santa Paula, California.
- 62. 62 Photo Information: District surveys will require overview photos as well as individual photos of significant resources. Be concise with your photo selections – most resources in a district can be captured with only one view. Choose a representative photo to serve as the primary photo. Henry T. Oxnard Historic District. Showing typical homes, massing, scale, setting, feeling, setbacks, street trees, sidewalks, and significant buildings. Oxnard, California.
- 63. 63 Photo Information: Well troops, I salute you for getting this far. Now you know the basics for capturing solid documentary photographs for SurveyLA. Charge your batteries (and take a spare), put on your neon safety vests, and go get ‘em. Good luck, and may the light be with you! Santa Claus statue created in 1950 as a roadside attraction atop the Santa Claus Juice stand in Carpinteria on Hwy 101. Santa was moved to Nyeland Acres, Oxnard, California, in 2002 and restored. Santa continues to greet motorists on the 101.
- 64. 64 Created for the Office of Historic Resources City of Los Angeles Department of City Planning http://www.preservation.lacity.org/ For more information about SurveyLA visit the SurveyLA website http://www.surveyla.org ••• Created by www.habsphoto.com 805.652.1000 P.O. Box 24218, Ventura, CA 93002 All photographs in this tutorial ©2008 Stephen Schäfer all rights reserved.