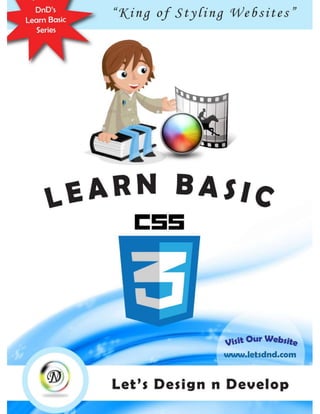
My Styles! My Rules! My Life! A Guide to CSS3 Fundamentals
•Download as DOCX, PDF•
0 likes•363 views

“Style is a magic wand, and turns everything to gold that it touches”. We truly believe that. Our "Learn Basic CSS3" will tell you how to hold this magic wand to make your web site shining in the web sphere. This book will reveal all the new coolest features that offer by CSS's latest version CSS3. You will totally be in love with this whole new styling experience. Ready meet the king of styling websites? Here's what inside the book. - Giving a new appearance for borders and backgrounds - Tips and Tricks when using Texts and Fonts - Transformations in 3D and 2D space - Just by code Animations - Layouting with columns and outlines And many more secrets with code segments and demonstrations in an easy to read way.

Recommended
More Related Content
Similar to My Styles! My Rules! My Life! A Guide to CSS3 Fundamentals
Similar to My Styles! My Rules! My Life! A Guide to CSS3 Fundamentals (20)
Recently uploaded
Recently uploaded (20)
My Styles! My Rules! My Life! A Guide to CSS3 Fundamentals
- 2. LetsDnD.com i Table of Contents Table of Contents.............................................................................................. 0 - Intro -.............................................................................................................. 5 New Look of Borders......................................................................................... 1 Rounded Borders........................................................................................... 2 Shadowed Borders......................................................................................... 3 Image Borders................................................................................................ 4 Background Controlling..................................................................................... 6 Background Size Property............................................................................... 7 Background Origin Property ........................................................................... 8 Multiple Images............................................................................................. 9 Rainbow Backgrounds..................................................................................... 12 CSS3 Linear Gradients .................................................................................. 13 Using Direction Name........................................................................ 13 Using Direction Angle........................................................................ 15 Using Multiple Colors ........................................................................ 16 Using Transparency........................................................................... 16 Repeating a linear-gradient ............................................................... 17 CSS3 Radial Gradients................................................................................... 18
- 3. LetsDnD.com ii Shape Parameter............................................................................... 18 Size Parameter.................................................................................. 19 Repeating a radial-gradient................................................................ 19 Text Effects ..................................................................................................... 21 Text Shadow................................................................................................ 22 Word Wrap.................................................................................................. 23 Text Overflow.............................................................................................. 24 Word Break.................................................................................................. 25 Web Fonts....................................................................................................... 27 Different Font Formats................................................................................. 29 Font Face Rule ............................................................................................. 30 Transformers in2D.......................................................................................... 32 2D Transformation Methods......................................................................... 33 Translate Method ........................................................................................ 33 Rotate Method ............................................................................................ 34 Scale Method............................................................................................... 35 Skew Method............................................................................................... 35 Matrix Method............................................................................................. 36 Transformers in3D.......................................................................................... 37 The RotateX ................................................................................................. 38 The RotateY ................................................................................................. 39 The Perspective............................................................................................ 39 The Backface Visibility.................................................................................. 41 Other 3D Transform Methods....................................................................... 42 With Motion ................................................................................................... 44 CSS3 Transitions........................................................................................... 45
- 4. LetsDnD.com iii Multiple effects............................................................................................ 46 With Animation............................................................................................... 49 CSS3 Animation Key Frames Rule.................................................................. 50 News Paper Columns....................................................................................... 55 Multiple Columns......................................................................................... 57 Interfacing....................................................................................................... 60 Resizing ....................................................................................................... 62 Box Sizing..................................................................................................... 62 Outline Offset.............................................................................................. 63 Thank You ....................................................................................................... 64
- 5. LetsDnD.com iv Learn Basic CSS3 Copyright © 2014 Let’s Design n Develop All rights reserved. No part of this book may be used or reproduced in any manner whatsoever without permission from the authors.
- 6. - Intro - ● ● ● My Styles! My Rules! My Life! ● ● ●
- 7. LetsDnD.com vi Introduction CSS3’s Module Concept CSS3 is the latest standard of Cascading Style Sheet -which people simply termed as CSS. And CSS3 is completely backward compatible with earlier versions of CSS. Most important thing that World Wide Web Consortium (W3C) came up with CSS3 was its module concept. It emerged because, CSS 2, which was the previous version, had a large unmanageable single specification defining all of the various features. Therefore CSS3 is divided into several separate documents called “modules”. Each module adds new capabilities or make extending the features defined in CSS2, preserving backward compatibility. CSS3 specification is still under development by W3C. Due to the modularization, different modules have different stability and statuses. As of June 2012, there are over fifty CSS modules published. Following are the few of most important Modules you can see on CSS3. CSS3 CSS3 Box Model Backgrounds and Borders Image Values and Replaced Content SelectorsText Effects 2D/3D Transformations Animations Multiple Column Layout User Interface
- 8. LetsDnD.com vii Introduction In the next few sections we are going to cover up most of those modules with introducing fascinating tricks to color up your web site. As this book brings you the advanced concepts in Cascading Style Sheet (CSS) with regard to CSS version 3, before moving on we strongly recommend you to go through all the dummies work in styling a web page using CSS to freshen up your minds. Here is a brief introduction what we’regoing to do in the next pages. “You might already know how to add borders with using HTML attribute border in the table element, as well as using CSS property border. You might have added thick borders, thin borders, colored borders and styled borders. But they were all straight lined borders. How about giving round cornered borders for your HTML element which gives a grandish look? We’re going to teach you how to do that.” Hurrah!! I add a border to my HTML table Yeeks!! Look at that! Why don’t you use CSS3 and make it look cooler?
- 9. LetsDnD.com viii Introduction “You might already know how to add images on a web page. When you needed to add a motion, a transition and transformation in the website, you might have done it using the gif format image. But now on you do not need gif. We are going to teach you how to add motion, transformation and transition to your web page through a simple code line.” Yippi!! I create an animated gif image to show a blooming flower. Now I can put it in my Flowers website Dah!! What a waste!! It could’ve easily done with using CSS3.
- 10. LetsDnD.com ix Introduction “You might already know how to add a background color. But it was always just a single plain color. When you want a rainbowed background you might have done it using a rainbowed background image. But now on you do not need an image to add a gradient background. We are going to teach you how to do that.” ♫ Rock On!! ♫♪ Hey!! How do I look? Boring!!! Look at your background. So plain and dull. Why don’t you try out a rocking gradient CSS3 background?
- 11. LetsDnD.com x Introduction You might already know about texts, fonts and layouts which are necessary concepts that needed for a publication. But do you know about columns like as in the news papers. You might have created columns by using a table. But now on we do not need tables to fulfill that task. We are going to teach you how add multiple columns on your text. Don’t you feel like we’ve being advancing now? Hell yes!!! We are not beginners any more. So be prepared and turned to next page. We have a long journey to go with CSS3. Huh!! Who say so? You can easily do it with CSS3. I’m going to create an online news paper. Gosh!!! This is really hard. I have to use lots of tables to create those columns.
- 12. New Look of Borders ● ● ● Borders are not always straight lines! ● ● ●
- 13. LetsDnD.com 2 Borders Borders are not always straight lined in web pages. You might have seen on the web, paragraphs with rounded divisional elements. So how can we do that? We know how to add borders, buthow to make them curved??? Patience!! We are going to teach you that just in a moment. Not only rounded borders, but also many other cool things that can come up with borders. Here we go… Rounded Borders This technique is used most of the time to highlight a specific content among other content. Look at the following and see how it highlighted. Having a straight lined border would make this uncool. But the rounded shape gives it a super cool presentation. To have this rounded corner we used the border-radius property other than to the border property which defines the color, thickness and pattern. TED (Technology, Entertainment, Design) is a global set of conferences owned by the private non-profit Sapling Foundation, under the slogan: “Ideas Worth Spreading”. TED was founded in 1984 as a one-off event. The annual conference began in 1990, in Monterey, California.
- 14. LetsDnD.com 3 Borders This is the code how it was written. div{ border-radius: 25px; } This is the coolest trick that comes with the CSS3. In previous versions we had done it using images on four corners. But now on we do not need images to make rounded borders anymore. Shadowed Borders If the element has a box model we can add a shadow into the box. We called it box shadow. Hereis how it looks like. This is the code how it was written. div{ box-shadow: 10px 10px 5px #888888; } Now on we never need Photoshop or any other image editing tool to makeour web site look cool. We can do all the colorfulfantastic things using CSS3 now on. Check our next trick. TED (Technology, Entertainment, Design) is a global set of conferences owned by the private non-profit Sapling Foundation, under the slogan: “Ideas Worth Spreading”. TED was founded in 1984 as a one-off event. The annual conference began in 1990, in Monterey, California.
- 15. LetsDnD.com 4 Borders Image Borders Borders are not always lines. We can flow an image on a border line. This is our original border image. See how we used this image to flow around the border of a division tag.
- 16. LetsDnD.com 5 Borders Following is the code snippet which was used to havethis patternized border. #round{ border-image: url(border.png) 30 30 round; } #stretch{ border-image: url(border.png) 30 30 stretch; } By varying the property values of border-image property can get wonderful effects you never knew. In the next section we are looking at how CSS3 allows a greater control over the background element. As you have seen, now on you do not need the help of Mr. Photoshop to make rounded borders, shadowed boxes, or pattenized borders. This is cool HA!! You know, I hate to use image editors just to do only this kind of lil stuff.
- 17. Background Controlling ● ● ● Allow your background to control You ● ● ●
- 18. LetsDnD.com 7 Background - Image Background of a web page can be either a color or an image. In this section we are look at the image perspective and the next section we are looking at it in colors perspective. CSS3 contains several new background properties, which allows greater control of the background element. We are looking at each of them now. Background Size Property The background-size property specifies the size of the background image. So now on, whatever the actual image size is, you can define the size of the image it should display. With this property we can use the same image in different contexts, without uploading many images with many sizes. This can be either a percentage or a pixel value. div{ background-size: 280px 60px; } This is our original image. See how we can have the same image with different sizes. We just need to upload only this originalimage to the server.
- 19. LetsDnD.com 8 Background - Image Background OriginProperty To learn about this you should need to know about box model concept in HTML elements. Following image describes it. This shows thebox model of “WHAT’S NEXT” which is a <h1> HTML element. Blue coloredarea, we calledit content box. Greencoloredarea, we calledit padding box. Cream coloredarea, we calledit border box.
- 20. LetsDnD.com 9 Background - Image So we can define, in which box we need to display our background image. In the content box, in the border box or in the padding box. Most of the time people put there in the content box. This is the code snippetto define that. .div1 { background-origin: border-box; } .div2 { background-origin: padding-box; } .div3 { background-origin: content-box; } Multiple Images This techniques is most useful when having transparent gif, or png format images. What we are going to do now is adding an image on another image. So through the transparentareas, wecan see the behind image. Code snippet goes like this. div{ background: url(spiderman.png), url(building.jpg); } We have this image which is transparent. And we used it in the front. So that’s why we put the URL of this image as the firstvalue of background property.
- 21. LetsDnD.com 10 Background - Image We are going to use this image as the back. So it doesn’t need to be transparent. And that’s why its URL is the second value of the property. You already know the background property and the way to add an image. But with CSS3 you can add multiple images, not only one. See now how it looks like. We swear, this image is not Photoshoped. Seriously!! It is overlapping of two images through CSS3.
- 22. LetsDnD.com 11 Background - Image Don’t forget we are not finished yet in the subject of backgrounds. Remember what we have promised in the beginning of this section. As we promised the next section is purely for backgroundcolors in different perspectives. Wow!! I believe CSS3 is kinda cool guy bringing up many many unimaginable things on the HTML web pages. Isn’t this really cool! We do not need Photoshop anymore. We can do insanely awesome stuff using just images.
- 23. Rainbow Backgrounds ● ● ● Can you sing a Rainbow? ● ● ●
- 24. LetsDnD.com 13 Background - Color If you can remember we have talked about the usage of images in the background in the previous section. Now we are going to describe about the coloring techniques to make your background looks cool. So what we are actually going to do is learning to make a rainbow colored background. Just not a solid colored as we know how to do that already. CSS3 gradients let you display smooth transitions between two or more specified colors. So now on you do not need Photoshop to create gradient images for your background, because CSS3 can support to make just the same thing in a simple code. This grants you to reduce the download time and the bandwidth usage of the web page. And the other advantage is, elements with gradients look better when zoomed, because the gradient is generated by the browser. There are two ways to add gradients in CSS3. CSS3 Linear Gradients Here is the syntaxof defining a linear gradient background. background: linear-gradient(<direction>, <color-stop1>, <color-stop2>, …, <last-color>); Using Direction Name To create a linear gradient you must define at least two color stops. Also you can add more than two color stops too. Color stops are the colors you want to render •(goes down/up/left/right/diagonally) Linear Gradients •(definedby their center) Radial Gradients
- 25. LetsDnD.com 14 Background - Color smooth transitions among. You can also set a starting point and a direction (or an angle) along with the gradient effect. You can use direction names such as to bottom, to top, to right, to left, to bottom right, to bottom left, to top right, to top left with justa two color gradient. This is the default direction which is top to bottom that do not need the direction name. #my_grad1 { background: linear-gradient(red, blue); } Let’s look at the directions CSS3 supports. #my_grad2 { background: linear-gradient(to right, red, blue); } Special thing about the diagonal direction is you can make a gradient diagonally by specifying both the horizontal and vertical starting positions. If you want to This linear gradient starts at the top. It starts red, transitioning to blue. This linear gradient starts at the left. It starts red, transitioning to blue.
- 26. LetsDnD.com 15 Background - Color flow your first color starting from top left and end color transition to bottom right, you mustmention the “to bottom right” direction value. #my_grad3 { background: linear-gradient(to bottom right, red, blue); } Using Direction Angle If you want more control over the direction of the gradient, you can define an angle, instead of the predefined direction names. The angle is specified as an angle between a horizontal line and the gradient line, going counter-clockwise. In other words, 0 degree angle creates a bottom to top gradient, while 90 degree angle generates a left to right gradient. This linear gradient starts at top left. It starts red, transitioning to blue. 90deg 0deg -90deg 180deg
- 27. LetsDnD.com 16 Background - Color Using Multiple Colors As we said earlier, this is not just a two color thing. We can have a rainbow of colors in there. Also we can define what percentage of the color should apply there. For example having more reddish than bluish on the background. Just think about having something like this. Using Transparency CSS3 gradients also support transparency, which can be used to create fading effects. To add transparency, we use the rgba() function to define the color stops. The last parameter in the rgba() function can be a value from 0 to 1, and it defines the My Gradient Background
- 28. LetsDnD.com 17 Background - Color transparency of the color: 0 indicates full transparency, 1 indicates full color (no transparency). Code snippet goes like this. div{ background: linear-gradient( to right,rgba(255,0,0,0),rgba(255,0,0,1) ); } Repeating a linear-gradient Using this value function we can repeat our rainbow colored pattern repeatedly on the background. div{ background: repeating-linear-gradient( red, yellow 10%, green 20% ); } Left side is Transparent
- 29. LetsDnD.com 18 Background - Color CSS3 Radial Gradients A radial gradient is defined by its center. To create a radial gradient you must also define at least two color stops same as the linear gradients. Here is the syntaxof defining a radial gradient background. background: radial-gradient(<shape size at position>,<start-color>, …, <last-color>); By default, shapeis ellipse, size is farthest-corner, and position is center. div { background: radial-gradient(red, green, yellow); } As the linear gradient we can evenly distribute the colors on the radial or use a percentage to define how much of color should apply. Shape Parameter The shape parameter defines the shape. It can take the value circle or ellipse. The default value is ellipse. Code snippet for the abovegoes like this. div { background: radial-gradient( circle, red, green, yellow ); }
- 30. LetsDnD.com 19 Background - Color Size Parameter The size parameter defines the sizeof the gradient. It can take four values: closest-side farthest-side closest-corner farthest-corner Repeating a radial-gradient Like as the linear gradient, we can repeat the circles again and again repeatedly on the background using this value function. Code snippet is goes as follows. div{ background: repeating-radial-gradient( red, yellow 10%, green 15% );
- 31. LetsDnD.com 20 Background - Color } So in this section what we basically learned was varying coloring techniques on a background. So here after we can have shaded backgrounds on our web site. This is the end of the background business and in the next section we are going to look at what are the text and font effects that CSS3 has offered.
- 32. Text Effects ● ● ● Text Me! Text Me! ● ● ●
- 33. LetsDnD.com 22 Text Other than to the text related styling things CSS has provided in previous versions, CSS3 offers severalnew text features. You might find these features are more important when creating newspaper looking paragraphs and eye catching headings. Let’s go through one by one which are most fascinating to learn. Because some of these properties may not be work on the all browsers. So we selected few of them, which are working almost all of the browsers to demonstrateto you how it works. Text Shadow There are two types of shadows that can be included on a HTML page. One shadow property we covered in the Border section as box shadow property. That shadow is applied into boxy elements. But this text-shadow property applied into texts. For examples headings and paragraphs. Look atthe following example.
- 34. LetsDnD.com 23 Text This was written as follows. <h1 style="text-shadow: 5px 5px 5px #FF0000;"> TEXT SHADOW EFFECT! </h1> The values here are the pixel value of horizontal shadow, the vertical shadow, the blur distance, and the color of the shadow. By changing the pixel amount of horizontal shadow, the vertical shadow and the blur distance you can come up with different shadow effects around your text. So you’ll see shadow is not goes only below but upwards by changing thosevalues. Word Wrap If a word is too long to fit within an area, it expands outside. You might come across this difficult situation when working with excel spreadsheets. So in excel there is a button to press called word wrap to avoid this situation. You might see this feature on notepad text editor also. If the text is so long in a line, goes beyond the visible screen area, by using word wrap feature you can wrap all the text in the visible area. Like as that, CSS3 offers this feature to wrap your text paragraphs. Look atthe following which is not wrapped. See what happens here. We defined a width of the paragraph elements and had a border around it. But that long word (a character set without spaces) goes beyond than the border. To avoid that wecan use word wrap. Here is a paragraph containing a very long word called thisisaveryveryveryveryveryverylongword.
- 35. LetsDnD.com 24 Text The word-wrap property allows you to force the text to wrap – even if it means splitting it in the middle of a word. Hereis the code segment. p{ word-wrap: break-word; } Text Overflow Sometimes when you write something on an element, the size of the element may not be fit into the text. So the text will be overflowed. To control this, you can use this CSS property. The text-overflow property specifies what should happen when text overflows the containing element. There are two property values you can include in here. clip- Default value. Itclips the text. ellipsis - Render an ellipsis ("...") to representclipped text So let’s demonstrate this. According to following code segment we have division elements like below. <div id="div1">This is some long text that will not fit in the box</div> <div id="div2">This is some long text that will not fit in the box</div> Here is a paragraph containing a very long word called thisisaveryveryveryveryveryv erylongword.
- 36. LetsDnD.com 25 Text #div1 { white-space: nowrap; width: 12em; overflow: hidden; text-overflow: clip; border: 1px solid #000000; } #div2 { white-space: nowrap; width: 12em; overflow: hidden; text-overflow: ellipsis; border: 1px solid #000000; } Word Break Previously we did word wrap property and we input there word break as a property value. So now this word break property controls how the break should need to be done. There are two ways that you can do this. keep-all : Breaks areprohibited between pairs of letters break-all : Lines may break between any two letters So let’s demonstrate this. According to following code segment we have two paragraphs. This is some long text that wil This is some long text that …
- 37. LetsDnD.com 26 Text <p class="test1"> This paragraph contains some text. This line will-break-at-hyphenates.</p> <p class="test2"> This paragraph contains some text: The lines will break at any character.</p> Now we are going to add some style into it. p.test1 { width: 9em; border: 1px solid #000000; word-break: keep-all; } p.test2 { width: 9em; border: 1px solid #000000; word-break: break-all; } So in this section we come to know there are many text effects offered by CSS3, but some of them may not be working in all browsers upto year 2014. Try the properties we demonstrated here because they are working on almost all popular browsers. In the next section we are going to cover up web fonts and finish the texting business on CSS3. This paragraph contains some text. This line will-break- at-hyphenates. This paragraph contai ns some text: The line s will break at any cha racter.
- 38. Web Fonts ● ● ● I’m the blacksheep of the family. ● ● ●
- 39. LetsDnD.com 28 Font As you all know we can have different font families on our web page. Having a good fonttype appropriately makes your paragraph or heading looks cooler. By using the font-family property you can mention what type of font; such as Times New Roman, Verdana or Luicda, you needed to display on the element text. Those fonts are most commonly used fonts. We called them “web-safe” fonts as almost all devices have this font installed. But there are many other fonts you can get from third parties and used on your web page. But the problem with those third party fonts is, they are not installed in every device. As we cannot predict what kind of user is going to look at our web page on the internet, most probably he will not have that third party font installed on their device. So he will not be able to see our web page exactly as we designed. So here comes the CSS3 into action with the Web Fonts. Web fonts allow Web designers to use fonts that are not installed on the user’s computer. With CSS3 web designers are no longer force to use web-safe fonts now. When you have found/bought the font you wish to use, just include the font file on your web server, and it will be automatically downloaded to the user when needed. Having a unique font which is rarely seen can make your web site looks more unique. Your “own” fonts are defined within the CSS3 @font-face rule. Before learning the usage of this property you must understand what kind of different font formats are available upto now.
- 40. LetsDnD.com 29 Font DifferentFont Formats Just remember most of the font formats are not working on all browsers. But some like TTF, OTF and WOFF fonts areworking in almost all browsers. • TrueType is a font standard developed in the late 1980s, by Apple and Microsoft. TrueType is the most common font format for both the Mac OS and Microsoft Windows operating systems. TrueType Fonts (TTF) • OpenType is a format for scalable computer fonts. It was built on TrueType, and is a registered trademark of Microsoft. OpenType fonts are used commonly today on the major computer platforms. OpenType Fonts (OTF) • WOFF is a font format for use in web pages. It was developed in 2009, and is now a W3C Recommendation. WOFF is essentially OpenType or TrueType with compression and additional metadata. The goal is to support font distribution from a server to a client over a network with bandwidth constraints. The Web OpenFont Format (WOFF) • SVG fonts allow SVG to be used as glyphs when displaying text. The SVG 1.1 specification define a font module that allows the creation of fonts within an SVG document. You can also apply CSS to SVG documents, and the @font-face rule can be applied to text in SVG documents. SVG Fonts/ Shapes • EOT fonts are a compact form of OpenType fonts designed by Microsoft for use as embedded fonts on web pages. Embedded OpenType Fonts (EOT)
- 41. LetsDnD.com 30 Font Font Face Rule Let’s see how to use the font you want on your web page. In the CSS3 @font-face rule you must first define a name for the font, and then point to the font file. As a standard practice we recommend you to use lowercase letters for the font URL always. Look below to see how the syntaxgoes. @font-face { font-family: myNewFont; src: url(mynewfont_normal.woff); } div { font-family: myNewFont; } But the problem comes when you want to add a bold text or an italic text or any other style. To have that you must add another @font-face rule containing descriptors for the style you needed. In the following example the file “mynewfont_bold.woff” is another font file, which contains the bold characters for my new font. Browsers will use this font file whenever a piece of text with the font-family “myNewFont” should render as bold. This way you can have many @font-face rules for the same font. Look at the syntaxof it. @font-face { font-family: myNewFont; src: url(mynewfont_normal.woff); } @font-face { font-family: myNewFont; src: url(mynewfont_bold.woff); font-weight: bold; } div { font-family: myFirstFont; }
- 42. LetsDnD.com 31 Font Okay!!! Now we have covered the usage of fonts in css3. Did you learn that, now on we do not need to always depend on the fonts which are commonly seen? Yep!!! We can experiment with our own hand made fonts in our web pages. This is all about font topic. In the next few sections we are going to talk about transformations.
- 43. Transformers in 2D ● ● ● I like to move it, move it!!! ● ● ●
- 44. LetsDnD.com 33 Transformation - 2D Transformation is an effect that lets an element change its shape, size and position. This transformation includes movement, scale, turn, spin, and stretch. Using CSS3 transform, we can do all of these things to an element. It can be either in 2D or 3D. We are going to coverup the 2 Dimensional (2D) part in this section. We’ll catchup with 3 Dimensionalpart later. 2D TransformationMethods Following are the few of methods that comes with CSS3 2D Transforms. Let’s go with each one. Translate Method With the translate() method, the element moves from its current position, depending on the parameters given for the left (X-axis) and the top (Y-axis) position.
- 45. LetsDnD.com 34 Transformation - 2D We’ll go through an example and its syntax. div { transform: translate(350px,20px); } Here we moved a division to a specific x and y position. Rotate Method With the rotate() method, the element rotates clockwise at a given degree. Negative values are allowed and it rotates the element counter-clockwise. div { transform: rotate(30deg); } Here we rotated the division by 30 degrees in clockwise. 300 This is a transformed division. (350, 20) This is a normal division.
- 46. LetsDnD.com 35 Transformation - 2D Scale Method With the scale() method, the element increases or decreases the size, depending on the parameters given for the width (X-axis) and the height (Y-axis). div { transform: scale(2.5,2); } The value scale(2.5,2) transforms the width to be 2.5 times big as its original size, and the height 2 times as its original size. Skew Method With the skew() method, the element turns in a given angle, depending on the parameters given for the horizontal(X-axis) and the vertical (Y-axis) lines. This is a normal division. This is a scaled division.𝓍 2𝓍𝓍 2 1 2 𝓍
- 47. LetsDnD.com 36 Transformation - 2D div { transform: skew(30deg,20deg); } The value skew(30deg,20deg) turns the element 30 degrees around the X-axis, and 20 degrees around the Y-axis. Matrix Method The matrix() method combines all of the 2D transform methods into one. The matrix method takes six parameters, containing mathematic functions, which allow you to: rotate, scale, move (translate), and skew elements. div { transform: matrix(0.566,0.5,-0.5,0.866,0,0); } This is all about 2D Transformation. But remember we are not finished yet. We need to catch-up with 3 Dimensional transformations in the next section.
- 48. Transformers in 3D ● ● ● Roll Over!!! Roll Over!!! ● ● ●
- 49. LetsDnD.com 38 Transformation - 3D You now know what kind of things that CSS3 offers with 2D transformation thanks to the previous section. Not only 2D, it also offers 3 dimensional transformations too. So in this section, we are going to look at what kind of transformations that comes with 3D. We will demonstrate few transformation methods in this section. But actually 3D transformation comes in handy, when you use it with some animations. But this is not the time to demonstrate animations in CSS3, and we promised you, we will cover up that with another section. So you will see, the examples we demonstrated here will not make any sense, but remember it will come useful with an animation. The RotateX With the rotateX() method, the element rotates around its X-axis at a given degree. Remember to put the additional X in the end of the method. If not it goes as 2D transformmethod. div{ transform: rotateX(120deg); } Actually what you see is doesn’t make sense. But if you animate this division element with rotateX() method, you will see gradually how this division element rotate around X axis in 3 dimensional space.
- 50. LetsDnD.com 39 Transformation - 3D The RotateY With the rotateY() method, the element rotates around its Y-axis at a given degree. Remember to put the additional Y in the end of the method. If not it goes as 2D transformmethod. div{ transform: rotateY(120deg); } Actually what you see is doesn’t make sense. But if you animate this division element with rotateY() method, you will see gradually how this division element rotate around Y axis in 3 dimensional space. The Perspective The perspective property defines how many pixels a 3D element is placed from the view. This property allows you to change the perspective on how 3D elements are viewed. When defining the perspective property for an element, it is the child elements that get the perspective view, not the element itself. And the other important thing is perspectiveaffects only 3D transformed child elements. Let’s look at the code how it is written.
- 51. LetsDnD.com 40 Transformation - 3D In this code segment wehave two divisions. Oneis a parent element of another. <div id="div1"> <div id="div2">HELLO</div> </div> Other than to the width and height and other style properties, we are assigning a special properties for this parent and child divisions. Take a look at them. #div1 { perspective: 150px; } #div2 { transform: rotateX(45deg); } Division1 which is the parent element got the perspective property and division2 which is the child element got the 3D transformation property. So the black bordered square is our parent division element which has the perspective property. That means you always need two elements to have that perspectivelook.
- 52. LetsDnD.com 41 Transformation - 3D The Backface Visibility When an element has a 3 dimensional space, it has a front side and a backside. So when the front side rotates back to the backside, you might want to hide it. Not make visible to the users. Or else you might want its flipped look. The backface- visibility property defines whether or not an element should be visible when not facing the screen. This property is useful when an element is rotated, and you do not want to see its backside. There are two values that can be input in here. Visible property value is the default value. So the backside is visible like as follow when it rotates. div { backface-visibility: visible; } Hidden property value makes the back side not visible. So at a one time of the rotation, there will be nothing in the screen, where it fully backsided. div { backface-visibility: hidden; }
- 53. LetsDnD.com 42 Transformation - 3D Other 3D Transform Methods Other than the rotate methods there are lots of methods that you can tryout. As you did most of the 2D transformation methods such like translate and scale, you’ll find the following 3D methods are lot easier to tryoutthan them. matrix3d(n,n,n,n,n,n,n,n,n,n,n,n,n,n,n,n) • Defines a 3D transformation, using a 4×4 matrix of 16 values translate3d(x,y,z) • Defines a 3D translation translateX(x) • Defines a 3D translation, using only the value for the X-axis translateY(y) • Defines a 3D translation, using only the value for the Y-axis translateZ(z) • Defines a 3D translation, using only the value for the Z-axis
- 54. LetsDnD.com 43 Transformation - 3D As you know now, both transformations in 2 dimensional and 3 dimensional spaces can move into give some motion into it. So what we are going to do in the next section is that task. So what learned in this section is not a waste, because we’regoing to use them in the next section. scale3d(x,y,z) • Defines a 3D scale transformation scaleX(x) • Defines a 3D scale transformation by giving a value for the X-axis scaleY(y) • Defines a 3D scale transformation by giving a value for the Y-axis scaleZ(z) • Defines a 3D scale transformation by giving a value for the Z-axis rotate3d(x,y,z,angle) • Defines a 3D rotation rotateZ(angle) • Defines a 3D rotation along the Z-axis perspective(n) • Defines a perspective view for a 3D transformed element
- 55. With Motion ● ● ● Transition Begins!!! ● ● ●
- 56. LetsDnD.com 45 Transition Before introducing CSS3 to the world, people add motion to web pages by using JavaScript, Flash or animated images such like gif formatted images. But with the emergence of CSS3, how things were done was all challenged and changed. We termed this as transitions in CSS3. So let’s see what kind of options that CSS3 transition offers to add motion to HTML elements. CSS3 Transitions They are effects that let an element gradually change fromone styleto another. To do this, you mustspecify two things: The CSS property you wantto add an effect to The duration of the effect For example look at the following syntax. div { width: 100px; transition: width 2s; }
- 57. LetsDnD.com 46 Transition It adds a transition effect on the width property, with duration of 2 seconds. But remember if the duration part is not specified, the transition will have no effect. The starting width will be 100px. The transition effect will start when the specified CSS property changes value. A typical CSS property change would be when a user mouse-over an element. So with the above code you need a pseudo class hover with the width property in a division tag. The ending width will be 300px. So with this code segment the width of division element will change gradually from 100px to 300px when you add the following code segmentinto it. div:hover { width: 300px; } Initially the element would like the position 1. When you just hover your mouse cursor over to the element it will gradually increase its width into position 2. Also you will notice that when the mouse cursor out of the element, it gradually changes back to its original style at position 1. Multiple effects How about adding effects more than one on the transition property? We already know how to change the width gradually. What about giving it a rotation as well? Here we need to separate the effects by a comma. The starting rotation transform property doesn’tneed to be defining because it will take default as zero degrees. CSS3 Transition CSS3 Transition Position 1: Without mouse over Position 2: On mouse over
- 58. LetsDnD.com 47 Transition Following is the code segment for that. div{ width: 100px; height: 100px; transition: width 2s, height 2s, transform 2s; } div:hover { width: 200px; height: 200px; transform: rotate(180deg); } Position 1: Without mouse over Position 2: On mouse over On mouse over intermediate positions
- 59. LetsDnD.com 48 Transition Initially the element would like the position 1. When you just hover your mouse cursor over to the element, browser will generate the intermediate positions like as the above. With both clockwise rotation and increasing width and heights. Then it goes into position 2. Also you will notice that when the mouse cursor out of the element, it gradually changes back to its original style at position 1 by counter clockwiserotation and decreasing width and heights. The transition property we introduced here was the shorthand transition property. If you like to know the standard properties of the transition here is the list. This can be written as follows if you like it on the long way. div{ transition-property: width; transition-duration: 1s; } So we gave some motion to HTML elements in this section. Next section will be more cooler than this becausewe are going to animate HTML elements in there. • A shorthand property for setting the four transition properties into a single property transition • Specifies when the transition effect will starttransition-delay • Specifies how many seconds or milliseconds a transition effect takes to complete transition-duration • Specifies the name of the CSS property the transition effect is for transition-property • Specifies the speed curve of the transition effect transition-timing- function
- 60. With Animation As we said in the ● ● ● Frame by frame!!! Style by Style!!! ● ● ●
- 61. LetsDnD.com 50 Key Frame previous section, before the emergence of CSS3, things were done differently when it comes to the subject of animation. We used Javascript or Flash or Animated Images to have animation on our web pages. Even for the simplest transition we have to upload above mentioned things. But with CSS3, you will never need them again. Before moving on we need to go through a specific rule class. CSS3 Animation Key Frames Rule The @keyframes rule is where the animation is created. You need to specify a CSS style inside the @keyframes rule and the animation will gradually change from the currentstyle to the new style as described by this rule. When an animation is created in the @keyframe rule, you must bind it to a selector, otherwisethe animation will have no effect. You can bind the animation to a selector (element) by specifying at least these two properties: The name of the animation The duration of the animation But the problem with mentioning only above two only is, it make runs the animation in one time only. If you like to mention the number of times it needed to run, you can specify it also. Now we are going to change the color of a division tag, red to yellow in infinite times. One transition of colors will take place around 5 seconds. But remember if the duration part is not specified, the animation will have no effect, because the default value is 0. Let’s go with the shorthand property first and then look into standard property for each of them.
- 62. LetsDnD.com 51 Key Frame This is how the code is written. div { animation: myfirst 5s infinite; } @keyframes myfirst { from {background: red;} to {background: yellow;} } In the above code segment our keyframe rule name is ‘myfirst’. There we specified at the starting point, background color of the element we are going to bind the rule should be red. Then it should gradually change into yellow. We can see that rule has tie into a division tag, and this color change should be done within 5 seconds and loop around infinite times. An animation lets an element gradually change from onestyle to another. You can change as many properties you want, as many times you want. You can specify when the change will happen in percent, or you can use the keywords “from” and “to” (which represents 0% and 100%). 0% represents the start of the animation, 100% is when the animation is complete. Let’s look at how to use this percentage rules.
- 63. LetsDnD.com 52 Key Frame @keyframes myfirst { 0% {background: red;} 25% {background: yellow;} 50% {background: blue;} 100% {background: green;} } Here we had several color transitions. It changes the background color when the animation is 25%, and 50%, and again when the animation is 100% complete. Now let’s see how to add a motion with a color change. The below code snippet will change the background color and the position when the animation is 25%, 50%, 75%, and again when the animation is 100% complete. @keyframes myfirst { 0% {background:red; left:0px; top:0px;} 25% {background:yellow; left:200px; top:0px;} 50% {background:blue; left:200px; top:200px;} 75% {background:green; left:0px; top:200px;} 100% {background:red; left:0px; top:0px;} }
- 64. LetsDnD.com 53 Key Frame Now it’s time to expand the shorthand property, and look into what are the standard properties that comes with CSS3 animation. div{ animation-name: myfirst; animation-duration: 5s; animation-timing-function: linear; animation-delay: 2s; animation-iteration-count: infinite; animation-direction: alternate; animation-play-state: running; } Let’s see whateach one means. animation-delay •Specifies when the animation will start animation-direction •Specifies whether or not the animation should play in reverseon alternate cycles animation-duration •Specifies how many seconds or milliseconds an animation takes to complete one cycle animation-fill-mode •Specifies whatstyles will apply for the element when the animation is not playing (when it is finished, or when it has a “delay”) animation-iteration-count •Specifies the number of times an animation should be played
- 65. LetsDnD.com 54 Key Frame animation-name •Specifies the name of the @keyframes animation animation-play-state •Specifies whether the animation is running or paused animation-timing-function •Specifies the speed curveof the animation Great!! We did color transitions, movements and lot of amazing things. Yeah!! We came across cool animation techniques offers with CSS3. That’s all about motion. In the next section we are going to discuss about something that is really important whendeveloping online news papers.
- 66. News Paper Columns ● ● ● Run by the columns!!! ● ● ●
- 67. LetsDnD.com 56 Column There are lots of paragraphs in news papers. Those paragraphs are organized in a nice way to convey the message easily to a reader as well as taking care of the space it has. For this organization or structure, we called them as paragraph columns. Using columns we can fit our wordings or paragraphs nicely on the space remained. But actually for web pages, this concept is really not necessary to use because in the internet there is no screen space limitations. But if you want to have a layout same as the traditional looking paragraphs, CSS3 offers this feature specifically for you. With CSS3, you can create multiple columns for laying out text – like in newspapers!Look atthe features it offers. column-count •Specifies the number of columns an element should be divided into column-fill •Specifies how to fill columns column-gap •Specifies the gap between the columns column-rule •A shorthand property for setting all the column-rule-*properties column-rule-color •Specifies the color of the rule between columns column-rule-style •Specifies the style of the rule between columns column-rule-width •Specifies the width of the rule between columns
- 68. LetsDnD.com 57 Column We are now going through some of these properties which are very much important. Multiple Columns Here we have paragraphs inside a division tag where the division had the following style on it. div{ column-count: 3; } column-span •Specifies how many columns an element should span across column-width •Specifies the width of the columns columns •A shorthand property for setting column-width and column-count
- 69. LetsDnD.com 58 Column With this code segment, the text inside the division automatically fitted into 3 column paragraph set. If you feel the default gap between the columns are not enough you can increase or decreaseaccordingly with the following code snippet. div{ column-count: 3; column-gap: 40px; } This is how it now looks like. If you want to have a separator to highlight the columns, the column-rule property sets the width, style, and color of the rule between columns. Look at the following example. div{ column-count: 3; column-gap: 40px; column-rule: 4px outset blue; }
- 70. LetsDnD.com 59 Column This is how it now looks like. Column rule is a shorthand property. Itis a combination of: In this section we see into what kind of features that CSS3 offers to make a web page like traditional news paper looking. So the main important concept we discussed herewas columns. column-rule column-rule-width column-rule-style column-rule-color
- 71. Interfacing ● ● ● I’m here to outline you!!! ● ● ●
- 72. LetsDnD.com 61 Interface With CSS3 there it comes with advanced features to support creating user interfaces. Such as resizing elements, box sizing, and outlining. Look at the complete list it offers. appearance •Allows you to make an element look like a standard user interface element box-sizing •Allows you to define certain elements to fit an area in a certain way icon •Provides the author the ability to style an element with an iconic equivalent nav-down •Specifies whereto navigatewhen using the arrow-down navigation key nav-index •Specifies the tabbing order for an element nav-left •Specifies whereto navigatewhen using the arrow-leftnavigation key nav-right •Specifies whereto navigatewhen using the arrow-rightnavigation key nav-up •Specifies whereto navigatewhen using the arrow-up navigation key outline-offset •Offsets an outline, and draws itbeyond the border edge resize •Specifies whether or not an element is resizableby the user
- 73. LetsDnD.com 62 Interface Let’s go through the important ones because some of them are still not supported by all the web browsers. Resizing In CSS3, the resize property specifies whether or not an element should be resizable by the user. Before CSS3, this feature only applied for HTML text area element and it came by default. But now you can specify whether some element is resizable or not by the user. In the following image you’ll see some mark in the bottom right corner of the element. Itallows you to click and resizeby dragging. Following is the code segment. div{ resize: both; overflow: auto; } Box Sizing The box-sizing property is used to tell the browser what the sizing properties (width and height) should include. Should they include the border-box or just the content-box which is the default value of the width and height properties. For example, if you want two bordered boxes side by side, it can be achieved through setting box-sizing to “border-box”. This forces the browser to render the box with the specified width and height, and place the border and padding inside the box. Following example specify two bordered boxes side by side.
- 74. LetsDnD.com 63 Interface Following is how it was written. div{ box-sizing: border-box; width: 50%; float: left; } Outline Offset The outline-offset property offsets an outline, and draws it beyond the border edge. Outlines differ fromborders in two ways: Outlines do not take up space Outlines may be non-rectangular Look at the following example. What you see in red color is the outline and what you see in black color is the border. div{ border: 2px solid black; outline: 2px solid red; outline-offset: 20px; }
- 75. Thank You So this is all the basic information we have to give you in CSS3. We guess now you can build a cool web page using the tips and tricks we had given to you with all these 11 sections. Thanks for downloading our book! We certainly hope you enjoyed ‘Learn Basic CSS3’. It’d be very nice to hear from you… For more ebooks and free tutorials. Website: www.letsdnd.com Contact Us Email: sandeeplikhar@letsdnd.com You can connect and be around with us for new updates from our social network. Don’tforget to like and follow.