
Recommended
More Related Content
Similar to aerialphotography-220920130348-1b827bf0.pdf
Similar to aerialphotography-220920130348-1b827bf0.pdf (20)
Recently uploaded
Recently uploaded (20)
aerialphotography-220920130348-1b827bf0.pdf
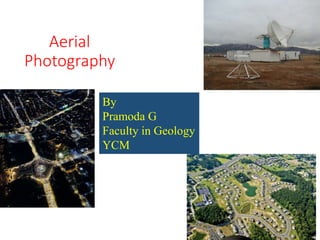
- 1. Aerial Photography By Pramoda G Faculty in Geology YCM
- 2. Aerial Photography • Science of making photographs from the air, for studying the surface of the earth. Uses • pictorial representation (Mosaics), • preparation of the base maps, • photo interpretation, • photogrammetric surveys, • economizing and expediting natural resources surveys in the fields of geology, soils, land use, civil engineering and town planning.
- 3. Basic Requirements of Aerial Photography faithful image image should be sharp, bright and clear Tilt and crab should be within tolerable limits continuous with sufficient overlapping of successive photographs Scale variation should be within tolerable limits distortion free
- 4. Factors Influencing Atmospheric factors Reflectivity of the object Aircraft Camera Processing and printing Negative and positive base and emulsions
- 5. Stages of Aerial Photography Planning for photography Planning and execution of photographic flights Processing of negatives and production of positive copies
- 6. Planning for Photography Area to be photographed Purpose of photography Type of photography Vertical aerial photograph Oblique aerial photographs Scale of Photography Inclination of optical axis Optical photographic deficiencies Topographic relief of the terrain photographed
- 7. Extreme growth in the technology and techniques used for acquiring aerial photographs. Aerial photographs are classified according • Attitude of camera axis, • Lens system, • Types of cameras, • Types of films and filters or • Some special equipment employed in the camera or techniques to record some special effect on the film. Types of Aerial Photographs
- 8. Vertical photographs • Two distinct axes are formed from the camera lens centre. One towards the ground plane and the other towards the photo plane. • Perpendicular from the camera lens centre to the ground plane is termed as the vertical axis. Line drawn from the lens centre to the photo plane is known as the photographic/optical axis. • When the photo plane is kept parallel to the ground plane, the two axes also coincide with each other - vertical aerial photograph (Figures). • Very difficult to achieve perfect parallelism between the two planes. • Photographic axis deviates from the vertical axis, Deviation is within the range of plus or minus 3 degree, the near-vertical aerial photographs are obtained. • Photography with an unintentional deviation of more than 3 degree in the optical axis from the vertical axis is known as a tilted photograph. Types of Aerial Photographs - Based on the Position of the Cameral Axis
- 10. Aerial photograph taken with an intentional deviation of 15° to 30° in the camera axis from the vertical axis is referred to as the low oblique photograph. This kind of photograph is often used in reconnaissance surveys. (ii) Low oblique photographs
- 11. (iii) High oblique photographs The high oblique are photographs obtained when the camera axis is intentionally inclined about 60° from the vertical axis. Such photography is useful in reconnaissance surveys.
- 12. Scale of Photography Ratio of photograph image distance to ground distance. This ratio is same as that of camera focal length to camera height - (f/H). The scales generally used in natural resource surveys vary between 1:5,000 and 1:50,000 depending upon the purpose for which the photographs are used. Two scales commonly preferred are 1: 15,000 and 1: 25,000. For general mapping purpose in the field of geology, the scale 1:50,000 or1: 60,000 are suitable. These scales have the advantage of corresponding to the scale of modern top sheets. Selection of scale often depends on relief and other considerations. The higher the relief of the terrain and higher the density of vegetation, the smaller should be the scale selected. While selecting the scale of photography for geological interpretation, advantages and, disadvantages of large and small scale should be considered.
- 13. • Cameras are framing systems which acquire a near- instantaneous "snapshot" of an area (A), of the surface. Camera systems are passive optical sensors that use a lens (B) to form an image at the focal plane (C), the plane at which an image is sharply defined. Aerial Cameras
- 14. FRAME • lens fixed relative to the focal plane • film being moved between exposure s STRIP Film is moved continuously along the focal plane and a narrow slit shaped aperture kept open constantly geophysical and other non- imaging surveys and for low altitude PANORA MIC • Ground areas are covered by either rotating the camera lens or rotating a prism infront of the lens. MULTISPEC TRAL • used to simultaneou sly image the terrain in different spectral bands Types
- 24. Normal or Standard angle camera: Lens with an angle of coverage upto 75º and the focal length ranging from 200 to 300 mm. Precision of the planimetry is the highest. Super wide-angle camera: Lens with an angle of coverage greater than 100º and the focal length ranging from 45 to 90 mm (f/8). Precision of height measurement is the highest. Wide angle camera: Lens with an angle of coverage between 75º & 100º and focal length ranging from 100 to 150 mm. Precision of height measurement is higher. Lenses of 11.5 cm and 15cm focal length are referred to as Wide angle lenses, lens of 21cm focal length is referred to as Normal angle lens lens of 30cm focal length is referred to as Narrow angle lens. Based on the angle of coverage Based on Focal Length
- 25. • Generally Cardinal direction • E-W & N - S direction. • The direction along the length of the area is commonly decided upon to keep the number of strips to minimum. • For geological interpretation flight direction across the strike of the formations (cross stripping) is preferred in highly folded areas to ensure sufficient overlap across the strike. In high mountainous areas where relief displacement is more. Flight Direction
- 26. Forward and Lateral Overlaps Forward Overlap: The forward overlap (fig- 2a) generally chosen is 60% ~ 5%. In no case it should be less than 53%. In mountainous areas it is safer to have overlap of 65%. Lateral Overlap: In general, a lateral overlap (fig-2b) of 20% + 5% is specified. In areas of high relief such as Himalayas a lateral overlap of 35% is specified to cater for relief displacements.
- 28. At high altitudes because of strong wind currents called sidewinds influence the aeroplane in maintaining predetermined direction and straightness of run. This deviation from the original intended flight path is called as drift. Pilot tries to maintain original path of the aeroplane slightly against the wind, this makes the aeroplane to rotate on its vertical axis. In this case, original path is maintained but the area covered by photograph is much different than that planned. The aerial photograph is rotated in the direction opposite to wind direction. This defect is called as crab. The above 2 defects causes reduction in stereoscopic coverage of the terrain. Drift Crab
- 29. Time of Photography • Decided as to avoid long shadows and haze conditions. Long shadows hide the detail and bring down the interpretational value of the photographs. • Normally the time is confined to the period when the sun is between 30º and 60º (8 to 10 AM and 2 to 4 PM are preferred). • In mountainous areas however the period around noon is preferred to avoid shadows of the hills. • In tropics where the time is limited to 1.5 to 3 hrs after the sunrise.
- 30. • Selection of the season depends on various factors such as seasonal changes in light reflection, seasonal changes in vegetation cover, seasonal changes in climatological factors. • The flying season in India is generally from September to October and March to April. • For the photogrammetric, geological and soil surveys the ground should be visible as clearly as possible. In forested areas such a time will be when the trees shed their leaves. Thus, for these purposes early spring to beginning of summer is most suitable. Land use surveys, preferable to have the photography when the crops are standing. Therefore, for these end of rainy season to the beginning of winter is suitable. Season of Photography
- 36. Glossy, matt, semi-matt, single weight or double weight should be decided. Type and Number of Prints Planning and Execution of Photographic Flights • Aerial photography is a delicate operation and demands painstaking preparation and professional execution. • The purpose of the project largely determines the scale. • The proper camera, necessary filters, suitable film, the photographic plate and other equipment will be selected. • Predetermined parallel flight lines. • The lines are equally spaced and generally run along the length of the area. • The spacing between the flight lines are predetermined according to the requirement of lateral overlap. • Interval between successive exposures is determined taking into account the speed of the aircraft and the forward overlap required on successive photographs.
- 37. • The timing of successive exposures is regulated by an instrument called "intervalometer" which is set to trigger the camera at proper intervals of time. • The exposure time, aperture opening are controlled by the photographer. Cross or oblique winds may force the pilot to head the plane diagonally into the wind to keep it moving along the predetermined flight line.
- 38. Aerial photography in India is controlled and coordinated by the Survey of India and information about the existing photo coverage is available with the Surveyor General. Numbering of photographs • Job Number: Every photographic task is allotted a job number by Surveyor General of India for easy reference and handling. The task carried out by I.A.F. is given a number 'suffixed by letter 'A' while that carried out by A.S.Co. is suffixed by 'B', and that by the NRSA is suffixed by 'C', EX:346-A, 331-B. • Strip Number: If the strips are flown E-W, numbering of the strips is given from N to S. If they are flown N-S, the numbering is given from W to E. • Photo Number: If the strip is flown E-W, the photos of the strip are numbered from W to E. If the strip is flown N-S, the photos are numbered from S to N. Procurement of Aerial Photographs
- 39. To show the position of any photo relative to it's approximate geographical position on a published map. These are of two types: (1)Photographic Index, and (2) Line Index. Photographic Index: It is normally prepared for areas where no reliable map coverage exists and for operations such as reconnaissance. The index is carried out by using photos on a smaller scale than the actual aerial photography. Line Index: It is a line map showing the photo layout in a mosaic as it covers the terrain. The layout is with flight lines, photo numbers etc. It is prepared on 1 inch: 4 miles or 1:2,50,000 scale and the longitudes and latitudes are marked at intervals of 15 minutes. Preparation of Photo Index
- 40. Information Recorded on Aerial Photographs Fiducial marks: Fiducial marks or collimating marks for the determination of the principal points. Altimeter reading: Recording of Altimeter reading for knowing the flying height of 'the aircraft above mean sea level (msl) at the time of exposure. Time: Recording of time at the moment of exposure. Level bubble: To indicate the tilt of the camera axis at the moment of exposure (not very accurate). Principal distance: For determining the scale of the photograph. Number of the photograph : e.g. 342-A
- 41. Elements of aerial photograph
- 42. • A systematic study of aerial photographs and satellite imageries usually ,involves several characteristics of features shown on an image and it depend upon field of application. • Most of the application consider the following basic characteristics or variation in them ,which aid the visual interpretation process of satellites imagery • Although there is a difference of opinion on the number of elements ,there is namely tone, size, shape, texture, pattern, location, association, shadow and resolution Image interpretation keys
- 43. Shape:- refers to the general form, structure, or outline of individual objects. Shape can be a very distinctive clue for interpretation. Straight edge shapes typically represent urban or agricultural (field) targets, while natural features, such as forest edges, are generally more irregular in shape, except where man has created a road or clear cuts. Farm or crop land irrigated by rotating sprinkler systems would appear as circular shapes
- 44. Size:- of objects in an image is a function of scale. It is important to assess the size of a target relative to other objects in a scene, as well as the absolute size, to aid in the interpretation of that target. A quick approximation of target size can direct interpretation to an appropriate result more quickly. For example, if an interpreter had to distinguish zones of land use, and had identified an area with a number of buildings in it, large buildings such as factories or warehouses would suggest commercial property, whereas small buildings would indicate residential use.
- 45. Tone:- refers to the relative brightness or colour of objects in an image. Generally, tone is the fundamental element for distinguishing between different targets or features. Variations in tone also allows the elements of shape, texture, and pattern of objects to be distinguished.
- 46. Pattern:- refers to the spatial arrangement of visibly discernible objects. Typically an orderly repetition of similar tones and textures will produce a distinctive and ultimately recognizable pattern. Orchards with evenly spaced trees, and urban streets with regularly spaced houses are good examples of pattern.
- 47. Texture:- refers to the arrangement and frequency of tonal variation in particular areas of an image. Rough textures would consist of a mottled tone where the grey levels change abruptly in a small area, whereas smooth textures would have very little tonal variation. Smooth textures are most often the result of uniform, even surfaces, such as fields, asphalt, or grasslands. A target with a rough surface and irregular structure, such as a forest canopy, results in a rough textured appearance. Texture is one of the most important elements for distinguishing features in radar imagery.
- 48. Shadow:- is also helpful in interpretation as it may provide an idea of the profile and relative height of a target or targets which may make identification easier. However, shadows can also reduce or eliminate interpretation in their area of influence, since targets within shadows are much less (or not at all) discernible from their surroundings. Shadow is also useful for enhancing or identifying topography and landforms, particularly in radar imagery.
- 49. Association:- takes into account the relationship between other recognizable objects or features in proximity to the target of interest. The identification of features that one would expect to associate with other features may provide information to facilitate identification. In the example given above, commercial properties may be associated with proximity to major transportation routes, whereas residential areas would be associated with schools, playgrounds, and sports fields. In our example, a lake is associated with boats, a marina, and adjacent recreational land. Site:-refers to the vocational characteristic of object such as topography, soil, vegetation and cultural features
- 50. AERIAL MOSAICS • Mosaic is an array of overlapping aerial photographs systematically assembled to form a continuous pictorial representation of a terrain.
- 52. • Planning purposes. • Mosaic provides an over view of the terrain, which helps in forming an initial impression about the nature and distribution of the materials and features occupying the terrain. • From the mosaic it will also be known how much scale variation exists from photo to photo, or if there is any crab or drift causing gap in the strip. • A mosaic annotated with the locational information on rivers, villages, townships, roads and other similar features taken from the topographic map helps in readily knowing about the geographic position of the area being interpreted. Uses of mosaic
- 53. Based on the method of compilation, the mosaics are classified in to three types Un-controlled mosaic: It is a compilation of photographs without regard to any horizontal control positions. The photographs are oriented in to position by matching corresponding images on adjacent photographs. Semi-controlled mosaic: It is a compilation of photographs without using rectified photographs but using control for positioning of each photograph. Controlled mosaic: It is a compilation of scaled and rectified photographs (tilt corrected photographs) assembled to fit plotted control points. Types of mosaics
- 54. • The task of compiling of mosaic is generally entrusted to an air surveyor photogrammetric organization. • Mosaics are generally compiled on the scale of available aerial photographs and then reproduced by enlargement or reduction to the desired scale. • More than double size enlargement is not recommended as it not only reduces the image quality and resolution but also becomes unwieldy in size for handling. Compilation of mosaic • For the mountainous terrain where relief displacement is much in the photographs, the compilation of the mosaic is done using orthophotographs. Such a compilation is called orthomosaic. • This method involves considerable amount of work in the field as well as in the laboratory and as such is resorted to rare cases. Orthomosaic
- 55. • The scale is decided based on the intended use. • Small scale (1:25,000 or smaller) mosaic, generally compiled on the scale of photographs chosen for interpretation, is used for geology, survey, forestry, flood control, terrain evaluation and other studies of extensive areas. • Medium scale (1:10,000 to1:20,000) is used for town planning, road and railway alignment and other geotechnical studies. • Large scale (larger than 1:10000) is used in detailed investigations for any of the purposes stated above. Scale of mosaic:
- 57. PHOTOGRAMMETRY • Coined by the geographer KERSTEN in 1855. • Photos (light) + Gramma (something drawn or written) + Metron, (to measure). • Art and Science of making measurements from imagery. • In a broader sense, it is the method of determining the shapes, sizes and positions of objects using their imaged positions. • the art, science, and technology of obtaining information about physical objects and the environment by photographic and • electromagnetic images. it includes; (i) Photographing an object, (ii) Measuring the image of the object on the processed photographs. (iii) Reducing the measurements to some useful form such as a topographical map or a numerical cadaster. deals with the geometrical aspects of aerial photographs
- 58. • Photographs taken by a lens system are of central projection. This photographs fall under the category of central perspective, which is that all straight lines joining object and image points pass through a point called the perspective centre. • An aerial photograph is a central perspective picture. For understanding the geometry of an aerial photograph, it is necessary to consider a low oblique photograph. • Focal plane is the flat surface where film is held. • Focal length is the distance from the focal plane to approximately the center of the camera lens. Thin lens equation is: Geometry of Aerial Photographs
- 64. Isocenter (i) :-The point that falls on a line halfway between the ‘Principal Point’ and the ‘Nadir’. ( dotted line --- ---- in sketch). Nadir: The point vertically beneath the camera at the time the photograph was taken. That plumb line extended up to ground gives Ground Nadir Point (N) Principal plane:- Plane defined by exposure station (O), Ground nadir point (N) and ground principal point (P) ( i.e. plane NOK) Principal line : Line of intersection of principal plane with photograph plane –nk
- 66. Principal point: It is geometric center of the photograph, and the intersection of the X and Y axes. Camera axis extended up to ground, the point obtained on ground is called Ground Principal point (K)
- 67. Exposure station (o) : The point in the atmosphere occupied by center of camera lenses at instance of photography. Flying height : Vertical distance between exposure station and mean sea level. Flight line: Line traced by exposure station in atmosphere ( track of aircraft) Horizon point (h) : It is point of intersection of horizontal line through center of lenses and principal line (np) on photograph. Azimuth : (A) : Clockwise horizontal angle measured about ground nadir point from true north to the principal plane of photograph.(Ф ) Swing (S) :-Angle measured in plane of photograph from +y axis clockwise to photo nadir point.
- 68. Geometry of Low Oblique Photograph • The point of intersection of the optical axis of the camera with the photo plane and ground plane are referred to respectively as photo principal point (p) and ground principal point (P). • The point vertically below the camera lens (perspective centre) on the ground is called the ground nadir point (N) and the corresponding image point on the photo is called the photo nadir point (n). • The points that falls on a line halfway between PP and Nadir – Isocenter. The isocenter vertical with the photo plane and ground plane are referred to respectively as photo isocentre (i) and ground isocentre' (I). • The distance along the optical axis from the perspective centre to the photo plane is the focal length (f) and the, vertical distance from the ground to the perspective centre is the flying height (H)
- 70. In the vertical aerial photograph the optical axis coincides with the vertical dropped from the perspective centre. As a result, the principal point, nadir point and isocentre coincide. The relationship of the camera lens, positive print and the ground in' a vertical aerial photograph is shown in fig. Geometry of Vertical Photograph
- 71. • The geometry of a stereo pair of vertical aerial photographs having 60% overlap. • Overlap of 60% results in the appearance of the principal point of the left photo on the right photo and vice versa. • Line joining the principal point and the image of the principal point of the adjoining photo indicates the direction of flight and this distance on the photo is called the photo base (b). Corresponding distance in the air between two successive camera stations is known as air base (B). • Fixing the principal point on a photograph four index marks known as the "fiducial marks", one in each corner of the photograph or about the middle of each edge of the photograph are given. • The intersection of lines joining opposite fiducial marks define the principal point on the photograph. In some photographs the position of the principle point itself is indicated by a cross. Geometry of a stereopair of Vertical Photographs
- 74. • Image distance divided by ground distance. • vertical photograph - focal length divided by flying height i.e. f/H. • From this relation vertical photograph the scale varies with relief variations on the ground, ‘f ’ being constant. Scale in Vertical Photographs • Tilted photograph the scale is not constant even if the terrain is flat. • The scale is constant only along any particular line on the photo, parallel to the axis of tilt. Such lines are called “plate parallels”. • Perpendicular to the axis of tilt the scale varies. It can be geometrically shown that in the case of a flat terrain the scales along plate parallel passing through the principal point, the isocentre and the nadir point are as follows, where θ is the angle of tilt, ‘f ’is the focal length of the camera and 'H' is the flying height. Scale in Oblique Photographs:
- 76. Scale along the plate parallel passing through the principal point f cos θ/H Scale along the plate parallel passing through the isocentre Scale along the plate parallel passing through the nadir point f/H f/H cos θ • The above relations show that the scale in an oblique photograph of a flat terrain is the same as that of a vertical photograph (f /H). • only along the plate parallel passing through the isocentre of the oblique photograph. This plate parallel is called the "isometric parallel". • No photograph, however, exists which has covered a terrain that is ideally flat allover except in the case of large water bodies. As such, the scale variations in an oblique photograph are due to the accumulative effect of tilt and relief.
- 77. • Relief variations of the terrain cause shifting of images from their correct planimetric positions. • Due to the height ‘h’ of an object at B, its planimetric position on the photograph is displaced by a distance of a – b. It can be shown that the displacement due to relief = r.h/H, • where 'r' is the displacement measured on the photo from nadir along the base, 'h is height of the object and 'H' is flying height. Image displacement due to Relief
- 78. Image displacement due to tilt: In the case of a tilted photograph of a flat terrain the image displacement equals to for a point which is on the principal line (line through the principal point and nadir point), where, 'i a' is the distance from isocentre to the image on the photo and Ie' is the angle of tilt and If', the focal length. If the image is not on the principal line and if the line joining isocentre and image makes an angle Ø with the principal line then the tilt displacement is equal to
- 79. STEREOSCOPY • A pair of photographs taken from two camera stations covering some common area constitutes a stereo-pair which when viewed in certain manner gives the impression as if a three-dimensional of the common area is being seen. • The stereoscopic vision is the capacity of the brain to perceive the objects in three dimensions by physiologically fusing the two different views of the object by the right and the left eye.
- 80. The optical axes of the camera must be approximately in one plane though the eyes can accommodate to a limited degree. 1. The ratio of the distance between the exposure stations and the flying height or the base – height ratio (B/H) must have an appropriate value. If this value is < 0.2 the depth perception is no stronger than if only one photograph is used. The ideal value, though not exactly known is about 0.25. 2. The scale of the two photographs should be approximately the same. Differences upto 15% may be successfully fused. For continuous observations, however, differences > 5% may be disadvantageous. 3. Each photograph of the pair should be viewed with one eye only. 4. The brightness of the photographs should be similar. 5. While viewing the photographs should be given the same relative position as they had during the time of exposure. Conditions
- 81. Pseudoscopy For normal vision the left eye should see only the left-hand photo and the right eye should see the right-hand photo. If this condition is reversed the depressions appear as elevations and the elevations as depressions. Such a condition is known as pseudoscopy. Distortions in a stereo model The natural relief in a stereo model is obtained only when the base height ratio is maintained at the ideal value of 0.25. The base height ratio used in aerial photography vary from 1:3 to 1:1 or even 1:0.6. The stereoscopic image obtained from photographs is, always different and distorted.
- 82. 1. As the eye base changes from the photograph stations but the view remains similar in all other respects. 2. As the photographs are observed at a distance which is not equal to the principal distance (for easy understanding this term may be taken as synonym of focal length though it is not exactly so). 3. The magnification, and more importantly the ratio between X, Y scale against the Z (height) scale changes. We get a flattened model, if this distance is smaller than the principal distance and exaggerated if it is greater than the principal distance. 4. Deformation in the model is produced because the eyes are moved away from the vertical through the principal points. 5. Shape of the object, shadows and association of other features influence the depth perception. Factors which influence the stereo model
- 83. Stereoscopic Parallax in a Stereopair of Photographs Stereopair of aerial photographs the shift in the camera position between two successive exposures causes apparent displacement in the position of an object, This is called parallax. Calculation of Heights using Parallax Difference The parallax difference due to an elevation difference of Δh above a reference plane is diagrammatically represented in fig. It can be shown geometrically that the elevation Δh above the reference plane is given by the formula: It must be kept in mind that the formula gives correct result when the photographs are truly vertical
- 84. Δh = Height of the object AR PR = Parallax of point R PA = Parallax of point A ZR = Flying height above the reference plane Δ P = Difference in parallax due to relief (PR – PA )
- 85. • It is an instrument designed for use with a mirror stereoscope that has a stereo base of ten inches or less. • It measures the relative position of identical points in both photographs, that is their parallax difference. • The parallax difference can then be used to compare the relative heights. • Parallax Bar consists of two glasses engraved with measuring marks (dots) connected by a bar whose length can be changed by a micrometer screw. • When seen through the stereoscope, the dots are fused stereoscopically and appear as a single dot having a fixed position in space. • By proper adjustment it can be placed on any feature on the stereo- model surface and reading obtained from the micrometer drum. Measurement of Parallax difference with Parallax Bar
- 86. • The micrometers are numbered increasingly as distance between corresponding points is decreasing. This means the point with a larger parallax gives a higher reading corresponding with a point of higher elevation. • Deducting this value from the value obtained of a point on the reference plane we get a minus value of ‘Δ p’ for points above the reference plane and plus value for points below the reference plane for substitution in the above formula.
- 87. It is the ratio between the height of an object as seen in the stereo-model and the actual height of the object, relative to the horizontal dimensions. The factors that influence the stereoscopic exaggeration are: Air base (B) Focal length (f) Flying height (H) – Photo Variables Viewing distance (d) Separation of photographs (s) Eye base (E) – Viewing Variables It can be shown that the relationship of these variable with the stereoscopic exaggeration is : Stereoscopic Exaggeration
- 88. Where, ‘f’ is the focal length and 'PR' is the parallax of the bottom point of the slope and ‘d’ is the horizontal distance of the slope on photo scale. PR is photobase of the photo. Estimation of slope and dip The slopes and dips we observe in a stereomodel vary from the true slopes and dips. The true slopes and dips are estimated from the photographs by measuring the parallax difference Δp between the top and bottom points of a given slope with a parallax bar and substituting it in the formula: