
Recommended
More Related Content
Similar to How to Polish Brass..
Similar to How to Polish Brass.. (20)
More from pranjal joshi
More from pranjal joshi (20)
Recently uploaded
Recently uploaded (20)
How to Polish Brass..
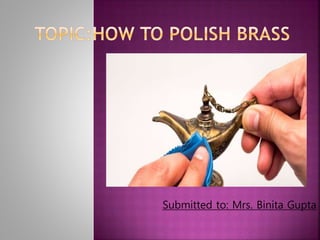
- 1. Submitted to: Mrs. Binita Gupta
- 2. 1.Choose the right polish. Many commercial metal polishes can be too abrasive for some brass items. As a general rule, look for a polish specifically labelled to work for brass. One labelled for use on the particular brass item you intend to polish is an even better choice. Also avoid products containing ammonia since ammonia can dissolve the copper component of brass.
- 3. 2.Apply the polish to a dry cloth. Squeeze a dollop of the brass polish onto a soft cloth. A little can go a long way, so you do not need to use much. Use a soft cotton or terrycloth rag for best results. It is recommended that you apply the polish to the cloth instead of applying it directly to the surface of the brass
- 4. 3.Buff the brass. Wipe the brass down with the polish-coated cloth, applying even pressure in small, circular motions. Cover the entire surface in this manner. Follow the label instructions on the polish when applying it, even if they differ from those described here. And using a polish improperly can result in damage to your brass.
- 5. 4.Rinse and dry to remove residual polish. For some polishes, you may need to wipe the polish off with a damp cloth before buffing gently with a clean, dry cloth.Some polishes do not need to be rinsed off. Even for these polishes, though, you should still buff the surface with a dry cloth.
- 6. 1.Combine distilled white vinegar and flour. Mix 2/3 cup (160 ml) of distilled white vinegar with 2/3 cup (160 ml) flour. Stir the ingredients together in a plastic or glass bowl until smooth and thoroughly combined.Never use a metal dish to combine the ingredients. If possible, you should also use a plastic or wooden utensil to mix the ingredients over a metal one. Vinegar is acidic, and this acidic quality can dissolve debris responsible for tarnishing and dulling brass. The flour makes the polish slightly more abrasive, but the main benefit of flour is that it thickens the vinegar and creates a paste.
- 7. 2.Add a little salt. Mix 1/2 cup (125 ml) salt into the paste until well combined. The salt adds an abrasive component to the paste. It works, both chemically and physically, to make the paste more effective. Note that this paste will not store well, so you should only make as much as you need at the present moment.
- 8. 3.Arrange your brass items on a platter. You'll need to let the polish paste sit on the brass for a prolonged period of time, so you should arrange the brass items in need of polishing on a plastic or glass platter and in a single layer.If you decide to use a metal baking sheet, line it with a layer of parchment paper or wax paper first to avoid letting the brass and the paste come into direct contact with the metal sheet.
- 9. 4.Apply the paste and let it sit. Use a spoon or your fingers to apply the paste in a thick, even coat onto all sides of the brass surface. Allow the paste to sit on the brass for at least 1 to 2 hours, if not longer.For severely tarnished or dulled brass, you can even leave the paste on overnight. As the vinegar paste does its thing, you should see it take on a green tint. This green tint is a natural result produced by the chemical action taking place, and it means that the tarnish and surface debris being dissolved and removed.
- 10. 5.Wash off the dried paste. When the brass is ready, gently scrub the paste off with a soft cloth and lukewarm running water. Gently buff the surface of the brass using small circular motions as you rinse.Use a soft cotton or terrycloth rag for best results. Scrub the surface of the brass thoroughly to make sure that all the paste has been removed. Depending on how thick your paste ended up being, it could take a bit of scraping with your thumbnail to chip it away.
- 11. 6.Buff with a dry cloth. To dry the brass and give it a final boost of shine, buff it with a soft, dry cloth using small circular passes until you cover the entire surface.
- 12. 1.Combine acidic lemon juice with a mild abrasive. The most common abrasives including baking soda and cream of tartar. Alternatively, you could also use half of a lemon and a little salt. Combine 1 to 2 Tbsp (15 to 30 ml) of lemon juice with 1 to 2 tsp (5 to 10 ml) of baking soda. The mixture should fizz at first, but gradually calm down once you stir it together.
- 13. 2.Apply the lemon juice to the brass. Use a soft cloth or your fingers to wipe the lemon paste onto the surface of the brass, coating it completely. Rub the paste on in a single direction for best results. Use a soft cotton or terrycloth rag for best results. A lemon-and-baking-soda paste only needs to sit for a few minutes, but a lemon-and- cream-of-tartar paste should sit on the brass for about 30 minutes.
- 14. 3.Rinse off the residue. Place the brass under lukewarm running water and gently wipe the residue away with your fingers.If parts of the brass still seem dull, you can reapply the lemon solution of choice to that area for additional shine. 4.Dry and buff with a soft cloth. Wipe the brass dry with a soft, clean towel. Apply even pressure in small, circular passes to give the brass an extra buffing.