SlideShare a Scribd company logo
1 of 8
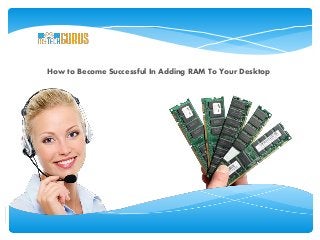
How to Become Successful In Adding RAM To Your Desktop
Steps to Add RAM To Your Computer
Turn off the PC and unplug the system from the power supply. Detach all the cables and move the computer to an
appropriate location.
Take out the side cover from your system. Different computers have different attachment. Some are attached via clips or
screws. Look at the manual in order to check how the cover comes off.
Touch the metal of the computer case or put on a ground strap which would keep you away from any kind of static. You
do this to save your computer components from any static shock.
Find out the RAM slots. If you find wires blocking the way, see if you can move them without detaching them. If in case
you need to unhook any of them, ensure you attach them appropriately once you put in the new memory.
Open the RAM which you purchased. Always remember that you should hold the RAM by the edges and not by the
surfaces or pins.
If you are replacing the old with the new one, look at the RAM slots in your desktop. You can notice little tabs on the
sides of the memory. Push the sides down allowing the memory to pop up and come loose. Take out the old RAM from
the machine and insert the new memory in the place where the previous one was. Push down on every side and notice
that the tabs rise up. Get it in place with the tabs clicked and you can see that the tabs are in the small groove holes of
the sides of the memory.
In case you are adding memory, find out a free slot. Take out the new RAM and put it into the free slot. Push down on
every side allowing the tabs to rise up. Get it in place with the tabs clicked and you can see that the tabs are in the small
groove of the sides of the memory.
Once you have placed the memory in its correct position, connect the cables that you have detached.
Take of the grounding strap and place the cover back on to the computer.
Connect all the cables and plug it back in. If you were successful in adding the memory, your computer should be able
to boot up normally. In order to see if the installation process you followed was correct, go to Start menu, click settings,
next click Control Panel. Then hit System and choose the General tab. You would be able to see the amount of RAM at
the very bottom of the page.
Thank YouContact :
888 258 8478
Follow us :
http://www.mytechgurus.com/
support@mytechgurus.com

More Related Content

Viewers also liked (6)

Internal components of the computer
Internal components of the computerInternal components of the computer
Internal components of the computer
 
Motherboard and its components
Motherboard and its componentsMotherboard and its components
Motherboard and its components
 
Introduction to Motherboard
Introduction to Motherboard Introduction to Motherboard
Introduction to Motherboard
 
Motherboard presentation it
Motherboard presentation itMotherboard presentation it
Motherboard presentation it
 
Motherboard Components
Motherboard ComponentsMotherboard Components
Motherboard Components
 
Computer Basics 101 Slide Show Presentation
Computer Basics 101 Slide Show PresentationComputer Basics 101 Slide Show Presentation
Computer Basics 101 Slide Show Presentation
 

Recently uploaded

Cloud Frontiers: A Deep Dive into Serverless Spatial Data and FME
Cloud Frontiers:  A Deep Dive into Serverless Spatial Data and FMECloud Frontiers:  A Deep Dive into Serverless Spatial Data and FME
Cloud Frontiers: A Deep Dive into Serverless Spatial Data and FME
Safe Software
 
Why Teams call analytics are critical to your entire business
Why Teams call analytics are critical to your entire businessWhy Teams call analytics are critical to your entire business
Why Teams call analytics are critical to your entire business
panagenda
 
Finding Java's Hidden Performance Traps @ DevoxxUK 2024
Finding Java's Hidden Performance Traps @ DevoxxUK 2024Finding Java's Hidden Performance Traps @ DevoxxUK 2024
Finding Java's Hidden Performance Traps @ DevoxxUK 2024
Victor Rentea
 

Recently uploaded (20)

Spring Boot vs Quarkus the ultimate battle - DevoxxUK
Spring Boot vs Quarkus the ultimate battle - DevoxxUKSpring Boot vs Quarkus the ultimate battle - DevoxxUK
Spring Boot vs Quarkus the ultimate battle - DevoxxUK
 
Strategize a Smooth Tenant-to-tenant Migration and Copilot Takeoff
Strategize a Smooth Tenant-to-tenant Migration and Copilot TakeoffStrategize a Smooth Tenant-to-tenant Migration and Copilot Takeoff
Strategize a Smooth Tenant-to-tenant Migration and Copilot Takeoff
 
Apidays New York 2024 - The Good, the Bad and the Governed by David O'Neill, ...
Apidays New York 2024 - The Good, the Bad and the Governed by David O'Neill, ...Apidays New York 2024 - The Good, the Bad and the Governed by David O'Neill, ...
Apidays New York 2024 - The Good, the Bad and the Governed by David O'Neill, ...
 
DBX First Quarter 2024 Investor Presentation
DBX First Quarter 2024 Investor PresentationDBX First Quarter 2024 Investor Presentation
DBX First Quarter 2024 Investor Presentation
 
Cloud Frontiers: A Deep Dive into Serverless Spatial Data and FME
Cloud Frontiers:  A Deep Dive into Serverless Spatial Data and FMECloud Frontiers:  A Deep Dive into Serverless Spatial Data and FME
Cloud Frontiers: A Deep Dive into Serverless Spatial Data and FME
 
EMPOWERMENT TECHNOLOGY GRADE 11 QUARTER 2 REVIEWER
EMPOWERMENT TECHNOLOGY GRADE 11 QUARTER 2 REVIEWEREMPOWERMENT TECHNOLOGY GRADE 11 QUARTER 2 REVIEWER
EMPOWERMENT TECHNOLOGY GRADE 11 QUARTER 2 REVIEWER
 
Why Teams call analytics are critical to your entire business
Why Teams call analytics are critical to your entire businessWhy Teams call analytics are critical to your entire business
Why Teams call analytics are critical to your entire business
 
AI in Action: Real World Use Cases by Anitaraj
AI in Action: Real World Use Cases by AnitarajAI in Action: Real World Use Cases by Anitaraj
AI in Action: Real World Use Cases by Anitaraj
 
presentation ICT roal in 21st century education
presentation ICT roal in 21st century educationpresentation ICT roal in 21st century education
presentation ICT roal in 21st century education
 
Apidays New York 2024 - The value of a flexible API Management solution for O...
Apidays New York 2024 - The value of a flexible API Management solution for O...Apidays New York 2024 - The value of a flexible API Management solution for O...
Apidays New York 2024 - The value of a flexible API Management solution for O...
 
Apidays New York 2024 - Scaling API-first by Ian Reasor and Radu Cotescu, Adobe
Apidays New York 2024 - Scaling API-first by Ian Reasor and Radu Cotescu, AdobeApidays New York 2024 - Scaling API-first by Ian Reasor and Radu Cotescu, Adobe
Apidays New York 2024 - Scaling API-first by Ian Reasor and Radu Cotescu, Adobe
 
Finding Java's Hidden Performance Traps @ DevoxxUK 2024
Finding Java's Hidden Performance Traps @ DevoxxUK 2024Finding Java's Hidden Performance Traps @ DevoxxUK 2024
Finding Java's Hidden Performance Traps @ DevoxxUK 2024
 
Polkadot JAM Slides - Token2049 - By Dr. Gavin Wood
Polkadot JAM Slides - Token2049 - By Dr. Gavin WoodPolkadot JAM Slides - Token2049 - By Dr. Gavin Wood
Polkadot JAM Slides - Token2049 - By Dr. Gavin Wood
 
CNIC Information System with Pakdata Cf In Pakistan
CNIC Information System with Pakdata Cf In PakistanCNIC Information System with Pakdata Cf In Pakistan
CNIC Information System with Pakdata Cf In Pakistan
 
AWS Community Day CPH - Three problems of Terraform
AWS Community Day CPH - Three problems of TerraformAWS Community Day CPH - Three problems of Terraform
AWS Community Day CPH - Three problems of Terraform
 
Apidays New York 2024 - Accelerating FinTech Innovation by Vasa Krishnan, Fin...
Apidays New York 2024 - Accelerating FinTech Innovation by Vasa Krishnan, Fin...Apidays New York 2024 - Accelerating FinTech Innovation by Vasa Krishnan, Fin...
Apidays New York 2024 - Accelerating FinTech Innovation by Vasa Krishnan, Fin...
 
Rising Above_ Dubai Floods and the Fortitude of Dubai International Airport.pdf
Rising Above_ Dubai Floods and the Fortitude of Dubai International Airport.pdfRising Above_ Dubai Floods and the Fortitude of Dubai International Airport.pdf
Rising Above_ Dubai Floods and the Fortitude of Dubai International Airport.pdf
 
Platformless Horizons for Digital Adaptability
Platformless Horizons for Digital AdaptabilityPlatformless Horizons for Digital Adaptability
Platformless Horizons for Digital Adaptability
 
Corporate and higher education May webinar.pptx
Corporate and higher education May webinar.pptxCorporate and higher education May webinar.pptx
Corporate and higher education May webinar.pptx
 
WSO2's API Vision: Unifying Control, Empowering Developers
WSO2's API Vision: Unifying Control, Empowering DevelopersWSO2's API Vision: Unifying Control, Empowering Developers
WSO2's API Vision: Unifying Control, Empowering Developers
 

How to Add RAM to your Desktop

  • 1. How to Become Successful In Adding RAM To Your Desktop
  • 2. Steps to Add RAM To Your Computer Turn off the PC and unplug the system from the power supply. Detach all the cables and move the computer to an appropriate location.
  • 3. Take out the side cover from your system. Different computers have different attachment. Some are attached via clips or screws. Look at the manual in order to check how the cover comes off.
  • 4. Touch the metal of the computer case or put on a ground strap which would keep you away from any kind of static. You do this to save your computer components from any static shock. Find out the RAM slots. If you find wires blocking the way, see if you can move them without detaching them. If in case you need to unhook any of them, ensure you attach them appropriately once you put in the new memory.
  • 5. Open the RAM which you purchased. Always remember that you should hold the RAM by the edges and not by the surfaces or pins.
  • 6. If you are replacing the old with the new one, look at the RAM slots in your desktop. You can notice little tabs on the sides of the memory. Push the sides down allowing the memory to pop up and come loose. Take out the old RAM from the machine and insert the new memory in the place where the previous one was. Push down on every side and notice that the tabs rise up. Get it in place with the tabs clicked and you can see that the tabs are in the small groove holes of the sides of the memory. In case you are adding memory, find out a free slot. Take out the new RAM and put it into the free slot. Push down on every side allowing the tabs to rise up. Get it in place with the tabs clicked and you can see that the tabs are in the small groove of the sides of the memory.
  • 7. Once you have placed the memory in its correct position, connect the cables that you have detached. Take of the grounding strap and place the cover back on to the computer. Connect all the cables and plug it back in. If you were successful in adding the memory, your computer should be able to boot up normally. In order to see if the installation process you followed was correct, go to Start menu, click settings, next click Control Panel. Then hit System and choose the General tab. You would be able to see the amount of RAM at the very bottom of the page.
  • 8. Thank YouContact : 888 258 8478 Follow us : http://www.mytechgurus.com/ support@mytechgurus.com