
Recommended
More Related Content
What's hot
What's hot (18)
Similar to Equivalents project summary
Similar to Equivalents project summary (20)
Recently uploaded
Recently uploaded (20)
Equivalents project summary
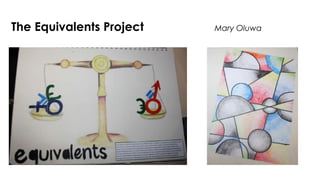
- 1. The Equivalents Project Mary Oluwa
- 2. 2 Use of primary and secondary sources To create this 3D model, I had to use various techniques and materials and also had to have awareness of the safety involved in the workshop. To make my model I used MDF material, which is somewhat similar to wood. I also used metal wiring, and some string. These three elements are what put my model together. I developed my model by taking away the stand to improve aesthetics and adding extra bits of metal to add an abstract look to it. I think I improved my model by doing this because now I prefer the look of it.
- 3. 3 Combination of formal elements in my work This piece was semi-3D and we were told to find things that we could include in our pieces that would help replicate certain textures and patterns that we saw in the set up and our observational drawings. I tried to use all the items that I collected within the piece, even if it didn’t necessarily fit with the art work (for example the leaves)
- 4. 4 Cubism I took a lot of inspiration throughout my project from different artists in order to explore different techniques that I may not have been familiar with previously. I enjoyed doing my Cubism art piece because it was a type of art that I didn’t know much about and therefore I learnt a lot about the materials they use and the formal elements used to create the pieces. I explored colour, shading and line to recreate one of Juan Gris’ famous pieces.
- 5. 5 Using a range of techniques I created this 3D model out of a few different materials. I had to do different things in order to recreate my drawing which is what I looked at whilst building the model. I created the umbrella by using stirring sticks and a translucent material similar to tracing paper. To create the links I used cardboard and had to relink them and stick it together to make it look like that.
- 6. 6 Safely creating and developing work To ensure that we were capable of using all the equipment in the workshop correctly and safely, we had to undergo an induction, which included a technician giving us a tutorial and telling us the safety rules for each piece of equipment before then having a go ourselves. After doing this, we had to create a production diary which guides you through the creation of the model we made in the workshop. After completing my production diary and evaluating my final product, I came to the conclusion that there were still things that I could improve to make it look better and not so plain. So I made adjustments but this isn’t included in my production diary because the changes were made afterwards.
- 7. Evaluation Summary Assessment criteria: evaluation of your work is vital to your development as an artist/designer –it is important to question your approach, what have you learnt, how have you developed an idea and what you would do differently in future to improve. Evaluation of the use visual language in your work and how it was informed by looking at others’ approach (Unit 1) Analyse and evaluate the creative potential and limitations of your use of materials, techniques and technology (Unit 2) Evaluation: this includes on-going annotation in sketchbook and final project evaluation. Write bullet points and support with examples of your work See link on the art & design website Project Evaluation Sheet