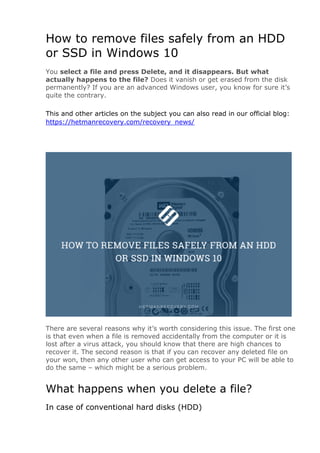
How to remove files safely from an HDD or SSD in Windows 10
•
1 like•77 views

You select a file and press Delete, and it disappears. But what actually happens to the file? Does it vanish or get erased from the disk permanently? If you are an advanced Windows user, you know for sure it’s quite the contrary.

Recommended
More Related Content
What's hot
What's hot (20)
Similar to How to remove files safely from an HDD or SSD in Windows 10
Similar to How to remove files safely from an HDD or SSD in Windows 10 (20)
Recently uploaded
Recently uploaded (20)
How to remove files safely from an HDD or SSD in Windows 10
- 1. How to remove files safely from an HDD or SSD in Windows 10 You select a file and press Delete, and it disappears. But what actually happens to the file? Does it vanish or get erased from the disk permanently? If you are an advanced Windows user, you know for sure it’s quite the contrary. This and other articles on the subject you can also read in our official blog: https://hetmanrecovery.com/recovery_news/ There are several reasons why it’s worth considering this issue. The first one is that even when a file is removed accidentally from the computer or it is lost after a virus attack, you should know that there are high chances to recover it. The second reason is that if you can recover any deleted file on your won, then any other user who can get access to your PC will be able to do the same – which might be a serious problem. What happens when you delete a file? In case of conventional hard disks (HDD)
- 2. When a file is deleted, it is sent to the Recycle Bin, that is, when you press the button Delete on your keyboard, the file is just marked as deleted and the shortcut to such file appears in the Recycle Bin directory. By default, the Recycle Bin is enabled when you install any version of Windows, and it is enabled for every local disk connected to your PC. To disable the Recycle Bin, right-click on its desktop shortcut and select Properties. Choose each disk on the list and check the option Don’t move files to the Recycle Bin. Remove files immediately when deleted, then click Apply. Recycle Bin is a very useful integrated feature in Windows. It allows you to restore deleted files and folders if you removed them by accident or if you need them some time after deleting. But what happens when you empty the Recycle Bin, that is, delete files permanently? In fact, nothing happens – nothing at all! The files are neither deleted from the disk nor moved elsewhere. The only thing that happens is updating a certain file in the operating system which says that the disk space allocated for the deleted files is now marked as free and any information can be written there – and overwrite the old data.
- 3. This file used by conventional hard disks is known as Master File Table (MFT), and looks like this. The first column on the left displays blocks of addresses. The middle column shows data in the hexadecimal code (also known as HEX). The column on the right presents the way this data looks as simple text. Therefore, the deleted file will be stored in the hard disk until the operating system overwrites this area with new data. The time required for this to happen can be quite long – up to a few months, but basically, it depends on
- 4. the total size of your hard disk, on how you use your computer, and on what kind of local disk the old data is stored in. Data in the system disk (by default, it’s С:) can be overwritten very soon, even within several minutes, As Windows writes new temporary data to disk all the time: system cache, program cache, web cache and so on. Let’s illustrate it with the example: we’ll use an app called NTFSWalker to scan any NTFS partition on a hard disk. The left column displays the list of files the app could find on the disk. The red letter X marks the MFT addresses which have been overwritten completely or partially, and the lines without such letter represent the addresses that have not been overwritten yet. In the right column, you can see additional information, including what specific data is written at this address. Now the problem of deleting files in an ordinary way becomes more obvious. In case of solid-state drives (SSD) Things are a bit different for SSDs. As solid-state drives are different from conventional HDDS in terms of technology, SSDs always write and move written data according to a special scheme so all physical memory of the storage device is used uniformly and proportionally. This standard feature allows to extend the SSD lifespan considerably by suggesting rational use of the read/write cycles – the guaranteed number of which is limited. This way,
- 5. all memory blocks will be worn out evenly, and the risk of separate blocks to get out of order is reduced. Therefore, if you delete a file with the address 2871 (for example), the deleted data may be relocated to another area on the disk sooner or later, until the SSD’s electronic brain decides to overwrite it. So how can you overwrite the unnecessary files for sure? In fact, it’s next to impossible to erase a specific file completely on an SSD. A group of engineers at the University of California, San Diego studied this topic and witnessed first- hand that completely erasing data from an SSD is very difficult. In an attempt to erase one file reliably, the disk actually retained from 4% to 75% of the file’s internal data. So my advice is to make sure you have encrypted your SSD and find out if your disk supports the TRIM feature. Actually, this problem is not too relevant for most users, but at the same time, you might be worried that hackers may get their hand on the data deleted from your disk. It’s quite possible you deal with secret or sensitive data, documents containing trade secrets, or just store your personal banking data openly. So how could you remove this information reliably so that it doesn’t fall into the wrong hands? Is that safe? Before learning how to safely erase data from an SSD, let’s find out what exactly it means to you. That is, if you are satisfied with the current level of
- 6. safety, it is going to be safe. If the data you don’t want to be restored is not of vital importance and can’t be used against you, then delete it in the standard way and don’t worry. Yet if you remove some banking data, work documents or data required for online authentication, it’s preferable to remove such files in a way that makes their recovery without your knowledge impossible. Now let’s have a closer look at some methods of safe – and not too safe – file removal in Windows. Until we have reached the part for full removal / full erase of the entire disk space, these methods only apply to conventional HDDs. The most dangerous method The easiest and most dangerous method of removing files is to select a specific file or files and press Delete on the keyboard. It will send the file to the Recycle Bin, right-click on the Recycle Bin shortcut, and select Empty Recycle Bin from the context menu. As I said before, the disk area occupied by this file will be marked as empty and ready for new data, but the actual contents of the file are still there on the disk and it can be restored easily. With this method, you can get rid of all types of files that are of no value to you: system cache, browser cache, unnecessary apps and updates, temporary files and so on. For example, you want to delete several photos. Go to the corresponding directory, select the files and remove them.
- 7. Then download from the official website hetmanrecovery.com a free trial version of the easiest data recovery program, Hetman Uneraser. Install it and scan the required disk – in my case, that is disk D:. In the window that opens, browse for the folder – in my case, its name is Test. Here you are! You can see the list of deleted photos, and click on each one for preview. The only thing left to do is to select the files and click Recovery, then save them to a different storage device.
- 8. Somewhat dangerous method (for conventional HDDs only) As I said earlier in this article, physically overwriting data with some other information is quite a good method of truly removing old files. This can be done with specialized software that will reliably overwrite the disk space occupied by a file with some random data. When trying to use a data recovery tool, hackers will be able to view the file name but its contents will be lost forever. This way, you can remove both separate files and entire directories. Such utilities may look very different, but they employ the same procedure – delete the old file and overwrite its location with zeroes or random values. Software tools of this kind can guarantee a higher degree of safety if compared with the standard removal scheme. The only problem is you have to always use such tools when removing important files. Yet too often, users forget about it and remove important information in an ordinary way.
- 9. For example, I moved several photos to a folder named Test2 and now I’d like to remove them permanently. I need to download a specialized program, for example, Mareew Free Erazer. Install and launch it, find the required directory on the left and select the file to remove. Click Delete File.
- 10. Now use a data recovery tool to check if the file contents have been removed. As you can see, the tool shows the file name and that the file was deleted. When selecting it for preview, all you can see is a JPG-type icon, and the actual photo is not shown.
- 11. Erase free disk space (for conventional HDDs only) The more acceptable and quicker way to erase the files completely after you deleted them with the Recycle Bin is to use ready-made software solution like CCleaner. This PC optimization tool is based on the all-in-one principle. With CCleaner, you can remove temporary and Internet files from the system disk, clean the system cache and program cache, clean the Windows registry, uninstall unneeded programs, and update the ones you’d like to keep. This app is one of the world’s best popular utilities – over 2.5 billion installations! CCleaner features a very useful function – erasing the free disk space physically (Wipe Free Space) which we will focus on. Visit the website www.ccleaner.com and download the free version, then install it to the system disk. Right-click on the desktop shortcut and choose Properties. Switch to the Compatibility tab and check the box Run this program as an administrator. This step is important to enable CCleaner to access all Windows directories, including system folders.
- 12. Click Apply and ОК. Launch the program, click Tools on the left and choose Drive Wiper. When the new tab opens, find Wipe and select Free Space Only, which means you are going to erase deleted information in all of the free disk space. In the field Security select Simple Overwrite (1 pass), which means the program will make one pass to erase the data. In this filed, you can select up to 35 passes to erase the information entirely, but for me, it seems too much. Select the local disk to work on or a group of disks, check the boxes and click Wipe, and all disk space marked as free will be overwritten with zeroes.
- 13. This method is more convenient as it erases all deleted files and folders at once so you don’t need to hunt each one down. The downside, though, is that erasing takes much longer and has to be run regularly – and do you know many users who would clean the disk space every day? Now let’s test how good this method is when we use Hetman Uneraser after that. For example, I created a folder named Test3 on disk D:, copied several important photos there, then deleted them and wiped free disk space with CCleaner.
- 14. Now let’s start Hetman Uneraser, run a quick scan on disk D: and switch to directory with the name Test3. As a result, the program can’t find any of the deleted files. It is fair to say, though, that wiping free disk space took over 50 minutes. The time required for this operation depends largely on the capacity of the local disk and on how actively it is used. The safest methods (for both HDD and SSD) The safest solutions to such problem are based on the principle of removing all contents from storage devices. However, you can’t apply the same method to all drive types, as SSDs differ from HDDs in terms of their design and technology. Below, I will list several options, and you can choose the one that fits your disk type. These methods will be useful when you decide to sell your old PC or send it to a scrap yard. To make sure nobody can recover data from your disks, it should be removed. Also, when you buy a new PC or reinstall the operating system, you should create local disks anew. These methods will also be useful if there are disk errors: if that’s the case, you will have to remove all partitions, remap the disk again and format the entire disk space.
- 15. Disk formatting To format a disk means to remove all of its data together with any viruses, unwanted programs and errors. There are two types of formatting: quick and full (low-level). Quick format wipes only the so-called MFT (MBR) area, but the actual FAT structure of the disk remains intact, while Windows sees such disk as absolutely empty. Restoring data after formatting is too difficult a task for Hetman Uneraser; it takes a more powerful tool capable of low-level data reading, such as Hetman Partition Recovery. You can download it from the official website hetmanrecovery.com. Let’s suppose you want to format a local disk. To do it, go to This PC, right- click on the necessary disk icon and select Format. In the window that appears, make sure that the proper file system is selected and the box is checked for Quick format, then click Start. In a few minutes (the actual time depends on the disk size), formatting operations will be over and the disk will become empty.
- 16. Let’s check the result with Hetman Partition Recovery. To begin with, download the program, install and launch it: the wizard starts automatic scan for all connected storage devices. Double-click on the local or physical disk to start the File Recovery Wizard. In the first stage, choose Full analysis and click Next. It will start the search for all information available on the disk.
- 17. I’d like to note that full low-level scan may take quite a long time depending on the disk capacity and disk errors, both logical and physical. After the scan, the program will display all files and folders it was able to find, with the folder structure retained. After that, just select the files you need, preview them and click Recovery.
- 18. As can be seen from the screenshot, recovering data after a quick format takes no effort for Hetman Partition Recovery. The second scenario involves full (low-level) formatting. In fact, this is the real formatting able to destroy all information on the disk, rebuild the FAT structure and overwrite all data with zeroes. Yet beginning with Windows 8, you can’t run full format with tools integrated into the operating system. To do it, you will have to use third-party apps which are aplenty on the Internet, both free and commercial, for example, Darik Boot and Nuke. Special utilities to format SSDs Most SSD manufacturers develop their own utilities to manage and safely remove data from their disks. Usually, these utilities can be downloaded for free in the Support section of a website.
- 19. For example, Kingston SSD Manager – a utility from the disk manufacturer that provides full control and monitoring of all settings in SSDs by Kingston. It helps users follow all kinds of disk issues, monitor the health values, see full model name and serial number, update the disk firmware automatically, and run safe removal of its data. The Security tab contains a feature for safe removal or erasing of all disk data, but it is only active when the SSD is not used as a system drive.
- 20. The toughest way to remove (for both HDD and SSD drives) At the moment, there is a method developed to destroy the most important data. Actually, it is the most aggressive way to treat data, as it leaves no pieces of information behind. It is based on melting the physical storage device, and there is a special NIST standard developed for this particular method. Specially licensed machines are designed to heat the disks to utmost temperatures, which turns them into pieces of scrap metal, and obviously very sensitive information (like secrets of state) does require such ironclad-guarantee methods. This and other articles on the subject you can also read in our official blog: https://hetmanrecovery.com/recovery_news/