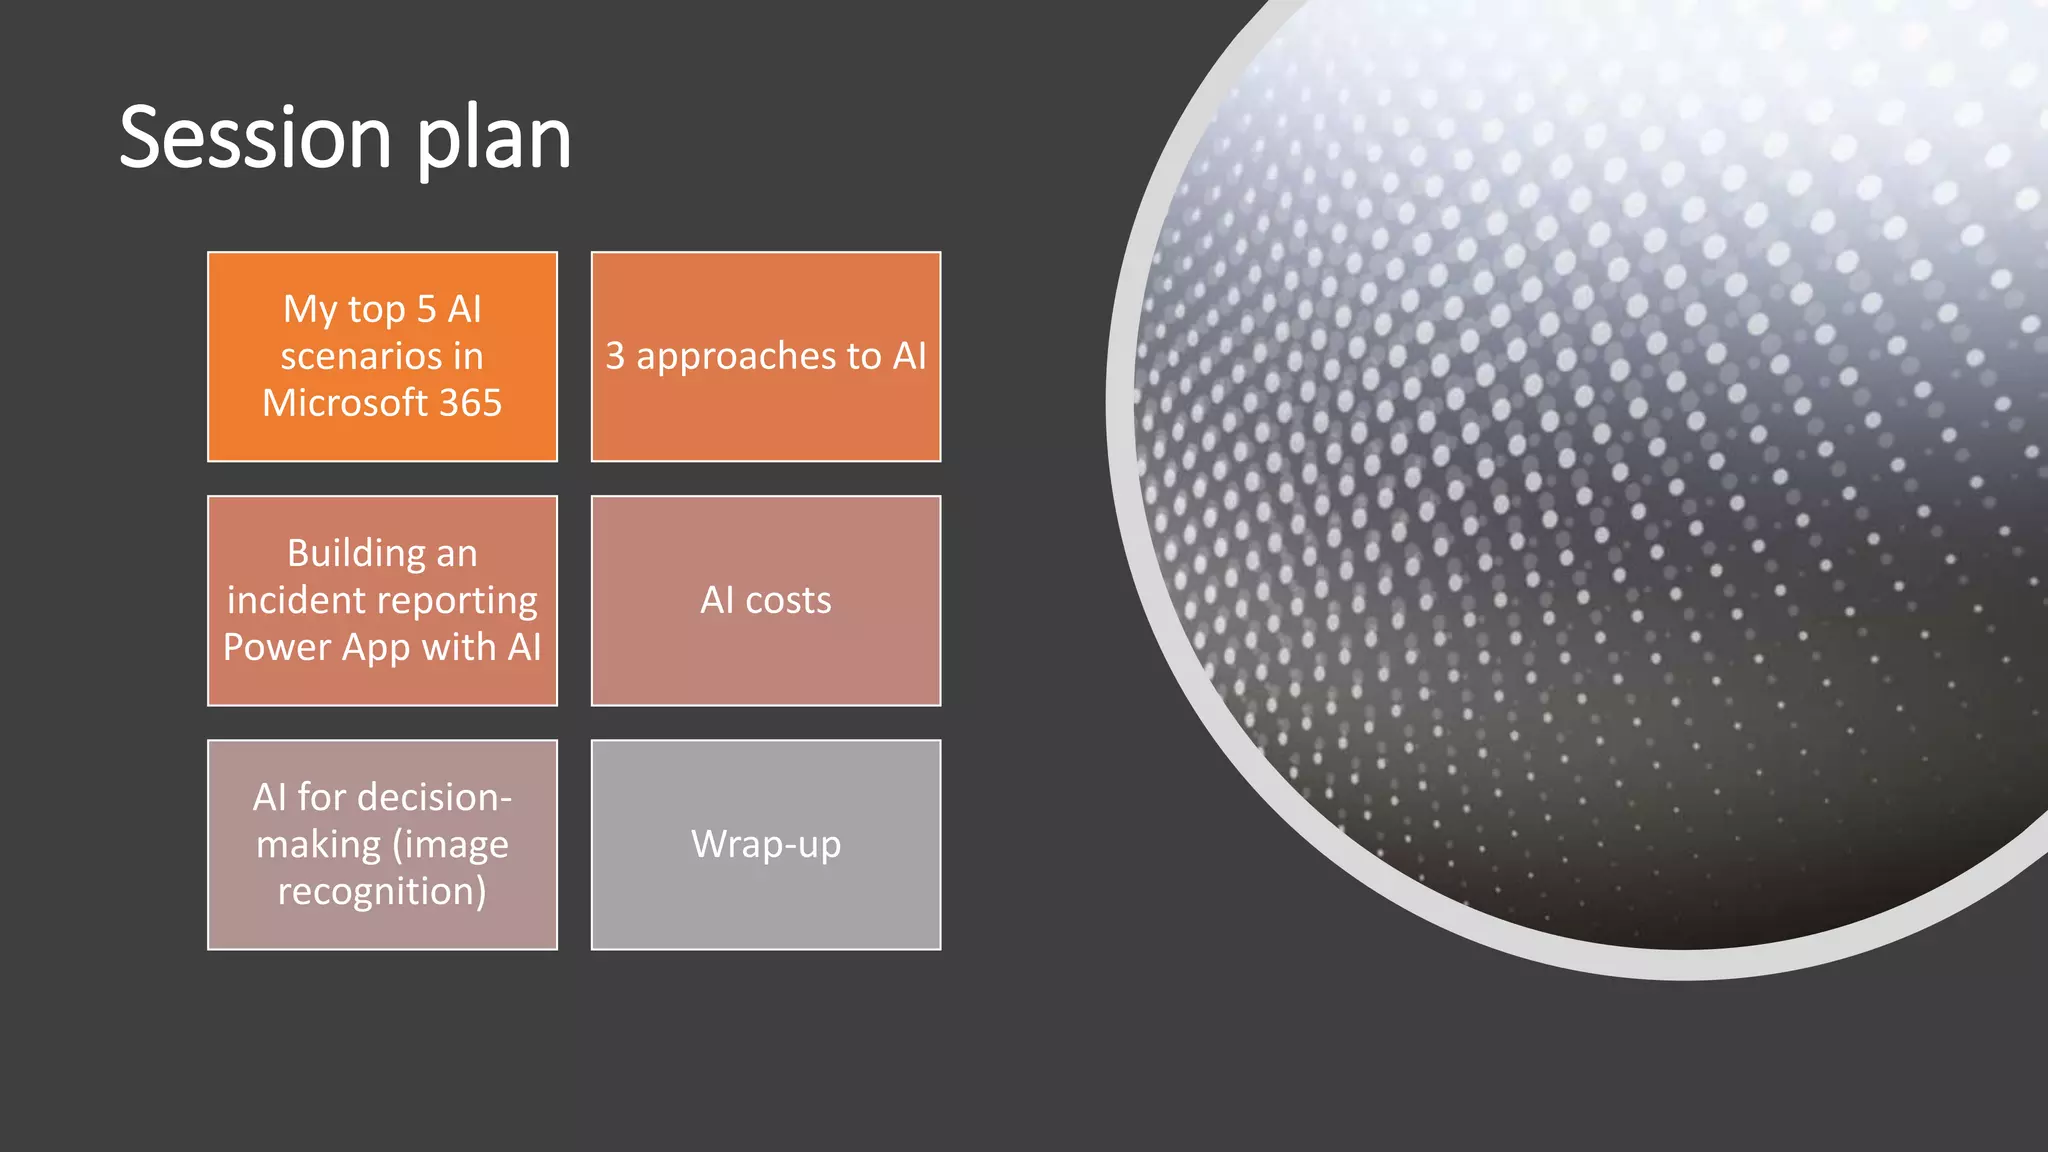
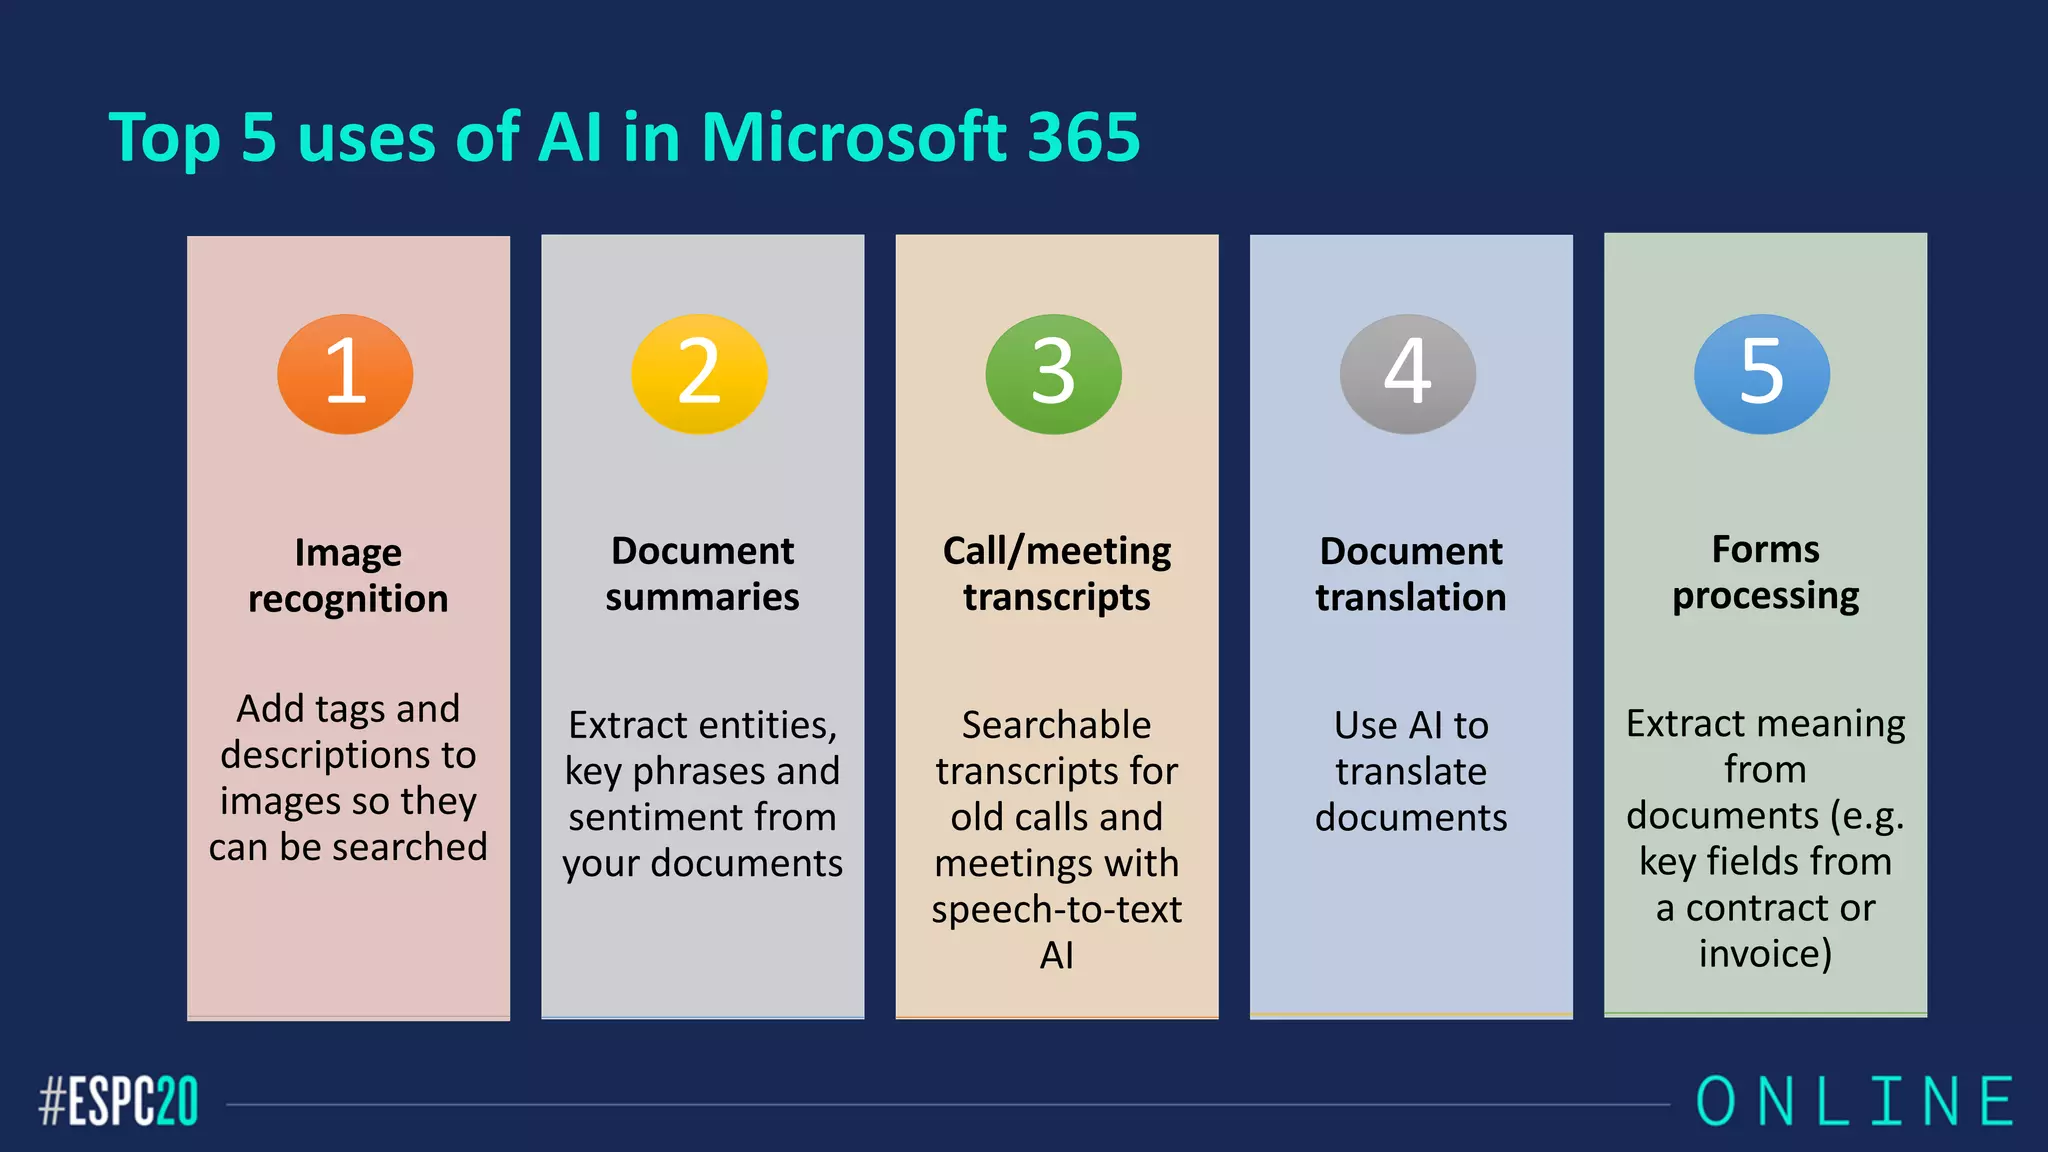
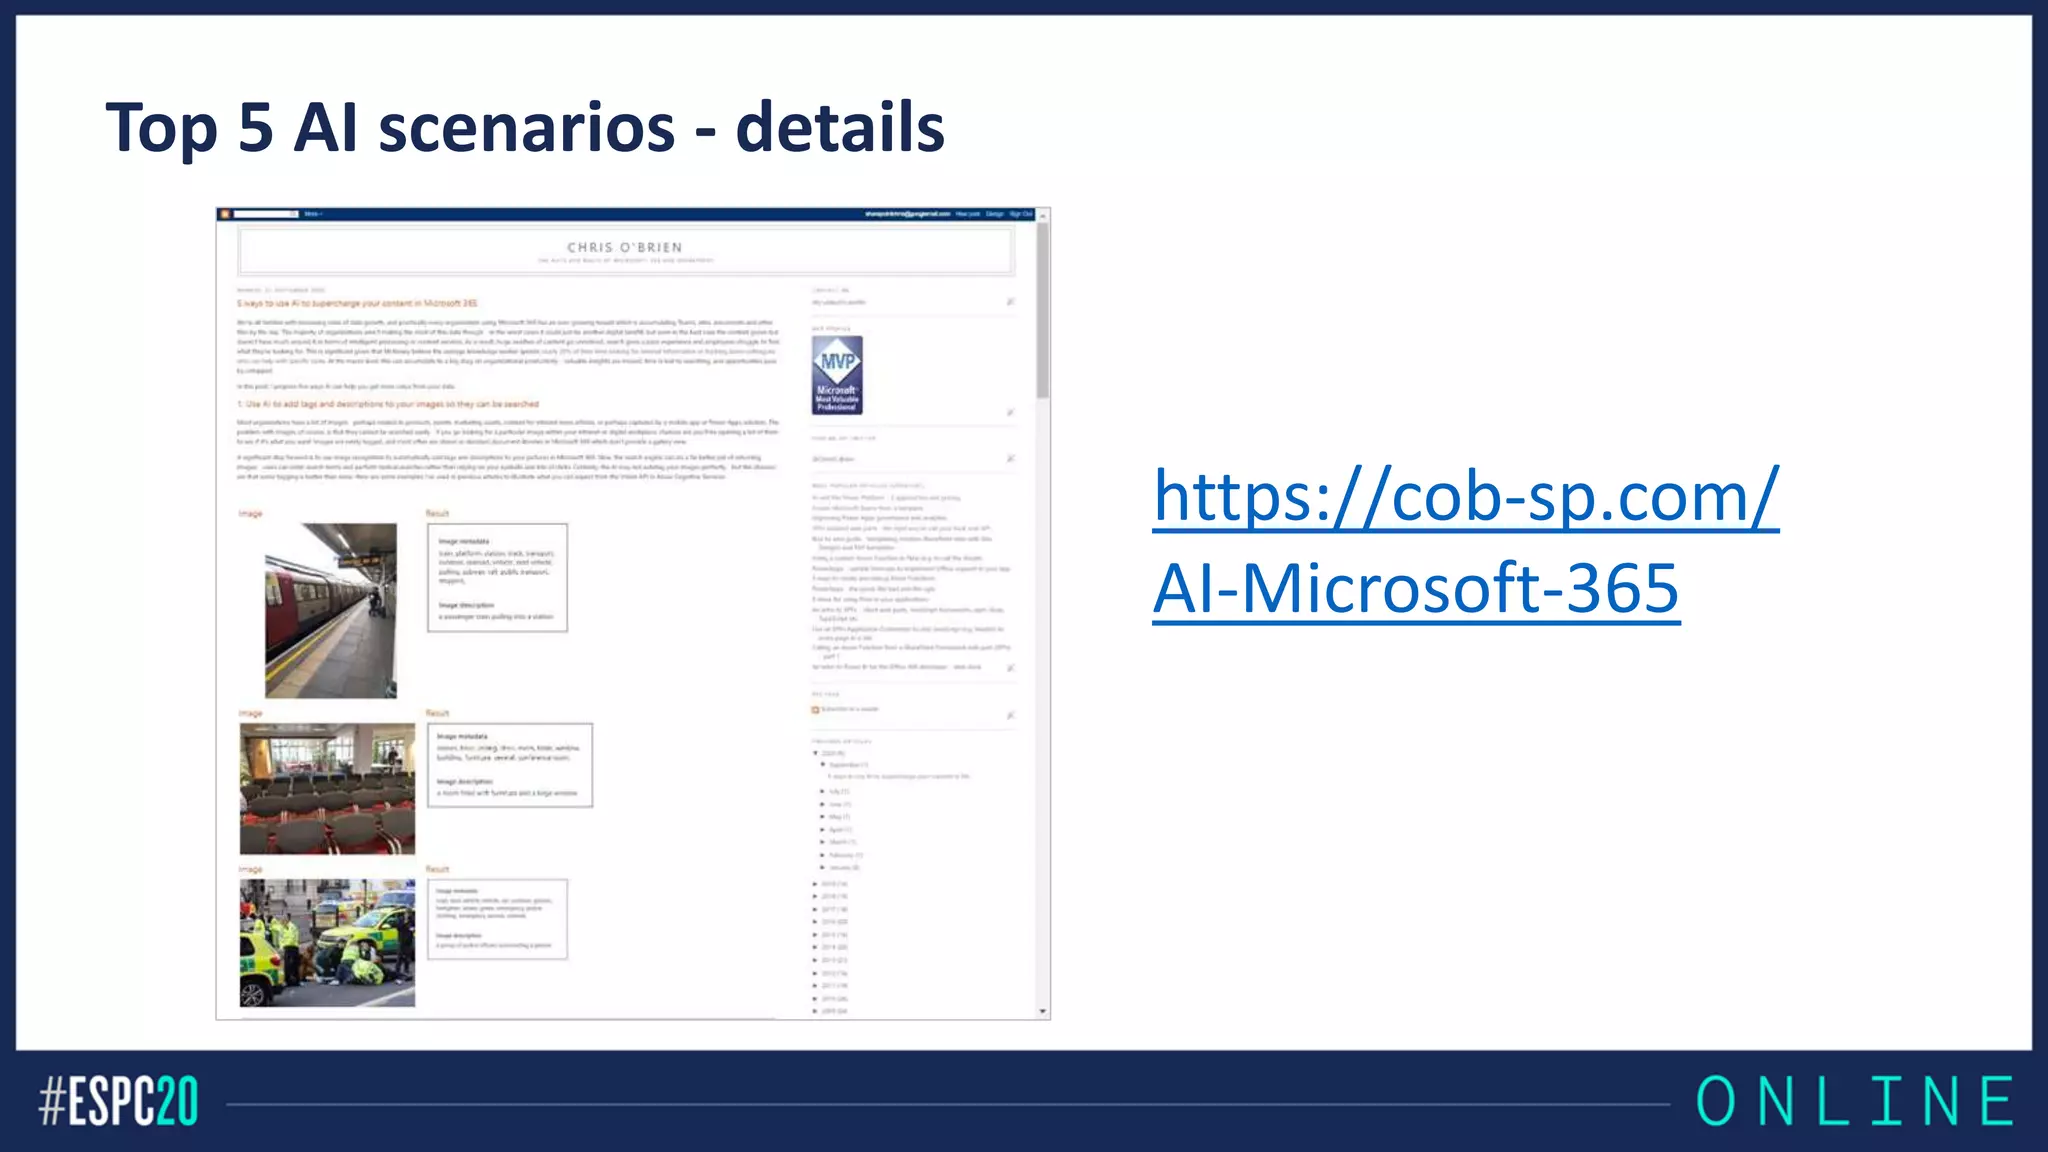
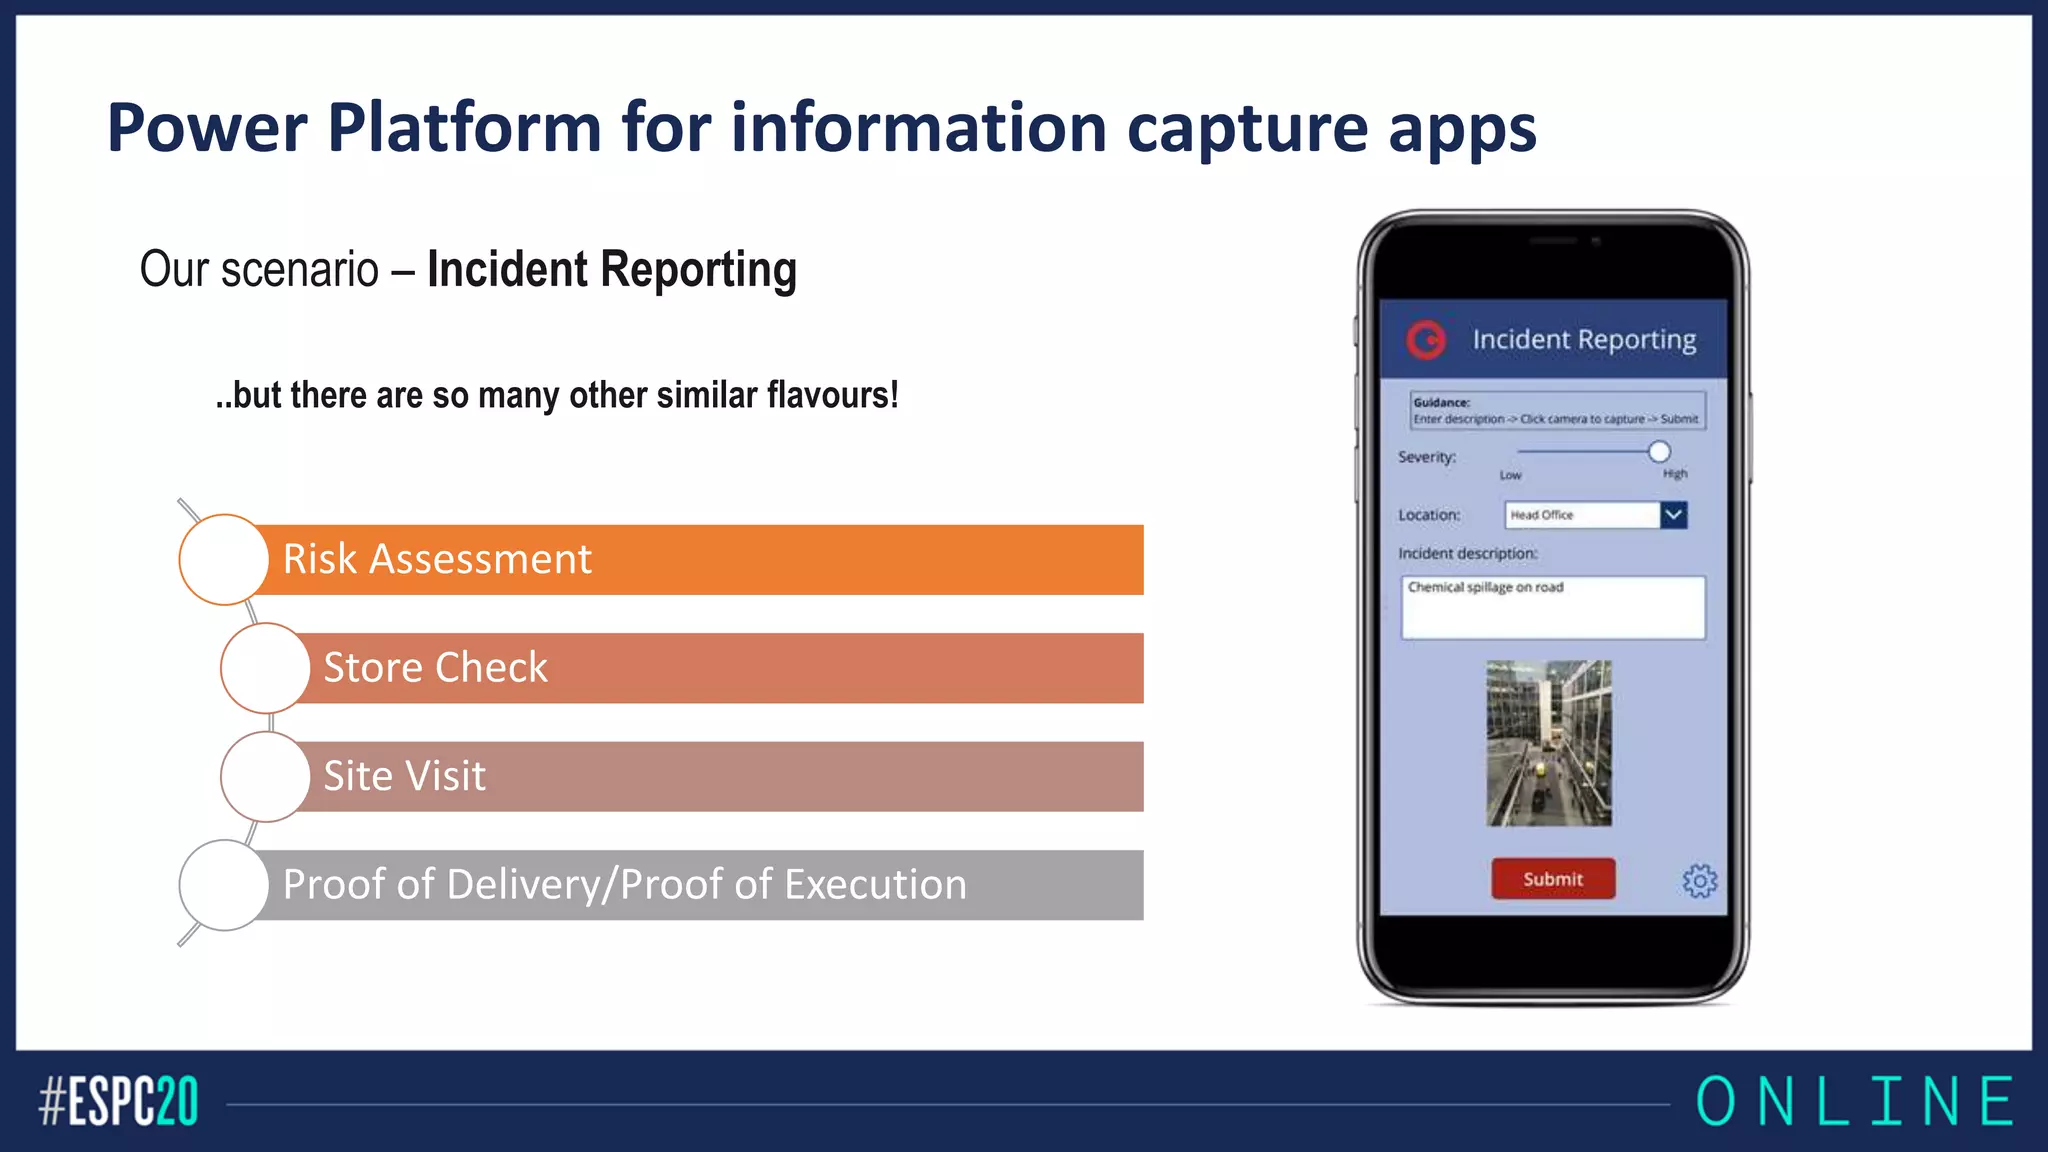
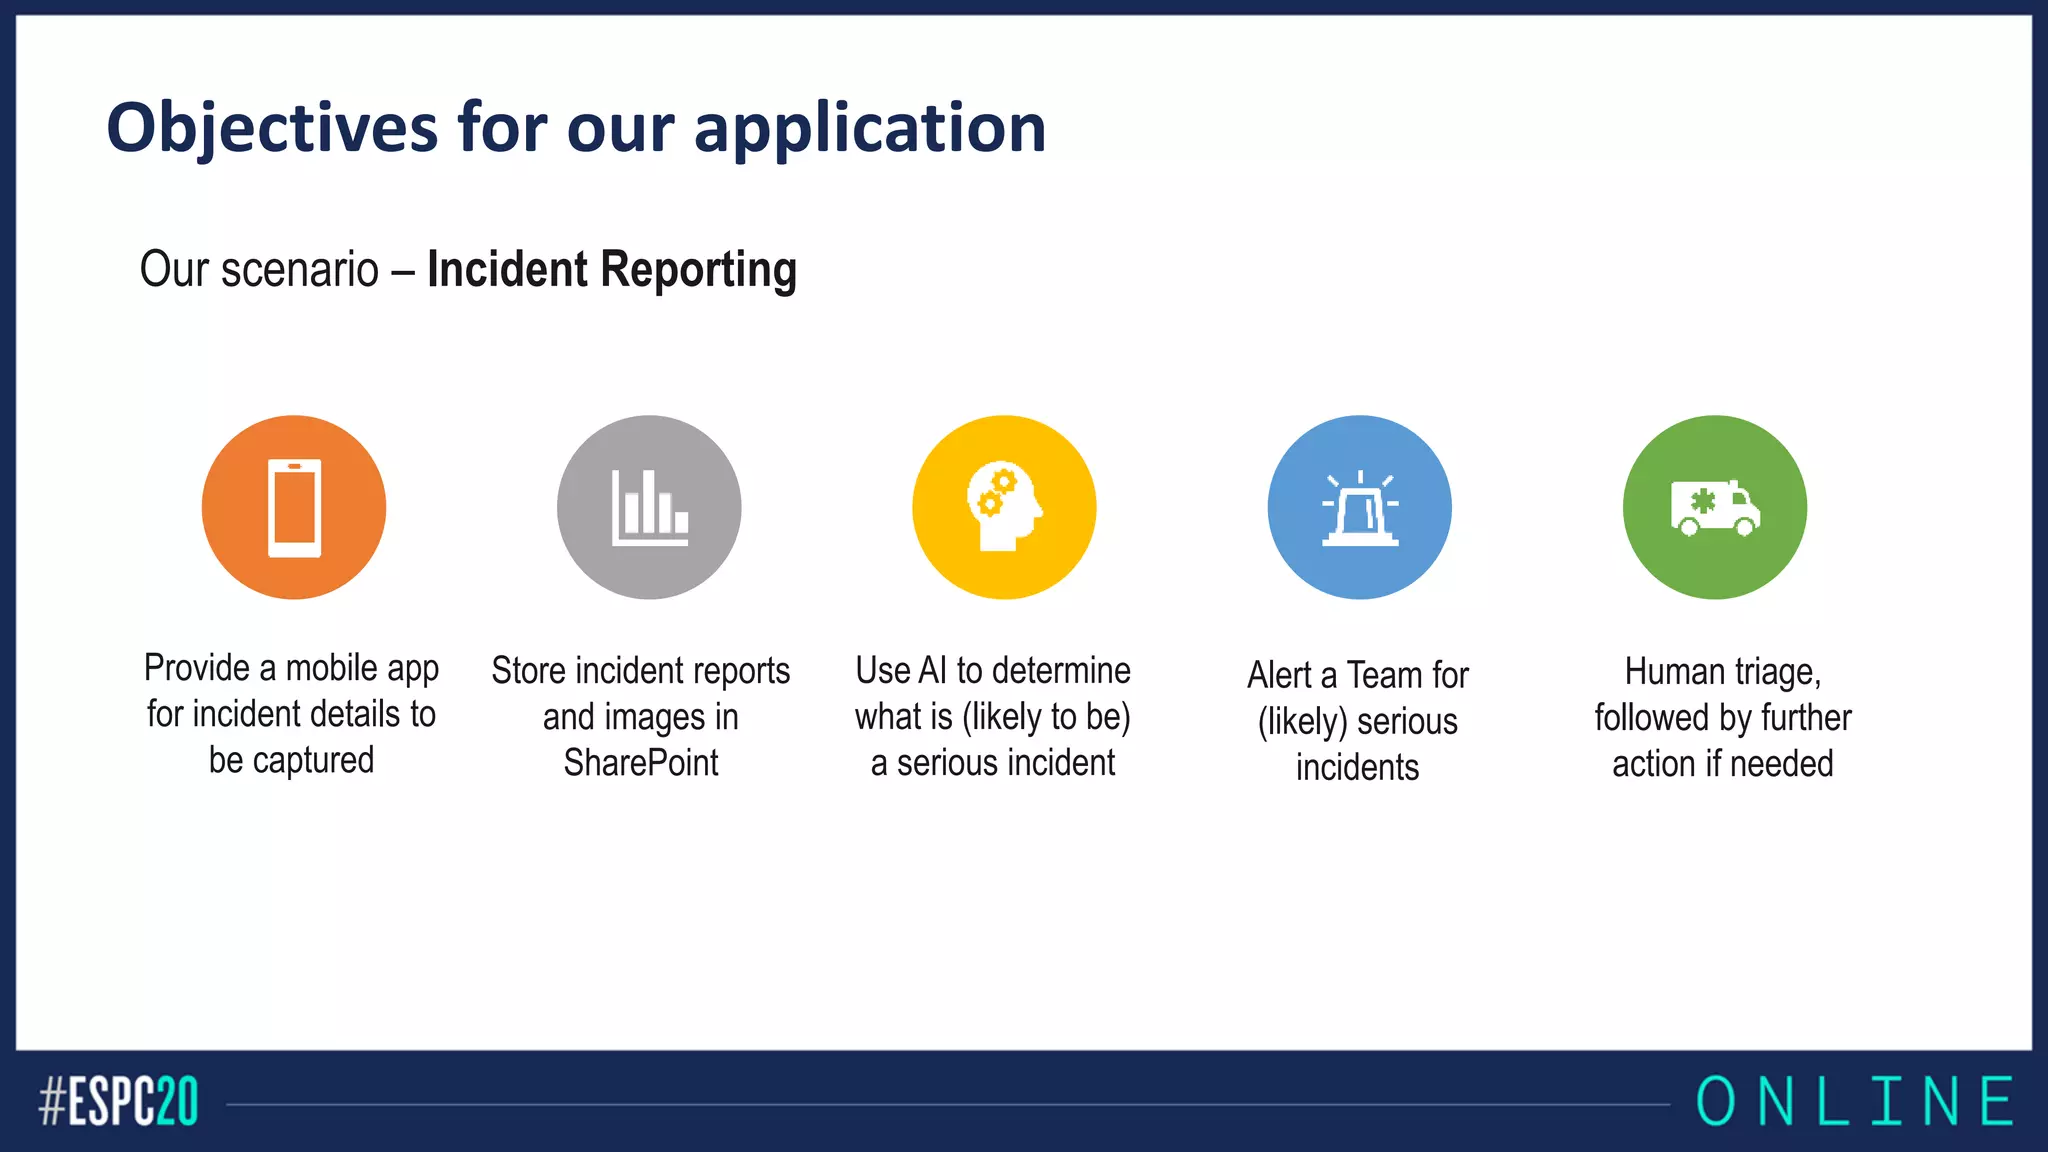
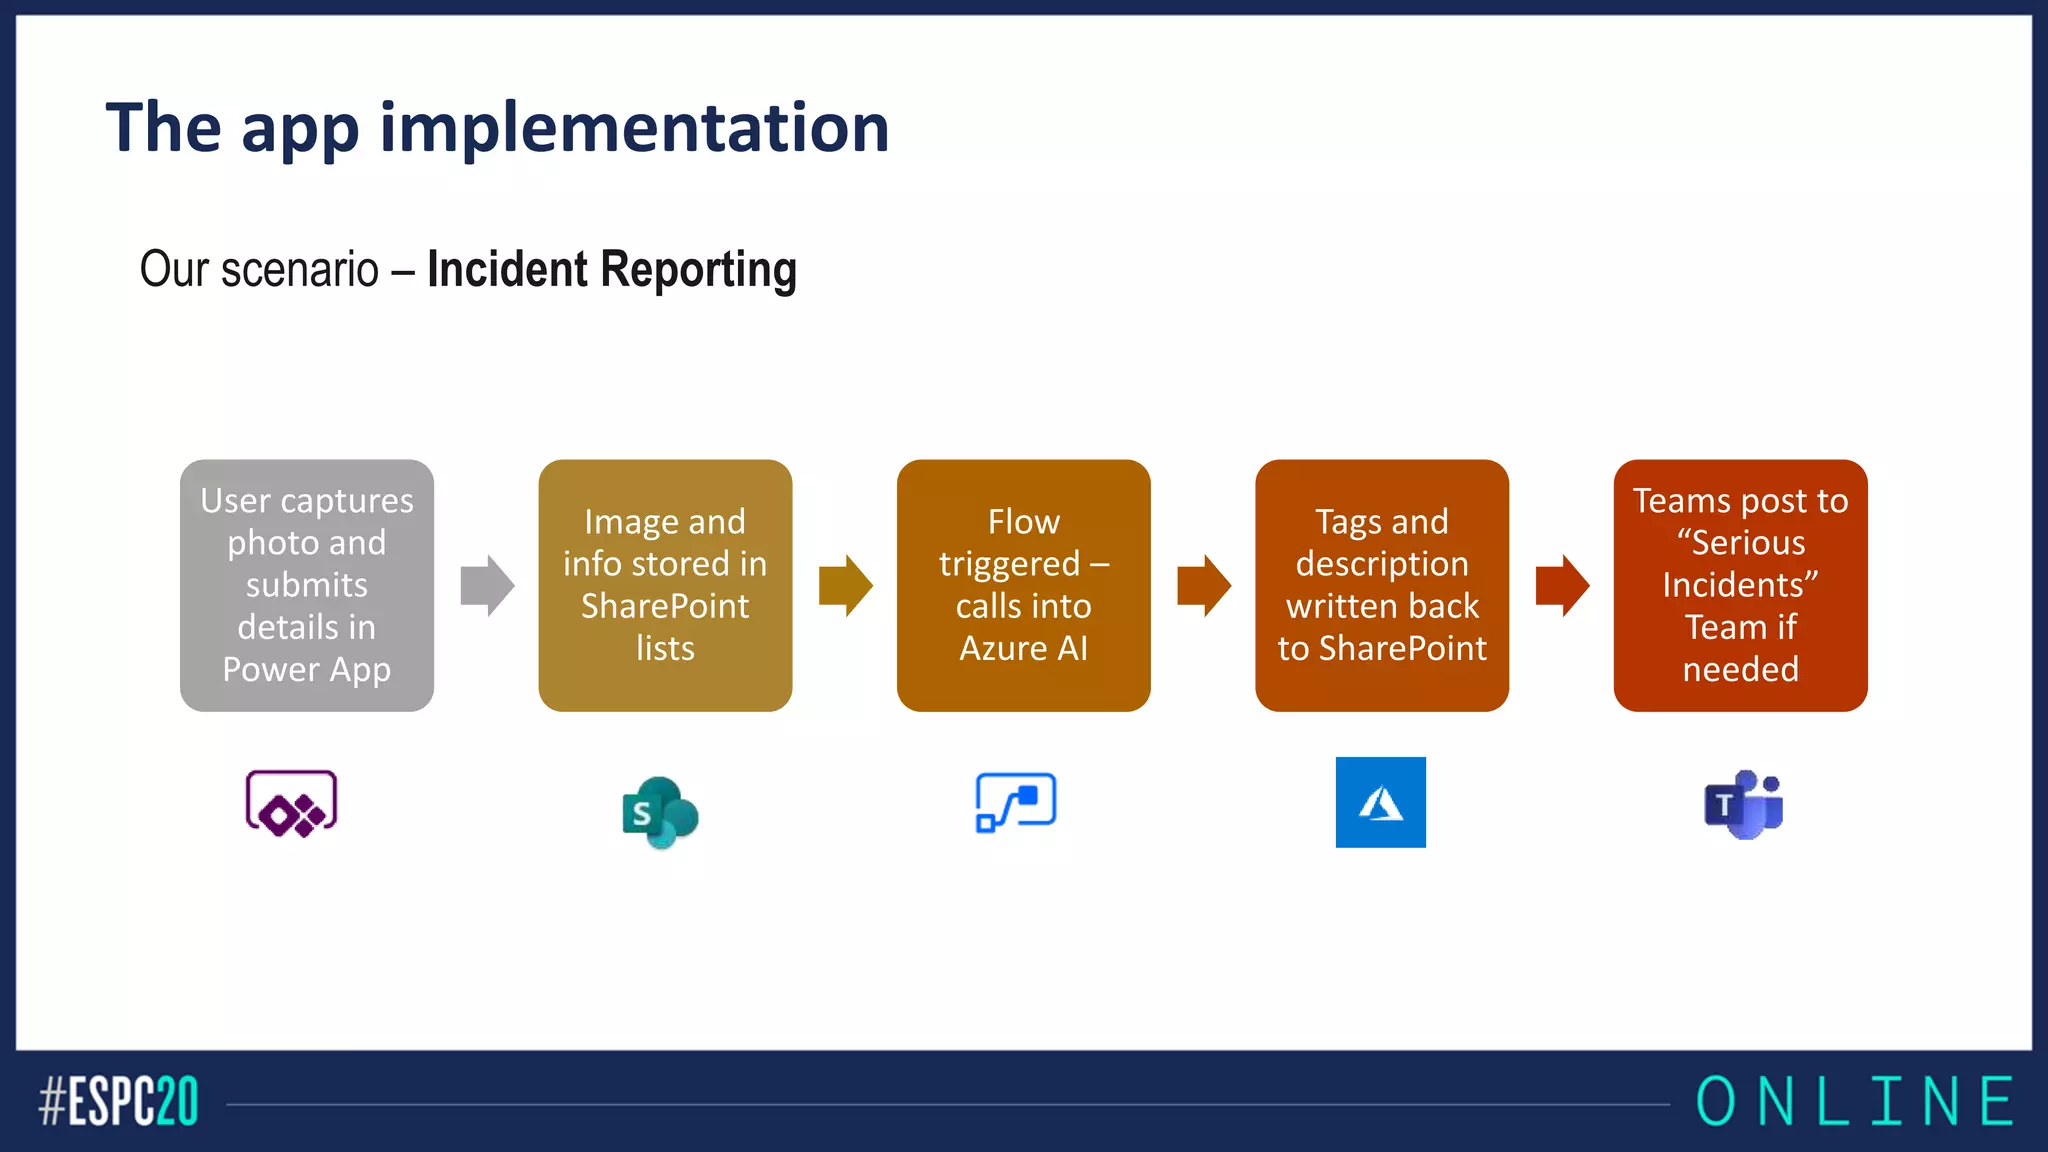
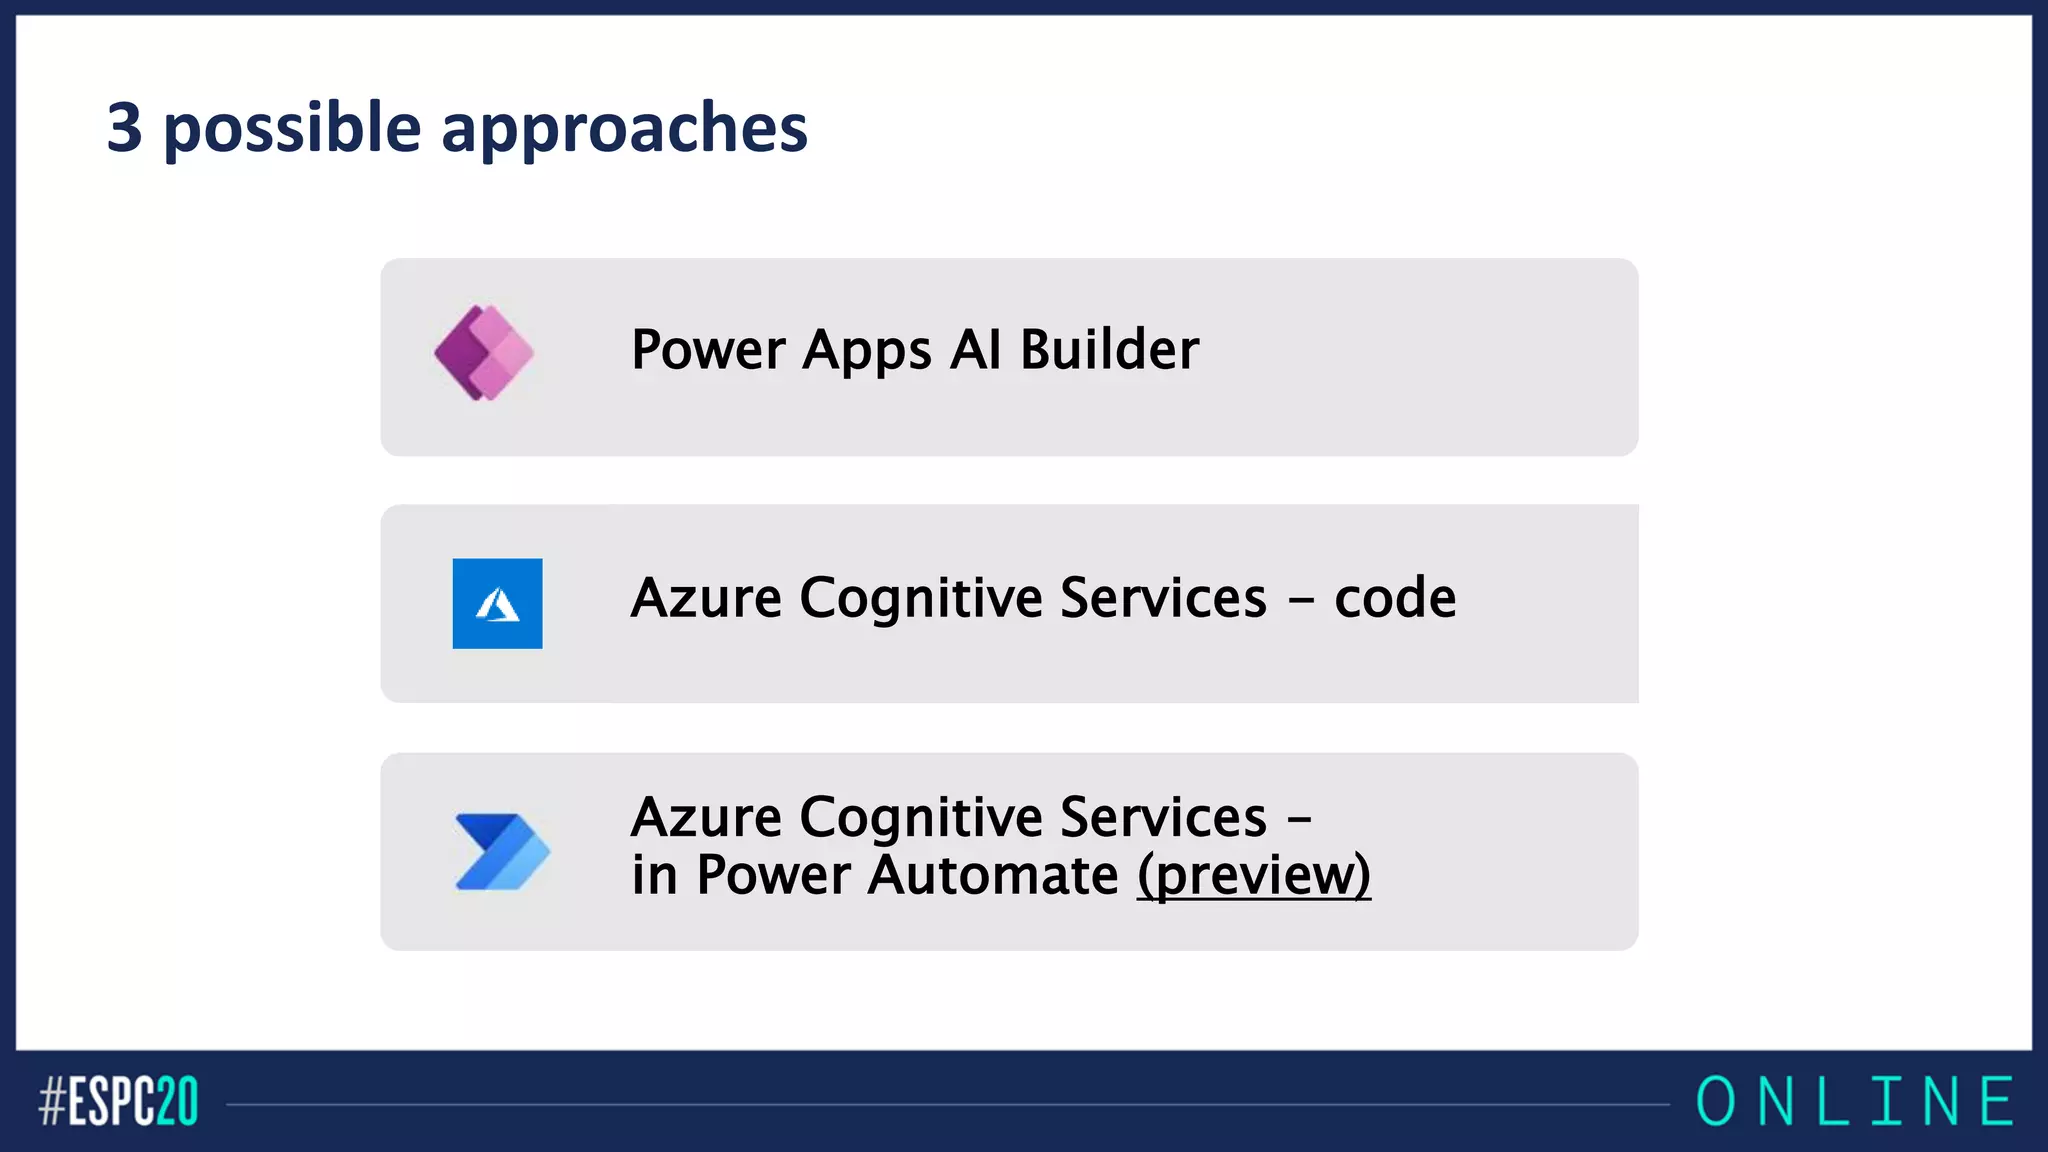
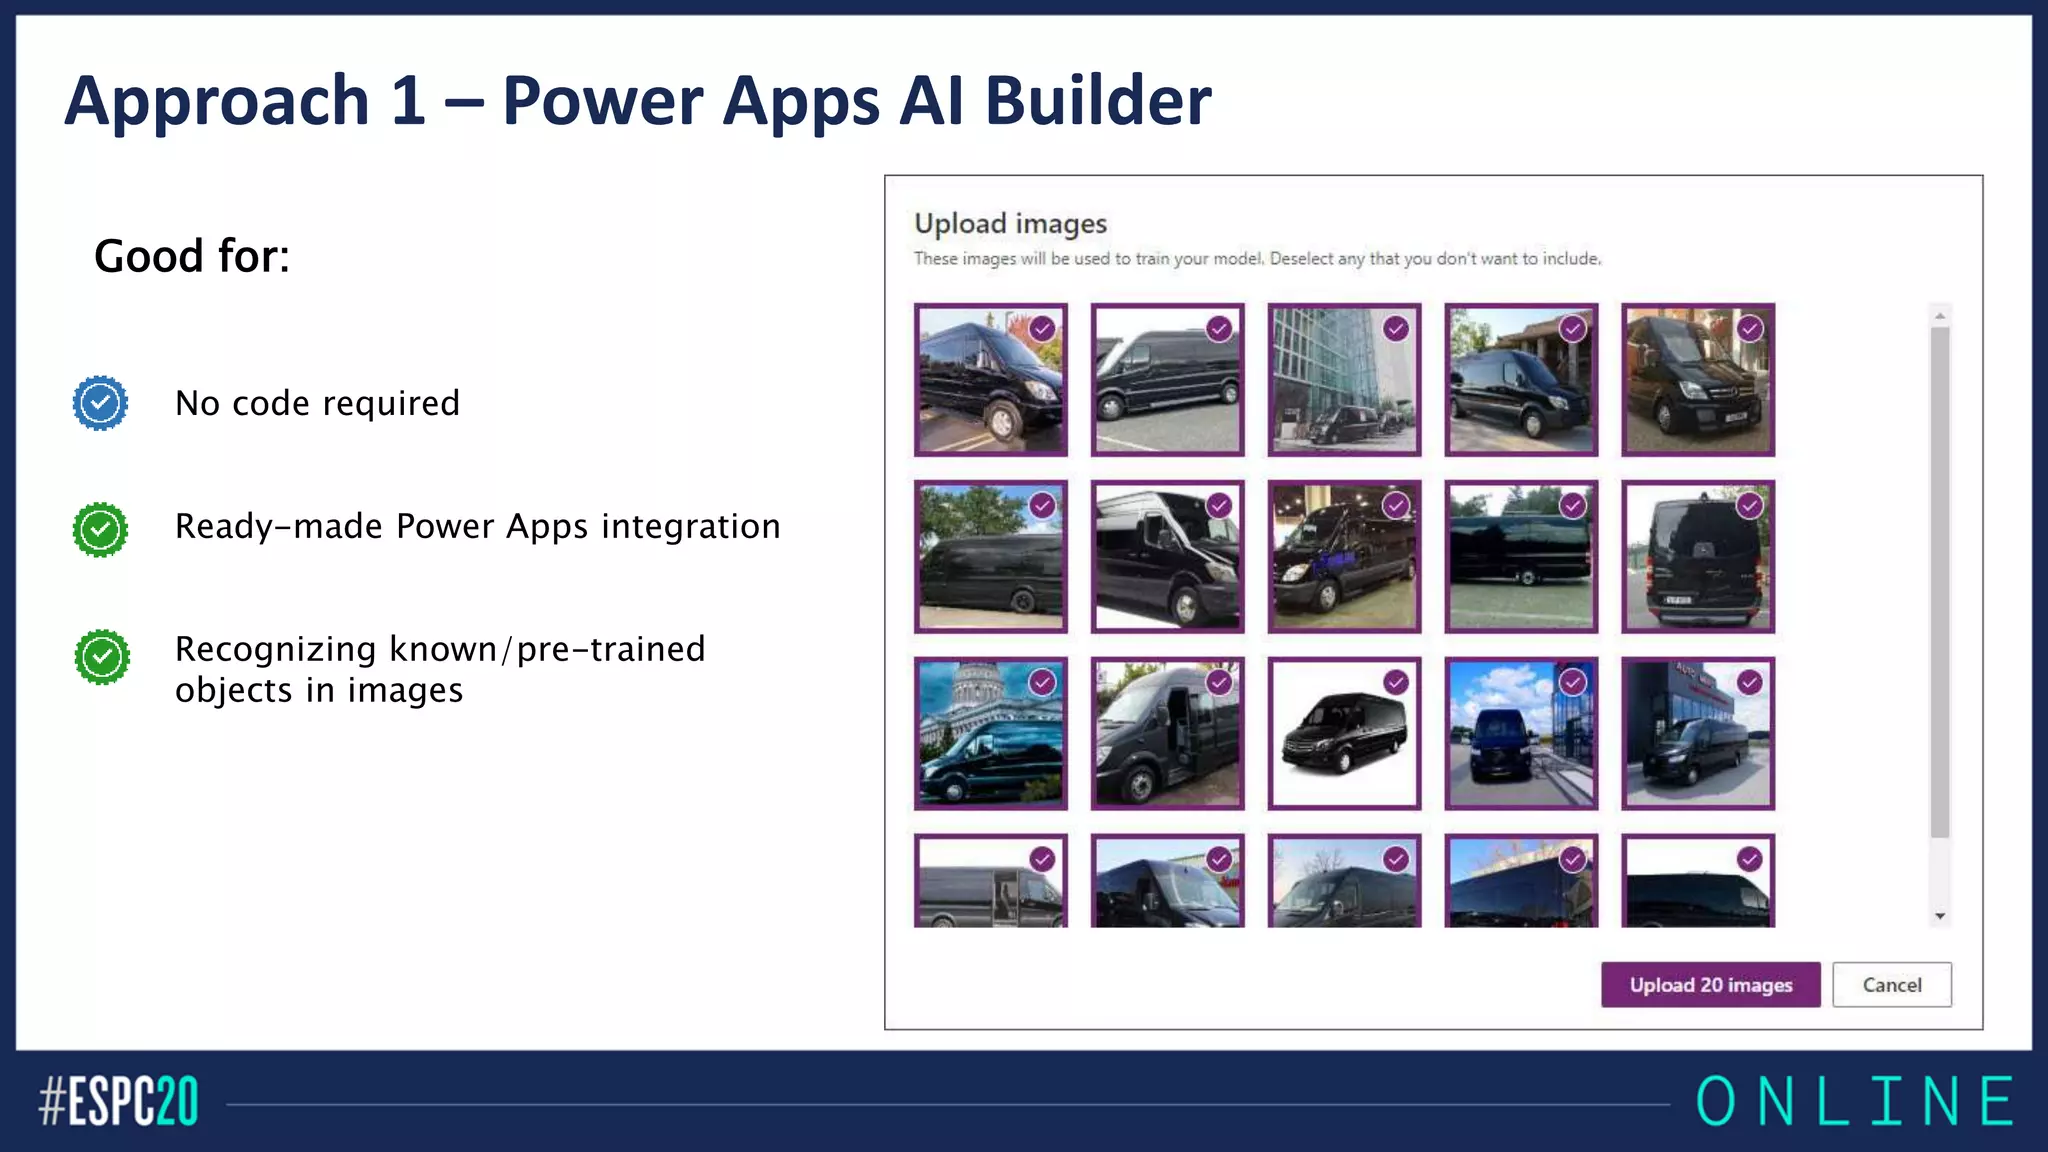
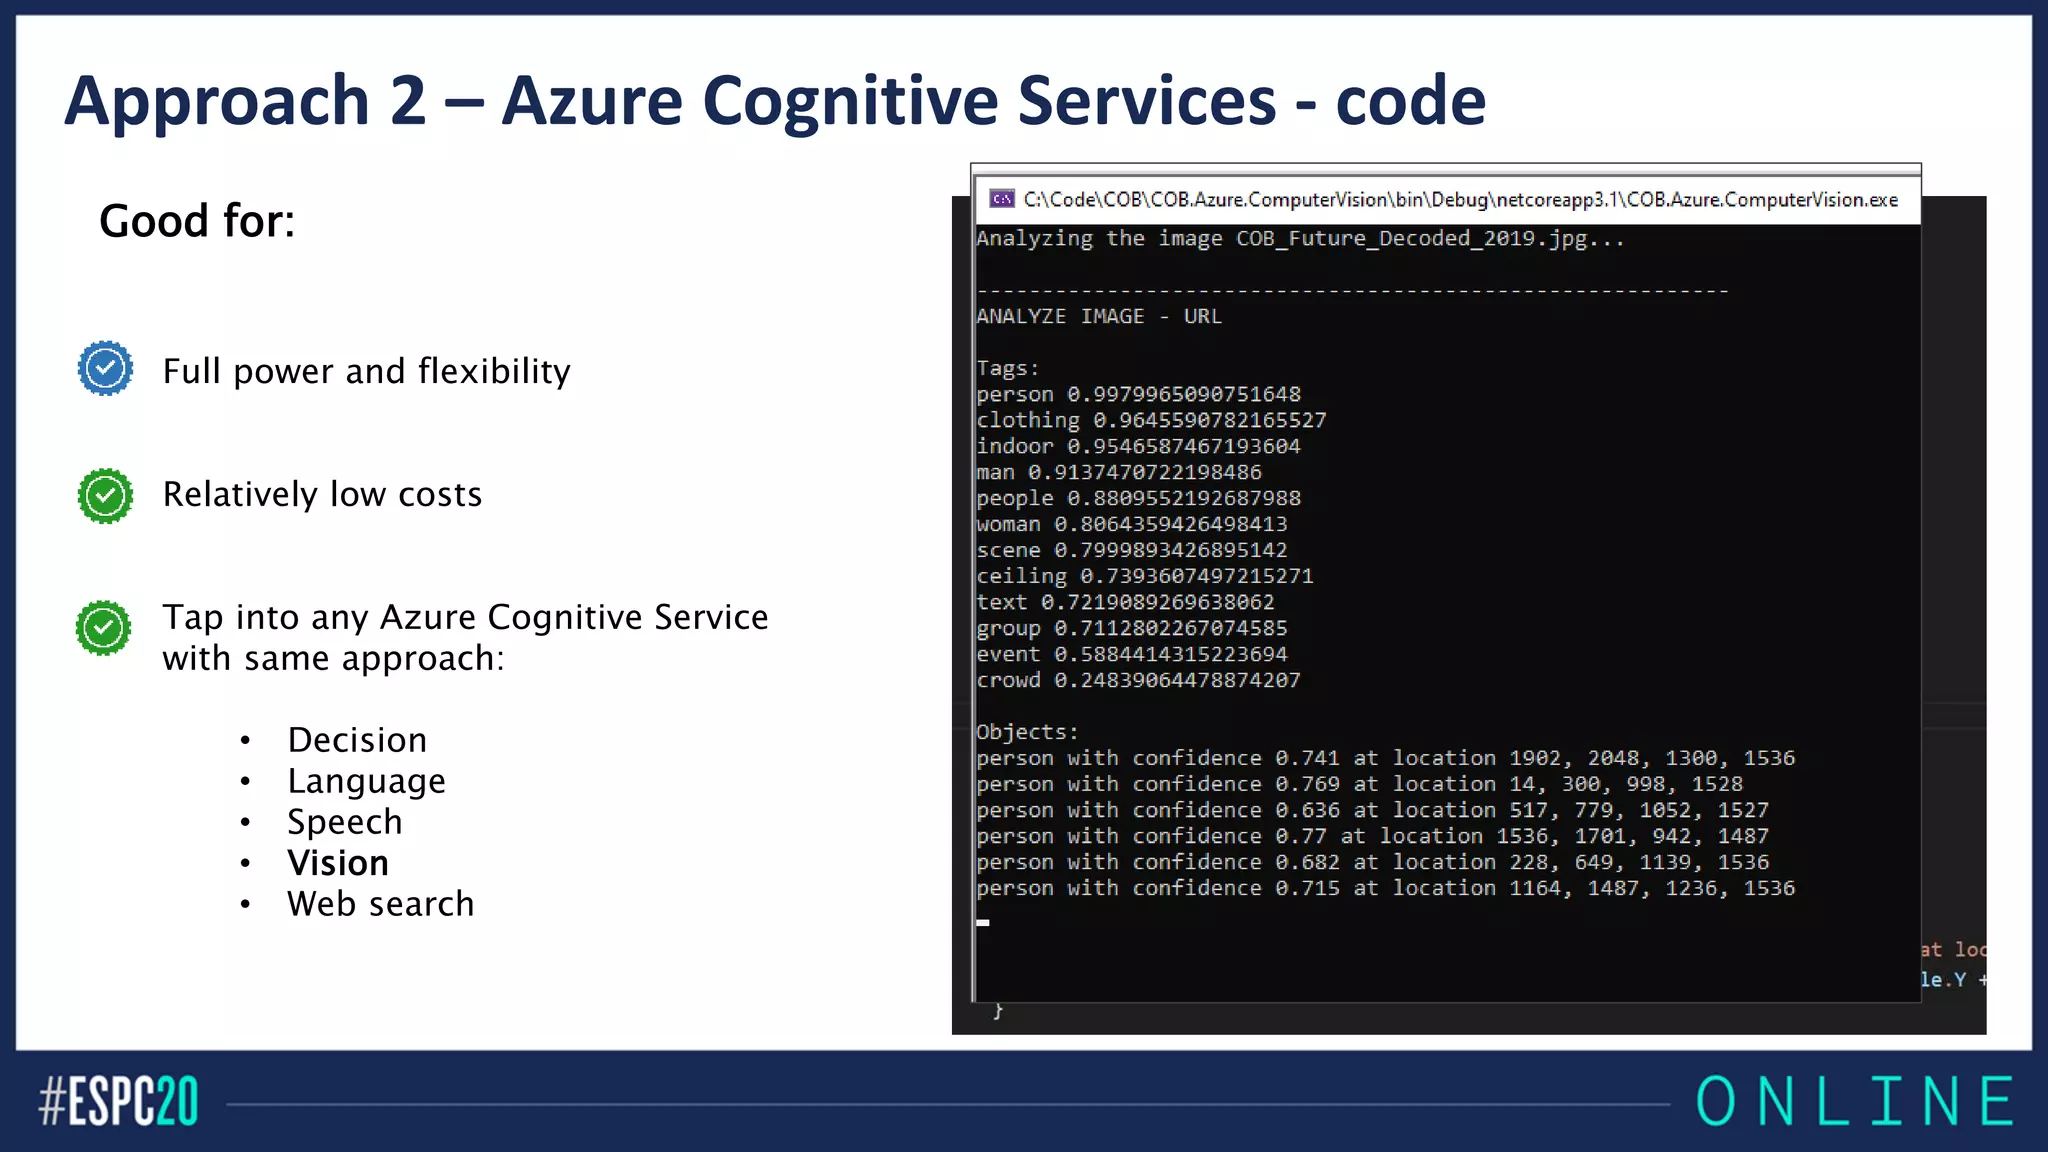
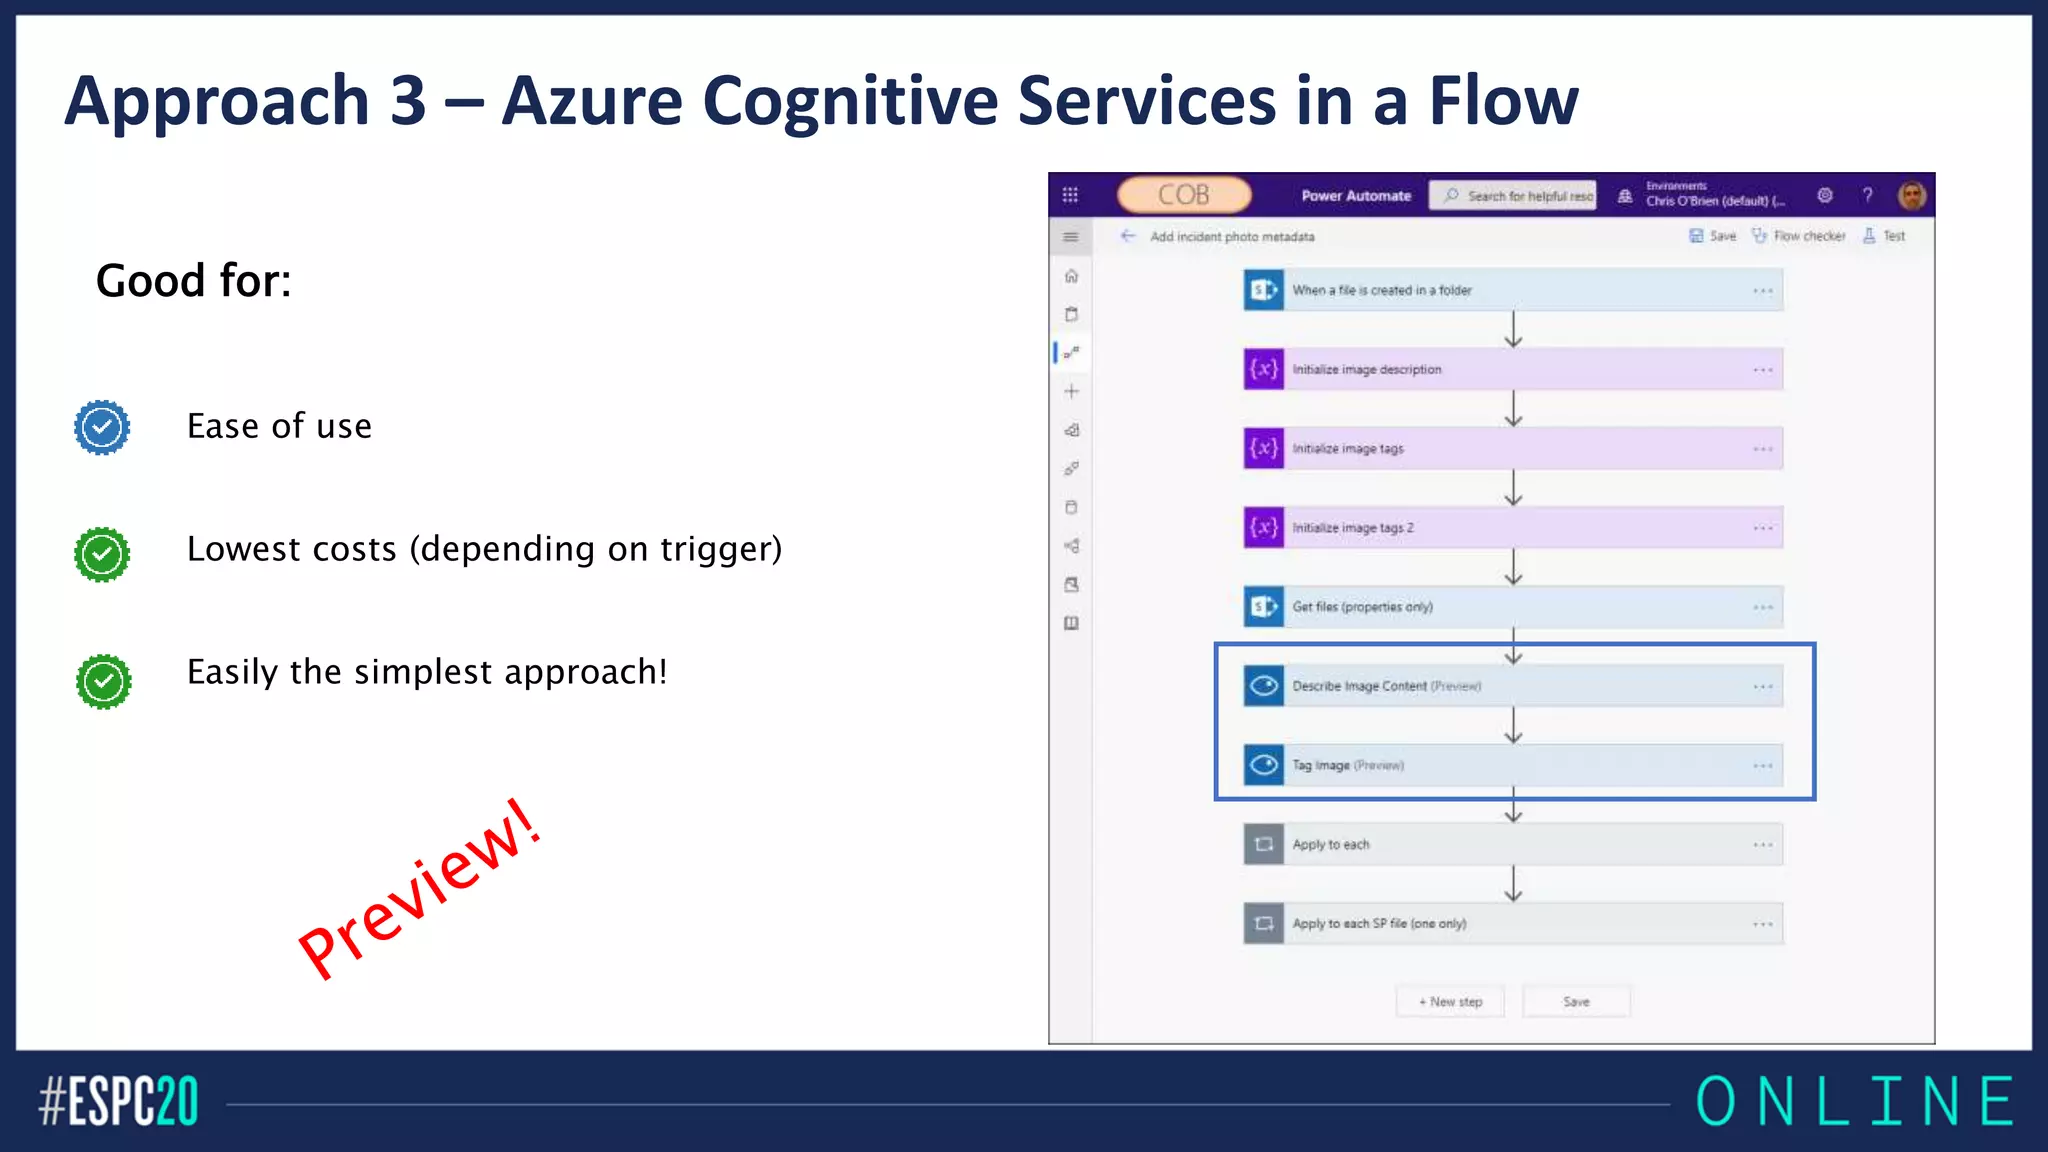
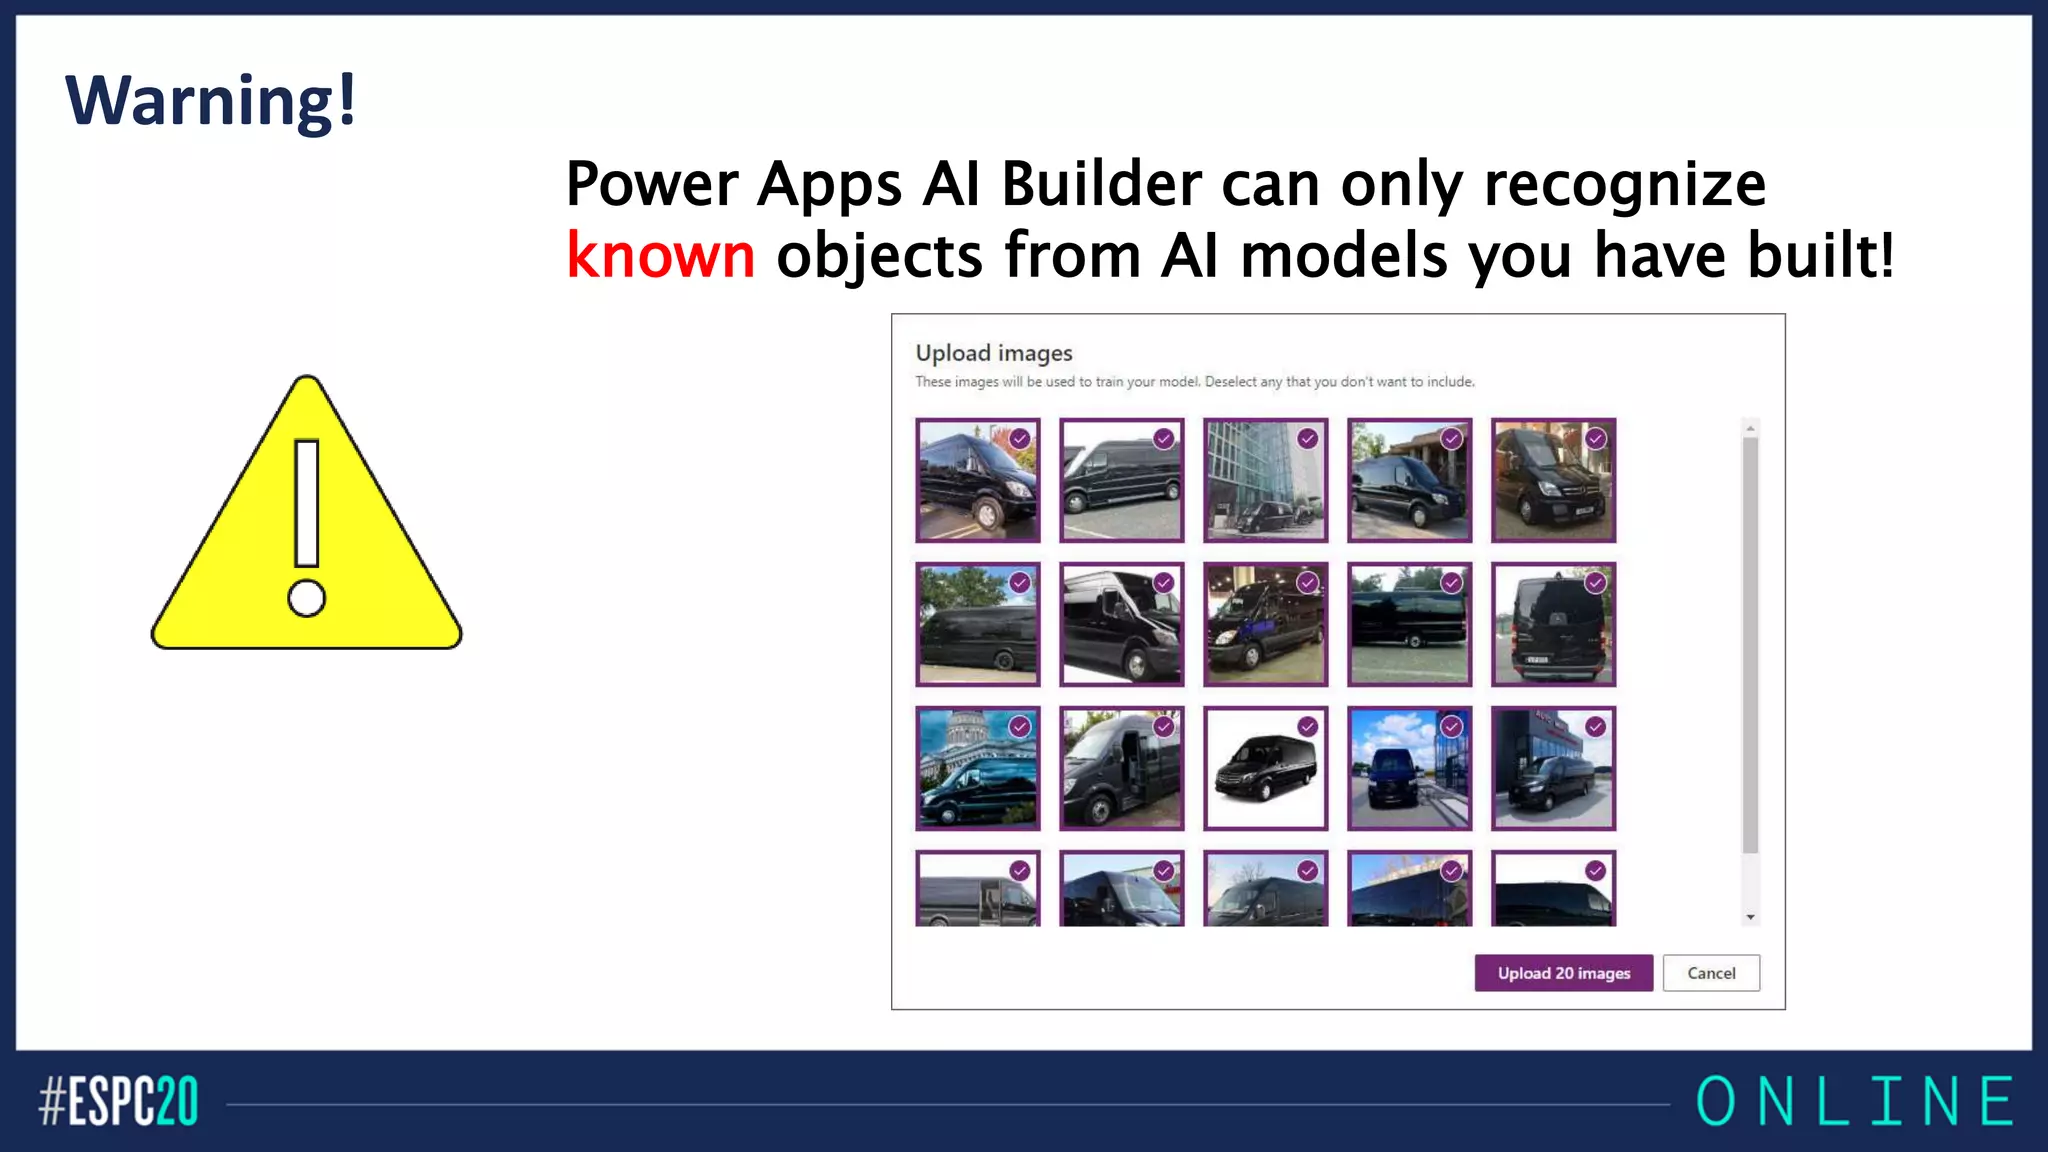
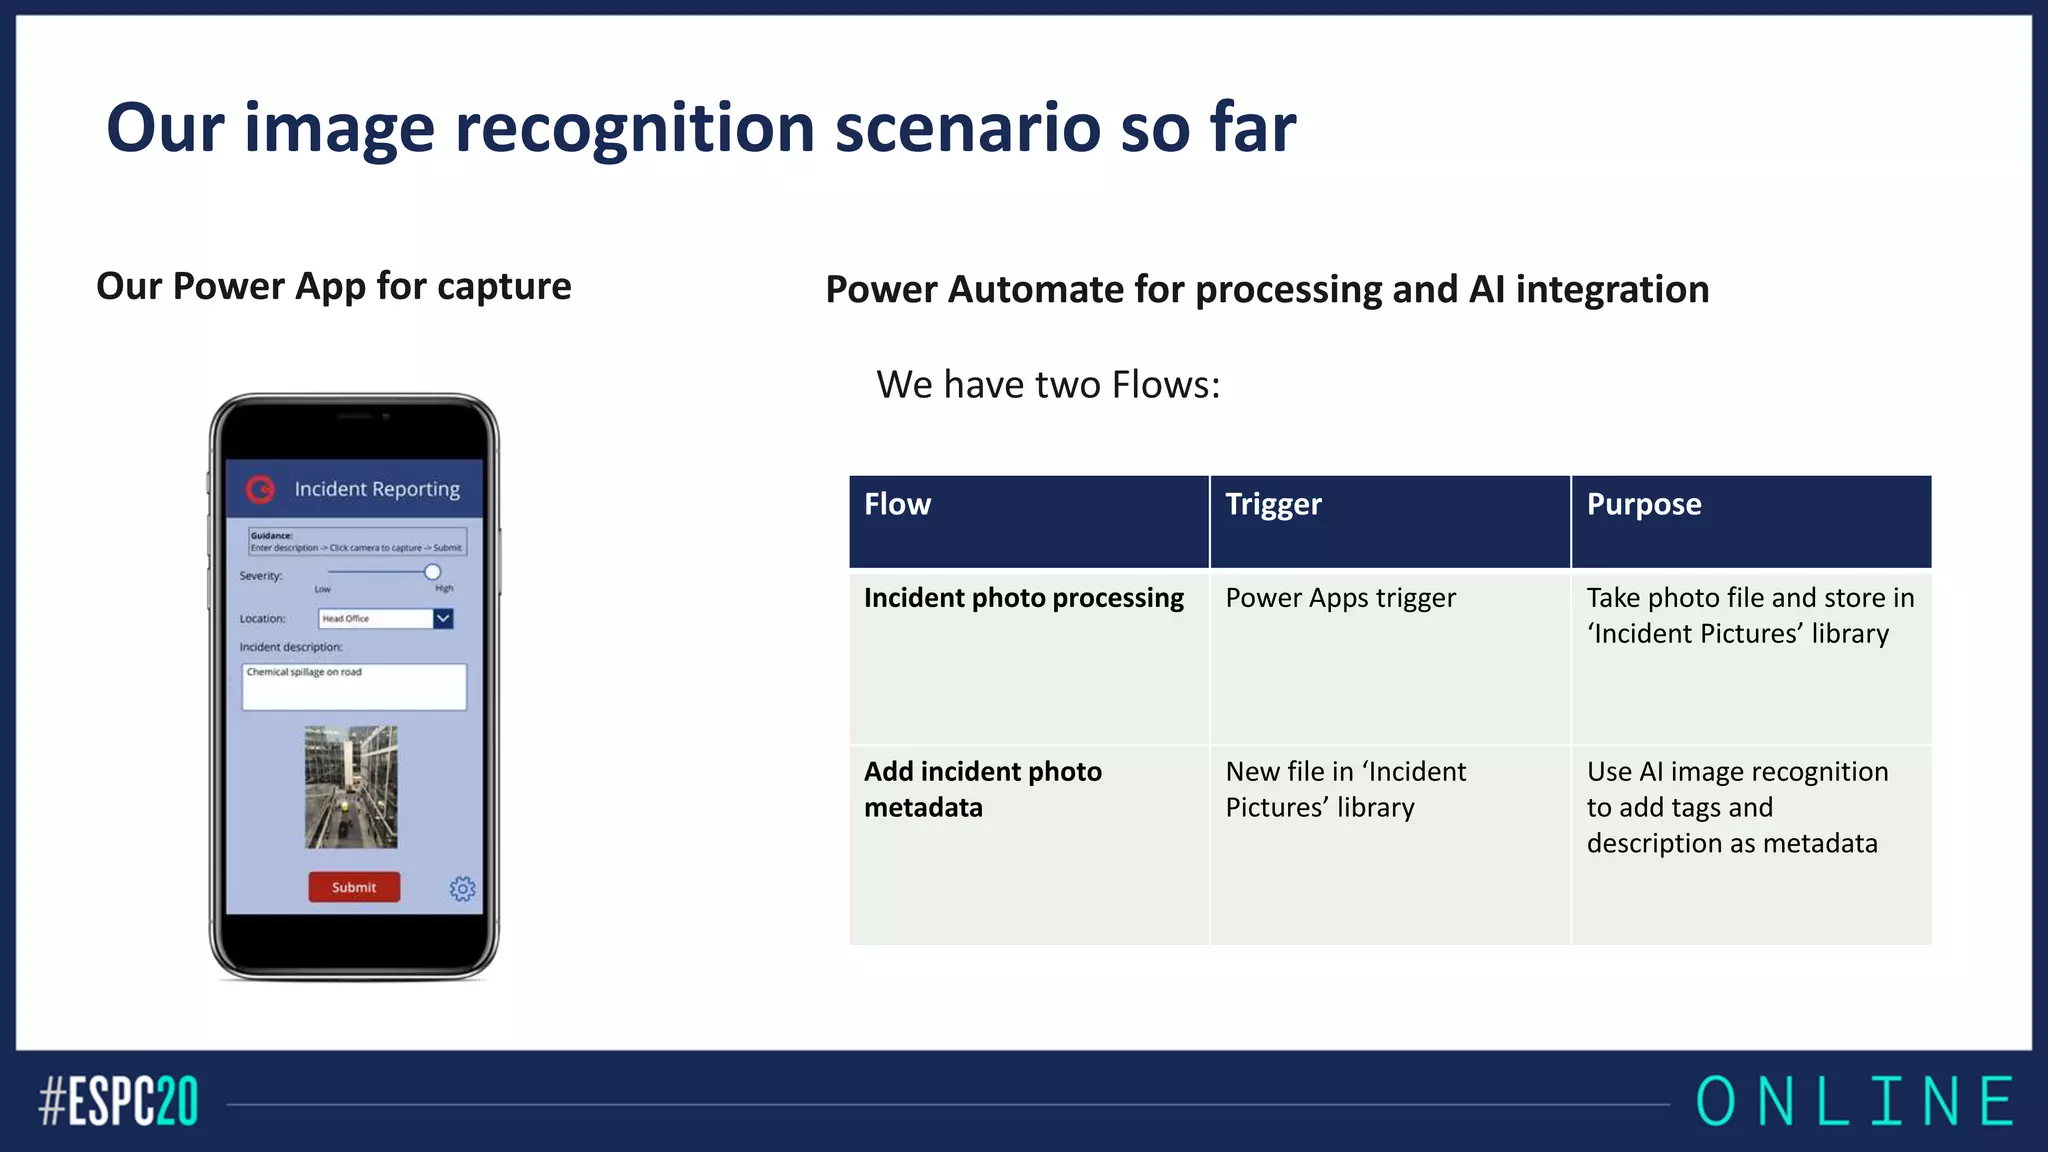
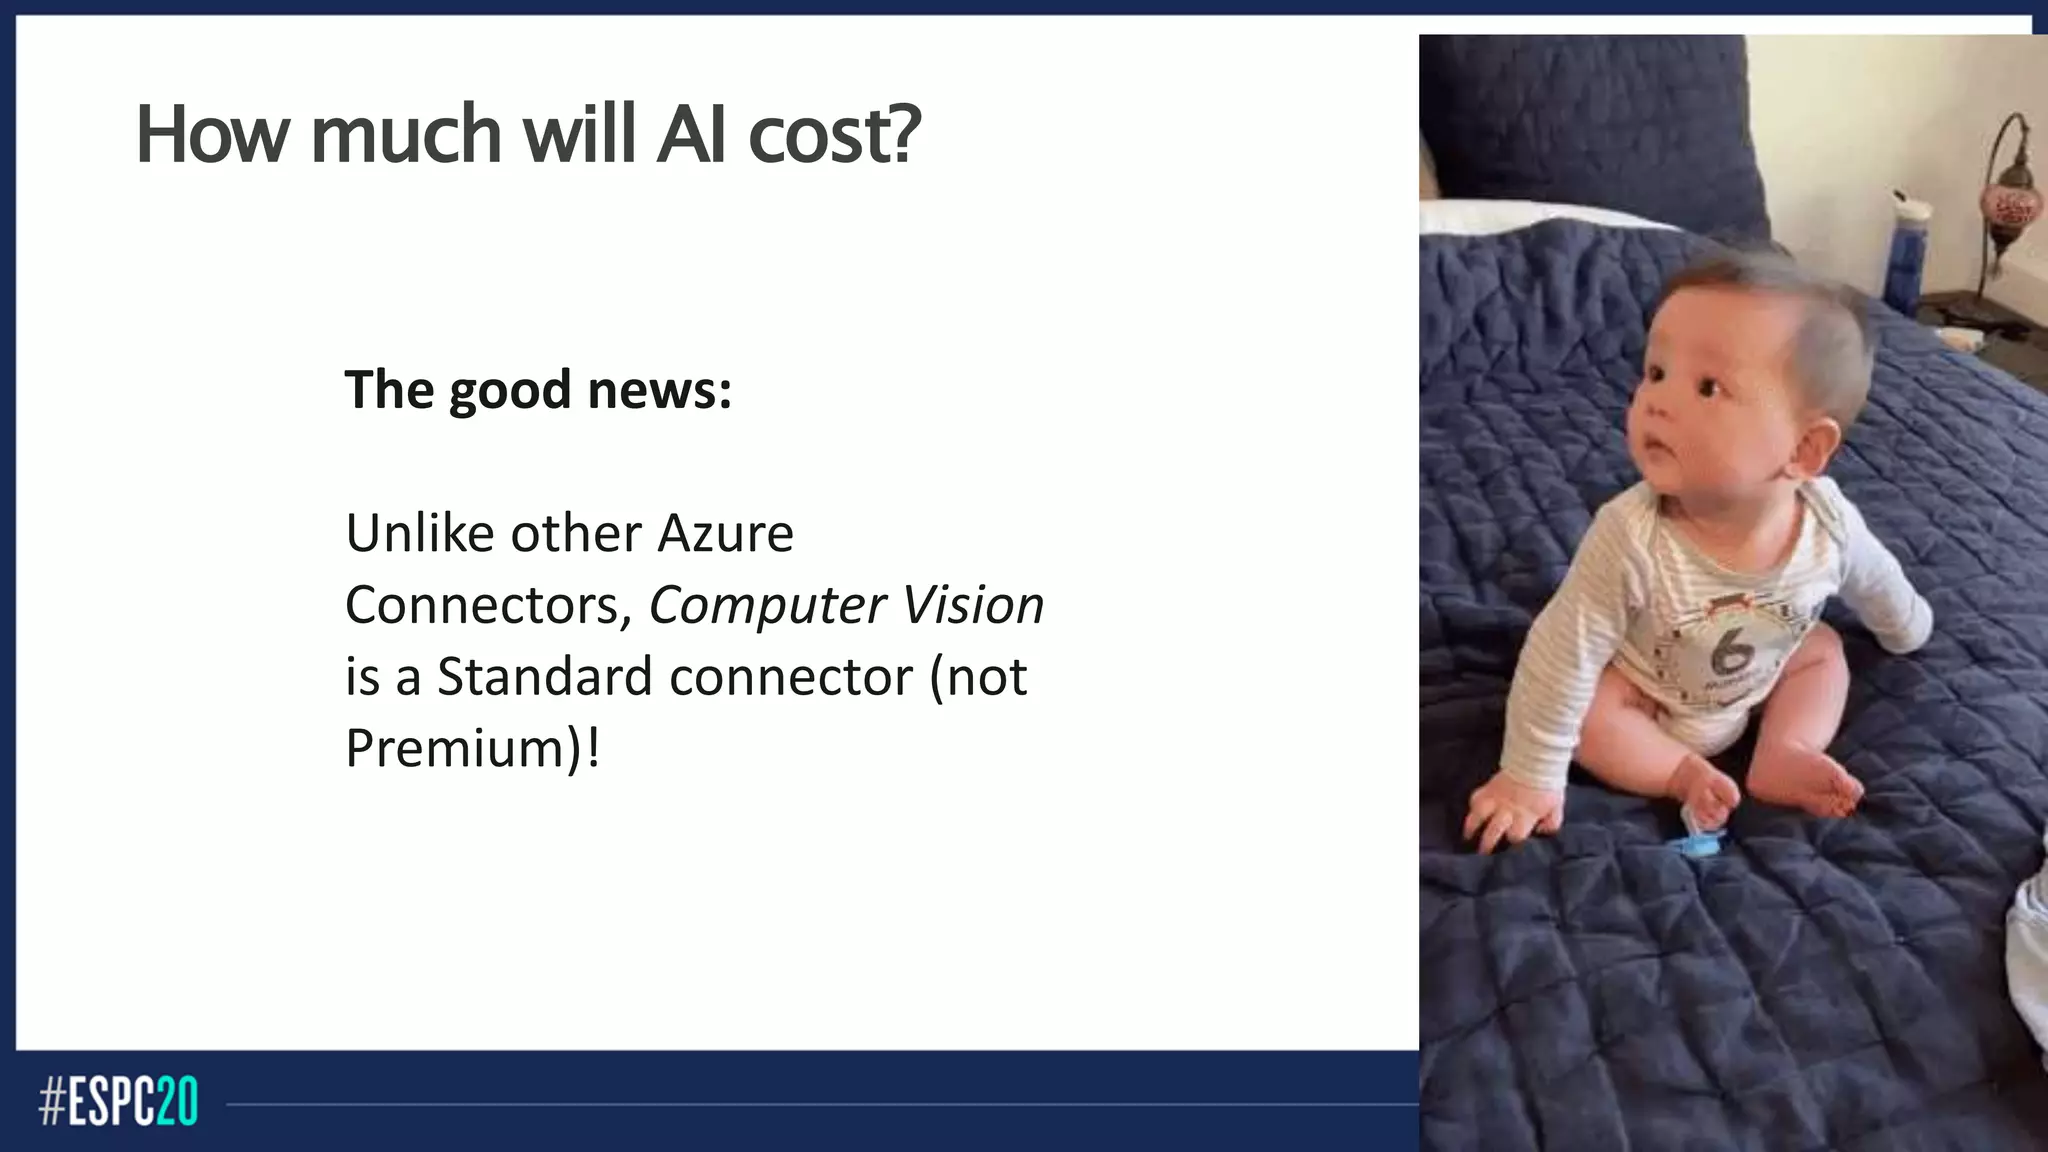
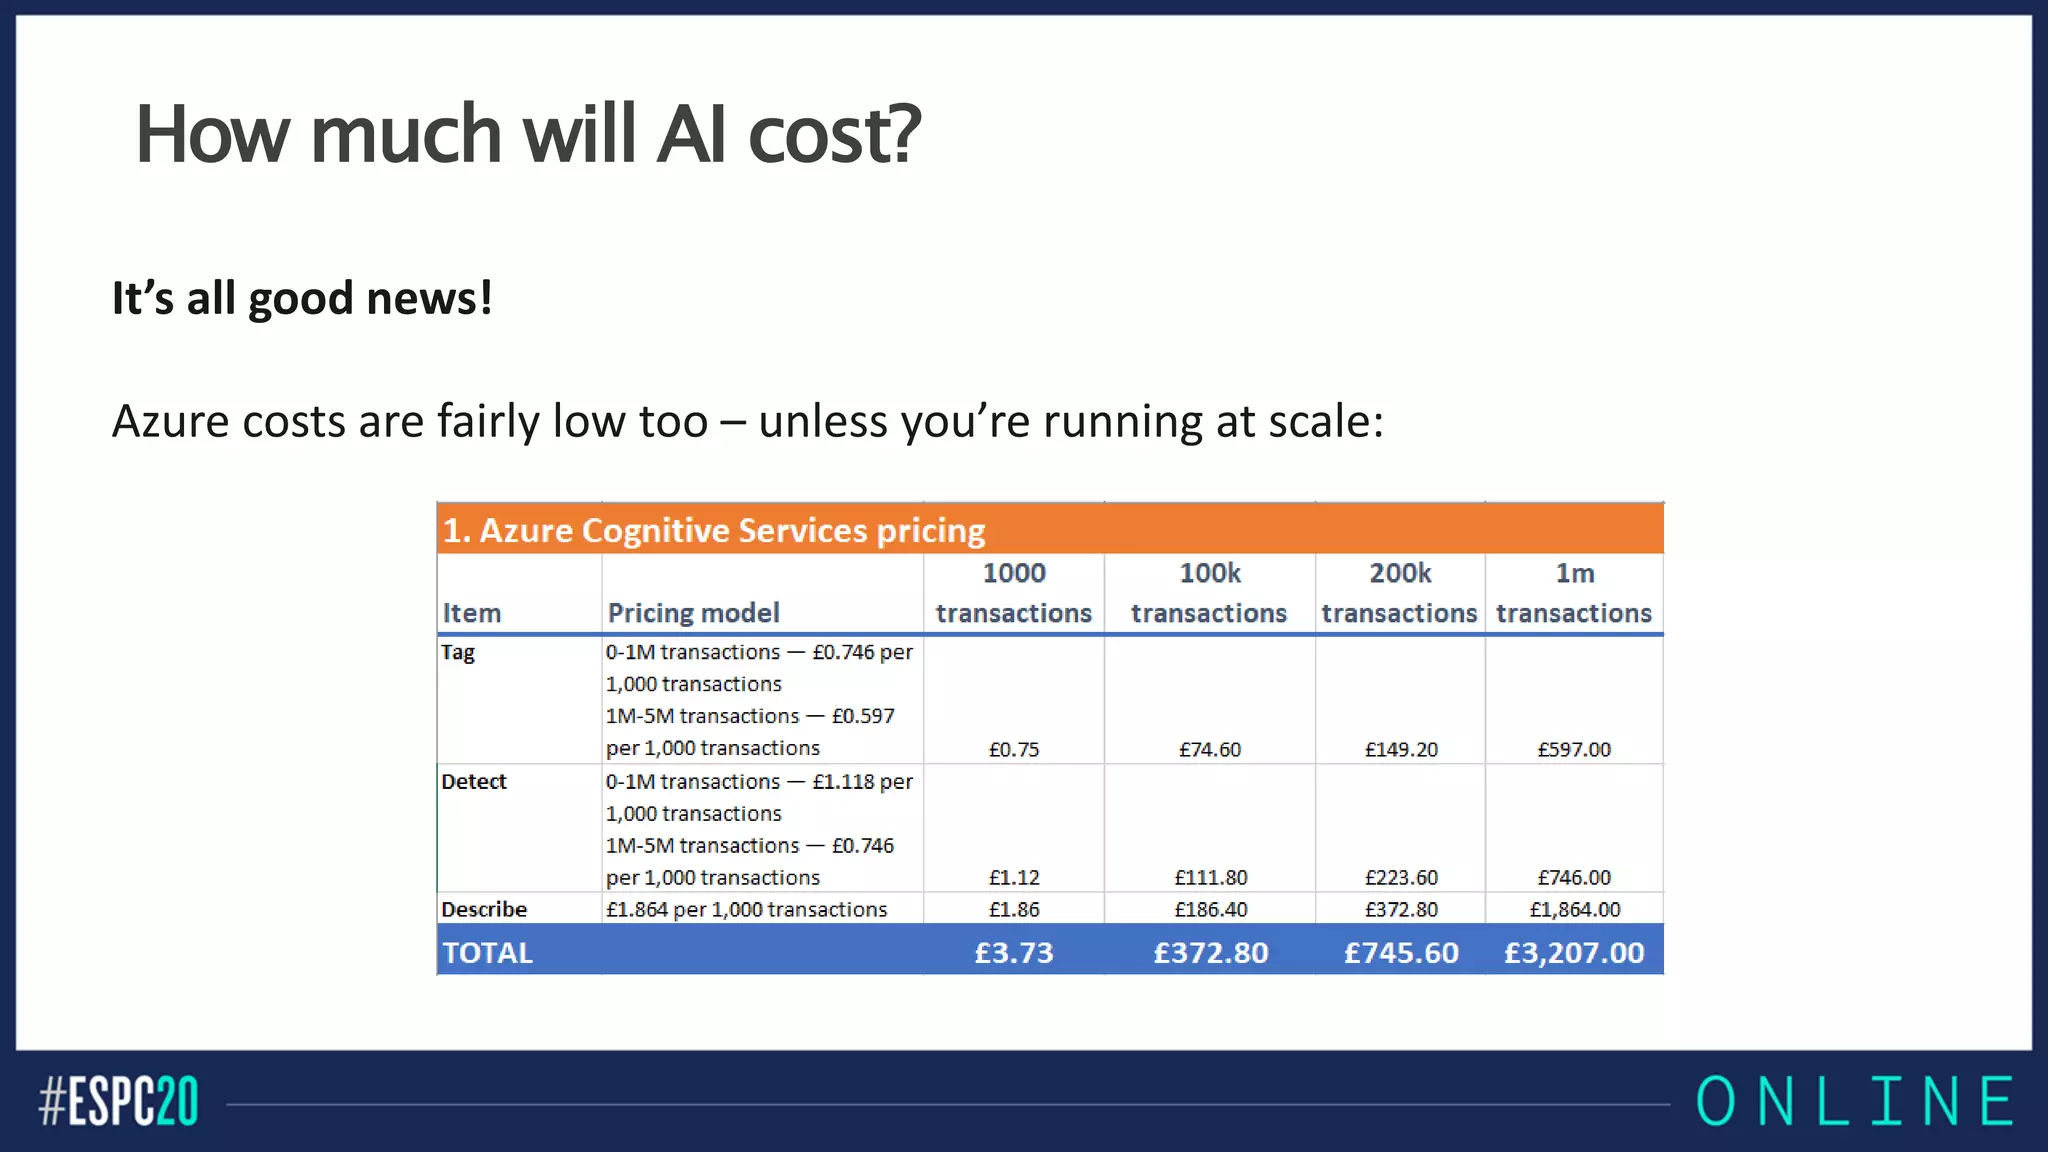
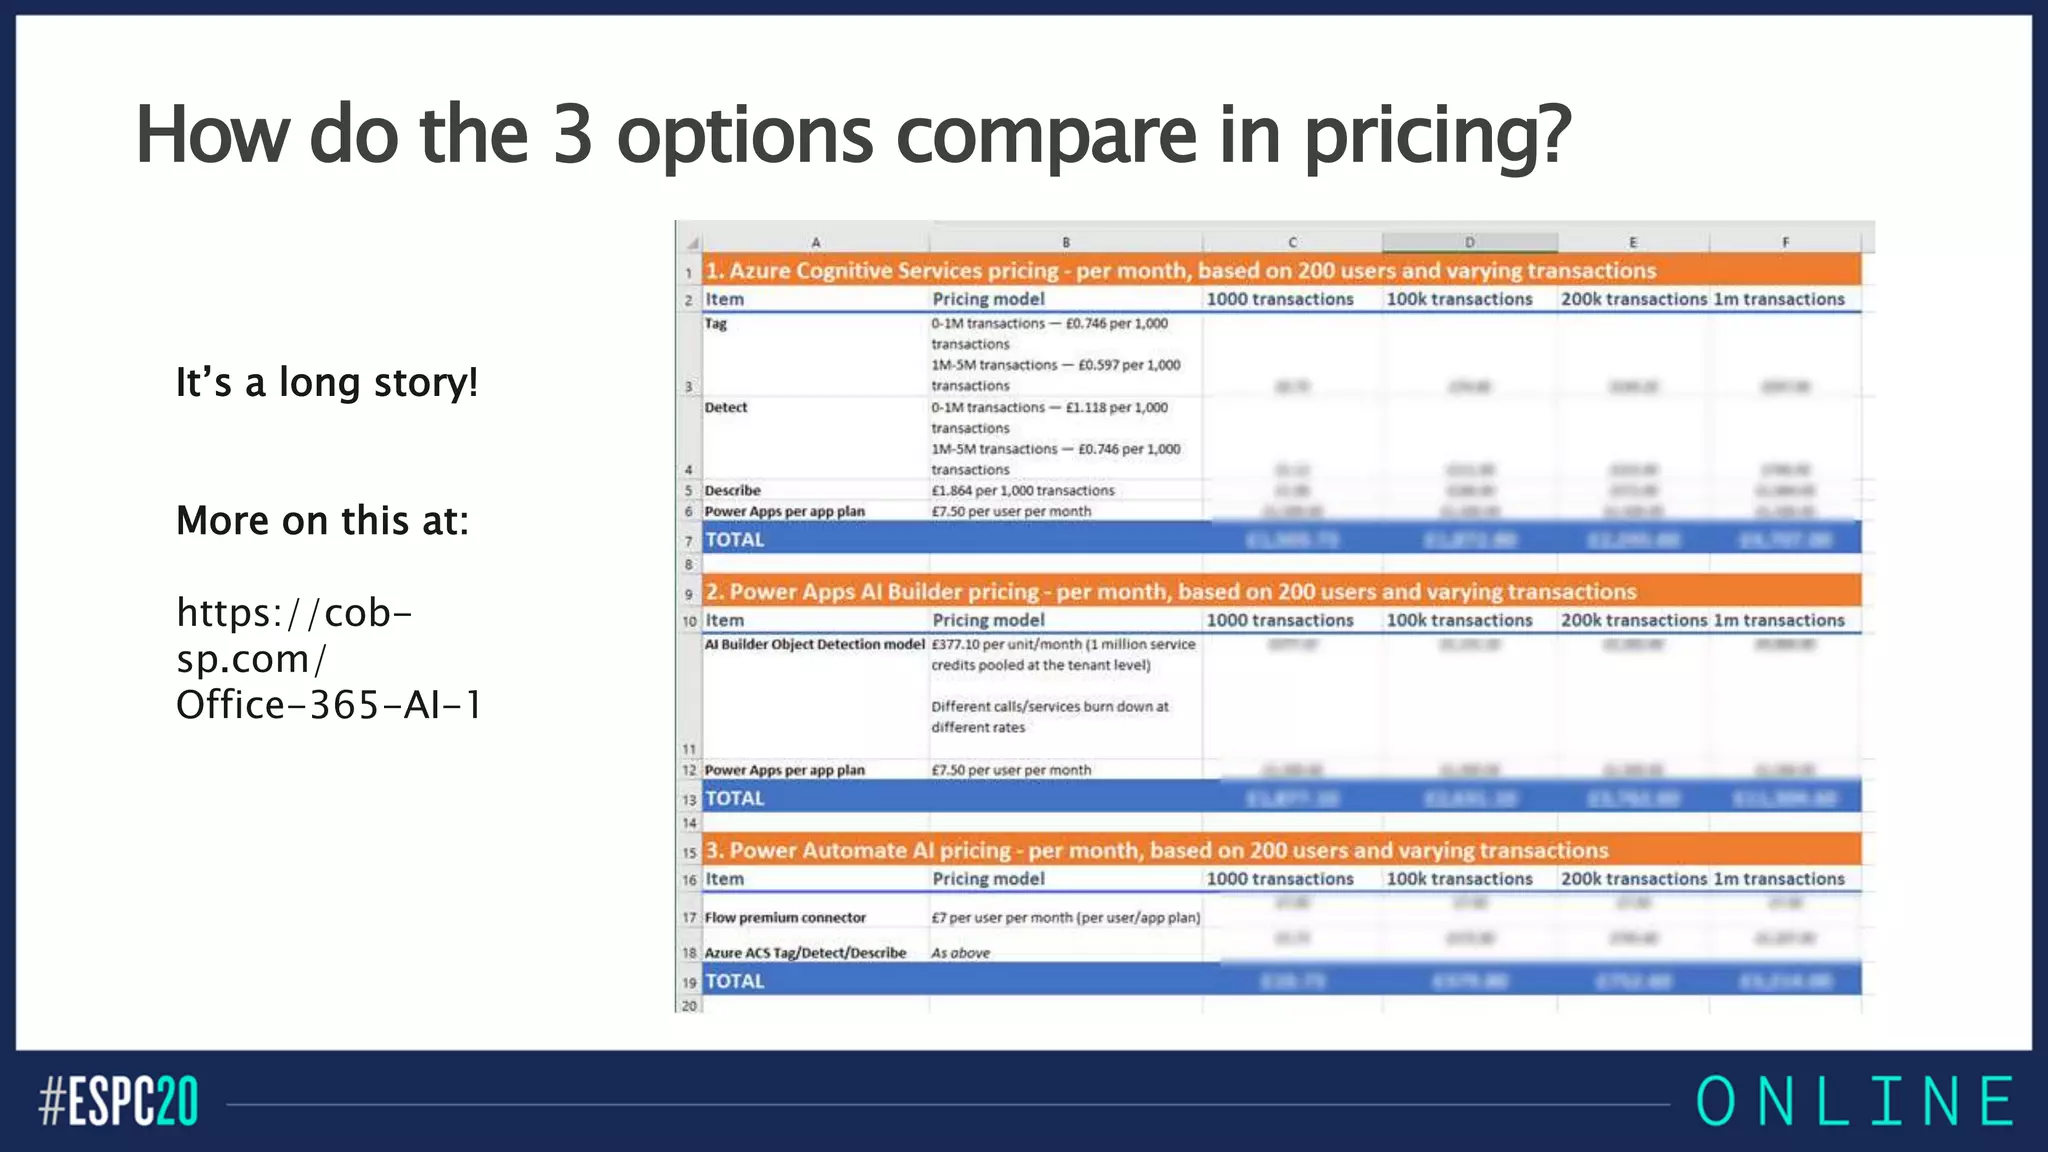
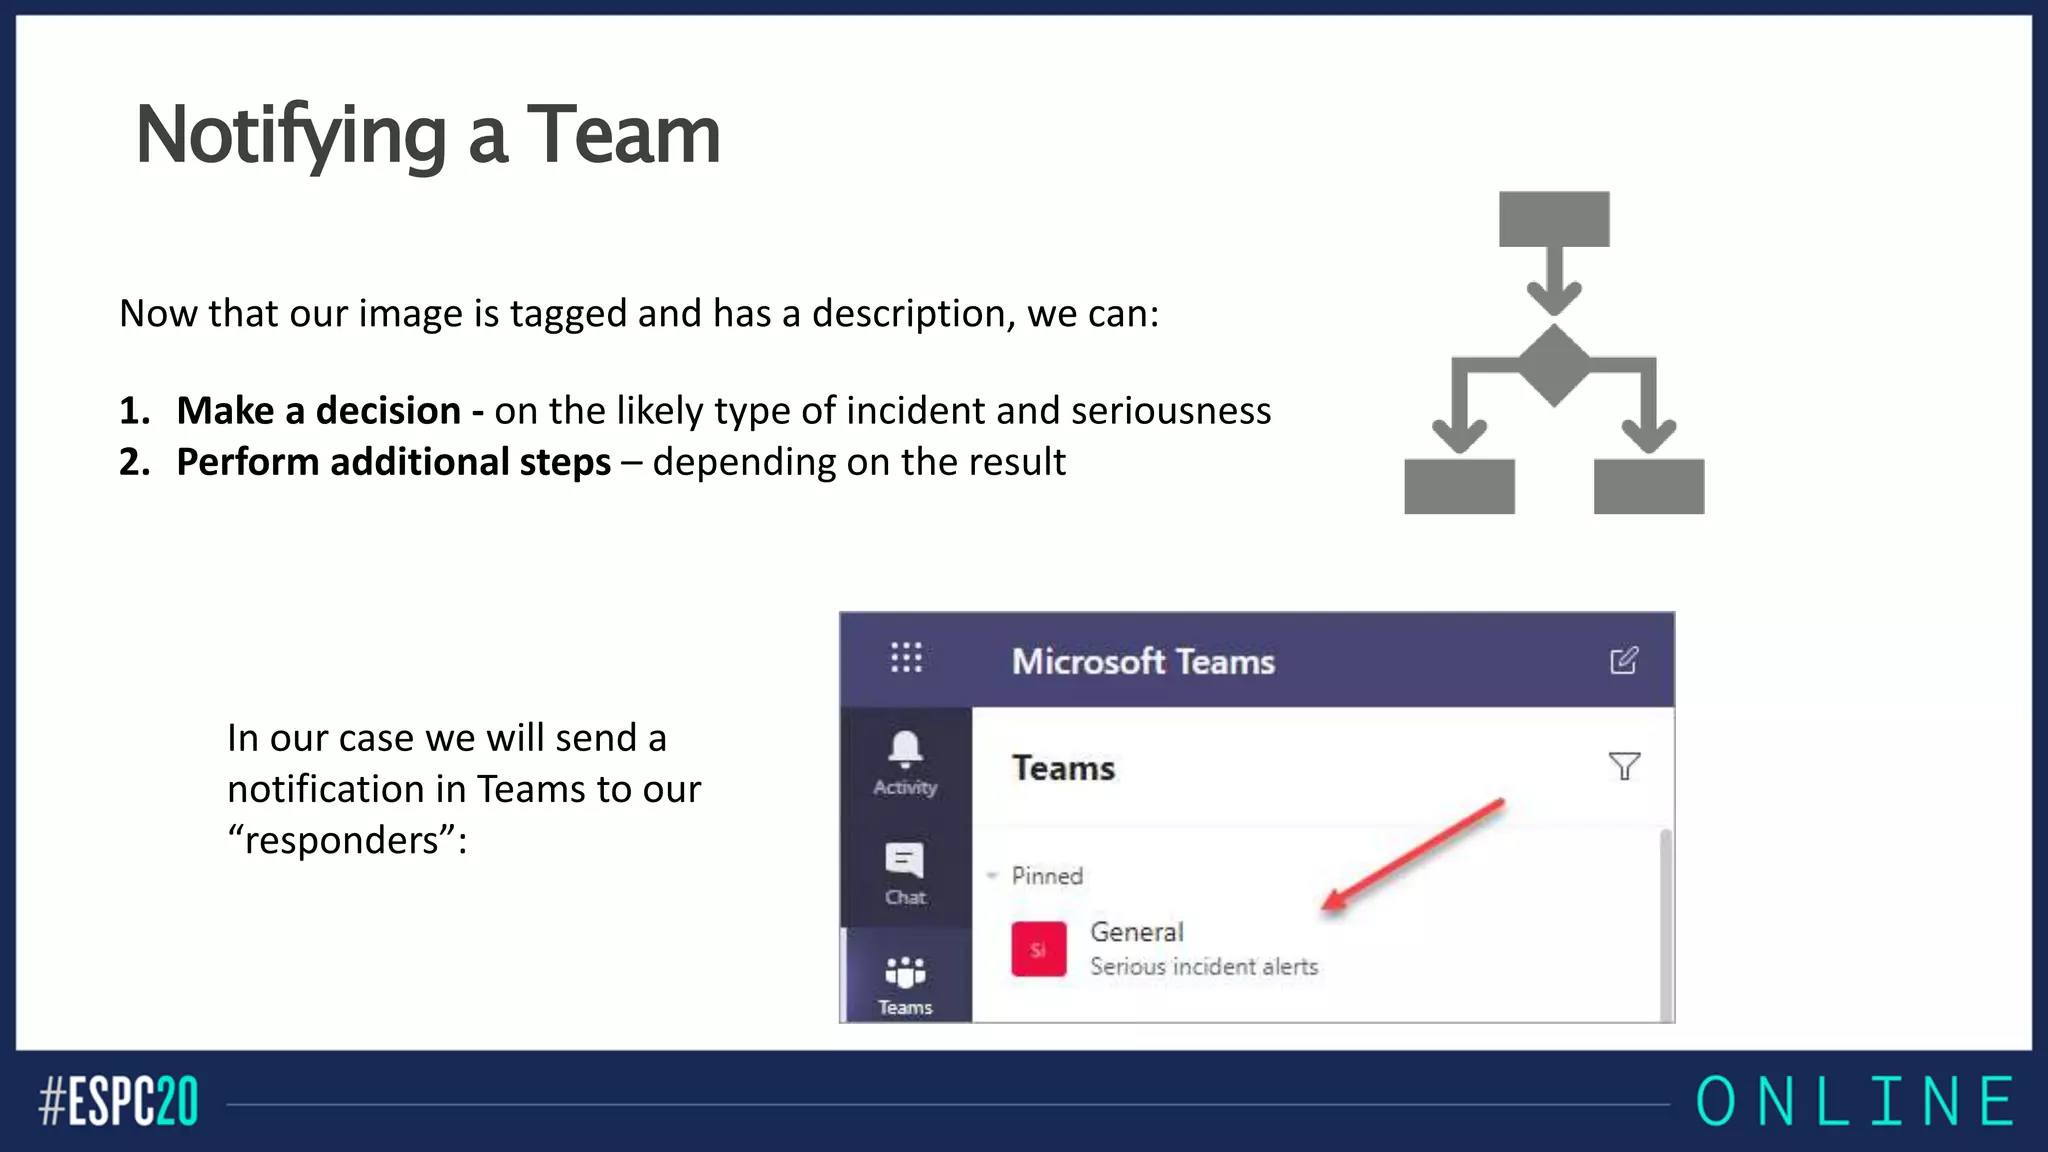
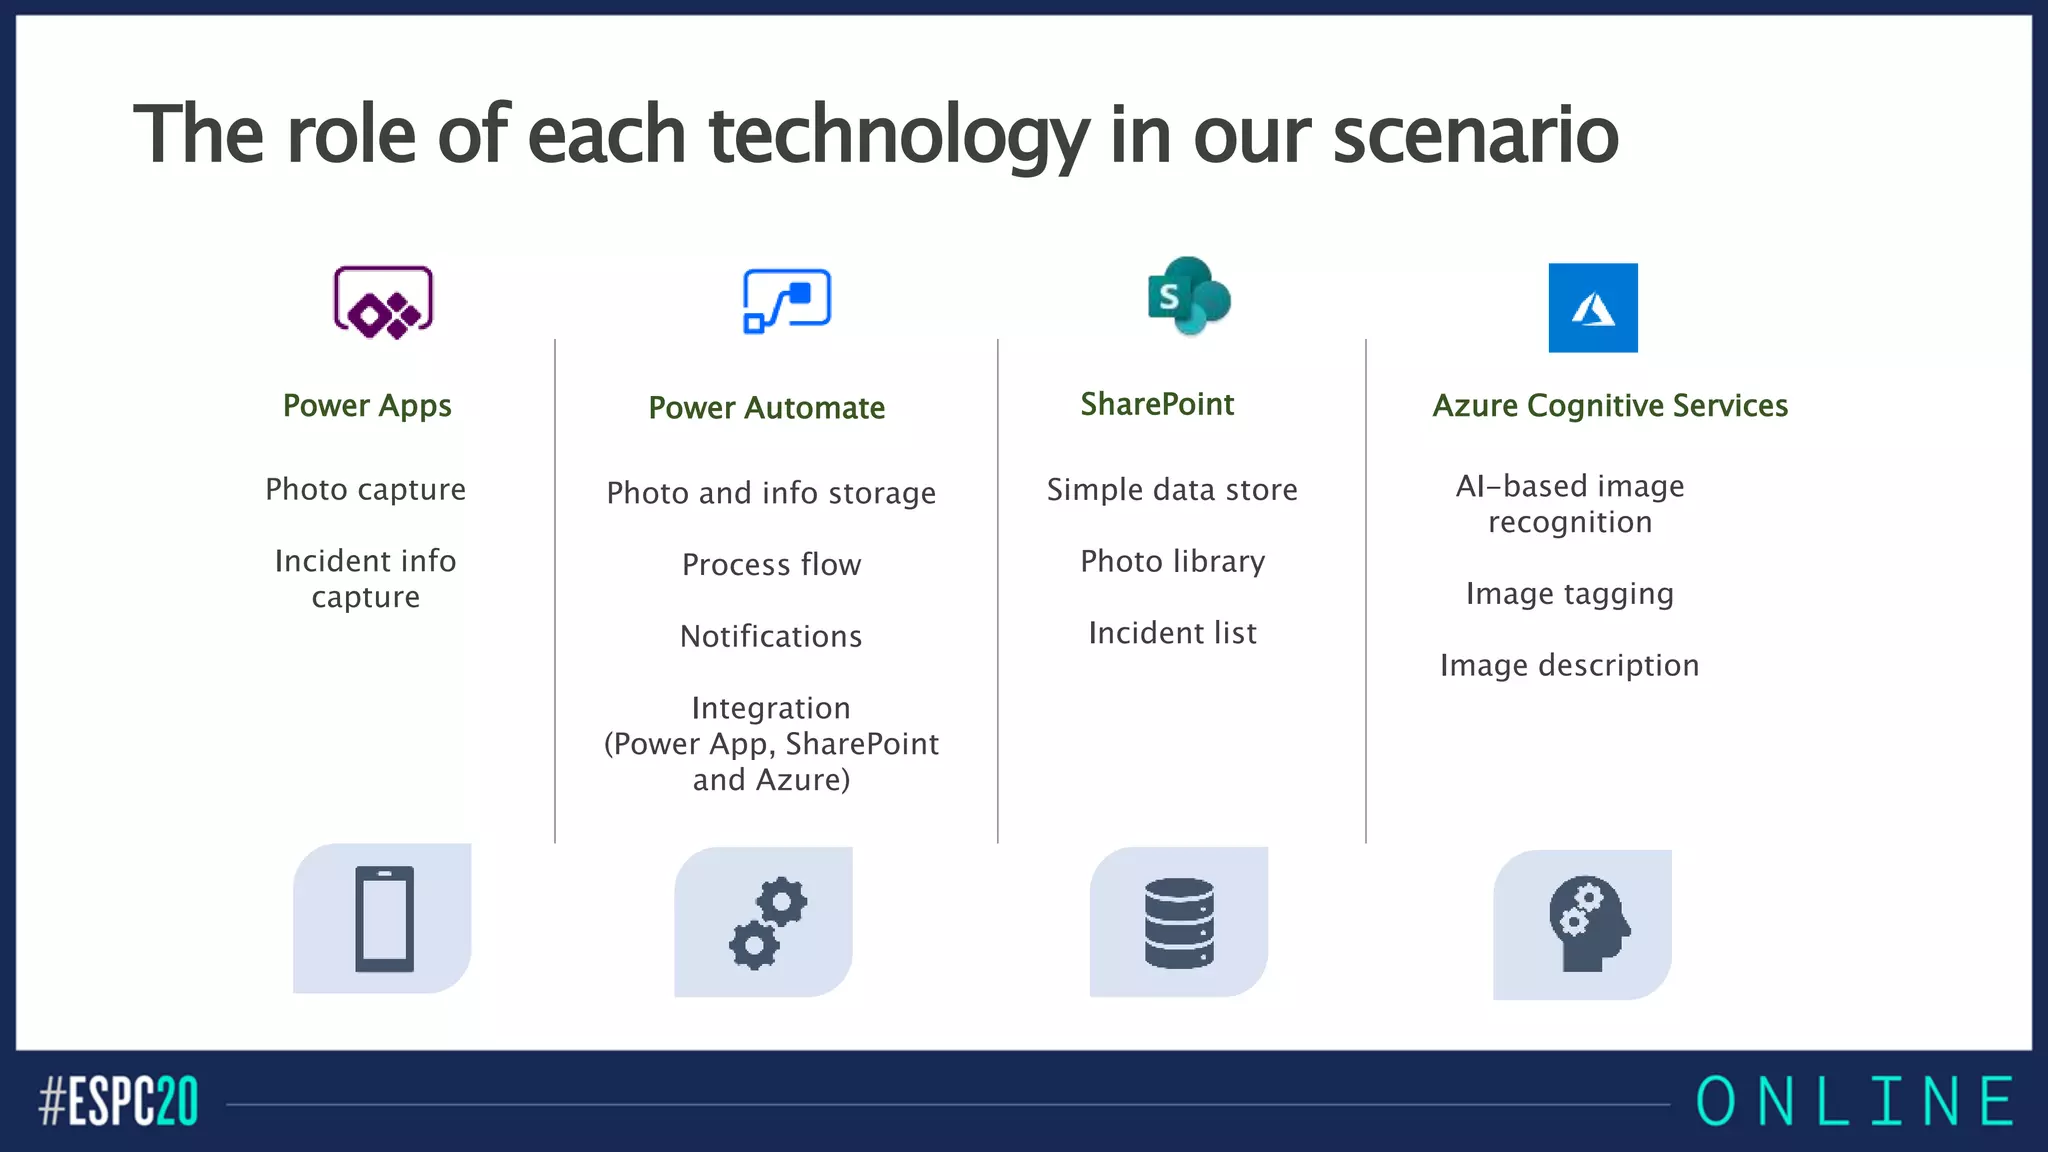
BUILDING AI INTO POWER
PLATFORM SOLUTIONS
CHRIS O’BRIEN, MVP
Products and Services Director,
Content+Cloud (UK)
About me
Products & Services Director,
Content+Cloud (UK)
www.sharepointnutsandbolts.com
@ChrisO_Brien
http://cob-sp.com/COBLinkedIn
Session plan
My top 5 AI
scenarios in
Microsoft 365
3 approaches to AI
Building an
incident reporting
Power App with AI
AI costs
AI for decision-
making (image
recognition)
Wrap-up
Top 5 uses of AI in Microsoft 365
Image
recognition
Add tags and
descriptions to
images so they
can be searched
1
Document
summaries
Extract entities,
key phrases and
sentiment from
your documents
2
Call/meeting
transcripts
Searchable
transcripts for
old calls and
meetings with
speech-to-text
AI
3
Document
translation
Use AI to
translate
documents
4
Forms
processing
Extract meaning
from
documents (e.g.
key fields from
a contract or
invoice)
5
Top 5 AI scenarios - details
https://cob-sp.com/
AI-Microsoft-365
Power Platform for information capture apps
Risk Assessment
Store Check
Site Visit
Proof of Delivery/Proof of Execution
Our scenario – Incident Reporting
..but there are so many other similar flavours!
Objectives for our application
Our scenario – Incident Reporting
Provide a mobile app
for incident details to
be captured
Store incident reports
and images in
SharePoint
Use AI to determine
what is (likely to be)
a serious incident
Alert a Team for
(likely) serious
incidents
Human triage,
followed by further
action if needed
The app implementation
Our scenario – Incident Reporting
User captures
photo and
submits
details in
Power App
Image and
info stored in
SharePoint
lists
Flow
triggered –
calls into
Azure AI
Tags and
description
written back
to SharePoint
Teams post to
“Serious
Incidents”
Team if
needed
3 possible approaches
Power Apps AI Builder
Azure Cognitive Services - code
Azure Cognitive Services –
in Power Automate (preview)
Approach 1 – Power Apps AI Builder
Good for:
No code required
Ready-made Power Apps integration
Recognizing known/pre-trained
objects in images
Approach 2 – Azure Cognitive Services - code
Good for:
Full power and flexibility
Relatively low costs
Tap into any Azure Cognitive Service
with same approach:
• Decision
• Language
• Speech
• Vision
• Web search
Approach 3 – Azure Cognitive Services in a Flow
Good for:
Ease of use
Lowest costs (depending on trigger)
Easily the simplest approach!
Warning!
Power Apps AI Builder can only recognize
known objects from AI models you have built!
DEMO
Adding image recognition AI with Power Automate
Scenario: Incident Reporting
Our image recognition scenario so far
Our Power App for capture
Flow Trigger Purpose
Incident photo processing Power Apps trigger Take photo file and store in
‘Incident Pictures’ library
Add incident photo
metadata
New file in ‘Incident
Pictures’ library
Use AI image recognition
to add tags and
description as metadata
Power Automate for processing and AI integration
We have two Flows:
How much will AI cost?
The good news:
Unlike other Azure
Connectors, Computer Vision
is a Standard connector (not
Premium)!
How much will AI cost?
It’s all good news!
Azure costs are fairly low too – unless you’re running at scale:
How do the 3 options compare in pricing?
It’s a long story!
More on this at:
https://cob-
sp.com/
Office-365-AI-1
DEMO
Routing serious incidents to a human
Notifying a Team
Now that our image is tagged and has a description, we can:
1. Make a decision - on the likely type of incident and seriousness
2. Perform additional steps – depending on the result
In our case we will send a
notification in Teams to our
“responders”:
The role of each technology in our scenario
Photo capture
Incident info
capture
Photo and info storage
Process flow
Notifications
Integration
(Power App, SharePoint
and Azure)
Simple data store
Photo library
Incident list
AI-based image
recognition
Image tagging
Image description
Power Apps Power Automate SharePoint Azure Cognitive Services
Take aways
All AI across Microsoft 365 is
Azure Cognitive Services
underneath
The easiest route BY FAR is
Power Automate – and costs are
more reasonable than Power
Apps AI Builder
No additional Power Platform
licensing is required since Azure
Vision/Text Analytics are
Standard connectors
Not every flavour of AI is
available in Power Platform –
but coding directly against Azure
Cognitive Services is possible
Resources:
Power Platform and AI – 3-part series on my blog:
https://cob-sp.com/Office-365-AI-1
5 ways to use AI to supercharge your content in
Microsoft 365:
https://cob-sp.com/AI-Microsoft-365
Improving Power Apps governance and analytics:
https://cob-sp.com/PowerApps-Governance
-------------------------------------------------------
Computer Vision in Power Automate
www.sharepointnutsandbolts.com
@ChrisO_Brien
Thank you!

Chris O'Brien - Building AI into Power Platform solutions

  • 1.
    BUILDING AI INTOPOWER PLATFORM SOLUTIONS CHRIS O’BRIEN, MVP Products and Services Director, Content+Cloud (UK)
  • 2.
    About me Products &Services Director, Content+Cloud (UK) www.sharepointnutsandbolts.com @ChrisO_Brien http://cob-sp.com/COBLinkedIn
  • 3.
    Session plan My top5 AI scenarios in Microsoft 365 3 approaches to AI Building an incident reporting Power App with AI AI costs AI for decision- making (image recognition) Wrap-up
  • 5.
    Top 5 usesof AI in Microsoft 365 Image recognition Add tags and descriptions to images so they can be searched 1 Document summaries Extract entities, key phrases and sentiment from your documents 2 Call/meeting transcripts Searchable transcripts for old calls and meetings with speech-to-text AI 3 Document translation Use AI to translate documents 4 Forms processing Extract meaning from documents (e.g. key fields from a contract or invoice) 5
  • 6.
    Top 5 AIscenarios - details https://cob-sp.com/ AI-Microsoft-365
  • 7.
    Power Platform forinformation capture apps Risk Assessment Store Check Site Visit Proof of Delivery/Proof of Execution Our scenario – Incident Reporting ..but there are so many other similar flavours!
  • 8.
    Objectives for ourapplication Our scenario – Incident Reporting Provide a mobile app for incident details to be captured Store incident reports and images in SharePoint Use AI to determine what is (likely to be) a serious incident Alert a Team for (likely) serious incidents Human triage, followed by further action if needed
  • 9.
    The app implementation Ourscenario – Incident Reporting User captures photo and submits details in Power App Image and info stored in SharePoint lists Flow triggered – calls into Azure AI Tags and description written back to SharePoint Teams post to “Serious Incidents” Team if needed
  • 10.
    3 possible approaches PowerApps AI Builder Azure Cognitive Services - code Azure Cognitive Services – in Power Automate (preview)
  • 11.
    Approach 1 –Power Apps AI Builder Good for: No code required Ready-made Power Apps integration Recognizing known/pre-trained objects in images
  • 12.
    Approach 2 –Azure Cognitive Services - code Good for: Full power and flexibility Relatively low costs Tap into any Azure Cognitive Service with same approach: • Decision • Language • Speech • Vision • Web search
  • 13.
    Approach 3 –Azure Cognitive Services in a Flow Good for: Ease of use Lowest costs (depending on trigger) Easily the simplest approach!
  • 14.
    Warning! Power Apps AIBuilder can only recognize known objects from AI models you have built!
  • 15.
    DEMO Adding image recognitionAI with Power Automate Scenario: Incident Reporting
  • 16.
    Our image recognitionscenario so far Our Power App for capture Flow Trigger Purpose Incident photo processing Power Apps trigger Take photo file and store in ‘Incident Pictures’ library Add incident photo metadata New file in ‘Incident Pictures’ library Use AI image recognition to add tags and description as metadata Power Automate for processing and AI integration We have two Flows:
  • 17.
    How much willAI cost? The good news: Unlike other Azure Connectors, Computer Vision is a Standard connector (not Premium)!
  • 18.
    How much willAI cost? It’s all good news! Azure costs are fairly low too – unless you’re running at scale:
  • 19.
    How do the3 options compare in pricing? It’s a long story! More on this at: https://cob- sp.com/ Office-365-AI-1
  • 20.
  • 21.
    Notifying a Team Nowthat our image is tagged and has a description, we can: 1. Make a decision - on the likely type of incident and seriousness 2. Perform additional steps – depending on the result In our case we will send a notification in Teams to our “responders”:
  • 22.
    The role ofeach technology in our scenario Photo capture Incident info capture Photo and info storage Process flow Notifications Integration (Power App, SharePoint and Azure) Simple data store Photo library Incident list AI-based image recognition Image tagging Image description Power Apps Power Automate SharePoint Azure Cognitive Services
  • 23.
    Take aways All AIacross Microsoft 365 is Azure Cognitive Services underneath The easiest route BY FAR is Power Automate – and costs are more reasonable than Power Apps AI Builder No additional Power Platform licensing is required since Azure Vision/Text Analytics are Standard connectors Not every flavour of AI is available in Power Platform – but coding directly against Azure Cognitive Services is possible
  • 24.
    Resources: Power Platform andAI – 3-part series on my blog: https://cob-sp.com/Office-365-AI-1 5 ways to use AI to supercharge your content in Microsoft 365: https://cob-sp.com/AI-Microsoft-365 Improving Power Apps governance and analytics: https://cob-sp.com/PowerApps-Governance ------------------------------------------------------- Computer Vision in Power Automate www.sharepointnutsandbolts.com @ChrisO_Brien Thank you!

Editor's Notes

  • #2 To add your image, insert your picture and scale it to the same size as the box.
  • #3 To add your image, first delete the place holder image as shown in the white box. Then insert your picture and scale it to be bigger than the size of the white box shown. Finally, right click on your image and select ‘Send to back’ – your image should now be framed correctly.
  • #4 To add your image, first delete the place holder image as shown in the white box. Then insert your picture and scale it to be bigger than the size of the white box shown. Finally, right click on your image and select ‘Send to back’ – your image should now be framed correctly.
  • #5 To add your image, first delete the place holder image as shown in the white box. Then insert your picture and scale it to be bigger than the size of the white box shown. Finally, right click on your image and select ‘Send to back’ – your image should now be framed correctly.
  • #6 To add your image, first delete the place holder image as shown in the white box. Then insert your picture and scale it to be bigger than the size of the white box shown. Finally, right click on your image and select ‘Send to back’ – your image should now be framed correctly.
  • #7 To add your image, first delete the place holder image as shown in the white box. Then insert your picture and scale it to be bigger than the size of the white box shown. Finally, right click on your image and select ‘Send to back’ – your image should now be framed correctly.
  • #8 To add your image, first delete the place holder image as shown in the white box. Then insert your picture and scale it to be bigger than the size of the white box shown. Finally, right click on your image and select ‘Send to back’ – your image should now be framed correctly.
  • #9 To add your image, first delete the place holder image as shown in the white box. Then insert your picture and scale it to be bigger than the size of the white box shown. Finally, right click on your image and select ‘Send to back’ – your image should now be framed correctly.
  • #10 To add your image, first delete the place holder image as shown in the white box. Then insert your picture and scale it to be bigger than the size of the white box shown. Finally, right click on your image and select ‘Send to back’ – your image should now be framed correctly.
  • #11 To add your image, first delete the place holder image as shown in the white box. Then insert your picture and scale it to be bigger than the size of the white box shown. Finally, right click on your image and select ‘Send to back’ – your image should now be framed correctly.
  • #12 To add your image, first delete the place holder image as shown in the white box. Then insert your picture and scale it to be bigger than the size of the white box shown. Finally, right click on your image and select ‘Send to back’ – your image should now be framed correctly.
  • #13 To add your image, first delete the place holder image as shown in the white box. Then insert your picture and scale it to be bigger than the size of the white box shown. Finally, right click on your image and select ‘Send to back’ – your image should now be framed correctly.
  • #14 To add your image, first delete the place holder image as shown in the white box. Then insert your picture and scale it to be bigger than the size of the white box shown. Finally, right click on your image and select ‘Send to back’ – your image should now be framed correctly.
  • #15 To add your image, first delete the place holder image as shown in the white box. Then insert your picture and scale it to be bigger than the size of the white box shown. Finally, right click on your image and select ‘Send to back’ – your image should now be framed correctly.
  • #16 To add your image, first delete the place holder image as shown in the white box. Then insert your picture and scale it to be bigger than the size of the white box shown. Finally, right click on your image and select ‘Send to back’ – your image should now be framed correctly.
  • #17 To add your image, first delete the place holder image as shown in the white box. Then insert your picture and scale it to be bigger than the size of the white box shown. Finally, right click on your image and select ‘Send to back’ – your image should now be framed correctly.
  • #18 To add your image, first delete the place holder image as shown in the white box. Then insert your picture and scale it to be bigger than the size of the white box shown. Finally, right click on your image and select ‘Send to back’ – your image should now be framed correctly.
  • #19 To add your image, first delete the place holder image as shown in the white box. Then insert your picture and scale it to be bigger than the size of the white box shown. Finally, right click on your image and select ‘Send to back’ – your image should now be framed correctly.
  • #20 To add your image, first delete the place holder image as shown in the white box. Then insert your picture and scale it to be bigger than the size of the white box shown. Finally, right click on your image and select ‘Send to back’ – your image should now be framed correctly.
  • #21 To add your image, first delete the place holder image as shown in the white box. Then insert your picture and scale it to be bigger than the size of the white box shown. Finally, right click on your image and select ‘Send to back’ – your image should now be framed correctly.
  • #22 To add your image, first delete the place holder image as shown in the white box. Then insert your picture and scale it to be bigger than the size of the white box shown. Finally, right click on your image and select ‘Send to back’ – your image should now be framed correctly.
  • #23 To add your image, first delete the place holder image as shown in the white box. Then insert your picture and scale it to be bigger than the size of the white box shown. Finally, right click on your image and select ‘Send to back’ – your image should now be framed correctly.
  • #24 To add your image, first delete the place holder image as shown in the white box. Then insert your picture and scale it to be bigger than the size of the white box shown. Finally, right click on your image and select ‘Send to back’ – your image should now be framed correctly.
  • #25 To add your image, first delete the place holder image as shown in the white box. Then insert your picture and scale it to be bigger than the size of the white box shown. Finally, right click on your image and select ‘Send to back’ – your image should now be framed correctly.