1. T.U. Cluj-Napoca, C.S. Dept. TortoiseSVN Short Tutorial Andrei Vatavu & Marius Joldoş
1/11
TortoiseSVN Short Tutorial
This tutorial presents some basic steps for using SVN and accessing your assigned Subversion account. To get familiar
with Apache Subversion see http://en.wikipedia.org/wiki/Apache_Subversion
1. Getting and Installing TortoiseSVN
1. Download the last version of TortoiseSVN from this link:
http://tortoisesvn.net/downloads.html
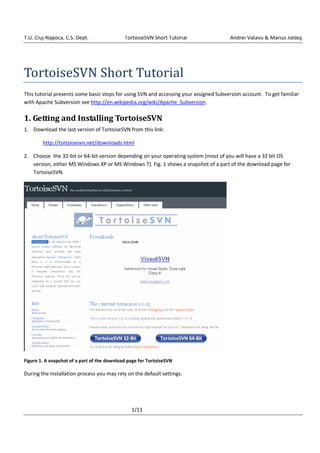
2. Choose the 32-bit or 64-bit version depending on your operating system (most of you will have a 32 bit OS
version, either MS Windows XP or MS Windows 7). Fig. 1 shows a snapshot of a part of the download page for
TortoiseSVN.
Figure 1. A snapshot of a part of the download page for TortoiseSVN
During the installation process you may rely on the default settings.
2. T.U. Cluj-Napoca, C.S. Dept. TortoiseSVN Short Tutorial Andrei Vatavu & Marius Joldoş
2/11
2. Using TortoiseSVN
Create a SVN Repository
1. Create a folder.
2. Right-click the newly created folder SVN check out (cf. Fig. 2 )
Figure 2. Choosing SVN checkout
3. In the “URL of repository” field, copy the one of the below URLs:
• To access repository from outside T.U. Cluj-Napoca network (e.g. from home or hostel):
https://os.obs.utcluj.ro:22443/user
• To access repository from INSIDE T.U. Cluj-Napoca network (e.g. from the laboratories):
https://10.158.0.45:443/user
Note: You should replace user with your given username. See Figure 3. In Fig. 3 the placeholder user is
symbolized by USERNAME.
4. Press OK
3. T.U. Cluj-Napoca, C.S. Dept. TortoiseSVN Short Tutorial Andrei Vatavu Marius Joldoş
3/11
Figure 3. Checking out a repository.
An authentication dialog will appear (cf. Fig. 4) : fill in your assigned username and password
Figure 4. Authentication dialog.
After Check out, you should have the content from server stored in your local folder.
Update
An update operation is used for getting a repository version of your work from a SVN server down to your computer.
To perform an Update:
5. Right click in our folder SVN Update (see Fig. )
The local copy will be updated from the repository.
4. T.U. Cluj-Napoca, C.S. Dept. TortoiseSVN Short Tutorial Andrei Vatavu Marius Joldoş
4/11
Figure 5. Updating a local copy
Note: If a red line is shown, then there is a conflict between the repository version and the local copy. Conflicts
must be solved with great attention, as they may cause undesired changes.
Commit
Commit is used for storing your local copy to the SVN repository. To achieve this:
1. Right click SVN Commit. A windows similar to the one shown in Fig. pops up.
5. T.U. Cluj-Napoca, C.S. Dept. TortoiseSVN Short Tutorial Andrei Vatavu Marius Joldoş
5/11
Figure 6. A commit window.
Notes:
• In the Message area, you have to write a description of, e.g., the changes made relative to the previous version,
or, in general, a message which helps to identify that version with ease..
• In the Changes Made area, you choose what you want to commit by hand. It just lists all changes (and sometimes
it does not include all of them).
3. Using Codeblocks with TortoiseSVN
In order to use Codeblocks with TortoiseSVN, you should take the following steps:
1. Create a new folder on your Desktop (e.g. use right-click-New folder, see Fig. 7).
6. T.U. Cluj-Napoca, C.S. Dept. TortoiseSVN Short Tutorial Andrei Vatavu Marius Joldoş
6/11
Figure 7. Creating a folder on the Desktop
2. Rename your new folder to YourNames (e.g MariusJoldos - see Fig. 8)
Figure 8. Renaming your newly created folder
3. Do a checkout on your repository using the supplied authentication credentials as shown in Fig. 9 and Fig. 10
Figure 9. Selecting SVN Checkout
7. T.U. Cluj-Napoca, C.S. Dept. TortoiseSVN Short Tutorial Andrei Vatavu Marius Joldoş
7/11
Figure 10. Checking out repository
A window covered by an authentication popup appeara. Type your credentials – see Fig. 11. You may choose to save
authentication.
Figure 11. Supplying authentication credentials on SVN checkout.
On success, a window similar to the one of Fig. 12 appears.
8. T.U. Cluj-Napoca, C.S. Dept. TortoiseSVN Short Tutorial Andrei Vatavu Marius Joldoş
8/11
Figure 12. Finishing checkout.
4. Run Codeblocks and create your project INSIDE the SVN repository working copy on your Desktop (see Fig. 13 and
14).
Figure 13. New Codeblocks project inside repository.
9. T.U. Cluj-Napoca, C.S. Dept. TortoiseSVN Short Tutorial Andrei Vatavu Marius Joldoş
9/11
Figure 14. Complete project data for Codeblocks. Note that project name is YourNames-1 as it will hold a solution for
Assignment 1.
5. Do your work with Codeblocks. Save your work and leave Codeblocks.
6. Commit the changes to the server. Do this with right-click on the folder and selecting SVN Commit (see Fig. 15).
In a window similar to Fig. 16 select what you desire to submit (e.g. use Select all checkbox). Press OK.
A window shows that you are done (Fig. 17).
Figure 15. Choosing Commit
10. T.U. Cluj-Napoca, C.S. Dept. TortoiseSVN Short Tutorial Andrei Vatavu Marius Joldoş
10/11
Figure 16. Selecting what to
commit.
11. T.U. Cluj-Napoca, C.S. Dept. TortoiseSVN Short Tutorial Andrei Vatavu Marius Joldoş
11/11
Figure 17. Commit done.
You may now check that your changes are on the server using a browser and the same URL.