1. K14395 6/06 Rev. A
5878
Wireless Wall Transmitter
USER GUIDE
GENERAL INFORMATION LOW BATTERY INDICATION
The 5878 is a compact, 6-button wall-mounted When a Button is pressed and a Low Battery
wireless transmitter that permits an alarm system condition exists, a message is transmitted to the
or home automation devices to be controlled control panel and LOW BAT will be displayed on
remotely. The transmitter is typically used for the keypad. The LED will not flash during
security system arming and panic and controlling transmission if the battery is low.
output relay operations associated with home
Replacing the Battery
automation devices. Check with your installer for
1. Slide out the battery tray located at the bottom
operation of the buttons on your unit.
of the 5878.
OPERATING THE BUTTONS 2. Carefully remove the battery.
To activate a programmed function, press and hold
3. Press and hold any button for at least one
the associated button(s) down. The LED will flash
second.
green to indicate the unit has transmitted in
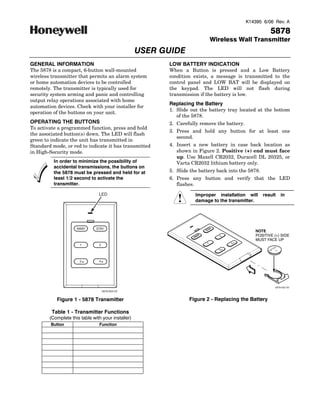
Standard mode, or red to indicate it has transmitted 4. Insert a new battery in case back location as
in High-Security mode. shown in Figure 2. Positive (+) end must face
up. Use Maxell CR2032, Duracell DL 20325, or
In order to minimize the possibility of Varta CR2032 lithium battery only.
accidental transmissions, the buttons on
the 5878 must be pressed and held for at 5. Slide the battery back into the 5878.
least 1/2 second to activate the 6. Press any button and verify that the LED
transmitter. flashes.
LED Improper installation will result in
damage to the transmitter.
AWAY STAY Y
STA NOTE
AY 2 POSITIVE (+) SIDE
AW
MUST FACE UP
1 4
1 2
Y
TER
3 BAT
3 4
5878-002-V0
5878-004-V0
Figure 1 - 5878 Transmitter Figure 2 - Replacing the Battery
Table 1 - Transmitter Functions
(Complete this table with your installer)
Button Function