
Recommended
More Related Content
What's hot
What's hot (18)
Similar to Instal Ubuntu Server dan Konfigurasi Proxy Squid
Similar to Instal Ubuntu Server dan Konfigurasi Proxy Squid (20)
Instal Ubuntu Server dan Konfigurasi Proxy Squid
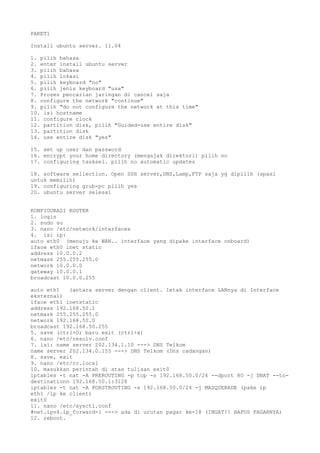
- 1. PAKET1 Install ubuntu server. 11.04 1. pilih bahasa 2. enter install ubuntu server 3. pilih bahasa 4. pilih lokasi 5. pilih keyboard "no" 6. pilih jenis keyboard "usa" 7. Proses pencarian jaringan di cancel saja 8. configure the network "continue" 9. pilih "do not configure the network at this time" 10. isi hostname 11. configure clock 12. partition disk, pilih "Guided-use entire disk" 13. partition disk 14. use entire disk "yes" 15. set up user dan password 16. encrypt your home directory (mengajak direktori) pilih no 17. configuring tasksel. pilih no automatic updates 18. software sellection. Open SSH server,DNS,Lamp,FTP saja yg dipilih (spasi untuk memilih) 19. configuring grub-pc pilih yes 20. ubuntu server selesai KONFIGURASI ROUTER 1. login 2. sudo su 3. nano /etc/network/interfaces 4. isi ip: auto eth0 (menuju ke WAN.. interface yang dipake interface onboard) iface eth0 inet static address 10.0.0.2 netmask 255.255.255.0 network 10.0.0.0 gateway 10.0.0.1 broadcast 10.0.0.255 auto eth1 (antara server dengan client. letak interface LANnya di Interface eksternal) iface eth1 inetstatic address 192.168.50.1 netmask 255.255.255.0 network 192.168.50.0 broadcast 192.168.50.255 5. save (ctrl+O) baru exit (ctrl+x) 6. nano /etc/resolv.conf 7. isi: name server 202.134.1.10 ---> DNS Telkom name server 202.134.0.155 ---> DNS Telkom (Dns cadangan) 8. save, exit 9. nano /etc/rc.local 10. masukkan perintah di atas tulisan exit0 iptables -t nat -A PREROUTING -p tcp -s 192.168.50.0/24 --dport 80 -j DNAT --to- destinationn 192.168.50.1:3128 iptables -t nat -A PORSTROUTING -s 192.168.50.0/24 -j MASQUERADE (pake ip eth1 /ip ke client) exit0 11. nano /etc/sysctl.conf #net.ipv4.ip_forward=1 ---> ada di urutan pagar ke-18 (INGAT!! HAPUS PAGARNYA) 12. reboot.
- 2. KONFIGURASI IP di komputer client. 1. atur ip di Laptop client ip add 192.168.50.10 ----> ip dari srver ce client. harus satu network subnet mask 255.255.255.0 gateway 192.168.50.1 Prefere DNS server 202.134.1.10 alternative DNS Server 202.134.0.155 2. test koneksi di CMD. ping 192.168.50.1 -t KONFIGURASI PROXY 1. apt-get update 2. apt-get install squid 3. nano etc/squid/squid.conf (bagian editan) 4. cari (ctrl +w) #http_port 3128 ---> hapus tanda pagarnya. trus tambahkan transparent d blkg 3128 5. cari lg (ctrl+w) # TAG: visible_hostname. kalo sdh dapat, cari di bagian bawanya. tulisan # visible_hostname web master. (hapus pagarnya). sudah itu ganti web master jadi www.sekolah.sch.id 6. cari lg (ctrl+w) cache_mgr sampe dapat/ kata kunci administrative parameters kalo dapat yg tulisan # cache_mgr webmaster , ganti web masternya jadi nama_sendiri@sekolah.sch.id ---> Ananda_apriliani@sekolah.sch.id 7. cari (ctrl+w) acl localhost. kalo sudah dapat, tambahkan acl lan src 192.168.50.0 diantara acl local host src dan acl to_localhost dst. setelah itu. di bawahnya acl lan src, tambahkan acl blokir dst domain "etc/squid/blokir" (pake tanda kutip memang. blokir nama folder yang dibuat). jadinya: acl local host src 127.0.0.1/32 acl lan src 192.168.50.0/255.255.255.0 acl blokir dstdomain "/etc/squid/blokir" acl to_localhost dst 127.0.0.0/8 0.0.0.0/32 8. cari kebawah-bawah lagi. samapi dapat # http_access deny all # only allow cachemgr access from localhost http_access deny blokir(nama foledr td) --->ditambahkan http_access allow manager localhost http_access allow lan ---->ditambahkan http_access deny manager 9. save. (ctrl+o) baru exit (ctrl+x) 10. pas keluar ketik ---> squid -z (kalo sudah ada keterangan running artinya berhasil) 11. ketik lagi ---> squid -k reconfigure 12. /etc/init.d/squid/restart 13. nano /etc/squid/blokir kettikanmi nama situs yang akan di blokir. www.facebook.com www.youtube.com 14. save. exit. 15. SELESAI. Tinggal cek di client.