
Recommended
More Related Content
Similar to 𝕬𝖓𝖎𝖒𝖆𝖙𝖎𝖓𝖌 𝖙𝖊𝖝𝖙 𝖆𝖓𝖉 𝖔𝖇𝖏𝖊𝖈𝖙 𝖇𝖞 𝕽𝖔𝖓𝖊𝖑𝖑 𝕸𝖔𝖍𝖆𝖓 7𝖙𝖍 𝕭.pptx
Similar to 𝕬𝖓𝖎𝖒𝖆𝖙𝖎𝖓𝖌 𝖙𝖊𝖝𝖙 𝖆𝖓𝖉 𝖔𝖇𝖏𝖊𝖈𝖙 𝖇𝖞 𝕽𝖔𝖓𝖊𝖑𝖑 𝕸𝖔𝖍𝖆𝖓 7𝖙𝖍 𝕭.pptx (20)
Recently uploaded
Recently uploaded (20)
𝕬𝖓𝖎𝖒𝖆𝖙𝖎𝖓𝖌 𝖙𝖊𝖝𝖙 𝖆𝖓𝖉 𝖔𝖇𝖏𝖊𝖈𝖙 𝖇𝖞 𝕽𝖔𝖓𝖊𝖑𝖑 𝕸𝖔𝖍𝖆𝖓 7𝖙𝖍 𝕭.pptx
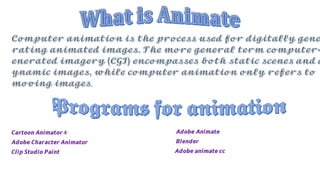
- 1. 𝘾𝙖𝙧𝙩𝙤𝙤𝙣 𝘼𝙣𝙞𝙢𝙖𝙩𝙤𝙧 4 𝘼𝙙𝙤𝙗𝙚 𝘾𝙝𝙖𝙧𝙖𝙘𝙩𝙚𝙧 𝘼𝙣𝙞𝙢𝙖𝙩𝙤𝙧 𝘾𝙡𝙞𝙥 𝙎𝙩𝙪𝙙𝙞𝙤 𝙋𝙖𝙞𝙣𝙩 𝘼𝙙𝙤𝙗𝙚 𝘼𝙣𝙞𝙢𝙖𝙩𝙚 𝘽𝙡𝙚𝙣𝙙𝙚𝙧 𝘼𝙙𝙤𝙗𝙚 𝙖𝙣𝙞𝙢𝙖𝙩𝙚 𝙘𝙘
- 3. o Timeline o Symbols And Instances o Types Of Animations o Motion Pre-sets o Masking
- 4. Timeline is the area where you decide the sequencing and timings of the various graphics and other elements of a movie. The timeline organises and controls the contents of the movie in layers and frames (Fig. 11.1). By default, the Timeline appears below the main document window. However, you can place it at any place of your choice in the document window. To move the Timeline, drag the title bar tab at the upper-left corner of the Timeline.
- 6. • Layers can be imagined as transparent sheets mounted on top of each other on the stage. Layers let us organize and manage entire work by separating the content of a movie into manageable sizes. We can draw and modify the objects of one layer without affecting objects placed on another layer. Also, layers can be used to change the order of the objects. Graphics in the higher layers appear on top of graphics that are placed in lower layers. When we open a new Animate document, it contains only one layer. We can create more layers to organize the contents of a movie. We can also hide or show, lock or unlock the contents of a layer (Fig. 11.2).
- 7. Adding a new layer Deleting a layer Renaming a layer Hiding/Showing a layer Locking/Unlocking a layer Changing the order of layers
- 10. Renaming a layer
- 12. Locking/Unlocking a layer • We can lock a layer to prevent any kind of modifications that can be done on that layer. To lock a layer, click in the Lock column to the right of the layer name. A lock appears in the Lock column to depict that the contents of the layer are locked (Fig. 11.5). Click on it again to unlock the layer
- 13. Changing the order of layers • We can change the order of layers by dragging one or more layers to the desired position (above or below the other layers) in the Timeline (Fig. 11.6). Graphics in the top layers are placed above the graphics in the bottom layers.
- 14. • A frame is the basic unit wherein we define the behavior or the change in the object properties for creating an animation. An animation consists of multiple frames. These frames when played together in a sequence create an animation effect. • The frames are represented as a grid of boxes in the Timeline. The red marker in the Timeline is called the play head. The play head moves from left to right through the frames in the Timeline to display the animation of the movie. You can check for the current frame number and the frame rate from the Timeline Status bar (Fig. 11.8).
- 15. Blank keyframe Property keyframe Normal keyframe White frame Grey frame Blue frame Green frames with an arrow
- 20. -It is a frame with no content on their layer (Fig. 11.12). It is a frame with content on their layer. It appears when you do motion tweening (explained later in this chapter). A collection of blue frames is called a tween span. It appears when you do shape twining (explained later in this chapter).
- 21. One of the important features of Animate is that it allows creating a graphic object once, and then reuses the created graphic object throughout the document. This can be done by defining the objects as symbols. Let us learn more about symbols. A symbol is any graphic object, movie or button stored in the library. A symbol can be reused again and again in the movie. Using symbols reduces the file size, which in turn, let your animations to download faster. When you create a symbol, it automatically becomes a part of the library. When you drag a symbol from the library on the stage, a copy of the symbol gets created. This copy of the symbol is called an instance of the symbol. An instance can differ from its symbol in colour or size. Making changes to a symbol updates all its instances, but making changes to an instance of a symbol updates only that instance and does not affect other instances.
- 22. • The steps to create a symbol are: Step 1 Select the existing object on the stage (Fig. 11.13). Step 2 Select Modify ► Convert to Symbol. The Convert to Symbol dialog box gets displayed. • Step 3 In the Convert to stmbol dialog box, type the name for the symbol and select an appropriate type . In this chapter, most of the time we will let the Type be Graphic.Click OK.
- 23. • To create the instance of a symbol, drag the symbol from the Library Panel to the stage. We can modify the properties of instances such as tint, transparency and brightness. As discussed earlier, change in these properties of the instance will not affect the symbol. • To modify the properties of the instance, follow the given steps. Step 1 Select the instance on the stage (Fig. 11.16). Step 2 If the Properties Inspecor is not displayed, click on window►Properties Step 3 In the Property Inspector,select one of the following options fom the Style menu in the colour Effect section
- 24. • This option let us adjust the relative brightness or darkness of the instance. Adjust the level of brightness by dragging the slider up or down [black (- 100%) to white (100%)].
- 26. • This option lets you change the transparency of the instance. Move the slider to adjust the slider value
- 27. • Animate let us create two types of animations. • Frame-by-frame animation • Tweened animation
- 28. 𝗙𝗿𝗮𝗺𝗲-𝗯𝘆-𝗳𝗿𝗮𝗺𝗲 𝗔𝗻𝗶𝗺𝗮𝘁𝗶 𝗼𝗻𝘀 • This is the form of animation in which you change the contents of every frame for creating an animation. Frame-by-frame animation is best suited for creating complex animations. Let us consider the following example to understand the concept of frame-by- frame animation. • Follow the given steps to create a frame-by-frame animation. Step 1 Select the Text tool and write the given text on the stage. Step 2 Select the text and convert it to a symbol by pressing F8. The Convert to Symbol dialog box appears.Type the name for the symbol and press OK. The text is saved as a symbol. Step 3 Select frame 2 in the Timeline window. Step 4 Insert a keyframe by selecting Insert ►Timeline ►Keyframe. • Step 5 Change the colour of the text symbol by selecting the Tint option from the Color drop- down list in the Property Inspector. Step 6 Similarly, add four to five more keyframes and change the colour of the text symbol in each keyframe. The timeline appears as shown in Figure 11.20. Step 7 Place the playhead on the first frame and select Control —► Play to play the movie. The text gets highlighted with different colours when a movie is played.
- 29. • This is the form of animation in which you define the contents of the first frame and the last frame of an animation, and Animate generates all the frames in between the two frames automatically. Tweened animation is an effective way to create animations in which you need to change the position or shape of an object over time during an animation. Animate let us create two types of tweened animations. • Motion Tweening • Shape Tweening
- 30. 𝗠𝗼𝘁𝗶𝗼𝗻 𝗧𝘄𝗲𝗲𝗻𝗶𝗻𝗴
- 31. Shape tweening is a type of animation in which you can convert one shape into another shape in order to create an animation. In shape tweening, you should not convert an object into a symbol. Let us consider an example to understand the concept of shape tweening by converting a circle into a rectangle. Example: Follow the given steps to convert a circle into a rectangle using shape tweening. Step 1 Click on frame 1 and draw a circle on the Stage as shown in Figure 11.26 Step 2 Click on frame number 30 and press F6 to insert a keyframe. Step 3 On frame 30, delete the circle and draw a rectangle as shown in Figure 11.27. Step 4 Click anywhere on the Timeline between frame 1 and 30, right-click and choose Create Shape Tween option or choose Insert ► Shape Tween option (Fig. 11.28). • We will notice that an arrow appears between the two keyframes. Step 5 Press Ctrl+Enter to play the movie
- 32. • We can apply motion or shape tweening in separate layers without disturbing other elements of the picture. Let us understand this concept by considering an example to make a butterfly fly to a flower. Example: Follow the given steps to create motion and shape tweening on separate layers. Step 1 Draw a circle on layer 1. Change the name of layer 1 to ‘flower’. Add another layer. A layer with the name layer 2 gets added. Rename layer 2 to ‘butterfly’. Draw a butterfly on this layer as shown in Figure (11.30). Step 2 Covert the butterfly into a symbol by pressing F8. Step 3 Apply shape tweening in the flower layer to convert the circle into a flower. For this, click on frme 40 on the flower layer and insert a keyframe.Change the circle into a flower in frame 40 and apply Shape Tweening (Fig.11.31). Step 4 Now click on frame 40 in the Butterfly layer and insert a frame (F5). Right- click on the Timeline in this layer and add Motion Tweening. Now click on frame 40 and move the Butterfly closer to the flower Step 5 Press Ctrl+Enter to play the movie
- 33. • Prebuilt motion presets are available in Adobe Animate that enable us to add animations quickly with a minimal number of steps. Let us consider an example to understand the concept of Motion Presets. Example: To apply motion presets to a ball, follow the given steps. • Step 1 Draw a ball in Layer 1. Convert the ball into a symbol by pressing F8. • Step 2 Select the object and click Window ►Motion Presets to open the Motion Presets panel. • Step 3 Choose the preset you want to apply in to the symbol and click on the Apply button (Fig. 11.35). The selected layer and symbol now have the animation applied (Fig. 11.36). • Step 4 Press Click+Enter to play the movie.
- 34. • In order to reveal only a selective portion of the underlying layer, we use the masking feature. By using masking, we can create binoculars-like effect to view only a portion of a graphic or a picture lying on the bottom layers. Let us consider an example to understand the concept of masking. Example 1: To reveal the text on the stage through masking, follow the given steps. Step 1 Select the Text Tool. Choose an appropriate font style and size from the Property Inspector. Step 2 Click on frame 1 on Layer 1 and insert any text on the stage. • Step 3 Click on frame 30 on Layer 1 and press F5 to insert frames. • Step 4 Add a new layer and rename this layer to ‘mask’. Click on frame 1 of the mask layer, and draw a circle slightly larger than the text. • Step 5 Convert the circle to symbol by pressing F8 and choosing graphic as option in the Convert to Symbol dialog box. • Step 6 Click anywhere between frame 1 and frame 30 in the Mask layer and choose Insert ►Motion Tween option • Step 7 Click on frame 30 in the An ^4 Mask layer and move the * ‘ circle towards the right and position it at the end of the text. • Step 8 The last step is to create the mask. Right-click on the mask layer (the top layer). Select Mask from the shortcut menu (Fig. 11.43). You will notice that now only a portion of the text is visible (Fig. 11.44). • Step 9 Press Ctrl + Enter to play the movie