SlideShare a Scribd company logo
1 of 62
Download to read offline
LAB MANUAL INDUSTRIAL
ELECTRONICS
SUB CODE: 3162415
Department of Power Electronics Engineering
Prof. N. D. Mehta
Index
Name of Student : ……………………………………………………………………………………
Enrolment No: …………………………………………… Semester & Batch : …………………
Academic Year : ……………
Course Outcomes: At the end of the course, student will be able to:
Sr.
No.
Name of Experiment Course Outcome Start Date End Date Grade Signature
1 To study various control
components and represent
symbolically.
PE- 3162415-01
2 To develop control logic for star-
delta starter.
PE- 3162415-01
3 To investigate working operation of
stepper motor.
PE- 3162415-02
4 To study Synchro transmitter and
receiver pair as error detector.
PE- 3162415-02
5 To investigate electrical and optical
characteristics of photo transistor.
PE- 3162415-04
6 To study working principle of
ultrasonics wave generators.
PE- 3162415-03
7 To obtain transfer characteristics
curve of the Opto-coupler.
PE- 3162415-04
8 To study working of solid-state
stabilizers.
PE- 3162415-03
9 To study on-line Uninterrupted
Power Supply and off-line
Uninterrupted Power Supply.
PE- 3162415-03
10 To conduct an experiment of
proximity switches to evaluate its
working principle.
PE- 3162415-04
Course
Outcome
CO statement
PE- 3162415-01 Develop the control logic for motor control application using magnetic control
components.
PE- 3162415-02 Select servo System in industrial requirement
PE- 3162415-03 Make use of ultrasonic, power conditioner in industries.
PE- 3162415-04 Select sensors & opto-electronics devices for industrial application.
LAB MANUAL OF INDUSTRIAL ELECTRONICS (3162415) 04/26/2021
POWER ELECTRONICS ENGINEERING DEPARTMENT 1
Experiment No. 1
Aim : To Study and Draw the different symbol used in Industrial Electronics
Engineering.
Theory : An electronic circuit is composed of various types of components. Some of these
components are termed as active components because they take part in the transformation of the
energy while other components, which only dissipate or store energy, are called as passive elements.
The vacuum tubes, rectifier, transistors are some of-the common active while the resistances, which
dissipate the power and energy storing elements such as capacitances and inductances are known as
passive elements. The transformers may be regarded as a matching device. The success of any
electronic circuit depends not only on proper selection of the active elements but on the passive and
matching elements too. The proper function, of an active device is decided by the proper values of
these passive elements. Hence the selection of these elements such as resistances, inductances,
capacitance, and transformers not only require the proper attention, but also decide the proper
function of the active devices as well as the circuit.
TABLE 1
CIRCUIT SYMBOL OF COMPONENT USED IN INDUSTRIAL ELECTRONICS
Sr. No. COMPONENT SYMBOL ALTERNATE
1
Ammeter
2
And Gate
3
Antenna, Balanced
4
Antenna, General
5
Antenna, Loop, Shielded
6
Antenna, Loop, Unshielded
7
Antenna, Unbalanced
8
Attenuator, Fixed
9
Attenuator, Variable
LAB MANUAL OF INDUSTRIAL ELECTRONICS (3162415) 04/26/2021
POWER ELECTRONICS ENGINEERING DEPARTMENT 2
10
Battery
11
Capacitor, Feed through
12
Capacitor, Fixed, Non polarized
13
Capacitor, Fixed, Polarized
14
Capacitor, Ganged, Variable
15
Capacitor, General
16
Capacitor, Variable, Single
17
Capacitor, Variable, Split-Stator
18
Cathode, Cold
19
Cathode, Directly Heated
20
Cathode, Indirectly Heated
21
Cavity Resonator
22
Cell
23
Circuit Breaker
24
Coaxial Cable
25
Crystal, Piezoelectric
26
Delay Line
27
Diode, General
28
Diode, Gunn
29
Diode, Light-Emitting
LAB MANUAL OF INDUSTRIAL ELECTRONICS (3162415) 04/26/2021
POWER ELECTRONICS ENGINEERING DEPARTMENT 3
30
Diode, Photosensitive
31
Diode, Photovoltaic
32
Diode, Pin
33
Diode, Varactor
34
Diode, Zener
35
Directional Coupler
36
Exclusive-Or Gate
37
Female Contact, General
38
Ferrite Bead
39
Fuse
40
Galvanometer
41
Ground, Chassis
42
Ground, Earth
43
Handset
44
Headphone, Double
45
Headphone, Single
46
Inductor, Air-Core
47
Inductor, Bifilar
48
Inductor, Iron-Core
49
Inductor, Tapped
LAB MANUAL OF INDUSTRIAL ELECTRONICS (3162415) 04/26/2021
POWER ELECTRONICS ENGINEERING DEPARTMENT 4
50
Inductor, Variable
51
Integrated Circuit
52
Inverter
53
Jack, Coaxial
54
Jack, Phone, 2-Conductor
55 Jack, Phone, 2-Conductor
Interrupting
56
Jack, Phone, 3-Conductor
57
Jack, Phono
58
Key, Telegraph
59
Lamp, Incandescent
60
Lamp, Neon
61
Male Contact, General
62
Microphone
63
Nand Gate
64
Negative Voltage Connection
65
Nor Gate
66
Operational Amplifier
67
Or Gate
68
Outlet, Utility, 117-V
69
Outlet, Utility, 234-V
LAB MANUAL OF INDUSTRIAL ELECTRONICS (3162415) 04/26/2021
POWER ELECTRONICS ENGINEERING DEPARTMENT 5
70
Photocell, Tube
71
Plug, Phone, 2-Conductor
72
Plug, Phone, 3-Conductor
73
Plug, Phono
74
Plug, Utility, 117-V
75
Plug, Utility, 234-V
76
Positive Voltage Connection
77
Potentiometer
78
Probe, Radio-Frequency
79
Rectifier, Semiconductor
80
Rectifier, Silicon-Controlled
81
Rectifier, Tube-Type
82
Relay, DPDT
83
Relay, DPST
84
Relay, SPDT
85
Relay, SPST
86
Resistor
87
Resonator
88
Rheostat
89
Saturable Reactor
LAB MANUAL OF INDUSTRIAL ELECTRONICS (3162415) 04/26/2021
POWER ELECTRONICS ENGINEERING DEPARTMENT 6
90
Shielding
91
Signal Generator
92
Speaker
93
Switch, DPDT
94
Switch, DPST
95
Switch, Momentary-Contact
96
Switch, Rotary
97
Switch, SPDT
98
Switch, SPST
99
Terminals, General, Balanced
100
Terminals, General, Unbalanced
101
Test Point
102
Thermocouple
103
Thyristor
104
Transformer, Air-Core
105
Transformer, Iron-Core
106
Transformer, Tapped Primary
107
Transformer, Tapped Secondary
108
Transistor, Bipolar, npn
109
Transistor, Bipolar, pnp
LAB MANUAL OF INDUSTRIAL ELECTRONICS (3162415) 04/26/2021
POWER ELECTRONICS ENGINEERING DEPARTMENT 7
110 Transistor, Field-Effect, N-
Channel
111 Transistor, Field-Effect, P-
Channel
112 Transistor, Metal-Oxide, Dual-
Gate
113 Transistor, Metal-Oxide, Single-
Gate
114
Transistor, Photosensitive
115
Transistor, Unijunction
116
Tube, Diode
117
Tube, Pentode
118
Tube, Photomultiplier
119
Tube, Tetrode
120
Tube, Triode
121
Unspecified Component
122
Voltmeter
123
Wattmeter
124
Wires
125
Wires, Connected, Crossing
126
Wires, Not Connected, Crossing
Conclusion:
LAB MANUAL OF INDUSTRIAL ELECTRONICS (3162415) 04/26/2021
POWER ELECTRONICS ENGINEERING DEPARTMENT 8
Quiz:
1. Define Active and Passive Component
2. List the specification required to for Passive Component R. L , C to procure.
3. Explain the color code for Capacitor.
Reference Book:
1 Biswanath Paul, “Industrila Electronics and Control”, PHI Learning Private Limited-2014
2 John R. Hackworth, Frederick D. Hackworth, Jr., “Programmable Logic Controllers: Programming
Methods and Applications”, Prentice Hall -2004.
3 G. K. Mithal, Dr. Maneesha Gupta, “ Industrial and Power Electronics”, Khanna Publisher-2001
4 S. K. Bhattacharya, S. Chatterjee, “Industrial Electronics and Control”, Tata McGraw-Hill
Publishing Company Ltd.
5 Harish C. Rai,“ Industrial and Power Electronics: Device, Circuits, Systems and Applications”,
Umesh Publications.
Course Outcomes: At the end of the course, student should be able to:
Sr. No. CO statement Topics
Mapped
Marks %
weightage
PE- 3162415-01 Develop the control logic for motor control application using.
magnetic control components.
1 20
PE- 3162415-02 Select servo System in industrial requirement 2 20
PE- 3162415-03 Make use of ultrasonic, power conditioner in industries. 4, 5 30
PE- 3162415-04 Select sensors & opto-electronics devices for industrial
application.
3, 6 30
LAB MANUAL OF INDUSTRIAL ELECTRONICS (3162415) 04/26/2021
POWER ELECTRONICS ENGINEERING DEPARTMENT 1
Experiment No. 2
Aim: To develop control logic for star-delta starter.
Theory:
Starting current of IM -
Induction motor we can observe that induction motor consists of two branch circuits which are in
parallel
● Magnetizing component circuit
● Resistance and reactance circuit
Magnetizing components of current flowing through an induction motor is proportional to the
applied voltage and is independent of load on the motor similar to a transformer.
Resistance and leakage reactance circuit consist of resistance and leakage reactance of stator and
rotor of induction motor connected in series. A load resistance (variable) is connected in series to the
fixed rotor and stator impedance. During starting of the motor, slip will be one. Therefore, if we
calculate the total impedance offered (stator and rotor impedance) to the inrush currents during
starting of the induction motor which is minimum resulting in high inrush currents during starting of
the motor.
When 3 phase voltage applied across the stator winding for starting of induction motor, high inrush
currents magnetize the air gap between the stator and rotor. An induced emf is generated in the rotor
windings of the induction motor because of the rotating magnetic field. This induced emf produces
electrical current in rotor windings. Current generated in the rotor windings produces a field which in
turn produces torque to rotate the motor. Once the rotor starts picking up the speed, current drawn by
the machine decreases. The time required for starting the motor depends on the time required for the
acceleration which depends on the nature of the connected load.
Types of starter -
● Full Voltage or Across the Line Starter
● Full Voltage Reversing Starter
● Multi Speed Starter
● Reduced Voltage Starter
LAB MANUAL OF INDUSTRIAL ELECTRONICS (3162415) 04/26/2021
POWER ELECTRONICS ENGINEERING DEPARTMENT 2
When an electric motor is started, it draws a high current typical 5-6 times greater than normal
current. In DC motors there is no back emf at starting therefore initial current is very high as
compared to the normal current. To protect the motor from these high starting currents we use a star
and delta starter.
The given figure shows the winding connections in star and delta configuration one by one.
In star connection, one end of all three windings is shorted to make star points while the other end of
each winding is connected to the power supply. In delta configuration, the windings are connected
such that to make a close loop. The connection of each winding is shown in the above figure. In the
actual motor the three phase connections are provided in the following order as shown. So, to make
winding connections in star and delta style in a practical motor, the connection is shown above.
Main contractor is used to supply power to the windings. It must be turned on all the time. Initially
the star contactor is closed while delta contactor is open It makes the motor windings in star
configuration.
LAB MANUAL OF INDUSTRIAL ELECTRONICS (3162415) 04/26/2021
POWER ELECTRONICS ENGINEERING DEPARTMENT 3
When the motor gains speed, the star contactor is opened while the delta contactor is closed turning
the motor windings into delta configuration.
PLC Ladder logic - The contactors are controlled by using PLC. This section will explain the ladder
programming for star delta motor starter.
Rung 1 Main contactor :
The main contactor depends upon the normally open input start push button (I1), normally closed
stop button (I2) and normally closed overload relay.
It means that Main contactor will only be energized if the start button is pressed, while stop is not
pressed and the overload relay is not activated. A normally open input named (Q1) is added in
parallel to the start button I1.
By doing so, a push button is created which means that once motor is started, it will be kept started
even if start button is released.
LAB MANUAL OF INDUSTRIAL ELECTRONICS (3162415) 04/26/2021
POWER ELECTRONICS ENGINEERING DEPARTMENT 4
Rung 2 Star contactor:
Star contactor depends upon main contactor, normally close contacts of timer (T1), and normally
close contacts of output delta contactor (Q3).
So star contactor will only be energized if the main contactor is ON, time output is not activated and
delta contactor is not energized.
Timer T1:
Timer T1 measures the time after which the winding connection of star delta starter is to be changed.
It will start counting time after the main contactor is energized.
Rung 3 Delta contactor:
Delta contactor will be energized when main contactor (Q1) is energized, timer T1 is activated, and
star contactor (Q3) is de-energized.
Conclusion:
Quiz:
1. Why we need starter in the Induction Motor.
2. Draw and list the different types of starter.
3. Explain the working of Start Delta Starter for Induction Motor.
Reference Book:
1 Biswanath Paul, “Industrila Electronics and Control”, PHI Learning Private Limited-2014
LAB MANUAL OF INDUSTRIAL ELECTRONICS (3162415) 04/26/2021
POWER ELECTRONICS ENGINEERING DEPARTMENT 5
2 John R. Hackworth, Frederick D. Hackworth, Jr., “Programmable Logic Controllers: Programming
Methods and Applications”, Prentice Hall -2004.
3 G. K. Mithal, Dr. Maneesha Gupta, “Industrial and Power Electronics”, Khanna Publisher-2001
4 S. K. Bhattacharya, S. Chatterjee, “Industrial Electronics and Control”, Tata McGraw-Hill
Publishing Company Ltd.
5 Harish C. Rai, “Industrial and Power Electronics: Device, Circuits, Systems and Applications”,
Umesh Publications.
Course Outcomes: At the end of the course, student should be able to:
Sr. No. CO statement Topics
Mapped
Marks %
weightage
PE- 3162415-01 Develop the control logic for motor control application using.
magnetic control components.
1 20
PE- 3162415-02 Select servo System in industrial requirement 2 20
PE- 3162415-03 Make use of ultrasonic, power conditioner in industries. 4, 5 30
PE- 3162415-04 Select sensors & opto-electronics devices for industrial
application.
3, 6 30
LAB MANUAL OF INDUSTRIAL ELECTRONICS (3162415) 04/26/2021
POWER ELECTRONICS ENGINEERING DEPARTMENT 1
Experiment No. 3
Aim: To investigate the working operation of Stepper motor
Theory:
1) A stepper motor is defined as a digital electromechanical device where each command pulse
results in a movement of the shaft by a discrete angle called step angle of the motor
2) A stepper motor is an electromechanical device which converts electrical pulses into discrete
mechanical movements.
CONSTRUCTION:
Stepper motor construction is quite similar to DC motor. It also has a permanent magnet as
Rotor. Rotor will be in the center and will rotate when force is acts on it. This rotor is surrounded by
a number of stator which is wound by magnetic coil all over it. Stator will be placed as close as
possible to rotor so that magnetic fields in stators can influence rotor’s movement. To control the
stepper motor each stator will be powered one by one alternatively. In this case the stator will
magnetize and act as an electromagnetic pole exerting repulsive force on the rotor and pushes it to
move one step. Alternative magnetizing and demagnetizing of stators will move the rotor step by step
and enable it to rotate with great control. Based on stator, it can be classified into two types. They are
Unipolar and Bipolar stepper motors.
WORKING:
The stepper motor rotor is a permanent magnet, when the current flows through the stator winding,
the stator winding to produce a vector magnetic field. The magnetic field drives the rotor to rotate by
LAB MANUAL OF INDUSTRIAL ELECTRONICS (3162415) 04/26/2021
POWER ELECTRONICS ENGINEERING DEPARTMENT 2
an angle so that the pair of magnetic fields of the rotor and the magnetic field direction of the stator
are consistent. When the stator's vector magnetic field is rotated by an angle, the rotor also rotates
with the magnetic field at an angle. Each time an electrical pulse is input, the motor rotates one
degree further. The angular displacement it outputs is proportional to the number of pulses input and
the speed is proportional to the pulse frequency. Change the order of winding power, the motor will
reverse. Therefore, it can control the rotation of the stepping motor by controlling the number of
pulses, the frequency and the electrical sequence of each phase winding of the motor.
TYPE OF STEPPER MOTOR
1) Variable Reluctance Stepper Motor
2) Permanent Magnet Stepper Motor
3) Hybrid Stepper Motor
1) VARIABLE RELUCTANCE STEPPER MOTOR
Variable reluctance (VR) motors have a plain iron rotor and operate based on the principle that
minimum reluctance occurs with minimum gap, hence the rotor points are attracted toward the stator
magnet poles.
The stepper motor like variable reluctance is the basic type of motor and it is used for the past many
years. As the name suggests, the rotor’s angular position mainly depends on the magnetic circuit’s
reluctance that can be formed among the teeth of the stator as well as a rotor.
The reluctance torque depends on the square of the phase current and its direction is dependent of the
polarity of the phase current A VR motor can be a single stack or multi-stack motor
ADVANTAGE:
LAB MANUAL OF INDUSTRIAL ELECTRONICS (3162415) 04/26/2021
POWER ELECTRONICS ENGINEERING DEPARTMENT 3
1) Enhanced acceleration rates
2) Easily operated and cost-effective
3) Quick dynamic response
4) The proportion of torque to inertia is more
DISADVANTAGE:
1) Capacity is minimal when there are huge inertial loads
2) There will be a limitation on output power
2) PERMANENT MAGNET STEPPER MOTOR
The operation of this motor works on the principle that unlike poles attract each other and like poles
repel each other. When the stator windings are excited with a DC supply, it produces magnetic
flux and establishes the North and South poles. Due to the force of attraction and repulsion between
permanent magnet rotor poles and stator poles, the rotor starts moving up to the position for which
pulses are given to the stator.
ADVANTAGE:
1) Low power requirement.
2) High detente torque as compared to VR motor.
3) Rotor do not require external exciting current.
4) It produces more torque per ampere stator current.
DISADVANTAGE:
1) Motor has higher inertia.
2) Slower acceleration.
LAB MANUAL OF INDUSTRIAL ELECTRONICS (3162415) 04/26/2021
POWER ELECTRONICS ENGINEERING DEPARTMENT 4
3)HYBRID STEPPER MOTOR
This motor works similar to that of permanent magnet stepper motor. The figure above shows 2-
phase, 4-pole, 6-tooth rotor hybrid stepper motor. When the phase A-A’ is excited with a DC supply,
keeping B-B’ unexcited, the rotor aligns such that the south pole of the rotor faces north pole of the
stator while north pole of rotor faces south pole of the stator.
Now, if the phase B-B’ is excited, keeping A-A’ switched off in such a way that upper pole becomes
north and lower becomes south, then the rotor will align to a new position by moving through
counterclockwise direction. If the phase B-B’ is oppositely excited such that the upper pole becomes
south and lower becomes north, then the rotor will turn clockwise direction.
By a proper sequence of pulses to the stator, the motor will turn in desired direction. For every
excitation, rotor will get locked into new position, and even if excitation is removed motor still
maintains its locked condition due to the permanent magnet excitation. The step angle of this 2-
phase, 4-pole, 6-tooth rotor motor is given as 360/ (2 × 6) = 30 degrees. In practice, hybrid motors
are constructed with more number of rotor poles in order to get high angular resolution.
ADVANTAGE:
1) Less tendency to resonate
LAB MANUAL OF INDUSTRIAL ELECTRONICS (3162415) 04/26/2021
POWER ELECTRONICS ENGINEERING DEPARTMENT 5
2) Provide detent torque with windings de-energized
3) Higher holding torque capability
4) High stepping rate capability
DISADVANTAGE:
1) Higher inertia and weight due to presence of rotor magnet.
2) Performance affected by change in magnetic strength.
Conclusion:
Quiz:
1. Define Stepper Motor
2. Draw the different types of stepper motor.
3. Compare the advantage and disadvantage of different types of stepper motor
Reference Book:
1 Biswanath Paul, “Industrila Electronics and Control”, PHI Learning Private Limited-2014
2 John R. Hackworth, Frederick D. Hackworth, Jr., “Programmable Logic Controllers: Programming
Methods and Applications”, Prentice Hall -2004.
3 G. K. Mithal, Dr. Maneesha Gupta, “ Industrial and Power Electronics”, Khanna Publisher-2001
4 S. K. Bhattacharya, S. Chatterjee, “Industrial Electronics and Control”, Tata McGraw-Hill
Publishing Company Ltd.
5 Harish C. Rai,“ Industrial and Power Electronics: Device, Circuits, Systems and Applications”,
Umesh Publications.
LAB MANUAL OF INDUSTRIAL ELECTRONICS (3162415) 04/26/2021
POWER ELECTRONICS ENGINEERING DEPARTMENT 6
Course Outcomes: At the end of the course, student should be able to:
Sr. No. CO statement Topics
Mapped
Marks %
weightage
PE- 3162415-01 Develop the control logic for motor control application using.
magnetic control components.
1 20
PE- 3162415-02 Select servo System in industrial requirement 2 20
PE- 3162415-03 Make use of ultrasonic, power conditioner in industries. 4, 5 30
PE- 3162415-04 Select sensors & opto-electronics devices for industrial
application.
3, 6 30
LAB MANUAL OF INDUSTRIAL ELECTRONICS (3162415) 04/26/2021
POWER ELECTRONICS ENGINEERING DEPARTMENT 1
Experiment No. 4
Aim: To study the Synchro used as Error Detector.
Theory: The Synchro is a type of transducer which transforms the angular position of the
shaft into an electric signal. It is used as an error detector and as a rotary position sensor. The
error occurs in the system because of the misalignment of the shaft. The transmitter and the
control transformer are the two main parts of the synchro.
It is general name for self-synchronizing machine which when electrically energized and electrically
interconnected, exert torque which cause two mechanically independent shafts either to run in
synchronism or to make the rotor of one unit follow the rotor position of the others. They are also
known by the trade name of selsyns and autosyns. It is , in fact, are small cylindrical motors varying
in diameter from 1.5 cm to 10 cm depending on their power output. They are low-torque devices and
are widely used in control system for transmitting shaft position information or for making two or
more shafts to run in synchronism. If a large device like a robot arm is to be positioned synchros will
not work. Usually, a servomotor is needed for higher torque.
Synchro’s System Types
The synchro system is of two types. They are.
1. Control Type Synchro.
2. Torque Transmission Type Synchro.
Torque Transmission Type Synchro’s
This type of synchro’s has small output torque, and hence they are used for running the very light
load like a pointer. The control type Synchro is used for driving the large loads.
Control Type Synchro’s System
The controls synchro’s is used for error detection in positional control systems. Their systems consist
of two units. They are:
1. Synchro Transmitter
2. Synchro receiver
The synchro always works with these two parts. The detail explanation of synchro transmitter and
receiver is given below.
Synchro’s Transmitter – Their construction is like the three-phase alternator. The stator of the
synchro is made of steel for reducing the iron losses. The stator is slotted for housing the three phase
windings. The axis of the stator winding is kept 120º apart from each other.
LAB MANUAL OF INDUSTRIAL ELECTRONICS (3162415) 04/26/2021
POWER ELECTRONICS ENGINEERING DEPARTMENT 2
Where Vr – r.ms.value of rotor voltage ωc – carrier frequency
The coils of the stator windings are connected in star. The rotor of the synchros is a dumbbell in
shape, and a concentric coil is wound on it. The AC voltage is applied to the rotor with the help of
slip rings. The constructional feature of the synchros is shown in the figure below.
Consider the voltage is applied to the rotor of the transmitter as shown in the figure above
LAB MANUAL OF INDUSTRIAL ELECTRONICS (3162415) 04/26/2021
POWER ELECTRONICS ENGINEERING DEPARTMENT 3
The voltage applied to the rotor induces the magnetizing current and an alternating flux along its
axis. The voltage is induced in the stator winding because of the mutual induction between the rotor
and stator flux. The flux linked in the stator winding is equal to the cosine of the angle between the
rotor and stator. The voltage is induced in the stator winding.
Let Vs1, Vs2, Vs3 be the voltages generated in the stator windings S1, S2, and S3 respectively. The
figure below shows the rotor position of the synchro transmitter. The rotor axis makes an angle
θr concerning the stator windings S2.
The three terminals of the stator windings are
LAB MANUAL OF INDUSTRIAL ELECTRONICS (3162415) 04/26/2021
POWER ELECTRONICS ENGINEERING DEPARTMENT 4
The variation in the stator terminal axis concerning the rotor is shown in the figure below.
When the rotor angle becomes zero, the maximum current is produced in the stator windings S2. The
zero position of the rotor is used as a reference for determining the rotor angular position.
The output of the transmitter is given to stator winding of the control transformer which is shown in
the above figure.
The current of the same and magnitude flow through the transmitter and control transformer of the
synchros. Because of the circulating current, the flux is established between the air gap flux of the
control transformer.
The flux axis of the control transformer and the transmitter is aligned in the same position. The
voltage generates by the rotor of control transformer is equal to the cosine of the angle between the
rotors of the transmitter and the controller. The voltage is given as
Where φ – angular displacement between the rotor axes of transmitter and controller.
Φ – 90º the axis between the rotor of transmitter and control transformer is perpendicular to each
other. The above figure shows the zero position of the rotor of transmitter and receiver.
Consider the position of the rotor and the transmitter is changing in the same direction. An angle
θR deflects the rotor of the transmitter and that of the control transformer is kept θC. The total angular
separation between the rotors is Φ = (90º – θR + θC)
The rotor terminal voltage of the Synchro transformer is given as
The small angular displacement between their rotor
position is given as
Sin (θR – θC) = (θR – θC)
On substituting the value of angular displacement in equation (1) we get
LAB MANUAL OF INDUSTRIAL ELECTRONICS (3162415) 04/26/2021
POWER ELECTRONICS ENGINEERING DEPARTMENT 5
The synchro transmitter and the control transformer together used for detecting the error. The voltage
equation shown above is equal to the shaft position of the rotors of control transformer and
transmitter.
The error signal is applied to the differential amplifier which gives input to the servo motor. The gear
of the servo motor rotates the rotor of the control transformer.
LAB MANUAL OF INDUSTRIAL ELECTRONICS (3162415) 04/26/2021
POWER ELECTRONICS ENGINEERING DEPARTMENT 6
The figure above shows the output of the synchro error detector which is a modulated signal. The
modulating wave above shown the misalignment between the rotor position and the carrier wave.
Where Ks is the error detector.
Conclusion:
LAB MANUAL OF INDUSTRIAL ELECTRONICS (3162415) 04/26/2021
POWER ELECTRONICS ENGINEERING DEPARTMENT 7
Quiz:
1. Define Synchro.
2. Explain the synchro transmitter and receiver
3. Explain the working of synchro as an error detector.
Reference Book:
1 Biswanath Paul, “Industrila Electronics and Control”, PHI Learning Private Limited-2014
2 John R. Hackworth, Frederick D. Hackworth, Jr., “Programmable Logic Controllers: Programming
Methods and Applications”, Prentice Hall -2004.
3 G. K. Mithal, Dr. Maneesha Gupta, “ Industrial and Power Electronics”, Khanna Publisher-2001
4 S. K. Bhattacharya, S. Chatterjee, “Industrial Electronics and Control”, Tata McGraw-Hill
Publishing Company Ltd.
5 Harish C. Rai,“ Industrial and Power Electronics: Device, Circuits, Systems and Applications”,
Umesh Publications.
Course Outcomes: At the end of the course, student should be able to:
Sr. No. CO statement Topics
Mapped
Marks %
weightage
PE- 3162415-01 Develop the control logic for motor control application using.
magnetic control components.
1 20
PE- 3162415-02 Select servo System in industrial requirement 2 20
PE- 3162415-03 Make use of ultrasonic, power conditioner in industries. 4, 5 30
PE- 3162415-04 Select sensors & opto-electronics devices for industrial
application.
3, 6 30
LAB MANUAL OF INDUSTRIAL ELECTRONICS (3162415) 04/26/2021
POWER ELECTRONICS ENGINEERING DEPARTMENT 1
Experiment No. 5
Aim: To investigate electrical and optical characteristics of photo transistor.
Theory: The phototransistor concept was known for the past many years. The first idea was
proposed by William Shockley in the year 1951, after the discovery of a normal bipolar transistor.
After two years, a phototransistor was demonstrated. After that, it was used in different applications,
and day by day its development was continued. Phototransistors are extensively obtainable with low
cost from the distributors of electronic components to use in different electronic circuits. A
semiconductor device like a phototransistor is used to detect the light levels and changes the flow of
current among emitter & collector terminals based on the light level it gets. This article discusses an
overview of phototransistors.
A Phototransistor is an electronic switching and current amplification component which relies on
exposure to light to operate. When light falls on the junction, reverse current flows which are
proportional to the luminance. Phototransistors are used extensively to detect light pulses and convert
them into digital electrical signals. These are operated by light rather than electric current. Providing
a large amount of gain, low cost and these phototransistors might be used in numerous applications.
Phototransistor Symbol
It can convert light energy into electric energy. Phototransistors work in a similar way to
photoresistors commonly known as LDR (light dependent resistor) but can produce both current and
voltage while photoresistors are only capable of producing current due to change in resistance.
Phototransistors are transistors with the base terminal exposed. Instead of sending current into the
base, the photons from striking light activate the transistor. This is because a phototransistor is made
of a bipolar semiconductor and focuses on the energy that is passed through it. These are activated by
light particles and are used in virtually all electronic devices that depend on light in some way. All
silicon photosensors (phototransistors) respond to the entire visible radiation range as well as to
infrared. In fact, all diodes, transistors, Darlington’s, TRIACs, etc. have the same basic radiation
frequency response.
The structure of the phototransistor is specifically optimized for photo applications. Compared to a
normal transistor, a phototransistor has a larger base and collector width and is made using diffusion
or ion implantation.
Construction
LAB MANUAL OF INDUSTRIAL ELECTRONICS (3162415) 04/26/2021
POWER ELECTRONICS ENGINEERING DEPARTMENT 2
A phototransistor is nothing but an ordinary bi-polar transistor in which the base region is exposed
to illumination. It is available in both the P-N-P and N-P-N types having different configurations like
common emitter, common collector, and common base but generally, common
emitter configuration is used. It can also work while the base is made open. Compared to the
conventional transistor it has more base and collector areas.
Ancient phototransistors used single semiconductor materials like silicon and germanium but now a
day’s modern components use materials like gallium and arsenide for high-efficiency levels. The
base is the lead responsible for activating the transistor. It is the gate controller device for the larger
electrical supply. The collector is the positive lead and the larger electrical supply. The emitter is the
negative lead and the outlet for the larger electrical supply.
Photo Transistor Construction
With no light falling on the device there will be a small current flow due to thermally generated hole-
electron pairs and the output voltage from the circuit will be slightly less than the supply value due to
the voltage drop across the load resistor R. With light falling on the collector-base junction the
current flow increases. With the base connection open circuit, the collector-base current must flow in
the base-emitter circuit, and hence the current flowing is amplified by normal transistor action.
The collector-base junction is very sensitive to light. Its working condition depends upon the
intensity of light. The base current from the incident photons is amplified by the gain of the
transistor, resulting in current gains that range from hundreds to several thousand. A phototransistor
is 50 to 100 times more sensitive than a photodiode with a lower level of noise.
How Does a Phototransistor Work?
A normal transistor includes an emitter, base, and collector terminals. The collector terminal is
biased positively relating to the emitter terminal & the BE junction is reverse biased.
A phototransistor activates once the light strikes the base terminal & the light triggers the
phototransistor by allowing the configuration of hole-electron pairs as well as the current flow across
the emitter or collector. When the current increases, then it is concentrated as well as changed into
voltage. Generally, a phototransistor doesn’t include a base connection. The base terminal is
disconnected as the light is used to allow the flow of current to supply throughout the phototransistor.
LAB MANUAL OF INDUSTRIAL ELECTRONICS (3162415) 04/26/2021
POWER ELECTRONICS ENGINEERING DEPARTMENT 3
Types of Phototransistor
Phototransistors are classified into two types namely BJT and FET.
BJT Phototransistor
In the deficiency of light, BJT phototransistor allows leakage among collectors as well as an emitter
of 100 nA otherwise low. Once this transistor is exposed to the beam, it performs upto 50mA. This
distinguishes it from photodiode which cannot allow much current.
FET Phototransistor
This kind of phototransistor includes two terminals that connect inside through its collector & emitter
otherwise source & drain within FET. The transistor’s base terminal reacts to light & controls the
current flow among the terminals.
Phototransistor Circuit
A phototransistor works just like a normal transistor, where the base current is multiplied to give the
collector current, except that in a phototransistor, the base current is controlled by the amount of
visible or infrared light where the device only needs 2 pins.
Phototransistor Circuit Diagram
In the simple circuit, assuming that nothing is connected to Vout, the base current controlled by the
amount of light will determine the collector current, which is the current going through the resistor.
LAB MANUAL OF INDUSTRIAL ELECTRONICS (3162415) 04/26/2021
POWER ELECTRONICS ENGINEERING DEPARTMENT 4
Therefore, the voltage at Vout will move high and low based on the amount of light. We can connect
this to an op-amp to boost the signal or directly to an input of a microcontroller.
The output of a phototransistor is dependent upon the wavelength of the incident light. These devices
respond to light over a broad range of wavelengths from the near UV, through the visible, and into
the near IR part of the spectrum. For a given light source illumination level, the output of a
phototransistor is defined by the area of the exposed collector-base junction and the dc current gain
of the transistor.
Phototransistors are available in different configurations like optoisolator, optical switch, retro
sensor. Optoisolator is like a transformer in that the output is electrically isolated from the input. An
object is detected when it enters the gap of the optical switch and blocks the light path between the
emitter and detector. The retro sensor detects the presence of an object by generating light and then
looking for its reflectance off the object to be sensed.
Amplification
The operation range of a phototransistor mainly depends on the applied light intensity because its
operating range is dependent on the input of the base. The current of the base terminal from the
incident photons can be amplified through the transistor’s gain, which results in a current gain that
ranges from 100 to 1000. A phototransistor is more sensitive as compared to a photodiode through a
less noise level.
Extra amplification can be supplied through a photodarlington-type transistor.
This is a phototransistor including an emitter output that is connected to the base terminal of the next
bipolar transistor. It gives high sensitivity within the levels of low light as it provides a current gain
that is equivalent to the two transistors. The gain of the two stages can offer net gains higher than
100,000A. A photodarlington transistor includes less response as compared to a normal
phototransistor.
Modes of Operation
In phototransistor circuits, the basic modes of operation include two like active & switch where the
commonly used mode of operation is switch type. It explains a non-linear response toward the light;
once there is no light then there is no flow of current into the transistor. Current starts to supply like
exposure toward light increases. The switch-mode works in an ON/OFF system. Active mode is also
called a linear that reacts in such a way that, it is proportional toward the light stimulus.
Performance Specifications
The selection of Phototransistor can be done depending on different parameters as well as
specifications like the following.
• Collector Current (IC)
LAB MANUAL OF INDUSTRIAL ELECTRONICS (3162415) 04/26/2021
POWER ELECTRONICS ENGINEERING DEPARTMENT 5
• Base Current (Iλ)
• Peak Wavelength
• Collector-to-Emitter Breakdown Voltage (VCE)
• Collect-emitter breakdown voltage (VBRCEO)
• Emitter-collector breakdown voltage (VBRECO)
• Dark current (ID)
• Power dissipation (PD or Ptot)
• Rise time (tR)
• Fall time (tF)
Design Parameters
The selected materials, as well as composition, play an essential role in the sensitivity of this type of
transistor. The gain level of Homo-structure or single material devices ranges from 50 to several
hundred. These are normal phototransistors that are frequently designed with silicon. The
heterostructure devices or several material configuration devices may include gain levels up to 10k
but they are less common dues to high production costs.
• The electromagnetic wavelength range of different materials include the following,
• For Silicon (Si) material, the electromagnetic wavelength range is 190 to 1100 nm
• For Germanium (Ge) material, the electromagnetic wavelength range is 400 to 1700 nm
• For Indium gallium arsenide (InGaAs) material, the electromagnetic wavelength range is
800 to 2600 nm
• For Lead sulfide material, the electromagnetic wavelength range is <1000 to 3500
• For the proper function of a phototransistor, mounting technology plays a key role.
The SMT or surface mount technology uses components to a PCB (printed circuit board) by
connecting the component terminals through soldering otherwise to the top face of the board.
Usually, the printed circuit board pad can be coated using a paste such as a solder & flux
formulation. High temperatures usually from an infrared oven will dissolve the paste to solder the
terminals of component toward the PCB pads.
THT or through-hole technology is a commonly utilized mounting style. The arrangement of
components can be done by placing component terminals using holes within the PCB & these
components can be soldered in the opposite face of the PCB. The features of phototransistors mainly
include a cutoff filter, used to block observable light. The light detection in others can be improved
through an anti-reflective coating. Devices including a round dome lens in place of a flat lens are also
obtainable.
Photodiode Vs Phototransistor
The difference between photodiode and phototransistor includes the following.
Photodiode Phototransistor
The photodiode is a PN-junction diode, used
to generate electric current once a photon of
light strikes on their surface.
The phototransistor is used to change the energy of
the light into an electrical energy
LAB MANUAL OF INDUSTRIAL ELECTRONICS (3162415) 04/26/2021
POWER ELECTRONICS ENGINEERING DEPARTMENT 6
It is less sensitive It is more sensitive
The output response of photodiode is fast The output response of the phototransistor is low
It produces current It produces voltage and current
It is used in solar power generation, detecting
UV otherwise IR rays & also for light
measuring, etc.
It is used in compact disc players, smoke detectors,
lasers, invisible light receivers, etc.
It is more reactive to incident lights It is less reactive
The photodiode has a less dark current Phototransistor has high dark current
In this, both the biasing is used like forward
and reverse In this, forward biasing is used
The linear response range of photodiode is
much wider
The linear response range of phototransistor is
much lower
Photodiode allows low current as compared to
a phototransistor
Phototransistor allows high current as compared to
the photodiode
The photodiode is used for battery-powered
devices that use less power.
The phototransistor is used as a solid-state switch,
not like a photodiode.
Characteristics
The characteristics of a phototransistor include the following.
• Low-cost visible and near-IR photodetection.
• Available with gains from 100 to over 1500.
• Moderately fast response times.
• Available in a wide range of packages including epoxy-coated, transfer-molded, and
surface mounting technology.
• Electrical characteristics were similar to that of signal transistors.
Advantages of Phototransistor
Phototransistors have several important advantages that separate them from another optical sensor
some of them are mentioned below.
• Phototransistors produce a higher current than photodiodes.
• Phototransistors are relatively inexpensive, simple, and small enough to fit several of them
onto a single integrated computer chip.
• Phototransistors are very fast and are capable of providing nearly instantaneous output.
• Phototransistors produce a voltage, that photo-resistors cannot do so.
Disadvantages of Phototransistor
LAB MANUAL OF INDUSTRIAL ELECTRONICS (3162415) 04/26/2021
POWER ELECTRONICS ENGINEERING DEPARTMENT 7
• Phototransistors that are made of silicon are not capable of handling voltages over 1,000
Volts.
• Phototransistors are also more vulnerable to surges and spikes of electricity as well as
electromagnetic energy.
• Phototransistors also do not allow electrons to move as freely as other devices do, such as
electron tubes.
Applications of Phototransistors
The Areas of application for the Phototransistor include:
• Punch-card readers.
• Security systems
• Encoders – measure speed and direction
• IR detectors photo
• electric controls
• Computer logic circuitry.
• Relays
• Lighting control (highways etc)
• Level indication
• Counting systems
Thus, this is all about an overview of a phototransistor. From the above information finally, we can
conclude that phototransistors are widely used in different electronic devices for detecting light such
as infrared receivers, smoke detectors, lasers, CD players, etc.
Conclusion:
Quiz:
LAB MANUAL OF INDUSTRIAL ELECTRONICS (3162415) 04/26/2021
POWER ELECTRONICS ENGINEERING DEPARTMENT 8
1. Draw the symbol and construction of Phototransistor.
2. List the difference between Photo diode and Phototransistor.
3. Compare the advantage and disadvantage of different types of Phototransistor.
Reference Book:
1 Biswanath Paul, “Industrila Electronics and Control”, PHI Learning Private Limited-2014
2 John R. Hackworth, Frederick D. Hackworth, Jr., “Programmable Logic Controllers: Programming
Methods and Applications”, Prentice Hall -2004.
3 G. K. Mithal, Dr. Maneesha Gupta, “ Industrial and Power Electronics”, Khanna Publisher-2001
4 S. K. Bhattacharya, S. Chatterjee, “Industrial Electronics and Control”, Tata McGraw-Hill
Publishing Company Ltd.
5 Harish C. Rai,“ Industrial and Power Electronics: Device, Circuits, Systems and Applications”,
Umesh Publications.
Course Outcomes: At the end of the course, student should be able to:
Sr. No. CO statement Topics
Mapped
Marks %
weightage
PE- 3162415-01 Develop the control logic for motor control application using.
magnetic control components.
1 20
PE- 3162415-02 Select servo System in industrial requirement 2 20
PE- 3162415-03 Make use of ultrasonic, power conditioner in industries. 4, 5 30
PE- 3162415-04 Select sensors & opto-electronics devices for industrial
application.
3, 6 30
LAB MANUAL OF INDUSTRIAL ELECTRONICS (3162415) 04/26/2021
POWER ELECTRONICS ENGINEERING DEPARTMENT 1
Experiment No. 6
AIM:- To study working principle of Ultrasonic wave generator.
Theory: Sound wave is a vibration that is transmitted through a medium, such as air, water, and
metals. Ultrasonic wave is defined as “inaudible sound with high frequency for human” the
frequency of which generally exceeds 20 kHz.
Ultrasonic Wave can be generating by the following methods.
1. Piezo-electric generator.
2. Magneto-striction generator.
(1) Piezo-electric generator: -
•Principle:- When a mechanical compression or tension is applied to some crystals like quartz, a
potential difference is developed across the crystal which is proportional to the applied pressure. This
phenomenon is known as Piezo-electric Effect also if the potential difference is applied across the
crystal, a mechanical compression or tension is developed. This is called Inverse Piezo-electric
Effect.
Circuit Diagram: -
1. The quartz crystal is placed between two metal plates A and B.
2. The plates are connected to the primary (L3) of a transformer.
3. The coils L1 and L2 of oscillator circuit are taken from the secondary of a
transformer.
4. The collector coil L2 inductively coupled to base coil L1.
• Working :-
LAB MANUAL OF INDUSTRIAL ELECTRONICS (3162415) 04/26/2021
POWER ELECTRONICS ENGINEERING DEPARTMENT 2
1. When battery is switched on, the oscillator produced high frequency alternating
voltages with a frequency.
2. Due to the transformer action, an Oscillatory e.m.f is induced in the coil L3. This
high frequency alternating voltages are fed on the plates A and B.
3. Inverse piezo-electric effect takes places and the crystal contracts and expands
alternatively.
4. The frequency of the vibration is given by
5. The variable condenser C1 is adjusted such that the frequency of the applied voltage is
equal to the natural frequency of the crystal, and thus resonance takes place.
6. Now the rod vibrates longitudinally with maximum amplitude and generates
ultrasonic waves of high frequency circuit.
• Piezoelectric Effect:-
1. If mechanical pressure is applied to the opposite faces of crystal, equal and opposite
electrical charges appear across its other faces. This is known as piezo-electric effect.
2. Potential Difference developed would be proportional to pressure applied.
3. The converse of piezo-electric effect is also true.
4. This effect was best observed in quartz, Tourmaline etc.
• Advantages :-
1. Ultrasonic frequency as high as 5×10⁸HZ or 500MHZ can be obtained with this
arrangement.
2. The output of this oscillator is very high.
3. It is not affected by temperature and humidity.
• Disadvantages :-
1. The cost of piezo-electric quartz is high.
2. The cutting and shaping of quartz crystal are very complex.
LAB MANUAL OF INDUSTRIAL ELECTRONICS (3162415) 04/26/2021
POWER ELECTRONICS ENGINEERING DEPARTMENT 3
(2) Magnetostriction Generator :-
• Circuit Diagram :-
1. BA is a rod of ferromagnetic material like iron or nickel.
2. The alternating magnetic field is generated by electronic oscillator.
3. The coil L1 wound on the road along with a variable capacitor C1.
4. The frequency of oscillator is controlled by the variable capacitor.
• Working :-
1. When battery is switched on, the collector circuit oscillates with a frequency,
2. This current flowing through the coil L1 produces an alternating magnetic field along the
length of the rod.
3. The frequency of vibration of the rod is given by,
4. The capacitor is adjusted so that the frequency of the oscillatory circuit is equal to natural
frequency of the rod and thus resonance takes place.
5. Now the rod vibrates longitudinally with maximum amplitude and generates ultrasonic
waves of high frequency from its ends.
• Magnetostriction Effect:-
LAB MANUAL OF INDUSTRIAL ELECTRONICS (3162415) 04/26/2021
POWER ELECTRONICS ENGINEERING DEPARTMENT 4
1. When a ferromagnetic rod like iron or nickel is placed in a magnetic field parallel to its
length, the rod experiences a small change in its length. This is called Magnetostriction
Effect.
2. The change in length produced in the rod depends upon the strength of the magnetic
field, the nature of the material and is independent of the direction of the magnetic field
applied.
• Advantages :-
1. The design of this oscillator is very simple and it’s production cost is low.
2. At low ultrasonic frequencies, the large power output can be produced without the risk of
damage of the oscillatory circuit.
• Disadvantages :-
1. It has low upper frequency limit and cannot generate ultrasonic frequency above
3000KHZ (i.e. 3MHZ).
2. The frequency of oscillations depends on temperature.
3. There will be losses of energy due to hysteresis and eddy current.
• Property of Ultrasonic Waves:-
1. Property 1: Ultrasonic waves vibrate at a frequency greater than the audible range for
humans (20 kilohertz).
2. Property 2: They have smaller wavelengths. As a result, their penetrating power is high.
3. Property 3: They cannot travel through vacuum.
4. Property 4: Ultrasonic waves travel at the speed of sound in the medium. They have
maximum velocity in a denser medium.
5. Property 5: In a homogeneous medium, they travel at a constant velocity.
6. Property 6: In low viscosity liquids, ultrasonic waves produce vibrations.
7. Property 7: They undergo reflection, refraction, and absorption.
8. Property 8: They have high energy content. They can be transmitted over a large distance
without much loss of energy.
9. Property 9: They produce intense heat when they are passed through objects.
• Application of Ultrasonic Waves:-
1. Detection of flaws (cracks, blowholes, porosity) in metals.
2. In SONAR (Sound Navigation and Ranging).
3. Ultrasonic Welding.
4. Ultrasonic cutting and machining.
5. Ultrasonic soldering.
LAB MANUAL OF INDUSTRIAL ELECTRONICS (3162415) 04/26/2021
POWER ELECTRONICS ENGINEERING DEPARTMENT 5
Conclusion:
Quiz:
1. Define Ultrasonic Waves
2. Draw the different circuit for generation of Ultrasonic Waves.
3. Compare the advantage and disadvantage of different types of Ultrasonic Wave Generator.
Reference Book:
1 Biswanath Paul, “Industrila Electronics and Control”, PHI Learning Private Limited-2014
2 John R. Hackworth, Frederick D. Hackworth, Jr., “Programmable Logic Controllers: Programming
Methods and Applications”, Prentice Hall -2004.
3 G. K. Mithal, Dr. Maneesha Gupta, “ Industrial and Power Electronics”, Khanna Publisher-2001
4 S. K. Bhattacharya, S. Chatterjee, “Industrial Electronics and Control”, Tata McGraw-Hill
Publishing Company Ltd.
5 Harish C. Rai,“ Industrial and Power Electronics: Device, Circuits, Systems and Applications”,
Umesh Publications.
Course Outcomes: At the end of the course, student should be able to:
Sr. No. CO statement Topics
Mapped
Marks %
weightage
PE- 3162415-01 Develop the control logic for motor control application using.
magnetic control components.
1 20
PE- 3162415-02 Select servo System in industrial requirement 2 20
PE- 3162415-03 Make use of ultrasonic, power conditioner in industries. 4, 5 30
LAB MANUAL OF INDUSTRIAL ELECTRONICS (3162415) 04/26/2021
POWER ELECTRONICS ENGINEERING DEPARTMENT 6
PE- 3162415-04 Select sensors & opto-electronics devices for industrial
application.
3, 6 30
LAB MANUAL OF INDUSTRIAL ELECTRONICS (3162415) 04/26/2021
POWER ELECTRONICS ENGINEERING DEPARTMENT 1
Experiment No. 7
AIM: - To obtain the transfer characteristics curve of the optocoupler
Theory: An optocoupler (or an Optoelectronic Coupler) is basically an interface between two
circuits which operate at (usually) different voltage levels. The key advantage of an optocoupler is
the electrical isolation between the input and output circuits. With an optocoupler, the only contact
between the input and the output is a beam of light. Because of this it is possible to have an
insulation resistance between the two circuits in the thousands of megohms.
Isolation like this is useful in high voltage applications where the potentials of two circuits may differ
by several thousand volts.
The ideal isolation scheme should only allow signal flow in one direction, should respond to DC
levels, and should offer an extremely large resistance between the input and output Circuits. These
features are available in a class of optoelectronic devices Called optocouplers.
The optocoupler is a device that contains an infra-red LED and a photodetector (such as a
Photodiode, phototransistor, Darlington pair, SCR, or triac) combined in one package.
➢ Optocoupler Characteristics: -
Like discrete semiconductor device characteristics, optocoupler characteristics are set of curves that
relate the voltage and current flowing through it. In an optocoupler we see two discrete devices,
namely the diode at the input side and a photo transistor at the output side.
LAB MANUAL OF INDUSTRIAL ELECTRONICS (3162415) 04/26/2021
POWER ELECTRONICS ENGINEERING DEPARTMENT 2
By drawing the individual characteristics curves one can identify the type of diode and photo
detector used inside the IC. The input diode will have the input forward voltage (IF) which depends
on its material. For example, a silicon diode has 0.6V forward voltage and LEDs of different colors
will have different forward voltages varying from 1V to 4V. Once the forward voltage and the
wavelength are known, the semiconductor material can be identified. On the output side we have a
photo transistor. The material of the photo transistor can be identified by its saturation voltage.
Hence by the characteristics curves the material used in the optocoupler can be identified. Typical
IC/IF characteristics of a simple optocoupler at various values of output-transistor collector
voltage (VC).
The most convenient way of specifying optocoupling efficiency is to quote the output-to-input
Current Transfer Ratio (CTR) of the device, i.e., the ratio of the output collector current (IC) of the
phototransistor, to the forward current (IF) of the LED. Thus, CTR = IC/IF. In practice, CTR may be
expressed as a simple figure such as 0.5, or (by multiplying this figure by 100) as a percentage figure
such as 50%.
➢ Current Transfer Ratio (CTR) :-
The Current Transfer Ratio (CTR) is an electrical parameter usually specified for an optocoupler.
CTR is defined as the ratio of the output collector current (IC) caused by the light detected by the
photodiode to the forward LED input current (IF) that generates the light and is denoted as a
percentage.
CTR=(IC/IF)×100 (%)
The Current Transfer Ratio (CTR) varies from 10% to 200% for devices of different makes. An
optocoupler with 50% CTR is found to be extremely good in practice. As the light intensity
increases, the collector current increases proportionately and becomes constant.
Conclusion:
LAB MANUAL OF INDUSTRIAL ELECTRONICS (3162415) 04/26/2021
POWER ELECTRONICS ENGINEERING DEPARTMENT 3
Quiz:
1. Define Optocoupler.
2. Draw and Explain output Characteristics of Optocoupler.
3. Define Current Transfer Ration and explain its significance in Optocoupler.
Reference Book:
1 Biswanath Paul, “Industrila Electronics and Control”, PHI Learning Private Limited-2014
2 John R. Hackworth, Frederick D. Hackworth, Jr., “Programmable Logic Controllers: Programming
Methods and Applications”, Prentice Hall -2004.
3 G. K. Mithal, Dr. Maneesha Gupta, “ Industrial and Power Electronics”, Khanna Publisher-2001
4 S. K. Bhattacharya, S. Chatterjee, “Industrial Electronics and Control”, Tata McGraw-Hill
Publishing Company Ltd.
5 Harish C. Rai,“ Industrial and Power Electronics: Device, Circuits, Systems and Applications”,
Umesh Publications.
Course Outcomes: At the end of the course, student should be able to:
Sr. No. CO statement Topics
Mapped
Marks %
weightage
PE- 3162415-01 Develop the control logic for motor control application using.
magnetic control components.
1 20
PE- 3162415-02 Select servo System in industrial requirement 2 20
PE- 3162415-03 Make use of ultrasonic, power conditioner in industries. 4, 5 30
PE- 3162415-04 Select sensors & opto-electronics devices for industrial
application.
3, 6 30
LAB MANUAL OF INDUSTRIAL ELECTRONICS (3162415) 04/26/2021
POWER ELECTRONICS ENGINEERING DEPARTMENT 1
Experiment No. 8
AIM: - To Study Working of Solid State Stabilizer
Theory: A voltage stabilizer stabilizes or regulates the voltage if the supply voltage varies or
fluctuates over a given range.
In India, we have a large power distribution system with heavy distribution losses and variations in
industrial/ domestic load. This results in voltage variations that may damage electrical/ electronic
appliances like light, fan, television, mixer-grinder, air-conditioner, heater, water pump, toaster, etc.
Here, we describe how to make a solid-state voltage stabilizer that does not use electro-mechanical
relays and is suitable for most purposes. It is an electrical appliance that feeds constant voltage to a
load during over and under voltage conditions. This device detects these voltage conditions and
correspondingly brings the voltage to desired range. Voltage stabilizers provide a means to regulate
the supply voltage to the load. These are not meant to provide a constant voltage output; instead, it
operates the load or system in an acceptable range of voltage. Stabilizers consume very less power,
typically about 2 to 5% of maximum load (i.e., rating of stabilizer). These are high efficiency
devices, typically 95 to 98%.
Key features of the solid-state voltage stabilizers are:
➢ Wide range of voltage variation from 120 V to 280 V
➢ Only two settings are required low voltage and high voltage.
➢ Stabilized output of 220V
➢ Compact size
➢ Silent operation and no relay chattering sound.
➢ Bar graph LED voltage indicator
➢ Low/high voltage indicator and cut-off protection
Need of Voltage Stabilizers:
➢ In case of lighting equipment, low voltage drop reduces the lumen output (illumination) that
will further reduce the life of the lamp.
➢ AC motor produces less torque and hence the speed under low voltage, and they produce
more speed than desired during overvoltage. This degrades motor life and causes insulation
damage under high voltages.
➢ In case of induction heating, low voltage reduces heat output which causes the load to operate
at inappropriate temperatures than desired.
➢ In TV and radio transmission, voltage drop will reduce the quality of transmission and also
cause the malfunction of other electronic components.
➢ Refrigerators are AC motor driven appliances that draw large currents during voltage drop
conditions which may lead to overheating of windings.
➢ To overcome above mentioned effects of voltage variations, voltage stabilizers are needed.
LAB MANUAL OF INDUSTRIAL ELECTRONICS (3162415) 04/26/2021
POWER ELECTRONICS ENGINEERING DEPARTMENT 2
Working of Voltage Stabilizer:
The figure below shows the working model of a voltage stabilizer that contains a step-down
transformer (usually provided with taps on secondary), rectifier, operational
amplifier/microcontroller unit and set of relays.
The circuit diagram comprises following four sections:
1. Analogue voltage to digital step changer
2. Isolated solid-state power relay
3. Control power supply unit
4. Main’s transformer
The circuit diagram of a solid-state voltage stabiliser is shown in Fig.2. The heart of the stabiliser is
IC1 (LM3914) bar display driver. It is used as LED type bar graph voltmeter with lower voltage and
upper voltage settings through presets VR1 and VR2. IC1 senses mains voltage. The difference
between the lower voltage and upper voltage is divided into 10 steps. every LED indicates one step
or one voltage level and is lit depending on the level of voltage received.
All the 10 outputs of IC1 that are used to lit the LEDs are also fed as inputs to dual
decoder/demultiplexer CD4556. CD4556 is used for converting analogue voltage to digital steps to
ensure that, at a given time, only one tapping of mains transformer gets input supply voltage from
mains. In all conditions only one step can be active as per analogue input voltage.
Assume the first condition when the mains voltage is less than the lower set value. All the output
pins (1, 18, 17, 16, 15, 14, 13, 12, 11, 10) of IC1 will be high. IC3(A) will be disabled and no step
will be selected (means low volt 16, 15, 14, 13, 12, 11, 10) of IC1 will be high. IC3(A) will be
disabled and no step will be selected (means low voltage cut-off).
Circuit operation:
As the mains voltage increases to more than the lower set value, LED1 of the bar graph voltmeter
glows as pin1 of IC1 is low and all other outputs pins are high. In this condition IC2(A) is enabled
because input E (pin 1) is low. As inputs A0 and A1 of IC2(A) are high, out put Q3 goes low. This is
step 1 of step charger.
LAB MANUAL OF INDUSTRIAL ELECTRONICS (3162415) 04/26/2021
POWER ELECTRONICS ENGINEERING DEPARTMENT 3
When voltage increases, input A0 of IC2(A) goes low and its output Q2 also goes low. This is Step 2
of step changer.
Both these outputs are combined with 1N4148 diodes and given to cathode pin of internal LED of
IC7 (MOC3011). As internal LED of IC7 glows, TRIAC1 conducts and provides AC mains to
tapping ‘A’ of mains transformer X2.
When voltage increases further, both inputs A0 and A1 of IC2(A) go low, while both of its outputs
go high , and TRIAC1 goes off. Input A1 and output Q2 of IC2(A) generate enable input E for
IC2(B) with the help of set and reset input pins (S and R) of flip-flop IC5(A) (CD4013). Pin 1 of
IC5(A) provides low signal to enable input E of IC2(B) and output Q3 of IC2(B) goes low. This is
Step 3 of step changer. Similarly, other conditions work in the same manner (see Table).
The number of tappings for transformer X2 and the number of solid-stat relays to be used depend on
the voltage range to be covered. If the minimum voltage can drop to 100 volts and the maximum
could rise to 300 volts, we need to cover 200 volts deviation. This can be managed either through ten
tappings with 20V difference or just five tappings with 40V difference between each.
LAB MANUAL OF INDUSTRIAL ELECTRONICS (3162415) 04/26/2021
POWER ELECTRONICS ENGINEERING DEPARTMENT 4
Isolated solid state power relay:
Isolated solid-state power relay comprises an opto-isolatortriac driver MOC3011, bridge rectifier
(5A) and triac BT136. The opto-isolator triac driver MOC3011 is used for controlling the steps and
connecting AC mains power supply to correct tapping of mains transformer X2 via solid-state relay.
The capacity of solid-state relay depends on both the components traic and bridge rectifier. Here triac
BT136 and 5A bridge rectifier are used for 1kW load. Triac BT139 with 10A bridge rectifier can be
used for a solid state relay of more than 1 kVA and less than 3 kVA. You can use up to 3 kVA solid-
state voltage stabiliser with 3 kVA transformer.
Advantages
➢ They regulate the voltage levels in various types of equipment. They are used in houses,
construction buildings, commercial malls and complexes etc.
➢ They protect such equipment from any kind of voltage issues. They assure 100% safety to
industrial machinery and household appliances.
➢ The voltage stabilizers allow limited usage of the power as required for the devices.
LAB MANUAL OF INDUSTRIAL ELECTRONICS (3162415) 04/26/2021
POWER ELECTRONICS ENGINEERING DEPARTMENT 5
Disadvantages
➢ Moving parts requiring restricted maintenance.
➢ Lower speed of response compared with solid state designs.
Application
➢ Air conditioners
➢ LCD/LED TV
➢ Refrigerators
➢ Music systems
➢ Washing machines
➢ And also available as a single large unit for all appliances.
Conclusion:
Quiz:
1. Define Solid State Voltage Stabilizers
2. Explain the need of Solid State Voltage Stabilizer.
3. Draw and Explain the circuit diagram of voltage Stabilizer
Reference Book:
1 Biswanath Paul, “Industrila Electronics and Control”, PHI Learning Private Limited-2014
2 John R. Hackworth, Frederick D. Hackworth, Jr., “Programmable Logic Controllers: Programming
Methods and Applications”, Prentice Hall -2004.
3 G. K. Mithal, Dr. Maneesha Gupta, “ Industrial and Power Electronics”, Khanna Publisher-2001
LAB MANUAL OF INDUSTRIAL ELECTRONICS (3162415) 04/26/2021
POWER ELECTRONICS ENGINEERING DEPARTMENT 6
4 S. K. Bhattacharya, S. Chatterjee, “Industrial Electronics and Control”, Tata McGraw-Hill
Publishing Company Ltd.
5 Harish C. Rai,“ Industrial and Power Electronics: Device, Circuits, Systems and Applications”,
Umesh Publications.
Course Outcomes: At the end of the course, student should be able to:
Sr. No. CO statement Topics
Mapped
Marks %
weightage
PE- 3162415-01 Develop the control logic for motor control application using.
magnetic control components.
1 20
PE- 3162415-02 Select servo System in industrial requirement 2 20
PE- 3162415-03 Make use of ultrasonic, power conditioner in industries. 4, 5 30
PE- 3162415-04 Select sensors & opto-electronics devices for industrial
application.
3, 6 30
LAB MANUAL OF INDUSTRIAL ELECTRONICS (3162415) 04/26/2021
POWER ELECTRONICS ENGINEERING DEPARTMENT 1
Experiment No. 9
AIM: - To Study Online Uninterrupted Power supply and offline Uninterrupted Power
Supply.
Theory: An Uninterruptible Power Supply (UPS) is defined as a piece of electrical
equipment which can be used as an immediate power source to the connected load
when the power source of input devices is disconnected from the main power source
momentarily or for short duration of time.
Need for the UPS system for protection against common Power Problem:
1. Power Failure: Total loss of utility power.
2. Power sag: Short term low-voltage issues. This is like a person being sleepy
after lunch time.
3. Power Surges or Spikes: Short-term high voltage that is more than 110% of
normal output. This is like a caffeine high in a person.
4. Under-voltage (brownout conditions): Reduced line voltage for an extended
period. This can be a few minutes to a few days. This commonly happens during
summer months when air conditioners put strain on the power grid.
5. Over-voltage: Increased line voltage for an extended period from a few minutes
to a few days.
6. Electrical line noise: A high power frequency wave caused by RFI or EMI.
7. Frequency Variation: A loss of stability in the power supply’s normal frequency
of 50 to 60 Hz.
8. Switching Transient: Instant under-voltage in the range of nanoseconds.
9. Harmonic Distortion: Distortion of a normal power wave, typically transmitted
by unequal loads.
Short Break UPS
This UPS is also called as Standby UPS system which can give only the most
basic features. Here, the primary source is the filtered AC mains (shown in solid path
in figure 1). When the power breakage occurs, the transfer switch will select the
backup source (shown in dashed path in figure 1). Thus, we can clearly see that the
stand by system will start working only when there is any failure in mains. In this
system, the AC voltage is first rectified and stored in the storage battery connected to
the rectifier.
LAB MANUAL OF INDUSTRIAL ELECTRONICS (3162415) 04/26/2021
POWER ELECTRONICS ENGINEERING DEPARTMENT 2
A variety of design approaches are used to implement UPS systems, each with distinct
performance characteristics. The most common design approaches are as follows: *
Standby
* Line Interactive
* Standby on-line hybrid
* Standby-Ferro
* Double Conversion On-Line
* Delta Conversion On-Line
Offline UPS :
When power breakage occurs, this DC voltage is converted to AC voltage by
means of a power inverter, and is transferred to the load connected to it. This is the
least expensive UPS system, and it provides surge protection in addition to back up.
The transfer time can be about 25 milliseconds which can be related to the time taken
by the UPS system to detect the utility voltage that is lost. The block diagram is shown
below.
NO Break UPS
LAB MANUAL OF INDUSTRIAL ELECTRONICS (3162415) 04/26/2021
POWER ELECTRONICS ENGINEERING DEPARTMENT 3
In this type of UPS, double conversion method is used. Here, first the AC input
is converted into DC by rectifying process for storing it in the rechargeable battery.
This DC is converted into AC by the process of inversion and given to the load or
equipment which it is connected (figure 2). This type of UPS is used where electrical
isolation is mandatory. This system is a bit more costly due to the design of constantly
running converters and cooling systems. Here, the rectifier which is powered with the
normal AC current is directly driving the inverter. Hence it is also known as Double
conversion UPS. The block diagram is shown below.
When there is any power failure, the rectifier have no role in the circuit and
the steady power stored in the batteries which is connected to the inverter is given to
the load by means of transfer switch. Once the power is restored, the rectifier begins
to charge the batteries. To prevent the batteries from overheating due to the high-
power rectifier, the charging current is limited. During a main power breakdown, this
UPS system operates with zero transfer time. The reason is that the backup source
acts as a primary source and not the main AC input. But the presence of inrush
current and large load step current can result in a transfer time of about 4-6
milliseconds in this system. The following table shows some of the characteristics of
the various UPS types. Some attributes of a UPS, like efficiency, are dictated by the
choice of UPS type.
LAB MANUAL OF INDUSTRIAL ELECTRONICS (3162415) 04/26/2021
POWER ELECTRONICS ENGINEERING DEPARTMENT 4
Application of UPS
1. Data Centers
2. Industries
3. Telecommunications
4. Hospitals
5. Banks and insurance
6. Some special projects (events)
7. ICU
8. Chemical’s plant
Conclusion:
LAB MANUAL OF INDUSTRIAL ELECTRONICS (3162415) 04/26/2021
POWER ELECTRONICS ENGINEERING DEPARTMENT 5
Quiz:
1. Define UPS.
2. Explain the need of UPS for mitigate power problems.
3. Draw and Explain the circuit diagram of ON Line and OFF Line UPS.
Reference Book:
1 Biswanath Paul, “Industrila Electronics and Control”, PHI Learning Private Limited-2014
2 John R. Hackworth, Frederick D. Hackworth, Jr., “Programmable Logic Controllers: Programming
Methods and Applications”, Prentice Hall -2004.
3 G. K. Mithal, Dr. Maneesha Gupta, “ Industrial and Power Electronics”, Khanna Publisher-2001
4 S. K. Bhattacharya, S. Chatterjee, “Industrial Electronics and Control”, Tata McGraw-Hill
Publishing Company Ltd.
5 Harish C. Rai,“ Industrial and Power Electronics: Device, Circuits, Systems and Applications”,
Umesh Publications.
Course Outcomes: At the end of the course, student should be able to:
Sr. No. CO statement Topics
Mapped
Marks %
weightage
PE- 3162415-01 Develop the control logic for motor control application using.
magnetic control components.
1 20
PE- 3162415-02 Select servo System in industrial requirement 2 20
PE- 3162415-03 Make use of ultrasonic, power conditioner in industries. 4, 5 30
PE- 3162415-04 Select sensors & opto-electronics devices for industrial
application.
3, 6 30
LAB MANUAL OF INDUSTRIAL ELECTRONICS (3162415) 04/26/2021
POWER ELECTRONICS ENGINEERING DEPARTMENT 1
Experiment No. 10
AIM: - To study proximity switches to evaluate its working principle.
Theory: Eddy current proximity sensors are used to detect non-magnetic but conductive materials.
They comprise of a coil, an oscillator, a detector, and a triggering circuit. Figure 2.3.1 shows the
construction of eddy current proximity switch. When an alternating current is passed thru this coil, an
alternative magnetic field is generated. If a metal object comes in the close proximity of the coil, then
eddy currents are induced in the object due to the magnetic field. These eddy currents create their
own magnetic field which distorts the magnetic field responsible for their generation. As a result,
impedance of the coil changes and so the amplitude of alternating current. This can be used to trigger
a switch at some pre-determined level of change in current. Eddy current sensors are relatively
inexpensive, available in small in size, highly reliable and have high sensitivity for small
displacements.
Applications of eddy current proximity sensors • Automation requiring precise location • Machine
tool monitoring • Final assembly of precision equipment such as disk drives • Measuring the
dynamics of a continuously moving target, such as a vibrating element, • Drive shaft monitoring •
Vibration measurements.
Inductive proximity switches are basically used for detection of metallic objects. Figure 2.3.2 shows
the construction of inductive proximity switch. An inductive proximity sensor has four components;
the coil, oscillator, detection circuit and output circuit. An alternating current is supplied to the coil
which generates a magnetic field. When, a metal object comes closer to the end of the coil,
inductance of the coil changes. This is continuously monitored by a circuit which triggers a switch
when a preset value of inductance change is occurred.
LAB MANUAL OF INDUSTRIAL ELECTRONICS (3162415) 04/26/2021
POWER ELECTRONICS ENGINEERING DEPARTMENT 2
Applications of inductive proximity switches • Industrial automation: counting of products during
production or transfer • Security: detection of metal objects, arms, land mines
Optical encoders provide digital output as a result of linear / angular displacement. These are widely
used in the Servo motors to measure the rotation of shafts. Figure 2.3.3 shows the construction of an
optical encoder. It comprises of a disc with three concentric tracks of equally spaced holes. Three
light sensors are employed to detect the light passing thru the holes. These sensors produce electric
pulses which give the angular displacement of the mechanical element e.g. shaft on which the
Optical encoder is mounted. The inner track has just one hole which is used locate the ‘home’
position of the disc. The holes on the middle track offset from the holes of the outer track by one-half
of the width of the hole. This arrangement provides the direction of rotation to be determined. When
the disc rotates in clockwise direction, the pulses in the outer track lead those in the inner; in counter
clockwise direction they lag behind. The resolution can be determined by the number of holes on
disc. With 100 holes in one revolution, the resolution would be, 360⁰/100 = 3.6⁰.
LAB MANUAL OF INDUSTRIAL ELECTRONICS (3162415) 04/26/2021
POWER ELECTRONICS ENGINEERING DEPARTMENT 3
Figure 2.3.5 shows several configurations of contact-type proximity switch being used in
manufacturing automation. These are small electrical switches which require physical contact and a
small operating force to close the contacts. They are basically employed on conveyor systems to
detect the presence of an item on the conveyor belt.
Magnet based Reed switches are used as proximity switches. When a magnet attached to an object
brought close to the switch, the magnetic reeds attract to each other and close the switch contacts. A
schematic is shown in Figure 2.3.6.
Photo emitting devices such as Light emitting diodes (LEDs) and photosensitive devices such as
photo diodes and photo transistors are used in combination to work as proximity sensing devices.
Figure 2.3.7 shows two typical arrangements of LEDs and photo diodes to detect the objects
breaking the beam and reflecting light
LAB MANUAL OF INDUSTRIAL ELECTRONICS (3162415) 04/26/2021
POWER ELECTRONICS ENGINEERING DEPARTMENT 4
Conclusion:
Quiz:
1. To detect non-conducting metallic objects which sensor would be useful?
LAB MANUAL OF INDUSTRIAL ELECTRONICS (3162415) 04/26/2021
POWER ELECTRONICS ENGINEERING DEPARTMENT 5
2. If a digital optical encoder has 7 tracks, then the minimum angular motion that can be measured
by this device ________________.
3. Explain in brief two applications of “Reed switch”.
Reference Book:
1 Biswanath Paul, “Industrila Electronics and Control”, PHI Learning Private Limited-2014
2 John R. Hackworth, Frederick D. Hackworth, Jr., “Programmable Logic Controllers: Programming
Methods and Applications”, Prentice Hall -2004.
3 G. K. Mithal, Dr. Maneesha Gupta, “ Industrial and Power Electronics”, Khanna Publisher-2001
4 S. K. Bhattacharya, S. Chatterjee, “Industrial Electronics and Control”, Tata McGraw-Hill
Publishing Company Ltd.
5 Harish C. Rai,“ Industrial and Power Electronics: Device, Circuits, Systems and Applications”,
Umesh Publications.
Course Outcomes: At the end of the course, student should be able to:
Sr. No. CO statement Topics
Mapped
Marks %
weightage
PE- 3162415-01 Develop the control logic for motor control application using.
magnetic control components.
1 20
PE- 3162415-02 Select servo System in industrial requirement 2 20
PE- 3162415-03 Make use of ultrasonic, power conditioner in industries. 4, 5 30
PE- 3162415-04 Select sensors & opto-electronics devices for industrial
application.
3, 6 30

More Related Content

Similar to Lab Manual IE 3162415.pdf

IRJET- Auto Selection of any Available Phase, in Three Phase Supply System
IRJET- Auto Selection of any Available Phase, in Three Phase Supply SystemIRJET- Auto Selection of any Available Phase, in Three Phase Supply System
IRJET- Auto Selection of any Available Phase, in Three Phase Supply SystemIRJET Journal
 
Measurement and Relay Indications.pptx
Measurement and Relay Indications.pptxMeasurement and Relay Indications.pptx
Measurement and Relay Indications.pptxEngrSyedGhulamMustaf
 
Speed Control of Induction Motor Using Hysteresis Method
Speed Control of Induction Motor Using Hysteresis MethodSpeed Control of Induction Motor Using Hysteresis Method
Speed Control of Induction Motor Using Hysteresis MethodIRJET Journal
 
Wireless Speed Control of AC/DC motor
Wireless Speed Control of AC/DC motorWireless Speed Control of AC/DC motor
Wireless Speed Control of AC/DC motorVAIBHAV GHATOL
 
LOW VOLTAGE CONTROL PANEL, SWITHGEAR, OVERLOAD PROTECTION, STARTING METHODS
LOW VOLTAGE CONTROL PANEL, SWITHGEAR, OVERLOAD PROTECTION, STARTING METHODSLOW VOLTAGE CONTROL PANEL, SWITHGEAR, OVERLOAD PROTECTION, STARTING METHODS
LOW VOLTAGE CONTROL PANEL, SWITHGEAR, OVERLOAD PROTECTION, STARTING METHODSJayant Suthar
 
IRJET- Tap Changing using Solid State Devices for Single Phase Transformer
IRJET- Tap Changing using Solid State Devices for Single Phase TransformerIRJET- Tap Changing using Solid State Devices for Single Phase Transformer
IRJET- Tap Changing using Solid State Devices for Single Phase TransformerIRJET Journal
 
Performance Analysis of Single Phase Inverter
Performance Analysis of Single Phase Inverter Performance Analysis of Single Phase Inverter
Performance Analysis of Single Phase Inverter IJMER
 
Power Generation Using Footstep
Power Generation Using FootstepPower Generation Using Footstep
Power Generation Using Footsteppaperpublications3
 
Report on minor project
Report on minor projectReport on minor project
Report on minor projectAnil Maurya
 
IRJET- Micro Inverter
IRJET-  	  Micro InverterIRJET-  	  Micro Inverter
IRJET- Micro InverterIRJET Journal
 
IRJET- VSI based Standalone PV Generation System using Super-Capacitor to Dri...
IRJET- VSI based Standalone PV Generation System using Super-Capacitor to Dri...IRJET- VSI based Standalone PV Generation System using Super-Capacitor to Dri...
IRJET- VSI based Standalone PV Generation System using Super-Capacitor to Dri...IRJET Journal
 
IRJET- Solar based User Adjustable Multi-Purpose Frequency Inverter
IRJET- Solar based User Adjustable Multi-Purpose Frequency InverterIRJET- Solar based User Adjustable Multi-Purpose Frequency Inverter
IRJET- Solar based User Adjustable Multi-Purpose Frequency InverterIRJET Journal
 
Electrical Discharge Machining Flyback Converter using UC3842 Current Mode PW...
Electrical Discharge Machining Flyback Converter using UC3842 Current Mode PW...Electrical Discharge Machining Flyback Converter using UC3842 Current Mode PW...
Electrical Discharge Machining Flyback Converter using UC3842 Current Mode PW...IJPEDS-IAES
 
Design of transformer less power supply for low power application
Design of transformer less power supply for low power applicationDesign of transformer less power supply for low power application
Design of transformer less power supply for low power applicationeSAT Journals
 
269010454 electrical-machines-lab-manual-for-petrochemaical
269010454 electrical-machines-lab-manual-for-petrochemaical269010454 electrical-machines-lab-manual-for-petrochemaical
269010454 electrical-machines-lab-manual-for-petrochemaicalsampathkumar Mtech Chemical Engg
 
Switchyard design overview
Switchyard design overviewSwitchyard design overview
Switchyard design overviewMilind Punj
 
47512039 m-i-lab-manual
47512039 m-i-lab-manual47512039 m-i-lab-manual
47512039 m-i-lab-manualGopinath Naidu
 
Smart Wireless Battery Charger with Charging Monitor: A Review
Smart Wireless Battery Charger with Charging Monitor: A ReviewSmart Wireless Battery Charger with Charging Monitor: A Review
Smart Wireless Battery Charger with Charging Monitor: A ReviewIRJET Journal
 

Similar to Lab Manual IE 3162415.pdf (20)

IRJET- Auto Selection of any Available Phase, in Three Phase Supply System
IRJET- Auto Selection of any Available Phase, in Three Phase Supply SystemIRJET- Auto Selection of any Available Phase, in Three Phase Supply System
IRJET- Auto Selection of any Available Phase, in Three Phase Supply System
 
Measurement and Relay Indications.pptx
Measurement and Relay Indications.pptxMeasurement and Relay Indications.pptx
Measurement and Relay Indications.pptx
 
Speed Control of Induction Motor Using Hysteresis Method
Speed Control of Induction Motor Using Hysteresis MethodSpeed Control of Induction Motor Using Hysteresis Method
Speed Control of Induction Motor Using Hysteresis Method
 
Wireless Speed Control of AC/DC motor
Wireless Speed Control of AC/DC motorWireless Speed Control of AC/DC motor
Wireless Speed Control of AC/DC motor
 
LOW VOLTAGE CONTROL PANEL, SWITHGEAR, OVERLOAD PROTECTION, STARTING METHODS
LOW VOLTAGE CONTROL PANEL, SWITHGEAR, OVERLOAD PROTECTION, STARTING METHODSLOW VOLTAGE CONTROL PANEL, SWITHGEAR, OVERLOAD PROTECTION, STARTING METHODS
LOW VOLTAGE CONTROL PANEL, SWITHGEAR, OVERLOAD PROTECTION, STARTING METHODS
 
IRJET- Tap Changing using Solid State Devices for Single Phase Transformer
IRJET- Tap Changing using Solid State Devices for Single Phase TransformerIRJET- Tap Changing using Solid State Devices for Single Phase Transformer
IRJET- Tap Changing using Solid State Devices for Single Phase Transformer
 
Photovoltaic array fed inverter
Photovoltaic array fed inverterPhotovoltaic array fed inverter
Photovoltaic array fed inverter
 
bhuwnesh
bhuwneshbhuwnesh
bhuwnesh
 
Performance Analysis of Single Phase Inverter
Performance Analysis of Single Phase Inverter Performance Analysis of Single Phase Inverter
Performance Analysis of Single Phase Inverter
 
Power Generation Using Footstep
Power Generation Using FootstepPower Generation Using Footstep
Power Generation Using Footstep
 
Report on minor project
Report on minor projectReport on minor project
Report on minor project
 
IRJET- Micro Inverter
IRJET-  	  Micro InverterIRJET-  	  Micro Inverter
IRJET- Micro Inverter
 
IRJET- VSI based Standalone PV Generation System using Super-Capacitor to Dri...
IRJET- VSI based Standalone PV Generation System using Super-Capacitor to Dri...IRJET- VSI based Standalone PV Generation System using Super-Capacitor to Dri...
IRJET- VSI based Standalone PV Generation System using Super-Capacitor to Dri...
 
IRJET- Solar based User Adjustable Multi-Purpose Frequency Inverter
IRJET- Solar based User Adjustable Multi-Purpose Frequency InverterIRJET- Solar based User Adjustable Multi-Purpose Frequency Inverter
IRJET- Solar based User Adjustable Multi-Purpose Frequency Inverter
 
Electrical Discharge Machining Flyback Converter using UC3842 Current Mode PW...
Electrical Discharge Machining Flyback Converter using UC3842 Current Mode PW...Electrical Discharge Machining Flyback Converter using UC3842 Current Mode PW...
Electrical Discharge Machining Flyback Converter using UC3842 Current Mode PW...
 
Design of transformer less power supply for low power application
Design of transformer less power supply for low power applicationDesign of transformer less power supply for low power application
Design of transformer less power supply for low power application
 
269010454 electrical-machines-lab-manual-for-petrochemaical
269010454 electrical-machines-lab-manual-for-petrochemaical269010454 electrical-machines-lab-manual-for-petrochemaical
269010454 electrical-machines-lab-manual-for-petrochemaical
 
Switchyard design overview
Switchyard design overviewSwitchyard design overview
Switchyard design overview
 
47512039 m-i-lab-manual
47512039 m-i-lab-manual47512039 m-i-lab-manual
47512039 m-i-lab-manual
 
Smart Wireless Battery Charger with Charging Monitor: A Review
Smart Wireless Battery Charger with Charging Monitor: A ReviewSmart Wireless Battery Charger with Charging Monitor: A Review
Smart Wireless Battery Charger with Charging Monitor: A Review
 

Recently uploaded

What are the advantages and disadvantages of membrane structures.pptx
What are the advantages and disadvantages of membrane structures.pptxWhat are the advantages and disadvantages of membrane structures.pptx
What are the advantages and disadvantages of membrane structures.pptxwendy cai
 
main PPT.pptx of girls hostel security using rfid
main PPT.pptx of girls hostel security using rfidmain PPT.pptx of girls hostel security using rfid
main PPT.pptx of girls hostel security using rfidNikhilNagaraju
 
(SHREYA) Chakan Call Girls Just Call 7001035870 [ Cash on Delivery ] Pune Esc...
(SHREYA) Chakan Call Girls Just Call 7001035870 [ Cash on Delivery ] Pune Esc...(SHREYA) Chakan Call Girls Just Call 7001035870 [ Cash on Delivery ] Pune Esc...
(SHREYA) Chakan Call Girls Just Call 7001035870 [ Cash on Delivery ] Pune Esc...ranjana rawat
 
OSVC_Meta-Data based Simulation Automation to overcome Verification Challenge...
OSVC_Meta-Data based Simulation Automation to overcome Verification Challenge...OSVC_Meta-Data based Simulation Automation to overcome Verification Challenge...
OSVC_Meta-Data based Simulation Automation to overcome Verification Challenge...Soham Mondal
 
Call Girls Service Nagpur Tanvi Call 7001035870 Meet With Nagpur Escorts
Call Girls Service Nagpur Tanvi Call 7001035870 Meet With Nagpur EscortsCall Girls Service Nagpur Tanvi Call 7001035870 Meet With Nagpur Escorts
Call Girls Service Nagpur Tanvi Call 7001035870 Meet With Nagpur EscortsCall Girls in Nagpur High Profile
 
Processing & Properties of Floor and Wall Tiles.pptx
Processing & Properties of Floor and Wall Tiles.pptxProcessing & Properties of Floor and Wall Tiles.pptx
Processing & Properties of Floor and Wall Tiles.pptxpranjaldaimarysona
 
(PRIYA) Rajgurunagar Call Girls Just Call 7001035870 [ Cash on Delivery ] Pun...
(PRIYA) Rajgurunagar Call Girls Just Call 7001035870 [ Cash on Delivery ] Pun...(PRIYA) Rajgurunagar Call Girls Just Call 7001035870 [ Cash on Delivery ] Pun...
(PRIYA) Rajgurunagar Call Girls Just Call 7001035870 [ Cash on Delivery ] Pun...ranjana rawat
 
Introduction and different types of Ethernet.pptx
Introduction and different types of Ethernet.pptxIntroduction and different types of Ethernet.pptx
Introduction and different types of Ethernet.pptxupamatechverse
 
Architect Hassan Khalil Portfolio for 2024
Architect Hassan Khalil Portfolio for 2024Architect Hassan Khalil Portfolio for 2024
Architect Hassan Khalil Portfolio for 2024hassan khalil
 
Call Girls in Nagpur Suman Call 7001035870 Meet With Nagpur Escorts
Call Girls in Nagpur Suman Call 7001035870 Meet With Nagpur EscortsCall Girls in Nagpur Suman Call 7001035870 Meet With Nagpur Escorts
Call Girls in Nagpur Suman Call 7001035870 Meet With Nagpur EscortsCall Girls in Nagpur High Profile
 
Decoding Kotlin - Your guide to solving the mysterious in Kotlin.pptx
Decoding Kotlin - Your guide to solving the mysterious in Kotlin.pptxDecoding Kotlin - Your guide to solving the mysterious in Kotlin.pptx
Decoding Kotlin - Your guide to solving the mysterious in Kotlin.pptxJoão Esperancinha
 
MANUFACTURING PROCESS-II UNIT-2 LATHE MACHINE
MANUFACTURING PROCESS-II UNIT-2 LATHE MACHINEMANUFACTURING PROCESS-II UNIT-2 LATHE MACHINE
MANUFACTURING PROCESS-II UNIT-2 LATHE MACHINESIVASHANKAR N
 
Coefficient of Thermal Expansion and their Importance.pptx
Coefficient of Thermal Expansion and their Importance.pptxCoefficient of Thermal Expansion and their Importance.pptx
Coefficient of Thermal Expansion and their Importance.pptxAsutosh Ranjan
 
chaitra-1.pptx fake news detection using machine learning
chaitra-1.pptx  fake news detection using machine learningchaitra-1.pptx  fake news detection using machine learning
chaitra-1.pptx fake news detection using machine learningmisbanausheenparvam
 
Gfe Mayur Vihar Call Girls Service WhatsApp -> 9999965857 Available 24x7 ^ De...
Gfe Mayur Vihar Call Girls Service WhatsApp -> 9999965857 Available 24x7 ^ De...Gfe Mayur Vihar Call Girls Service WhatsApp -> 9999965857 Available 24x7 ^ De...
Gfe Mayur Vihar Call Girls Service WhatsApp -> 9999965857 Available 24x7 ^ De...srsj9000
 
HARMONY IN THE NATURE AND EXISTENCE - Unit-IV
HARMONY IN THE NATURE AND EXISTENCE - Unit-IVHARMONY IN THE NATURE AND EXISTENCE - Unit-IV
HARMONY IN THE NATURE AND EXISTENCE - Unit-IVRajaP95
 
(ANVI) Koregaon Park Call Girls Just Call 7001035870 [ Cash on Delivery ] Pun...
(ANVI) Koregaon Park Call Girls Just Call 7001035870 [ Cash on Delivery ] Pun...(ANVI) Koregaon Park Call Girls Just Call 7001035870 [ Cash on Delivery ] Pun...
(ANVI) Koregaon Park Call Girls Just Call 7001035870 [ Cash on Delivery ] Pun...ranjana rawat
 

Recently uploaded (20)

What are the advantages and disadvantages of membrane structures.pptx
What are the advantages and disadvantages of membrane structures.pptxWhat are the advantages and disadvantages of membrane structures.pptx
What are the advantages and disadvantages of membrane structures.pptx
 
main PPT.pptx of girls hostel security using rfid
main PPT.pptx of girls hostel security using rfidmain PPT.pptx of girls hostel security using rfid
main PPT.pptx of girls hostel security using rfid
 
(SHREYA) Chakan Call Girls Just Call 7001035870 [ Cash on Delivery ] Pune Esc...
(SHREYA) Chakan Call Girls Just Call 7001035870 [ Cash on Delivery ] Pune Esc...(SHREYA) Chakan Call Girls Just Call 7001035870 [ Cash on Delivery ] Pune Esc...
(SHREYA) Chakan Call Girls Just Call 7001035870 [ Cash on Delivery ] Pune Esc...
 
OSVC_Meta-Data based Simulation Automation to overcome Verification Challenge...
OSVC_Meta-Data based Simulation Automation to overcome Verification Challenge...OSVC_Meta-Data based Simulation Automation to overcome Verification Challenge...
OSVC_Meta-Data based Simulation Automation to overcome Verification Challenge...
 
Call Girls Service Nagpur Tanvi Call 7001035870 Meet With Nagpur Escorts
Call Girls Service Nagpur Tanvi Call 7001035870 Meet With Nagpur EscortsCall Girls Service Nagpur Tanvi Call 7001035870 Meet With Nagpur Escorts
Call Girls Service Nagpur Tanvi Call 7001035870 Meet With Nagpur Escorts
 
Processing & Properties of Floor and Wall Tiles.pptx
Processing & Properties of Floor and Wall Tiles.pptxProcessing & Properties of Floor and Wall Tiles.pptx
Processing & Properties of Floor and Wall Tiles.pptx
 
Roadmap to Membership of RICS - Pathways and Routes
Roadmap to Membership of RICS - Pathways and RoutesRoadmap to Membership of RICS - Pathways and Routes
Roadmap to Membership of RICS - Pathways and Routes
 
(PRIYA) Rajgurunagar Call Girls Just Call 7001035870 [ Cash on Delivery ] Pun...
(PRIYA) Rajgurunagar Call Girls Just Call 7001035870 [ Cash on Delivery ] Pun...(PRIYA) Rajgurunagar Call Girls Just Call 7001035870 [ Cash on Delivery ] Pun...
(PRIYA) Rajgurunagar Call Girls Just Call 7001035870 [ Cash on Delivery ] Pun...
 
Introduction and different types of Ethernet.pptx
Introduction and different types of Ethernet.pptxIntroduction and different types of Ethernet.pptx
Introduction and different types of Ethernet.pptx
 
Architect Hassan Khalil Portfolio for 2024
Architect Hassan Khalil Portfolio for 2024Architect Hassan Khalil Portfolio for 2024
Architect Hassan Khalil Portfolio for 2024
 
Call Girls in Nagpur Suman Call 7001035870 Meet With Nagpur Escorts
Call Girls in Nagpur Suman Call 7001035870 Meet With Nagpur EscortsCall Girls in Nagpur Suman Call 7001035870 Meet With Nagpur Escorts
Call Girls in Nagpur Suman Call 7001035870 Meet With Nagpur Escorts
 
Decoding Kotlin - Your guide to solving the mysterious in Kotlin.pptx
Decoding Kotlin - Your guide to solving the mysterious in Kotlin.pptxDecoding Kotlin - Your guide to solving the mysterious in Kotlin.pptx
Decoding Kotlin - Your guide to solving the mysterious in Kotlin.pptx
 
MANUFACTURING PROCESS-II UNIT-2 LATHE MACHINE
MANUFACTURING PROCESS-II UNIT-2 LATHE MACHINEMANUFACTURING PROCESS-II UNIT-2 LATHE MACHINE
MANUFACTURING PROCESS-II UNIT-2 LATHE MACHINE
 
Call Us -/9953056974- Call Girls In Vikaspuri-/- Delhi NCR
Call Us -/9953056974- Call Girls In Vikaspuri-/- Delhi NCRCall Us -/9953056974- Call Girls In Vikaspuri-/- Delhi NCR
Call Us -/9953056974- Call Girls In Vikaspuri-/- Delhi NCR
 
Coefficient of Thermal Expansion and their Importance.pptx
Coefficient of Thermal Expansion and their Importance.pptxCoefficient of Thermal Expansion and their Importance.pptx
Coefficient of Thermal Expansion and their Importance.pptx
 
9953056974 Call Girls In South Ex, Escorts (Delhi) NCR.pdf
9953056974 Call Girls In South Ex, Escorts (Delhi) NCR.pdf9953056974 Call Girls In South Ex, Escorts (Delhi) NCR.pdf
9953056974 Call Girls In South Ex, Escorts (Delhi) NCR.pdf
 
chaitra-1.pptx fake news detection using machine learning
chaitra-1.pptx  fake news detection using machine learningchaitra-1.pptx  fake news detection using machine learning
chaitra-1.pptx fake news detection using machine learning
 
Gfe Mayur Vihar Call Girls Service WhatsApp -> 9999965857 Available 24x7 ^ De...
Gfe Mayur Vihar Call Girls Service WhatsApp -> 9999965857 Available 24x7 ^ De...Gfe Mayur Vihar Call Girls Service WhatsApp -> 9999965857 Available 24x7 ^ De...
Gfe Mayur Vihar Call Girls Service WhatsApp -> 9999965857 Available 24x7 ^ De...
 
HARMONY IN THE NATURE AND EXISTENCE - Unit-IV
HARMONY IN THE NATURE AND EXISTENCE - Unit-IVHARMONY IN THE NATURE AND EXISTENCE - Unit-IV
HARMONY IN THE NATURE AND EXISTENCE - Unit-IV
 
(ANVI) Koregaon Park Call Girls Just Call 7001035870 [ Cash on Delivery ] Pun...
(ANVI) Koregaon Park Call Girls Just Call 7001035870 [ Cash on Delivery ] Pun...(ANVI) Koregaon Park Call Girls Just Call 7001035870 [ Cash on Delivery ] Pun...
(ANVI) Koregaon Park Call Girls Just Call 7001035870 [ Cash on Delivery ] Pun...
 

Lab Manual IE 3162415.pdf

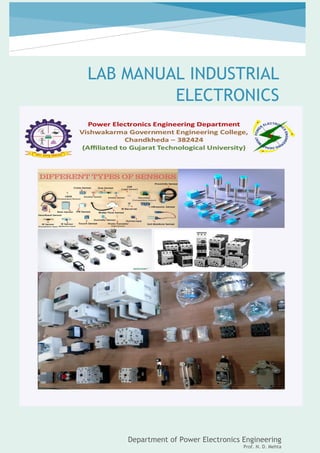
  • 1. LAB MANUAL INDUSTRIAL ELECTRONICS SUB CODE: 3162415 Department of Power Electronics Engineering Prof. N. D. Mehta
  • 2.
  • 3. Index Name of Student : …………………………………………………………………………………… Enrolment No: …………………………………………… Semester & Batch : ………………… Academic Year : …………… Course Outcomes: At the end of the course, student will be able to: Sr. No. Name of Experiment Course Outcome Start Date End Date Grade Signature 1 To study various control components and represent symbolically. PE- 3162415-01 2 To develop control logic for star- delta starter. PE- 3162415-01 3 To investigate working operation of stepper motor. PE- 3162415-02 4 To study Synchro transmitter and receiver pair as error detector. PE- 3162415-02 5 To investigate electrical and optical characteristics of photo transistor. PE- 3162415-04 6 To study working principle of ultrasonics wave generators. PE- 3162415-03 7 To obtain transfer characteristics curve of the Opto-coupler. PE- 3162415-04 8 To study working of solid-state stabilizers. PE- 3162415-03 9 To study on-line Uninterrupted Power Supply and off-line Uninterrupted Power Supply. PE- 3162415-03 10 To conduct an experiment of proximity switches to evaluate its working principle. PE- 3162415-04 Course Outcome CO statement PE- 3162415-01 Develop the control logic for motor control application using magnetic control components. PE- 3162415-02 Select servo System in industrial requirement PE- 3162415-03 Make use of ultrasonic, power conditioner in industries. PE- 3162415-04 Select sensors & opto-electronics devices for industrial application.
  • 4. LAB MANUAL OF INDUSTRIAL ELECTRONICS (3162415) 04/26/2021 POWER ELECTRONICS ENGINEERING DEPARTMENT 1 Experiment No. 1 Aim : To Study and Draw the different symbol used in Industrial Electronics Engineering. Theory : An electronic circuit is composed of various types of components. Some of these components are termed as active components because they take part in the transformation of the energy while other components, which only dissipate or store energy, are called as passive elements. The vacuum tubes, rectifier, transistors are some of-the common active while the resistances, which dissipate the power and energy storing elements such as capacitances and inductances are known as passive elements. The transformers may be regarded as a matching device. The success of any electronic circuit depends not only on proper selection of the active elements but on the passive and matching elements too. The proper function, of an active device is decided by the proper values of these passive elements. Hence the selection of these elements such as resistances, inductances, capacitance, and transformers not only require the proper attention, but also decide the proper function of the active devices as well as the circuit. TABLE 1 CIRCUIT SYMBOL OF COMPONENT USED IN INDUSTRIAL ELECTRONICS Sr. No. COMPONENT SYMBOL ALTERNATE 1 Ammeter 2 And Gate 3 Antenna, Balanced 4 Antenna, General 5 Antenna, Loop, Shielded 6 Antenna, Loop, Unshielded 7 Antenna, Unbalanced 8 Attenuator, Fixed 9 Attenuator, Variable
  • 5. LAB MANUAL OF INDUSTRIAL ELECTRONICS (3162415) 04/26/2021 POWER ELECTRONICS ENGINEERING DEPARTMENT 2 10 Battery 11 Capacitor, Feed through 12 Capacitor, Fixed, Non polarized 13 Capacitor, Fixed, Polarized 14 Capacitor, Ganged, Variable 15 Capacitor, General 16 Capacitor, Variable, Single 17 Capacitor, Variable, Split-Stator 18 Cathode, Cold 19 Cathode, Directly Heated 20 Cathode, Indirectly Heated 21 Cavity Resonator 22 Cell 23 Circuit Breaker 24 Coaxial Cable 25 Crystal, Piezoelectric 26 Delay Line 27 Diode, General 28 Diode, Gunn 29 Diode, Light-Emitting
  • 6. LAB MANUAL OF INDUSTRIAL ELECTRONICS (3162415) 04/26/2021 POWER ELECTRONICS ENGINEERING DEPARTMENT 3 30 Diode, Photosensitive 31 Diode, Photovoltaic 32 Diode, Pin 33 Diode, Varactor 34 Diode, Zener 35 Directional Coupler 36 Exclusive-Or Gate 37 Female Contact, General 38 Ferrite Bead 39 Fuse 40 Galvanometer 41 Ground, Chassis 42 Ground, Earth 43 Handset 44 Headphone, Double 45 Headphone, Single 46 Inductor, Air-Core 47 Inductor, Bifilar 48 Inductor, Iron-Core 49 Inductor, Tapped
  • 7. LAB MANUAL OF INDUSTRIAL ELECTRONICS (3162415) 04/26/2021 POWER ELECTRONICS ENGINEERING DEPARTMENT 4 50 Inductor, Variable 51 Integrated Circuit 52 Inverter 53 Jack, Coaxial 54 Jack, Phone, 2-Conductor 55 Jack, Phone, 2-Conductor Interrupting 56 Jack, Phone, 3-Conductor 57 Jack, Phono 58 Key, Telegraph 59 Lamp, Incandescent 60 Lamp, Neon 61 Male Contact, General 62 Microphone 63 Nand Gate 64 Negative Voltage Connection 65 Nor Gate 66 Operational Amplifier 67 Or Gate 68 Outlet, Utility, 117-V 69 Outlet, Utility, 234-V
  • 8. LAB MANUAL OF INDUSTRIAL ELECTRONICS (3162415) 04/26/2021 POWER ELECTRONICS ENGINEERING DEPARTMENT 5 70 Photocell, Tube 71 Plug, Phone, 2-Conductor 72 Plug, Phone, 3-Conductor 73 Plug, Phono 74 Plug, Utility, 117-V 75 Plug, Utility, 234-V 76 Positive Voltage Connection 77 Potentiometer 78 Probe, Radio-Frequency 79 Rectifier, Semiconductor 80 Rectifier, Silicon-Controlled 81 Rectifier, Tube-Type 82 Relay, DPDT 83 Relay, DPST 84 Relay, SPDT 85 Relay, SPST 86 Resistor 87 Resonator 88 Rheostat 89 Saturable Reactor
  • 9. LAB MANUAL OF INDUSTRIAL ELECTRONICS (3162415) 04/26/2021 POWER ELECTRONICS ENGINEERING DEPARTMENT 6 90 Shielding 91 Signal Generator 92 Speaker 93 Switch, DPDT 94 Switch, DPST 95 Switch, Momentary-Contact 96 Switch, Rotary 97 Switch, SPDT 98 Switch, SPST 99 Terminals, General, Balanced 100 Terminals, General, Unbalanced 101 Test Point 102 Thermocouple 103 Thyristor 104 Transformer, Air-Core 105 Transformer, Iron-Core 106 Transformer, Tapped Primary 107 Transformer, Tapped Secondary 108 Transistor, Bipolar, npn 109 Transistor, Bipolar, pnp
  • 10. LAB MANUAL OF INDUSTRIAL ELECTRONICS (3162415) 04/26/2021 POWER ELECTRONICS ENGINEERING DEPARTMENT 7 110 Transistor, Field-Effect, N- Channel 111 Transistor, Field-Effect, P- Channel 112 Transistor, Metal-Oxide, Dual- Gate 113 Transistor, Metal-Oxide, Single- Gate 114 Transistor, Photosensitive 115 Transistor, Unijunction 116 Tube, Diode 117 Tube, Pentode 118 Tube, Photomultiplier 119 Tube, Tetrode 120 Tube, Triode 121 Unspecified Component 122 Voltmeter 123 Wattmeter 124 Wires 125 Wires, Connected, Crossing 126 Wires, Not Connected, Crossing Conclusion:
  • 11. LAB MANUAL OF INDUSTRIAL ELECTRONICS (3162415) 04/26/2021 POWER ELECTRONICS ENGINEERING DEPARTMENT 8 Quiz: 1. Define Active and Passive Component 2. List the specification required to for Passive Component R. L , C to procure. 3. Explain the color code for Capacitor. Reference Book: 1 Biswanath Paul, “Industrila Electronics and Control”, PHI Learning Private Limited-2014 2 John R. Hackworth, Frederick D. Hackworth, Jr., “Programmable Logic Controllers: Programming Methods and Applications”, Prentice Hall -2004. 3 G. K. Mithal, Dr. Maneesha Gupta, “ Industrial and Power Electronics”, Khanna Publisher-2001 4 S. K. Bhattacharya, S. Chatterjee, “Industrial Electronics and Control”, Tata McGraw-Hill Publishing Company Ltd. 5 Harish C. Rai,“ Industrial and Power Electronics: Device, Circuits, Systems and Applications”, Umesh Publications. Course Outcomes: At the end of the course, student should be able to: Sr. No. CO statement Topics Mapped Marks % weightage PE- 3162415-01 Develop the control logic for motor control application using. magnetic control components. 1 20 PE- 3162415-02 Select servo System in industrial requirement 2 20 PE- 3162415-03 Make use of ultrasonic, power conditioner in industries. 4, 5 30 PE- 3162415-04 Select sensors & opto-electronics devices for industrial application. 3, 6 30
  • 12. LAB MANUAL OF INDUSTRIAL ELECTRONICS (3162415) 04/26/2021 POWER ELECTRONICS ENGINEERING DEPARTMENT 1 Experiment No. 2 Aim: To develop control logic for star-delta starter. Theory: Starting current of IM - Induction motor we can observe that induction motor consists of two branch circuits which are in parallel ● Magnetizing component circuit ● Resistance and reactance circuit Magnetizing components of current flowing through an induction motor is proportional to the applied voltage and is independent of load on the motor similar to a transformer. Resistance and leakage reactance circuit consist of resistance and leakage reactance of stator and rotor of induction motor connected in series. A load resistance (variable) is connected in series to the fixed rotor and stator impedance. During starting of the motor, slip will be one. Therefore, if we calculate the total impedance offered (stator and rotor impedance) to the inrush currents during starting of the induction motor which is minimum resulting in high inrush currents during starting of the motor. When 3 phase voltage applied across the stator winding for starting of induction motor, high inrush currents magnetize the air gap between the stator and rotor. An induced emf is generated in the rotor windings of the induction motor because of the rotating magnetic field. This induced emf produces electrical current in rotor windings. Current generated in the rotor windings produces a field which in turn produces torque to rotate the motor. Once the rotor starts picking up the speed, current drawn by the machine decreases. The time required for starting the motor depends on the time required for the acceleration which depends on the nature of the connected load. Types of starter - ● Full Voltage or Across the Line Starter ● Full Voltage Reversing Starter ● Multi Speed Starter ● Reduced Voltage Starter
  • 13. LAB MANUAL OF INDUSTRIAL ELECTRONICS (3162415) 04/26/2021 POWER ELECTRONICS ENGINEERING DEPARTMENT 2 When an electric motor is started, it draws a high current typical 5-6 times greater than normal current. In DC motors there is no back emf at starting therefore initial current is very high as compared to the normal current. To protect the motor from these high starting currents we use a star and delta starter. The given figure shows the winding connections in star and delta configuration one by one. In star connection, one end of all three windings is shorted to make star points while the other end of each winding is connected to the power supply. In delta configuration, the windings are connected such that to make a close loop. The connection of each winding is shown in the above figure. In the actual motor the three phase connections are provided in the following order as shown. So, to make winding connections in star and delta style in a practical motor, the connection is shown above. Main contractor is used to supply power to the windings. It must be turned on all the time. Initially the star contactor is closed while delta contactor is open It makes the motor windings in star configuration.
  • 14. LAB MANUAL OF INDUSTRIAL ELECTRONICS (3162415) 04/26/2021 POWER ELECTRONICS ENGINEERING DEPARTMENT 3 When the motor gains speed, the star contactor is opened while the delta contactor is closed turning the motor windings into delta configuration. PLC Ladder logic - The contactors are controlled by using PLC. This section will explain the ladder programming for star delta motor starter. Rung 1 Main contactor : The main contactor depends upon the normally open input start push button (I1), normally closed stop button (I2) and normally closed overload relay. It means that Main contactor will only be energized if the start button is pressed, while stop is not pressed and the overload relay is not activated. A normally open input named (Q1) is added in parallel to the start button I1. By doing so, a push button is created which means that once motor is started, it will be kept started even if start button is released.
  • 15. LAB MANUAL OF INDUSTRIAL ELECTRONICS (3162415) 04/26/2021 POWER ELECTRONICS ENGINEERING DEPARTMENT 4 Rung 2 Star contactor: Star contactor depends upon main contactor, normally close contacts of timer (T1), and normally close contacts of output delta contactor (Q3). So star contactor will only be energized if the main contactor is ON, time output is not activated and delta contactor is not energized. Timer T1: Timer T1 measures the time after which the winding connection of star delta starter is to be changed. It will start counting time after the main contactor is energized. Rung 3 Delta contactor: Delta contactor will be energized when main contactor (Q1) is energized, timer T1 is activated, and star contactor (Q3) is de-energized. Conclusion: Quiz: 1. Why we need starter in the Induction Motor. 2. Draw and list the different types of starter. 3. Explain the working of Start Delta Starter for Induction Motor. Reference Book: 1 Biswanath Paul, “Industrila Electronics and Control”, PHI Learning Private Limited-2014
  • 16. LAB MANUAL OF INDUSTRIAL ELECTRONICS (3162415) 04/26/2021 POWER ELECTRONICS ENGINEERING DEPARTMENT 5 2 John R. Hackworth, Frederick D. Hackworth, Jr., “Programmable Logic Controllers: Programming Methods and Applications”, Prentice Hall -2004. 3 G. K. Mithal, Dr. Maneesha Gupta, “Industrial and Power Electronics”, Khanna Publisher-2001 4 S. K. Bhattacharya, S. Chatterjee, “Industrial Electronics and Control”, Tata McGraw-Hill Publishing Company Ltd. 5 Harish C. Rai, “Industrial and Power Electronics: Device, Circuits, Systems and Applications”, Umesh Publications. Course Outcomes: At the end of the course, student should be able to: Sr. No. CO statement Topics Mapped Marks % weightage PE- 3162415-01 Develop the control logic for motor control application using. magnetic control components. 1 20 PE- 3162415-02 Select servo System in industrial requirement 2 20 PE- 3162415-03 Make use of ultrasonic, power conditioner in industries. 4, 5 30 PE- 3162415-04 Select sensors & opto-electronics devices for industrial application. 3, 6 30
  • 17. LAB MANUAL OF INDUSTRIAL ELECTRONICS (3162415) 04/26/2021 POWER ELECTRONICS ENGINEERING DEPARTMENT 1 Experiment No. 3 Aim: To investigate the working operation of Stepper motor Theory: 1) A stepper motor is defined as a digital electromechanical device where each command pulse results in a movement of the shaft by a discrete angle called step angle of the motor 2) A stepper motor is an electromechanical device which converts electrical pulses into discrete mechanical movements. CONSTRUCTION: Stepper motor construction is quite similar to DC motor. It also has a permanent magnet as Rotor. Rotor will be in the center and will rotate when force is acts on it. This rotor is surrounded by a number of stator which is wound by magnetic coil all over it. Stator will be placed as close as possible to rotor so that magnetic fields in stators can influence rotor’s movement. To control the stepper motor each stator will be powered one by one alternatively. In this case the stator will magnetize and act as an electromagnetic pole exerting repulsive force on the rotor and pushes it to move one step. Alternative magnetizing and demagnetizing of stators will move the rotor step by step and enable it to rotate with great control. Based on stator, it can be classified into two types. They are Unipolar and Bipolar stepper motors. WORKING: The stepper motor rotor is a permanent magnet, when the current flows through the stator winding, the stator winding to produce a vector magnetic field. The magnetic field drives the rotor to rotate by
  • 18. LAB MANUAL OF INDUSTRIAL ELECTRONICS (3162415) 04/26/2021 POWER ELECTRONICS ENGINEERING DEPARTMENT 2 an angle so that the pair of magnetic fields of the rotor and the magnetic field direction of the stator are consistent. When the stator's vector magnetic field is rotated by an angle, the rotor also rotates with the magnetic field at an angle. Each time an electrical pulse is input, the motor rotates one degree further. The angular displacement it outputs is proportional to the number of pulses input and the speed is proportional to the pulse frequency. Change the order of winding power, the motor will reverse. Therefore, it can control the rotation of the stepping motor by controlling the number of pulses, the frequency and the electrical sequence of each phase winding of the motor. TYPE OF STEPPER MOTOR 1) Variable Reluctance Stepper Motor 2) Permanent Magnet Stepper Motor 3) Hybrid Stepper Motor 1) VARIABLE RELUCTANCE STEPPER MOTOR Variable reluctance (VR) motors have a plain iron rotor and operate based on the principle that minimum reluctance occurs with minimum gap, hence the rotor points are attracted toward the stator magnet poles. The stepper motor like variable reluctance is the basic type of motor and it is used for the past many years. As the name suggests, the rotor’s angular position mainly depends on the magnetic circuit’s reluctance that can be formed among the teeth of the stator as well as a rotor. The reluctance torque depends on the square of the phase current and its direction is dependent of the polarity of the phase current A VR motor can be a single stack or multi-stack motor ADVANTAGE:
  • 19. LAB MANUAL OF INDUSTRIAL ELECTRONICS (3162415) 04/26/2021 POWER ELECTRONICS ENGINEERING DEPARTMENT 3 1) Enhanced acceleration rates 2) Easily operated and cost-effective 3) Quick dynamic response 4) The proportion of torque to inertia is more DISADVANTAGE: 1) Capacity is minimal when there are huge inertial loads 2) There will be a limitation on output power 2) PERMANENT MAGNET STEPPER MOTOR The operation of this motor works on the principle that unlike poles attract each other and like poles repel each other. When the stator windings are excited with a DC supply, it produces magnetic flux and establishes the North and South poles. Due to the force of attraction and repulsion between permanent magnet rotor poles and stator poles, the rotor starts moving up to the position for which pulses are given to the stator. ADVANTAGE: 1) Low power requirement. 2) High detente torque as compared to VR motor. 3) Rotor do not require external exciting current. 4) It produces more torque per ampere stator current. DISADVANTAGE: 1) Motor has higher inertia. 2) Slower acceleration.
  • 20. LAB MANUAL OF INDUSTRIAL ELECTRONICS (3162415) 04/26/2021 POWER ELECTRONICS ENGINEERING DEPARTMENT 4 3)HYBRID STEPPER MOTOR This motor works similar to that of permanent magnet stepper motor. The figure above shows 2- phase, 4-pole, 6-tooth rotor hybrid stepper motor. When the phase A-A’ is excited with a DC supply, keeping B-B’ unexcited, the rotor aligns such that the south pole of the rotor faces north pole of the stator while north pole of rotor faces south pole of the stator. Now, if the phase B-B’ is excited, keeping A-A’ switched off in such a way that upper pole becomes north and lower becomes south, then the rotor will align to a new position by moving through counterclockwise direction. If the phase B-B’ is oppositely excited such that the upper pole becomes south and lower becomes north, then the rotor will turn clockwise direction. By a proper sequence of pulses to the stator, the motor will turn in desired direction. For every excitation, rotor will get locked into new position, and even if excitation is removed motor still maintains its locked condition due to the permanent magnet excitation. The step angle of this 2- phase, 4-pole, 6-tooth rotor motor is given as 360/ (2 × 6) = 30 degrees. In practice, hybrid motors are constructed with more number of rotor poles in order to get high angular resolution. ADVANTAGE: 1) Less tendency to resonate
  • 21. LAB MANUAL OF INDUSTRIAL ELECTRONICS (3162415) 04/26/2021 POWER ELECTRONICS ENGINEERING DEPARTMENT 5 2) Provide detent torque with windings de-energized 3) Higher holding torque capability 4) High stepping rate capability DISADVANTAGE: 1) Higher inertia and weight due to presence of rotor magnet. 2) Performance affected by change in magnetic strength. Conclusion: Quiz: 1. Define Stepper Motor 2. Draw the different types of stepper motor. 3. Compare the advantage and disadvantage of different types of stepper motor Reference Book: 1 Biswanath Paul, “Industrila Electronics and Control”, PHI Learning Private Limited-2014 2 John R. Hackworth, Frederick D. Hackworth, Jr., “Programmable Logic Controllers: Programming Methods and Applications”, Prentice Hall -2004. 3 G. K. Mithal, Dr. Maneesha Gupta, “ Industrial and Power Electronics”, Khanna Publisher-2001 4 S. K. Bhattacharya, S. Chatterjee, “Industrial Electronics and Control”, Tata McGraw-Hill Publishing Company Ltd. 5 Harish C. Rai,“ Industrial and Power Electronics: Device, Circuits, Systems and Applications”, Umesh Publications.
  • 22. LAB MANUAL OF INDUSTRIAL ELECTRONICS (3162415) 04/26/2021 POWER ELECTRONICS ENGINEERING DEPARTMENT 6 Course Outcomes: At the end of the course, student should be able to: Sr. No. CO statement Topics Mapped Marks % weightage PE- 3162415-01 Develop the control logic for motor control application using. magnetic control components. 1 20 PE- 3162415-02 Select servo System in industrial requirement 2 20 PE- 3162415-03 Make use of ultrasonic, power conditioner in industries. 4, 5 30 PE- 3162415-04 Select sensors & opto-electronics devices for industrial application. 3, 6 30
  • 23. LAB MANUAL OF INDUSTRIAL ELECTRONICS (3162415) 04/26/2021 POWER ELECTRONICS ENGINEERING DEPARTMENT 1 Experiment No. 4 Aim: To study the Synchro used as Error Detector. Theory: The Synchro is a type of transducer which transforms the angular position of the shaft into an electric signal. It is used as an error detector and as a rotary position sensor. The error occurs in the system because of the misalignment of the shaft. The transmitter and the control transformer are the two main parts of the synchro. It is general name for self-synchronizing machine which when electrically energized and electrically interconnected, exert torque which cause two mechanically independent shafts either to run in synchronism or to make the rotor of one unit follow the rotor position of the others. They are also known by the trade name of selsyns and autosyns. It is , in fact, are small cylindrical motors varying in diameter from 1.5 cm to 10 cm depending on their power output. They are low-torque devices and are widely used in control system for transmitting shaft position information or for making two or more shafts to run in synchronism. If a large device like a robot arm is to be positioned synchros will not work. Usually, a servomotor is needed for higher torque. Synchro’s System Types The synchro system is of two types. They are. 1. Control Type Synchro. 2. Torque Transmission Type Synchro. Torque Transmission Type Synchro’s This type of synchro’s has small output torque, and hence they are used for running the very light load like a pointer. The control type Synchro is used for driving the large loads. Control Type Synchro’s System The controls synchro’s is used for error detection in positional control systems. Their systems consist of two units. They are: 1. Synchro Transmitter 2. Synchro receiver The synchro always works with these two parts. The detail explanation of synchro transmitter and receiver is given below. Synchro’s Transmitter – Their construction is like the three-phase alternator. The stator of the synchro is made of steel for reducing the iron losses. The stator is slotted for housing the three phase windings. The axis of the stator winding is kept 120º apart from each other.
  • 24. LAB MANUAL OF INDUSTRIAL ELECTRONICS (3162415) 04/26/2021 POWER ELECTRONICS ENGINEERING DEPARTMENT 2 Where Vr – r.ms.value of rotor voltage ωc – carrier frequency The coils of the stator windings are connected in star. The rotor of the synchros is a dumbbell in shape, and a concentric coil is wound on it. The AC voltage is applied to the rotor with the help of slip rings. The constructional feature of the synchros is shown in the figure below. Consider the voltage is applied to the rotor of the transmitter as shown in the figure above
  • 25. LAB MANUAL OF INDUSTRIAL ELECTRONICS (3162415) 04/26/2021 POWER ELECTRONICS ENGINEERING DEPARTMENT 3 The voltage applied to the rotor induces the magnetizing current and an alternating flux along its axis. The voltage is induced in the stator winding because of the mutual induction between the rotor and stator flux. The flux linked in the stator winding is equal to the cosine of the angle between the rotor and stator. The voltage is induced in the stator winding. Let Vs1, Vs2, Vs3 be the voltages generated in the stator windings S1, S2, and S3 respectively. The figure below shows the rotor position of the synchro transmitter. The rotor axis makes an angle θr concerning the stator windings S2. The three terminals of the stator windings are
  • 26. LAB MANUAL OF INDUSTRIAL ELECTRONICS (3162415) 04/26/2021 POWER ELECTRONICS ENGINEERING DEPARTMENT 4 The variation in the stator terminal axis concerning the rotor is shown in the figure below. When the rotor angle becomes zero, the maximum current is produced in the stator windings S2. The zero position of the rotor is used as a reference for determining the rotor angular position. The output of the transmitter is given to stator winding of the control transformer which is shown in the above figure. The current of the same and magnitude flow through the transmitter and control transformer of the synchros. Because of the circulating current, the flux is established between the air gap flux of the control transformer. The flux axis of the control transformer and the transmitter is aligned in the same position. The voltage generates by the rotor of control transformer is equal to the cosine of the angle between the rotors of the transmitter and the controller. The voltage is given as Where φ – angular displacement between the rotor axes of transmitter and controller. Φ – 90º the axis between the rotor of transmitter and control transformer is perpendicular to each other. The above figure shows the zero position of the rotor of transmitter and receiver. Consider the position of the rotor and the transmitter is changing in the same direction. An angle θR deflects the rotor of the transmitter and that of the control transformer is kept θC. The total angular separation between the rotors is Φ = (90º – θR + θC) The rotor terminal voltage of the Synchro transformer is given as The small angular displacement between their rotor position is given as Sin (θR – θC) = (θR – θC) On substituting the value of angular displacement in equation (1) we get
  • 27. LAB MANUAL OF INDUSTRIAL ELECTRONICS (3162415) 04/26/2021 POWER ELECTRONICS ENGINEERING DEPARTMENT 5 The synchro transmitter and the control transformer together used for detecting the error. The voltage equation shown above is equal to the shaft position of the rotors of control transformer and transmitter. The error signal is applied to the differential amplifier which gives input to the servo motor. The gear of the servo motor rotates the rotor of the control transformer.
  • 28. LAB MANUAL OF INDUSTRIAL ELECTRONICS (3162415) 04/26/2021 POWER ELECTRONICS ENGINEERING DEPARTMENT 6 The figure above shows the output of the synchro error detector which is a modulated signal. The modulating wave above shown the misalignment between the rotor position and the carrier wave. Where Ks is the error detector. Conclusion:
  • 29. LAB MANUAL OF INDUSTRIAL ELECTRONICS (3162415) 04/26/2021 POWER ELECTRONICS ENGINEERING DEPARTMENT 7 Quiz: 1. Define Synchro. 2. Explain the synchro transmitter and receiver 3. Explain the working of synchro as an error detector. Reference Book: 1 Biswanath Paul, “Industrila Electronics and Control”, PHI Learning Private Limited-2014 2 John R. Hackworth, Frederick D. Hackworth, Jr., “Programmable Logic Controllers: Programming Methods and Applications”, Prentice Hall -2004. 3 G. K. Mithal, Dr. Maneesha Gupta, “ Industrial and Power Electronics”, Khanna Publisher-2001 4 S. K. Bhattacharya, S. Chatterjee, “Industrial Electronics and Control”, Tata McGraw-Hill Publishing Company Ltd. 5 Harish C. Rai,“ Industrial and Power Electronics: Device, Circuits, Systems and Applications”, Umesh Publications. Course Outcomes: At the end of the course, student should be able to: Sr. No. CO statement Topics Mapped Marks % weightage PE- 3162415-01 Develop the control logic for motor control application using. magnetic control components. 1 20 PE- 3162415-02 Select servo System in industrial requirement 2 20 PE- 3162415-03 Make use of ultrasonic, power conditioner in industries. 4, 5 30 PE- 3162415-04 Select sensors & opto-electronics devices for industrial application. 3, 6 30
  • 30. LAB MANUAL OF INDUSTRIAL ELECTRONICS (3162415) 04/26/2021 POWER ELECTRONICS ENGINEERING DEPARTMENT 1 Experiment No. 5 Aim: To investigate electrical and optical characteristics of photo transistor. Theory: The phototransistor concept was known for the past many years. The first idea was proposed by William Shockley in the year 1951, after the discovery of a normal bipolar transistor. After two years, a phototransistor was demonstrated. After that, it was used in different applications, and day by day its development was continued. Phototransistors are extensively obtainable with low cost from the distributors of electronic components to use in different electronic circuits. A semiconductor device like a phototransistor is used to detect the light levels and changes the flow of current among emitter & collector terminals based on the light level it gets. This article discusses an overview of phototransistors. A Phototransistor is an electronic switching and current amplification component which relies on exposure to light to operate. When light falls on the junction, reverse current flows which are proportional to the luminance. Phototransistors are used extensively to detect light pulses and convert them into digital electrical signals. These are operated by light rather than electric current. Providing a large amount of gain, low cost and these phototransistors might be used in numerous applications. Phototransistor Symbol It can convert light energy into electric energy. Phototransistors work in a similar way to photoresistors commonly known as LDR (light dependent resistor) but can produce both current and voltage while photoresistors are only capable of producing current due to change in resistance. Phototransistors are transistors with the base terminal exposed. Instead of sending current into the base, the photons from striking light activate the transistor. This is because a phototransistor is made of a bipolar semiconductor and focuses on the energy that is passed through it. These are activated by light particles and are used in virtually all electronic devices that depend on light in some way. All silicon photosensors (phototransistors) respond to the entire visible radiation range as well as to infrared. In fact, all diodes, transistors, Darlington’s, TRIACs, etc. have the same basic radiation frequency response. The structure of the phototransistor is specifically optimized for photo applications. Compared to a normal transistor, a phototransistor has a larger base and collector width and is made using diffusion or ion implantation. Construction
  • 31. LAB MANUAL OF INDUSTRIAL ELECTRONICS (3162415) 04/26/2021 POWER ELECTRONICS ENGINEERING DEPARTMENT 2 A phototransistor is nothing but an ordinary bi-polar transistor in which the base region is exposed to illumination. It is available in both the P-N-P and N-P-N types having different configurations like common emitter, common collector, and common base but generally, common emitter configuration is used. It can also work while the base is made open. Compared to the conventional transistor it has more base and collector areas. Ancient phototransistors used single semiconductor materials like silicon and germanium but now a day’s modern components use materials like gallium and arsenide for high-efficiency levels. The base is the lead responsible for activating the transistor. It is the gate controller device for the larger electrical supply. The collector is the positive lead and the larger electrical supply. The emitter is the negative lead and the outlet for the larger electrical supply. Photo Transistor Construction With no light falling on the device there will be a small current flow due to thermally generated hole- electron pairs and the output voltage from the circuit will be slightly less than the supply value due to the voltage drop across the load resistor R. With light falling on the collector-base junction the current flow increases. With the base connection open circuit, the collector-base current must flow in the base-emitter circuit, and hence the current flowing is amplified by normal transistor action. The collector-base junction is very sensitive to light. Its working condition depends upon the intensity of light. The base current from the incident photons is amplified by the gain of the transistor, resulting in current gains that range from hundreds to several thousand. A phototransistor is 50 to 100 times more sensitive than a photodiode with a lower level of noise. How Does a Phototransistor Work? A normal transistor includes an emitter, base, and collector terminals. The collector terminal is biased positively relating to the emitter terminal & the BE junction is reverse biased. A phototransistor activates once the light strikes the base terminal & the light triggers the phototransistor by allowing the configuration of hole-electron pairs as well as the current flow across the emitter or collector. When the current increases, then it is concentrated as well as changed into voltage. Generally, a phototransistor doesn’t include a base connection. The base terminal is disconnected as the light is used to allow the flow of current to supply throughout the phototransistor.
  • 32. LAB MANUAL OF INDUSTRIAL ELECTRONICS (3162415) 04/26/2021 POWER ELECTRONICS ENGINEERING DEPARTMENT 3 Types of Phototransistor Phototransistors are classified into two types namely BJT and FET. BJT Phototransistor In the deficiency of light, BJT phototransistor allows leakage among collectors as well as an emitter of 100 nA otherwise low. Once this transistor is exposed to the beam, it performs upto 50mA. This distinguishes it from photodiode which cannot allow much current. FET Phototransistor This kind of phototransistor includes two terminals that connect inside through its collector & emitter otherwise source & drain within FET. The transistor’s base terminal reacts to light & controls the current flow among the terminals. Phototransistor Circuit A phototransistor works just like a normal transistor, where the base current is multiplied to give the collector current, except that in a phototransistor, the base current is controlled by the amount of visible or infrared light where the device only needs 2 pins. Phototransistor Circuit Diagram In the simple circuit, assuming that nothing is connected to Vout, the base current controlled by the amount of light will determine the collector current, which is the current going through the resistor.
  • 33. LAB MANUAL OF INDUSTRIAL ELECTRONICS (3162415) 04/26/2021 POWER ELECTRONICS ENGINEERING DEPARTMENT 4 Therefore, the voltage at Vout will move high and low based on the amount of light. We can connect this to an op-amp to boost the signal or directly to an input of a microcontroller. The output of a phototransistor is dependent upon the wavelength of the incident light. These devices respond to light over a broad range of wavelengths from the near UV, through the visible, and into the near IR part of the spectrum. For a given light source illumination level, the output of a phototransistor is defined by the area of the exposed collector-base junction and the dc current gain of the transistor. Phototransistors are available in different configurations like optoisolator, optical switch, retro sensor. Optoisolator is like a transformer in that the output is electrically isolated from the input. An object is detected when it enters the gap of the optical switch and blocks the light path between the emitter and detector. The retro sensor detects the presence of an object by generating light and then looking for its reflectance off the object to be sensed. Amplification The operation range of a phototransistor mainly depends on the applied light intensity because its operating range is dependent on the input of the base. The current of the base terminal from the incident photons can be amplified through the transistor’s gain, which results in a current gain that ranges from 100 to 1000. A phototransistor is more sensitive as compared to a photodiode through a less noise level. Extra amplification can be supplied through a photodarlington-type transistor. This is a phototransistor including an emitter output that is connected to the base terminal of the next bipolar transistor. It gives high sensitivity within the levels of low light as it provides a current gain that is equivalent to the two transistors. The gain of the two stages can offer net gains higher than 100,000A. A photodarlington transistor includes less response as compared to a normal phototransistor. Modes of Operation In phototransistor circuits, the basic modes of operation include two like active & switch where the commonly used mode of operation is switch type. It explains a non-linear response toward the light; once there is no light then there is no flow of current into the transistor. Current starts to supply like exposure toward light increases. The switch-mode works in an ON/OFF system. Active mode is also called a linear that reacts in such a way that, it is proportional toward the light stimulus. Performance Specifications The selection of Phototransistor can be done depending on different parameters as well as specifications like the following. • Collector Current (IC)
  • 34. LAB MANUAL OF INDUSTRIAL ELECTRONICS (3162415) 04/26/2021 POWER ELECTRONICS ENGINEERING DEPARTMENT 5 • Base Current (Iλ) • Peak Wavelength • Collector-to-Emitter Breakdown Voltage (VCE) • Collect-emitter breakdown voltage (VBRCEO) • Emitter-collector breakdown voltage (VBRECO) • Dark current (ID) • Power dissipation (PD or Ptot) • Rise time (tR) • Fall time (tF) Design Parameters The selected materials, as well as composition, play an essential role in the sensitivity of this type of transistor. The gain level of Homo-structure or single material devices ranges from 50 to several hundred. These are normal phototransistors that are frequently designed with silicon. The heterostructure devices or several material configuration devices may include gain levels up to 10k but they are less common dues to high production costs. • The electromagnetic wavelength range of different materials include the following, • For Silicon (Si) material, the electromagnetic wavelength range is 190 to 1100 nm • For Germanium (Ge) material, the electromagnetic wavelength range is 400 to 1700 nm • For Indium gallium arsenide (InGaAs) material, the electromagnetic wavelength range is 800 to 2600 nm • For Lead sulfide material, the electromagnetic wavelength range is <1000 to 3500 • For the proper function of a phototransistor, mounting technology plays a key role. The SMT or surface mount technology uses components to a PCB (printed circuit board) by connecting the component terminals through soldering otherwise to the top face of the board. Usually, the printed circuit board pad can be coated using a paste such as a solder & flux formulation. High temperatures usually from an infrared oven will dissolve the paste to solder the terminals of component toward the PCB pads. THT or through-hole technology is a commonly utilized mounting style. The arrangement of components can be done by placing component terminals using holes within the PCB & these components can be soldered in the opposite face of the PCB. The features of phototransistors mainly include a cutoff filter, used to block observable light. The light detection in others can be improved through an anti-reflective coating. Devices including a round dome lens in place of a flat lens are also obtainable. Photodiode Vs Phototransistor The difference between photodiode and phototransistor includes the following. Photodiode Phototransistor The photodiode is a PN-junction diode, used to generate electric current once a photon of light strikes on their surface. The phototransistor is used to change the energy of the light into an electrical energy
  • 35. LAB MANUAL OF INDUSTRIAL ELECTRONICS (3162415) 04/26/2021 POWER ELECTRONICS ENGINEERING DEPARTMENT 6 It is less sensitive It is more sensitive The output response of photodiode is fast The output response of the phototransistor is low It produces current It produces voltage and current It is used in solar power generation, detecting UV otherwise IR rays & also for light measuring, etc. It is used in compact disc players, smoke detectors, lasers, invisible light receivers, etc. It is more reactive to incident lights It is less reactive The photodiode has a less dark current Phototransistor has high dark current In this, both the biasing is used like forward and reverse In this, forward biasing is used The linear response range of photodiode is much wider The linear response range of phototransistor is much lower Photodiode allows low current as compared to a phototransistor Phototransistor allows high current as compared to the photodiode The photodiode is used for battery-powered devices that use less power. The phototransistor is used as a solid-state switch, not like a photodiode. Characteristics The characteristics of a phototransistor include the following. • Low-cost visible and near-IR photodetection. • Available with gains from 100 to over 1500. • Moderately fast response times. • Available in a wide range of packages including epoxy-coated, transfer-molded, and surface mounting technology. • Electrical characteristics were similar to that of signal transistors. Advantages of Phototransistor Phototransistors have several important advantages that separate them from another optical sensor some of them are mentioned below. • Phototransistors produce a higher current than photodiodes. • Phototransistors are relatively inexpensive, simple, and small enough to fit several of them onto a single integrated computer chip. • Phototransistors are very fast and are capable of providing nearly instantaneous output. • Phototransistors produce a voltage, that photo-resistors cannot do so. Disadvantages of Phototransistor
  • 36. LAB MANUAL OF INDUSTRIAL ELECTRONICS (3162415) 04/26/2021 POWER ELECTRONICS ENGINEERING DEPARTMENT 7 • Phototransistors that are made of silicon are not capable of handling voltages over 1,000 Volts. • Phototransistors are also more vulnerable to surges and spikes of electricity as well as electromagnetic energy. • Phototransistors also do not allow electrons to move as freely as other devices do, such as electron tubes. Applications of Phototransistors The Areas of application for the Phototransistor include: • Punch-card readers. • Security systems • Encoders – measure speed and direction • IR detectors photo • electric controls • Computer logic circuitry. • Relays • Lighting control (highways etc) • Level indication • Counting systems Thus, this is all about an overview of a phototransistor. From the above information finally, we can conclude that phototransistors are widely used in different electronic devices for detecting light such as infrared receivers, smoke detectors, lasers, CD players, etc. Conclusion: Quiz:
  • 37. LAB MANUAL OF INDUSTRIAL ELECTRONICS (3162415) 04/26/2021 POWER ELECTRONICS ENGINEERING DEPARTMENT 8 1. Draw the symbol and construction of Phototransistor. 2. List the difference between Photo diode and Phototransistor. 3. Compare the advantage and disadvantage of different types of Phototransistor. Reference Book: 1 Biswanath Paul, “Industrila Electronics and Control”, PHI Learning Private Limited-2014 2 John R. Hackworth, Frederick D. Hackworth, Jr., “Programmable Logic Controllers: Programming Methods and Applications”, Prentice Hall -2004. 3 G. K. Mithal, Dr. Maneesha Gupta, “ Industrial and Power Electronics”, Khanna Publisher-2001 4 S. K. Bhattacharya, S. Chatterjee, “Industrial Electronics and Control”, Tata McGraw-Hill Publishing Company Ltd. 5 Harish C. Rai,“ Industrial and Power Electronics: Device, Circuits, Systems and Applications”, Umesh Publications. Course Outcomes: At the end of the course, student should be able to: Sr. No. CO statement Topics Mapped Marks % weightage PE- 3162415-01 Develop the control logic for motor control application using. magnetic control components. 1 20 PE- 3162415-02 Select servo System in industrial requirement 2 20 PE- 3162415-03 Make use of ultrasonic, power conditioner in industries. 4, 5 30 PE- 3162415-04 Select sensors & opto-electronics devices for industrial application. 3, 6 30
  • 38. LAB MANUAL OF INDUSTRIAL ELECTRONICS (3162415) 04/26/2021 POWER ELECTRONICS ENGINEERING DEPARTMENT 1 Experiment No. 6 AIM:- To study working principle of Ultrasonic wave generator. Theory: Sound wave is a vibration that is transmitted through a medium, such as air, water, and metals. Ultrasonic wave is defined as “inaudible sound with high frequency for human” the frequency of which generally exceeds 20 kHz. Ultrasonic Wave can be generating by the following methods. 1. Piezo-electric generator. 2. Magneto-striction generator. (1) Piezo-electric generator: - •Principle:- When a mechanical compression or tension is applied to some crystals like quartz, a potential difference is developed across the crystal which is proportional to the applied pressure. This phenomenon is known as Piezo-electric Effect also if the potential difference is applied across the crystal, a mechanical compression or tension is developed. This is called Inverse Piezo-electric Effect. Circuit Diagram: - 1. The quartz crystal is placed between two metal plates A and B. 2. The plates are connected to the primary (L3) of a transformer. 3. The coils L1 and L2 of oscillator circuit are taken from the secondary of a transformer. 4. The collector coil L2 inductively coupled to base coil L1. • Working :-
  • 39. LAB MANUAL OF INDUSTRIAL ELECTRONICS (3162415) 04/26/2021 POWER ELECTRONICS ENGINEERING DEPARTMENT 2 1. When battery is switched on, the oscillator produced high frequency alternating voltages with a frequency. 2. Due to the transformer action, an Oscillatory e.m.f is induced in the coil L3. This high frequency alternating voltages are fed on the plates A and B. 3. Inverse piezo-electric effect takes places and the crystal contracts and expands alternatively. 4. The frequency of the vibration is given by 5. The variable condenser C1 is adjusted such that the frequency of the applied voltage is equal to the natural frequency of the crystal, and thus resonance takes place. 6. Now the rod vibrates longitudinally with maximum amplitude and generates ultrasonic waves of high frequency circuit. • Piezoelectric Effect:- 1. If mechanical pressure is applied to the opposite faces of crystal, equal and opposite electrical charges appear across its other faces. This is known as piezo-electric effect. 2. Potential Difference developed would be proportional to pressure applied. 3. The converse of piezo-electric effect is also true. 4. This effect was best observed in quartz, Tourmaline etc. • Advantages :- 1. Ultrasonic frequency as high as 5×10⁸HZ or 500MHZ can be obtained with this arrangement. 2. The output of this oscillator is very high. 3. It is not affected by temperature and humidity. • Disadvantages :- 1. The cost of piezo-electric quartz is high. 2. The cutting and shaping of quartz crystal are very complex.
  • 40. LAB MANUAL OF INDUSTRIAL ELECTRONICS (3162415) 04/26/2021 POWER ELECTRONICS ENGINEERING DEPARTMENT 3 (2) Magnetostriction Generator :- • Circuit Diagram :- 1. BA is a rod of ferromagnetic material like iron or nickel. 2. The alternating magnetic field is generated by electronic oscillator. 3. The coil L1 wound on the road along with a variable capacitor C1. 4. The frequency of oscillator is controlled by the variable capacitor. • Working :- 1. When battery is switched on, the collector circuit oscillates with a frequency, 2. This current flowing through the coil L1 produces an alternating magnetic field along the length of the rod. 3. The frequency of vibration of the rod is given by, 4. The capacitor is adjusted so that the frequency of the oscillatory circuit is equal to natural frequency of the rod and thus resonance takes place. 5. Now the rod vibrates longitudinally with maximum amplitude and generates ultrasonic waves of high frequency from its ends. • Magnetostriction Effect:-
  • 41. LAB MANUAL OF INDUSTRIAL ELECTRONICS (3162415) 04/26/2021 POWER ELECTRONICS ENGINEERING DEPARTMENT 4 1. When a ferromagnetic rod like iron or nickel is placed in a magnetic field parallel to its length, the rod experiences a small change in its length. This is called Magnetostriction Effect. 2. The change in length produced in the rod depends upon the strength of the magnetic field, the nature of the material and is independent of the direction of the magnetic field applied. • Advantages :- 1. The design of this oscillator is very simple and it’s production cost is low. 2. At low ultrasonic frequencies, the large power output can be produced without the risk of damage of the oscillatory circuit. • Disadvantages :- 1. It has low upper frequency limit and cannot generate ultrasonic frequency above 3000KHZ (i.e. 3MHZ). 2. The frequency of oscillations depends on temperature. 3. There will be losses of energy due to hysteresis and eddy current. • Property of Ultrasonic Waves:- 1. Property 1: Ultrasonic waves vibrate at a frequency greater than the audible range for humans (20 kilohertz). 2. Property 2: They have smaller wavelengths. As a result, their penetrating power is high. 3. Property 3: They cannot travel through vacuum. 4. Property 4: Ultrasonic waves travel at the speed of sound in the medium. They have maximum velocity in a denser medium. 5. Property 5: In a homogeneous medium, they travel at a constant velocity. 6. Property 6: In low viscosity liquids, ultrasonic waves produce vibrations. 7. Property 7: They undergo reflection, refraction, and absorption. 8. Property 8: They have high energy content. They can be transmitted over a large distance without much loss of energy. 9. Property 9: They produce intense heat when they are passed through objects. • Application of Ultrasonic Waves:- 1. Detection of flaws (cracks, blowholes, porosity) in metals. 2. In SONAR (Sound Navigation and Ranging). 3. Ultrasonic Welding. 4. Ultrasonic cutting and machining. 5. Ultrasonic soldering.
  • 42. LAB MANUAL OF INDUSTRIAL ELECTRONICS (3162415) 04/26/2021 POWER ELECTRONICS ENGINEERING DEPARTMENT 5 Conclusion: Quiz: 1. Define Ultrasonic Waves 2. Draw the different circuit for generation of Ultrasonic Waves. 3. Compare the advantage and disadvantage of different types of Ultrasonic Wave Generator. Reference Book: 1 Biswanath Paul, “Industrila Electronics and Control”, PHI Learning Private Limited-2014 2 John R. Hackworth, Frederick D. Hackworth, Jr., “Programmable Logic Controllers: Programming Methods and Applications”, Prentice Hall -2004. 3 G. K. Mithal, Dr. Maneesha Gupta, “ Industrial and Power Electronics”, Khanna Publisher-2001 4 S. K. Bhattacharya, S. Chatterjee, “Industrial Electronics and Control”, Tata McGraw-Hill Publishing Company Ltd. 5 Harish C. Rai,“ Industrial and Power Electronics: Device, Circuits, Systems and Applications”, Umesh Publications. Course Outcomes: At the end of the course, student should be able to: Sr. No. CO statement Topics Mapped Marks % weightage PE- 3162415-01 Develop the control logic for motor control application using. magnetic control components. 1 20 PE- 3162415-02 Select servo System in industrial requirement 2 20 PE- 3162415-03 Make use of ultrasonic, power conditioner in industries. 4, 5 30
  • 43. LAB MANUAL OF INDUSTRIAL ELECTRONICS (3162415) 04/26/2021 POWER ELECTRONICS ENGINEERING DEPARTMENT 6 PE- 3162415-04 Select sensors & opto-electronics devices for industrial application. 3, 6 30
  • 44. LAB MANUAL OF INDUSTRIAL ELECTRONICS (3162415) 04/26/2021 POWER ELECTRONICS ENGINEERING DEPARTMENT 1 Experiment No. 7 AIM: - To obtain the transfer characteristics curve of the optocoupler Theory: An optocoupler (or an Optoelectronic Coupler) is basically an interface between two circuits which operate at (usually) different voltage levels. The key advantage of an optocoupler is the electrical isolation between the input and output circuits. With an optocoupler, the only contact between the input and the output is a beam of light. Because of this it is possible to have an insulation resistance between the two circuits in the thousands of megohms. Isolation like this is useful in high voltage applications where the potentials of two circuits may differ by several thousand volts. The ideal isolation scheme should only allow signal flow in one direction, should respond to DC levels, and should offer an extremely large resistance between the input and output Circuits. These features are available in a class of optoelectronic devices Called optocouplers. The optocoupler is a device that contains an infra-red LED and a photodetector (such as a Photodiode, phototransistor, Darlington pair, SCR, or triac) combined in one package. ➢ Optocoupler Characteristics: - Like discrete semiconductor device characteristics, optocoupler characteristics are set of curves that relate the voltage and current flowing through it. In an optocoupler we see two discrete devices, namely the diode at the input side and a photo transistor at the output side.
  • 45. LAB MANUAL OF INDUSTRIAL ELECTRONICS (3162415) 04/26/2021 POWER ELECTRONICS ENGINEERING DEPARTMENT 2 By drawing the individual characteristics curves one can identify the type of diode and photo detector used inside the IC. The input diode will have the input forward voltage (IF) which depends on its material. For example, a silicon diode has 0.6V forward voltage and LEDs of different colors will have different forward voltages varying from 1V to 4V. Once the forward voltage and the wavelength are known, the semiconductor material can be identified. On the output side we have a photo transistor. The material of the photo transistor can be identified by its saturation voltage. Hence by the characteristics curves the material used in the optocoupler can be identified. Typical IC/IF characteristics of a simple optocoupler at various values of output-transistor collector voltage (VC). The most convenient way of specifying optocoupling efficiency is to quote the output-to-input Current Transfer Ratio (CTR) of the device, i.e., the ratio of the output collector current (IC) of the phototransistor, to the forward current (IF) of the LED. Thus, CTR = IC/IF. In practice, CTR may be expressed as a simple figure such as 0.5, or (by multiplying this figure by 100) as a percentage figure such as 50%. ➢ Current Transfer Ratio (CTR) :- The Current Transfer Ratio (CTR) is an electrical parameter usually specified for an optocoupler. CTR is defined as the ratio of the output collector current (IC) caused by the light detected by the photodiode to the forward LED input current (IF) that generates the light and is denoted as a percentage. CTR=(IC/IF)×100 (%) The Current Transfer Ratio (CTR) varies from 10% to 200% for devices of different makes. An optocoupler with 50% CTR is found to be extremely good in practice. As the light intensity increases, the collector current increases proportionately and becomes constant. Conclusion:
  • 46. LAB MANUAL OF INDUSTRIAL ELECTRONICS (3162415) 04/26/2021 POWER ELECTRONICS ENGINEERING DEPARTMENT 3 Quiz: 1. Define Optocoupler. 2. Draw and Explain output Characteristics of Optocoupler. 3. Define Current Transfer Ration and explain its significance in Optocoupler. Reference Book: 1 Biswanath Paul, “Industrila Electronics and Control”, PHI Learning Private Limited-2014 2 John R. Hackworth, Frederick D. Hackworth, Jr., “Programmable Logic Controllers: Programming Methods and Applications”, Prentice Hall -2004. 3 G. K. Mithal, Dr. Maneesha Gupta, “ Industrial and Power Electronics”, Khanna Publisher-2001 4 S. K. Bhattacharya, S. Chatterjee, “Industrial Electronics and Control”, Tata McGraw-Hill Publishing Company Ltd. 5 Harish C. Rai,“ Industrial and Power Electronics: Device, Circuits, Systems and Applications”, Umesh Publications. Course Outcomes: At the end of the course, student should be able to: Sr. No. CO statement Topics Mapped Marks % weightage PE- 3162415-01 Develop the control logic for motor control application using. magnetic control components. 1 20 PE- 3162415-02 Select servo System in industrial requirement 2 20 PE- 3162415-03 Make use of ultrasonic, power conditioner in industries. 4, 5 30 PE- 3162415-04 Select sensors & opto-electronics devices for industrial application. 3, 6 30
  • 47. LAB MANUAL OF INDUSTRIAL ELECTRONICS (3162415) 04/26/2021 POWER ELECTRONICS ENGINEERING DEPARTMENT 1 Experiment No. 8 AIM: - To Study Working of Solid State Stabilizer Theory: A voltage stabilizer stabilizes or regulates the voltage if the supply voltage varies or fluctuates over a given range. In India, we have a large power distribution system with heavy distribution losses and variations in industrial/ domestic load. This results in voltage variations that may damage electrical/ electronic appliances like light, fan, television, mixer-grinder, air-conditioner, heater, water pump, toaster, etc. Here, we describe how to make a solid-state voltage stabilizer that does not use electro-mechanical relays and is suitable for most purposes. It is an electrical appliance that feeds constant voltage to a load during over and under voltage conditions. This device detects these voltage conditions and correspondingly brings the voltage to desired range. Voltage stabilizers provide a means to regulate the supply voltage to the load. These are not meant to provide a constant voltage output; instead, it operates the load or system in an acceptable range of voltage. Stabilizers consume very less power, typically about 2 to 5% of maximum load (i.e., rating of stabilizer). These are high efficiency devices, typically 95 to 98%. Key features of the solid-state voltage stabilizers are: ➢ Wide range of voltage variation from 120 V to 280 V ➢ Only two settings are required low voltage and high voltage. ➢ Stabilized output of 220V ➢ Compact size ➢ Silent operation and no relay chattering sound. ➢ Bar graph LED voltage indicator ➢ Low/high voltage indicator and cut-off protection Need of Voltage Stabilizers: ➢ In case of lighting equipment, low voltage drop reduces the lumen output (illumination) that will further reduce the life of the lamp. ➢ AC motor produces less torque and hence the speed under low voltage, and they produce more speed than desired during overvoltage. This degrades motor life and causes insulation damage under high voltages. ➢ In case of induction heating, low voltage reduces heat output which causes the load to operate at inappropriate temperatures than desired. ➢ In TV and radio transmission, voltage drop will reduce the quality of transmission and also cause the malfunction of other electronic components. ➢ Refrigerators are AC motor driven appliances that draw large currents during voltage drop conditions which may lead to overheating of windings. ➢ To overcome above mentioned effects of voltage variations, voltage stabilizers are needed.
  • 48. LAB MANUAL OF INDUSTRIAL ELECTRONICS (3162415) 04/26/2021 POWER ELECTRONICS ENGINEERING DEPARTMENT 2 Working of Voltage Stabilizer: The figure below shows the working model of a voltage stabilizer that contains a step-down transformer (usually provided with taps on secondary), rectifier, operational amplifier/microcontroller unit and set of relays. The circuit diagram comprises following four sections: 1. Analogue voltage to digital step changer 2. Isolated solid-state power relay 3. Control power supply unit 4. Main’s transformer The circuit diagram of a solid-state voltage stabiliser is shown in Fig.2. The heart of the stabiliser is IC1 (LM3914) bar display driver. It is used as LED type bar graph voltmeter with lower voltage and upper voltage settings through presets VR1 and VR2. IC1 senses mains voltage. The difference between the lower voltage and upper voltage is divided into 10 steps. every LED indicates one step or one voltage level and is lit depending on the level of voltage received. All the 10 outputs of IC1 that are used to lit the LEDs are also fed as inputs to dual decoder/demultiplexer CD4556. CD4556 is used for converting analogue voltage to digital steps to ensure that, at a given time, only one tapping of mains transformer gets input supply voltage from mains. In all conditions only one step can be active as per analogue input voltage. Assume the first condition when the mains voltage is less than the lower set value. All the output pins (1, 18, 17, 16, 15, 14, 13, 12, 11, 10) of IC1 will be high. IC3(A) will be disabled and no step will be selected (means low volt 16, 15, 14, 13, 12, 11, 10) of IC1 will be high. IC3(A) will be disabled and no step will be selected (means low voltage cut-off). Circuit operation: As the mains voltage increases to more than the lower set value, LED1 of the bar graph voltmeter glows as pin1 of IC1 is low and all other outputs pins are high. In this condition IC2(A) is enabled because input E (pin 1) is low. As inputs A0 and A1 of IC2(A) are high, out put Q3 goes low. This is step 1 of step charger.
  • 49. LAB MANUAL OF INDUSTRIAL ELECTRONICS (3162415) 04/26/2021 POWER ELECTRONICS ENGINEERING DEPARTMENT 3 When voltage increases, input A0 of IC2(A) goes low and its output Q2 also goes low. This is Step 2 of step changer. Both these outputs are combined with 1N4148 diodes and given to cathode pin of internal LED of IC7 (MOC3011). As internal LED of IC7 glows, TRIAC1 conducts and provides AC mains to tapping ‘A’ of mains transformer X2. When voltage increases further, both inputs A0 and A1 of IC2(A) go low, while both of its outputs go high , and TRIAC1 goes off. Input A1 and output Q2 of IC2(A) generate enable input E for IC2(B) with the help of set and reset input pins (S and R) of flip-flop IC5(A) (CD4013). Pin 1 of IC5(A) provides low signal to enable input E of IC2(B) and output Q3 of IC2(B) goes low. This is Step 3 of step changer. Similarly, other conditions work in the same manner (see Table). The number of tappings for transformer X2 and the number of solid-stat relays to be used depend on the voltage range to be covered. If the minimum voltage can drop to 100 volts and the maximum could rise to 300 volts, we need to cover 200 volts deviation. This can be managed either through ten tappings with 20V difference or just five tappings with 40V difference between each.
  • 50. LAB MANUAL OF INDUSTRIAL ELECTRONICS (3162415) 04/26/2021 POWER ELECTRONICS ENGINEERING DEPARTMENT 4 Isolated solid state power relay: Isolated solid-state power relay comprises an opto-isolatortriac driver MOC3011, bridge rectifier (5A) and triac BT136. The opto-isolator triac driver MOC3011 is used for controlling the steps and connecting AC mains power supply to correct tapping of mains transformer X2 via solid-state relay. The capacity of solid-state relay depends on both the components traic and bridge rectifier. Here triac BT136 and 5A bridge rectifier are used for 1kW load. Triac BT139 with 10A bridge rectifier can be used for a solid state relay of more than 1 kVA and less than 3 kVA. You can use up to 3 kVA solid- state voltage stabiliser with 3 kVA transformer. Advantages ➢ They regulate the voltage levels in various types of equipment. They are used in houses, construction buildings, commercial malls and complexes etc. ➢ They protect such equipment from any kind of voltage issues. They assure 100% safety to industrial machinery and household appliances. ➢ The voltage stabilizers allow limited usage of the power as required for the devices.
  • 51. LAB MANUAL OF INDUSTRIAL ELECTRONICS (3162415) 04/26/2021 POWER ELECTRONICS ENGINEERING DEPARTMENT 5 Disadvantages ➢ Moving parts requiring restricted maintenance. ➢ Lower speed of response compared with solid state designs. Application ➢ Air conditioners ➢ LCD/LED TV ➢ Refrigerators ➢ Music systems ➢ Washing machines ➢ And also available as a single large unit for all appliances. Conclusion: Quiz: 1. Define Solid State Voltage Stabilizers 2. Explain the need of Solid State Voltage Stabilizer. 3. Draw and Explain the circuit diagram of voltage Stabilizer Reference Book: 1 Biswanath Paul, “Industrila Electronics and Control”, PHI Learning Private Limited-2014 2 John R. Hackworth, Frederick D. Hackworth, Jr., “Programmable Logic Controllers: Programming Methods and Applications”, Prentice Hall -2004. 3 G. K. Mithal, Dr. Maneesha Gupta, “ Industrial and Power Electronics”, Khanna Publisher-2001
  • 52. LAB MANUAL OF INDUSTRIAL ELECTRONICS (3162415) 04/26/2021 POWER ELECTRONICS ENGINEERING DEPARTMENT 6 4 S. K. Bhattacharya, S. Chatterjee, “Industrial Electronics and Control”, Tata McGraw-Hill Publishing Company Ltd. 5 Harish C. Rai,“ Industrial and Power Electronics: Device, Circuits, Systems and Applications”, Umesh Publications. Course Outcomes: At the end of the course, student should be able to: Sr. No. CO statement Topics Mapped Marks % weightage PE- 3162415-01 Develop the control logic for motor control application using. magnetic control components. 1 20 PE- 3162415-02 Select servo System in industrial requirement 2 20 PE- 3162415-03 Make use of ultrasonic, power conditioner in industries. 4, 5 30 PE- 3162415-04 Select sensors & opto-electronics devices for industrial application. 3, 6 30
  • 53. LAB MANUAL OF INDUSTRIAL ELECTRONICS (3162415) 04/26/2021 POWER ELECTRONICS ENGINEERING DEPARTMENT 1 Experiment No. 9 AIM: - To Study Online Uninterrupted Power supply and offline Uninterrupted Power Supply. Theory: An Uninterruptible Power Supply (UPS) is defined as a piece of electrical equipment which can be used as an immediate power source to the connected load when the power source of input devices is disconnected from the main power source momentarily or for short duration of time. Need for the UPS system for protection against common Power Problem: 1. Power Failure: Total loss of utility power. 2. Power sag: Short term low-voltage issues. This is like a person being sleepy after lunch time. 3. Power Surges or Spikes: Short-term high voltage that is more than 110% of normal output. This is like a caffeine high in a person. 4. Under-voltage (brownout conditions): Reduced line voltage for an extended period. This can be a few minutes to a few days. This commonly happens during summer months when air conditioners put strain on the power grid. 5. Over-voltage: Increased line voltage for an extended period from a few minutes to a few days. 6. Electrical line noise: A high power frequency wave caused by RFI or EMI. 7. Frequency Variation: A loss of stability in the power supply’s normal frequency of 50 to 60 Hz. 8. Switching Transient: Instant under-voltage in the range of nanoseconds. 9. Harmonic Distortion: Distortion of a normal power wave, typically transmitted by unequal loads. Short Break UPS This UPS is also called as Standby UPS system which can give only the most basic features. Here, the primary source is the filtered AC mains (shown in solid path in figure 1). When the power breakage occurs, the transfer switch will select the backup source (shown in dashed path in figure 1). Thus, we can clearly see that the stand by system will start working only when there is any failure in mains. In this system, the AC voltage is first rectified and stored in the storage battery connected to the rectifier.
  • 54. LAB MANUAL OF INDUSTRIAL ELECTRONICS (3162415) 04/26/2021 POWER ELECTRONICS ENGINEERING DEPARTMENT 2 A variety of design approaches are used to implement UPS systems, each with distinct performance characteristics. The most common design approaches are as follows: * Standby * Line Interactive * Standby on-line hybrid * Standby-Ferro * Double Conversion On-Line * Delta Conversion On-Line Offline UPS : When power breakage occurs, this DC voltage is converted to AC voltage by means of a power inverter, and is transferred to the load connected to it. This is the least expensive UPS system, and it provides surge protection in addition to back up. The transfer time can be about 25 milliseconds which can be related to the time taken by the UPS system to detect the utility voltage that is lost. The block diagram is shown below. NO Break UPS
  • 55. LAB MANUAL OF INDUSTRIAL ELECTRONICS (3162415) 04/26/2021 POWER ELECTRONICS ENGINEERING DEPARTMENT 3 In this type of UPS, double conversion method is used. Here, first the AC input is converted into DC by rectifying process for storing it in the rechargeable battery. This DC is converted into AC by the process of inversion and given to the load or equipment which it is connected (figure 2). This type of UPS is used where electrical isolation is mandatory. This system is a bit more costly due to the design of constantly running converters and cooling systems. Here, the rectifier which is powered with the normal AC current is directly driving the inverter. Hence it is also known as Double conversion UPS. The block diagram is shown below. When there is any power failure, the rectifier have no role in the circuit and the steady power stored in the batteries which is connected to the inverter is given to the load by means of transfer switch. Once the power is restored, the rectifier begins to charge the batteries. To prevent the batteries from overheating due to the high- power rectifier, the charging current is limited. During a main power breakdown, this UPS system operates with zero transfer time. The reason is that the backup source acts as a primary source and not the main AC input. But the presence of inrush current and large load step current can result in a transfer time of about 4-6 milliseconds in this system. The following table shows some of the characteristics of the various UPS types. Some attributes of a UPS, like efficiency, are dictated by the choice of UPS type.
  • 56. LAB MANUAL OF INDUSTRIAL ELECTRONICS (3162415) 04/26/2021 POWER ELECTRONICS ENGINEERING DEPARTMENT 4 Application of UPS 1. Data Centers 2. Industries 3. Telecommunications 4. Hospitals 5. Banks and insurance 6. Some special projects (events) 7. ICU 8. Chemical’s plant Conclusion:
  • 57. LAB MANUAL OF INDUSTRIAL ELECTRONICS (3162415) 04/26/2021 POWER ELECTRONICS ENGINEERING DEPARTMENT 5 Quiz: 1. Define UPS. 2. Explain the need of UPS for mitigate power problems. 3. Draw and Explain the circuit diagram of ON Line and OFF Line UPS. Reference Book: 1 Biswanath Paul, “Industrila Electronics and Control”, PHI Learning Private Limited-2014 2 John R. Hackworth, Frederick D. Hackworth, Jr., “Programmable Logic Controllers: Programming Methods and Applications”, Prentice Hall -2004. 3 G. K. Mithal, Dr. Maneesha Gupta, “ Industrial and Power Electronics”, Khanna Publisher-2001 4 S. K. Bhattacharya, S. Chatterjee, “Industrial Electronics and Control”, Tata McGraw-Hill Publishing Company Ltd. 5 Harish C. Rai,“ Industrial and Power Electronics: Device, Circuits, Systems and Applications”, Umesh Publications. Course Outcomes: At the end of the course, student should be able to: Sr. No. CO statement Topics Mapped Marks % weightage PE- 3162415-01 Develop the control logic for motor control application using. magnetic control components. 1 20 PE- 3162415-02 Select servo System in industrial requirement 2 20 PE- 3162415-03 Make use of ultrasonic, power conditioner in industries. 4, 5 30 PE- 3162415-04 Select sensors & opto-electronics devices for industrial application. 3, 6 30
  • 58. LAB MANUAL OF INDUSTRIAL ELECTRONICS (3162415) 04/26/2021 POWER ELECTRONICS ENGINEERING DEPARTMENT 1 Experiment No. 10 AIM: - To study proximity switches to evaluate its working principle. Theory: Eddy current proximity sensors are used to detect non-magnetic but conductive materials. They comprise of a coil, an oscillator, a detector, and a triggering circuit. Figure 2.3.1 shows the construction of eddy current proximity switch. When an alternating current is passed thru this coil, an alternative magnetic field is generated. If a metal object comes in the close proximity of the coil, then eddy currents are induced in the object due to the magnetic field. These eddy currents create their own magnetic field which distorts the magnetic field responsible for their generation. As a result, impedance of the coil changes and so the amplitude of alternating current. This can be used to trigger a switch at some pre-determined level of change in current. Eddy current sensors are relatively inexpensive, available in small in size, highly reliable and have high sensitivity for small displacements. Applications of eddy current proximity sensors • Automation requiring precise location • Machine tool monitoring • Final assembly of precision equipment such as disk drives • Measuring the dynamics of a continuously moving target, such as a vibrating element, • Drive shaft monitoring • Vibration measurements. Inductive proximity switches are basically used for detection of metallic objects. Figure 2.3.2 shows the construction of inductive proximity switch. An inductive proximity sensor has four components; the coil, oscillator, detection circuit and output circuit. An alternating current is supplied to the coil which generates a magnetic field. When, a metal object comes closer to the end of the coil, inductance of the coil changes. This is continuously monitored by a circuit which triggers a switch when a preset value of inductance change is occurred.
  • 59. LAB MANUAL OF INDUSTRIAL ELECTRONICS (3162415) 04/26/2021 POWER ELECTRONICS ENGINEERING DEPARTMENT 2 Applications of inductive proximity switches • Industrial automation: counting of products during production or transfer • Security: detection of metal objects, arms, land mines Optical encoders provide digital output as a result of linear / angular displacement. These are widely used in the Servo motors to measure the rotation of shafts. Figure 2.3.3 shows the construction of an optical encoder. It comprises of a disc with three concentric tracks of equally spaced holes. Three light sensors are employed to detect the light passing thru the holes. These sensors produce electric pulses which give the angular displacement of the mechanical element e.g. shaft on which the Optical encoder is mounted. The inner track has just one hole which is used locate the ‘home’ position of the disc. The holes on the middle track offset from the holes of the outer track by one-half of the width of the hole. This arrangement provides the direction of rotation to be determined. When the disc rotates in clockwise direction, the pulses in the outer track lead those in the inner; in counter clockwise direction they lag behind. The resolution can be determined by the number of holes on disc. With 100 holes in one revolution, the resolution would be, 360⁰/100 = 3.6⁰.
  • 60. LAB MANUAL OF INDUSTRIAL ELECTRONICS (3162415) 04/26/2021 POWER ELECTRONICS ENGINEERING DEPARTMENT 3 Figure 2.3.5 shows several configurations of contact-type proximity switch being used in manufacturing automation. These are small electrical switches which require physical contact and a small operating force to close the contacts. They are basically employed on conveyor systems to detect the presence of an item on the conveyor belt. Magnet based Reed switches are used as proximity switches. When a magnet attached to an object brought close to the switch, the magnetic reeds attract to each other and close the switch contacts. A schematic is shown in Figure 2.3.6. Photo emitting devices such as Light emitting diodes (LEDs) and photosensitive devices such as photo diodes and photo transistors are used in combination to work as proximity sensing devices. Figure 2.3.7 shows two typical arrangements of LEDs and photo diodes to detect the objects breaking the beam and reflecting light
  • 61. LAB MANUAL OF INDUSTRIAL ELECTRONICS (3162415) 04/26/2021 POWER ELECTRONICS ENGINEERING DEPARTMENT 4 Conclusion: Quiz: 1. To detect non-conducting metallic objects which sensor would be useful?
  • 62. LAB MANUAL OF INDUSTRIAL ELECTRONICS (3162415) 04/26/2021 POWER ELECTRONICS ENGINEERING DEPARTMENT 5 2. If a digital optical encoder has 7 tracks, then the minimum angular motion that can be measured by this device ________________. 3. Explain in brief two applications of “Reed switch”. Reference Book: 1 Biswanath Paul, “Industrila Electronics and Control”, PHI Learning Private Limited-2014 2 John R. Hackworth, Frederick D. Hackworth, Jr., “Programmable Logic Controllers: Programming Methods and Applications”, Prentice Hall -2004. 3 G. K. Mithal, Dr. Maneesha Gupta, “ Industrial and Power Electronics”, Khanna Publisher-2001 4 S. K. Bhattacharya, S. Chatterjee, “Industrial Electronics and Control”, Tata McGraw-Hill Publishing Company Ltd. 5 Harish C. Rai,“ Industrial and Power Electronics: Device, Circuits, Systems and Applications”, Umesh Publications. Course Outcomes: At the end of the course, student should be able to: Sr. No. CO statement Topics Mapped Marks % weightage PE- 3162415-01 Develop the control logic for motor control application using. magnetic control components. 1 20 PE- 3162415-02 Select servo System in industrial requirement 2 20 PE- 3162415-03 Make use of ultrasonic, power conditioner in industries. 4, 5 30 PE- 3162415-04 Select sensors & opto-electronics devices for industrial application. 3, 6 30