
Recommended
More Related Content
What's hot
What's hot (20)
Similar to ADVANCED PERL LOOPS
Similar to ADVANCED PERL LOOPS (20)
Recently uploaded
Recently uploaded (20)
ADVANCED PERL LOOPS
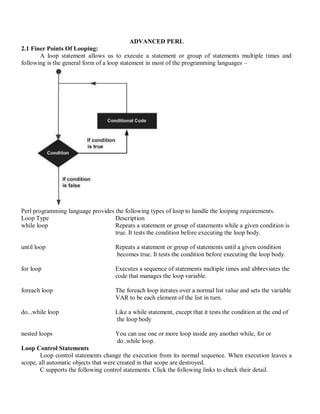
- 1. ADVANCED PERL 2.1 Finer Points Of Looping: A loop statement allows us to execute a statement or group of statements multiple times and following is the general form of a loop statement in most of the programming languages – Perl programming language provides the following types of loop to handle the looping requirements. Loop Type Description while loop Repeats a statement or group of statements while a given condition is true. It tests the condition before executing the loop body. until loop Repeats a statement or group of statements until a given condition becomes true. It tests the condition before executing the loop body. for loop Executes a sequence of statements multiple times and abbreviates the code that manages the loop variable. foreach loop The foreach loop iterates over a normal list value and sets the variable VAR to be each element of the list in turn. do...while loop Like a while statement, except that it tests the condition at the end of the loop body nested loops You can use one or more loop inside any another while, for or do..while loop. Loop Control Statements Loop control statements change the execution from its normal sequence. When execution leaves a scope, all automatic objects that were created in that scope are destroyed. C supports the following control statements. Click the following links to check their detail.
- 2. Control Statement Description next statement Causes the loop to skip the remainder of its body and immediately retest its condition prior to reiterating. last statement Terminates the loop statement and transfers execution to the statement immediately following the loop. continue statement A continue BLOCK, it is always executed just before the conditional is about to be evaluated again. redo statement The redo command restarts the loop block without evaluating the conditional again. The continue block, if any, is not executed. goto statement Perl supports a goto command with three forms: goto label, goto expr, and goto &name. The Infinite Loop A loop becomes infinite loop if a condition never becomes false. The for loop is traditionally used for this purpose. Since none of the three expressions that form the for loop are required, you can make an endless loop by leaving the conditional expression empty. #!/usr/local/bin/perl for(;;) { printf"This loop will run forever.n"; } You can terminate the above infinite loop by pressing the Ctrl + C keys. When the conditional expression is absent, it is assumed to be true. You may have an initialization and increment expression, but as a programmer more commonly use the for (;;) construct to signify an infinite loop. Multiple Loop Variables: For loop can iterate over two or more variables simultaneously. Eg: for($m=1,$n=1,$m<10,$m++,$n+=2) { ……. } Here (,) operator is a list constructor, it evaluates its left hand argument. 2.2 Pack and Unpack: Pack Function The pack function evaluates the expressions in LIST and packs them into a binary structure specified by EXPR. The format is specified using the characters shown in Table below − Each character may be optionally followed by a number, which specifies a repeat count for the type of value being packed. that is nibbles, chars, or even bits, according to the format. A value of * repeats for as many values remain in LIST. Values can be unpacked with the unpack function. For example, a5 indicates that five letters are expected. b32 indicates that 32 bits are expected. h8 indicates that 8 nybbles ( or 4 bytes) are expected. P10 indicates that the structure is 10 bytes long.
- 3. Syntax Following is the simple syntax for this function − pack EXPR, LIST Return Value This function returns a packed version of the data in LIST using TEMPLATE to determine how it is coded. Here is the table which gives values to be used in TEMPLATE. Character Description A ASCII character string padded with null characters A ASCII character string padded with spaces B String of bits, lowest first B String of bits, highest first C A signed character (range usually -128 to 127) C An unsigned character (usually 8 bits) D A double-precision floating-point number F A single-precision floating-point number H Hexadecimal string, lowest digit first H Hexadecimal string, highest digit first I A signed integer I An unsigned integer L A signed long integer L An unsigned long integer N A short integer in network order N A long integer in network order P A pointer to a string S A signed short integer S An unsigned short integer U Convert to uuencode format V A short integer in VAX (little-endian) order V A long integer in VAX order X A null byte X Indicates "go back one byte" @ Fill with nulls (ASCII 0) Following is the example code showing its basic usage − #!/usr/bin/perl -w $bits =pack("c",65); # prints A, which is ASCII 65. print"bits are $bitsn"; $bits =pack("x"); # $bits is now a null chracter. print"bits are $bitsn"; $bits =pack("sai",255,"T",30); # creates a seven charcter string on most computers' print"bits are $bitsn"; @array=unpack("sai","$bits"); #Array now contains three elements: 255, T and 30. print"Array $array[0]n";
- 4. print"Array $array[1]n"; print"Array $array[2]n"; When above code is executed, it produces the following result − bits are A bits are bits are �T- Array 255 Array T Array 30 Unpack Function The unpack function unpacks the binary string STRING using the format specified in TEMPLATE. Basically reverses the operation of pack, returning the list of packed values according to the supplied format. You can also prefix any format field with a %<number> to indicate that you want a 16-bit checksum of the value of STRING, instead of the value. Syntax Following is the simple syntax for this function − unpack TEMPLATE, STRING Return Value - This function returns the list of unpacked values. Here is the table which gives values to be used in TEMPLATE. Character Description A ASCII character string padded with null characters A ASCII character string padded with spaces B String of bits, lowest first B String of bits, highest first C A signed character (range usually -128 to 127) C An unsigned character (usually 8 bits) D A double-precision floating-point number F A single-precision floating-point number H Hexadecimal string, lowest digit first H Hexadecimal string, highest digit first I A signed integer I An unsigned integer L A signed long integer L An unsigned long integer N A short integer in network order N A long integer in network order P A pointer to a string S A signed short integer S An unsigned short integer U Convert to uuencode format V A short integer in VAX (little-endian) order V A long integer in VAX order X A null byte X Indicates "go back one byte" @ Fill with nulls (ASCII 0)
- 5. Example: Following is the example code showing its basic usage − #!/usr/bin/perl -w $bits =pack("c",65); # prints A, which is ASCII 65. print"bits are $bitsn"; $bits =pack("x"); # $bits is now a null chracter. print"bits are $bitsn"; $bits =pack("sai",255,"T",30); # creates a seven charcter string on most computers' print"bits are $bitsn"; @array=unpack("sai","$bits"); #Array now contains three elements: 255, A and 47. print"Array $array[0]n"; print"Array $array[1]n"; print"Array $array[2]n"; When above code is executed, it produces the following result − bits are A bits are bits are �- Array255 Array T Array30 2.3 Files: The basics of handling files are simple: you associate a filehandle with an external entity (usually a file) and then use a variety of operators and functions within Perl to read and update the data stored within the data stream associated with the filehandle. A filehandle is a named internal Perl structure that associates a physical file with a name. All filehandles are capable of read/write access, so you can read from and update any file or device associated with a filehandle. However, when you associate a filehandle, you can specify the mode in which the filehandle is opened. Three basic file handles are - STDIN, STDOUT, and STDERR, which represent standard input, standard output and standard error devices respectively. Opening and Closing Files There are following two functions with multiple forms, which can be used to open any new or existing file in Perl. open FILEHANDLE, EXPR open FILEHANDLE sysopen FILEHANDLE, FILENAME, MODE, PERMS sysopen FILEHANDLE, FILENAME, MODE Here FILEHANDLE is the file handle returned by the open function and EXPR is the expression having file name and mode of opening the file. Open Function Following is the syntax to open file.txt in read-only mode. Here less than < sign indicates that file has to be opend in read-only mode.
- 6. open(DATA,"<file.txt"); Here DATA is the file handle which will be used to read the file. Here is the example which will open a file and will print its content over the screen. #!/usr/bin/perl open(DATA,"<file.txt")ordie"Couldn't open file file.txt, $!"; while(<DATA>){ print"$_"; } Following is the syntax to open file.txt in writing mode. Here less than > sign indicates that file has to be opend in the writing mode. open(DATA,">file.txt")ordie"Couldn't open file file.txt, $!"; This example actually truncates (empties) the file before opening it for writing, which may not be the desired effect. If you want to open a file for reading and writing, you can put a plus sign before the > or < characters. For example, to open a file for updating without truncating it − open(DATA,"+<file.txt");ordie"Couldn't open file file.txt, $!"; To truncate the file first − open DATA,"+>file.txt"ordie"Couldn't open file file.txt, $!"; You can open a file in the append mode. In this mode writing point will be set to the end of the file. open(DATA,">>file.txt")||die"Couldn't open file file.txt, $!"; A double >> opens the file for appending, placing the file pointer at the end, so that you can immediately start appending information. However, you can't read from it unless you also place a plus sign in front of it open(DATA,"+>>file.txt")||die"Couldn't open file file.txt, $!"; Following is the table which gives the possible values of different modes. Entities Definition < or r Read Only Access > or w Creates, Writes, and Truncates >> or a Writes, Appends, and Creates +< or r+ Reads and Writes +> or w+ Reads, Writes, Creates, and Truncates +>> or a+ Reads, Writes, Appends, and Creates Sysopen Function The sysopen function is similar to the main open function, except that it uses thesystem open() function, using the parameters supplied to it as the parameters for the system function − For example, to open a file for updating, emulating the +<filename format from open − sysopen(DATA,"file.txt", O_RDWR); Or to truncate the file before updating − sysopen(DATA,"file.txt", O_RDWR|O_TRUNC ); You can use O_CREAT to create a new file and O_WRONLY- to open file in write only mode and O_RDONLY - to open file in read only mode. The PERMS argument specifies the file permissions for the file specified if it has to be created. By default it takes 0x666. Following is the table, which gives the possible values of MODE. Entities Definition O_RDWR Read and Write O_RDONLY Read Only
- 7. O_WRONLY Write Only O_CREAT Create the file O_APPEND Append the file O_TRUNC Truncate the file O_EXCL Stops if file already exists O_NONBLOCK Non-Blocking usability Close Function To close a filehandle, and therefore disassociate the filehandle from the corresponding file, you use the close function. This flushes the filehandle's buffers and closes the system's filedescriptor. close FILEHANDLE close If no FILEHANDLE is specified, then it closes the currently selected filehandle. It returns true only if it could successfully flush the buffers and close the file. close(DATA)||die"Couldn't close file properly"; Reading and Writing Files Once you have an open filehandle, you need to be able to read and write information. There are a number of different ways of reading and writing data into the file. The <FILEHANDLE> Operator The main method of reading the information from an open filehandle is the <FILEHANDLE> operator. In a scalar context, it returns a single line from the filehandle. For example − #!/usr/bin/perl print"What is your name?n"; $name =<STDIN>; print"Hello $namen"; When you use the <FILEHANDLE> operator in a list context, it returns a list of lines from the specified filehandle. For example, to import all the lines from a file into an array − #!/usr/bin/perl open(DATA,"<import.txt")ordie"Can't open data"; @lines=<DATA>; close(DATA); getc Function The getc function returns a single character from the specified FILEHANDLE, or STDIN if none is specified − getc FILEHANDLE getc If there was an error, or the filehandle is at end of file, then undef is returned instead. read Function The read function reads a block of information from the buffered filehandle: This function is used to read binary data from the file. read FILEHANDLE, SCALAR, LENGTH, OFFSET read FILEHANDLE, SCALAR, LENGTH The length of the data read is defined by LENGTH, and the data is placed at the start of SCALAR if no OFFSET is specified. Otherwise data is placed after OFFSET bytes in SCALAR. The function returns the number of bytes read on success, zero at end of file, or undef if there was an error.
- 8. print Function For all the different methods used for reading information from filehandles, the main function for writing information back is the print function. print FILEHANDLE LIST print LIST print The print function prints the evaluated value of LIST to FILEHANDLE, or to the current output filehandle (STDOUT by default). For example − print "Hello World!n"; Copying Files Here is the example, which opens an existing file file1.txt and read it line by line and generate another copy file file2.txt. #!/usr/bin/perl # Open file to read open(DATA1,"<file1.txt"); # Open new file to write open(DATA2,">file2.txt"); # Copy data from one file to another. while(<DATA1>) { print DATA2 $_; } close( DATA1 ); close( DATA2 ); Renaming a file Here is an example, which shows how we can rename a file file1.txt to file2.txt. Assuming file is available in /usr/test directory. #!/usr/bin/perl rename("/usr/test/file1.txt","/usr/test/file2.txt"); This function renames the takes two arguments and it just rename existing file. Deleting an Existing File Here is an example, which shows how to delete a file file1.txt using the unlink function. #!/usr/bin/perl unlink("/usr/test/file1.txt"); Positioning inside a File You can use to tell function to know the current position of a file and seek function to point a particular position inside the file. tell Function The first requirement is to find your position within a file, which you do using the tell function− tell FILEHANDLE tell This returns the position of the file pointer, in bytes, within FILEHANDLE if specified, or the current default selected filehandle if none is specified. seek Function The seek function positions the file pointer to the specified number of bytes within a file − seek FILEHANDLE, POSITION, WHENCE
- 9. The function uses the fseek system function, and you have the same ability to position relative to three different points: the start, the end, and the current position. You do this by specifying a value for WHENCE. Zero sets the positioning relative to the start of the file. For example, the line sets the file pointer to the 256th byte in the file. Q File Information You can test certain features very quickly within Perl using a series of test operators known collectively as -X tests. For example, to perform a quick test of the various permissions on a file, you might use a script #/usr/bin/perl my $file ="/usr/test/file1.txt"; my(@description, $size); if(-e $file) { push@description,'binary'if(-B _); push@description,'a socket'if(-S _); push@description,'a text file'if(-T _); push@description,'a block special file'if(-b _); push@description,'a character special file'if(-c _); push@description,'a directory'if(-d _); push@description,'executable'if(-x _); push@description,(($size =-s _))?"$size bytes":'empty'; print"$file is ", join(', ',@description),"n"; } Here is the list of features, which you can check for a file or directory − Operator Definition -A Script start time minus file last access time, in days. -B Is it a binary file? -C Script start time minus file last inode change time, in days. -M Script start time minus file modification time, in days. -O Is the file owned by the real user ID? -R Is the file readable by the real user ID or real group? -S Is the file a socket? -T Is it a text file? -W Is the file writable by the real user ID or real group? -X Is the file executable by the real user ID or real group? -b Is it a block special file? -c Is it a character special file? -d Is the file a directory? -e Does the file exist? -f Is it a plain file? -g Does the file have the setgid bit set? -k Does the file have the sticky bit set? -l Is the file a symbolic link? -o Is the file owned by the effective user ID? -p Is the file a named pipe?
- 10. -r Is the file readable by the effective user or group ID? -s Returns the size of the file, zero size = empty file. -t Is the filehandle opened by a TTY (terminal)? -u Does the file have the setuid bit set? -w Is the file writable by the effective user or group ID? -x Is the file executable by the effective user or group ID? -z Is the file size zero? 2.4 EVAL The eval operator comes in 2 forms: In the first form ,eval takes an arbitrary string as an operand and evaluates the string and executed in the current context. The value returned is the value of the last expression evaluated. In case of syntax error or runtime error,eval returns the value “undefined” and places the error in the variable $@ Ex: $myvar =’ …’; …. $value = eval “ $$myvar “; In the second form ,it takes a block as an argument and the block is compiled only once. If there is a runtime error,the error is returned in $@. Instead of try we use eval and instead of catch we test $@ Example Eval { ……. } If ($@ ne ‘ ‘) { …….. }