
Recommended
More Related Content
What's hot
What's hot (20)
Similar to Mp14 Barge Salvage Survey Final
Similar to Mp14 Barge Salvage Survey Final (20)
Mp14 Barge Salvage Survey Final
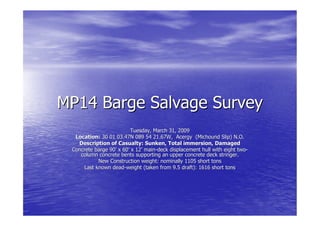
- 1. MP14 Barge Salvage Survey Tuesday, March 31, 2009 Location: 30 01 03.47N 089 54 21.67W, Acergy (Michound Slip) N.O. Description of Casualty: Sunken, Total immersion, Damaged Concrete barge 90’ x 60’ x 12’ main-deck displacement hull with eight two- 90’ 60’ 12’ main- two- column concrete bents supporting an upper concrete deck stringer. stringer. New Construction weight: nominally 1105 short tons Last known dead-weight (taken from 9.5 draft): 1616 short tons dead-
- 2. Orientation of casualty: • Reference marks are located at each corner of the main deck with mud-line elevations at corners of barge. Elevation of the water surface at time of survey was +1.25’. Beginning at the South-East corner of the casualty • (DC-1) elevation was -9.75’ (water depth 11’) mud-line depth was - 22.25’ (water depth 23.5’) moving clock-wise to South-West Corner • (DC-2) elevation was -27.75’ (water depth 29’), mud-line elevation was -33.75’ (water depth 35’), moving clock-wise to North-West corner • (DC-3) elevation was -37.75’ (water depth 39’) and mud-line elevation was -36.75’ (water depth 38’). Moving clock-wise to North- East corner • (DC-4) elevation was -19.75’ (water depth 21’) and mud-line elevation was -28.25 (water depth 29.5’).
- 5. DC-2 DC-1
- 6. DC-3
- 7. Note open hatch at DC-3 and excavated bottom profile
- 8. DC-2 DC-1
- 9. Three dimensional drawing shows present mud-line Details thre dimensional re in relationship to casualty interior Presents 3-dimensional relationship of mud-line to casualty
- 10. Obstruction Beneath Casualty • The barges was then referenced in fifteen feet increments beginning at DC-1 to DC-4 (the shore-ward 90’ side) and began jetting 70’ long sections of 2” diameter conduit beneath the barge to determine if jetting lifting bands beneath the casualty would be a viable option. From corner DC1 (South to North): • 0+15’: Encountered solid obstruction at 37’ penetration. Divers attempted to adjust angle slightly Southward and encountered solid obstruction at 40’ penetration. A third conduit was attempted at a greater angle and conduit deflected off solid and exited the front of casualty 15’ from corner rather than exiting the opposing side of the casualty. • 0+30: Divers inserted conduit and encountered solid obstruction at 32’ penetration. A second attempt was made with similar results. • 0+45’ (center-line): Divers encountered solid obstruction at 26’ penetration. • 0+60’: divers encountered solid obstruction at 20’ penetration. • 0+75’: divers encountered solid obstruction at 12’ penetration. • After a consultation with Wayne Fillingame (Acergy), it was noted that a previous tenant had disposed of two concrete bridge deck sections in the vicinity of the casualty and that the casualty is resting atop of one or both of them, there-by precluding the use of lifting bands beneath the casualty by conventional means.
- 12. Internal Inspection • Divers entered the casualty at an open access point located in the North- West quadrant (DC-3, lowest elevation) and determined a depth of siltation average of 6.75’ inside that quadrant. Since the majority of the main-deck is beneath the natural mud-line, this was not unexpected information. Divers deployed an air-lift to remove mud from inside this quadrant to survey potential damage to the side-walls and deck, Four primary areas of damage were noted, including: • North Side wall hole nominally 12” x undetermined length • West Side wall and deck has apparent collision damage that is detailed in attached sketch, measuring: – Deck has hole extending seven feet inboard by fourteen feet long – Side-wall has hole and fractured area six feet by fourteen feet Side- • Near centerline west hatch (sealed by salvage patch) has deck surrounding it heavily fractured and holed by apparent compressed air • North-west deck shows heavy spall and fractured concrete with exposed rebars at juncture to side-wall and indications of deck separation. • All mud removed from inside this quadrant by air-lifting was replenished through deck and side-wall damage in under 12 hours.
- 13. Areas of deck separation noted
- 14. DC-3 DC-4 Note depth of casualty below existing bottom contour at corner DC-3
- 15. Ground Reaction Forces • The DC-3 quadrant is resting in a depression created by dredging during the previous salvage attempt with the natural mud-line elevation sloped from -27’ to the reference point DC-3 elevation of -37.75. This is a critical component because, without this dredged depression, most of the barge would be completely below the mud-line with the deepest point being 10’ below the mud-line at DC-3. The initial dredging depression created a mud- line elevation lower than the deck surface of the barge but has subsequently slumped material back into the depression to an elevation slightly covering the DC-3 quadrant and consistently replacing any sediments removed from inside the casualty by ingress through large damage openings in the North-west side-wall, North-West Deck, West center-line deck opening, and the North Side-wall (all beneath the existing mud-line except the center-line access). • Actual ground reaction is extrapolated at 88 pounds per square ft. across the bottom of the casualty based on laboratory results of samples taken from each of the four corners. Overcoming the reaction (soil suction) for initial movement will require an additional force of 237.6 Tons above total dead-weight. This reaction component will go away once initial movement is achieved.
- 16. DC-3 Note open hatches in deck and sediment above deck at North-west corner DC-4
- 17. Summary • This casualty is immersed on a descending mud bank near parallel to the shore-line with a 14º Port to starboard list and a 16º diagonal (port bow to starboard stern) trim. Average depth of mud surrounding the casualty is 5.5’ with corner DC-1 being 12.5’ above the mud-line and corner DC-3 being 1’ below the mud-line. Most of the DC-3 quadrant (the only quadrant penetrated during the inspection) is filled with sediment to an approximate level surface, estimated at minimally1200 cubic yards, if consistent through-out the plane of the entire barge interior (we would assume this to be so). • Quadrant DC-3 is heavily damaged on both side-walls and deck and is not capable of supporting the forces anticipated to gain buoyancy and will have to be carefully planned by weight and dimension, to maintain structural integrity necessary to lift. • Solid obstruction beneath the barge is probably a remnant bridge deck section (per Wayne Fillingame, Acergy). This obstruction eliminates the possibility of jetting lifting bands beneath the casualty by conventional methods. There remains an option of directional boring beneath the casualty to insert rigging but this method is both costly and inefficient and severely limits load distribution of the rigging slings by size.
- 18. Salvage/Removal Options 350 Ton Chain Pullers
- 19. Wreck in Place • Due to the amount of structural steel (rebars) in the casualty and the depth and consistency of the sediments surrounding the casualty, demolition by breaking would be virtually impossible to guarantee substantial removal without permitting for bucket dredging. Previous removal attempts by Pearl River Navigation of a similar concrete barge near this location were eventually abandoned after removing an estimated 30-40% of the casualty.
- 20. Refloat • A previous salvage attempt of this casualty conducted by Offshore Marine Offshore Contractors, utilizing pump capacity in excess of 15,000 gpm (per Steve Pemberton, owner of Fast-flow Pumps Inc.) combined with compressed air injection rather than Fast- than ambient air intake, resulted in a partial refloat of one end of the casualty before air pressure fractured numerous areas of deck surface and separated portions of the deck from the side-walls. This is in evidence by heavy spall and exposed rebars at the side- juncture of the deck to the side-walls through-out the casualty and by a severely side- through- damaged area of the deck surrounding the Southern end of the centerline deck centerline access 3’ x 5’ that had been sealed by a salvage patch. 3’ 5’ • While it may be possible to patch this casualty to a point where a refloat could be achieved, several factors need to be accounted: • Substantial ground reaction from the present attitude (beneath the existing mud- the mud- line) will require a considerable amount of dredging around the casualty and some means of slowing re-ingress for the duration of the salvage operations. re- • Near complete removal of all sediment inside the casualty will be required to reduce be both the static and dynamic loads prior to refloat. • There is heavy potential of severe damage as yet unidentified which may include the which bottom of the casualty that would eliminate the possibility of refloat. refloat. • With these factors in mind, I would estimate less than a 30% probability of probability successful salvage by conventional refloat.
- 21. Intact Lift • Lifting the casualty intact is a viable option with a moderate to high probability of to success but would entail several factors: • Since the casualty is resting upon some type of solid structure, the possibility of lifting from beneath the barge with metal straps is not a viable or cost effective option. • While the static load, as constructed, should be only around 700-800 tons (while 700- immersed), The dynamic load would include the displaced weight of nominally 1200 of cubic yards of sediment inside the barge (648 tons displaced weight), and a ground weight), reaction force of nominally 237.6 tons. – Sediments inside the barge can be removed by divers and most of the points of ingress arrested but will require substantial time and costs for penetration diving operations. – Ground reaction forces can be greatly reduced by dredging but may require may permitting and other environmental costs and time-lines. time- • Lifting points on the casualty will have to be distributed along the side-walls side- equilaterally to allow for a maximum tension force of 200 tons per leg and would per require a minimum of ten chain-pullers to guarantee a high probability of success chain- (see Lifting-pin diagram). Lifting- – Would require four barges to distribute the loads safely – Equilateral distribution of the load may be affected by concrete damage as yet undiscovered on the casualty • Final disposition of the casualty would be limited to reefing or releasing the load to another location until patches could be installed in damaged areas and lifting point areas access holes to allow the barge to be refloated.
- 22. Dragging to Shore • Dragging the casualty to shore utilizing chain-pullers, either intact or in sections, is also a viable option with the following considerations: • Shore soil compaction factored to determine the number of Manta-anchors necessary to dead-man the pullers • Installation of slide-beams beneath the leading edge of the casualty to insure a lesser degree of friction as well as to preclude the possibility of the casualty “bull-dozing” into the strata while being pulled • It may be possible to “Choke” the ends of the casualty with heavy chain by dredging but will need to be reinforced to prevent the chains from breaking into the concrete. • Ground reaction forces still have to be taken into account when estimating the number of pullers needed to drag the load to shore. Should this factor be in excess of the holding force of the manta-anchors, sectioning of the casualty would be required to reduce the weight of the load. • The casualty will be heavily damaged, probably beyond recovery, by this method and would require complete demolition and removal by truck or barge. • While this method is a viable option with a very high probability of success, the time- line is not predictable enough to allow as an option other than under a “Time and Materials” agreement.
- 23. Sectional Removal • This method of removal has the highest probability of success of all the options considered with the additional advantage of moderately predictable costs and time-lines. The casualty would be cross- time- cross- sectioned into five roughly proportional sized sections (60’ x 18’) utilizing a “top-down” diamond wire (60’ 18’ top- down” saw (see attached sketch ). • An air-lift would be deployed by crane to excavate access at each point to be sectioned to allow the air- diver to attach each turning sheave to the side-wall of the casualty with the sheave extending below the side- bottom edge of the casualty. The sheave plates are attached utilizing four (4) 3/8” grade eight stud utilizing 3/8” bolts driven into the side-wall with an underwater powder-actuated fastener tool. The diamond wire is side- powder- then threaded from the work platform barge through the outside of one sheave, over the top of the of casualty and down to the second sheave and back to the saw unit located on the work platform barge. • Each end (side-wall) of a section will require two 6.25” diameter core-borings to act as a receiver for the (side- 6.25” core- lifting pins (see attached lifting pin drawing). Core drill is hydraulically operated and requires a single hydraulically 5/8” x 6” Red-head to attach to the side-wall. Three inch chain will be shackled to each lifting pin and 5/8” 6” Red- side- passed to a 250 ton hydraulic chain puller, mounted on a barge. Each piece will then be lifted between the two staging barges and towed to a pre-determined place for disposal. There are several advantages pre- to this method of removal: • Requires only two inland work barges (one with small crane) to assist with operations. assist • Requires minimal shore staging of operations • Requires minimal dredging or permits • Requires only four (4) chain-pullers, lifting pins, and chain shots chain- • Greatly reduced ground reaction forces – Reduced surface area – Renders interior sediments a means of egress • Offers increased disposal options • Engineering data supports load bearing design of lifting pins and attachments. and
- 24. Appendices • Diagram of Lifting Pin • 200 Ton Chain Puller • 350 Ton Chain-puller • Diamond Wire-saw • Hydraulic Pile Cutter • Diamond Wire Routing Diagram
- 28. Diamond Wire-saw