
Recommended
More Related Content
Similar to ITSP PAL Training - Intermediate
Similar to ITSP PAL Training - Intermediate (12)
More from Rick Youngblood
More from Rick Youngblood (20)
Recently uploaded
Recently uploaded (20)
ITSP PAL Training - Intermediate
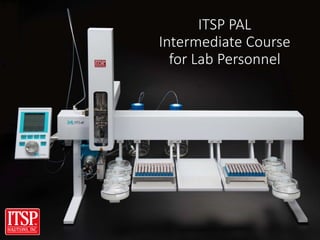
- 1. ITSP PAL Intermediate Course for Lab Personnel
- 2. Instructor 2 ITSP PAL Intermediate Course for Lab Personnel for research purposes only Rick Youngblood Director of Technology ITSP Solutions, Inc. Ga Tech Electrical Engineer and Computer Scientist Lean Six Sigma Green Belt 30 years experience in industrial automation and controls technology including 16 years with Honeywell, Inc. Certified by CTC Analytics in PAL Service and PAL Programming 5 years experience in ITSP PAL lab automation
- 3. ITSP PAL Intermediate Course for Lab Personnel This course is intended to familiarize lab personnel with the different concepts, processes, and software programs used to run and troubleshoot ITSP methods and PAL performance. Topics include: 1. Using CTC PAL Loader software to manage PAL firmware from a PC 2. Using CTC PAL Object Manager software to manage PAL objects from a PC 3. Using the local terminal on the PAL to manage objects from the PAL 4. Using CTC PAL Cycle Composer software (simulating supervisory control software, e.g. Agilent MassHunter) to manage methods and sample lists from a PC 5. A discussion of important ITSP concepts ITSP PAL Intermediate Course for Lab Personnel for research purposes only 3 The ITSP PAL Basic Course for Lab Personnel is prerequisite for this course.
- 4. PAL Loader Software Check the serial port parameters on the COM port of the PC . Check that no other software is locking the port, e.g. MassHunter. Click on the desktop icon to start the PAL Loader software. PAL Loader software is used to backup, restore, or upgrade PAL firmware. ITSP PAL Intermediate Course for Lab Personnel for research purposes only 4
- 5. PAL Loader – Setup Select “Setup” to configure the PAL Loader software serial communication port to match the port connected to the PAL ITSP PAL Intermediate Course for Lab Personnel for research purposes only 5
- 6. PAL Loader – Info Selecting “Info” reports the current firmware version loaded on the PAL ITSP PAL Intermediate Course for Lab Personnel for research purposes only 6
- 7. There is a red LED light on the back of the PAL X-axis rail that provides information about the current PAL mode and connection/communication status: • Off: The PAL is in normal operating mode • Blinking: The PAL is in “Loader” mode • On: Data transfer is in progress PAL Loader – Status ITSP PAL Intermediate Course for Lab Personnel for research purposes only 7
- 8. If the Loader software is having difficulty establishing a connection to the PAL, after verifying cable connections and port settings, then it is sometimes helpful to force the PAL into Loader Mode. To do this: 1. Turn the PAL power off 2. Turn the power on but when the PAL logo screen appears on the display and 2 beeps are heard, turn the PAL off again (before it completes initialization). 3. Turn the power on again, the PAL will not respond - it is in Loader Mode and will receive commands from the Loader software PAL Loader – Mode ITSP PAL Intermediate Course for Lab Personnel for research purposes only 8
- 9. PAL Loader – Backup Start Backup Automatic file naming (can be customized) Select Backup ITSP PAL Intermediate Course for Lab Personnel for research purposes only 9
- 10. PAL Loader – Backup Progress bar Status bar ITSP PAL Intermediate Course for Lab Personnel for research purposes only 10
- 11. PAL Loader – Update Select ”Update“ to either upgrade the PAL firmware version level or to reload a firmware backup file (*.sss) to the PAL ITSP PAL Intermediate Course for Lab Personnel for research purposes only 11
- 12. PAL Loader – Start PAL Before Exit After the update or backup is finished, before exiting the Loader software, always select “Start PAL” to switch the PAL from “Loader” mode to “Running” ITSP PAL Intermediate Course for Lab Personnel for research purposes only 12
- 13. PAL Firmware Troubleshooting • It is highly recommended to perform a backup with the PAL Loader software after an installation of, or any change to, a PAL. • If any uncontrolled changes are made or a damage does corrupt the firmware, e.g. an electric surge, the user always has a fast way to recover. • First, attempt a PAL reboot to see if that fixes the problem. • If not, then the original complete backup file can be re-loaded using “Update” with the PAL Loader software, and the PAL will be up and running within a few minutes. Backup File Anytime any settings or configuration of a PAL have been changed, a new backup file should be made. ITSP PAL Intermediate Course for Lab Personnel for research purposes only 13
- 14. PAL Firmware Troubleshooting • Naturally, any obvious possible source of an error should first be checked and eliminated. • Firmware errors can occur in various forms, e.g. only some parts may be corrupted and a specific object might create a problem. • Many errors can be eliminated by simply restoring a backup file and this fix step is very fast and can easily be done by lab personnel. • Experience has shown that firmware errors related to an object can often be eliminated by simply reloading the backup file. • Typical cases include: • Plunger sensor not detected • Head communication error • Vial not detected • An “STR” (String) error code reported on the message line of the local terminal Firmware Errors ITSP PAL Intermediate Course for Lab Personnel for research purposes only 14
- 15. PAL Object Manager Software Check the serial port parameters on the COM port of the PC. Check that no other software is locking the port, e.g. MassHunter. Click on the desktop icon to start the PAL Object Manager software. PAL Object Manager software is used to load new objects to the PAL. ITSP PAL Intermediate Course for Lab Personnel for research purposes only 15
- 16. In the Menu bar, select “File” , “Options”, “Communication” to configure the PAL Object Manager software serial communication port to match the PC serial port connected to the PAL . PAL Object Manager – Communication ITSP PAL Intermediate Course for Lab Personnel for research purposes only 16
- 17. • In the Menu bar, select “File” , “Options”, “Object List Folder” to browse to the appropriate object name within the object list. • Select the desired object name and click "Send Selected Objects to PAL“. • When finished, close the PAL Object Manager software. PAL Object Manager – Load Objects ITSP PAL Intermediate Course for Lab Personnel for research purposes only 17
- 18. PAL Object Manager – Object Lists Additional information is available from the context popup text box when mousing over individual object lists. Explanation of the object list List of loaded objects ITSP PAL Intermediate Course for Lab Personnel for research purposes only 18
- 19. PAL Object Manager – ITSP Tray Holders Each ITSP tray holder file contains all the tray holder, tray, and tray type objects associated with the ITSP station in that position. ITSP PAL Intermediate Course for Lab Personnel for research purposes only 19
- 20. PAL Object Manager – ITSP Tray Types Each ITSP tray type file contains two matching tray types, one for the elution tray and one for the injection sample tray superimposed on the same physical PAL tray location, e.g. If tray “ITSPelt1” is tray type “DW96ITSP”, then the corresponding tray “MT1-Rear” will need to be tray type “DW96”. This is the tray located directly behind the ITSP tray “ITSPprp1”. Mirrored tray types ITSPprp# tray types ITSP PAL Intermediate Course for Lab Personnel for research purposes only 20
- 21. PAL Object Manager – ITSP Tray Types • The difference between the two is the presence of the ITSP cartridge at tray “ITSPelt1”. • Notice the difference in vial height, and needle penetration. • * The tray type group is also different, to facilitate the use of the PAL local terminal to assign only ITSP tray types to ITSP trays. * ITSP PAL Intermediate Course for Lab Personnel for research purposes only 21
- 22. PAL Object Manager – Mirrored ITSP Tray Types If tray “MT1-Rear” is tray type “DW96Mrrr”, then tray “ITSPelt1” should be tray type “DM96ITSP”. These two tray types compose a coordinated mirrored tray set that is used by ITSP to reduce carryover and to improve chain of custody at the elution plate location. Row “A” is now the last row Row “H” is now the first row When using mirrored tray types for the elution tray, cartridges in ITSPprp1 row “A” are eluted to ITSPelt1 row “H”, “B” to “G”, etc. Cartridge “A1” elutes to well “H1”, “A2” to “H2” . . . “B1” to “G1”, etc. Therefore, ITSP cartridges are never transported over an unused well. In the elution tray: ITSP PAL Intermediate Course for Lab Personnel for research purposes only 22
- 23. PAL Object Manager – ITSP Vials ITSP SPE solvent reservoirs ITSP cartridge disposal locations PAL vials can be used to hold SPE conditioning, washing, and elution solvents for ITSP methods. The location to dispose of spent ITSP cartridges is a PAL vial object class. ITSP PAL Intermediate Course for Lab Personnel for research purposes only 23
- 24. PAL Object Manager Finally, after loading new objects on the PAL: • First, teach or verify the position of the new objects using the local terminal. • Then, make a new backup file of the PAL firmware using the PAL Loader software. ITSP PAL Intermediate Course for Lab Personnel for research purposes only 24
- 25. Using the PAL Local Terminal ITSP PAL Intermediate Course for Lab Personnel for research purposes only 25 The PAL Local Terminal is used for various PAL operations, e.g., priming wash stations or changing syringes.
- 26. Using the PAL Local Terminal • Make a firmware backup using Loader before you start making changes to the PAL using the local terminal! • Remove the syringe adapter from the injection unit before performing the following steps! (or else risk «Z»-ing a needle.) • Make sure the solvent reservoirs, tray holders, valve, and wash station are properly and securely mounted to the PAL X-axis. The following description is an example of how to teach the reference position for a tray holder. The described procedure is common to all PAL objects. ITSP PAL Intermediate Course for Lab Personnel for research purposes only 26
- 27. Tray Holder Reference Position For a tray holder, the reference position is a hole in the base plate. The lower needle guide should be centered in the hole with the bottom of the needle guide flush with the bottom of the base plate. ITSP PAL Intermediate Course for Lab Personnel for research purposes only 27
- 28. Steps for Teaching an Object Switch on the PAL power supply. When the "Job Queue" menu is displayed, complete the following sequence (common to all objects): where "Named Tray Holder" represents a predefined tray holder (e.g. THldr1 or MTHldr2). ITSP PAL Intermediate Course for Lab Personnel for research purposes only 28
- 29. Steps for Teaching an Object After selecting "Named Tray Holder" (e.g. THldr1 or MTHldr2), the X/Y/Z- positions for the selected object will be displayed. ITSP PAL Intermediate Course for Lab Personnel for research purposes only 29
- 30. Steps for Teaching an Object • Highlight the item position X with the cursor bars and press “ENTER” (the inner knob). The injection unit will move to the defined X-axis position. • Rotate the outer knob to adjust the X-axis position to the tray holder reference Position. • Press the inner knob to “ENTER” the position X value. • Repeat the steps above for position Y and position Z. • Press the F3 button "Move to Zero". The injection unit will move to the HOME position. • Verify the defined X/Y/Z-positions by pressing F1 "Check Pos". ITSP PAL Intermediate Course for Lab Personnel for research purposes only 30
- 31. Wash Station & Waste Position Wash Station (Wash1 or Wash2) • For a fast wash station the reference positions are two holes above the wash station glass liners. The lower needle guide should be centered in these holes with the bottom of the lower needle guide lightly touching the surface of the wash station assembly. ITSP PAL Intermediate Course for Lab Personnel for research purposes only 31
- 32. Wash Station & Waste Position • The Waste position represents an “Injector” within the PAL firmware. It is defined in the object class “Injectors“. • For the Waste port the reference position is a hole (slightly larger than the needle guide) in front of wash2. The lower needle guide should be centered in this hole with the bottom of the lower needle guide lightly touching the surface of the wash station assembly. ITSP PAL Intermediate Course for Lab Personnel for research purposes only 32
- 33. LC Injection Valve • For an LC valve, the reference position is the valve needle guide fitting mounted on the top valve port. • The lower needle guide of the injection unit should be centered in the valve needle guide fitting. Adjust the Z-position such that the bottom of the lower needle guide is just touching the surface of the valve needle guide fitting. Then reduce the value by 2.0mm (up). ITSP PAL Intermediate Course for Lab Personnel for research purposes only 33
- 34. The X-Y target for training an ITSP tray is not the septum in the seal. Train the X-Y of an ITSP tray to the exact center of the septum at well A1 to allow the needle to penetrate the septum directly above the bore of the cartridge. The Z Offset of ITSP trays should be trained 0.5mm above the cartridge, because the PAL transports ITSP cartridges with the Lower Needle Guide “blocked”. Training ITSP Trays The training of trays is not standard with normal PAL usage but it is critical with ITSP to ensure robust PAL performance. ITSP PAL Intermediate Course for Lab Personnel for research purposes only 34
- 35. Verifying Positions After all positions have been loaded and trained, then: • Install a syringe. • Verify all positions. • Check the needle penetration for all positions. o Menu/Utilities/[Named Tray]/Needle Penetration • After all positions have been set, perform a backup of the current configuration. ITSP PAL Intermediate Course for Lab Personnel for research purposes only 35
- 36. PAL Firmware Firmware is the base level of control in the PAL autosampler. • Within the PAL, firmware atoms operate on objects. • Atoms and objects have parameters. o Atom parameters can be: • Left undefined by the method developer, or • Hard-coded at the macro level of control by the method developer, or • Passed 1 level up to the method level of control as a macro (or cycle) variable, or • Passed 2 levels up to the sample list level in some cases. (In ITSP methods, those cases are SL.Tray, SL.Index, and SL.Volume.) o Object parameters which are left undefined within a macro by the method developer can then still be controlled from the local terminal by lab personnel. ITSP PAL Intermediate Course for Lab Personnel for research purposes only 36
- 37. PAL PC File Extensions • File Extensions • PAL MEthods: *.pme • PAL MAcros: *.pma • PAL Sample List: *.psl • PAL Object List: *.pol (latest_pal.pol and latest_pal.xml, which are the latest PAL configuration, and other object files) • PAL firmware backup files: *.sss • Cycles: *.cyx • When e-mailing ITSP Solutions for support with custom ITSP macros or cycles, please include the following attachments: • [macro_name].pma (or [cycle_name].cyx for MassHunter cycles) • Latest_pal.pol (or latest_pal.xml for MassHunter cycles) • Method macro (or MassHunter cycle) parameter settings (e.g., *.pme) ITSP PAL Intermediate Course for Lab Personnel for research purposes only 37
- 38. ICC OEM’s 38 ITSP PAL Intermediate Course for Lab Personnel for research purposes only
- 39. Regular PAL Maintenance Suggested intervals for other maintenance procedures to ensure uninterrupted operation: Maintenance Procedure Interval Clean the outside of the instrument Weekly or more often as needed Replace the syringe plunger and clean the syringe; replace the syringe (needle) The syringe, and/or plunger, and/or needle need to be replaced on a regular basis depending on the application. Clean SPE and wash station solvent reservoirs Weekly or more often as needed Exchange needle seal in the LC injection port Monthly or more often as needed Replace worn bungee cords Quarterly or more often as needed Preventative maintenance by certified PAL service technician Annually or more often as needed ITSP PAL Intermediate Course for Lab Personnel for research purposes only 39
- 40. Annual Preventative Maintenance and Repair • Maintaining the PAL system as described above is considered a daily or weekly PM. • As a general rule the system should be thoroughly checked and cleaned at minimum once a year. This annual PM should be performed by a certified PAL service technician using a PM Kit from CTC Analytics. ITSP PAL Intermediate Course for Lab Personnel for research purposes only 40
- 41. Troubleshooting The following are suggested steps for troubleshooting problems: Symptom Possible Cause Solution Clicking sound when injecting to LC valve Needle penetration for Injector too deep Re-teach needle penetration Intermittent error message: “vial not found” error# 115 Z offset value wrong for tray Re-teach Z offset value for tray PAL collision error at ITSP object X, Y, or Z offset value wrong at ITSP object Re-teach X, Y, or Z offset for ITSP object PAL transports ITSP cartridge at an angle X or Y offset value wrong at ITSPprp# Re-teach X or Y offset for ITSPprp# ITSP PAL Intermediate Course for Lab Personnel for research purposes only 41
- 42. Important ITSP Concepts • ITSP methods are usually run serially on-line from MassHunter eluting to an open well of a 96-well plate. • ITSP methods are sometimes run in off-line batches from Cycle Composer software. • When running batches off-line, or when chain-of-custody is paramount, such as in Forensic Toxicology labs, the elution tray should be a sealed 2mL vial 54-position tray using a vial lock: The cap on the vial must be the MicroLiter #11-0056, available from Wheaton, which has a starburst pre-cut septa. The MicroLiter Vial Lock #12-0000-VL is available from Wheaton. This is the only solution approved for eluting ITSP to a closed well or vial. ITSP PAL Intermediate Course for Lab Personnel for research purposes only 42
- 43. Certification Test 1. Perform a backup of the PAL. 2. Load a new ITSP tray type object to the PAL 3. Change the ITSP elution tray to the new ITSP tray type. 4. Teach an ITSPprp# tray location. 5. Teach an ITSPelt# tray location. 6. Teach the ITSPdisp vial location. 7. Place all solvent reservoirs and trays in their proper location on the PAL deck and describe to the instructor the purpose of each location. 8. Replace the syringe. 9. Create an ITSP method to run an existing macro utilizing the new tray type and test step-wise. 10. Create an ITSP sample list to run an existing method and test on 2 samples. ITSP PAL Intermediate Course for Lab Personnel for research purposes only 43
- 44. Additional ITSP Resources The USB memory stick in the ITSP startup kits include: • ITSP application notes • ITSP PAL objects • Example ITSP macros and methods • Example ITSP automated SPE method development macros • ITSP setup guide • ITSP method development guide • Other resources such as catalogs, videos, and presentations with more information about ITSP. The USB memory stick in the ITSP PAL training courses include: • Copies of the course presentations • Copies of additional PAL reference materials ITSP PAL Intermediate Course for Lab Personnel for research purposes only 44
- 45. Instructor Contact Information Rick Youngblood Director of Technology ITSP Solutions, Inc. 706-395-8300 855-395-8300 toll free Rick.Youngblood@ITSPsolutions.com www.ITSPsolutions.com http://www.linkedin.com/in/rickyoungblood/ Mailing Address Shipping Address 212 Northlake Drive 10 S. Carolina Street Hartwell, GA 30643 Hartwell, GA 30643 ITSP PAL Intermediate Course for Lab Personnel for research purposes only 45
- 46. ITSP Pal Intermediate Course for Lab Personnel