
Recommended
More Related Content
Similar to Emergency First Aid: Assess and Treat Life Threats
Similar to Emergency First Aid: Assess and Treat Life Threats (20)
More from PiaJayCalizo
Recently uploaded
Recently uploaded (20)
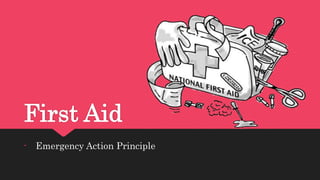
Emergency First Aid: Assess and Treat Life Threats
- 1. First Aid - Emergency Action Principle
- 2. Emergency Action Principle Pre-hospital Emergency Care is a series of decisions about treatment and transport. For you to make good decisions about how the best care for your patients, you must first gather information as you progress thru the patients assessment process: - Perform scene seize up - Perform an initial assessment - Provide Spinal Immobilization - Identify and treat life threatening conditions - Perform a focused history and physical exam - Provide transport for patients with obvious life threatening situation - Reassess vital signs - Perform ongoing assessments
- 3. Emergency Action Principle Plans of action for any emergency. The principles conducted in the following order can ensure you safety and that of the victim and other bystanders and increase the chance of survival of the victim.
- 4. The Stages of Pre-Hospital Care 1.) Survey the Scene - Consider scene characteristic - Identify possible hazards - Is it safe for me to approach the victim? - Is there any hazard to the patient? - Environmental Hazards example: Fire, Smoke, Heat or Cold - Structural Hazards example: Unstable vehicle or structure - Am I going to need help in this emergency? Are there any other services need? Do I need any special equipment to reach the victim?
- 5. The Stages of Pre-Hospital Care 1.) Survey the Scene - Once the scene is safe, determine the nature of the problem A. Trauma - Is the physical injury caused by external force or violence? - If suspected Trauma is at hand, you’ll be working with Mechanism of Injury (MOI) - How’s the patient injured? MOI is the basis for the index of suspicion for trauma injuries B. Nature of Illness (NOI) - A patient who is not injured but suffering from a medical condition. - Determine the number of patients / victim
- 6. The Stages of Pre-Hospital Care 2.) Primary Survey (Rapid Assessment) - To identify and treat conditions that involves and immediate threat to life. Possible intervention to interrupt the Journey from Life to Death
- 7. The Stages of Pre- Hospital Care Components of the Primary Survey Determine if the patient is conscious or not. Form a general impression Mouth Check and Finger Sweep Assess the airway Indication of partial airway occlusion Assess the breathing Assess the pulse Identify major bleeding Assess perfusion Asses mental status
- 8. The Stages of Pre-Hospital Care 3.) Activate Medical Assistance (AMA) / Preparation of Transport Facilities - Cyanosis of pale skin / Significant blood loss / Multiple wounds - Injuries to the head, chest, abdomen and pelvis - Multiple injuries of the extremities and posterior thorax - Unresponsive patient who is not obeying commands - Inability to maintain a patent airway - Patient with possible shock condition / Patient with open wound on the chest - Patient with chest pain and with systolic blood pressure of less than 100mmHg
- 9. The Stages of Pre-Hospital Care 4. Secondary Survey / Focused History and Physical Assessment The overall purpose of the Secondary Survey is to detect problems that do not post an immediate threat to life but may become more serious, life threatening even, if they are not promptly managed. 2 Phase of Secondary Survey Information Gathering - Trying to determine the nature of the patient’s problem by making questions and observing where the patient is found. Examination Phase / Physical Assessment - Making a rapid but complete hands on evaluation of the patient to determine his vital signs and detect injuries or signs of illnesses.
- 10. Secondary Survey Obtaining Medical History The fundamental reason for taking a history background is to find out: - What Happened? What hurts? What else is wrong? - To obtain data that might otherwise be unavailable to the doctor or the medical staff. Sources of Information The scene - Clues to underlying illnesses - Mechanism of injury - Severity of injury - The patient - Other informants - Bystanders, family and friends - Medical Identification Devices
- 11. Secondary Survey Know the Chief Complaints Apply SAMPLE – OPQRSTA format Explore the patient’s chief complaint with a few questions, you may be able to obtain a clear picture of the patient’s problem. Reassess General Appearance - Position - Level of Consciousness - Behavior and Degree of Distress - Obvious Wounds and Deformities - Skin Color, Temperature, and Moisture Reassess Vital Signs Pulse – assess rate, force and rhythm Respiration – assess rate, rhythm, abnormal noises, quality and unusual odor Blood Pressure Capillary Refill
- 12. Secondary Survey Head Toe Examination When performing the Rapid Trauma Assessment, it is necessary to: Inspect - Look - Colors, Contours and Symmetry Palpate - Feel - Texture, Consistency, Temperature Auscultate - Listen - For Sounds Use sense of smell: D -Deformities C – Contusions A - Abrasions P – Penetrations / Punctured B - Burns T - Tenderness L - Lacerations S – Swelling
- 13. Secondary Survey
- 14. Secondary Survey Abdomen Shape – outward or inward, flat or distended Surface – Laceration and Contusion Tone – Soft and rigid, inspect each quadrant and compare to upper and lower quadrants Abdominal Distention – abdomen appears to be abnormally large or swollen. It is an indication that a significant amount of blood has been lose in the abdominal cavity. Inspect discoloration around the umbilicus and in the flank areas side. Palpate each of the four quadrants of the abdomen with your fingers. Place one hand on top of the other and roll the hand across the quadrants. It should be quickly palpating once for tenderness, guarding, and rigidity.
- 15. Secondary Survey The Abdominal Cavity Right Upper Quadrant (RUQ) - Liver, right kidney, stomach, colon, pancreas, and the gall bladder Left Upper Quadrant (LUQ) - Liver, spleen, left kidney, stomach, colon, pancreas, the female reproductive organ, bladder Right Lower Quadrant (RLQ) - Colon, small intestine, major artery and vein to the right leg, ureter, appendix, female reproductive organ Left Lower Quadrant (LLQ) - Colon, small intestines, major artery and veins to the left leg, ureter, female reproductive organ Midline Area - Aorta, pancreas, small intestine, bladder and the spine
- 16. Secondary Survey Pelvis Check for stability by pressing downward and inward. Apply pressure over the anterior, superior iliac spine. Note whether bleeding around the meatus is present Genitalia Check if there is blood on the patient’s clothing. Suggestive of injury to genital region Upper and Lower Extremities DCAPBTLS Neuro Vascular Check P – Pulses – Check the distal pulse, dorsalis pedis, tibial pulse, radial pulse M – Motor Function – if the patient can obey command, ask the patient to wiggle his toes and squeeze his fingers S – Sensation – pinch the hand and feet, watch for response
- 17. Secondary Survey Examination of the Back Without moving the patient, slide your hands beneath the grove of the patient’s back and palpate for deformity or tenderness, withdraw your hands and inspect for blood.